Deploy Infoblox vNIOS Instances for AWS - DEPLOYMENT GUIDE - Draft
←
→
Page content transcription
If your browser does not render page correctly, please read the page content below
DEPLOYMENT GUIDE

Deploy Infoblox vNIOS
Instances for AWS
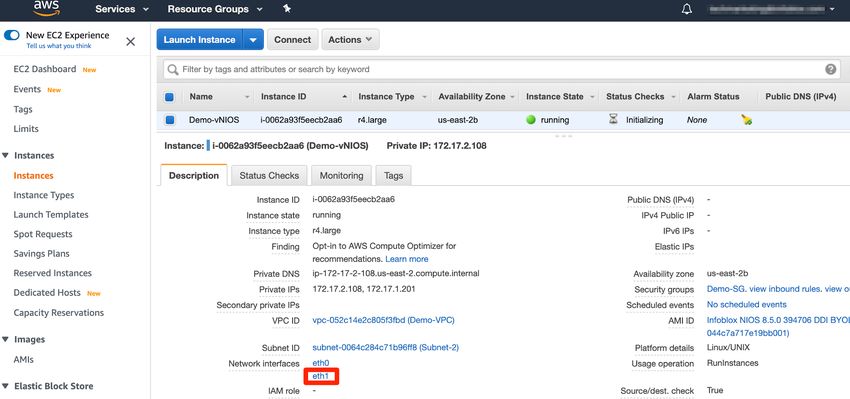
Table of Contents

Introduction                                                          6

    Infoblox vNIOS for AWS Use Cases                                  6

         DNS and RPZ for Public Cloud                                 6

         IPAM and vDiscovery for Public Cloud                         6

         DHCP Service for On-Premises Clients                         6

         Fault Tolerance and Disaster Recovery                        7

    AWS Services                                                      7

    Workflow                                                          7

Prerequisites                                                         7

Architecture                                                          7

    Standalone Deployment                                             8

    Hybrid Grid Deployment                                            8

Security Considerations                                               9

    Infoblox vNIOS Admin Accounts                                     9

    IAM Configuration for vDIscovery                                  9

         IAM Policy                                                   9

         IAM User                                                     12

         Rotating Credentials                                         15

         IAM Role                                                     15

    Network Configuration                                             17

Planning Considerations                                               18

    Cost                                                              18

         Billable AWS Resources                                       18

         Infoblox Licenses                                            18

    AWS EC2 Instance Size                                             18

Deployment Guide: Deploy Infoblox vNIOS Instances for AWS, May 2021        2 of 89
AWS EBS Volume Type and Size                                      19

Deployment                                                            19

    Deploy AWS VPC (Optional)                                         19

         Create VPC                                                   19

         Create Subnets                                               22

         Add Internet Connectivity to the VPC                         25

         Attach Internet Gateway                                      25

         Add Routes                                                   27

    Deploy vNIOS Instance in AWS                                      29

         Deploy From Marketplace                                      29

         Deploy From AWS Console                                      30

         Select AMI and Instance Type                                 31

         Configure Instance Details                                   33

         Add Storage                                                  35

         Add Tags                                                     35

         Configure Security Group                                     36

         Review and Launch                                            38

         Troubleshooting                                              39

    Add a Public IP to vNIOS Instance (Optional)                      40

         Allocate Elastic IP                                          42

         Attach Elastic IP to vNIOS Instance                          43

Configuration                                                         44

    Connect to vNIOS Instance                                         45

         SSH                                                          45

         Grid Manager                                                 46

    Join vNIOS to Existing Grid                                       46

         Add New Infoblox Appliance to Grid                           47

Deployment Guide: Deploy Infoblox vNIOS Instances for AWS, May 2021        3 of 89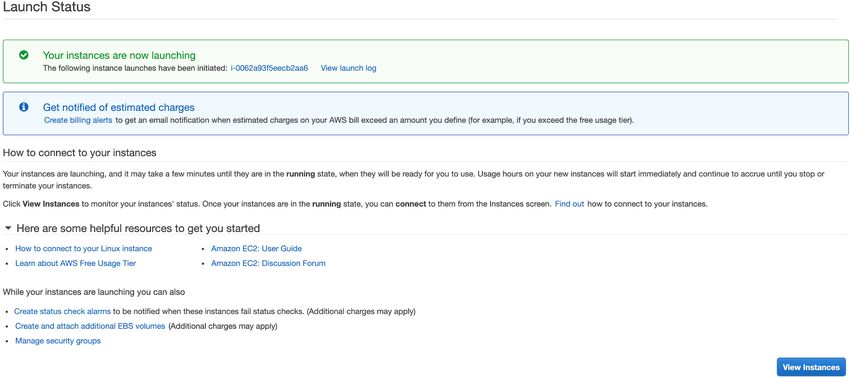
Join Appliance to Grid                                       49

         Adding SSH Keys for Administrators                           51

    Use vNIOS Instance for New Grid                                   53

    Use vNIOS Instance as Primary DNS for VPC                         56

         Setup DNS Service                                            56

         Create AWS DHCP Option Set                                   62

    vDiscovery for AWS                                                65

         Configure vDiscovery in Grid Manager                         65

         Run vDiscovery                                               70

         vDiscovery Data                                              71

    Configuring for Highly Available Services                         74

         Grid Master Candidate                                        74

         DNS                                                          75

         DHCP                                                         76

         Regions and Availability Zones                               76

Operational Guidance                                                  76

    Monitoring                                                        76

    Backup and Recovery                                               78

         Automated Backup                                             78

         Restoring From Backup                                        81

         Instance Failure                                             83

         RTO and RPO                                                  84

    Routine Maintenance                                               85

         NIOS Software Patches and Upgrades                           85

         Managing Licenses                                            86

         Managing AWS Service Quotas                                  86

    Emergency Maintenance                                             88

Deployment Guide: Deploy Infoblox vNIOS Instances for AWS, May 2021        4 of 89
Support                                                               88

    Receiving Support                                                 88

    Service Level Agreements                                          88

    Additional Services                                               88

Additional Resources                                                  88

Deployment Guide: Deploy Infoblox vNIOS Instances for AWS, May 2021        5 of 89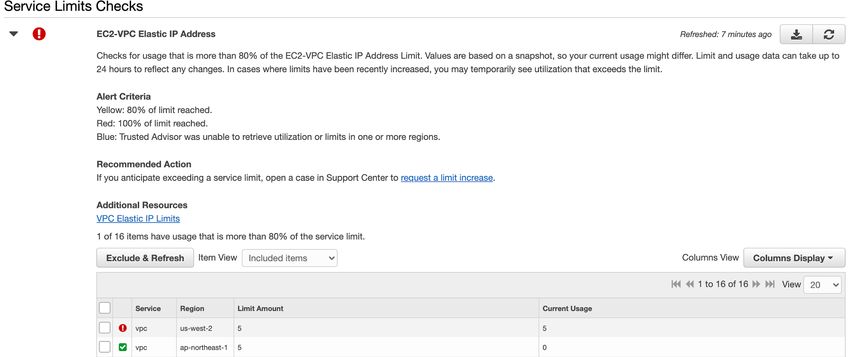
Introduction
Infoblox vNIOS for AWS is a virtual appliance designed for deployment as a Virtual Machine (VM) instance in
Amazon Web Services. Infoblox vNIOS for AWS enables you to deploy robust, manageable and cost effective
Infoblox appliances in the Amazon Cloud.

Infoblox NIOS is the underlying software running on Infoblox appliances which provide core network services
and a framework for integrating all the components of the modular Infoblox solution. It provides integrated,
secure, and easy-to-manage DNS (Domain Name System), DHCP (Dynamic Host Configuration Protocol,
IPAM (IP address management) and other services.

Infoblox vNIOS for AWS appliances can either be joined to an existing on-premises or hybrid/multi cloud grid,
or the entire grid can run in AWS. The vNIOS appliance can be configured as a primary DNS server for your
AWS VPCs. You can also use Infoblox Cloud Network Automation with vNIOS for AWS to improve visibility of
cloud resources and increase the flexibility of your cloud environment.

Infoblox vNIOS for AWS Use Cases
Extending your Infoblox grid into AWS with vNIOS appliances can provide solutions for many hybrid cloud
infrastructure requirements and issues. The following are some of the common use cases:

DNS and RPZ for Public Cloud
A vNIOS appliance can be used as the primary DNS server in AWS VPCs. This allows you to extend your
enterprise DNS and RPZ services into the public cloud. Clients running on AWS, attached to your VPCs, are
able to use the same consolidated and secure DNS service as clients on-premises and in your private cloud
environments. vNIOS appliances running the DNS service can be deployed in shared services or transit virtual
networks and used for DNS resolution across other virtual networks via peering relationships. This is powerful
especially when combined with the vDiscovery use case for automated creation of DNS records for your AWS
resources.

IPAM and vDiscovery for Public Cloud
The Infoblox vDiscovery feature can be used for detecting and obtaining information about Tenants, VPCs,
Subnets, and Virtual Machines operating in your AWS environments. Many organizations operate hybrid and
multi-cloud environments that may contain many subscriptions and accounts. These environments tend to be
very dynamic, with things such as VMs being created and terminated on a frequent basis. This makes it difficult
to keep track of everything. With Infoblox vDiscovery, tasks can be configured to run automatically, allowing
your Infoblox vNIOS appliance to keep track of all AWS environments, storing this data in IPAM. Infoblox
vDiscovery can also be used to automate creation of DNS records for VMs running in your cloud environments.
Using vDiscovery in conjunction with the Cloud Network Automation (CNA) feature, you will gain enhanced
visibility into your cloud environments, all within a ‘single pane of glass’.

DHCP Service for On-Premises Clients
A vNIOS appliance running on AWS can provide DHCP service for your on-premises clients. This DHCP
appliance can serve as your primary DHCP server or be configured as part of a failover pair with a NIOS DHCP
server running on-premises for a hybrid, survivable solution. Two vNIOS appliances, each running in AWS
could also be configured for DHCP failover for highly available, fault tolerant DHCP services. Using a vNIOS
appliance running on AWS for DHCP requires using DHCP Relay or IP Helper on your router or layer 3 switch
to send DHCP traffic from your on-premises network to your AWS VPC.

Deployment Guide: Deploy Infoblox vNIOS Instances for AWS, May 2021                                               6 of 89
Fault Tolerance and Disaster Recovery
You can achieve Fault Tolerance and aid in Disaster Recovery of DDI services by deploying vNIOS appliances
in AWS. In case of failure in the Primary Datacenter (power outage, network outage, or other critical failure) an
Infoblox vNIOS appliance enabled as a Grid Master Candidate (GMC) can be promoted to the Grid Master role
so that Grid services can continue to operate. Deploying vNIOS appliances in multiple regions and across
availability zones can increase fault tolerance and survivability further. DNS services can also be redirected to
vNIOS instances operating in AWS, possibly without even requiring any manual intervention, helping to ensure
the business can continue to operate. DHCP fault tolerance can be achieved using Infoblox DHCP Failover
configured between on-premises grid members and members running on AWS.

AWS Services
The following AWS services are used in a typical vNIOS deployment on AWS:

    ●    VPC: Virtual Private Clouds are used to deploy virtual networks and associated resources in a logically
         isolated area of the AWS cloud. https://docs.aws.amazon.com/vpc/index.html
    ●    EC2: Elastic Compute Cloud is the underlying service which provides compute resources in the
         Amazon cloud. https://docs.aws.amazon.com/ec2/index.html
    ●    EBS: Elastic Block Store provides storage volumes for use with EC2 instances.
         https://docs.aws.amazon.com/AWSEC2/latest/UserGuide/AmazonEBS.html

Workflow
The following outline lays out the basic steps to deploy and configure Infoblox vNIOS in a new AWS account
(steps 7-8 are optional, depending on specific use case):

    1. Deploy an AWS VPC and subnets.
    2. Deploy and configure Internet access for your VPC.
    3. Deploy a vNIOS instance.
    4. Add a public IP to your vNIOS instance.
    5. Connect to your vNIOS instance.
    6. Join your vNIOS instance to a Grid or create a new Grid.
    7. Configure vNIOS as DNS server for AWS VPC.
    8. Perform vDiscovery for AWS.
Typical time for deployment and configuration of vNIOS for AWS, following this user guide is 30 to 45 minutes,
depending on which use cases are configured.

Prerequisites
The following are prerequisites to deploying and managing an Infoblox vNIOS for AWS appliance:

    ●    Valid AWS account.
    ●    Permissions on AWS to create VPCs, VMs, and related resources.
    ●    Understanding of basic networking concepts and tools, including public and private IP addressing,
         DNS, Secure Shell (SSH), and command line/terminal applications.

Architecture
Specific designs for Infoblox vNIOS for AWS deployment architectures can vary based on the use cases and
cloud/hybrid environment of an organization. At a minimum, deployments will require a VPC with two subnets

Deployment Guide: Deploy Infoblox vNIOS Instances for AWS, May 2021                                                 7 of 89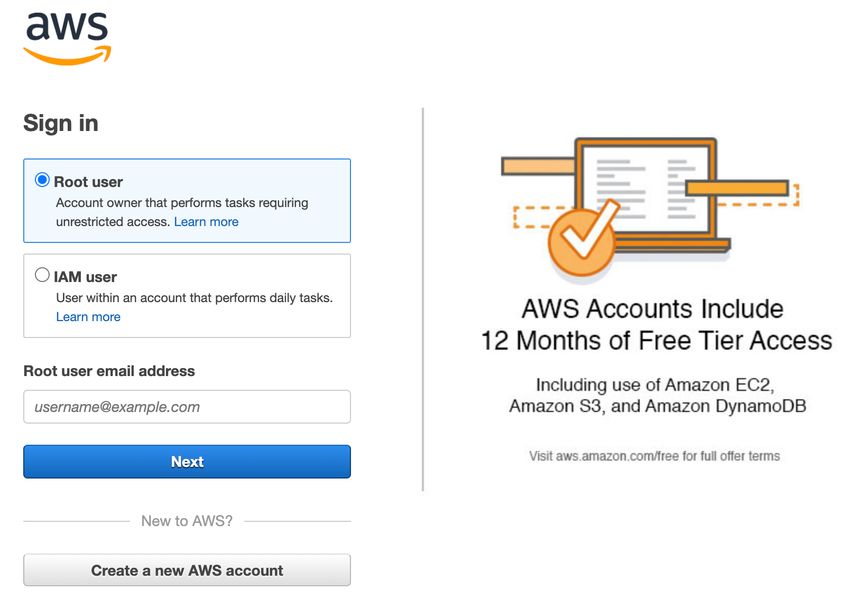
and a vNIOS instance with two network interfaces. The diagrams in this section depict basic architecture for a
standalone deployment and a hybrid Grid deployment.

Standalone Deployment

This diagram shows a typical stand-alone Infoblox vNIOS for AWS deployment. An Internet gateway allows the
instance inbound and outbound connectivity. An Elastic IP can be associated with the vNIOS LAN1 (eth0)
interface to allow admin access via the Internet.

Hybrid Grid Deployment

Deployment Guide: Deploy Infoblox vNIOS Instances for AWS, May 2021                                              8 of 89
This diagram shows a typical hybrid Grid deployment where the Infoblox vNIOS for AWS instance will
communicate with a Grid Master running on-premises. AWS Direct Connect or a site-to-site VPN allows for
private communication between Grid members running on-premises and in AWS.

Security Considerations
Infoblox NIOS and Grid technology are purpose-built for security. The NIOS operating system does not allow
for root access and services are disabled by default until configured. Infoblox Grid communication takes place
through encrypted VPN tunnels established between the Grid Master and member appliances. For information
on additional security services and configuration, refer to Infoblox NIOS documentation at
https://docs.infoblox.com/display/ILP/NIOS. When deploying and using Infoblox vNIOS on AWS, you should
always follow AWS IAM best practices as detailed in AWS IAM documentation:
https://docs.aws.amazon.com/iam/index.html. The sections below cover security considerations specific to
Infoblox vNIOS for AWS appliance deployment and configuration.

Infoblox vNIOS Admin Accounts
A user must have an admin account to log in to the vNIOS appliance. Each admin account belongs to an admin
group, which is assigned roles and permissions that determine the tasks a user can perform. Users connect to
the vNIOS appliance with a username and password. Infoblox strongly recommends changing the default
administrator password to a complex password containing a mix of uppercase and lowercase letters, numbers,
and special characters.

Additionally, Infoblox recommends creating role-based accounts for admins, using the principle of least
privilege, granting minimal permissions needed to conduct required tasks.

For additional information on role-based access control in vNIOS and additional authentication methods, refer
to the Infoblox NIOS Admin Guide: https://docs.infoblox.com/display/nios85/Managing+Administrators.

IAM Configuration for vDIscovery
In order to use the Infoblox vDiscovery for AWS feature described in the Configuration section of this guide, you
will need an IAM user or role with some minimum permissions to view resources in AWS. Minimum permissions
required in AWS to conduct vDiscovery are:

    ●    iam:GetUser
    ●    ec2:DescribeVpcs
    ●    ec2:DescribeSubnets
    ●    ec2:DescribeRouteTables
    ●    ec2:DescribeAddresses
    ●    ec2:DescribeNetworkInterfaces
    ●    ec2:DescribeInstances
IAM Policy
First, we will create a custom policy with the permissions listed above to assign to users or roles.

    1.   In the AWS Management Console, Use the Services menu to navigate to IAM under Security, Identity,
         & Compliance.
    2.   Select Policies from the IAM menu.

Deployment Guide: Deploy Infoblox vNIOS Instances for AWS, May 2021                                                 9 of 89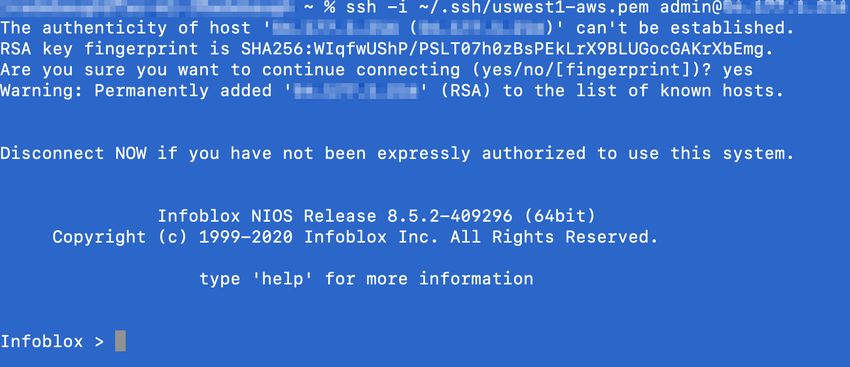
3.    Click on Create policy.

    4.    Policies can be selected through the visual editor or defined using JSON. For this guide, we will use
          JSON. Click the JSON tab.

    5.    In the JSON editor view, you will see the base outline for a policy definition:

    6.    Between the square brackets next to Statement, paste the following to define your policy:

     {

         "Effect": "Allow",

         "Action": [

Deployment Guide: Deploy Infoblox vNIOS Instances for AWS, May 2021                                               10 of 89
"ec2:DescribeAddresses",
"ec2:DescribeInstances",
"ec2:DescribeNetworkInterfaces",
"ec2:DescribeVpcs",
"ec2:DescribeSubnets",
"ec2:DescribeRouteTables"
],
"Resource": "*"
},
{
"Effect": "Allow",
"Action": "iam:GetUser",
"Resource": "arn:aws:iam::*:user/*"
}
7. Your JSON policy definition should look like this:
8. Click Review Policy.
9. Name your policy.
Deployment Guide: Deploy Infoblox vNIOS Instances for AWS, May 2021 11 of 8910. Optionally, add a description.
11. Review the Summary.
12. Click Create Policy.
IAM User
Next, we will create a user with an access key that can be used to authenticate for vDiscovery jobs.
1. Select Users from the IAM menu.
2. Click Add user.
3. Name the user.
4. For Access type, select Programmatic access.
5. Click Next: Permissions.
Deployment Guide: Deploy Infoblox vNIOS Instances for AWS, May 2021 12 of 896. Under Set permissions, click on Attach existing policies directly.
7. Enter the name of your policy in the search bar or scroll down to locate your policy.
8. Check the box next to your vDiscovery policy.
9. Click Next: Tags.
10. Optionally, add tags.
11. Click Next: Review.
Deployment Guide: Deploy Infoblox vNIOS Instances for AWS, May 2021 13 of 8912. Review your selections.
13. Click Create user.
14. Click Download .csv to save a CSV file with the user Access key ID and Secret access key. Follow
any prompts to download and save the file.
Note: This is the only opportunity to download or view these credentials. If you do not save them, or lose them
later, you will have to create new access keys for this user.
15. Click Close.
Deployment Guide: Deploy Infoblox vNIOS Instances for AWS, May 2021 14 of 89Rotating Credentials
When using user access keys as described in the previous section, keys should be rotated on a regular basis,
at a minimum every 90 days. To rotate access keys for an IAM user, follow the guidance in AWS
documentation: https://docs.aws.amazon.com/IAM/latest/UserGuide/id_credentials_access-keys.html,
specifically the section titled Rotating access keys.
IAM Role
Creating a role to use for vDiscovery is optional and if desired should be completed prior to deploying your
vNIOS for AWS instance. The role can be assigned to your instance during deployment, as described in the
Deploy vNIOS Instance in AWS → Configure Instance Details section of this guide. It is also possible to add
roles to a running instance using the AWS CLI command: aws ec2 associate-iam-instance-profile. See AWS
CLI documentation for details on working with this and other commands related to IAM roles:
https://docs.aws.amazon.com.
1. In the AWS Management Console, Use the Services menu to navigate to IAM under Security, Identity,
& Compliance.
2. Select Roles from the IAM menu.
3. Click on Create role.
4. Under Choose a use case, click on EC2 - Allows EC2 instances to call AWS services on your behalf.
5. Click Next: Permissions.
Deployment Guide: Deploy Infoblox vNIOS Instances for AWS, May 2021 15 of 896. Enter the name of your policy in the search bar or scroll down to locate your policy.
7. Check the box next to your vDiscovery policy.
8. Click Next: Tags.
9. Optionally, add tags.
10. Click Next: Review.
11. Enter a name next to Role name
12. Optionally, add a description
13. Review the role properties.
14. Click Create role.
Deployment Guide: Deploy Infoblox vNIOS Instances for AWS, May 2021 16 of 89Network Configuration Network security and configuration requirements can vary greatly based on use case. You will need a security group in each VPC where vNIOS is deployed to allow for management and service traffic. The following table lists the most common rules needed for Infoblox vNIOS for AWS appliances: Type Protocol Port Range Purpose SSH TCP 22 CLI access for appliance administration HTTPS TCP 443 Grid Manager GUI access Custom UDP Rule UDP 1194 NIOS Grid Traffic (VPN) Custom UDP Rule UDP 2114 NIOS Grid Traffic (key exchange) DNS (UDP) UDP 53 UDP DNS DNS (TCP) TCP 53 TCP DNS Custom UDP Rule UDP 67-68 DHCP Custom TCP Rule TCP 8787 Infoblox AWS API Proxy Deployment Guide: Deploy Infoblox vNIOS Instances for AWS, May 2021 17 of 89
Infoblox recommends you only allow traffic for necessary management and services. Rules should be as
restrictive as possible in regards to where source traffic is allowed from. For further detail on ports and
protocols used by Infoblox NIOS, refer to https://docs.infoblox.com/display/nios85/Configuring+Ethernet+Ports.

Planning Considerations
The following sections detail planning considerations specific to Infoblox vNIOS for AWS deployments.

Cost
Billable AWS Resources
The following billable AWS resources may be used as part of an Infoblox vNIOS for AWS deployment:

    ●    EC2 Instance: This resource is mandatory and will be used in every Infoblox vNIOS for AWS
         deployment. Refer to the AWS EC2 Instance Size section of this guide for instance type and size
         selection. For current AWS EC2 instance prices and options, refer to AWS pricing documentation
         https://aws.amazon.com/ec2/pricing/.
    ●    EBS Volume: This resource is mandatory and will be used in every Infoblox vNIOS for AWS
         deployment. Refer to the AWS EBS Volume Type and Size section of this guide for specific type and
         size. For current AWS EBS prices, refer to AWS pricing documentation
         https://aws.amazon.com/ebs/pricing/.
    ●    Elastic IP Address (EIP): This resource is optional for Infoblox vNIOS for AWS deployments. You can
         have one EIP associated with a running instance at no charge. For current prices of additional EIPs
         and EIPs not associated with a running instance, refer to AWS pricing documentation
         https://aws.amazon.com/ec2/pricing/on-demand/.
Infoblox Licenses
Infoblox vNIOS for AWS appliances use a bring your own license (BYOL) model. Sixty day temporary/trial
licenses are available for many virtual appliances and features at no cost. The Deployment section of this guide
covers details on installing temporary licenses during deployment. For details on obtaining and installing
production licenses, refer to Infoblox documentation
https://docs.infoblox.com/display/nios85/Managing+Licenses.

AWS EC2 Instance Size
This section lists the Infoblox vNIOS models available for deployment in AWS and recommends corresponding
AWS EC2 instance types and sizes. The following table lists models and sizes available for the most recent
NIOS versions (8.4 and 8.5) in most AWS regions.

 vNIOS Model                     vCPUs                            Memory (GiB)       Type

 TE-V825                         2                                15.25              r4.large

 TE-V1425                        4                                30.5               r4.xlarge

 TE-V2225                        8                                61                 r4.2xlarge

 CP-V805                         2                                15.25              r4.large

 CP-V1405                        4                                30.5               r4.xlarge

Deployment Guide: Deploy Infoblox vNIOS Instances for AWS, May 2021                                                18 of 89
CP-V2205 8 61 r4.2xlarge
For information on recommended sizes for models available with older NIOS versions and recommendations
on alternate instance sizes when the above are not available, refer to vNIOS for AWS appliance documentation
https://docs.infoblox.com/display/NAIG/Infoblox+vNIOS+for+AWS+AMI+Shapes+and+Regions.
AWS EBS Volume Type and Size
General Purpose SSD (gp2) EBS volumes should be used for Infoblox vNIOS for AWS instances. Volume size
should be set to a default/minimum value of 250 GiB.
Deployment
This section provides step-by-step instructions for deploying a new Infoblox vNIOS for AWS instance using the
AWS Management Console. Deploying a new VPC is optional and should be skipped if you plan to deploy the
vNIOS instance in an existing VPC. Note: In order to use the MGMT interface of your vNIOS for AWS instance,
you will need a VPC with two subnets in the same availability zone and the LAN1 and MGMT interfaces must
be deployed in separate subnets.
Deploy AWS VPC (Optional)
Prior to deploying a vNIOS for AWS instance, you will need a VPC in the desired region. This section details
the deployment and configuration of a new VPC. If deploying vNIOS into an existing VPC, skip ahead to the
Deploy vNIOS Instance section.
Create VPC
1. Log in to the AWS Management Console.
Deployment Guide: Deploy Infoblox vNIOS Instances for AWS, May 2021 19 of 892. On the console home page, scroll down to locate VPC under Networking & Content Delivery. Click on
VPC.
3. On the VPC Dashboard, click on Your VPCs.
Deployment Guide: Deploy Infoblox vNIOS Instances for AWS, May 2021 20 of 894. Click the Create VPC button.
5. Enter a name for your VPC.
6. Enter a CIDR block for your VPC.
Note: For information on any of the configuration settings, such as allowable CIDR blocks, hover on the i next
to that setting.
7. Leave settings for IPv6 CIDR block and Tenancy at their defaults as shown below.
8. Click Create.
9. Once the VPC is successfully created, click Close.
Deployment Guide: Deploy Infoblox vNIOS Instances for AWS, May 2021 21 of 89Create Subnets
Before using your new VPC, you will need to create at least one subnet. vNIOS for AWS instances should use
two subnets, one for the LAN1 interface and one for the MGMT interface. In this guide, we will create a subnet
for each interface.
1. Back on the VPC page, click on Subnets.
2. Click the Create subnet button.
3. Enter a name for the subnet.
4. Select your new VPC from the dropdown list.
Deployment Guide: Deploy Infoblox vNIOS Instances for AWS, May 2021 22 of 895. Leave Availability Zone as No preference or select a zone if desired.
6. Enter a CIDR block for the subnet that fits within the CIDR of your VPC.
Warning: AWS allows you to create a subnet in your VPC that uses the same CIDR prefix and mask as for the
host VPC, and add new instances to it. For example, consider a VPC CIDR 172.17.0.0/16. In AWS, an
administrator is allowed to create a subnet with the same CIDR 172.17.0.0/16 and to run instances within it.
NIOS does not allow for subnets in an AWS VPC that use the same prefix and mask as the VPC network
container, and does not discover or recognize resources within that subnet. You will also not be able to create
new Grid objects in that subnet. Ensure that all VPCs to be managed or discovered through Grid Manager only
use subnets with CIDR mask values that are smaller than the CIDR denoting the VPC. For example, the host
VPC has a CIDR mask of /16, and the subnets have a mask of /24.
7. Click Create.
8. Once the subnet is successfully created, click Close.
Deployment Guide: Deploy Infoblox vNIOS Instances for AWS, May 2021 23 of 899. Select the new subnet.
10. Make a note of the Availability Zone under Description. For example, us-east-2b.
Note: In order for an VM instance to connect to two subnets, they must be in the same Availability Zone.
11. Click on Create subnet to begin creating the second subnet.
12. Name this subnet and select your VPC from the dropdown.
13. For Availability Zone, use the dropdown to select the same availability zone used by the first subnet.
Deployment Guide: Deploy Infoblox vNIOS Instances for AWS, May 2021 24 of 8914. Enter a CIDR for this subnet, which must not overlap with the first subnet.
15. Click Create.
16. Once the subnet is successfully created, click Close.
Add Internet Connectivity to the VPC
To allow connectivity in and out of your VPC through the Internet, including connectivity for your vNIOS
instance, you will need to create an Internet Gateway and associated routes. If you are using site-to-site VPN
or other methods of connecting to AWS VPCs, direct Internet connectivity may not be needed. Configuring
these other types of connectivity are outside the scope of this guide; please refer to AWS documentation.
Attach Internet Gateway
1. Click on Internet Gateways in the VPC menu.
2. Click on Create internet gateway.
3. Name the gateway and optionally add other Tags.
Deployment Guide: Deploy Infoblox vNIOS Instances for AWS, May 2021 25 of 894. Click Create internet gateway.
5. Once the gateway has been successfully created, click on Attach to a VPC.
6. Select your VPC from the dropdown.
Deployment Guide: Deploy Infoblox vNIOS Instances for AWS, May 2021 26 of 897. Click on Attach internet gateway.
Add Routes
Next, we’ll update the VPC route table to send all traffic through the new internet gateway.
1. Once the attach operation is complete, click Route tables in the VPC menu.
2. Select the route table for the new VPC.
3. Click on the Routes tab.
4. Click the Edit routes button.
5. On the Edit routes page, click Add route.
Deployment Guide: Deploy Infoblox vNIOS Instances for AWS, May 2021 27 of 896. For Destination, enter 0.0.0.0/0.
7. For Target, select Internet Gateway from the dropdown.
8. Select the Internet gateway for this VPC from the dropdown.
9. Click on Save routes.
Deployment Guide: Deploy Infoblox vNIOS Instances for AWS, May 2021 28 of 8910. Once the route is successfully edited, click Close.
Deploy vNIOS Instance in AWS
Infoblox vNIOS for AWS instances can be deployed using many different methods, including the AWS CLI,
CloudFormation, AWS Management Console, and many other orchestration and automation platforms. Starting
with NIOS version 8.5.2, Infoblox vNISO for AWS can also be found in the AWS Marketplace. This guide will
use the AWS Marketplace and AWS Console for deployment. Refer to the Additional Resources section at the
end of this guide for links to information on other deployment methods.
Deploy From Marketplace
1. To begin, in the AWS Marketplace, search for “ Infoblox vNIOS for DNS, DHCP and IPAM”.
2. Select the listing and click Continue to Subscribe.
3. Accept terms and click Continue to Configuration.
4. Select your Region and click Continue to Launch.
Deployment Guide: Deploy Infoblox vNIOS Instances for AWS, May 2021 29 of 895. From the Choose Action dropdown, select Launch through EC2.
6. Click Launch.
Warning: Do not select the Launch from Website option. This option will launch the instance with a single
network interface instead of the required two, and the instance will not function properly.
Clicking Launch will bring you to Step 2 of the launch instance wizard in the AWS Console. Continue from the
Select instance Type step in the following section.
Deploy From AWS Console
1. To begin, in the AWS console use the Services dropdown menu to select EC2 under Compute.
Deployment Guide: Deploy Infoblox vNIOS Instances for AWS, May 2021 30 of 897. Select Instances from the EC2 menu.
8. Click the Launch Instance button.
Select AMI and Instance Type
The first steps in deploying a new Infoblox vNIOS for AWS instance are selecting an Amazon Machine Image
(AMI) and selecting an appropriate VM instance size for the appliance.
AWS Marketplace: Starting with vNIOS version 8.5.2, vNIOS AMIs are available from the AWS Marketplace.
Community AMI: Older versions of the Infoblox vNIOS AMIs are available as Community AMIs published by
Infoblox. For NIOS 8.4 and 8.5, a single AMI is published in each AWS region, which can be used to deploy
any of the available models. For NIOS 8.3 and older, select the appropriate AMI for the virtual appliance type
you are deploying.
1. On Step 1, click on AWS Marketplace or Community AMIs, depending on the version you will deploy.
Deployment Guide: Deploy Infoblox vNIOS Instances for AWS, May 2021 31 of 892. In the search bar, type Infoblox and press Enter.
3. Find the NIOS version you want to use in the list.
Note: Not all versions will be available in all regions. New versions may be added without notice. The
description under each version lists supported appliance models and their corresponding instance sizes.
4. Click Select next to your chosen version. For this guide, we will use version 8.5.0.
Instance Type: In Step 2, we will select a supported instance type for the vNIOS appliance model we are
deploying. The description for each Infoblox AMI lists the supported models and corresponding instance types.
Not all AWS regions support every instance type. For more information on choosing the right instance type for
your vNIOS appliance, refer to Infoblox AWS appliance documentation at:
https://docs.infoblox.com/display/NAIG/Infoblox+vNIOS+for+AWS+AMI+Shapes+and+Regions.
1. On Step 2, scroll down to select the correct instance type for your vNIOS model. For this guide, we will
select r4.large for a TE-V825 virtual appliance.
Deployment Guide: Deploy Infoblox vNIOS Instances for AWS, May 2021 32 of 892. Click Next: Configure Instance details.
Configure Instance Details
On Step 3 of the instance launch wizard, we will configure networking for the vNIOS instance as well as some
initial operating system configuration via the User Data field.
Network Configuration: Infoblox vNIOS for AWS appliances require two network interfaces. The first AWS
network interface, eth0 corresponds to the MGMT interface in NIOS. The second AWS network interface, eth1
corresponds to the LAN1 interface in NIOS.
Warning: Infoblox vNIOS for AWS instance deployment will not complete successfully unless two network
interfaces are attached.
1. Next to Network, select the VPC to launch your instance into.
2. Next to Subnet, select a subnet for the eth0 (MGMT) interface.
Note: On this step, you can optionally assign an IAM role for the instance to use with Infoblox vDiscovery. Refer
to the vDiscovery credentials section of this guide for details.
3. Scroll down to the Network interfaces section.
4. Click on Add Device.
Deployment Guide: Deploy Infoblox vNIOS Instances for AWS, May 2021 33 of 895. Use the dropdown to select a subnet for eth1 (LAN1). This should be a different subnet from eth0 in
the same availability zone.
Note: By default, this interface and subnet will be used for all connections to and services provided by your
vNIOS for AWS instance.
User Data: You can use the User Data field in AWS instance deployment for some initial configuration of your
Infoblox vNIOS appliance’s operating system. For vNIOS, the user data field can pass cloud-init directives, an
open-source package used for initial configuration. You can specify settings such as administrator password
and allowing SSH access. This section will cover a common configuration for a standalone appliance.
1. Scroll down to the Advanced Details section.
2. Next to User data, select As text.
3. Enter the following in the text box:
#infoblox-config
remote_console_enabled: y
default_admin_password: complex_password
temp_license: enterprise dns dhcp cloud nios IB-V825
This will enable SSH connection to the instance, set an admin password, and apply temporary licenses for the
Grid, DNS, DHCP, CNA, and NIOS model TE-V825 virtual appliance.
4. Click on Next: Add Storage to proceed to the next step.
Deployment Guide: Deploy Infoblox vNIOS Instances for AWS, May 2021 34 of 89Temporary Licenses: To include temporary licenses in user data, use the temp_license: entry. All
licenses should be listed with a single space between them. For example:
#infoblox-config
temp_license: enterprise dns dhcp cloud nios IB-V825
The following temporary licenses can be used with the latest versions of vNIOS for AWS:
● On any vNIOS for AWS instance: enterprise dns dhcp rpz cloud vnios
● nios should always be followed by the model. For TE appliances, supported licenses are: IB-V825
IB-V1425 IB-V2225. For CP appliances, supported licenses are: CP-V805 CP-V1405 CP-V2205.
● Additionally, for a CP appliance, the cloud_api license is required. For example:
#infoblox-config
temp_license: enterprise dns dhcp cloud_api nios CP-V805
For additional information and use cases regarding user data, refer to NIOS documentation at
https://docs.infoblox.com.
Add Storage
AWS instance disks are stored as Elastic Block Store (EBS) volumes. There are 3 EBS types that can be
selected for your boot disk. General Purpose SSD (gp2) is the base level for SSD and will work for most vNIOS
deployments. Provisioned IOPS SSD (io1) supports high levels of input and output and may be useful for high
read/write volume environments. Magnetic (standard) EBS is not recommended for vNIOS deployments except
in non-production environments.
1. Verify Size is set to 250 (this should be the default).
2. Select the Volume Type: General Purpose SSD (gp2).
3. Click Next: Add Tags.
Add Tags
On Step 5 of the instance launch wizard, you can add tags to your instance in the form of key-value pairs. It is
recommended to add a Name tag to your instance at minimum.
1. Click on Add Tag.
Deployment Guide: Deploy Infoblox vNIOS Instances for AWS, May 2021 35 of 892. Under Key, type Name.
3. Under Value, enter a name for your instance.
4. Optionally, add additional tags.
5. Click Next: Configure Security Group.
Configure Security Group
On Step 5 of the instance launch wizard, we will configure a security group with rules to allow specific traffic to
the vNIOS instance. Security groups function as a basic firewall for the instance. By default the new security
group will contain a rule to allow SSH from all IP addresses. We will add additional rules for services and grid
traffic. While this guide shows allowing traffic from anywhere (0.0.0.0/0) for demonstration purposes, you
should restrict traffic to only necessary source IPs in your environment. The following table lists rules that may
be needed for your vNIOS for AWS instance. For further information on ports and protocols used by Infoblox
NIOS, refer to https://docs.infoblox.com.
Type Protocol Port Range Description
SSH TCP 22 SSH for Administration
DNS (UDP) UDP 53 UDP DNS
DNS (TCP) TCP 53 TCP DNS
HTTPS TCP 443 HTTPS for Grid Manager
Custom UDP Rule UDP 1194 NIOS Grid Traffic
Custom UDP Rule UDP 2114 NIOS Grid Traffic
Deployment Guide: Deploy Infoblox vNIOS Instances for AWS, May 2021 36 of 89Custom UDP Rule UDP 67-68 DHCP
Custom TCP Rule TCP 8787 Infoblox AWS API Proxy
1. Optionally, change the Security group name and Description.
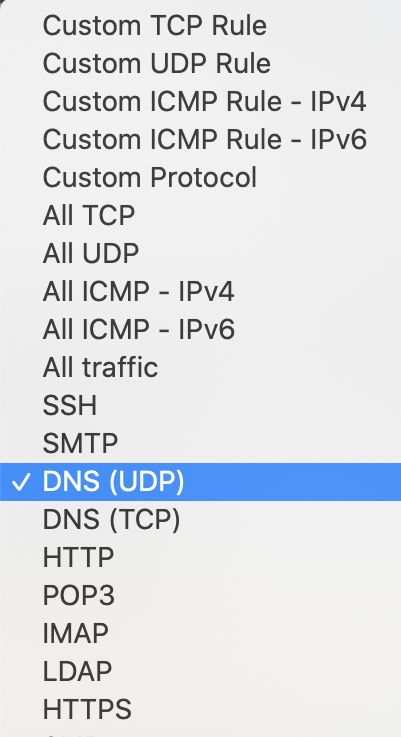
2. To add predefined rules, click Add Rule.
3. For Type, select DNS (UDP) from the dropdown.
4. Protocol and Port will automatically be set to UDP and 53 respectively.
5. For Source, enter 0.0.0.0/0 to allow traffic from any IP address.
6. Optionally, enter a Description for the rule.
7. Repeat steps 2-6 to add rules for DNS (TCP) and HTTPS.
8. To add custom rules, click Add Rule.
9. Select Custom UDP Rule from the dropdown.
10. Under Port Range, enter 1194.
11. For Source, enter 0.0.0.0/0 to allow traffic from any IP address.
12. Optionally, enter a Description for the rule.
Deployment Guide: Deploy Infoblox vNIOS Instances for AWS, May 2021 37 of 8913. Repeat steps 8-12 to add rules for UDP ports 2114 and 67-68 (Optional - for DHCP).
14. Repeat steps 8-12, substituting Custom TCP Rule in step 9, to add a rule for TCP port 8787 (Optional
- for AWS API Proxy).
15. Click Review and Launch.
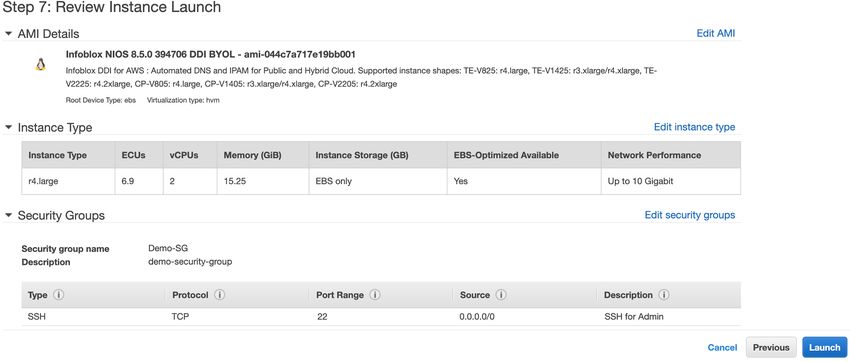
Review and Launch
On step 7 of the instance launch wizard, review warnings and summarized details for your instance.
1. Click Launch.
2. In the key pair popup window, select your desired option from the dropdown.
3. Click the acknowledgement checkbox if required.
4. Click Launch Instances.
Deployment Guide: Deploy Infoblox vNIOS Instances for AWS, May 2021 38 of 89Note: Key pair authentication is required for SSH access with vNIOS for AWS version 8.5.2 and newer. If you
do not add a key pair on this step, you will need to configure this in Grid Manager. For older versions, key pair
authentication is not used, but you can optionally still create or specify a key pair in this step for future use.
5. On the Launch Status page, click View Instances to watch the progress of your vNIOS instance
deployment.
Troubleshooting
Deploying and configuring your Infoblox vNIOS for AWS instances is generally a straightforward process. One
of the most common issues encountered while deploying a vNIOS for AWS instance is not adding the required
second network interface. This issue can be identified when the instance Status Check is stuck at 1/2 checks
passed.
Deployment Guide: Deploy Infoblox vNIOS Instances for AWS, May 2021 39 of 89Verify that a missing interface is the issue by selecting the instance and reviewing the description.
The description tab in the screenshot shows only the single eth0 interface in the Network interface section.
To resolve this issue:
1. Create a new network interface in the same VPC as your instance..
2. Attach the network interface to your instance.
3. Restart your Infoblox vNIOS for AWS instance.
Add a Public IP to vNIOS Instance (Optional)
In this step, we will attach a public IP to the vNIOS for AWS instance in order to connect to it. This is an
optional step and not necessary if you are able to connect to your AWS VPC via VPN, Direct Connect, or
jumpbox. First, we will give the eth1 (LAN1) interface a custom name to make it easier to recognize.
1. On the Instances page, select your instance.
2. Under description, click on eth1.
Deployment Guide: Deploy Infoblox vNIOS Instances for AWS, May 2021 40 of 893. In the Network Interface popup, click on the Interface ID.
4. On the Network Interface page, under the Name column, hover over the space next to your eth1
interface.
5. Click the pencil to edit the Name.
Deployment Guide: Deploy Infoblox vNIOS Instances for AWS, May 2021 41 of 896. Enter a name for the interface and click the check mark.
Allocate Elastic IP
1. Select Elastic IPs from the EC2 side menu.
2. Click Allocate Elastic IP address.
3. Leave Amazon’s pool of IPv4 addresses selected.
4. Click Allocate.
Deployment Guide: Deploy Infoblox vNIOS Instances for AWS, May 2021 42 of 895. To name your allocated IP address, hover next to your IP address, under the Name column.
6. Click the edit symbol.
7. Enter a name for your public IP address.
8. Click Save.
Attach Elastic IP to vNIOS Instance
1. To attach the Elastic IP to your vNIOS instance, select the checkbox for the IP.
2. Use the Actions menu to select Associate Elastic IP address from the dropdown.
3. Under Resource type, select Network interface.
4. Click in the box under Network interface and select the vNIOS instance eth1 interface from the list.
Deployment Guide: Deploy Infoblox vNIOS Instances for AWS, May 2021 43 of 895. Click in the box under Private IP address and select the interface private IP.
6. Click Associate.
Configuration
Once the Infoblox vNIOS for AWS deployment is complete, the new virtual appliance can be joined to an
existing Grid or configured as a Grid Master for a new Grid. This section provides basic guidance for common
configuration of vNIOS for AWS appliances.
Deployment Guide: Deploy Infoblox vNIOS Instances for AWS, May 2021 44 of 89Connect to vNIOS Instance
There are two methods available by default to connect to your vNIOS for AWS instance, using SSH and the
Grid Manager GUI. To connect via either method, you will need to know the public IP address of your instance.
It is also possible to connect to your instance using the private IP address over VPN or Direct Connect,
however that is outside the scope of this guide.
1. To find the public IP address of your vNIOS instance, Navigate to the EC2 Instances page.
2. Select your vNIOS instance.
3. Under Description, locate the IPv4 Public IP.
4. Hover over the public IP address.
5. Click the copy symbol to copy this IP address to your clipboard.
SSH
1. Open a PowerShell or Terminal window on your computer.
2. Enter the command ssh admin@ to start the SSH connection (use the public IP address
of your vNIOS instance).
Note: For vNIOS version 8.5.2 and newer, you will need to add the -i option to your SSH command and specify
your private key.
3. When prompted, type yes to add the IP address to your known_hosts file.
4. If you are not using key-pair authentication, enter the password you set in User-Data.
Deployment Guide: Deploy Infoblox vNIOS Instances for AWS, May 2021 45 of 895. Once the SSH session is established, you can interact with the NIOS command line interface (CLI).
Refer to NIOS documentation at https://docs.infoblox.com for details on CLI commands and use.
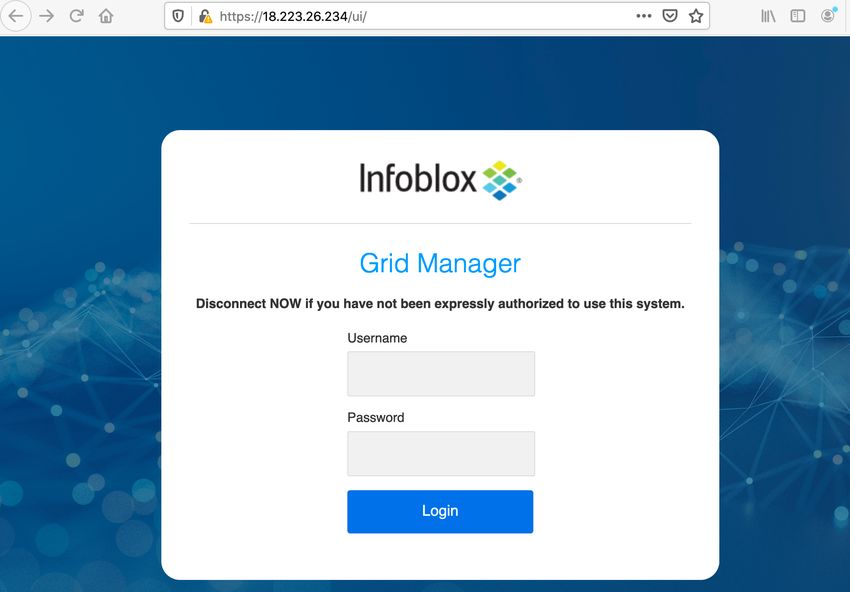
Grid Manager
1. Open a web browser on your computer.
2. Navigate to https:// (use the public IP address of your vNIOS instance).
Note: By default, NIOS uses a self-signed certificate. Warnings about the connection being insecure are to be
expected and might require that you add an exception before being able to connect.
3. Login with the username admin and the password specified during deployment.
Note: NIOS 8.5.2 and later require you to change the admin password on your first login to the vNIOS for AWS
instance.
4. Accept the Infoblox End-User License Agreement.
5. Read and make a selection for the Infoblox Customer Experience Improvement Program.
Join vNIOS to Existing Grid
Infoblox vNIOS for AWS instances can be joined to existing Grids running on-premises, in AWS, or across
multiple cloud platforms. The vNIOS for AWS instance must be able to communicate with the Grid Master using
either private or public IP addressing. At a minimum, communication must be open over UDP ports 1194 and
2114.
Deployment Guide: Deploy Infoblox vNIOS Instances for AWS, May 2021 46 of 89Add New Infoblox Appliance to Grid
Prior to joining a new member to an existing Grid, the member needs to be added (defined) in the Grid. This
can be done using the Grid Manager GUI or using the Infoblox API. This guide will demonstrate using the Grid
Manager to add a new member.
1. Login to the Grid Manager GUI of your existing Grid.
2. Navigate to the Grid → Grid Manager → Members tab.
3. Click the (add button) to add a new Grid member.
4. In Step 1 of the Add Grid Member wizard, for Member Type, select Virtual NIOS from the dropdown.
5. Enter a Host Name for the new member.
6. Click Next.
7. On Step 2, Select Standalone Member. Note: vNIOS for AWS instances are not supported for use in
High Availability pairs.
Deployment Guide: Deploy Infoblox vNIOS Instances for AWS, May 2021 47 of 898. For the LAN1 interface, enter the private IP address of your vNIOS for AWS instance eth1 interface.
9. Enter the Subnet Mask.
10. Enter the Gateway address for your VPC subnet. Note: by default, AWS assigns the gateway the .1 IP
address in a subnet.
11. Click Save & Close.
Adding Grid Member Public IP: Complete these steps only if your vNIOS for AWS instance will communicate
with the Grid Master using public IP addressing. If you are using VPN or other methods for private IP address
communication, skip to the next section.
1. Click the action menu next to your new Grid member. Select Edit.
2. In the Grid Member Properties Editor, navigate to the Network → Advanced tab.
3. Scroll down and select Enable NAT.
4. Ensure No group is selected for NAT Group.
5. Enter the public IP address of your instance for LAN1 in NAT Addresses.
6. Click Save & Close.
Deployment Guide: Deploy Infoblox vNIOS Instances for AWS, May 2021 48 of 89For additional information on configuring network address translation (NAT) and NAT groups in your Grid, refer
to NIOS documentation at https://docs.infoblox.com.
Join Appliance to Grid
An Infoblox vNIOS for AWS instance can be joined to the grid using the CLI or the Grid Manager GUI. To join a
Grid, you will need to know the Grid Master’s IP address, the name of the Grid, and the Shared Secret used to
authenticate the connection. In the Grid Manager, navigate to the Grid → Grid Manager → Members tab and
click Grid Properties in the menu to review or change Grid name and Shared Secret.
Note: The Shared Secret is encrypted once it is saved. There is no recovery mechanism if it is lost. The value
can be changed without any impact to any appliances online in your Grid. Any offline Grid members will need to
be reset before being joined back to the Grid after any change is made to the Shared Secret. The default
Shared Secret is “test”.
Join Using CLI
1. Login to your vNIOS for AWS instance using an SSH client.
2. Type the command set membership and press Enter.
3. Enter the IP address of the Grid Master when prompted. Press Enter.
4. Enter the Grid name when prompted if it is different from the default (Infoblox). Press Enter.
5. Enter the Shared Secret when prompted. Press Enter.
6. Verify that the join details are correct and enter y at confirmation prompts to begin the join process.
Deployment Guide: Deploy Infoblox vNIOS Instances for AWS, May 2021 49 of 897. Your vNIOS for AWS instance will restart and the SSH session will be closed. Monitor the join process
from the Grid Manager on the Grid → Grid Manager → Members tab.
Join Using Grid Manager GUI
1. Login to your vNIOS for AWS instance Grid Manager GUI.
2. If the Grid Setup Wizard is displayed, click Cancel.
3. Navigate to the Grid → Grid Manager → Members tab.
4. In the vertical toolbar on the right-hand side of the page, click Join Grid.
5. Enter the IP address of the Grid Master.
6. Enter the Grid Name and Grid Shared Secret.
7. Click OK.
Deployment Guide: Deploy Infoblox vNIOS Instances for AWS, May 2021 50 of 898. Your vNIOS for AWS instance will restart and the GUI session will be closed. Monitor the join process
from the Grid Manager of your existing Grid on the Grid → Grid Manager → Members tab.
Adding SSH Keys for Administrators
After joining the vNIOS for AWS instance to your existing Grid, the local administrator is replaced by
administrators configured in your Grid. With NIOS 8.5.2 and later, you will no longer be able to access your new
instance through SSH until you configure a Grid administrator to use key-pair authentication. To enable SSH
key authentication for an administrator:
1. Login to your Grid Manager.
2. Navigate to the Administration → Administrators → Admins tab.
3. Select the administrator you will use for SSH to the member and click the Edit icon.
4. In the admin editor, click the check box for Use AWS SSH authentication keys.
5. Use the dropdown for Authentication Method to select either Key pair or Key pair + Password.
6. Click the (Add) next to Manage SSH Public Keys.
Deployment Guide: Deploy Infoblox vNIOS Instances for AWS, May 2021 51 of 897. Use the Upload dialog to Select and Upload your public key.
8. Click Save & Close. You are now able to SSH to Grid members including your vNIOS for AWS
instance using your private key.
Deployment Guide: Deploy Infoblox vNIOS Instances for AWS, May 2021 52 of 89Use vNIOS Instance for New Grid
Infoblox vNIOS for AWS instances can be used as a standalone appliance or as a Grid Master for a new Grid.
This section covers the basic setup of your new vNIOS instance as a Grid Master.
1. Login to your vNIOS for AWS instance Grid Manager GUI.
2. On your first login to the instance, the Grid Setup Wizard should open. If it is not open, navigate to the
Grid → Grid Manager → Members tab. Open the dropdown for Grid Properties in the right-hand
menu. Select Setup Wizard.
3. In Step 1 of the Grid Setup Wizard, select Configure a Grid Master.
4. Click Next.
Deployment Guide: Deploy Infoblox vNIOS Instances for AWS, May 2021 53 of 895. In Step 2, optionally change the Grid name and Shared Secret.
6. Leave defaults for Network Connectivity and HA pair.
7. Click Next.
8. On Step 3, verify the IP settings for your instance LAN1 interface. You should not need to make any
changes here.
9. Click Next.
10. On Step 4, optionally select Yes to change the admin password (recommended).
Deployment Guide: Deploy Infoblox vNIOS Instances for AWS, May 2021 54 of 8911. Enter your new admin password.
12. Click Next.
13. On Step 5, set the Time Zone.
14. Optionally, select Yes to enable NTP.
15. Set the time and date if they are incorrect.
16. Click Next.
17. On Step 6, review the appliance settings.
18. Click Finish.
Deployment Guide: Deploy Infoblox vNIOS Instances for AWS, May 2021 55 of 8919. Click Yes in the Warning window to restart your vNIOS appliance and apply the settings.
20. Your vNIOS for AWS instance will restart.
Use vNIOS Instance as Primary DNS for VPC
Infoblox vNIOS for AWS instances can be used as the primary DNS servers for AWS VPC. This allows you to
extend your enterprise DNS and RPZ services into your AWS networks.
Setup DNS Service
First, we will configure basic DNS service on the Infoblox vNIOS for AWS instance. In this guide we will
configure the server for both authoritative and recursive DNS; in production environments you will likely want to
separate these roles on multiple appliances.
1. Login to your vNIOS for AWS instance Grid Manager GUI.
2. Navigate to the Grid → Grid Manager → Services tab.
3. Click on the DNS service.
Deployment Guide: Deploy Infoblox vNIOS Instances for AWS, May 2021 56 of 894. Select the checkbox next to your vNIOS member.
5. Click the start button to start the DNS service.
6. Click Yes in the popup window to confirm.
7. Once the service is started, open the dropdown next to Edit in the right-hand menu.
8. Select Grid DNS Properties.
Deployment Guide: Deploy Infoblox vNIOS Instances for AWS, May 2021 57 of 899. In the Grid DNS Properties window, select the Queries tab.
10. Optionally, change Allow queries to Set of ACEs.
11. Use the add dropdown to select IPv4 Network.
12. For Address enter the network prefix for your VPC. For example: 172.17.0.0.
13. Use the Netmask slider to select the correct mask size. For example: /16.
14. Click Add.
15. Scroll down and select Allow recursion.
16. Select Set of ACEs.
17. Use the add dropdown to select IPv4 Network.
Deployment Guide: Deploy Infoblox vNIOS Instances for AWS, May 2021 58 of 8918. For Address enter the network prefix for your VPC. For example: 172.17.0.0.
19. Use the Netmask slider to select the correct mask size. For example: /16.
20. Click Add.
21. Click Save & Close.
22. In the Warning window, click Yes.
23. Click Restart in the banner that opens in the top of the window.
24. Click the Restart button in the Restart Grid Services window.
Deployment Guide: Deploy Infoblox vNIOS Instances for AWS, May 2021 59 of 8925. To add an authoritative DNS zone, navigate to the Data Management → DNS → Zones tab.
26. Use the add dropdown to select Authoritative Zone.
27. On Step 1 of the Add Authoritative Zone Wizard, select Add an authoritative forward-mapping
zone.
28. Click Next.
29. On Step 2 enter a name for your DNS zone.
30. Click Next.
Deployment Guide: Deploy Infoblox vNIOS Instances for AWS, May 2021 60 of 8931. On Step 3 select Use this set of name servers.
32. Use the add dropdown to select Grid Primary.
33. Click Select. The single member of this Grid will automatically be selected.
34. Click Add.
35. Click Save & Close to create the new zone. Or, click Next to proceed to optional steps.
36. Click Restart in the banner that opens at the top of the window.
Deployment Guide: Deploy Infoblox vNIOS Instances for AWS, May 2021 61 of 8937. Click the Restart button in the Restart Grid Services window.
Create AWS DHCP Option Set
AWS VPCs use DHCP option sets to specify optional configurations such as a default domain name or the
DNS servers your instances should use. We will use an option set to make the Infoblox vNIOS for AWS
instance the primary DNS server for a VPC. DHCP option sets cannot be modified after creation, so we will
start by creating a new DHCP option set.
1. In the AWS Management Console, Use the Services menu to navigate to VPC under Networking &
Content Delivery.
2. From the VPC menu, click on DHCP Options Sets.
3. Click Create DHCP options set.
4. Enter a name for your option set.
5. Under Domain name servers, enter the private IP address of your vNIOS for AWS eth1 (LAN1)
interface.
Deployment Guide: Deploy Infoblox vNIOS Instances for AWS, May 2021 62 of 896. Scroll down and click Create DHCP options set.
7. To assign this DHCP options set to your VPC, select Your VPCs in the menu.
8. Select your VPC.
Deployment Guide: Deploy Infoblox vNIOS Instances for AWS, May 2021 63 of 899. Use the Actions dropdown menu to select Edit DHCP options set.
10. Use the dropdown menu next to DHCP options set to select the new options set you created.
11. Click Save.
Deployment Guide: Deploy Infoblox vNIOS Instances for AWS, May 2021 64 of 8912. Any VM instances you create in this VPC will use your Infoblox vNIOS for AWS appliance for DNS
resolution. Existing VM instances may need a reboot to apply this change.
vDiscovery for AWS
The Infoblox vDiscovery feature is very useful for detecting and obtaining information about Tenants, VPCs,
Subnets, and Virtual Machines (VM’s) operating in your public cloud environments.
Many organizations operate hybrid and multi-cloud environments that may contain many subscriptions and
accounts. These environments tend to be very dynamic, with things such as VMs being created and terminated
on a frequent basis. This makes it difficult to keep track of everything. With Infoblox vDiscovery, tasks can be
configured to run automatically allowing your Infoblox vNIOS appliance to keep track of all cloud environments,
storing this data in IPAM. Infoblox vDiscovery can also be used to automate creation of DNS records for VMs
running in your cloud environments. Using vDiscovery in conjunction with the Cloud Network Automation (CNA)
feature, you will gain enhanced visibility into your cloud environments, all within a ‘single pane of glass’.
Configure vDiscovery in Grid Manager
DNS Resolver: In order to conduct vDiscovery for AWS, your Infoblox vNIOS for AWS instance must be able to
resolve the AWS endpoints such as iam.amazonaws.com. Configuring the DNS Resolver in NIOS will achieve
this.
1. Log into the Grid Manager GUI of your vNIOS for AWS instance.
2. Navigate to the Grid → Grid Manager → Members tab.
3. In the Toolbar, Open the Grid Properties dropdown.
4. Select Edit.
5. Navigate to the DNS Resolver tab of the Grid Properties Editor.
6. Select the checkbox next to Enable DNS Resolver.
7. Click the (Add) to add an upstream Name Server to use for DNS resolution.
Deployment Guide: Deploy Infoblox vNIOS Instances for AWS, May 2021 65 of 898. Enter the IP address of the name server you wish to use. For example, 172.17.1.201.
9. Click Save & Close.
Note:If you have set up your vNIOS for AWS instance as a DNS resolver for the VPC, as specified in the Setup
DNS Service section of this guide, you can enter the IP address of the instance’s eth1 (LAN1) interface, to use
itself for DNS resolution. This method is used in the example system for this guide.
vDiscovery Job: To conduct vDiscovery in AWS, you must configure a discovery job, using the Access Key ID
and Secret Access Key created with AWS IAM, as well as the regional EC2 Endpoint identified in AWS.
1. Log into the Grid Manager GUI of your vNIOS for AWS instance.
2. Navigate to the Data Management → IPAM tab.
3. In the Toolbar, Open the vDiscovery dropdown.
4. Select Discovery Manager.
Deployment Guide: Deploy Infoblox vNIOS Instances for AWS, May 2021 66 of 895. In the vDiscovery Job Manager window, click (Add) to add a new job.
6. In the vDiscovery Job Wizard, enter a name for the job.
7. Next to Member, click Select.
8. For a Grid with only one member, it will be automatically selected. If your Grid has multiple members,
select the one you want to use for vDiscovery.
Deployment Guide: Deploy Infoblox vNIOS Instances for AWS, May 2021 67 of 899. Click Next.
10. On Step 2, select AWS for Server Type.
11. For Service Endpoint, enter the ec2 endpoint for the AWS region you will conduct vDiscovery in, for
example ec2.us-west-1.amazonaws.com. A full list of AWS endpoints can be found at
https://docs.aws.amazon.com/general/latest/gr/rande.html.
12. Select Use IAM credential.
13. Enter the Access Key ID and Secret Access Key for the user you created. You will find these in the
CSV file you downloaded earlier.
Note: If you have configured the IAM role to use with your vNIOS instance, select Use instance profile here
instead.
14. Click Next.
15. Review the configuration for Network Views on Step 3.
Deployment Guide: Deploy Infoblox vNIOS Instances for AWS, May 2021 68 of 89Note: The most common cause for vDiscovery to fail to import any data is a “Sync Error” due to
overlapping/conflicting address space. To account for any address space conflicts that are encountered during
the vDiscovery process or with your existing IPAM data, you may need to select the option to use The tenant's
network view (if it does not exist, create a new one).
16. Click Next.
17. Optional: For automatic creation of DNS records, on step 4 select the checkbox For every newly
discovered IP address, create:
18. Select the desired DNS record object type. If in doubt, stick with the default (Host) option.
19. The name for DNS records that are created is controlled with a macro, with the most commonly used
macro being ${vm_name). In the text box, type the desired macro, followed by the zone that you want
to use. Example: ${vm_name}.testzone.com.
Deployment Guide: Deploy Infoblox vNIOS Instances for AWS, May 2021 69 of 89You can also read