Live Cell Imaging - Advanced Microscopy Course 2015 Lecture 7: Richard Parton - Department of Biochemistry ...
←
→
Page content transcription
If your browser does not render page correctly, please read the page content below
Advanced Microscopy Course 2015

         Lecture 7:

            Live Cell Imaging

Richard Parton - Richard.Parton@bioch.ox.ac.uk
Department of Biochemistry
University of Oxford
                                                 2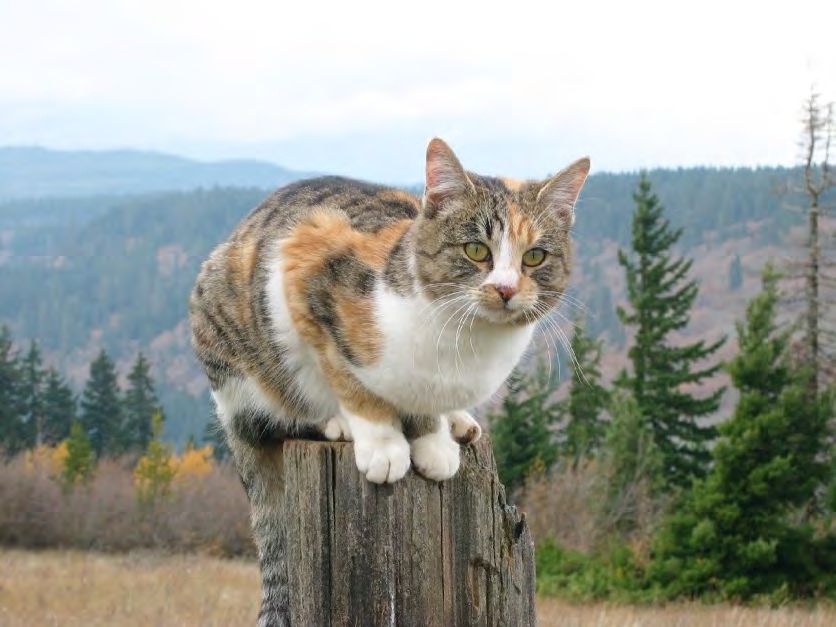
Live Cell Imaging

• Reasons for live cell imaging

• Requirements for live cell imaging
                Experimental design

                Choice and setup of equipment

                Collect every photon

                Image processing and analysis

                                                3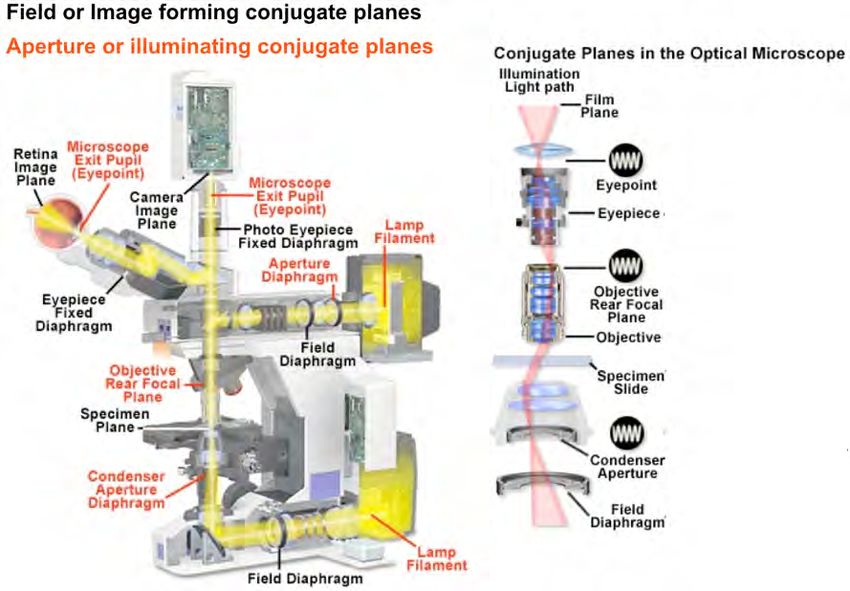
Reasons for live imaging: Fixed vs Live
h"p://imgur.com/a//uPr
h"p://www.afranko.org/2014/01/calico-‐cat/
4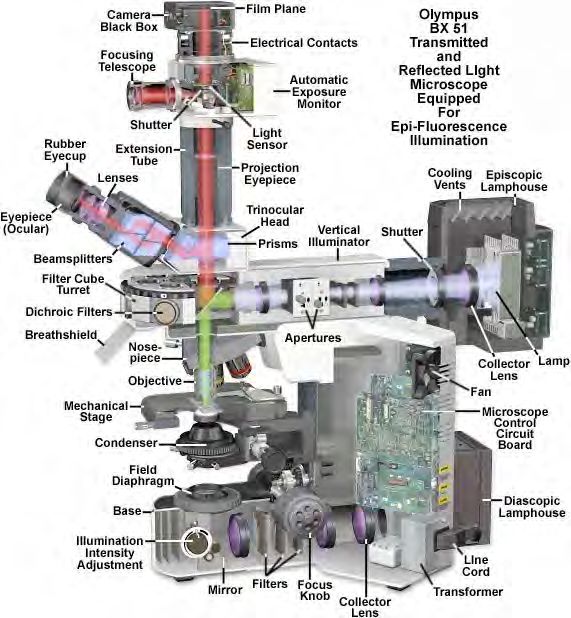
Fixed                 Live
Shulman et al 2000

                 microtubules

             Posterior cargo           5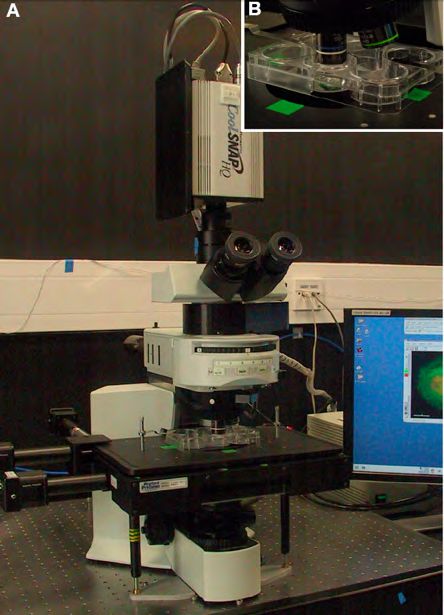
6
                Reasons for live imaging
1) You can believe what you see - no fixation artifacts

2) Can follow the order of sequential events in real time
                                            time-course of cell
                                            migration - Andrea
                                            Linford Barr lab

3) Can monitor the kinetics of dynamic processes:
            - active transport vs diffusion Macrophage:
                                            EB1-GFP
            - Microtubule turnover          tagged MT

4) Can record sensitive or transient processes:
            - Calcium signalling transients
            - Ion gradients
            - membrane potential       Calcium ratio imaging
                                       pollen tube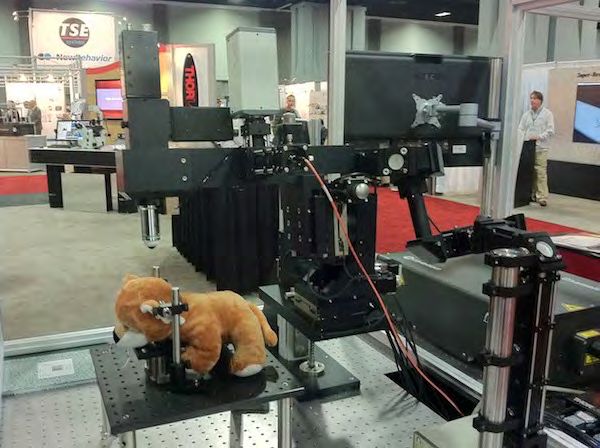
You can believe what you see - no fixation artifacts

Nature Methods, 9(2), 152–158. doi:10.1038/nmeth.1855

** Ester - lecture 4 - sample prep and minimizing artifacts **
** Errin - lecture 19 / Rainer - lecture 15 EM, correlative light and EM, super-precision microscopy **

                                                                                                          7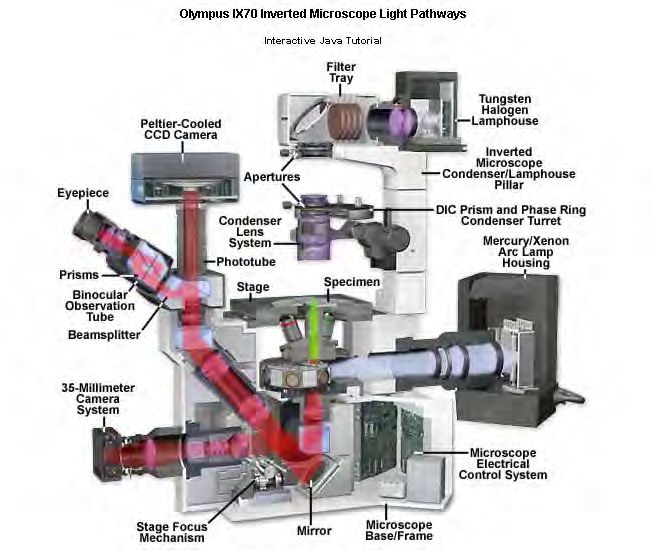
Can monitor the kinetics of dynamic processes
       Fixed - EM                                         Live

                                               FM4-64 labelling of the plasma membrane
Electron Micrograph From
                                               and apical vesicles in a living pollen tube
Lancelle,S.A.; Cresti,M.; Hepler,P.K. (1997)
Protoplasma 196, 21-33.                        Parton et al, 2001. JCS
                                                                                             8
Can follow the order of sequential events in real time
                                                Bouton growth (fillet prep)

                                            v

Live neuronal organisation and develpment
Drosophila larva (ELAV driven GFP)
Thomas Germe, Lu Yang - Davis lab

                                                                              9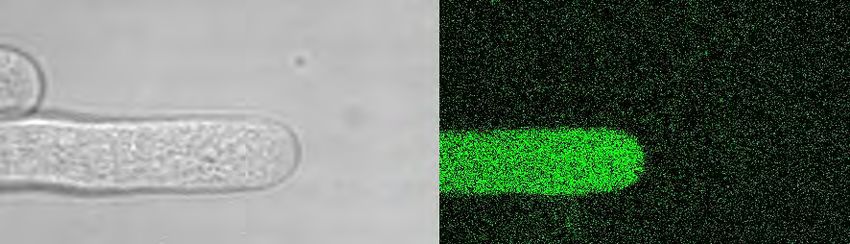
Can record sensitive or transient processes

Calcium transient upon activation
                          Mature Drosophila oocyte

                               anterior

                                              posterior

Ratio image:
                                                            myr GCaMP3:
Calcium-Green1/Rhodamine

 high                    low              1 frame / 5 sec   high          low   1 frame / 25 sec

Claire Bromley, Richard Parton, Tim Weil: Davis Lab

                                                                                             10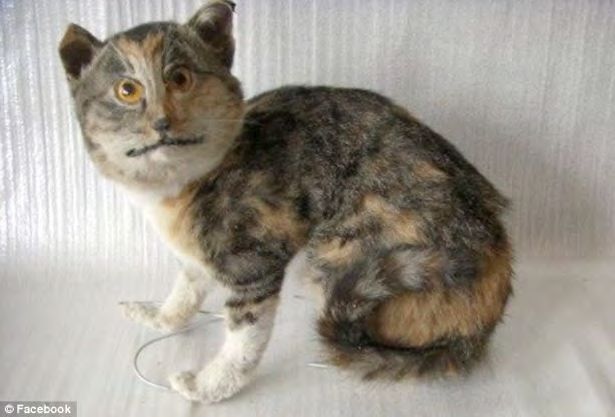
Requirements for live cell imaging:

Careful Balancing of Conflicting Interests

                                             11
What is important What is also important
in microscopy? in live-cell imaging?
1. Resolution 1. Cell viability
2. Sampling 2. Speed
3. Contrast 3. Field of view
4. Noise 4. Multiple channels
12What is important What is also important
in microscopy? in live-cell imaging?
1. Resolution 1. Cell viability
2. Sampling 2. Speed
3. Contrast 3. Field of view
4. Noise 4. Multiple channels
Live-cell imaging is a compromise!
13Death by imaging!
Cytoplasmic GFP in a living Lilium pollen tube imaged by multiphoton (800 nm)
Also:
• mis-expression or aberrant behaviour of GFP tagged proteins
• stressed live cells behave abnormally
do the appropriate controls
14Requirements for live cell imaging:
1. Optimise your experimental design
2. Choose your technique carefully
3. Set up you imaging equipment properly
4. Correct Spherical Aberration
5. Collect every photon
15Optimise your experimental design:
• What do you need from your imaging?
» Qualitative
» Quantitative
» Spatial information
» Temporal information
Goal Setting!
h"p://thecatsdiary.typepad.com/.a/6a0133f3617f23970b0147e36dbedc970b-‐pi
16Choice of equipment and technique:
Depends upon:
1) What you want to see - experimental design
2) Your experimental material
3) What is available
4) Your budget
There is no, one, purfect technique!
17Choice of microscope stand
• The modern epifluorescence microscope
Upright microscope (lens above specimen)
Inverted microscope (lens below specimen)
18Upright microscope design
•Cheaper
• Use with thick or opaque
material
• Use with dipping objectives
• stable stand for manipulation
http://www.olympusmicro.com/
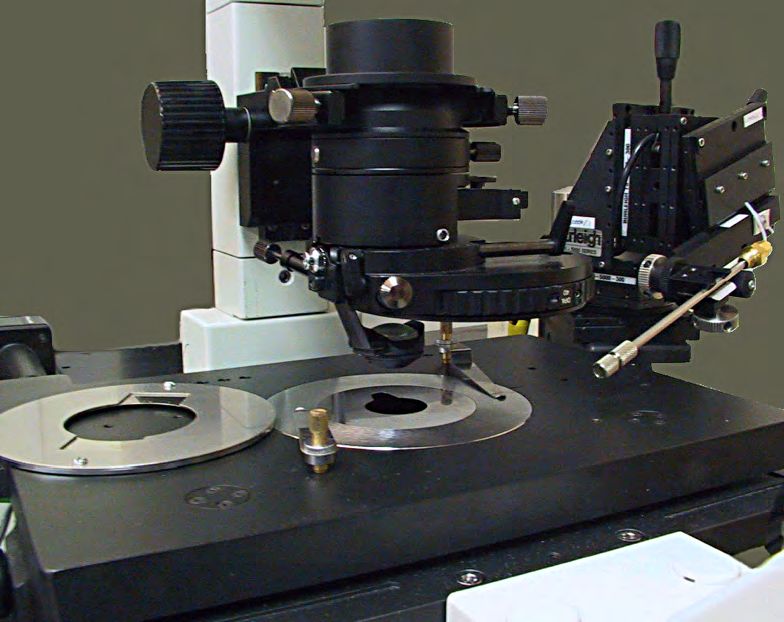
19Upright microscope design
PatchPro 6000
• stable stand for electrophysiology
20Upright microscope - larval fillet prep
21Inverted microscope design
• Easy access to the specimen
• Good for oil immersion objectives
• Convenient side port
• Possible second camera
on bottom port or side
port
http://www.olympusmicro.com/
22Inverted microscope - injection
h"p://www.liveassay.com/catalogue-‐2/images/47/single-‐dish-‐black-‐
big-‐72dpi-‐301.jpg?240,300,1,100,-‐1493687186
h"ps://
www.warneronline.com/
img_md/640375_QE-‐1_v1.jpg
23There is a microscope stand for everything....
Thorlabs - B scope: www.thorlabs.de/newgrouppage9.cfm?objectgroup_id=6611
be inventive..
The Thorlabs scope is set up to rotate about an axis that is in
the plane of focus. So you can be looking at a cell and then,
while imaging, rotate the scope (since it’s motorized) and still
keep looking at the same thing, just from a different angle.
24Choice of imaging technique
Use a confocal for:
Bright, thick specimens with low contrast
To generate high resolution 3D image reconstructions
Easy simultaneous multichannel imaging
Use wide-field deconvolution for:
Weakly fluorescent, sensitive specimens
Following fast dynamic events
Use TIRF for:
Imaging with high contrast within 100 nm of the coverslip
25Choice of imaging technique:
Example of a thick specimen
Confocal Wide-field
50 um
WF- deconvolved
Drosophila embryo, nls GFP
Thick, bright specimen
26For really thick specimens consider
point scanning confocal or multiphoton
h"p://animalzfun.blogspot.co.uk/2012/09/fat-‐cats-‐awesome-‐photographs.html
or DLSM *lecture 13* 27Multiphoton
28Confocal vs Widefield Deconvolution
Confocal (optical configuration) Widefield Deconvolution (processing)
Discards out-of-focus light Reassigns out-of-focus light
using a pinhole in the light path to its point of origin
Less sensitive - throws away light, More sensitive (and quantitative) -
generally poorer signal to noise Better signal to noise ratio
More convenient - immediate high Less convenient - requires time
contrast images, even with single Z consuming (post acquisition)
sections. calculations, best with multiple Z
sections.
Electronic zoom
Deals well with strong but diffuse signal Better for point sources of light and
with a lot of out-of-focus light weak signals
(low contrast)
Confocal images can be deconvolved
as well
29
**Alan - lecture 8 - confocal and multiphoton**30
If the choice is not obvious...
* VISIT A FACILITY *
it’s worth trying them all.Live imaging as an experimental tool:
F* techniques to measure protein interactions and dynamics:
•FRAP (Fluorescence Recovery After Photobleaching)
•Fhoto-activation (PA-GFP)
•FRET (Fluorescence Resonance Energy Transfer)
•FLIM (Fluorescence Lifetime IMaging)
•FCS (Fluorescence Correlation Spectroscopy)
**Antonia- lecture 11 - F* techniques**
31Live imaging as an experimental tool: 32
Using light to manipulate cell behaviour:
•“Killer red” genetically encoded photosensitiser
CALI = chromophore assisted light inactivation
Reactive oxygen species in photochemistry of the red fluorescent protein “Killer Red”
Vegh et al, Chem. Commun., 2011,47, 4887-4889
DOI: 10.1039/C0CC05713D
EVROGEN - Killer red expressed in
mitochondria
•Channelrhodopsin-2 (ChR2) photo-induced behaviour through
light activation of cation-selective ion channels
Zimmermann, G., et al. (2009). Manipulation of an Innate Escape Response in Drosophila: Photoexcitation of acj6 Neurons Induces the Escape Response. PLoS ONE, 4(4), e5100.
doi:10.1371/journal.pone.0005100.g005
D42-GAL4 motor neuron driver
and three copies of UAS-chr2::yfp
Josh TitlowLive imaging as an experimental tool:
Using light to manipulate cell behaviour:
laser tweezers (optical trap)
manipulating the behaviour of fungal hyphae
output laser power (70 mW) was used in this experiment, which equates to a trapping force of 19 pN
Graham D. Wright et al., Fungal Genetics and Biology. Volume 44, Issue 1, January 2007, Pages 1–13
http://dx.doi.org/10.1016/j.fgb.2006.07.002
33For live cell imaging collect every photon:
34Be economical with your light budget - hardware
• Sensitive detectors Deep Cooled CCD’s **Antonia- lecture 10**
EMCCD’s
• Optimised synchronisation of illumination, exposure and readout
“real time” system controllers
fast shuttering
diode light sources
• Optimised filter sets for your probes
hard coated “ET” filter sets
filter free “spectral” options
• Choose the best objective for the job Oil immersion
water immersion
RI matching immersion
• Set up your equipment properly
35Matching Fluorescent Probes to Filter-Sets:
Covered in lectures 4, 6 - Ester, Mark Howarth
36Matching Fluorescent Probes to Filter-Sets http://www.olympusmicro.com/primer/java/fluorescence/matchingfilters/index.html 37
Be economical with your light budget - hardware
• Sensitive detectors   Deep Cooled CCD’s
                        EMCCD’s

• Optimised synchronisation of illumination, exposure and readout
                              “real time” system controllers
                               fast shuttering
                               diode light sources

• Optimised filter sets for your probes
                          hard coated “ET” filter sets
                          filter free “spectral” options

• Choose the best objective for the job      Oil immersion
                                             water immersion
                                             RI matching immersion

• Set up your equipment properly
                                                                     38
Lenses: http://www.olympusamerica.com/seg_section/uis2/seg_uis2.asp
• Low mag, Low NA air objectives (x4 - x40 dry, to 0.95 NA):
Can image deep, long working distance (mm)
Wide field of view
Low resolution
Low mag leads to undersampling
• Dipping, Water, multi-immersion objectives (x20 - x100 to 1.0 NA):
Can image relatively deep, working distance (200 um - mm)
Reduced field of view
Increased resolution
High mag options for better sampling
39Lenses: http://www.olympusamerica.com/seg_section/uis2/seg_uis2.asp
• High mag, High NA oil objectives (x40 - x150 oil, 1.35 to 1.45 NA):
Problems imaging deep, short working distance (170 um)
Prone to spherical aberration
High resolution
Good light efficiency (High NA)
High mag allows appropriate sampling
Often highly corrected, flat field (plan), colour corrected
( apo chromatic)
40Lenses:
• Specialist Objectives - Water/glycerol immersion objectives
- silicone immersion objectives
http://www.olympusamerica.com/seg_section/seg_silicone_oil_objectives.asp
deeper imaging into live samples
Very Expensive!!
41Be economical with your light budget - hardware
• Sensitive detectors Deep Cooled CCD’s
EMCCD’s
• Optimised synchronisation of illumination, exposure and readout
“real time” system controllers
fast shuttering
diode light sources
• Optimised filter sets for your probes
hard coated “ET” filter sets
filter free “spectral” options
• Choose the best objective for the job Oil immersion
water immersion
RI matching immersion
• Set up your equipment properly 42Setup your imaging equipment properly:
h"p://ecx.images-‐amazon.com/images/I/61XmwpJvskL._SL1500_.jpg
43Koehler illumination and conjugate planes
* Self Taught Practical Exercises - 1 and 2 *
* Regular servicing of equipment *
http://www.olympusmicro.com/ http://www.microscopyu.com/articles/formulas/formulasconjugate.html 44Be economical with your light budget - best practice
• Close down the field iris to cover just the region of interest
• Use bright-field to minimise light exposure
• Correct spherical aberration
• Choose good labels
• Careful specimen preparation
• Make use of denoising algorithms
45Correct Spherical Aberration:
Spherical aberration (SA) - beams passing through
different parts of the lens brought to different focal points
Confocal
• “In focus” light is blocked by the pinhole
Wide field
• Detail is “smeared” in Z
“in-focus” light is blocked by pinhole
SA results from refractive index mismatch along the optical path:
glass 1.514; oil 1.33-1.534; air; 1.0; water 1.33; cell 1.35-1.6; 70% glycerol 1.47
4647 Correct empirically using beads: Spherically aberrated Corrected Increased signal and resolution!
48
Correcting Spherical Aberration:

 • Immersion oils

• Objective SA correction collar

          mention adaptive spherical aberration
          correction - refer to custom experimental
          design lecture??? Ilan lecture 9?

• Adaptive optics
 ** Ian - lectures 2 and 9 **
Correcting Spherical Aberration:
• Evaluate of spherical aberration with depth
• Explore corrective collar settings
• Automate correction
Data Taken with Manual Lever
Jonathan Sturt, RMP: x60 SI lens - automated collar correction
ActinGFP expressing Drosophila egg chamber injected with 100 nm red beads Jonathan Sturt, RMP: x60 SI lens - manual collar correctionBe economical with your light budget - best practice
• Close down the field iris to cover just the region of interest
• Use bright-field to minimise light exposure
• Correct spherical aberration
• Choose good labels
• Careful specimen preparation
• Make use of denoising algorithms
50Loading dyes into living cells: • Cell permeant dyes Nile Red: lipid stain Rhizoid of fern gametophyte 51
Injection into cells:

• Virtually any probe

• Technically difficult
• Expensive equipment
• Not all cell types amenable
• Potentially damaging

                                Injection into a Drosophila embryo
                                                                     52
53
Transgenic GFP: Covered in lecture 6 - Mark Howarth
• GFP is inherently fluorescent
• 238 AA; 27 KDa; 4nm - dominated
by an 11 stranded beta-barrel
• Fluorochrome forms by the post-
translational oxidisation and cyclisation
of residues 65 to 67 during folding
• Can be expressed in many organisms
• GFP can be functionally expressed
as N or C terminal conjugates to other
proteins
beta-barrel in light green • Protein traps are preferable to over-
fluorophore in bright green
expression lines
(Ser-65, Tyr-66, Gly-67)
http://www.nature.com/nbt/journal/v14/n10/pdf/nbt1096-1219.pdfScientists hope to use the GM animals in the study of HIV/Aids
Eric Poeschla, Mayo Clinic
54Macrophage: GFP microtubules
55Extending the palette of fluorescent proteins 56
EYFP = enhanced Yellow Fluorescent Protein
(GFP derivative)
ECFP = enhanced Cyan Fluorescent Protein
(GFP derivative)
DsRed2FP = Red Fluorescent Protein
(coral protein, unrelated to GFP, and not
monomeric)
Changing the
properties of GFP
and RFP by genetic
engineering
Shaner, N. C., Steinbach, P. A., & Tsien, R. Y. (2005). A guide to choosing fluorescent proteins. Nature Methods, 2(12), 905–909. doi:10.1038/nmeth819Be economical with your light budget - best practice
• Close down the field iris to cover just the region of interest
• Use bright-field to minimise light exposure
• Correct spherical aberration
• Choose good labels
• Careful specimen preparation
• Make use of denoising algorithms
57Specimen Preparation:
• Oil objectives image best close to the coverslip
Mount the specimen appropriately
Use alternative immersion lenses
• Vibration / movement can degrade imaging
Adhere cells to substrates
Tricks to keep specimens still
• Ensure the viability of your sample
Media / drying out
Temperature / CO2
58Be economical with your light budget - best practice
• Close down the field iris to cover just the region of interest
• Use bright-field to minimise light exposure
• Correct spherical aberration
• Choose good labels
• Careful specimen preparation
• Make use of denoising algorithms
59Denoising - imaging with 10-100 x less light
8 ms exposure, 0.1% 488 Laser power 8 ms exposure, 10% 488 Laser power
Live Macrophage: Jupiter-GFP labeling microtubules; 7Z, 3 stacks per second
Jerome Boulanger: SAFIR Denoising software J. Boulanger, C. Kervrann, and P. Bouthemy, “Space-time adaptation for
patch-based image sequence restoration,” IEEE Trans. on Pattern Analysis
Integrated into Priism by the John Sedat Group UCSF and Machine Intelligence, vol. 29, no. 6, pp. 1096ñ1102, June 2007 60END
61Reference Material:
Live Cell Imaging, (2010) 2nd Edition Eds Goldman, Swedlow, Spector.
Cold Spring Harbour Press.
http://www.olympusmicro.com/
General info on microscope components, setup and use
h"p://www.olympusmicro.com/primer/digitalimaging/deconvoluVon/deconarVfacts.html
Deconvolution artefacts
62You can also read


