NATIONAL GEOGRAPHIC EDUCATOR'S GUIDE - COMMON CORE ALIGNMENTS AND CLASSROOM ACTIVITIES
←
→
Page content transcription
If your browser does not render page correctly, please read the page content below
NATIONAL GEOGRAPHIC EDUCATOR’S GUIDE
    COMMON CORE ALIGNMENTS AND CLASSROOM ACTIVITIES

         NATIONAL GEOGRAPHIC READERS SERIES

                              A
 A CLASSROOM GUIDE
 National Geographic Readers allow you to feed your students’ interests and create readers who
 not only can read but want to read! Children are naturally curious about the world around
 them, and curiosity is a powerful motivation for reading. And studies show that informational
 reading is critical to success as students progress through school. National Geographic Readers
 engage your students in learning more about the world we live in, while enhancing their
 reading comprehension.

 This guide provides sample lesson plans for popular titles in the series. Lessons are aligned to the
 Common Core State Standards (CCSS), Reading Standards for Informational Text K–5. There
 are 10 Reading Standards for Informational Text, organized into 4 categories. Each standard
 becomes more complex as grade levels increase, as you can see in the complete standards at the
 end of this guide. However, in thinking about the standards for informational text, we found
 it useful to reflect on the essence of each standard. The following chart attempts to capture key
 concepts and may be useful to you as you implement these standards.

     1145 17th ST NW Washington, DC • Visit us at www.ngchildrensbooks.org • Follow us on NGKidsBks
Overview of CCSS Reading Standards for
                Informational Text K – 5
    1. Asking and answering questions about key details to
       demonstrate understanding, drawing inferences in
       upper grades
    2. Identifying main topic or idea(s)
    3. Describing or explaining relationships between people,
       events, ideas, concepts, or procedures
    CRAFT AND STRUCTURE
    4. Determining the meaning of words and phrases, especially
       grade-appropriate academic and domain-specific vocabulary
    5. Using text features and text structure to search for
       information and support comprehension
    6. Identifying author’s/illustrator’s purpose and varying
       points of view (includes primary and secondary sources)
    INTEGRATION OF KNOWLEDGE AND IDEAS
    7. Integrating information from the words and illustrations/
       charts/diagrams to understand the text
    8. Identifying and explaining how author uses reasons and
       evidence to support points in text
    9. Comparing and contrasting multiple texts on same topic
    RANGE OF READING AND TEXT COMPLEXITY
    10. Reading and comprehending informational text with
        grade-appropriate complexity and support

   In the sample lessons, you will see suggestions that address Standards 1–9.You
   will be helping your students achieve Standard 10 by providing them with
   opportunities for learning with the National Geographic Readers.
   The National Geographic Readers can be read across grade levels, depending
   on children’s reading levels and interests. So the lessons list the standards
   addressed, but do not identify specific grade levels. Sharks, for example, appeal
   to many ages. For younger children who are not yet reading or for struggling
   readers, the standards can be addressed as part of read-alouds or as group
   reading. For children who are more able readers, teachers can adjust activities
   upward on the grade level progression.

PAGE 2                                                                        READERS SERIES
These lesson ideas were written by Mariam Jean Dreher and Laura Broach.
  Each has taught 10 years at the elementary school level — Jean in California
  and Laura in Washington, DC. Jean is currently professor of reading education
  at the University of Maryland, College Park, and Laura is a reading specialist in
  Massachusetts. Jean and Laura have presented frequently on informational text
  at the annual International Reading Association Convention, and Jean is co-author of
  Informational Text in K-3 Classrooms: Helping Children Read
  and Write.

                                  SAFARI
                                  by Gail Tuchman
                                  Students will be excited to meet elephants, lions,
                                  hippos and more on this exciting safari! Close-
                                  up photographs of wild animals eating, playing,
                                  soaking, and grazing will captivate your young
                                  readers.

  BEFORE READING
  •   To activate prior knowledge and engage students with the topic, show and
      explain objects that will prepare students for reading Safari: binoculars, caps,
      sunscreen, cameras. With binoculars, we can look closely at the world
      around us. Have you ever used binoculars? When do we use caps and
      sunscreen? Why do we use cameras? We’re going to have an adventure in
      reading and you might notice these items being used in our next book. [See
      related activity in Extra Credit section below.] (RI-3)
  •   To preview unfamiliar vocabulary: Have any of you ever visited a place with
      wild animals? Maybe you’ve visited a zoo or a wild animal park. Or maybe
      you’ve watched a program about wild animals. What do you think it would
      be like to visit the wild animals where they really live–in their natural
      habitat? When people do that, it is called a safari. Where do you think you
      might take a safari? (RI-4)

NATIONAL GEOGRAPHIC SOCIETY                                                              PAGE 3
•     Help students notice that the photographs in this book provide valuable
         information that accompanies the text. Take a picture walk of the first few
         pages: This book is illustrated with photographs. How are photographs
         different from drawings? What would this book be like if there were no
         photos? Notice that we will learn lots of information from the photographs
         and the text together. (RI-6)

   DURING READING
   •     Remind students: While we read, use the photographs in the book to think
         about important ideas. For example, ask students: Why do you think
         elephants spray? (See pages 4-5, 6, 13.) What are the different ways that lions
         play? (See pages 8-9, 12, 20.) What can you tell from the photographs about
         the kind of land you would see on safari in Africa? (RI-1,7)
   •     Explain a strategy for using the photographs to help determine word
         meanings: We can also look at the photographs to figure out what words
         mean. What do you think “graze” means? (See pages 16-17.) What do you
         think “soak” means? (See pages 18-19.) Encourage students to use these new
         words in sentences of their own. (RI-4)

   AFTER READING
   •     In this book, the author describes animals doing all sorts of things. What
         are some of the different things that animals do? Discuss, then encourage
         students to act out the animals’ movements (e.g. “spraying” like the elephant,
         eating like the giraffe, running like the rhino, etc.) (RI-2, 8)

   EXTRA CREDIT
   •     Students have learned that the animals they saw on safari act differently
         from each other. Have students pick two animals from Safari and compare
         them. Make a chart or diagram to show how they are the same and how
         they are different. After doing this as a group, students can work in pairs or
         independently to compare and contrast two other animals from the book.
         (RI-3)
   •     Take a walk outside. Use binoculars (or cameras) to look at neighborhood
         animals (e.g., squirrels, birds, etc.). Encourage students to look closely at
         the animals and their behaviors. After returning to class, write a group book
         following the pattern of Safari. (RI-3)

PAGE 4                                                                          READERS SERIES
RI = READING STANDARDS FOR INFORMATIONAL TEXT
Other National Geographic Readers of Interest
Here’s another book for kids who are ready to read!
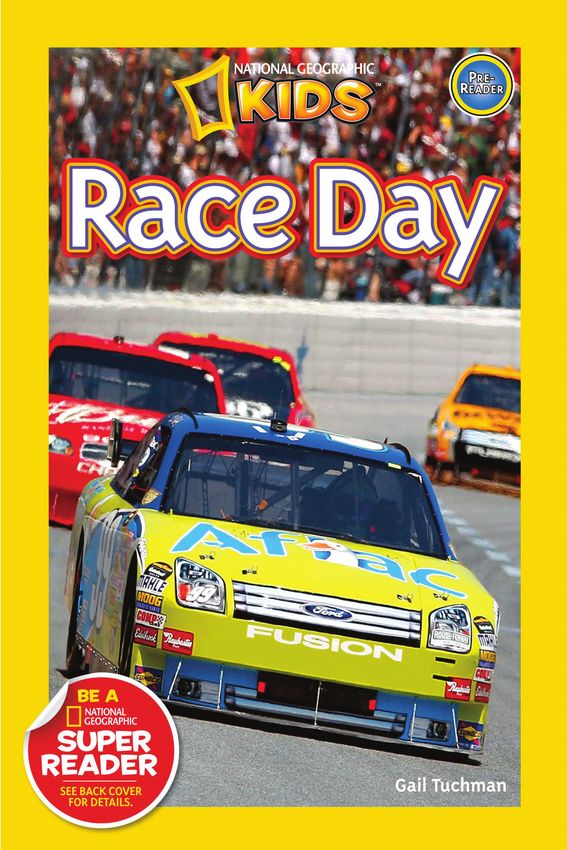
RACE DAY
by Gail Tuchman
Other appealing titles your students won’t be able to resist include the
following:
PONIES FROGS
by Laura Marsh by Elizabeth Carney
TRUCKS!
by Wil Mara
Dump trucks, cement mixers, and even the
three-million-dollar, humongous Liebherr T282
will enthrall your students.Vivid photographs of
impressive trucks roar off the page! Students can
study, compare and contrast, and learn all about
these heavy haulers in this exciting book about
kids’ favorite type of transportation: trucks!
NATIONAL GEOGRAPHIC SOCIETY PAGE 5
BEFORE READING
   •     Activate prior knowledge by introducing the concept of transportation (a
         way to carry goods or people). List various forms of transportation (e.g.,
         cars, trucks, boats, planes), then focus on trucks. Have you ever seen a big
         truck? What do you think trucks transport or carry? What special jobs
         can trucks do? (Generate lists to refer to later.) Optional: To build
         engagement, bring in a variety of toy trucks for students to examine. (RI-2)
   •     Preview the first few pages, including the Table of Contents and its purpose.
         Point out that the titles of the sections correspond to the different types
         of trucks, using “Dump Truck” as an example. Read aloud the first few
         pages, stopping on page 7. Encourage the students to use the headings to
         support their learning as they read. (RI-5)
   •     Guide students to use an important feature for vocabulary learning: In this
         book, we can look at special boxes labeled “Truck Talk” to find definitions
         for important words that you may not know. These words can also be found
         in the Glossary. Discuss the definition for hydraulic cylinder (on
         page 7) and look for examples of it in the photograph of a dump truck on
         page 6. (RI-4, 5)

   DURING READING
   •     Point out the headings, labels, and speech bubbles as text features that
         students can use to gain more information as they read. Guide your students
         in this example: We looked at the Table of Contents earlier and noticed the
         section called “Dump Truck.” Look on page 6 to see that “Dump Truck”
         is the heading at the top of this page. That tells us that the information on
         these pages will be all about this type of truck. There is another important
         text feature on this page that we need to pay attention to. Can you find it?
         The label points to an image of the key term “hydraulic cylinders. “And if you
         look at page 7, Slick’s speech bubble gives its pronunciation. As we read, let’s
         pay careful attention to headings, labels, and speech bubbles to learn many
         details about all the heavy haulers in this book. (RI-5)
   •     Continue to develop vocabulary understanding by stopping at the Truck
         Talk boxes — such as “hatch” on page 16 — guiding students to use the
         definition and labeled illustrations to understand the word. Have students
         identify other instances of the Truck Talk words as they appear in photos.
         For example, students can find hydraulic cylinders in various photographs
         (see garbage truck, page 10, and car transport, page 18). To extend their
         understanding of a particular term, consider using a “word web” type of
         graphic organizer and place the key term in the center, surrounded by
         spokes leading to various related concepts of that word (definition,
         synonyms, related words, non-examples, use in a sentence, etc.). (RI-4, 5)

PAGE 6                                                                          READERS SERIES
•   Teach students how to examine details as a key strategy for understanding
      text. Earlier we discussed things that trucks could transport and special work
      that they can do. As we read, we can pay attention to details in the text and
      photographs to find out even more information about trucks. What are
      some of the different things that the “heavy haulers” in this book can
      transport? What are some of the special jobs they do? Continue the lists
      begun earlier of the things that trucks haul and the work they do. (RI-1, 7)

  AFTER READING
  •   In this book, the author describes many different types of trucks. How
      are the garbage truck and the cement mixer similar? How are they different?
      Record the information on a graphic organizer, such as a Venn diagram.
      Students can work in pairs to choose two trucks from the book and
      compare and contrast them using a similar graphic organizer. (RI-3, 7)
  •   Discuss how trucks play an important role in transportation. Review the
      lists created earlier of things that trucks can transport and jobs that they
      can do and discuss how trucks are important to people. Earlier we made
      lists of things that trucks transport and special jobs that they can do. How
      does this work help us in our lives? Students can work in pairs to discuss
      one particular type of truck and the work that it does. If desired, the lists
      created earlier can be extended to include information about the ways that
      each truck connects to our lives. (RI-2, 3)
  •   Authors have a purpose when writing books. In this book, let’s figure out
      what the author’s main purpose might be. (Some possible ideas: trucks are
      useful, trucks can do a lot of things, trucks are important to people.) Select
      one main idea and guide the students to list evidence throughout the
      text and illustrations to support it. For example, if one overarching idea is
      that trucks are useful to people, then the following points from the book
      provide evidence to support it: tow trucks carry cars that are broken,
      garbage trucks can crush and carry our trash away, fire trucks help to put
      out fires, etc. Students can work in pairs to select a main idea and list three
      points of evidence from the text and photographs to support it. (RI-2, 8)
  •   We can look at the photographs and read the text to make inferences about
      Slick and his own tractor trailer rig. How does Slick feel about his truck?
      Why is his truck so important to him? Create a two-column chart to
      explain the relationship between Slick and his truck. In one column, list
      all the evidence that comes directly from the text and photographs, such as
      the facts that Slick can sleep in his rig and his office is in the rig. In the
      second column, list ideas that students can infer from the book–for
      example, Slick’s rig carries important things in its trailer, Slick uses the
      controls on the dashboard to operate the truck, the truck is his method of
      transportation, his job is a truck driver. (RI-7)

NATIONAL GEOGRAPHIC SOCIETY                                                             PAGE 7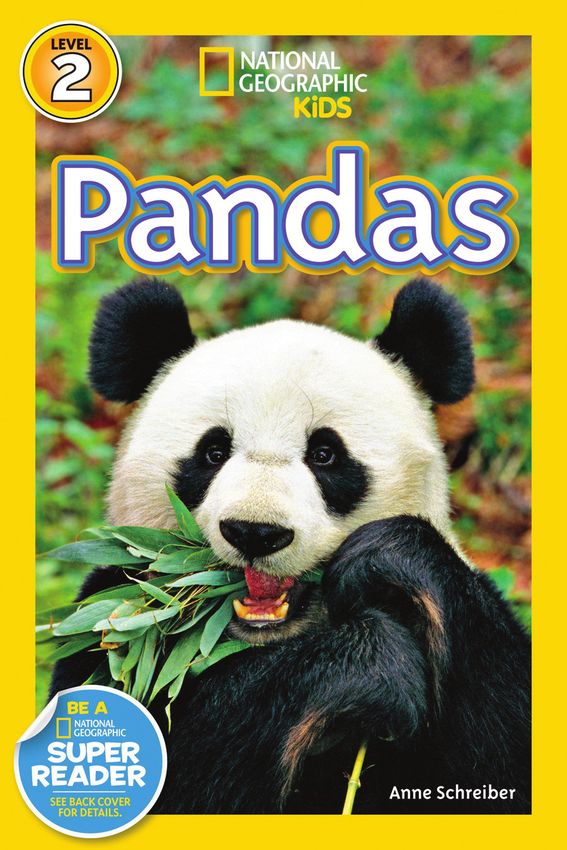
EXTRA CREDIT
   •     Read other books to learn more information about the trucks described
         in this book. Select one particular truck, then compare and contrast
         the information from Trucks! and the other books to extend students’
         understanding of that type of truck. (RI-9)
   •     Trucks! describes only one type of fire truck. Investigate other types of fire
         trucks by using a variety of print and digital resources.Visit a local fire
         station (or have the firefighters visit you) to explore the fire trucks first-
         hand and increase students’ understanding of fire engines. (RI-9)

   RI = READING STANDARDS FOR INFORMATIONAL TEXT
   Other National Geographic Readers of Interest
   Here’s another book for kids who are ready to read!
   Just like Trucks!, these books offer exciting and useful information about other
   big things that move!

         TRAINS                   PLANES                 DINOSAURS
       by Amy Shields           by Amy Shields     by Kathy Weidner Zoehfeld

PAGE 8                                                                          READERS SERIES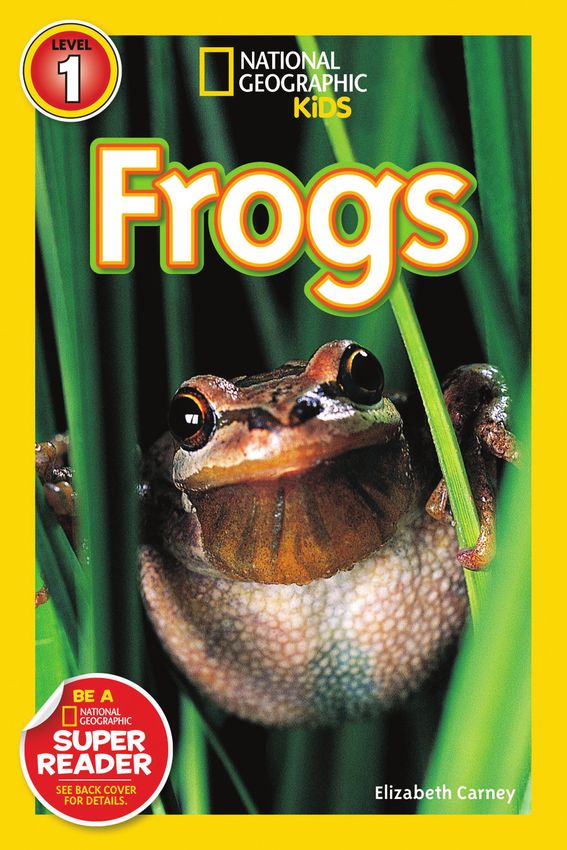
Your students will be thrilled to discover the exciting world of frogs from the
  tiny microfrog to the goliath frog that is as big as a rabbit! Vivid photographs of
  frogs in every size, shape, and color will engage your students in learning about
  these intriguing amphibians.

  BEFORE READING
  •   To activate prior knowledge and to set a purpose for reading, play a
      recording of frogs croaking. (Many examples are available by searching the
      internet for “recordings of frogs.”) What do you hear? Can you hear a
      croaking sound? Can you guess what we will be learning about? Yes, frogs,
      and that’s the title of this book! (RI-2)
  •   Show the cover, preview a few pages, then read aloud the first page of text
      (page 5). Encourage the children to “hop like a frog” briefly before settling
      back down to read the rest of the book. Explain: Now we know that frogs
      croak and hop, but we will read carefully to learn more important
      information about these fascinating animals. (RI-2)
  •   Preview the Table of Contents: Often before we read informational text,
      we have questions that we would like to have answered. Let’s take a peek at
      the Table of Contents to get a better idea about the topics in this book.
      Now what are some questions that you would like to have answered? Keep
      the list of questions to use later. (RI-1, 5)
  •   Introduce a key feature for vocabulary development: In this book, there may
      be some new words that you might not know. Word boxes will explain what
      they mean, and here’s an example. (Show page 7 with a box for habitat.)
      Why do you think the author of this book calls these boxes “Ribbit!”? (RI-4)

  DURING READING
  •   Point out the headings and explain how to use them to determine main
      ideas: Look at the heading on page 8. What do you think the section will be
      about? Note the connection between the headings and the Table of
      Contents. (RI-2, 5)
  •   Remind students about the “Ribbit!” word boxes, and model how to use
      the first one on page 7 to determine the meaning of habitat. For each new
      word box, guide children to engage in the same process. (RI-4)
  •   Point out the labels throughout the book. For example, direct the students
      to: Look at the labels on pages 12 and 13. What do those labels tell us? How
      would these labels help us if we wanted to learn more? (RI-5)

NATIONAL GEOGRAPHIC SOCIETY                                                             PAGE 9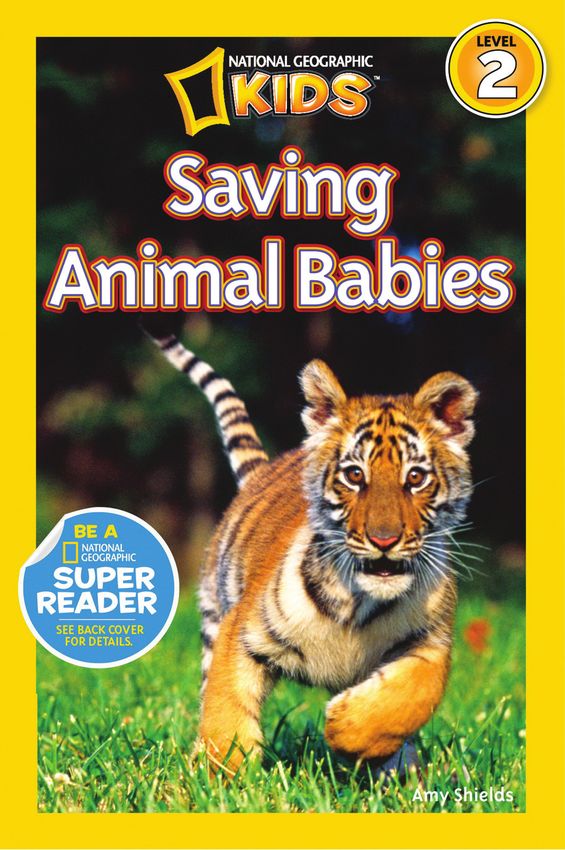
•   Discuss how the pictures combined with the text help us understand more
       about frogs. Support students’ close observation of illustrations to learn new
       information. We have listed some examples. Encourage students to find
       other examples:
   •   On pages 14 and 15: How do the pictures and the text work together to
       help us understand how frogs catch bugs to eat? How does the ruler help
       us understand the information on that page better? (RI-6, 7)
   •   On page 17: Look closely at the illustration. Can you figure out how much
       the goliath frog weighs? (RI-6, 7)
   •   On pages 26-27: Notice that the information on these pages is numbered 1
       through 4. Why do you think the illustrator did that? (RI-3, 5)
   •   On pages 28-29: What has the illustrator done here to helps us understand
       the difference between frogs and toads. Read these pages carefully and share
       some ideas you find about how frogs and toads are different. (RI-3, 5)

   AFTER READING
   •   Refer back to the chart of questions generated before reading. Discuss the
       answers to some of the questions, encouraging students to refer back to the
       text to review what they have learned. (RI-1, 8)
   •   Have students review the poster images on pages 30-31. Discuss how the
       author used illustrations and text to create the posters. Guide students to
       select their favorite frog in the book and create their own posters, including
       a picture and text that explains one important or interesting fact about the
       frog. (RI-3, 7)

   EXTRA CREDIT
   •   Prepare information about frogs in your area to share with the students.
       If possible, take students on a walk in a frog habitat. They can draw or write
       their observations about their local habitat. Refer back to Frogs! to compare
       and contrast the habitats described or photographed in the book with the
       one in your local area. Make a chart to illustrate the different types of frog
       habitats. (RI-3, 9)
   •   Many students will want to know more about frogs. Provide books,
       magazines, or websites for students to find information about unanswered
       questions. (RI-1, 8)

PAGE 10                                                                      READERS SERIES
RI = READING STANDARDS FOR INFORMATIONAL TEXT
Other National Geographic Readers of Interest
Students who love Frogs! will also be intrigued with other fascinating animals–
plus a bonus book on spooky-scary Halloween!
ANTS BATS HALLOWEEN
by Melissa Stewart by Elizabeth Carney by Laura Marshs
LIZARDS SNAKES SPIDERS
by Laura Marsh by Melissa Stewart by Laura Marsh
CATERPILLAR TO BUTTERFLY
by Laura Marsh
NATIONAL GEOGRAPHIC SOCIETY PAGE 11STORMS
by Miriam Busch Goin
Tornados, sandstorms, blizzards and more will
whirl your students into the wet and windy
extremes of weather. With detailed text and
brilliant photographs, this book will provide
students with important information about
wild, wonderful, weather!
BEFORE READING
• Prepare students for learning by listing different types of weather on a chart.
As students make suggestions, put the names of storms in a separate column.
Review the list, telling students:You know a lot about weather, and in this
book, we will be learning more about different types of storms. To engage
students further, you may want to wear a raincoat and hold an umbrella as
you introduce this lesson. (RI-2)
• Take a picture walk, studying the cover and stopping at the Table of
Contents. What do you notice about the Table of Contents? Do you notice
that the author will first tell us about weather in general? Next she has
written sections on different types of storms. Some of these storms are ones
that we listed on our chart! As you preview the next few pages, point out to
students that the headings correspond to the Table of Contents. (RI-5)
• Introduce students to an important tool for learning definitions of
unfamiliar words. As we read this book, we can look for special boxes
that tell us the meanings of words we may not know. These boxes are called
“Weather Words.” The first one on page 7 will tell us what weather means,
and keep a look out for others as you read the book. (RI-4)
DURING READING
• Teach students a strategy for improving comprehension. We can learn
important information from the photographs as well as the text. Let’s read
pages 4 and 5 and look at the pictures carefully to learn ways that people
and animals are helped by weather. As students offer their observations, you
may want to use a two-column chart to list the facts learned from the text
and facts learned from the photographs. As we continue to read this book,
let’s study the pictures to find more information about storms. (RI-7)
PAGE 12 READERS SERIES• Remind students to use the headings to prepare for the information that
follows. For example, the heading “Thunder and Lightning” on page 8
prepares the reader for information about thunderstorms on pages 8
through 11. Encourage them to continue to pay attention to the headings
for each section. (RI-5)
• Point out the importance of attending to details: As we read, we need to
study the details carefully to learn more information. We have listed some
examples; encourage students to find others:
o On page 8: Read the details on this page carefully. What makes the flash
of lightning? What makes the loud boom of thunder? (RI-1)
o On page 9: After reading this page, can you explain different ways that
lightning can move through the sky? (RI-1)
o On page 14: By reading the details, can you find other names for a
tornado?
o On page 22: Can you use the details on this page to imagine what a
hurricane might look like? Where would it happen? What would it be
like in the center of the storm?
AFTER READING
• Guide students to an understanding of the main topic of the book. In
this book, the author tells about weather and many different types of
storms. The very first sentence of the book is “Storms are important.” Do
you think that’s true? What are some points that the author makes to
support this statement? Are storms helpful or dangerous? (Both.) Direct
students to re-read the text to find evidence to support the statement that
storms are important. This could be a group activity or students could work
in pairs and write about their findings. (RI-2, 8)
• Pick two types of storms and compare and contrast them. Hurricanes and
monsoons are both wild storms. How are they similar? How are they
different? Discuss and record students’ responses. Then students could work
with a partner to choose two types of storms and compare and contrast
them using a graphic organizer such as a Venn diagram. (RI-3)
EXTRA CREDIT
• Encourage students to read more about storms and weather. Pairs or small
groups of students can select one type of storm and read about it in multiple
texts. Provide a variety of resources (books, magazines, online websites) for
their research. (RI-9)
NATIONAL GEOGRAPHIC SOCIETY PAGE 13• This book has exciting sections about diverse topics such as storms on other
planets, how people build houses to withstand storms, and special ways
animals deal with storms. Students can select one of these topics to explore
further. (RI-9)
RI = READING STANDARDS FOR INFORMATIONAL TEXT
Other National Geographic Readers of Interest
Stoke your students’ natural curiosity about the world around them with more
titles on Earth Science like these:
VOLCANOES! ROCKS & PLANETS
by Anne Schreiber MINERALS by Elizabeth Carney
by Kathleen Weidner
Zoehfeld
SHARKS
by Anne Schreiber
Students will be amazed to learn that sharks
have five rows of teeth, and much more! The
spectacular real-life photos will take them right
into the world of sharks.
BEFORE READING
• To activate prior knowledge and to set a purpose for reading, show the
cover and tell students: Today we are going to read Sharks! Take a minute
PAGE 14 READERS SERIESto share with your neighbor what you already know about sharks. Then
with the whole group, ask: What do you want to find out about sharks? List
the questions for later use. (RI-1)
• Introduce a key feature for vocabulary development: There are going to be
some new words that you might not know. This book has word boxes for
some key words. Here’s an example. (Show page 6 with a box for cartilage.)
When we get to this page, we can read the box to figure out what the word
means. By the way, in this book, the author calls these boxes Word Bites!
Why do you think she does that? (RI-4)
• Show the Glossary (page 32). All the Word Bites are listed here in a glossary.
How might this glossary help us when we read? (RI-4, 5)
• Show the Table of Contents. How does this help us when we read? As
students read, help them notice that the sections listed in the Table of
Contents match the headings. (RI-5)
• Point out captions and labels as sources of information. There are two types
of text features that are common in this book and they can help us
understand important information about sharks. Let’s take a peek at pages 8
and 9 where we can see a caption and two labels. Can you find them? As
you read this book, pay careful attention to all the captions and labels so that
you will understand the photographs better and learn lots of important
details. (RI-5)
DURING READING
• Guide students to use the headings to determine main ideas. Headings
can prepare us for the information that follows and can help us figure out
the main idea for that section. Look at the heading on page 4. Why do
you think the author called this section “Chomp”? (The title is just for fun
— it makes us think about sharks. Because it’s the first section, it might
explain general, introductory information about sharks.) Let’s read the pages
in this section (up to page 7) and see what we learn. Briefly discuss. Now
look at the next heading called “Shark Pups.” Can you figure out what we
will learn here? Did you know that shark babies are called “pups”? Let’s
read this section to find out its main ideas. Continue to support students’ use
of headings to determine the main ideas of each section. (RI-2, 5, 6)
• When students reach page 6, remind them about the Word Bites boxes.
Model how to use the first one to determine the meaning of cartilage. For
the remaining word boxes, guide children to use in the same process. (RI-4)
• Encourage students to use the illustrations and the text together to learn
new information. We can look carefully at the photographs to learn
NATIONAL GEOGRAPHIC SOCIETY PAGE 15important information that adds to the text. For example, the pictures of sharks’
teeth on pages 16-19, combined with the text, help us understand how the
teeth are used. Encourage students to find other examples where the author
uses the text and pictures together to explain something. (RI-7)
AFTER READING
• Have students discuss what they learned and support their ideas with
evidence from the text. The author thinks that sharks are “awesome
predators” (page 13). What information does the author use to support this
idea? Students can use information they recall as well as refer back to the
text to support their points. As part of this discussion, ask students if they
agree that sharks are awesome predators and, if so, which points most
impressed them. This discussion could be extended to include student
writing (see Extra Credit below). (RI-8)
• Return to their Before Reading questions to encourage more reading. Before
we read this book, we listed the questions that we had about sharks. Let’s
take a look at them and see if we found some of the answers. Identify the
questions that remain unanswered and encourage students to read to find
out more. We have learned a lot of information about sharks, but what
questions do you still have about them? How could we find that
information? Provide other resources, such as books, magazines, and
websites. Guide students to compare and contrast the information found in
the different resources. For this purpose, students can use an Inquiry
Chart (I-Chart) on which they write a question at the top of a column
and record the different resources in each row. They complete the chart
by recording new information in the grid and then use the bottom row to
summarize the information in each column. (RI- 5, 9)
EXTRA CREDIT
• Have students apply what they have learned to write in support of the claim
that “Sharks are awesome predators.” They must be sure to include specific
points to support their ideas. (See the related activity in the After Reading
section above.) (RI-3, 8)
• This book tells us that there are about 375 different types of sharks (page
22) and many of them are mentioned or described in the book. Have
children work with a partner to choose a favorite shark to learn more about.
Provide additional resources and opportunities to create posters for “award-
winners” such as those found on pages 22-23. (RI-9)
PAGE 16 READERS SERIESRI = READING STANDARDS FOR INFORMATIONAL TEXT
Other National Geographic Readers of Interest
Now that they’ve gotten their feet wet with Sharks, immerse your students in
books about sea animals!
DOLPHINS PENGUINS SEA TURTLES
by Melisa Stewart by Anne Schreiber by Laura Marsh
WHALES WEIRD SEA
by Laura Marsh CREATURES
by Laura Marsh
PANDAS
by Anne Schreiber
Is it a raccoon? Is it a cat? Is it a bear? It’s a panda!
Adorable tree-climbing, bamboo-munching,
roly-poly pandas abound in this book packed full
of information and captivating photographs that
curious students will love.
NATIONAL GEOGRAPHIC SOCIETY PAGE 17BEFORE READING
• Activate students’ prior knowledge by showing the cover of Pandas.
What do you already know about pandas? Take a moment to share with
your neighbor a few things that you already know about these special
animals. After students briefly turn and talk, ask: What do you think the
author wants us to learn as we read her book? Students may share ideas
such as these: information about what kind of animal a panda is, where it
lives, what it eats, and how it grows. (RI-2)
• Have children look at the photos on the title page and the copyright page,
and then stop at the Table of Contents. We know that the Table of Contents
can show us the topics that will be discussed in the book. Let’s take a look
and think about what kinds of questions might be answered in each section.
The first section is called “Giant Panda!” I bet that we might find the answer
to questions like “What is a Giant Panda?” and “Where do Giant Pandas
live?” Let’s look at each topic in the Table of Contents and think of a
question or two that might be answered in that section. Then when we read
the book, we can be better prepared for learning. Record students’ questions
on chart paper to refer to in an After Reading activity. (RI-1, 5)
• Guide students to use an important tool for increasing their vocabulary.
Often we can learn new vocabulary words when we read. In this book, the
author has special “Bear Word” boxes that give the meaning for terms that
may be unfamiliar to you.You can also find these words in the Glossary at
the back of the book. Be on the lookout for these special words as you read.
(RI-4)
DURING READING
• As students read, point out the variety of text features that they can use to
support comprehension. Let’s look at two kinds of text features that can
help us when we read. On page 6, see if you can find a label and a caption.
How can you tell them apart? (A label identifies a picture, and a caption
gives an explanation for an illustration or photograph.) Notice that even
though they are little, labels and captions provide important information!
Encourage students to share captions that they find and explain how they
relate to the photograph or illustration. (RI-5)
• Continue to guide students’ use of the Bear Word boxes to learn new
vocabulary words. Did you notice the Bear Word box on page 8? How does
the definition for habitat relate to the photograph? Using information from
the Bear Word box, the text, and the photograph, how would you describe
the habitat of the panda? Have the students find the next Bear Word box
and apply the same strategy. (RI-4)
PAGE 18 READERS SERIES• Teach students the importance of attending to details. For example, guide
them to understand the relationship between the unique features of a
panda’s body and its habitat. Let’s look at the information on pages 8 and 9
and review what we know about the panda’s habitat. Briefly discuss. Now
let’s look closely again at the information about the panda’s body on pages
10 and 11. How can we combine the information from these four pages to
understand how the special features of a panda’s body are perfectly designed
for its habitat? (For example, the panda has a woolly coat that keeps it warm
and dry in a cold, rainy habitat.) As students continue to read, guide them to
focus on details to build their knowledge about pandas. (RI-3, 7)
AFTER READING
• Have students review the various names for pandas on pages 30 and 31.
Students can choose their favorite name and write about why it is the best.
Or some students may want to create their own best name for pandas.
Either way, students should review the text to identify two or three points
from the book that support their choice. (RI-1, 3, 7)
• Identify the main ideas of Pandas. Refer back to the chart of questions
generated before reading. When we looked at the Table of Contents, we
asked some terrific questions. Did we find the answers to most of them?
Were there some answers that surprised you? What do you think the main
idea of this book might be? [Possible answer: Learning about pandas and
how they live.] (RI-2)
EXTRA CREDIT
• Using information gathered in the After Reading discussion about the main
ideas of Pandas, create a web-style graphic organizer to understand this
special animal and its relationship to the topics covered in the book. For
example, the word panda could go in the center of the web, then the class
could generate various topics for several spokes, such as habitat, body
features, cubs, red pandas, protecting pandas, etc. (RI- 2, 6)
• Encourage students to learn more about the panda as an endangered species
and ways people can help. Provide students with additional materials (books,
magazines, online resources) to learn more. They could use an Inquiry
Chart (or I-Chart) to synthesize the information they learn from
different resources. To create this kind of grid, students can place a question
at the top of each column and different sources in each row,
then complete the grid using information collected from their research. In
the bottom row, students can summarize the ideas that they’ve learned.
(RI-1, 3, 9)
NATIONAL GEOGRAPHIC SOCIETY PAGE 19RI = READING STANDARDS FOR INFORMATIONAL TEXT
Other National Geographic Readers of Interest
If your students liked learning all about pandas, then have them check out these
titles about other furry friends!
MONKEYS CATS VS. DOGS PONIES
by Anne Schreiber by Elizabeth Carney by Laura Marsh
SAVING
ANIMAL BABIES
by Amy Shields
ABRAHAM LINCOLN
by Caroline Crosson Gilpin
With authentic illustrations, this book shows
young readers who Lincoln was and why his
presidency made such a difference to our nation.
The Civil War and his decision to abolish slavery
are clearly explained. And your students will get
a sample of Lincoln’s own words, as well as fun
facts, a time line, and a quiz!
PAGE 20 READERS SERIESBEFORE READING
• Activate prior knowledge and introduce the book by reviewing important
terms and concepts:
• How many of you have heard of Abraham Lincoln? What do you know
about Lincoln? Write down the comments for later use. (RI- 2)
• Today, you are going to learn more about Abraham Lincoln, and I’ll bet
that in some cases, you may find that you’ll need to correct some of
what you think you know! Keep an eye out as we read this biography. Does
everyone remember what a biography is? Briefly discuss the definition.
(RI- 4)
• Guide students to consider the author’s craft. This biography was written by
Caroline Crosson Gilpin. Show her name on the title page. She did
research to provide you with information that is true or accurate. And
there’s some information in this book that shows us one thing she did to
be sure this book is accurate. Turn to the copyright page (p. 2). The first
thing you probably noticed is that the author has included a copy of
Lincoln’s famous signature! But look right below his signature. There’s
an important point there. Let’s read it. “The publisher and author gratefully
acknowledge the review of proofs for this book by Bryon Andreasen, Ph.D.,
Abraham Lincoln Presidential Library and Museum.” What does this
sentence tell us? As students read closely to figure out this point, take
the opportunity to help them expand their vocabulary with words like
“acknowledge” and to learn about experts, primary sources, and institutions
like libraries, museums, and universities that preserve important
documents and artifacts. (RI-1, 4, 6)
• Introduce a feature for extending students’ knowledge. This book has boxes
called In His Own Words. When we get to those boxes, what do you think
we’ll find? Why do you think the author would include Lincoln’s own
words? (RI- 3, 6)
DURING READING
• Lead students to determine the author’s main purpose in writing this book.
As students begin reading on pages 4-5, they will see the heading, “A
Much-Loved President” and the claim that “Lincoln is an important man in
America’s history.” Ask students, Think about this claim. What do you think
the author will tell us in the rest of this book? (They will learn about
Lincoln and why he is so important in our history.) (RI-6)
• Assist students to link Lincoln’s words to the events described in this book.
For example, page 7 offers the first In His Own Words box: “Leave nothing
NATIONAL GEOGRAPHIC SOCIETY PAGE 21for tomorrow which can be done today.” Work with students to figure out
what Lincoln means, and how his words seem to match the information
this page provides about Lincoln as a boy. (His words seem to parallel all the
work he did on his family’s farm). As students move to pages 8 and 9, they
will find even more examples of not postponing hard work. Similarly, have
students carefully consider Lincoln’s words on slavery (page 19) in relation
to the action he took to outlaw slavery. Does his action make sense based on
what he said? (RI-1, 3, 5)
• Help students develop their vocabulary:
• Model how to use word boxes. When students reach page 9, have them
note the “Words to Know” box. Model how to use the box to figure out
the meaning of lawyer. Point out to students that there will be more Words
to Know boxes that they can use the same way, and that all the words in
these boxes are also in the Glossary at the end of the book if students need
to find them quickly. (RI-4, 5)
• Review how students can learn new vocabulary from context. For example,
the Gettysburg Address is mentioned on page 23, and then on page 24 it is
a heading. Be sure students understand the meaning of address in this
context. Close reading can help. Have students read page 23 which says that
“he gave his most famous speech: the Gettysburg (GET-tees-burg) Address.”
Rather than telling students what this means, help them use the way this
sentence is worded to figure out that speech and address are synonyms.
Then have students generate some examples for which they could use
address in the same way (when the school principal talks to the whole
school at an assembly, you could say she addresses the school; when a pastor
or priest or rabbi gives a sermon, you could say that is an address; if a
student enters a contest, he or she might need to address an audience; etc.).
(RI-4)
AFTER READING
• Return to the list of what students knew about Lincoln in the Before
Reading activity. Have students check off points that this book verified,
correct or delete any points that this book caused them to change their
minds on, and add new points that they learned. Students may also have
points on the list that the book did not address. They can flag those points
with question marks for further reading (see Extra Credit below). During
this discussion, encourage students to check on their ideas by using the
index to locate sections to reread. (RI-1, 5, 7)
• Revisiting the Before Reading list will serve as a good review of Lincoln’s
life. Follow up on that review by having students return to the During
PAGE 22 READERS SERIESReading discussion of the author’s claim on page 5 that “Lincoln is an
important man in America’s history.” Ask students to point out evidence
that the author uses to support that claim throughout the book. Students
should skim and reread, as needed. (RI-2, 8)
EXTRA CREDIT
• Encourage students to read to find out more. If students flagged points
they had more questions about during the After Reading activity, provide
other resources for further reading on those topics. Or if they have not
already formed questions, start a discussion: We have learned a lot about
Lincoln, but what questions do you still have about him, his family, or the
time when he lived? Students may be interested in knowing more about
the 1800s, about other children who lived in the White House, or more
about Lincoln. How could we find that information? Provide books,
magazines, and websites, and guide students to compare and contrast the
information found in the different resources. (RI-1, 5, 9)
• Extend students’ insight into the way illustrations and text are integrated
to convey information. Some students may want to know more about the
illustrations in this book. These students will enjoy decoding the photo
credits on the copyright page. They will quickly catch on that the first
line gives source abbreviations (B/C means Bettman/Corbis, etc.), then the
rest of the paragraph gives the sources for the illustrations on each page. For
example, the cover photo is credited to Alexander Gardner/LC or the
Library of Congress Prints and Photographs Division. Such information
helps students realize that the photos and illustrations are authentic and
provide evidence for the author’s points. (RI-7, 8)
NATIONAL GEOGRAPHIC SOCIETY PAGE 23RI = READING STANDARDS FOR INFORMATIONAL TEXT
Other National Geographic Readers of Interest
Many students are interested in history—and many more will be intrigued by
these compelling titles! Here’s another biography of a great man, the story of an
impressive ship, rich detail on an amazing civilization, and exciting information
from prehistoric times.
MARTIN LUTHER TITANIC MUMMIES
KING, JR. by Melissa Stewart by Elizabeth Carney
by Kitson Jazynka
DINOSAURS
by Kathy Weidner Zoehfeld
DEADLIEST ANIMALS
by Melissa Stewart
Your students will learn that dangerous animals
come in all sizes and shapes! This book is full of
surprising information and dramatic photographs
of astonishing and scary animals.
PAGE 24 READERS SERIESBecause this book is so rich with information, you will likely want to use the
following examples to inspire even more activities. Also, you may want to have
students read this book over more than one session. This book is divided into
clearly marked sections, so you will find it easy to determine good stopping
points.
BEFORE READING
• To activate prior knowledge and to set a purpose for reading, ask students:
Have you ever encountered a deadly animal? What other animals do you
know about that are deadly? Show Deadliest Animals. Do you think those
animals might be in this book? Do you think there might be other animals
we haven’t thought about? (RI-1)
• Explain a key feature for vocabulary development: There are going to be
some words that you might not know. This book has word boxes for some
key words. Here’s an example. (Show the word box on page 5.) When
you get to this page, you can read the box to figure out what the word
means. Notice that in this book, the author calls these word boxes “Deadly
Definitions. “ Why do you think she does that? And why do you think the
illustrator put the words “Deadly Definitions” in this yellow triangle? (It’s in
the shape and color of a warning label.) (RI-4, 7)
• Show the Glossary (page 46-47). All the Deadly Definitions words are listed
here in a glossary so that you can find them easily in case you need a
reminder. (RI-4, 5)
• Students need not read the entire book all at once. A good stopping point
is at the end of any section listed in the Table of Contents. Decide how far
students should read each time. Have students turn to the Table of Contents.
Direct them to read the section title(s) you have selected for the session and
predict what they might find there. Then have students turn to the section
for the session. (RI-5)
DURING READING
• As students begin each new section, remind them that they can use the
heading to predict what the section will contain and to help organize the
information they are reading. Students may also need to be reminded that
the headings in the book match the Table of Contents. (RI-5)
• Point out to students that the author has put some interesting information
in special boxes. Here are 2 examples:
• The author has some boxes called Death Toll. Here’s one on page 13. Do
you know what Death Toll means? Discuss the meaning of toll in this
NATIONAL GEOGRAPHIC SOCIETY PAGE 25context. Do you think it makes sense that the author would label some
boxes Death Toll in this book? Why? You will see other boxes of interesting
information, so look out for them. They will add to what you are learning.
(RI-5)
• When students reach pages 20-21, point out Toxic Tidbits. Here’s another
special box the author has included. This one is called Toxic Tidbits. It’s
marked with a skull and crossbones, so what do you think the information
here will be about? (Something dangerous or deadly.) And what do you
think toxic means? (If needed, toxic is defined on page 20 and in the
glossary.) So could we conclude that a toxic tidbit is a little bit of
information on something dangerous? Watch for more Toxic Tidbits!
(RI-5, 7)
• At the end of each section, guide students to reflect on and organize what
they have learned. Here are 2 examples:
• After students read Big and Brutal (pages 14-19), guide them to review the
3 animals they have learned about. They can organize what they have
learned by creating a chart comparing and contrasting hippopotamuses,
elephants, and Cape buffaloes. The chart might include a row for each
animal, with columns indicating when they are likely to attack, how much
damage they can do, and interesting facts. Students may also want to include
a column in which they use information from the text to justify their
ranking of how dangerous these 3 animals are. (RI-1, 2, 3)
• After reading Ferocious Fish (pages 24-29), students can summarize what
they have learned about great white sharks, stonefish, and puffer fish. They
can organize what they have learned by creating a chart. Lead students to
notice the contrast between great white sharks,which are predators, and the
stonefish and puffer fish, which are deadly in response to predators.
(RI-1, 2, 3)
AFTER READING
• After students have finished the entire book, guide them in a discussion of
what they have learned. Lead them to the main idea that animals of all sizes
and shapes can be deadly. Discuss the many different ways that animals
can be deadly. (If students have created charts at the end of each section
while reading, they can use those charts to help in this discussion. Or
students can re-read sections to review information.) Students can decide
on categories to describe the ways different ways that animals can be deadly,
and then group the animals they have read about according to those
categories. For example, some animals kick, crush, or throw; others kill
with teeth, hooves, or horns; some bite or sting with poisonous venom;
PAGE 26 READERS SERIESsome are poisonous to touch, others cause deadly allergic reactions (by
touch or bite); some spread deadly diseases with their bites. (RI-1, 2, 3)
EXTRA CREDIT
• Encourage students to read to find out more. Direct students to scan the
index (page 48) to recall all the deadly animals they have read about. They
can use the page numbers listed to return to interesting animals for a
review. Then individuals or pairs of students can pick one of the animals
they would like to know more about. Provide books, magazines, or websites
so that students compare and contrast information found in the different
resources. Students can share what they find with the class. (RI- 5, 9)
RI = READING STANDARDS FOR INFORMATIONAL TEXT
Other National Geographic Readers of Interest
If your students just can’t get enough about deadly animals, have no fear! These
titles will meet the challenge.
CHEETAHS POLAR BEARS SHARKS WOLVES
by Laura Marsh by Laura Marsh by Anne Schreiber by Laura Marsh
SNAKES SPIDERS TIGERS
by Melissa Stewart by Laura Marsh by Laura Marsh
NATIONAL GEOGRAPHIC SOCIETY PAGE 27BUTTERFLIES:
GREAT MIGRATION
by Laura Marsh
Monarch butterflies may look delicate. But they
migrate 2,000 to 3,000 miles every year from
Mexico all the way to the U.S. and Canada, and
then back again.Your students will learn that it
takes these butterflies generations to make the
trip, and that monarchs face challenges all along
their journey. With amazing photos and maps throughout, this book also shows
the four stages in their life cycle, from egg to caterpillar to chrysalis to butterfly.
BEFORE READING
• Engage students with a key concept in this book by using the opening
section, On the Move, to explain what migration means. Introduce the
book to students by showing the cover: As you can see, this book is about
butterflies and we are going to learn about a very special butterfly–the
monarch! But look at the cover again.You can also see that the subtitle is
Great Migrations. So what does migration mean? Briefly discuss ideas. Let’s
read pages 4-5 to find out if we are correct. (Pages 4 and 5 are introductory
pages that define migration.) (RI-1, 4)
• Point out to students key features for vocabulary development–word boxes
and a glossary: Did you notice the box called “Wing Words” on page 5?
[This box has definitions for migration and mate.] This book has word
boxes for some key words that you might not know. When you see Wing
Words, you can read the box to figure out what the word means. And all the
Wing Words are listed in the glossary at the end of the book (pages 46-47)
so that you can find them easily in case you need a reminder. (RI-4, 5, 7).
• Students need not read the entire book all at once.You can stop at the end
of any section listed in the Table of Contents. If you choose to read this book
in 2 sessions, then a good place to stop the first session is at the end of page
21. At that point, the complete migration route has been explained. (RI-5)
DURING READING
• As students begin each new section, remind them to use the heading to
predict what the section will contain and to help organize the information
they are reading. At the end of each section, guide students to reflect on
what they have learned. Here are examples:
PAGE 28 READERS SERIES• As students turn to Amazing Monarchs on pages 6-7, ask them what kind
of information they might expect. When students have finished the section,
ask them what evidence the author has used to show us why monarchs are
amazing (fastest insect on earth, migrate thousands of miles each year, etc.)
(RI-1, 2, 5, 8)
• After they read pages 6-7, guide students to wonder how monarchs can
possibly migrate all that way. Ask students what they think the next section
of the book will be about–they will likely predict that the book will
explain how monarchs migrate. And indeed as students read pages 8 to 21,
they’ll find out! First, have students study the text and the map on pages
8-9 to get an overview of where monarchs fly. Then guide them to the
details of how monarchs travel on pages 10-21. At the end of page 21, have
students summarize how monarchs migrate, looking back as needed.
(RI- 1, 2, 7)
• As students read Danger! on pages 22-25, they should look for evidence the
author uses to support the claim that monarchs face danger in their
migration. (RI-5, 8)
• Guide students to use the text and photos together to gain a clearer
understanding of key concepts. Together, for example, the text and the
photos convey the enormous number of monarchs that migrate. Students
can consider these examples and locate others:
• Page 11 makes the first mention of how many monarchs migrate—“…
clusters of butterflies make the trees look orange. There are so many
butterflies, they could cover 11 football fields!” After students read
these points, have them think about just how big that is, then have them
look very closely at the photo on page 10. They may not have noticed the
many butterflies. (RI-7)
• Page 13 notes that “In the spring, swarms of newly awakened monarchs
cover the trees and fly through the air. Millions of monarchs are ready to
leave Mexico.” Help students notice that the inset photo on page 12 shows
the detail whereas the background photo gives the big picture of the swarm
of butterflies. (RI-7)
• Direct students to return to the title page and look closely. What looks like
leaves at first sight is really butterflies! (RI-7)
AFTER READING
• To review important details, students can locate the many comparisons the
author uses to make points come alive. Encourage students to note
comparisons such as:
NATIONAL GEOGRAPHIC SOCIETY PAGE 29• “a butterfly’s 2,800-mile trip is like a person traveling 275,00 miles” (p. 7)
• a butterfly’s trip is “like walking around Earth 11 times” (p. 7)
• “so many butterflies, they could cover 11 football fields” (p. 11)
• “monarchs’ migration takes several generations …. that means if you started
the journey, your great, great grandchildren would finish it” (p. 16)
• “that’s about three times faster than we can run” (p. 26)
• “A tiny butterfly egg is the size of a pinhead” (p. 30)
Work through the first example with students, helping them think it
through carefully and figure out what the comparison really means. Then
students can work in pairs to find more comparisons that they can discuss
with their partners. (RI-1, 2, 3, 8)
• Have students review what they have learned using the maps on pages 8
and 9 and 19. With these maps as cues, students can then summarize
where monarchs fly and how they do it. (RI-1, 2, 3, 7)
• Return to the pre-reading discussion of what migration means. Then ask
students: Why do you think this book is subtitled, Great Migrations? What
might make a migration a great migration? Do you think it is correct to call
the monarch butterfly’s journey a great migration? Why? What evidence can
you offer to support your view? (RI-2, 3, 8)
EXTRA CREDIT
• Just for fun, students may want to decide on their top 2 or 3 choices of
interesting facts about monarchs. Facts throughout the book are eligible!
But students could start by rereading the list of “10 Cool Things About
Monarchs” (pages 38-39) and the Weird But True boxes throughout the
book. (RI- 1, 2)
• After discussing the problems humans cause, students may want to learn
more about monarch butterflies and ways to help them. To do so, students
can visit the websites on page 45. (RI- 9)
• Encourage students to read to find out more about animals that migrate.
Direct students to review page 5 where they will see red crabs and
wildebeest mentioned as other animals that migrate. Provide books,
magazines, or websites that pairs or small groups of students can use to learn
more about a migrating animal of their choice. Students can share what they
find with the class. To extend the activity, the class can use what their
classmates’ have found to compare and contrast different animals’ migration
patterns. For example, they might construct a chart with rows for each
animal and columns for information such as how far the animals migrate,
when they migrate, challenges they face, and amazing facts. (RI- 9)
PAGE 30 READERS SERIESYou can also read