USER MANUAL Updated March 20, 2021 - cdn77.org
←
→
Page content transcription
If your browser does not render page correctly, please read the page content below
USER MANUAL
         Updated March 20, 2021

®
Table of Contents
What is Sky Force 3D?..................................................................................................................... 3
Compatibility...................................................................................................................................... 5
Software Update History................................................................................................................ 6
Important Information.................................................................................................................... 9
Performance Considerations......................................................................................................10
Installation Procedure...................................................................................................................11
Startup, Registration and General Setup Procedures.......................................................16
Quick Start Procedures.................................................................................................................23
Quick Operating Procedures......................................................................................................24
Dashboard, Latest Shared Themes, and My Real-Time Airport Procedures............25
Synchronization System Status and Controller...................................................................33
3D Cloud Models Manager and Procedures........................................................................35
Environment Procedures..............................................................................................................38
Flight Center Procedures..............................................................................................................43
Weather Center Procedures........................................................................................................50
Interactive Map Procedures........................................................................................................55
Themes Procedures........................................................................................................................61
Settings Overview...........................................................................................................................66
Important Simulator Settings.....................................................................................................78
Recommended FSX Settings.......................................................................................................79
Recommended P3Dv1 Settings.................................................................................................80
Recommended P3Dv2 Settings.................................................................................................81
Recommended P3Dv3 Settings.................................................................................................83
Recommended P3Dv4 Settings.................................................................................................85
Support and Assistance................................................................................................................87
EULA .................................................................................................................................................88

                                                                                                                                                           PAGE 2
What is Sky Force 3D?
• 3D Cloud Model Structures, based on              • Integrating a weather engine that harnesses
   real-world cloud classification                     over 70,000 points of weather data globally.
                                                       The weather engine reads and interprets live
• Intelligent Weather Engine with Real-Time
                                                       model data to sample the atmosphere and
   Weather and Cloud Model Synchronization
                                                       therefore will sync the appropriate clouds
• Photo-Based Global Environment Texture and          structures, allowing for more accuracy.
   Effects
• Flight Center                                     • Incorporating synchronization technology
                                                       which dynamically syncs 3D cloud model
• Interactive Weather Mapping System                   structures in real-time during flight.
• Local & Shared Community Integration
                                                    • Increasing frame rates by eliminating
• Advanced Customization                               unnecessary cloud sprites for all cloud types.

Sky Force 3D is a complete overhaul of the          • Restructuring the cloud SDK for true
weather and environmental experience while             formation realism. No more upside down
bringing dimension to FSX, FSX Steam, and              clouds in bizarre and unrealistic positions,
Prepar3D v1, 2, 3, 4 and 5. This is accomplished       or cloud bases that are presented with
through a single platform by:                          repeating patterns.

• Redoing the 3D cloud model structure and         • Elevating the visual experience through our
   SDK and patterning it after real-world cloud        new natural, photo-based environment
   classifications with their own specifications,      texture technology.
   positions and heights.
                                                    • Developing single-session cloud texture
• Developing real-world cloud model system            variation, allowing more variety during a
   including (but not limited to) cloud streets,       flight session, increasing the overall realism.
   super cells, wall clouds, funnel, shelf, rain
   shaft and tornadoes.                             ...and much more! Read on.

                                                                                                 PAGE 3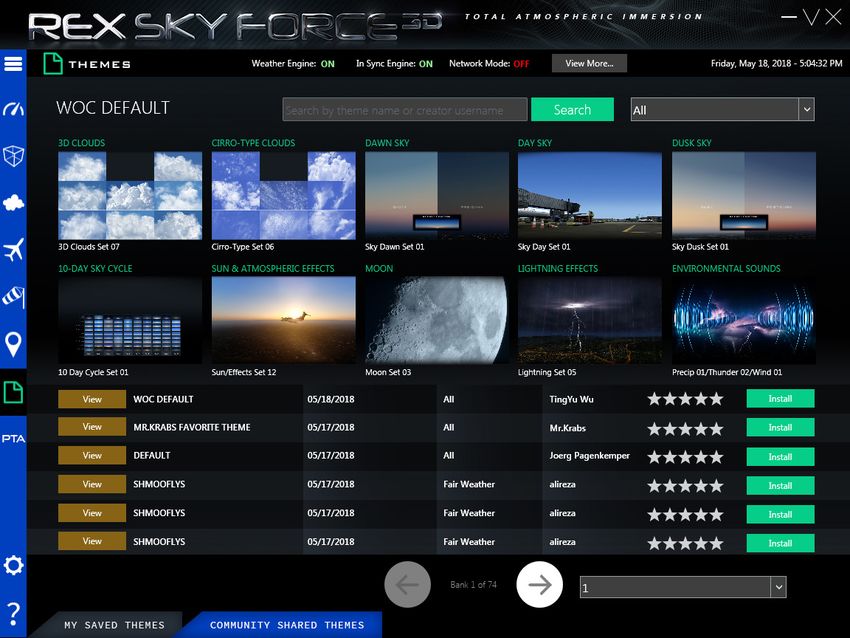
What is Sky Force 3D

WE HAVE SUCCESSFULLY CREATED SUPERIOR
CLOUD AND WEATHER FORMATIONS.
The simulator will now be able to display soft   WHAT IS LACKING IN P3D AND FSX?
and more robust detailed clouds structured
                                                 The current cloud model system within the
together within the SAME session. In addition,
                                                 simulator, misrepresents real-world cloud
we have developed close to 3,000 new
                                                 classification and formations. The randomly
cloud model structures and cloud types,
                                                 created cloud sprites cause a severe frame
nearly 20GB of natural photo-based
                                                 rate hit especially with more dense cloud
environmental textures as well as hi-
                                                 cover. Because of this we notice upside down
definition atmospheric sound effects.
                                                 clouds in bizarre and unrealistic positions,
                                                 cloud bases that are presented with
Sky Force 3D also simulates real-world
                                                 repeating patterns, all of which affect the
cloud classification; from uniform clouds
                                                 overall realism in flight.
to full and complete mature stage cloud
structures... all while being able to be
synced in real-time in sim.                      THE FIX.
                                                 REX Sky Force 3D corrects these problems
Even with costly similar                         (and more) and even increases the frame
                                                 rates by eliminating unnecessary cloud
aftermarket products                             sprites for all cloud types. The 3D Cloud
                                                 structures are now correctly and accurately
installed, weather                               displayed, and detailed clouds will NEVER

systems severely lack                            be represented upside down. In addition,
                                                 we have added NEW cloud types to the
due to the constraints                           SDK, including; altocumulus, stratocumulus,
                                                 humilis, mediocris, congestus, tower
of the simulator SDK.                            cumulus, cumulonimbus calvus,
                                                 supercell and rainshaft, tornado, stratus,
                                                 nimbostratus, altostratus and cirrus class.

                                                                                        PAGE 4
Compatibility

REX SKY FORCE 3D IS COMPATIBLE WITH THE
FOLLOWING FLIGHT SIMULATORS:
Microsoft FSX
Microsoft FSX Steam Edition
Prepar3D v.1
Prepar3D v.2
Prepar3D v.3
Prepar3D v.4
Prepar3D v.5

ALL Weather Engines - When not using the Sky Force 3D Weather Engine.
(Freeware, payware, default simulator)

IMPORTANT NOTE: If using another weather engine besides the one that is
included within Sky Force, and you want the Sky Force 3D cloud structures to
adjust based upon weather conditions within the simulator as you fly, you must
make sure the “Enable real-time 3D cloud model (structures) sync mode function
is enabled in the Cloud Sync settings. Sky Force must remain opened in the
background for this process to work.

                                                                           PAGE 5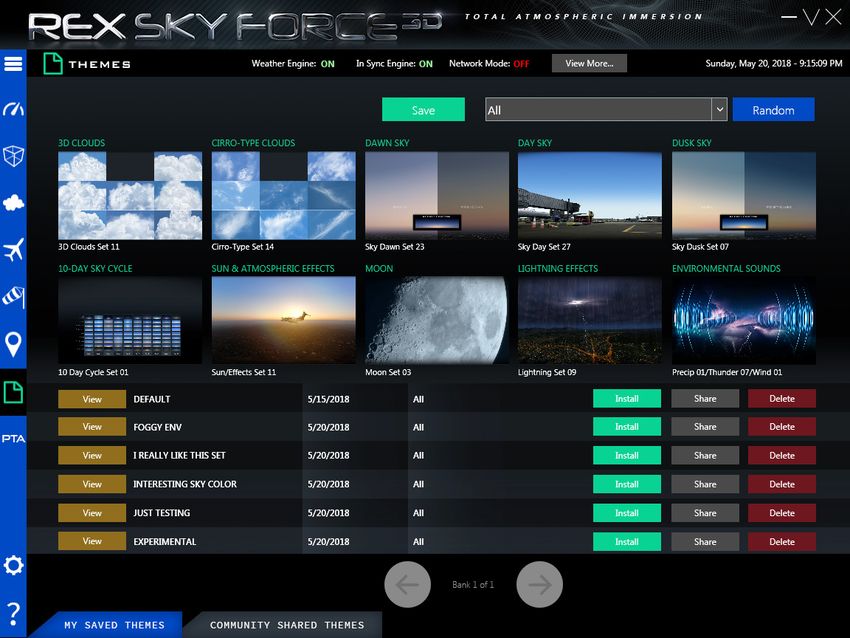
Software Update History

Software Update History
Don’t have the latest version? Visit our support page at http://www.rexsimulations.com/support.html.

Technical Update 1                                            FIXED – Weather injection issue causing errors with GSX
                                                              and ChasePlane
FIXED – Step 2 registration validation issue
                                                              FIXED – Weather engine continuing to inject weather
FIXED – Language and regional settings
                                                              after it was turned off
FIXED – No mapping issue
                                                              FIXED – In-sim green status bar not showing during
FIXED – PFPX file export issue locally and on the server
                                                              weather engine injection
when data is not available
                                                              FIXED – Network mode for weather injection
FIXED – Community shared themes missing data item
                                                              FIXED – Installer stating “Organization” instead of “Email”
FIXED – Minimum altitude missing value
                                                              during user registration
FIXED – Processing objects missing when weather engine
                                                              FIXED – Issue with Sky Force working with FSUIPC autosave
resets or reprocesses
                                                              FIXED – Long named favorite airports cutting off on
FIXED – Favorite airport .net Framework error
                                                              Favorite Airport panel within the Dashboard
FIXED – Various .net Framework issues
                                                              FIXED – Sky Force resolution issue with Windows 10
Technical Update 2                                            FIXED – In-Sim briefing not reporting flight plan data
                                                              FIXED – In-Sim briefing not showing clouds reported
FIXED – Freezing of application when user confirms
                                                              FIXED – Issue with textures sets not being saved when
removal of favorite airport
                                                              creating themes
FIXED – Scaling issue with Windows 10
                                                              FIXED – Issue of application hang while changing a
FIXED – Overlapping community theme notification
                                                              theme within the PTA window
FIXED – Notifications causing P3D 4.1 to reload
                                                              FIXED – Double popup alert window when installing a
FIXED – Issue of overwriting last entered favorite airport
                                                              preset theme from the PTA window
during registration
                                                              FIXED – Default airport not being saved after restart
FIXED – CTD issue when some users right-click the
                                                              FIXED – Preventing duplication favorite airports from
interactive map
                                                              being added
FIXED – Aircraft and precipitation positioning on the map
                                                              FIXED – Weather not reporting CAVOK properly within
FIXED – Failure when Pilot2Atc flight plan is imported
                                                              the Weather Center
into Sky Force
                                                              FIXED – “Precip” button on the mapping still showing
FIXED – Naming conventions for Sun/Atmospherics sets
                                                              precipitation if turned off
08 and 13
                                                              FIXED – Latest TAF report is included in the Weather
FIXED – “Theme completed” popup when adding a new set
                                                              Center data
FIXED – Issue where weather was not showing in the
                                                              FIXED – Bank numbers did not change when selecting a
Weather Center due to foreign date/time
                                                              category in My Saved Themes or Community Shared Themes
FIXED – Searches within the Weather Center for stations/
                                                              FIXED – Toggle button within the Engine setting grayed
airports not in the database
                                                              out when not active
FIXED – Texture sets not showing due to missing folder sets
                                                              FIXED – Search for weather stations with winds over 30kts+
FIXED – .net error messages within the In-Sync Cloud Engine
                                                              FIXED – Length of notification text on successful texture
FIXED – Toggle button “Enable Quick Start” not being
                                                              install being cut off
aligned with other buttons
                                                              FIXED – Step 2 grammatical error during registration
FIXED – Issue where Sky Force was causing P3D to go
                                                              FIXED – Disabling the In-Sync Cloud function was not
directly into “Load” mode
                                                              disabling all functions
FIXED – Major jumps of altimeter
                                                              FIXED – Weather engine was showing DISCONNECTED
FIXED – Accuracy of weather injections
                                                              instead of ON. Changed global variable
FIXED – Visibility causing complete reduction including
                                                              FIXED – Issue where clicking Currently In Sim was
the cockpit
                                                              causing Sky Force to CTD
FIXED – .net errors with the weather engine
                                                              FIXED – Altitude of roll clouds showing at higher altitudes
FIXED – OAT/TAT/SAT erratic temperatures increasing
                                                              FIXED – Issue with cirrus not showing
with altitude
FIXED – No weather showing                                           Continued on next page
FIXED – Visibility too low for FSX, FSXSE when at 10SM

                                                                                                                  PAGE 6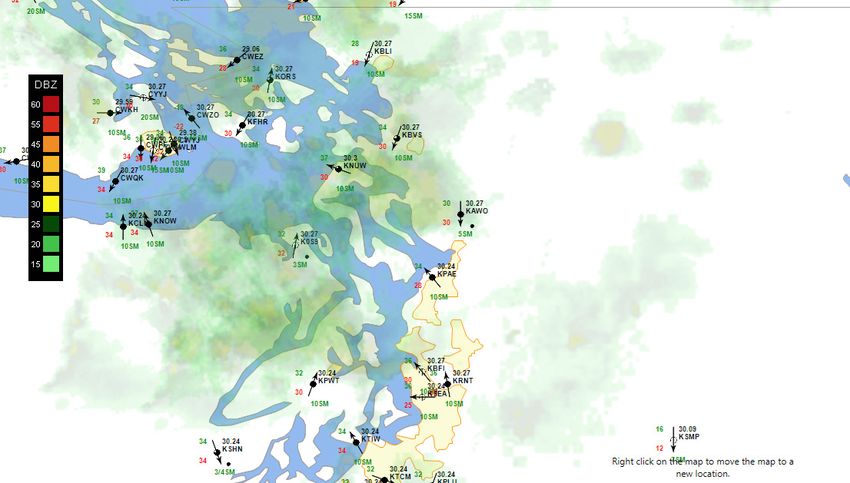
Software Update History

FIXED – Weather engine continued to load when disabled         ADDED – Added new button synchronization window to
FIXED – Load time of weather injections in-sim                 track aircraft location
FIXED – Inaccurate HDR read-only settings per sim type         ADDED – Disable notifications button for session to
causing textures to not install correctly                      community notifications screen
FIXED – Close icons on system and community                    REMOVED – Support for PFPX export flight plans
notification areas. Incorporated buttons instead of icons      REMOVED – Additional popup alert when deleting a
as some users would quit the application by mistake.           favorite airport
ADDED – Function to minimize Sky Force to system tray          STREAMLINED – Weather engine
ADDED – Option to overwrite default backup of flight           STREAMLINED – Cloud model sync engine
sim files                                                      RECODED – In-Sim weather briefing
ADDED – Fade in/out of generic alert system                    UPDATED – Software User Manual
ADDED – Function to save latest map settings when
application is closed and restarted                            Technical Update 2.1.0
ADDED – 3 levels of density related 3D stratus overcast        FIXED – HDD activity at startup
model sets for user control over performance impact            FIXED – Looped precipitation sound
ADDED – 7 levels of density related 3D cumulus overcast        FIXED – Automatic flight plan import into simulator (FSX
model sets for user control over performance impact            Steam does not allow this feature through simconnect)
ADDED – Feature within the Weather Center to add a             FIXED – Minimum altitude weather engine limit
custom airport into the database when not found                FIXED – Issue with in-sim audio briefings remaining
ADDED – Feature to set default favorite weather station/       read-only have enabling audible weather briefings
airport to show in the Weather Center and Favorite Airports    FIXED – Issue of failed weather injection after first injection
ADDED – View buttons to replace ID numbers within My           FIXED – Issue of numerous openings/closings of simconnect
Themes and Community Themes                                    FIXED – Erroneous reports of air pressure during weather
ADDED – Better handling of the user’s system profile to        injection
help optimize texture resolution                               FIXED – Issue of right-click on mapping system causing CTD
ADDED – Encrypted serial key field to the Profile              CHANGED – Default core file installs to be set to minimum
Settings window                                                for sake of meeting minimal requirements of machines
ADDED – Function within General Settings to give the           CHANGED – Note statement on Step 2 of registration
user the ability to start up Sky Force in the system tray      CHANGED – Error message reporting email
ADDED – Flight sim validation location validation              ADDED – Control for users to select weather injection
ADDED – Full support for weather injection for Prepar3D v4.0   refresh rate
ADDED – Tool tips rollovers to 3 buttons on top right of       ADDED – Control for users to select male/female voice
main window                                                    for in-sim weather briefings
ADDED – Weather Refresh button to engine status window         IMPROVED – Performance of the weather engine
ADDED – Disabling feature when changing between                IMPROVED – Weather injection accuracy
Enable Performance Optimizer and Auto tune                     IMPROVED – Performance of the mapping system
ADDED – Code that prevents duplicate airports from             IMPROVED – Application launch speed
being added to the Favorite Airport list from the Weather      REMOVED – Product website link on setting page
Center and Dashboard windows
ADDED – Confirmation of Favorite Airport being added
when set from the Weather Center window
                                                               Technical Update 2.2.0
                                                               FIXED – 3D models folder
ADDED – Download of the metar_report.xml file for
                                                               IMPROVED – Performance of the weather engine
ProAtc users
                                                               IMPROVED – Performance of the mapping system
ADDED – Code to prevent users from starting more than
one version of Sky Force at a time
ADDED – Examples of the required lat/lon degrees when
                                                               Technical Update 2.3.0
                                                               FIXED – Network remote computer connection issue
adding an airport to the database
ADDED – Note to Flight Center details that winds are
provided via the GFS model on the 12 and 00Z times                   Continued on next page
ADDED – Text to Favorite Airports stating to wait
patiently as we download data from our servers
ADDED – Text to Most Recent Community Themes stating
to wait patiently as we download data from our servers

                                                                                                                      PAGE 7
Software Update History

Technical Update 2.3.1
FIXED – Cloud model in-sync issue
FIXED – Odd cloud patterns
FIXED – Error issue with a missing icon
ADDED – New weather rendering engine (Preview)
ADDED – Cloud shader fix to improve cloud coloring
IMPROVED – Performance of mapping
IMPROVED – Performance of the weather engine

Technical Update 2.4.0
FIXED – Mapping upper level winds greater than 100kts depiction
FIXED – Upper level winds greater than 100kts with weather injection
FIXED – Green bar showing when disabled
FIXED – Cloud shader brightness
FIXED – Weather briefing connection
ADDED – Function to prevent re-registration after software update
ADDED – Function to save themes to server
ADDED – Function to save user settings to server
ADDED – Functions for preparation of Creative Update 1.0 content
ADDED – Support for PMDG weather file
ADDED – New weather data export json file for 3rd-party developer SDK

Technical Update 2.5
ADDED – Support for Prepar3D v5
FIXED – Improved visibility and haze effect rendering for Prepar3D v5
FIXED – PMDG wind file missing folder issue
FIXED – Optimization risk negative numbers with higher-end graphics cards
FIXED – Registration failures
FIXED – Cloud brightness modification for Prepar3D v5
FIXED – Overcast cloud models for Prepar3D 5 (Non-trueSky™)
FIXED – Green bar rendering when disabled
FIXED – Backup files will not overwrite with both 64bit and 32bit installed
FIXED – Export file not updating
FIXED – Export JSON file not being downloaded
FIXED – Flight plan not being cleared within the application
IMPROVED – Rendering moderate rain handling when BR is recognized within the metar report

                                                                                            PAGE 8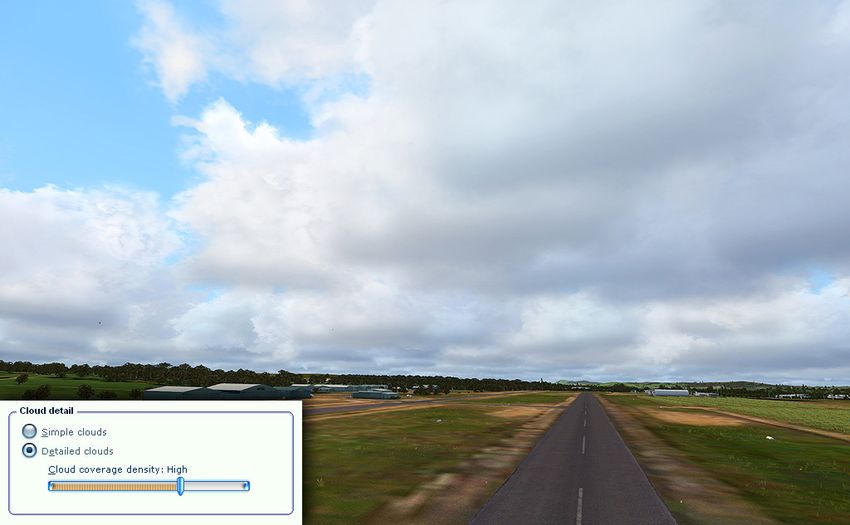
Important Information

  !     IMPORTANT
        BELOW ARE IMPORTANT FACTORS IN
        CONSIDERATION FOR INSTALLING AND
        OPERATING REX SKY FORCE 3D WITHIN FSX AND/
        OR PREPAR3D:
        1. S
            ky Force is compatible with Microsoft Flight Simulator X with SP2
           or Acceleration Pack, FSX:Steam and Lockheed Martin’s Prepar3D v.1
           through v.5.

        2. NEVER install REX into the main FSX or P3D folder.

        3. If REX, FSX or Prepar3D are installed into the program files (x86)
           directory, UAC (User Account Control) MUST be turned OFF in
           Windows to allow the proper communication between the two.

        4. IF FSX or Prepar3D is installed in the Program Files folder you may
           need to set Permissions and Sharing so that REX may write the
           necessary files into the simulator.

        5. W
            e recommend turning OFF all virus scanners while the simulator is
           running.

        6. If you wish to view high-definition textures within FSX, you must
           make sure to set this value in the FSX.cfg file. Add TEXTURE_MAX_
           LOAD=4096 within the GRAPHICS section of the cfg file. This can be
           located in your
           c:\Users\\AppData\Roaming\Microsoft\
           FSX. If the AppData folder is hidden, you will need to change the
           VIEW settings as outlined below: Open Folder Options by clicking
           the Start button, clicking Control Panel, clicking Appearance and
           Personalization, and then clicking Folder Options. Click the View tab.
           Under Advanced settings, click Show hidden files and folders, and
           then click OK.

                                                                                    PAGE 9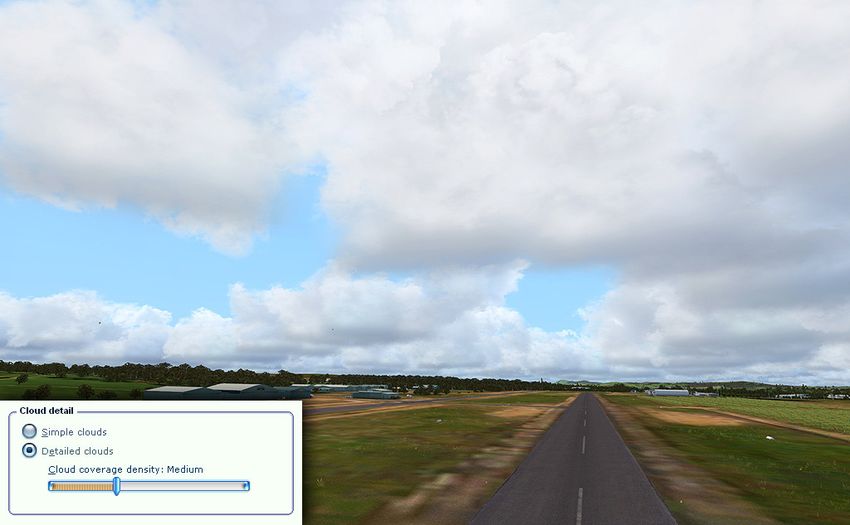
Performance Considerations

  !     PERFORMANCE
        CONSIDERATIONS
        BELOW ARE IMPORTANT FACTORS IN
        CONSIDERATION FOR IMPROVING PERFORMANCE
        WITHIN THE SIMULATOR:
        1. A
            nti-aliasing settings have a MAJOR influence on P3D performance.
           SGSS set in NVIDIA Inspector is a real performance killer when clouds
           are present. If you have FPS issues, please disable SGSS!

        2. B
            ecause each system configuration is different, we strongly
           recommend you start with lower texture resolution settings and
           increase the resolution until you reach a happy medium of quality vs.
           performance.

        3. W
            e HIGHLY recommend the use of the DXT5 compression algorithm
           for clouds. DXT5 is the most flexible general purpose compression
           codec, so if problems are experienced using REX clouds at higher
           resolution, select the DXT5 setting on the main Settings screen under
           the “Resolution” tab. You must reinstall textures after changing this
           setting.

        4. W
            e have optimized our new 3D cloud models in the latest Technical
           Update 2, so please take advantage of this new feature on the main
           3D Cloud Model Structures screen! There are 2 sliders that control
           these, Overcast Density under Stratus and Cumulus. Simply select
           your desired setting, then click the “Install Now” button to apply these
           changes. The less density the better FPS you will experience.

                                                                                      PAGE 10
Installation Procedure
The following is the procedure on how to install Sky Force.
Before Installation and Operating
The following is STRONGLY RECOMMENDED before installing.
Figure 1.0 – UAC (User Account Control) Screen
1. P
lease set your UAC (User Account Control) to “Never Notify” (Fig 1.0). This
will prevent Windows from stopping Sky Force from moving files to and from your
simulator and system.
2. P
lease turn off your Antivirus software. All REX files are safe and have been
inspected prior to upload and while they sit on the server. After Sky Force is installed,
please give the REX Sky Force 3D folder “exclusion” rights.
3. Make sure you NEVER install Sky Force directly into your Flight Simulator
Folders. This could cause MAJOR damage to your flight simulator.
PAGE 11Installation Procedure
INSTALLATION PROCEDURE
Figure 1.1 – Install Files
If using Windows 7:
Step 1 – Right-click “rexinstaller.exe” and select “Run-As-Administrator” to begin installation.
If using Windows 8, 8.1, or 10:
Step 1 – Click the “rexinstaller.exe” file to begin installation.
Step 2 – Once the installer starts, follow the prompt windows by clicking “NEXT”.
NOTE: Not all installation windows are represented in the following images.
Figure 1.2 – Install Welcome Screen
Step 3 – Click “NEXT” to start the installation (Fig. 1.2).
PAGE 12Installation Procedure
Figure 1.3 – Customer Registration Screen
Step 4 – Enter your information: Username, Email Address, and Serial Key (Fig 1.3).
IMPORTANT NOTE: It is important to have an active internet connection to install
and activate your software.
Figure 1.4 – EULA License Agreement Confirmation Screen
Step 5 – T
o continue installation you must accept the End-User License Agreement (Fig 1.4).
PAGE 13Installation Procedure
Figure 1.5 – Installation Folder Screen
Step 6 – The installer will select the RECOMMENDED default location for installation.
It is important that you do not change this location unless it is absolutely
necessary. (Fig 1.5).
IMPORTANT NOTE: DO NOT INSTALL SKY FORCE INTO
YOUR MAIN FLIGHT SIMULATOR FOLDERS OR THIS MAY
CAUSE SERIOUS DAMAGE TO YOUR SIMULATOR FILES.
Figure 1.6 – Installation Process Window
Step 7 – Please give the installation process several minutes to complete (Fig 1.6).
PAGE 14Installation Procedure
Figure 1.7 – Finish Installation Window
Step 8 – After installation is complete, click “Finish” to finalize installation (Fig 1.7).
Although you may not be required, it is always recommended to reboot
your computer after installing software.
PAGE 15Startup, Registration and General Setup Procedures
The following is the procedure on how to startup, register, and setup Sky Force.
Before Startup
The following is STRONGLY RECOMMENDED before you start Sky Force.
Figure 2.0 – UAC (User Account Control) Screen
1. P
lease set your UAC (User Account Control) to “Never Notify” (Fig 1.0). This
will prevent Windows from stopping Sky Force from moving files to and from your
simulator and system.
2. P
lease turn off your Antivirus software. All REX files are safe and have been
inspected prior to upload and while they sit on the server. After Sky Force is installed,
please give the REX Sky Force 3D folder “exclusion” rights.
3. Make sure flight simulator is not running. For proper installation of files, it is
important that you do not have your flight simulator running.
PAGE 16Startup, Registration and General Setup Procedures
Startup Operations
Figure 2.1 – Desktop Icon
If using Windows 7:
Step 1 – To start, right click on the Sky Force icon and select “Run As Administrator” (Fig 2.1).
If using Windows 8, 8.1, 10:
Step 1 – To start, click on the Sky Force icon (Fig 2.1).
Figure 2.2 – Splash Screen Window
Step 2 – After the icon is clicked, the application splash screen appears during startup
and initialization (Fig 2.2).
AUTHOR’S NOTE: No action is needed during this step.
PAGE 17Startup, Registration and General Setup Procedures
Figure 2.3 – Registration Window
Step 3 – On first startup of Sky Force you will be required to register your product (Fig
2.3). This will only be required one time. Please fill out the fields accordingly.
Click “NEXT” to continue.
IMPORTANT NOTE: Upon re-installation of Sky Force, you will need to register
again using the SAME EXACT information. Otherwise your registration process will
fail. Please keep your registration information in a safe place for future use.
Figure 2.4 – Setting the Default Flight Simulator Window
Step 4 – Click the toggle button next to the flight simulator you would like to use
(Fig 2.4). Click “NEXT” to continue.
AUTHOR’S NOTE: This procedure may be changed later within the Settings Windows.
IMPORTANT: Sky Force is able to read the system registry to recover the locations
of your installed flight simulator(s). If nothing is found, click “BROWSE” next to
the simulator you plan to use, then select the main folder of that flight simulator.
PAGE 18Startup, Registration and General Setup Procedures
Figure 2.5 – Favorite Airport Setup Window
Step 5 – (Optional) Enter an airport ICAO code to add to your Favorite Airports list for
fast access (Fig 2.5). Click “NEXT” to continue.
AUTHOR’S NOTE: This procedure is optional and may be changed later within the
Settings Windows.
IMPORTANT NOTE: If you have trouble locating a specific ICAO, it’s because the
airport doesn’t contain current valid metar data.
Figure 2.6 – General Settings Window
Step 6 – (Optional) Enable/Disable any of these settings by adjusting toggle buttons (Fig
2.6). Click “NEXT” to continue.
PAGE 19Startup, Registration and General Setup Procedures
Figure 2.6 – General Settings Window
AUTHOR’S NOTE: This procedure is optional and may be changed later within the
Settings Windows.
PAGE 20Startup, Registration and General Setup Procedures
Figure 2.7 – Texture Resolution Settings Window
Step 7 – (Optional) Enable/Disable and/or change texture options here (Fig 2.7). Click
“NEXT” to continue.
AUTHOR’S NOTE: This procedure is optional and may be changed later within the
Settings Windows.
IMPORTANT NOTE: Choosing higher texture resolutions will always affect frame
rates. It is recommended that you use the Texture Resolution Optimization Engine
in the General Settings section to optimize your texture settings.
Figure 2.8 – Thank You Window
PAGE 21Startup, Registration and General Setup Procedures
Figure 2.9 – File Backup Process Window
Figure 3.0 – Install Core Sky Force Files Process Window
Step 8 – Click “FINISH” to finalize the registration and setup procedures (Fig 2.8). During
finalization, Sky Force will backup your default flight simulator files (Fig 2.9) and
install core files required for use with Sky Force. (Fig 3.0).
PAGE 22Quick Start Procedures
Quick Start Procedures
Figure 3.1 – Quick Start Window
Operating Sky Force is very simple and doesn’t require a lot of effort. However, it does
offer a lot of features to customize your experience within flight simulator (Fig 3.1).
PAGE 23Quick Operating Procedures
THE FOLLOWING ARE SUGGESTIONS FOR QUICK
OPERATING PROCEDURES AFTER SKY FORCE HAS
BEEN CONFIGURED.
OPTION 1 Step 4 – Once the simulator is setup properly
and you want to track your flight in
JUST START YOUR SIM AND FLY
real-time, click the “Follow Aircraft”
toggle button on the Interactive
With the REX weather engine:
Map window or the “Follow Aircraft”
Step 1 – Start REX Sky Force and minimize.
button on the new Synchronization
Step 2 – Start your flight simulator and enter
System Status screen accessible from
flight. The REX weather engine will
the View More button located on the
automatically engage during your flight.
Dashboard strip from the top screen.
Without the REX weather engine or using a
IMPORTANT NOTE: If you want Sky
3rd-party weather engine:
Force to automatically import your flight
Step 1 – Start Sky Force. Click the Settings
plan into your flight simulator you will
“gear” icon on the navigation bar. If
need to engage the REX weather engine.
the REX weather engine has been
Otherwise, this will need to be manually
disabled, skip to Step 4.
done if using a 3rd-party weather engine.
Step 2 – Click on the engine button and
disable the weather engine.
Step 3 – Keep Sky Force open during the flight
so Sky Force can sync the proper
OPTION 3
cloud models/structures.
3D CLOUD SYNC DURING FLIGHT
Step 4 – Start your 3rd-party weather engine.
With OR without the REX weather engine:
Step 5 – Start your flight simulator.
Step 1 – Start Sky Force and minimize.
Step 2 – Start your flight simulator and fly. The
OPTION 2 3D cloud model sync function will
automatically engage during flight.
TRACKING YOUR IN-FLIGHT WEATHER
IMPORTANT NOTE: If you want the clouds
With OR without the REX weather engine:
to adjust based upon weather conditions
Step 1 – Start Sky Force and navigate to the
within the simulator, you must make sure
Flight Center.
the “Enable real-time 3D cloud model
Step 2 – Either import a flight plan or click on
(structures) sync mode and texture sync”
the Community Shared Flight Plans to
function is enabled in the Cloud Sync
import.
settings.
Step 3 – Once a flight plan has been imported,
start your flight simulator.
PAGE 24Dashboard, Latest Shared Themes, and My Real-Time Airports Procedures
The following is an overview of each section within Sky Force as well as how to operate
the Latest Shared Themes and Real-Time Airports panels within the Dashboard.
Navigation
To navigate throughout Sky Force you will utilize the Navigation Bar located along the
left side of the application. To view what each icon represents, click the hamburger icon.
This expands the navigation bar (Fig 4.0) containing more information about each icon.
Figure 4.0 – Navigation Bar
AUTHORS NOTE: It is not required to expand the Navigation Bar to navigate.
PAGE 25Dashboard, Latest Shared Themes, and My Real-Time Airports Procedures
Dashboard
The Dashboard (Fig 4.1) allows a general jump off point to key areas of the application.
It also provides a quick highlight of valuable information about the application as well as
other facets to your flight simulation experience.
Figure 4.1 – Dashboard Window
System Status Messages
Global system status messages will be communicated with you through a variety of
status bars appearing at the top of the application. Each message will be accompanied
with a way to either disregard, close, accept or navigate for further communication.
Below are a couple examples of what you may encounter (Fig 4.1a).
Figure 4.1a – System Status Messages
PAGE 26Dashboard, Latest Shared Themes, and My Real-Time Airports Procedures
Weather or Not
This section of the Dashboard (Fig 4.1b) informs you if the Sky Force weather and sync
engines are currently communicating with your flight simulator, as well as the status of
your network if you are using Sky Force in a network configuration.
The VIEW MORE button navigates you to the new Synchronization System Status
screen included in the latest Technical Update 2. (See page 33)
Figure 4.1b – Weather & Sync Engine and Network Mode Status Bar
The following is a list of status messages and their meanings contained on this status bar:
PAGE 27Dashboard, Latest Shared Themes, and My Real-Time Airports Procedures
Buttons to Push
There are six primary areas of Sky Force that are represented by large buttons on the
Dashboard (Fig 4.1c). Clicking a button will bring you to that area.
Figure 4.1c – Dashboard Buttons
PAGE 28Dashboard, Latest Shared Themes, and My Real-Time Airports Procedures
Latest Themes and
Airport Weather
The panel on the right of the Dashboard provides a wealth of information.
This panel (Fig 4.1d) allows you access to the latest shared environment themes from
the community, as well as your favorite airports and a high-level view of their
weather conditions.
Figure 4.1d – Dashboard Panel
PAGE 29Dashboard, Latest Shared Themes, and My Real-Time Airports Procedures
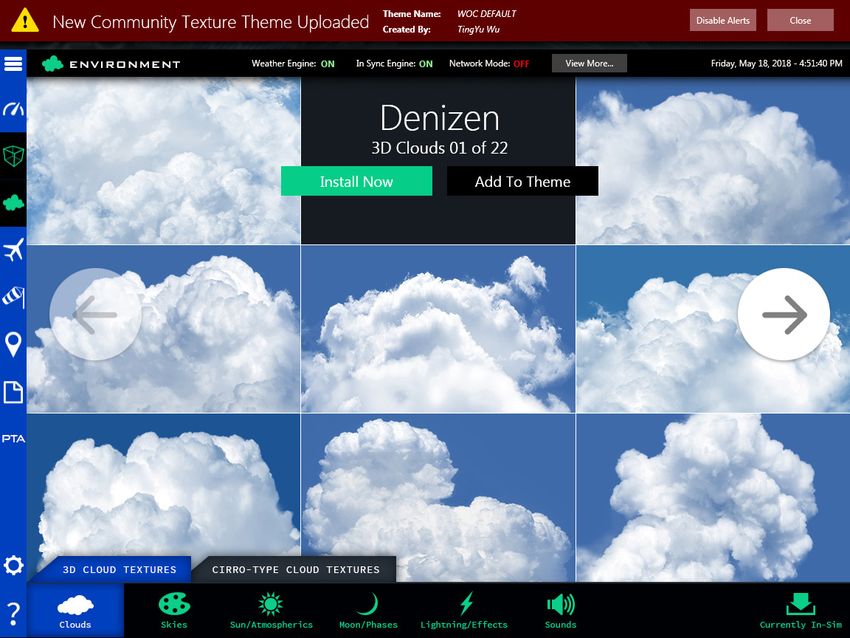
Latest and Greatest Themes
The Latest Shared Environment Themes panel (Fig 4.1e) displays all the latest created
community themes. You can view the details of them by clicking “VIEW”, or immediately
install that theme into your simulator by clicking “INSTALL”. This is a great way to change
up your environment for different looks.
Figure 4.1e – Latest Shared Environment Themes Panel
PAGE 30Dashboard, Latest Shared Themes, and My Real-Time Airports Procedures
Favorite Airports
This panel (Fig 4.1f) provides a snapshot view of the current weather conditions at your
favorite airports.
Figure 4.1f – My Real-time Airport Weather
View More Information or Delete
Each airport label provides the airport ICAO, current weather, and current temperature
(Fig 4.1g).
Figure 4.1g – Specific Airport Label
PAGE 31Dashboard, Latest Shared Themes, and My Real-Time Airports Procedures
Add a New Airport
Figure 4.1h – Add New Button
Step 1 - To add a new airport to the Real-time Airport Weather list, click the Add New
button (Fig 4.1h) at the bottom of the list.
Figure 4.1i – Add Favorite Airport Popup Window
Step 2 – Enter your favorite airport ICAO code and click “OK” to add it to the list. Once
complete you should see your new airport added to the list with its latest
weather conditions (Fig 4.1j).
Figure 4.1j – New Favorite Airport
PAGE 32Synchronization System Status and Controller
Synchronization System Status
THE SYNCHRONIZATION SYSTEM STATUS CONTROLLER (FIG 5.0) IS A NEW
FEATURE CONTAINED IN THE LATEST SKY FORCE TECHNICAL UPDATE 2 RELEASE.
We have streamlined all of the processes of controlling weather injection, cloud model
syncing, sim briefing status and network mode into one, easy-to-use area!
Figure 5.0 – Weather & Sync Engine and Network Mode Status
The following is a list of status messages and their meanings contained on
Synchronization System Status screen.
PAGE 33Synchronization System Status and Controller
The following is a general overview of each setting and their function provided on the
Synchronization System Status screen.
PAGE 343D Cloud Models Manager and Procedures
3D Cloud Models
The following is the procedure on how to control, install, and sync the 3D Cloud Models.
Figure 6.0 – 3D Cloud Models Button
Step 1 – Click the 3D Cloud Models button to enter the 3D Cloud Models manager.
(Fig 6.1)
Figure 6.1 – 3D Cloud Models Window
PAGE 353D Cloud Models Manager and Procedures
Figure 6.2 – 3D Cloud Models Window
HOW TO INSTALL 3D CLOUD MODELS
Step 1 – Select the 3D Model Options you want to install (Fig 6.2).
Step 2 – Select which additional 3D Model Add-ons you want to install.
Step 3 – Click “INSTALL NOW” to install the 3D Cloud Models.
Step 4 – Minimize Sky Force and start your flight simulator.
HOW TO ENABLE REAL-TIME SYNC MODE
Running the Real-Time Sync Mode WITH the REX weather engine
Step 1 – Enable Real-Time Sync Mode.
Step 2 – Make sure the REX weather engine is enabled via the settings window.
Step 3 – Start your flight simulator and minimize Sky Force.
Running the Real-Time Sync Mode WITHOUT the REX weather engine
Step 1 – Enable Real-Time Sync Mode.
Step 2 – Make sure the REX weather engine is disabled via the settings window.
Step 3 – Start your flight simulator and minimize Sky Force.
AUTHOR’S NOTE: The REX weather engine is not required to use real-time sync mode.
IMPORTANT NOTE: Sky Force must remain open during flight operations so that
Real-Time Sync Mode will operate.
PAGE 363D Cloud Models Manager and Procedures
IMPORTANT INFORMATION IMPORTANT NOTE: THE
ABOUT THE SKY FORCE REX WEATHER ENGINE IS
3D CLOUD MODEL NOT REQUIRED TO RUN TO
STRUCTURES ENJOY REAL-TIME MODEL
SYNC CAPABILITIES.
3D MODEL OPTIONS VS. 3D MODEL
ADD-ONS The real-time sync mode of Sky Force is more
Prior to Sky Force there were only four cloud tied to certain key weather conditions. For
types for flight simulation. With Sky Force we example, other 3rd-party weather engines
can cover most true world cloud classifications. may read a thunderstorm at an airport and
Most of these cloud types are automatically then display that via the flight simulator
installed into the simulator as a part of the Sky injected weather. To that weather engine a
Force core install. thunderstorm is a thunderstorm, nothing
more.
In addition, we have provided the option to
include additional variations of these cloud Utilizing real-time model data and our weather
types to be installed and synced. engine we can generate weather at a whole
new level. From this data, we can determine
The 3D Model options are required models the atmosphere’s stability. This allows Sky
to be installed, but you can select different Force to sync the correct 3D cloud models and
variations of each cloud section – except for weather to generate the proper thunderstorm
stratus type clouds. structures.
Incus/Supercell thunderstorms provides The beauty of Sky Force is that you can
a few more options to select from. still receive the benefit of close to real-
world cloud classification and key weather
You can experience high/low precipitation
elements even without the use of the REX
storms and/or visible rain shafts or visible wall
weather engine being enabled.
clouds. In addition, you can select a range of top
heights of storms. There are two levels: 45,000 to
For example, if the weather conditions
60,000 feet or 60,000 to 75,000 feet tops.
report a wall cloud or funnel cloud, then
Real-Time Sync Mode will automatically
3D Model Add-on clouds are clouds models
inject the models that support those
that can be added for additional variation
conditions while you are sim – no matter
and special weather phenomena such as roll
which weather engine you use.
clouds, funnel clouds, and tornadoes.
REAL-TIME SYNC MODE
Some 3rd-party weather add-ons require
additional textures to be synced to cover the
cloud classifications. But because they are not
able to change the models in real-time, you
will notice repeat after repeat of textures with
patterned cloud bottoms to the horizon. But
because of the new Sky Force cloud models,
this process is no longer necessary, as we are
able to cover all cloud specifications within the
new model structures.
PAGE 37Environment Procedures
Environment
The following is the procedure on how to operate the Environment section of Sky Force.
Figure 7.0 – Environment Button
Step 1 – Click the Environment Button on the dashboard window (Fig 7.0).
ENVIRONMENT CATEGORIES
Figure 7.1a – Environment Categories
Figure 7.1b – Environment Sub-Categories
Step 1 – In the Environment section, navigate to different categories via the buttons at
the bottom of the screen (Fig 7.1a).
Step 2 – Some categories contain sub-categories, separated by tabs. (Fig 7.1b).
PAGE 38Environment Procedures
NAVIGATING CATEGORY SETS
This is the procedure on how to navigate through environment category sets.
Figure 7.2 – Environment Category Sets
Step 1 – Use the left/right buttons to navigate through the different sets (Fig 7.2).
IMMEDIATE INSTALL
Step 1 – Once you have decided on a set to try, click “INSTALL NOW” to immediately
install this set into the flight simulator (Fig 7.2).
AUTHOR’S NOTE: A log file named installindividualtextures.txt can be found in the
main Sky Force folder. This file confirms if the file(s) were in fact installed.
PAGE 39Environment Procedures
ADD TO THEME
Creating an environmental texture theme is customary practice and easy to do.
Figure 7.2a – Theme Creation Complete Popup
Step 1 – Navigate through each Environmental category and sub categories. While
navigating through each set, click “ADD TO THEME” to add that set to a Theme
(Fig 7.2).
Step 2 – Once you have selected all the required sets for a theme, you will be alerted by
a popup window that the theme is complete (Fig 7.2a). Click “OK” to continue.
Figure 7.2b – Environmental Theme Name Popup
Step 3 – Once an environmental theme has been created you will be asked to give
the theme a name (Fig 7.2b). Enter a name for your theme as well as select a
category for your theme. Click “OK” to create your theme.
PAGE 40Environment Procedures
Figure 7.2c – Install Created Environment Texture Theme Popup
Step 4 – Once the theme has been created, you will be asked to install your theme into
your flight simulator. Click “OK” to install the theme or click “CANCEL” to cancel
this process (Fig 7.2c).
Figure 7.1d – Environment Texture Theme Install Success Popup
Step 5 – After the theme has been installed you will receive an install success popup.
Click “OK” to continue (Fig 7.2d).
PAGE 41Environment Procedures
ADDITIONAL INFORMATION ABOUT
ENVIRONMENTAL TEXTURE SETS
NO TEXTURES ARE THE SAME
In this current age of flight sim, we have seen an explosion of both freeware and
payware texture sets on the market.
However, the Environmental Texture Sets within Sky Force are unique and a huge
advancement over previous REX products and other 3rd-party products on the market.
SAME CLOUDS HARD TO FIND
Even with 3rd-party products currently on the market, it’s easy to notice repeated
textures on clouds, massive repeating cloud bottoms to the horizon, and the dreaded
upside down clouds.
Now, with the introduction of our new cloud model system we can double the texture
sheets on the cloud model structures in ONE scene. No 3rd-party program can do this.
Sure, they can add more ‘textures’, but not in a given scene. They are stuck with one
texture per scene.
This new technology allows us to cover all cloud classifications, and also dramatically
reduce the number of cloud repeats in a given scene. Also, this eliminates the upside
down clouds and repeated cloud bottoms!
VBLEND AND VAPOROUS SKIES
New techniques create a smoother, realistic and natural sky color blending at dawn
and dusk as well as newly improved visibility and fog. With VBlend have achieved more
realistic horizontal and vertical day, dawn and dusk fog generation and sky visibility
blending.
In addition, the sky is not always a palate of straight hues. This can be broken up by
different layers of water vapor that slightly condense, but not enough to form a cloud.
Thus, we have introduced into our skies the ability to model this vapor. This creates what
we call “Vaporous” skies.
PAGE 42Flight Center Procedures
Flight Center
The following are the procedures on how to utilize the Flight Center.
Figure 8.0 – Flight Center Button
Step 1 – Click the Flight Center button on the dashboard (Fig 8.0).
Figure 8.1 – Flight Center Main Window
You can either import a (LOCAL) flight plan or select a community shared flight plan
to import (Fig 8.1).
PAGE 43Flight Center Procedures
IMPORTING A FLIGHT PLAN
Figure 8.1a – Import A Flight Plan button
Step 1 – Click “Import a Flight Plan” (Fig 8.1a).
Figure 8.1b – Flight Plan Import Popup
Step 2 – A popup window will display (Fig 8.1b). Click “BROWSE” to select a standard
format flight plan to import (Fig 8.1.c). Once the flight plan has been selected it
will be imported into Sky Force and formatted for the application.
Figure 8.1c – Flight Plan Selection Popup
PAGE 44Flight Center Procedures
Figure 8.1d – Flight Plan Import Success Popup
Step 3 – O
nce the import of the flight plan is completed (Fig 8.1d), click “NEXT” to continue.
Figure 8.1e – Visual Flight Plan Window
Step 4 – (Optional) If you want to view a detailed overview of your imported flight plan with
its waypoints, click the “FLIGHT PLAN DETAILS” panel and click “MORE” (Fig 8.1e).
PAGE 45Flight Center Procedures
Figure 8.1f – Flight Plan Details Window
The Flight Plan Detail’s window offers a detailed view of the entire flight with its
waypoints (Fig 8.1f). You can view the temperatures and winds aloft from departing
airport, to each waypoint to your arrival airport.
In addition, (if available) you can view a complete forecasted view of the departure and
arrival airport weather conditions.
PAGE 46Flight Center Procedures
SHARE A FLIGHT PLAN WITH THE COMMUNITY
You might want to share your adventure with a friend or another virtual pilot.
Step 1 – Click “SHARE” on the Flight Plan Details window (Fig 8.1f).
Figure 8.1g – Share Flight Plan Enter Name Popup
Step 2 – Assign a name to the flight plan (Fig 8.1g). Click “NEXT” to continue.
Figure 8.1h – Shared Flight Plan Success Popup
Step 3 – Once the flight plan has been uploaded to the REX ‘cloud’, an alert will display
advising of a successful upload. Click “OK” to continue (Fig 8.1h).
PAGE 47Flight Center Procedures
IMPORTING A SHARED COMMUNITY FLIGHT PLAN
Figure 8.2 – Community Shared Flight Plan Button
Step 1 – Click “Community Shared Flight Plan” (Fig 8.2) to view the listed flight plans
available for import (Fig 8.2a).
Figure 8.2a – Community Shared Flight Plan Window
PAGE 48Flight Center Procedures
Figure 8.2b – Search Community Shared Flight Plans
Step 2 – (Optional) Enter a flight plan name, departure, or arrival airport into the search
field to search for a specific flight plan to import (Fig 8.2b). Click “SEARCH” to
activate your search.
Figure 8.2c – Flight Plan #
Step 3 – Click the Plan # to import the community flight plan into Sky Force (Fig 8.2c).
PAGE 49Weather Center Procedures
Weather Center
The following are the procedures on how to operate the Weather Center.
Figure 9.0 – Weather Center Button
Click the Weather Center button on the dashboard (Fig 9.0).
DETAILED VIEW OF THE WEATHER CONDITIONS
Figure 9.1 – Detailed Weather Conditions Window
Here you can view weather conditions for an airport, enter the interactive weather map,
view favorite airport weather, and search for more specific weather conditions (Fig 9.1).
PAGE 50Weather Center Procedures
VISUAL VIEW OF THE AIRPORTS WEATHER
Figure 9.1a – Interactive Map View of the Airports Weather
Click “MAP VIEW” to view the airport’s location and surrounding weather conditions on
the Interactive Map (Fig 9.1a).
SEARCH FOR SPECIFIC WEATHER CONDITIONS
Figure 9.1b – Search By Airport ICAO Code
PAGE 51Weather Center Procedures
Figure 9.1c – Airport ICAO Search Results
(Optional) You can search for weather at a specific airport ICAO or up to a radius of
400nm from an airport ICAO (Fig 9.1b). The results will include the main airport and list
of airports weather conditions (Fig 9.1c).
Figure 9.1d – Search By Specific Weather Condition
(Optional) You can also search by a specific weather condition by using the filters
provided by the Search Weather screen (Fig 9.1d).
PAGE 52Weather Center Procedures
Figure 9.1e – Specific Weather Search Results
When the search is complete, a list of airports reporting the specific weather conditions
will be displayed in a list (Fig 9.1e). Click the ICAO code to view the details of that
specific airport.
ADD CUSTOM AIRPORT WHEN AIRPORT NOT FOUND
In Technical Update 2 of Sky Force we have included a new feature within the Weather
Center to add a custom airport into the Sky Force database when an airport could not
be located (Fig 9.1f).
Step 1 – Click “Add” (Fig 9.1f)
Figure 9.1f – Add Custom Airport
PAGE 53Weather Center Procedures
Figure 9.1g – Add Custom Airport
Step 2 – Enter the ICAO code, airport name, and the latitude and longitude. Click “OK”
when complete or “Cancel” to cancel the operation.
PAGE 54Interactive Map Procedures
Interactive Map
The following are the procedures on how to operate the Interactive Map.
Figure 10.0 – Interactive Map Button
Step 1 – Click on the Interactive Map button on the dashboard (Fig 10.0).
WEATHER OVERLAYS
Figure 10.1 – Weather Overlay Buttons
To display different weather overlays on the Interactive Map, click the corresponding
button to initiate the overlay (Fig 10.1). The following is a list of the optional overlays
and their functions.
Each overlay can be turned on/off by clicking its corresponding button.
The “Precip” button is one overlay that can remain on with each other weather overlay.
PAGE 55Interactive Map Procedures
Figure 10.1a – Precip Overlay
PAGE 56Interactive Map Procedures
Figure 10.1b – Winds Overlay
Figure 10.1c – Temperature Overlay
PAGE 57Interactive Map Procedures
Figure 10.1d – PIREPS Overlay
Figure 10.1e – SIGMETS Overlay
PAGE 58Interactive Map Procedures
Figure 10.1f – METAR Overlay
MAP OVERLAYS
Figure 10.2 – Generic Map Overlays
The map overlays (Fig 10.2) help with point of reference within the map. These overlays
can be enabled or disabled and can coexist with weather and map overlays.
PAGE 59Interactive Map Procedures
Figure 10.2a – Airport and Major Road Overlays
MAP CONTROLS
Figure 10.3 – Map Controls
The Map Controls allow you to modify the mapping system for better viewing or
tracking needs.
PAGE 60Themes Procedures
Themes
Figure 11.0 – Themes Button
Step 1 – Click on the Themes button on the dashboard (Fig 11.0).
Figure 11.1 – Main My Saved Themes Window
PAGE 61Themes Procedures
HOW TO RANDOMLY CREATE A THEME
Step 1 – Click “RANDOM” on the top right side of the “My Saved Themes” window (Fig
11.1). This process will create a new “Temp” theme set.
AUTHOR’S NOTE: You may modify any theme texture set by clicking on a specific
image preview. This will take you to that texture set to make your changes.
Figure 11.1a – Theme Name Popup
Step 2 – Click “SAVE” and give your randomized theme a name (Fig 11.1). You will be
presented with a popup window to give your theme a name and assign it to a
category (Fig 11.1a). Click “OK” to continue.
Figure 11.1b – Install Created Theme Popup
Step 3 – (Optional) You will be presented with the option to install your theme or cancel.
Click “OK” to install and “CANCEL” to cancel the installation (Fig 11.1b).
PAGE 62Themes Procedures
FILTER MY SAVED THEMES BY CATEGORY
To filter your list of themes that you created, you can use the category filter provided at
the top of the screen.
Figure 11.2 – Filter your saved themes by category
Step 1 – Use the category drop down list to filter your My Saved Theme list (Fig 11.2).
FURTHER ACTIONS WITH YOUR SAVED THEMES
You can do several things to your “My Saved Themes”. You can view the contents, install
them into your simulator, share them with the community, or delete them.
Figure 11.2a – List of My Saved Themes
VIEW THE CONTENTS OF A SAVED THEME
Step 1 – Click “View” to view the contents of your saved theme (Fig 11.2a).
AUTHOR’S NOTE: You may modify any theme texture set by clicking on a specific
image preview. This will take you to that texture set to make your changes. Then
you will need to click the “SAVED” button to save your newly modified theme.
INSTALL YOUR SAVED THEME
Step 1 – Click “INSTALL” on the line of the theme you want to install into your flight
simulator (Fig 11.2a).
SHARE YOUR SAVED THEME WITH THE COMMUNITY
Step 1 – Click “SHARE” on the line of the theme you want share. This will allow you to
upload your theme to the REX ‘cloud’ to share with the community (Fig 11.2a).
PAGE 63Themes Procedures
DELETE YOUR SAVED THEME
Step 1 – Click “DELETE” on the line of the theme you want to delete from your saved
theme list (Fig 11.2a).
COMMUNITY SHARED THEMES
Sometimes you may not feel as creative and would like to install a friend’s or another
virtual pilot’s creation.
Figure 11.3 – Themes Tabs
Click on the “COMMUNITY SHARED THEMES” tab at the bottom of the Themes window
to access the various uploaded themes.
Figure 11.3a – Community Shared Themes Window
The Community Shared Themes window is very similar to the My Saved Themes window,
but with some differences (Fig 11.3a).
PAGE 64Themes Procedures
SEARCH FOR A COMMUNITY SHARED THEME
You can search for a community shared theme by name or theme creator.
Figure 11.3b – Search Function of Community Shared Themes
Step 1 – (Optional) Type in a theme name or creator name, then click “SEARCH”.
Step 2 – (Optional) OR use the drop-down to filter the list by category.
Figure 11.3c – View, Rate, and/or Install a Theme
VIEW THE CONTENTS OF A COMMUNITY THEME
Step 1 – Click “View” to display a preview of the community theme (Fig 11.3c).
AUTHOR’S NOTE: You may modify any theme texture set by clicking on a specific
image preview. This will take you to that texture set to make your changes. Then
you will need to click the “SAVE” button to save your newly modified theme.
RATE A COMMUNITY THEME
Step 1 – Click the appropriate star to rate a theme (Fig 11.3c).
INSTALL A COMMUNITY THEME
Step 1 – To install a community shared theme, click “INSTALL” (Fig 11.3c). This procedure
will immediately install the content of that theme into your simulator.
PAGING THROUGH MULTIPLE COMMUNITY THEMES
Figure 11.4 – Community Bank Paging or Filter
To page through community themes, use the left/right arrow buttons to navigate (Fig
11.4), or use the drop-down to access a bank of community themes immediately.
PAGE 65You can also read