NQuire 300 series customer information terminal - SDK handbook - Newland
←
→
Page content transcription
If your browser does not render page correctly, please read the page content below

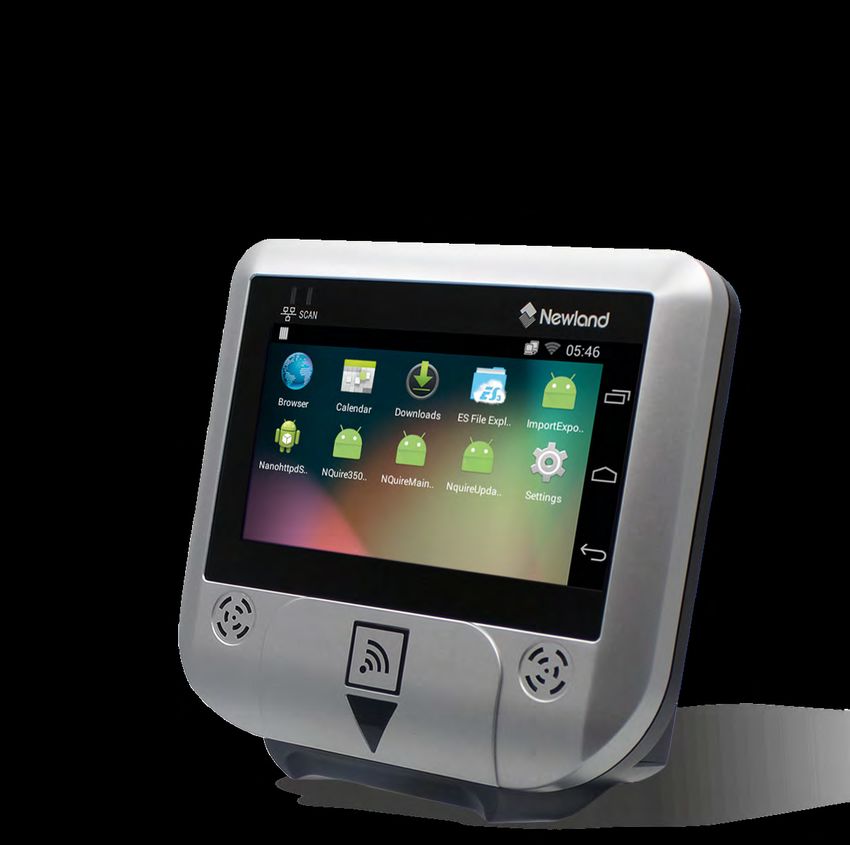
SCANNING MADE SIMPLE

NQuire 300 series
customer information terminal
SDK handbook
Revision History

  Version                      Description           Date
  V1.0.0    Initial release.                 June 7, 2017
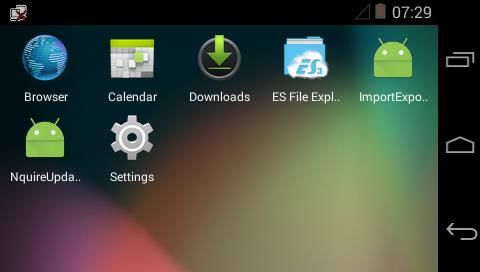
Table of Contents

Running ADB ............................................................................................................................................. 1
Barcoding Scanning .................................................................................................................................. 4
    1. Scan Barcode................................................................................................................................. 4
    2. Obtain Barcode Data ...................................................................................................................... 4
    3. Change the Scanner Settings ........................................................................................................ 6
    4. Symbology ID Number ................................................................................................................... 7
NFC/RFID ................................................................................................................................................. 8
    1. Basic Configurations ...................................................................................................................... 8
    2. Read/Write NDEF Tags .................................................................................................................. 9
        1) Write NDEF Data to an NFC Tag ............................................................................................ 9
        2) Read NDEF Data from an NFC Tag ...................................................................................... 12
    3. Read/Write Non-NDEF Tags ........................................................................................................ 13
        1) Directly Write to Mifare Ultralight page .................................................................................. 13
        2) Directly read Mifare Ultralight page ....................................................................................... 15
GPIO Programming ................................................................................................................................. 16
Launch Application on Boot ..................................................................................................................... 18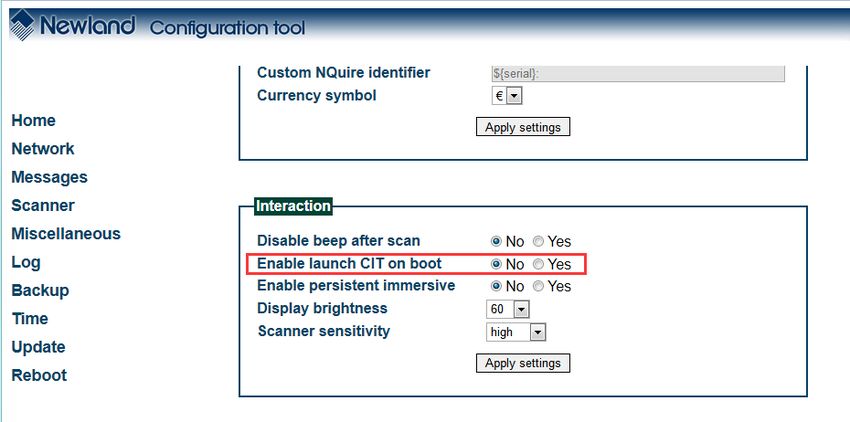
Running ADB
  ADB (Android Debug Bridge) tool can be used to debug apps developed for the NQuire300. The
  following describes how to run the ADB.

  1. Turn on the NQuire300. If it displays other screen other than the desktop, scan the Enter Setup
  barcode then Return to Desktop barcode to return to the desktop.

                 Enter Setup                                     Return to Desktop

  2. Tap “Settings” on the desktop.

  3. Tap “About tablet”.

                                                1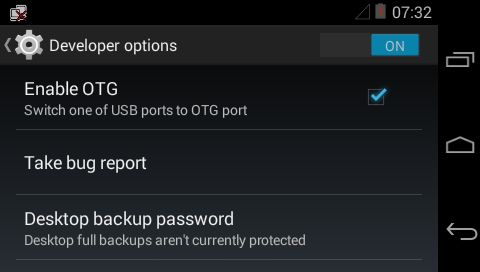
4. Tap “Build number” 7 times to become a developer.

5. Tap      to return to the previous screen.

6. Tap “Developer options”.

                                                2
7. Select “Enable OTG”.
8. Connect the USB Host/Slave port on the NQuire300 to PC with a USB cable.
USB Host/Slave port
9. Tap “OK”.
3Barcoding Scanning
The NQuire300’s ScanAPI is built based on standard Android broadcast mechanism, so there is no
need for additional SDKs. The NQuire300 application development environment is the same as
Android application development environment.
1. Scan Barcode
The NQuire300 will automatically activate when a barcode is detected and thus there is no extra
control required from your application for triggering a scan.
2. Obtain Barcode Data
There are three ways to obtain barcode data:
1. Fill in EditText directly: Output scanned data at the current cursor position in EditText.
2. Simulate keystroke: Output scanned data to keyboard buffer to simulate keyboard input and obtain
the data at the current cursor position in TextBox.
3. Output via API (default): Application obtains scanned data by registering a broadcast receiver and
listening for specific broadcast intents.
Broadcast: nlscan.action.SCANNER_RESULT
To obtain barcode data.
Extra scan result 1 parameter: SCAN_BARCODE1
Type: String
To obtain the data of the barcode scanned.
Extra scan state parameter: SCAN_STATE (value: fail or ok)
Type: String
To obtain the status of scan operation: Value = fail, operation failed
Value = ok, operation succeeded
Extra symbology ID number parameter: SCAN_BARCODE_TYPE
Type: int (-1 indicates failure to obtain symbology ID number)
To obtain the ID number of the barcode scanned (Refer to the “Symbology ID Number” section
to get the barcode type).
The following code example is an example of setting the scanner parameters (enable the Output via
API mode; do not add a line feed; turn Good Read LED on), scanning barcode and acquiring barcode
data and barcode type.
4private void registerBarcodeScannerBroadcastReceiver() {
//Enable the Output via API mode; do not add a line feed; turn Good Read LED on
Intent intent = new Intent ("ACTION_BAR_SCANCFG");
intent.putExtra("EXTRA_SCAN_MODE", 3);
intent.putExtra("EXTRA_SCAN_AUTOENT", 0);
intent.putExtra("EXTRA_SCAN_NOTY_LED", 1);
sendBroadcast(intent);
registerReceiver(barcodeScannerBroadcastReceiver, new IntentFilter("nlscan.action.SCANNER_RESULT"));
}
private void unregisterBarcodeScannerBroadcastReceiver() {
unregisterReceiver(barcodeScannerBroadcastReceiver);
}
private BroadcastReceiver barcodeScannerBroadcastReceiver = new BroadcastReceiver() {
@Override
public void onReceive(Context context, Intent intent) {
final String scanResult_1=intent.getStringExtra("SCAN_BARCODE1");
final String scanStatus = intent.getStringExtra("SCAN_STATE");
if (null==scanResult_1 || null==scanStatus
|| scanResult_1.isEmpty() || scanStatus.isEmpty()) {
return;
}
if ("ok".equals(scanStatus)) {
tvBarcode.setText(scanResult_1);
int codeId = intent.getIntExtra("SCAN_BARCODE_TYPE", -1);
tvCodeId.setText(""+codeId);
}
}
};
53. Change the Scanner Settings
Application can set one or more scanner parameters, such as enable/disable scanner, by sending to
the system the broadcast ACTION_BAR_SCANCFG which can contain up to 3 parameters.
Parameter Type Description (* indicates default)
Value = 0 Disable scanner
= 1 Enable scanner*
EXTRA_SCAN_POWER INT Note: When scanner is enabled, it will take some
time to initialize during which all scan requests will be
ignored.
Value = 1 Continuous mode
EXTRA_TRIG_MODE INT
=2 Normal mode*
Value = 1 Fill in EditText directly
EXTRA_SCAN_MODE INT = 2 Simulate keystroke
=3 Output via API*
Value = 0 Do not add a line feed*
EXTRA_SCAN_AUTOENT INT
= 1 Add a line feed
Value = 0 Turn Good Read beep off
EXTRA_SCAN_NOTY_SND INT
=1 Turn Good Read beep on*
Value = 0 Turn Good Read LED off
EXTRA_SCAN_NOTY_LED INT
=1 Turn Good Read LED on*
The following code example is an example of setting the scanner parameters (enable the Output via
API mode; do not add a line feed; turn Good Read LED on) and registering a broadcast receiver for
barcode scanning intent.
private void registerBarcodeScannerBroadcastReceiver() {
// Enable the Output via API mode, do not add a line feed, turn Good Read LED on
Intent intent = new Intent ("ACTION_BAR_SCANCFG");
intent.putExtra("EXTRA_SCAN_MODE", 3);
intent.putExtra("EXTRA_SCAN_AUTOENT", 0);
intent.putExtra("EXTRA_SCAN_NOTY_LED", 1);
sendBroadcast(intent);
registerReceiver(barcodeScannerBroadcastReceiver, new IntentFilter("nlscan.action.SCANNER_RESULT"));
}
64. Symbology ID Number
ID Number Symbology ID Number Symbology
2 CODE128 39 CODE49
3 UCCEAN128 40 CODE16K
4 AIM128 41 HIBC128
5 GS1_128 42 HIBC39
6 ISBT128 43 RSSFAMILY
7 EAN8 256 PDF417
8 EAN13 257 MICROPDF
9 UPCE 258 QRCODE
10 UPCA 259 MICROQR
11 ISBN 260 AZTEC
12 ISSN 261 DATAMATRIX
13 CODE39 262 MAXICODE
14 CODE93 263 CSCODE
15 93I 264 GRIDMATRIX
16 CODABAR 265 EARMARK
17 ITF 266 VERICODE
18 ITF6 267 CCA
19 ITF14 268 CCB
20 DPLEITCODE 269 CCC
21 DPIDENTCODE 270 COMPOSITE
22 CHNPOST25 271 HIBCAZT
23 STANDARD25 272 HIBCDM
23 IATA25 273 HIBCMICROPDF
24 MATRIX25 274 HIBCQR
25 INDUSTRIAL25 512 POSTNET
26 COOP25 513 ONECODE
27 CODE11 514 RM4SCC
28 MSIPLESSEY 515 PLANET
29 PLESSEY 516 KIX
30 RSS14 517 APCUSTOM
31 RSSLIMITED 518 APREDIRECT
32 RSSEXPANDED 519 APREPLYPAID
33 TELEPEN 520 APROUTING
34 CHANNELCODE 2049 ZZCODE
35 CODE32 2050 EAN413
36 CODEZ 2051 EAN414
37 CODABLOCKF 2052 EAN419
38 CODABLOCKA
7NFC/RFID
The NQuire300 is equipped with NFC module. Android NFC API (android.nfc) can be used to
develop NFC/RFID applications. The NFC-enabled NQuire300 supports three modes of operation:
reader/writer mode, Card Emulation mode, and P2P mode. For more information, please visit the
website: https://developer.android.com/guide/topics/connectivity/nfc/index.html. The following gives a
brief description of Android application development of NFC reader/writer mode.
1. Basic Configurations
Add permission to access NFC hardware in the Android manifest file:
Build an activity for receiving NFC tag data in the Android manifest file:
First, configure activity properties by specifying the launchmode as “singleTop” to avoid starting the
same activity multiple times in a row.
Second, use NfcBaseActivity to initialize NFC before certain NFC operations and use
NfcAdapter.enableForegroundDispatch method to bring your application to foreground to allow
your application to have priority over other applications when an NFC tag is scanned.
public class NfcBaseActivity extends AppCompatActivity {
private final String LOGCAT_TAG = getClass().getSimpleName();
private NfcAdapter mNfcAdapter = null;
private PendingIntent mNfcPendingIntent = null;
@Override
protected void onCreate(Bundle savedInstanceState) {
super.onCreate(savedInstanceState);
mNfcAdapter = NfcAdapter.getDefaultAdapter(this);
if (mNfcAdapter!=null) {
Intent nfcIntent = new Intent(this, getClass());
// If set, the activity will not be launched if it is already running at the top of the history stack.
nfcIntent.addFlags(Intent.FLAG_ACTIVITY_SINGLE_TOP);
mNfcPendingIntent = PendingIntent.getActivity(this, 0, nfcIntent, 0);
} else {
Log.e(LOGCAT_TAG, "no NFC adapter exists");
8}
}
@Override
protected void onResume() {
super.onResume();
if (mNfcAdapter!=null && mNfcPendingIntent!=null) {
mNfcAdapter.enableForegroundDispatch(this, mNfcPendingIntent, null, null);
}
}
@Override
protected void onPause() {
super.onPause();
if (mNfcAdapter != null) {
mNfcAdapter.disableForegroundDispatch(this);
}
}
}
2. Read/Write NDEF Tags
NFC Data Exchange Format (NDEF) is a standardized data format specification by the NFC Forum.
NDEF data can be stored on many types of tags (such as NXP Mifare Ultralight tags) and exchanged
between NFC-enabled devices.
1) Write NDEF Data to an NFC Tag
Build an activity that inherits from NfcBaseActivity above. When an NFC tag is detected, system will
call onNewIntent() and obtain the card number, and then write a custom NDEF message in binary
representation to the tag. If the tag is not NDEF formatted, then it needs to be formatted. It is
recommended not to perform write operations on the main thread as they may get stuck. The code
example below is to perform write operations on a dedicated thread for NFC operations.
@Override
protected void onNewIntent(Intent intent) {
super.onNewIntent(intent);
final Tag tag = intent.getParcelableExtra(NfcAdapter.EXTRA_TAG);
if (tag!=null) {
String cardNr = byteArrayToHexString(tag.getId());
Log.d(LOGCAT_TAG, "card Number:"+cardNr);
9doWriteNdefTest(tag);
}
}
private void doWriteNdefTest(final Tag tag) {
// Connecting, writing may block. Must not be called from the main application thread.
runOnNfcThread(new Runnable() {
@Override
public void run() {
final boolean writeRet = writeNdef(tag);
runOnUiThread(new Runnable() {
@Override
public void run() {
if (writeRet) {
Toast.makeText(MainActivity.this, "Writing is completed successfully",
Toast.LENGTH_SHORT).show();
} else {
Toast.makeText(MainActivity.this, "Failed to write this tag", Toast.LENGTH_SHORT).show();
}
}
});
}
});
}
private boolean formatNdef(Tag tag, NdefMessage ndefMessage) {
boolean ret = false;
NdefFormatable ndefFormatable = NdefFormatable.get(tag);
if (ndefFormatable!=null) {
try {
ndefFormatable.connect();
ndefFormatable.format(ndefMessage);
ret = true;
} catch (IOException | FormatException e) {
e.printStackTrace();
} finally {
try {
ndefFormatable.close();
} catch (IOException e) {
e.printStackTrace();
}
}
} else {
Log.e(LOGCAT_TAG, "can not format this card");
10}
return ret;
}
private boolean writeNdef(Tag tag) {
boolean ret = false;
byte[] ndefMsgPayloadBytes = "Hello NQuire300!".getBytes();
NdefMessage ndefMessage = new NdefMessage(new NdefRecord[]{NdefRecord.createExternal("nlscan",
"teststring", ndefMsgPayloadBytes)});
Ndef ndef = Ndef.get(tag);
if (ndef==null) {
Log.d(LOGCAT_TAG, "Invalid NDEF card, format it");
ret = formatNdef(tag, ndefMessage);
} else {
try {
ndef.connect();
if (ndef.isConnected() && ndef.isWritable()) {
if (ndefMessage.getByteArrayLength()2) Read NDEF Data from an NFC Tag
Read the written NDEF message on the dedicated thread and display the results on the main thread.
@Override
protected void onNewIntent(Intent intent) {
super.onNewIntent(intent);
final Tag tag = intent.getParcelableExtra(NfcAdapter.EXTRA_TAG);
if (tag!=null) {
String cardNr = byteArrayToHexString(tag.getId());
Log.d(LOGCAT_TAG, "card Number:"+cardNr);
//doWriteNdefTest(tag);
doReadNdefTest(tag);
}
}
private void doReadNdefTest(final Tag tag) {
runOnNfcThread(new Runnable() {
@Override
public void run() {
Ndef ndef = Ndef.get(tag);
if (ndef==null) {
Log.e(LOGCAT_TAG, "Invalid NDEF card. Can not test read.");
return;
}
try {
ndef.connect();
NdefMessage ndefMessage = ndef.getNdefMessage();
if (ndefMessage==null) {
Log.e(LOGCAT_TAG, "No NDEF message in the tag.");
return;
}
NdefRecord record = ndefMessage.getRecords()[0];
if (record.getTnf()!=NdefRecord.TNF_EXTERNAL_TYPE) {
Log.e(LOGCAT_TAG, "No test record in the tag.");
return;
}
final String domainType = new String(record.getType());
final String payload = new String(record.getPayload());
runOnUiThread(new Runnable() {
@Override
public void run() {
tvNfcMsg.setText(domainType+"\n"+payload);
12}
});
} catch (IOException | FormatException e) {
e.printStackTrace();
} finally {
try {
ndef.close();
} catch (IOException e) {
e.printStackTrace();
}
}
}
});
}
3. Read/Write Non-NDEF Tags
Android also provides APIs for reading/writing non-NDEF tags directly. You may use these APIs to
read/write tags in your desired format. The following shows an example of reading/writing an Mifare
Ultralight tag.
1) Directly Write to Mifare Ultralight page
The first 4 pages of Mifare Ultralight are for OTP, manufacturer data, and locking bits. The following
example shows how to write data to its next 4 pages on the dedicated thread and display the results
on the main thread.
@Override
protected void onNewIntent(Intent intent) {
super.onNewIntent(intent);
final Tag tag = intent.getParcelableExtra(NfcAdapter.EXTRA_TAG);
if (tag!=null) {
String cardNr = byteArrayToHexString(tag.getId());
Log.d(LOGCAT_TAG, "card Number:"+cardNr);
doMifareUltralightWriteTest(tag);
}
}
private void doMifareUltralightWriteTest(final Tag tag) {
runOnNfcThread(new Runnable() {
@Override
public void run() {
boolean testResult = false;
MifareUltralight mifareUltralight = MifareUltralight.get(tag);
if (mifareUltralight==null) {
Log.e(LOGCAT_TAG, "Not MifareUltralight.");
13return;
}
try {
mifareUltralight.connect();
// The first 4 block are for the OTP area. We test the next 3 pages.
mifareUltralight.writePage(4, "NLNQ".getBytes());
mifareUltralight.writePage(5, "TEST".getBytes());
mifareUltralight.writePage(6, "1234".getBytes());
mifareUltralight.writePage(7, "5678".getBytes());
testResult = true;
} catch (IOException e) {
e.printStackTrace();
} finally {
try {
mifareUltralight.close();
} catch (IOException e) {
e.printStackTrace();
}
}
final boolean isWritingOk = testResult;
runOnUiThread(new Runnable() {
@Override
public void run() {
if (isWritingOk) {
Toast.makeText(MainActivity.this, "Pages writing is OK", Toast.LENGTH_SHORT).show();
} else {
Toast.makeText(MainActivity.this, "Failed to write pages", Toast.LENGTH_SHORT).show();
}
}
});
}
});
}
142) Directly read Mifare Ultralight page
MifareUltralight.readPages can read 4 pages in one go. Perform read operations on the dedicated
thread and display the results on the main thread.
@Override
protected void onNewIntent(Intent intent) {
super.onNewIntent(intent);
final Tag tag = intent.getParcelableExtra(NfcAdapter.EXTRA_TAG);
if (tag!=null) {
String cardNr = byteArrayToHexString(tag.getId());
Log.d(LOGCAT_TAG, "card Number:"+cardNr);
doMifareUltralightReadTest(tag);
}
}
private void doMifareUltralightReadTest(final Tag tag) {
runOnNfcThread(new Runnable() {
@Override
public void run() {
MifareUltralight mifareUltralight = MifareUltralight.get(tag);
if (mifareUltralight==null) {
Log.e(LOGCAT_TAG, "Not MifareUltralight.");
return;
}
try {
mifareUltralight.connect();
// readPages will read 4 pages
final String data1 = new String(mifareUltralight.readPages(4));
runOnUiThread(new Runnable() {
@Override
public void run() {
tvNfcMsg.setText(data1);
}
});
} catch (IOException e) {
e.printStackTrace();
} finally {
try {
mifareUltralight.close();
} catch (IOException e) {
e.printStackTrace();
}
}
}
});
}
15GPIO Programming
The NQuire300 has 8 GPIO pins (4 for input, 4 for output). Application can read and control those
pins as per actual needs.
The following code example shows how to read/write and set the GPIO pins.
/**
* Read and write nquire gpio
*/
public class GpioUtils {
public static final String OUTPIN1 = "/sys/class/gpio/gpio163/value";
public static final String OUTPIN2 = "/sys/class/gpio/gpio165/value";
public static final String INPIN1 = "/sys/class/switch/INPIN1/state";
public static final String INPIN2 = "/sys/class/switch/INPIN2/state";
public static boolean setOutPinHigh(String pin, boolean high) {
FileOutputStream out = null;
boolean ret = false;
try {
out = new FileOutputStream(pin);
out.write(high ? '1' : '0');
ret = true;
} catch (IOException e) {
e.printStackTrace();
} finally {
if (out != null) {
try {
out.close();
} catch (IOException e) {
16e.printStackTrace();
}
}
}
return ret;
}
public static boolean isInPinHigh(String pin) throws Exception {
FileInputStream in = null;
boolean ret = false;
try {
in = new FileInputStream(pin);
int value = in.read();
switch (value) {
case '1':
ret = true;
break;
case '0':
ret = false;
break;
default:
throw new Exception(pin + ", invalid value: " + value);
}
} finally {
if (in != null) {
try {
in.close();
} catch (IOException e) {
e.printStackTrace();
}
}
}
return ret;
}
}
17Launch Application on Boot
By default, the NQuire300 start NQuire200-compatible CIT at startup. If you want to run your own
application instead of CIT at startup, follow the steps described below.
1. Open NQuire Configuration tool homepage in a web browser. Then click “Miscellaneous” in the
menu on the left pane and select “No” for the “Enable launch CIT on boot” item.
2. Create a new class MyReceiver. In its onReceive() method you can start your desired app
component or activity. To launch the activity as a main application entry, you need to add the flags
Intent.FLAG_ACTIVITY_NEW_TASK.
public class MyReceiver extends BroadcastReceiver {
public MyReceiver() {
}
@Override
public void onReceive(Context context, Intent intent) {
Intent activityIntent = new Intent(context, MainActivity.class);
activityIntent.addFlags(Intent.FLAG_ACTIVITY_NEW_TASK);
context.startActivity(activityIntent);
}
}
183. Add the android.permission.RECEIVE_BOOT_COMPLETED permission to the
AndroidManifest.xml and register a broadcast receiver listening for the boot complete event in the
AndroidManifest.xml.
19SCANNING MADE SIMPLE
Newland EMEA HQ D-A-C-H United Kingdom France Russia
+31 (0) 345 87 00 33 +49 (0) 6182 82916-16 +44 (0) 1442 212020 +39 (0) 345 8804096 +31 (0) 345 87 00 33
info@newland-id.com info@newland-id.de sales@newland-id.co.uk france@newland-id.com russia@newland-id.com
newland-id.com
Benelux South Africa Ibérica Middle East
+31 (0) 345 87 00 33 Gauteng: +27 (0) 11 553 8010 +34 (0) 93 303 74 66 +39 (0) 345 8804096
benelux@newland-id.com Cape Town: +27 (0) 21 9140819 info@newland-id.es middleeast@newland-id.com
info@newland-id.co.za
Italy Turkey Nordic & Baltic Iran
+39 (0) 342 0562227 +90 (0) 544 538 40 49 +46 (0) 70 88 47 767 +90 (0) 544 538 40 49
italy@newland-id.com turkey@newland-id.com nordic@newland-id.com iran@newland-id.comYou can also read