Planting instructions - AUTUMN 2021 - sarahraven.com - Sarah Raven
←
→
Page content transcription
If your browser does not render page correctly, please read the page content below
planting
instructions
AUTUMN 2021
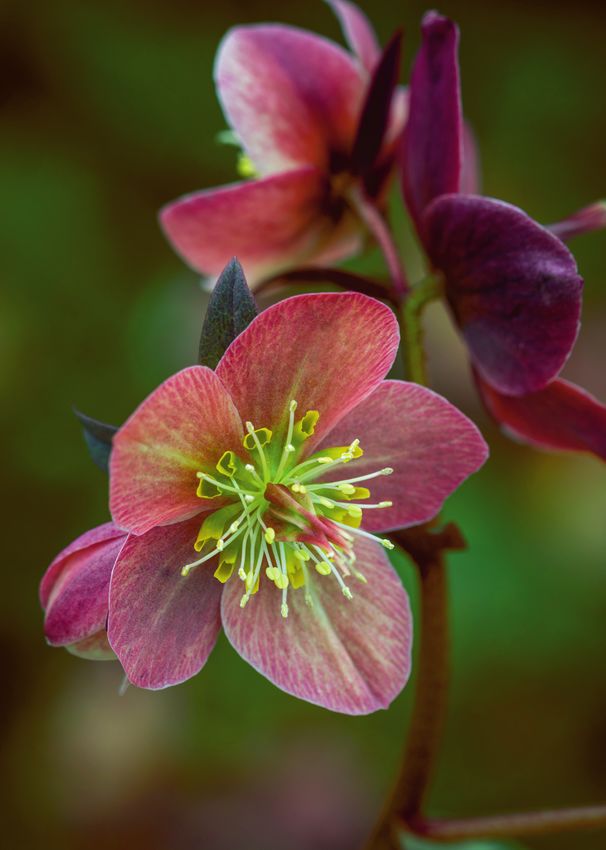
Helleborus x
ballardiae ‘Merlin’ sarahraven.com
sarahraven.com
SR AUTUMN planting guide 2021_FINAL.indd 1 30/07/2021 09:52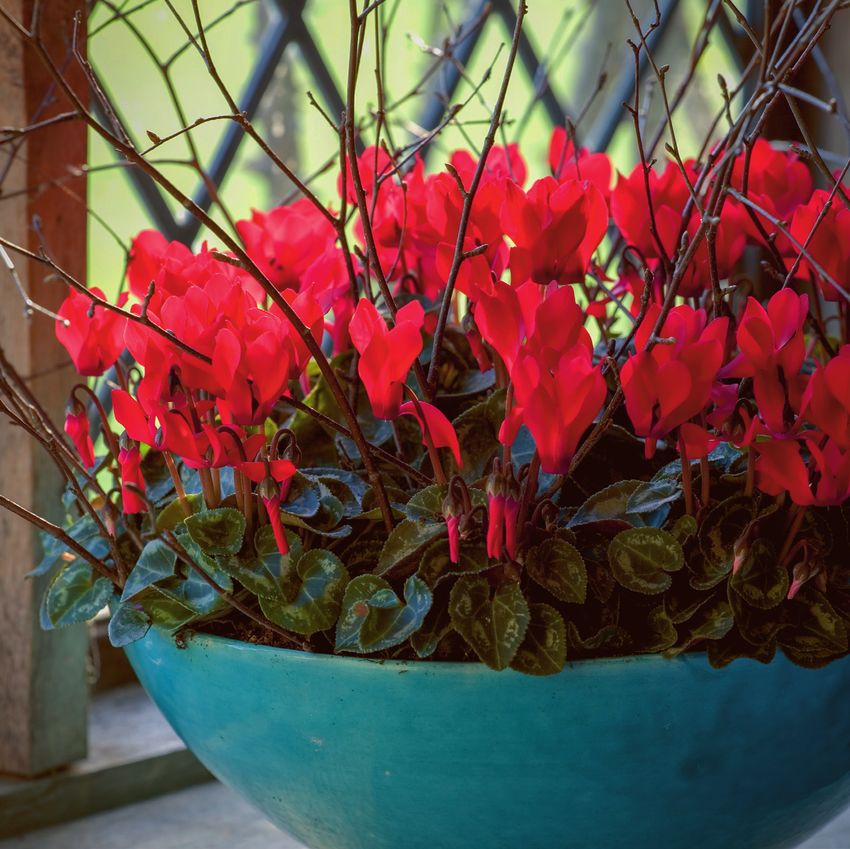
Here are the instructions you will need for planting
                                                and caring for your seedlings, plants, roses, shrubs and
                                                climbers. For more information and to watch my videos,
                                                please visit our website.
                                                Happy gardening,

                                                Sign up to our emails at sarahraven.com for
                                                more advice, offers and first looks at new ranges

    contents
    3   Types of plant                       8     Roses                         15     Herb seedlings
    4-5 Potting on &                         9     Climbers                             & plants
        planting out                         10-11 Container plants              16     Wildflower Plugs
    6   Peonies & wallflowers                 12-14 Kitchen garden plants
    7   Shrubs                               14-15 Veg & salad seedlings

    OUR PLANTS are all carefully grown to arrive in the best possible condition for potting
    on or planting. See below for a guide to our plant sizes or visit our website.

        A                          B

    Seedlings and rooted cuttings (A)
    Jumbo seedlings and young plants (B)                  9cm to 3L pots                Bare roots

    WHEN YOUR PLANTS ARRIVE carefully remove the packaging as soon as possible and check to see
    if the compost is still moist. If it feels dry, water gently or sit the plants in a bucket (or wheelbarrow) of
                                                                                                                      Photography by Jonathan Buckley ©

    water for 20 minutes. Let the water drain and follow the growing instructions in this leaflet as soon as
    you can. Plants can usually be left for up to 3 days.
    Bare root plants are shipped as dormant plants without pots and will usually arrive in bags as a mass
    of roots with very little top growth and a tiny amount of loose soil to protect the root. If you need to
    store them for a very short period before planting, remove all packaging and sit the roots in a container,
    gently covering with loose, damp compost. They can be left for a few days like this in a garage or
    garden shed but it is important to plant them as soon as possible as they are vulnerable to drying out.

    2 For our exclusive plants and seedlings see sarahraven.com

SR AUTUMN planting guide 2021_FINAL.indd 2                                                                30/07/2021 09:53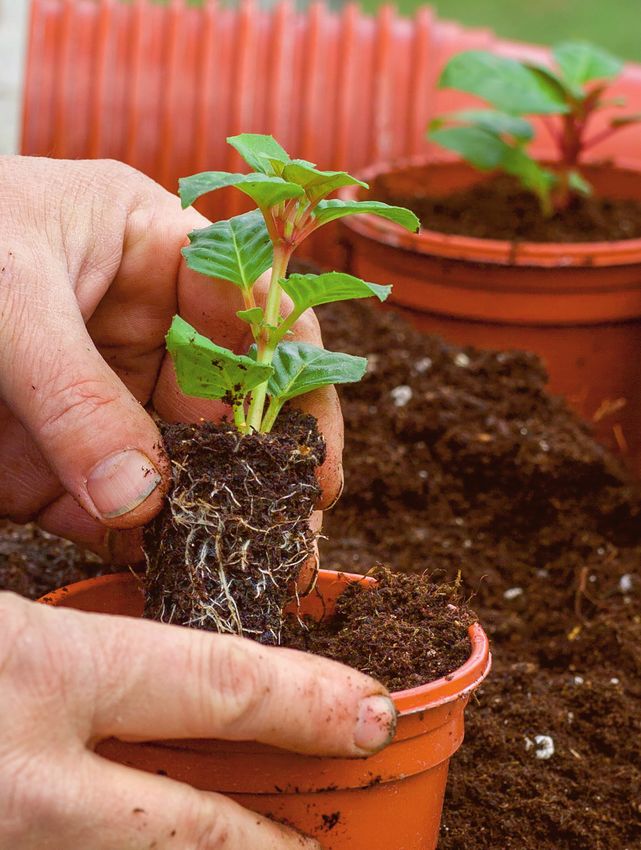
understanding types of plants

                                       PLANT DORMANCY
                                       In the autumn or early spring, some of our plants will be despatched whilst entering or in a dormant
                                       state and there may be little or no sign of growth above the soil level. The plants are healthy and at
                                       their prime for planting. Once in the ground they will establish a strong root system before new growth
                                       appears in spring.

                                       Understanding types of plants
                                       Before you start planting, especially if you are new to gardening, understanding the
                                       different types of plants will help you get to grips with how to care for them, so you can
                                       get the most from them and your garden. Here are some handy definitions:
                                       ANNUALS will root, form leaves, flower, set seed and die all within the space of a year. They are defined
                                       as hardy or half-hardy:
                                       Hardy annuals can withstand the frosts and are often planted in the autumn or early spring. They are
                                       easy to grow in our northern climate, where they form the backbone of vegetable and cutting gardens;
                                       without them, your patch would be half empty.
                                       Half-hardy annuals cannot withstand winter wet and cold, and will be zapped by the frosts in the
                                       autumn. Grow your seedlings on in a light, frost-free place, protecting them under cover until the frosts
                                       are over. You’ll then have decent-sized plants ready to plant out in the garden at the end of spring
                                       where they will grow until the frosts in autumn.

                                       BIENNIALS & SHORT-LIVED PERENNIALS
                                       Biennials are plants whose lifecycle spans two years, so they produce roots and leaves in the first year
                                       and then flower, set seed and die in their second year. If you are lucky, you may find they self-seed.
                                       Short-lived perennials are plants that have a lifespan of 3-5 years. Although they may not live forever,
                                       short-lived perennials still have an advantage over their longer-living cousins as they generally bloom
                                       profusely the first year you plant them, which is certainly not the case of most long-lived perennials,
                                       most of which take at least 3 years before giving their best show.

                                       PERENNIALS live substantially longer than 2 years and if they can survive frosts (i.e. are ‘hardy’) will
                                       remain in the garden from one year to the next. They make a brilliant investment and addition to your
                                       patch. Herbaceous perennials are those with foliage which dies back to the ground in winter; many
                                       other perennials are evergreen.
                                       Tender Perennials have a long and prolific flowering period, usually from June until the first frosts,
                                       which more than compensates for the extra care they require.
                                       Being tender, they will begin to suffer when exposed to temperatures below 1-5°C and will not survive
                                       being frozen. To avoid frosts many plants can simply be mulched with compost, manure or bark
                                       chippings to protect the roots and basal buds from cold temperatures. Alternatively, they may need to
                                       be lifted and brought indoors during the winter. If leaving outdoors, it is essential that the soil has good
Photography by Jonathan Buckley ©

                                       drainage as winter wet is often the biggest threat to tender plants.
                                       Some tender perennials are best grown and treated as annuals, for example argyranthemums, which
                                       can be propagated each year from cuttings. In this way, you can keep your favourite plants from year to
                                       year without losing vigour and flower power.

                                                                                                                      sarahraven.com 3

                                    SR AUTUMN planting guide 2021_FINAL.indd 3                                                             30/07/2021 09:53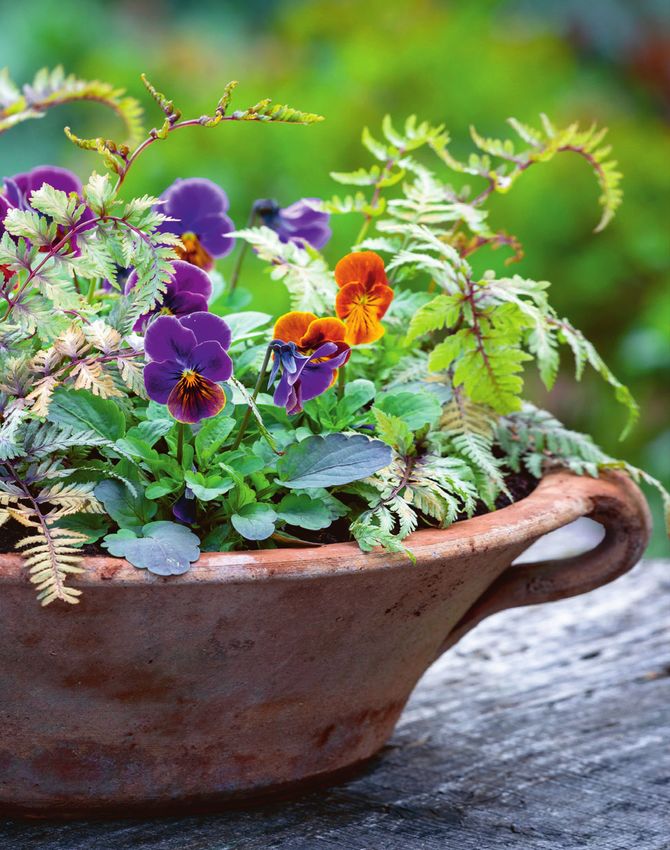
potting on and planting out

    SEEDLINGS & ROOTED CUTTINGS
    These are small, well-rooted plants grown from
    seed or cuttings which are ready to be potted on
    following the step-by-step guide below. They will
    be ready to go into the garden once you see new
    growth, the roots have filled the pot and weather
    conditions are suitable. Exceptions: For veg, salad
    and herb seedlings see p.14-15; for wildflower
    plugs see p.16.

    Potting on seedlings and rooted cuttings
    1. Prepare the potting mixture using a good
       quality, peat-free, multipurpose compost
       (see our website), which you can mix with
       a little perlite or horticultural grit to ensure
       good drainage.
    2. Fill a 7-9cm pot with the potting mix and firm
       down gently. Use your fingers or a dibber
       to make a hole in the middle, slightly deeper
       than the seedling. Pop the plant into the hole,
       handling it carefully to make sure you don’t
       damage it.
    3. Check that the roots are fully covered and give the pot a tap to settle down the soil.
    4. Water well and place in a greenhouse, cold frame or suitably sheltered spot outside to grow on.
    5. Once the plant shows signs of strong top growth, it is ready to plant out in its final position following
       the guide on p.5.

    JUMBO SEEDLINGS & YOUNG PLANTS
    These are well-established seedlings, grown from seed, or young plants grown from cuttings or tissue
    culture. They can be potted on (as above) into 1 or 2 litre pots and grown on ready for planting out. As
    the roots systems are large they can also be planted directly into containers (see p.10) for winter and
    spring pot displays or, if weather conditions are ideal, directly into very well-prepared, moist, warm soil
    (follow the step-by-step planting guide on p.5.)

    CONTAINER-GROWN PLANTS
    These are mature, garden-ready biennial and perennial plants, sent out in 9cm pots or larger. They have
    well-established root systems and can be planted straight into the garden following the step-by-step
    guide on p.5. Young perennials in 9cm pots planted into warm, moist soil in autumn, establish extremely
    well, forming large plants the following spring. If the soil is very wet or frozen we would recommend
    delaying planting until conditions improve as this will help get your plants off to the best possible start.
    For shrubs and climbers see p.7-9; for container-grown fruit and herbs see p.12-15.

    BARE ROOT PERENNIALS
    You can plant these straight outside (see p. 5) but if soil and weather conditions don’t allow, pot them
    on and plant out once signs of top growth appear and the roots have spread to fill the pot. Exceptions:
    for bare root strawberries and rhubarb crowns, please refer to page 13.

    4 See sarahraven.com for our full range of plants, bulbs and seedlings

SR AUTUMN planting guide 2021_FINAL.indd 4                                                            30/07/2021 09:53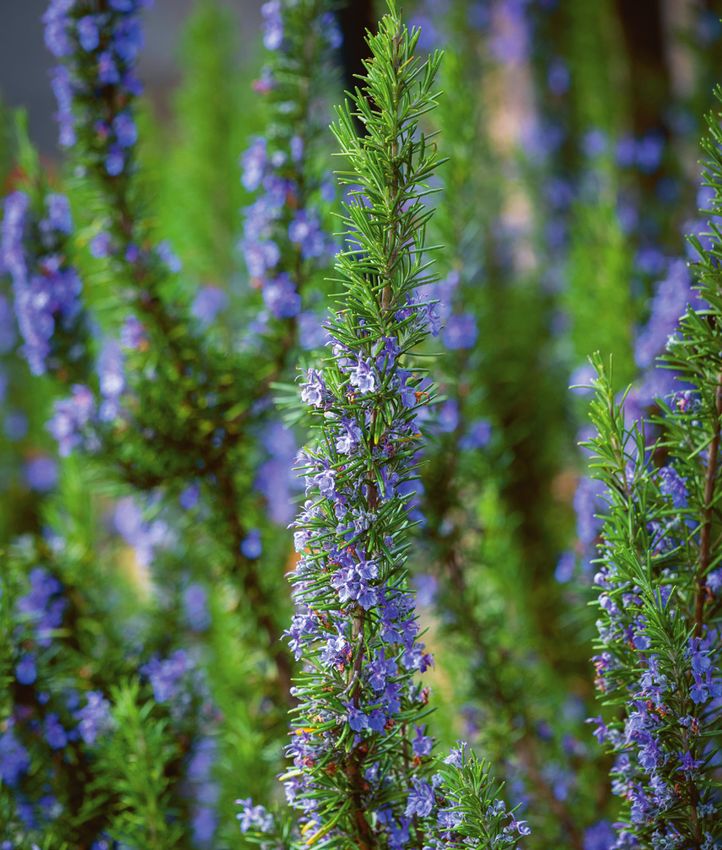
potting on and planting out

   Potting on bare root perennials
   1. Give the plants a soak in a bucket of water for 20 minutes while preparing the potting mixture. Use a
      good quality, peat-free, multipurpose compost (see our website), which you can mix with a little grit
      or perlite to ensure good drainage.
   2. Choose a pot slightly larger than the root mass and partly fill it with the potting mix.
   3. Position the plant in the centre of the pot, holding the base of the crown (where the roots meet the
      top growth) just below the top of the pot and carefully fill around the roots. You may need to tap
      the pot now and then to settle the soil. NB: For peonies the ‘eyes’ or resting buds, should be no more
      than 3-5cm (1-2in) below the surface.
   4. Water well and place in a cold frame or sheltered spot outside to grow on.

   PLANTING OUT: STEP-BY-STEP GUIDE
   Soil and site Full sun or light dappled shade is usually ideal for most of our plants, with a soil that is
   moist but well-drained. To check ideal growing conditions for each plant, visit the product pages on our
   website, our online growing guides or refer to the Autumn 2021 catalogue.
   Preparing the ground (ideally do this at least 2 weeks before planting)
   1. Dig over the area, incorporating garden compost or other well-rotted organic material (e.g. Orgro
      Concentrated Manure, see website) to help retain moisture, this is especially important on light,
      sandy soils. If you garden on poorly drained clay soil, add 5-6mm grit, or sharp sand to improve
      drainage. Remove any weeds as you dig.
   2. Once cultivated, try not to tread on the soil directly. Stand on a plank to distribute your weight
      evenly over a larger area to avoid compacting the soil too much.
   3. Just prior to planting, rake the soil to a tilth. Ideally choose a dry day about 24 hours after rain when
      lumps of soil will break apart easily. Rake in one direction, breaking up any lumps bigger than a plum
      and removing any large stones. Once you have a fine crumbly texture or tilth, you are ready to plant.
   Planting out
   1. When you have chosen the best planting site for your plants, mark out the position with a plant
      label or empty pot – to make sure you space them correctly (see our website for height and spacing
      information).
   2. Water well before planting or soak plants in a bucket (or wheelbarrow) full of water for 20 minutes if
      they seem particularly dry.
   3. Dig a generous planting hole, deep and wide enough so that the roots will be covered but the
      crown of the plant (i.e. where the roots meet the top growth) sits flush with the soil surface. NB: For
      peonies make sure you don’t plant too deep. The ‘eyes’ (or buds) should be no more than 3-5cm
      (1-2in) below the soil surface.
   4. To aid establishment you can sprinkle Rootgrow – a naturally occurring mycorrhizal fungi into the
      base of the planting hole before planting (see website).
   5. Position the plant in the centre of the planting hole, backfill with soil and firm in gently.
   6. Water well, this will settle the soil so you may need to add a little extra if the level drops too much.
   7. For most plants it’s a good idea to apply a layer of organic mulch – garden compost, leaf mould or
      bark chippings – around the base of the plant to help retain moisture and suppress weeds but it’s
      best to avoid mulching peonies as this will gradually bury the crown.
   8. Keep well-watered if the weather is dry until plants get established. For information on pruning,
      dividing and after planting care visit sarahraven.com.
                                                                                    sarahraven.com 5

SR AUTUMN planting guide 2021_FINAL.indd 5                                                              30/07/2021 09:53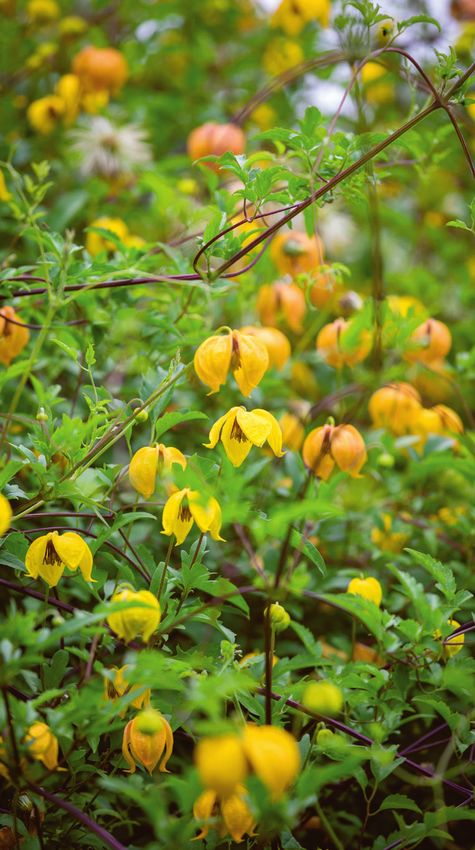
peonies and wallflowers

    Peonies
    Bare root herbaceous and intersectional peonies are best planted while the soil is still warm in autumn,
    or as it warms up in spring. If the soil is very wet or the ground is frozen, it is best to pot them on (see
    p.4-5) and wait until conditions improve before getting them in the ground.
    Soil and site Peonies are large plants and need about a square metre of space without competition
    from other garden plants in order to thrive. Peonies prefer heavier soils in a sunny or lightly shaded
    position but will grow well in a range of soils as long as it does not get waterlogged in winter or dry
    out in summer. Mix plenty of organic matter into the planting hole and add grit on very heavy soils.
    Instructions Dig a hole deep and wide enough to cover the roots. To aid establishment, you can sprinkle
    Rootgrow (see our website) into the base of the planting hole. Backfill with soil, firm in well and water
    to settle the soil around the roots. Ensure that the resting buds or ‘eyes’ of the peony roots are no more
    than 3-5cm (1-2in) below the soil surface. Any deeper and they may not flower well. For the same
    reason, avoid mulching as this will gradually bury the crown.
    In containers Peonies are fine in a pot for a few years but their large root system will ultimately outgrow
    it. Shield from bright sun and use a soil-based compost with extra grit and lime.
    Notes Peonies are a long-term investment for your garden, they may not flower in their first year but
    be patient as flower production will increase as plants establish. Your bare root peony may arrive with
    lengthy side shoots, this is completely natural and will not affect the long-term success of the plant. If
    preferred, these shoots can be cut back before planting as the plant will have sufficient stored energy to
    produce new secondary shoots after planting.

    Wallflowers                                       Erysimum ‘Winter Orchid’

    Perennial wallflowers (Erysimum ‘Apricot
    Twist’, ‘Bowles Mauve’, ‘Caribbean Island’,
    ‘Early Sunrise’, ‘Gogh’s Gold’, ‘Monet’s
    Moment’, ‘Night Skies’, ‘Paintbox’, ‘Plant
    World Lemon’, ‘Red Jep’ and ‘Winter
    Orchid’) are short-lived perennials which
    will flower profusely all spring for several
    years. Plant individually in borders or large
    containers and allow space for them to
    reach at least 45cm tall and wide. Clip
    over after flowering.
    Biennial wallflowers (Sugar Rush and
    Sunset series) flower best in the spring
    after planting and can then be disposed
    of. Plant in Autumn in rows in the cutting
    garden or as edging for borders, or
    group a few together in a container for a
    wonderful spring display. The Sugar Rush
    series should start flowering in autumn,
    soon after planting, stop over winter and
    start again in spring.

    6 See sarahraven.com for plants and seedlings

SR AUTUMN planting guide 2021_FINAL.indd 6                                                            30/07/2021 09:53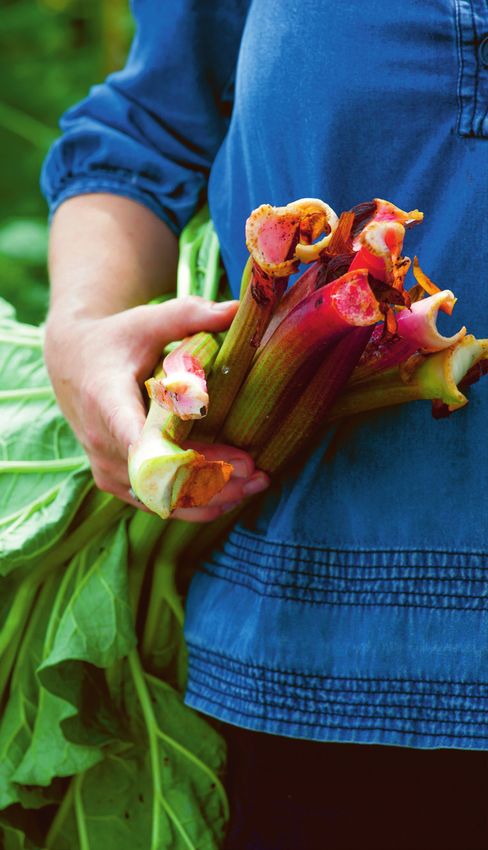
shrubs

   Shrubs
   Our container-grown shrubs (deciduous or evergreen woody plants) can be planted at any time of
   year, provided the ground is not frozen or waterlogged, but autumn is the ideal time, allowing their root
   system to establish in the warm soil before the following summer. Soil and site Choose a planting spot
   that suits the variety you have received (see our website for more information) and prepare the ground
   well before planting, following the guide on p.5. Instructions Dig a hole deep and wide enough to cover
   the root ball. You may need to stand the plant in the hole a few times to help you judge it, but ideally
   the top of the root ball should be level with the surface of the soil. To help establish plants more quickly,
   you can sprinkle Rootgrow (see our website), a mycorrhizal fungi, into the planting hole and around
   the root ball. Backfill with soil and firm down gently around the plant using your heel. Water generously
   and mulch with compost or well-rotted manure to help retain moisture. Pruning Most shrubs require
   pruning to keep them shapely and productive, please refer to our website for the specific requirements
   of each plant.
   HYDRANGEA
   Soil and site Moist, fertile soil. Plant in a cool,
   semi-shady part of the garden, avoiding exposed             Hydrangea paniculata ‘Wim’s Red’
   east-facing sites where cold winds may damage
   young spring growth. Also avoid dry, sunny
   spots. Spacing Plant approximately 2.5m apart
   (depending on variety). Instructions Work plenty
   of organic matter into the soil prior to planting.
   On lighter, sandier soils, feed in early spring with
   a flowering shrub fertiliser. On richer soils: too
   much feeding can encourage excessive soft, leafy
   growth, with plants less likely to develop flower
   buds and more at risk from frost in colder winters.
   Pruning H. arborescens and paniculata: remove
   any dead, damaged, diseased or crossing
   branches in early spring. Once established, cut
   back last year’s stems to within one or two buds
   of the older woody framework, to encourage
   more prolific flowering. H. macrophylla: remove
   the dead flowerheads in early spring, cutting back
   to the first strong, healthy pair of buds. Once
   established cut out one or two of the oldest stems
   at the base to encourage the production of new,
   replacement growth that will be more floriferous.
   H. aspera: this needs very little pruning and in
   most cases are best left to their own devices.
   They do not send out vigorous shoots that
   need curbing. Remove diseased, damaged, congested or crossing shoots. Shoots that are growing in
   unwanted directions can also be pruned out. These plants flower on previous or current year’s growth.
   H. petiolaris: plant next to a wall, fence or other structure to which it can cling and support itself via
   aerial roots. Prune immediately after flowering to maintain the framework of branches, otherwise only
   light pruning is required to remove dead or damaged stems.

                                                                                  sarahraven.com 7

SR AUTUMN planting guide 2021_FINAL.indd 7                                                             30/07/2021 09:53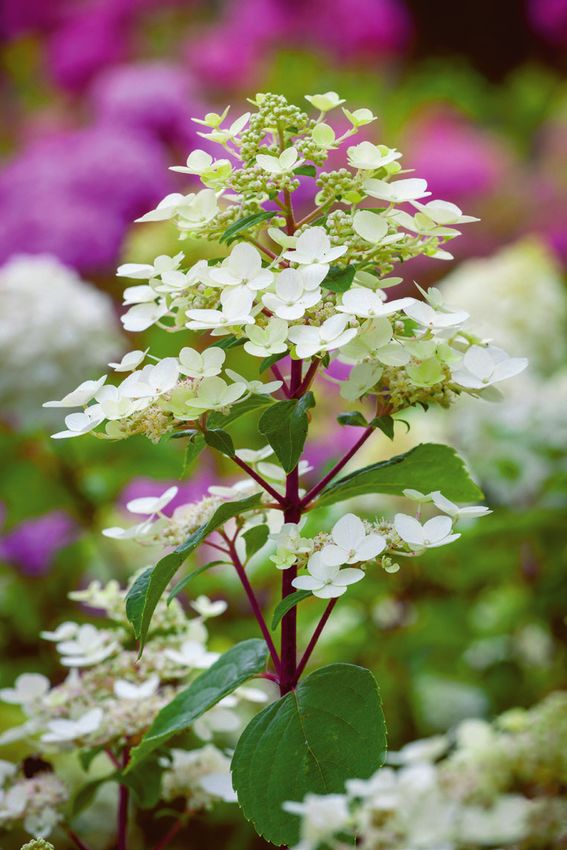
roses

    Roses
    Our bare root roses can be planted out from late autumn to
    early spring. Choose a day when there is no frost on the ground
    and avoid planting if your soil is very waterlogged. If conditions
    don’t allow you to plant, we recommend potting on bare root
    roses into large, deep containers to grow on and plant out later
    - follow the steps on page 4 for potting on bare root perennials.
    Soil and site Find a spot that has at least half of the day in sun.
    If you are replacing old roses with new, remove as much of the
    old soil as possible and replace with soil that hasn’t grown roses
    before (the old soil will grow anything else apart from roses).
    To avoid having to replace the soil you can use Rootgrow
    (mycorrhizal fungi) when planting (see below) which helps
    them to get established even where roses have previously been
    grown in the same soil. See our website for more information
    on heights, flowering times and spacing for specific rose                   Rosa ‘Koko Loco’
    varieties.
    PLANTING OUT ROSES: STEP-BY-STEP GUIDE
    1. Prepare the ground as for planting perennials, following the steps on page 3.
    2. Soak the root in a bucket of water overnight. Dig a generous hole that suits the size and shape of the
       roots you have to plant. Every rose is different, some roots are at funny angles and so will need extra
       care when planting.
    3. Fork the base of the hole over well to break up the soil and add a handful of Organic Rose Food (see
       website). Mound a small pile of soil, mixed with a little compost, in the centre of the hole to support
       the crown of the rose.
    4. Sprinkle the base of the planting hole and the roots with Rootgrow (see website) and place the rose
       in the centre of the planting hole. Lay a bamboo cane across the top of the hole to make sure that
       the ‘union’ of the rose (i.e. the join between the rootstock plant and the graft, which looks like a knee)
       is slightly below soil level. If it isn’t, dig the hole more deeply. This is crucial. If the union is above soil
       level, you promote the formation of suckers from the root material and these may then outgrow the
       grafted rose on top
    5. Fill in the hole with soil mixed with well-rotted manure or homemade compost. Firm down with your
       heel, mulch well and water.

    FORMATIVE PRUNING AND TRAINING
    Modern bush roses can be cut back hard the first winter after planting to encourage them to send up
    multiple new shoots; shrub roses are better left until the following winter for their first prune.
    Climbers and ramblers do not need pruning in their first year but they do need training against a
    pergola, arch or a framework of wires positioned at 60cm (24in) intervals across a wall or fence. Train
    stems horizontally, fanned out against the wires. After a time, the horizontal stems will throw up vertical
    shoots; use the strongest verticals arising from the base and/or the middle of the plant to train along
    higher wires to create another tier if required.
    Roses need annual pruning in winter (except ramblers which can be pruned after flowering in summer)
    to remove dead, diseased and damaged growth, stimulate strong new stems and promote flowering.
    See the Rose Growing Guide online for more advice.

    8 See sarahraven.com for plants and seedlings

SR AUTUMN planting guide 2021_FINAL.indd 8                                                                  30/07/2021 09:53
climbers

   Climbers
   Our container-grown, perennial climbers can be planted outside at any time as long as the ground is not
   frozen or waterlogged. Soil and site Most prefer full sun or dappled shade with a moist but well-drained
   soil. For specific guidance on each plant, please see our website. Instructions Climbers will require
   support from a suitable structure e.g. fences, trellises, arches and pergolas; you can also grow them
   through permanent host plants such as evergreen shrubs or trees. Prepare the ground as for perennials
   (see p.5), and make sure that suitable supports are in place. If planting next to shrubs or trees, place the
   planting hole outside the rain shadow created by their canopies and use canes to train the plant into the
   shrub or tree. If planting next to a wall or fence, dig the hole at least 60cm (24in) away from the wall
   and train the plant along canes towards the supports. Water regularly until established. In containers
   Ensure the pot size is adequate for the size and vigour of the plant, to give roots enough space, and
   make sure supports will be sufficiently tall and strong. A loam based peat-free is ideal as it holds plenty
   of water and is easily re-wetted. Climbers can act like wicks and dry out quickly when grown in pots.
   Water freely during the growing season and apply a balanced liquid fertiliser every fortnight. Pruning
   Most climbers require pruning to keep them healthy and productive, please refer to our website for the
   specific requirements of each plant.
   CLEMATIS
                                                             Clematis ‘Bill Mackenzie’
   Soil and site Well-drained soil in full sun or
   partial shade with lots of organic matter added
   to the planting position. Try to shade the roots
   of clematis if possible. If planted on a wall, lean
   a tile over the base and roots; if planting in a
   border, shade the roots with other plants. The
   smaller growing clematis, e.g. alpines and modern
   hybrids, do well in large containers with at least
   45cm depth and width. See individual varieties
   on our website for flowering times, heights and
   spacing. Instructions Plant as for other climbers
   above. All clematis will need support on a wall or
   in the border over which they can climb. Pruning
   Clematis are split into three different pruning
   groups depending on when they flower and their
   growth habit. Pruning at the wrong time can
   remove flowers.
   Pruning Group 1 C. ‘Apple Blossom’, ‘Avalanche’,
   C. montana types No need to prune, except to
   tidy after flowering.
   Pruning Group 2 Nelly Moser’ Prune very lightly
   in February and after first flowers in early summer.
   Pruning Group 3 C. ‘Bill Mackenzie’, ‘Fond
   Memories’, ‘Giselle’, ‘Purpurea Plena Elegans’,
   ‘Royal Velours’, ‘Prince Charles’, ‘Princess Diana’,
   ‘Princess Kate’, ‘Sarah Elizabeth’, ‘Taiga’, C.
   rehderiana, Prune in February, cutting back hard
   to a healthy pair of buds, 30cm (12in) above the
   ground.

                                                                                         sarahraven.com 9

SR AUTUMN planting guide 2021_FINAL.indd 9                                                            30/07/2021 09:53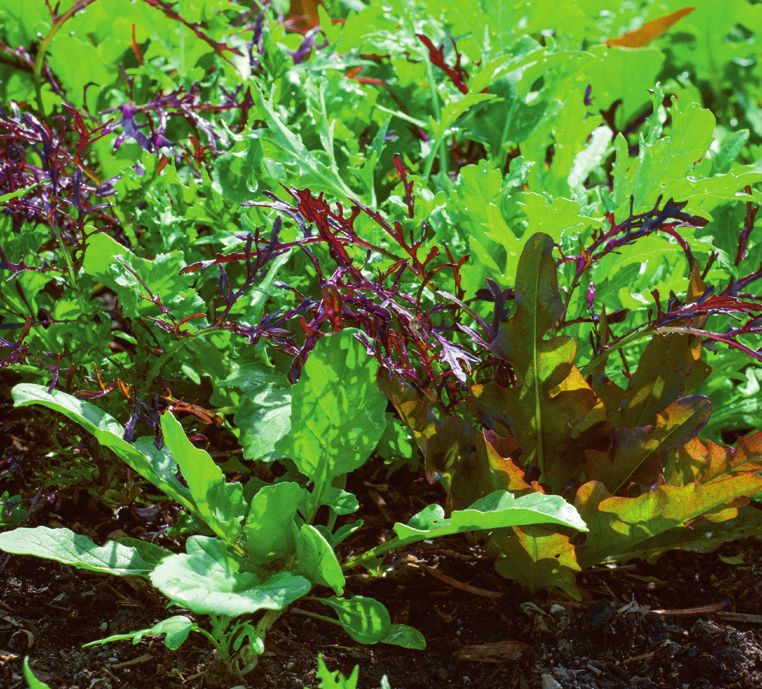
container plants

    Container plants
    You might think winter would be
    tricky for pots, but our container
    plants and collections have been
    chosen to provide bursts of colour
    when not much else is going on in
    the garden. Pretty winter-flowering
    polyanthus and violas work well
    on a sheltered outside table, or as
    pot toppers in window boxes and
    large containers to overplant spring
    flowering bulbs such as miniature
    irises, anemones, tulips or narcissi.
    Hellebores are also ideal for winter
    pots, and you can combine them
    with winter bulbs and other shade-
    loving perennials to transform a
    dank, dreary space.
    GUIDE TO PLANTING AUTUMN/
    WINTER POTS:
    1. Select your container considering
       the height and spread of the
       plants and the kind of effect you
       want to achieve. You can space           Antique Silver Container Collection
       bedding plants more closely than
       you would in spring or summer,
       as they won’t put on much growth during winter. Make sure the pot is frost-proof and will ideally
       provide insulation for the plant’s roots when things turn chilly – pots made from wood, terracotta or
       stone are a good choice for this.
    2. If you are going to include bulbs in your display make sure there is enough depth to bury them
       sufficiently (see our website for planting depths). Plant the earliest, smallest bulbs just below the
       compost surface, and the larger, later-flowering ones in another single or double layer below. Leave
       about 10cm (4in) of space at the top for the final layer of planting (see point below).
    3. Put some crocks (e.g. stones or broken pieces of old plant pots) over large drainage holes to stop
       the compost falling out,then fill the pot with a peat-free, multipurpose or loam-based compost.
    4. Arrange your plants so that the top of the root ball is level with the surface of the compost, about
       2-3cm (1in) below the rim of the pot. Backfill and firm your plants in gently to remove any air
       pockets. Water them well and backfill with a bit more compost if the surface has sunk more than an
       inch below the rim.
    5. Place your pot somewhere you can enjoy it through the winter months, making sure it’s in the best
       spot for the type of plants you are growing (see our website for more information).
    6. Don’t allow the soil to dry out and keep deadheading winter bedding as often as you can. When the
       display has finished you can move plants into your borders and fill the pots with fresh compost and
       plants for a summer display.

    10 See sarahraven.com for plants and seedlings

SR AUTUMN planting guide 2021_FINAL.indd 10                                                        30/07/2021 09:53
container plants
BRINGING CONTAINER PLANTS INDOORS
Mini cyclamen (C. persicum ‘Blanc Pur’, Rouge Ecarlate’ and ‘Violette’) and hellebores (H. niger
‘Christmas Carol’ and ‘Verboom Beauty’) can be grown indoors for a winter display.
They do best in rooms with cool temperatures such as porches, conservatories or on east or
north-facing windowsills away from radiators. You will soon know if your location is too warm because
high temperatures will make the plants stretch out and stop flowering. Plants need to be kept moist but
do not allow the compost to become soggy or leave plants sitting in a saucer of water as they may rot.
Once flowering finishes in spring, stop watering cyclamen to encourage them to go dormant. Repot
them into a slightly larger pot and place in a greenhouse, coldframe or sheltered corner of the garden.
In September when they begin to shoot, start watering again and then bring them back into the house
for flowering in winter. Once hellebores have finished flowering they can be planted out in the garden in
partial shade where the soil is moist but well-drained.
Cyclamen persicum ‘Rouge Ecarlate’
sarahraven.com 11
SR AUTUMN planting guide 2021_FINAL.indd 11 30/07/2021 09:53kitchen garden plants
Kitchen garden plants
BLACKBERRY
Soil and site Blackberries are very tough and will grow almost anywhere with decent drainage,
although you will get better crops on a sunny, fertile site. Spacing Plant at least 2m apart.
Instructions Water young plants during dry spells, top-dress and mulch in mid-spring. Provide support
with galvanised wires at 30cm intervals attached to a wall, fence or stretched between sturdy wooden
posts. Pruning Blackberries fruit best on last year’s growth so cut out old canes following fruiting and tie
in any new canes as they appear. Harvest August-September/October.
BLACKCURRANT, REDCURRANT & WHITECURRANT
Soil and site Best in an open sunny site with plenty of organic matter in the soil, but they will still
produce a good yield in a less than perfect position. These can also be grown in large containers
(minimum diameter 50cm) in a soil-based compost. Spacing Plant 1.5cm (5ft) apart. Instructions Water
newly planted bushes well in dry weather, but established plants are fairly drought tolerant. Pruning
Prune once a year in the autumn and apply a thick mulch of well-rotted compost (this is especially
important with blackcurrants as they require more nutrients). Harvest When the fruit starts to change
colour, protect from birds by covering in netting. From June-August, harvest by taking off each bunch
of berries with a strong pair of scissors. Pick your berries when it’s dry as wet currants will go mouldy.
For jelly, pick them when they are slightly unripe as there is more pectin in the fruit and the jelly should
set much better.
BLUEBERRY
Soil and site Full sun to part shade in fertile acidic soil. Spacing Blueberry ‘Bluedrop’
Plant 90cm (3ft) apart. Instructions Mulch newly planted
blueberries with leaf mould or pine bark (composted or
chipped) and mulch each spring or autumn thereafter. Water
with rainwater if possible rather than tap water as tap water is
often very alkaline. Special requirements No pruning necessary
in the first two years. After that, prune in late February or March
to remove a portion of the old wood. In containers Start off
in a 30cm (12in) pot, use loam-based ericaceous compost and
feed every month with a liquid feed formulated for ericaceous
plants. May require re-potting every few years. Harvest
June-early July.
GOOSEBERRY
Soil and site Gooseberries prefer a sunny site but will put up
with some shade. Avoid exposed areas and frost pockets.
Spacing Space bushes 1.2m-1.5m apart and the same between
rows. Instructions Container-grown plants can be planted at any time, avoid waterlogged, parched or
frozen soil. Dig your planting holes to the same depth as the root ball and twice as wide. Position in the
hole and backfill with soil, firming as you go. Pruning In order to get a good yield, prune between late
autumn and winter, shorten any new growth on leaders and side shoots by half, cutting to an outward
facing bud. Any side shoots crowding the centre or growing downwards can be cut right back to one
bud from their base. Summer pruning is optional but will help the sun ripen the fruit more quickly.
After pruning mulch with well-rotted manure or compost as gooseberries are hungry plants. Harvest
July-August. Fruits should ripen by mid-summer, only pick once fully ripened on the bush for the best
flavour. Gooseberries freeze well.
12 See sarahraven.com for plants and seedlings
SR AUTUMN planting guide 2021_FINAL.indd 12 30/07/2021 09:53kitchen garden plants
RHUBARB Rhubarb ‘Victoria’, part of
Soil and site Choose an open, sunny site with the Rhubarb Collection
moist but free-draining soil. Avoid waterlogged
soil and frost pockets and select an area which has
not grown rhubarb in the last six years. Rhubarb
can also be planted in very large pots at least
50cm (20in) deep and wide. Instructions When
you receive your bare root rhubarb plants, grow
them on in pots of compost, with the growing
point at or just below the soil surface. After about
a month the roots should have filled the pot and
are ready to plant out. Special requirements
Don’t harvest anything in the first year – just
allow the sticks of rhubarb to grow over the
spring and summer and die back in the autumn.
Spread organic compost around the crown at
the end of autumn. If a stressed plant should
run to seed in late spring, due to dry and cold
conditions, remove the flowering spike straight
away. Harvest In the second season (12-14 months
after planting), you can start picking when the
leaves have fully unfurled and the stems are
approximately 30cm (12in) long. Never take more
than half of the stems at a time – over-cropping
will reduce the plants’ vigour. Stalks are harvested
by gently twisting the stems and pulling from
the base of the plant. Remember: the leaves are
poisonous to eat but can be safely composted
with the rest of your garden waste.
STRAWBERRIES
Soil and site Grow these in a sunny, sheltered spot in the border, in pots, in the veg patch or allotment.
They are easy to grow and, after a smaller first crop, will provide abundant fruit for at least three years.
Dig in plenty of compost or well-rotted manure before planting. Spacing Plant 45cm (18in) apart
with 75cm (30in) between each row. Instructions If you have received bare root plants, immerse in a
bucket of warm water and soak for 20 minutes so the roots can rehydrate. Plant at intervals as directed
above. Dig your planting holes to the same depth as the lengths of the roots and twice as wide. Spread
the roots out in the hole and refill the hole with soil, keeping the crown of the plant where shoots will
emerge at soil level. Container-grown plants can be planted straight out at the same depth. Water
after planting and mulch with straw or grass clippings to help preserve moisture. Alternatively, they
may also be planted through sheets of polythene which will help smother weeds, retain soil moisture
and encourage early cropping by warming the soil. Special requirements Strawberries require regular
watering throughout the growing season, and ripening fruits may need to be netted against pests.
Flowers may need protecting from frosts in spring. Pinch out runners as they appear if new plants are
not required. Harvest May-July, when fully ripe, complete with stalks. Use at once for best flavour. Once
the crop has been picked, cut out old foliage from plants, taking care not to damage young leaves. Clear
away foliage and debris from around the plants to reduce opportunities for pests and diseases to take
hold. Feed with a balanced fertiliser.
sarahraven.com 13
SR AUTUMN planting guide 2021_FINAL.indd 13 30/07/2021 09:53veg and salad seedlings
Garlic ‘Solent Wight’
GARLIC
Soil and site Garlic grows best in a sunny site in
light, well-drained soil. Instructions Plant garlic
outside as soon as you can after receiving it. Split
the bulb into cloves and plant these individually,
each clove upright with the flat base down and
pushed into the soil so the tips are just below the
surface spaced at intervals of 15cm (6in) or 30cm
(12in) for elephant garlic. Special requirements
They need very little after care. Just nip off the
flower bud if one appears and keep the area
weed-free until the foliage turns yellow. Harvest
As soon as the leaves start to fade and dry, the
plants need to be lifted. They can be bunched
or plaited together and stored in a cool, dry,
frost-free area for several months until required.
SHALLOTS AND ONIONS
Sets are easy to grow, turning into a full-sized bulbs without any attention from you. Sets are the
immature plants that are raised from seed the previous summer. Because they were sown at a very
high density, they do not reach sufficient size to bolt – they just carry on growing instead. Soil and site
Shallots and onions thrive in a sunny, well-drained position which was manured for a previous crop.
Instructions Plant sets out as soon as you receive them, pushing gently into the soil so the tips are level
with the surface. It’s a good idea to cover them with pea sticks or fleece to prevent birds pulling them
out. Space onion sets 10cm (4in) apart and shallots 25cm (10in) with 30cm (12in) between rows. The
chance of bolting is decreased if you avoid planting in cold, wet soil. Keep weed-free, especially early
on. Harvest Lift in the summer. The foliage will yellow and flop over naturally. Lift the bulbs with a fork
to break the roots and leave them on the soil surface to ripen fully in the sun. In a wet summer, move
them to a greenhouse bench to ripen. Notes It is important to move the onion bed around every year to
prevent the build-up of diseases like onion white rot.
Veg and salad seedlings
Soil and site Most veg grow best in the kind of
sunny, sheltered spot where you might want to
sunbathe in summer. All the seedlings we sell in
autumn are hardy. These are best planted while
the soil is still warm in autumn and will then
cope with standing in the ground during winter
provided they receive some winter sun. As well
as sun, many plants prefer being sheltered from
the wind. They won’t grow well if rocked at their
roots and their leaves will blacken with wind
burn. Instructions Plant straight outside into
Autumn and Winter Salad Leaf Mix
well-prepared soil (follow the ground preparation containing mustard, rocket and mizuna
advice on page 3). Remove plants from their
14 See sarahraven.com for plants and seedlings
SR AUTUMN planting guide 2021_FINAL.indd 14 30/07/2021 09:53herb seedling and plants
packaging and gently water or soak for 20 minutes if they seem dry. Dig holes deep and wide enough
to bury the root ball and firm in well. Allow enough space between plants for them to grow without too
much competition - for detailed information on spacings and growing advice for all our edible plants
please see our website. Water in well, and water regularly, particularly if conditions are dry. Laying a
good 5cm (2in) layer of mulch in between your rows (garden compost, mushroom compost or leaf
mould is ideal) will exclude weeds and hold in water, making maintenance so much easier. Use fleece
to protect salad crops during very cold weather. In containers Plenty of edibles thrive growing in a pot
and will supply you with delicious food. Use large containers filled with a drainage layer of crocks or
stones in the bottom, and at least a foot of a rich and water-retaining, loam-based compost below the
roots. Apply an organic liquid feed regularly to maintain fertility.
HARVESTING SALAD LEAVES
There are two ways of picking the leaves:
1. CUT-AND-COME-AGAIN This means cutting the whole plant, harvesting every leaf and then leaving
it for a couple of weeks to form more, which you then cut again. You must cut at least 1cm (½in)
above soil level and above the basal seed leaves or you’ll kill the plant.
2. PICKING ROUND This means picking some, but not all of the leaves at one time. If there are six
leaves, pick three. The advantage of this system is that you leave the heart of the plant intact.
The plants also then tend to form mini trunks at the base. This makes them hardier and more able
to withstand winter wet and cold, than the fleshier cut-and-come-again equivalents. This is the
technique I use.
See our website for full growing details of all veg and salad varieties including harvesting times
and methods.
Herb seedlings Rosemary ‘Green Ginger’
and plants
Soil and site Our hardy annual and
perennial herbs can be planted
straight into the ground, a window
box or container. Many herbs are
Mediterranean in origin and will usually
need lots of sun plus a well-drained soil,
although some will tolerate a damp
site in partial shade. Instructions If
planting perennial herbs in containers,
use a loam-based compost which will
provide nutrients and hold its structure
for longer than traditional multipurpose
composts. Herbs like rosemary can grow
fast and will need a large pot eventually.
For specific advice on how to grow each
variety, including spacing, care tips,
harvesting information and recipe ideas,
see our website.
sarahraven.com 15
SR AUTUMN planting guide 2021_FINAL.indd 15 30/07/2021 09:53Wildflower Plugs
Soil and site These can be planted directly into turf or borders if soil conditions allow. Instructions These
are hardy, native plants which should thrive if planted into warm, moist soil in autumn, requiring minimal
extra care. You can also pot them up into larger pots to grow on in a sheltered place outside for planting
out after a few weeks.
Silene latifolia
1 Woodstock Court, Blenheim Road, Marlborough, Wiltshire SN8 4AN
For more gardening advice, Sarah’s videos and growing guides visit our website
sarahraven.com
@sarahravensgarden @sarahravensgarden @srkitchengarden sarahraven.com/podcast
16
SR AUTUMN planting guide 2021_FINAL.indd 16 30/07/2021 09:53You can also read