Renewable Energy Projects for the Classroom - Oglesby, IL 61348 www.ivcc.edu/wind www.ivcc.edu/nsf
←
→
Page content transcription
If your browser does not render page correctly, please read the page content below
Renewable Energy Projects

    for the Classroom

    Illinois Valley Community College
             Oglesby, IL 61348
             www.ivcc.edu/wind
             www.ivcc.edu/nsf
                  August 2013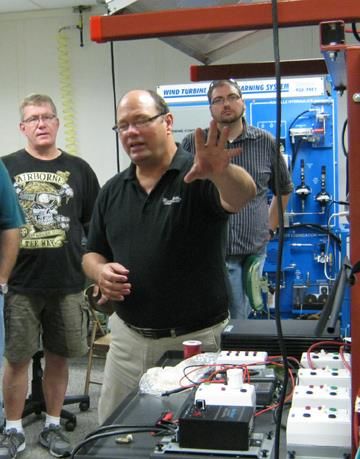
Renewable Energy Projects
    for the Classroom

                           By

Jim Gibson, Sue Isermann, Jamie Gahm and Rose Marie Lynch

    Illinois Valley Community College
            815 North Orlando Smith Road
                  Oglesby, IL 61348
                     815-224-2720
                   www.ivcc.edu/wind
                    www.ivcc.edu/nsf

                       August 2013

                                 Supported by National Science
                                   Foundation Grant #1003730

                            ii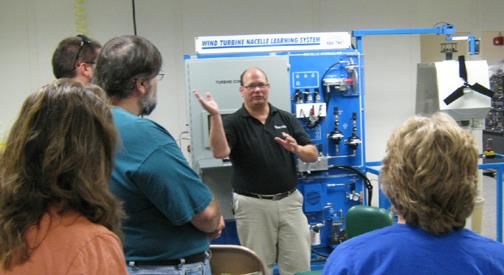
To Anyone Considering a Renewable Energy
                    Project:
This handbook is designed to provide instructions and resources to enable
teachers, including those without a technical background, to guide students in
renewable energy projects. The projects or modules in this handbook were
developed by middle school through community college teachers enrolled in a
course entitled Introduction to Renewable Energy Topics for Teachers.
Organized through Illinois Valley Community College’s Continuing Education
Division and taught by IVCC’s Program Coordinator of Electronics in summer
2013, the course offered two semester hours of graduate-level credit through
Quincy University
We encourage you to give your students first-hand experience with a renewable
energy project that you can utilize to introduce or reinforce an unlimited number
of concepts, at varying levels of expertise, in a number of subject areas.

                                                                          Jim Gibson
                                                                         Jamie Gahm
                                                                        Sue Isermann
                                                                    Rose Marie Lynch

Acknowledgements
The authors wish to acknowledge the assistance of Illinois Valley Community College,
the National Science Foundation, Quincy University, and the teachers who developed
the modules in this handbook. The material in this handbook is based upon work
supported by the N.S.F. under grant #1003730 (“Preparing a New Workforce for a
Sustainable Economy”), the development of programs for renewable energy technicians
at IVCC, and a graduate-level course offered for teachers through Quincy College. Any
opinions, findings, and conclusions or recommendations expressed in this material are
those of the authors and do not necessarily reflect the views of the National Science
Foundation.

NSF Grant Principal Investigator: Jim Gibson, Program Coordinator of Electronics
jim_gibson@ivcc.edu

NSF Grant Co-PIs:
      Sue Isermann, Associate Vice President for Academic Affairs
                   sue_isermann@ivcc.edu
     Jamie Gahm, Director of Continuing Education and Business Serivces
                   jamie_gahm@ivcc.edu
      Rose Marie Lynch, Communications Instructor
                   rosemarie_lynch@ivcc.edu

The cover image is from the Image Gallery of the National Renewable Energy Lab
(NREL), U.S. Department of Energy, at http://images.nrel.gov. NREL offers images for
free download, display, use and copy.

                                         iii
Table of Contents

Middle School Activities

       Introduction to Renewable Energy………………………………………1

       Solar Energy Unit………………………………………………………….5

       Wind Turbines as an Alternative Energy Source……………………...13

High School Activities

       Alternative Fuel Lesson: Driver Education ……………………………23

       Angular and Linear Speed of Wind Turbines: Geometry……………...31

       Residence: Alternative Sustainable Energy System………………….39

Community College Activities

       Sustainable Energy Planning…………………………………………….44

       Biofuels: Cellulosic Ethanol Lab………………………………………....51

       The Effects of Wind Obstructions on the Power Generation of
            Wind Turbines………………………………………………………55

Appendix: Course Plan………………………………………………………...…61

Additional Resources………………………………………………………………67

While the activities in this handbook were developed with specific student groups in
mind, many of these activities are adaptable to varying ages of students.

                                           iv
Jim Gibson, Program Coordinator of
Illinois Valley Community College’s
Electronics Program, demonstrates
renewable energy trainers to teachers
enrolled in Introduction to Renewable
Energy Topics for Teachers, the
course in which the activities in this
handbook were developed.
FOR MEDIA COVERAGE OF THE
COURSE:
“Teachers learn about renewable
energy: Going ‘off the grid’”
By Amy Flanery
News Tribune, LaSalle, IL
July 12, 2013
newstrib.com/main.asp?SectionID=
2&SubSectionID=126&ArticleID=30117
vIntroduction to Renewable Energy
Developed for Middle School Level
By Donna Gerrard
Background: This lesson plan will be used to enhance the sixth grade
science chapter on the major energy sources and energy efficiency and
conservation.
The objective is to provide a hands-on lesson to increase the students’
awareness to energy efficiency. Solar energy will be discussed in this lesson
but the other alternative energies will be discussed as well.
LESSON PLAN: ENERGY FROM THE SUN
Time: three-class period of 45 minutes each.
Objective:
The student will be able to recognize the importance of alternate energy
sources.
Activity 1: Introduction
The students will be asked to do the “What a Day!” activity (below), and
then share and discuss their decisions.
1What a Day
You wake up one morning and find all your sources of energy are gone.
There is no TV, sour milk in the refrigerator, no lights. What will you do?
Devise a survival plan for you and your family.
Materials:
Science journals
Student guides (background information from manual)
Computer lab
DMM
Solar panel
Red and black clip lead
Red and black jumper
Motor
Sunshine
Activity 2: Research
Procedure: In the science journal the student will write what he thinks he
knows, what he wants to know, and after doing some research in the
computer lab, what he learned.
Suggested websites for videos:
www.nationalgeographic.com/video/environment/energy
www.neok12.com/solar-energy
www.science.howstuffworks.com
www.teachertube.com/viewvideo
Suggested websites:
www.energy.gov/kids
www.eia.doe.gov/kids
www.energystar.gov/kids
www.nrel.gov
www.eere.energy.gov
www.energy.sandia.gov
www.nasa.gov
www.southwestpv.com
2Activity 3: How a solar thermal energy source works. (Ch 7-1)
For these activities the teacher will utilize GREENtech Energy Efficiency &
Renewable Energy Training Lab. The students will be arranged into groups
and given a student guide to do the given experiments.
Objective: The student will learn to measure the DC voltage output of a solar
panel.
Activity 4: Power a motor with a solar cell. (Ch 7-2)
Objective: The student will connect a solar panel to power a motor.
Activity 5: Observe effect of tilt on a solar panel. (7-5)
Objectives:
The student will demonstrate how a solar panel reacts to direct and indirect
rays from the sun in order to produce electricity.
The student will understand why solar panels must be oriented at the proper
angle to the light source for maximum electrical output.
3ASSESSMENT
Activity 6: Solar Oven
Objective:
The student will construct a solar oven using a variety of materials. The
student should be able to understand the transformation of radiant energy to
thermal energy to have a working oven.
Activity 7: Use solar energy to produce electricity assessment.
Objective:
The student will use the vocabulary words to explain how electricity is
produced by photovoltaic systems and concentrated solar power systems.
Dish/engine systems
Electricity
Electrons
Parabolic troughs
PV system
Radiant energy
Residential
Solar Cell
Solar power towers
Thermal energy
Utility scale
TEACHER RESOURCES:
www.NEED.org
GREENtech Energy Efficiency & Renewable Energy Training
Lab by Graymark
4Solar Energy Unit
Developed for Middle School Level
By Teresa Sigler
Overview : 4 – 5 days
Introduction to solar energy
How solar panels work
The four different types of solar panels
Using a Digital Multimeter
Measuring DC voltage with the DMM
Building a solar oven
Day 1
Objective: Students will be able to understand how solar panels work.
Introduction:
Have you ever seen solar panels on a house or business?
How do you think they work?
Discussion – assess for prior knowledge.
Instructions:
Vocabulary sheet with definitions
Diagram of solar panel – students will label with assistance.
Video on Promethean Board showing how a solar panel is constructed and
how they work.
Evaluation: Teacher will monitor that students are labeling their solar panel diagram.
Check for understanding after the video through discussion.
5Day 2
Objective: Students will be measuring and comparing the DC voltage output from the
solar panel with different lighting situations.
Introduction: We will be measuring the voltage that the solar panel will be producing.
This activity was obtained, but modified, through GREENtech Energy Efficiency &
Renewable Energy Training Lab Book by Graymark.
Materials needed: everything will be located in tubs labeled for each lab station.
3 volt solar cell
Digital multimeter
Red Jumper
Black Jumper
Black clip lead
Red clip lead
Clamp on light
40, 60 &100 watt light bulb
Ruler
Instructions
1. Get out the Digital Multimeter (DMM). Set the dial to 20Volt DC range turning it
to the right side of the meter.
2. Plug the Black Jumper into the Black Solar Panel jack.
3. Connect one end of the Black clip lead to the other end of the black jumper.
4. Connect the other end of the Black clip lead to the Black DMM Lead.
5. Plug the Red Jumper into the Red Solar Panel jack.
6. Connect one end of the Red clip lead to the other end of the Red Jumper.
Procedure
1. Get out the chart that you will be recording voltage on. The reading should be
between 0.5 volts and 3.0 volts. The exact reading will depend on the amount of
light reaching the Solar Panel.
2. Classroom lights will be off. Read and record on your chart,the voltage on the
display screen.
3. One set of classroomlights will be turned on. Read and record on your chart, the
voltage on the display screen.
4. Both sets of classroom lights will be turned on. Read and record on your chart,
the voltage on the display screen.
5. Place a 40 watt light bulb in your clamp on light. Plug in the light. Hold the light
an arms length away from the solar panel. Read and record on your chart, the
voltage on the display screen.
6. Using your ruler, hold the light 12 inches away from solar panel. Read and
record.
67. Using your ruler, hold the light 6 inches away from solar panel. Read and record.
8. Turn off light and let it cool.
9. Replace 40 watt light bulb with a 60 watt bulb and repeat steps 5,6,7 & 8.
10. Replace 60 watt light bulb with a 100 watt bulb and repeat steps 5,6,7 & 8.
11. After turning off the clamp on light, students will discuss with their group their
fiinding and record what they have concluded from this activity on their chart.
Evaluation
1. Students will remain on task and will cooperate with their group members.
2. Students will record their readings and then draw a conclusion after the activity.
3. The teacher will circulate throughout the room and assess for understanding of
directions and what they have concluded based on their recordings.
Chart for Recording
Day 2
Voltage
Lights off in
classroom
Half of the lights
on in classroom
All lights on in
the classroom
Arms length 12 inches above 6 inches above
Voltage Voltage Voltage
40 watt bulb
60 watt bulb
100 watt bulb
Conclusion
7Chart for Recording
Day 3
Voltage
Solar panel on West side of building
facing West
Solar panel on South side of building
facing South
Solar panel on East side of building
facing East
Solar panel on North side of building
facing North
Solar panel directly
facing the sun
Voltage measured after 30 seconds
Solar panel directly facing the sun
with piece of paper covering half of
solar panel
Solar panel directly facing the sun
with piece of paper covering whole
solar panel
Conclusion
8Day 3
Objective: Students will use their solar panel and Digital Multimeter outside to gather
readings using sunlight on each side of the building. They will then conclude whether
sunlight creates more voltage than lamp light.
Introduction: We will discuss whether the students think the sunlight will generate
more voltage than the lamp light.
Materials needed will be located in the tub labeled for each lab station.
3 volt solar cell
Digital Multimeter
Red Jumper
Black Jumper
Black clip lead
Red clip lead
Piece of paper
Instructions
1. Get out the Digital Multimeter (DMM). Set the dial to 20 volt DC range turning it
to the right side of the meter.
2. Plug the Black Jumper into the Black Solar Panel jack.
3. Connect one end of the Black clip lead to the other end of the black jumper.
4. Connect the other end of the black clip lead to the Black DMM Lead.
5. Plug the Red Jumper into the Red Solar Panel jack.
6. Connect one end of the Red clip lead to the other end of the Red Jumper.
Procedure
1. Get out the chart for Day 3 that you will be recording voltage.
2. We will exit the building to the West. Our first reading will be on the West side
of the building. Your team will set the solar panel and DMM on the grass at the
top of the hill, facing West and get your reading. Please handle the solar panel
and DMM carefully. Get your reading and record on your chart.
3. We will then move to the South side of the building. We will place the solar
panel and DMM on the grass behind the sidewalk facing South. Get your reading
and record on your chart.
4. We will then move to the East side of the building and place the solar panel and
DMM on the grass facing East. Get your reading and record.
5. We will then move to the North side of the building and place the solar panel and
DMM on the grass facing North. Get your reading and record.
6. We will now locate and position our panel directly facing the sun. Get your
reading and record.
7. Leaving your solar panel and DMM where they are we are now going to place a
sheet of paper to cover half of the solar panel. We will leave it covered for 30
seconds. Get your reading and record.
98. Leaving your solar panel and DMM where they are we are now going to place a
sheet of paper to cover the whole solar panel. We will leave it covered for 30
seconds. Get your reading and record.
Evaluation
1. Students will remain on task and cooperate with their group members.
2. Students will record their readings and then draw a conclusion after the activity.
3. Students will handle their equipment with care throughout our activity.
4. The teacher will circulate throughout the groups and assess for understanding of
Directions and what they have concluded based on their recordings.
Day 4/5
Objective: The students will construct a solar oven.
Introduction:
Students will work in their lab groups to construct a pizza oven. Activity was
obtained through the U.S. Department of Energy-Energy Efficiency and
Renewable Energy Roofus’ Solar and Efficient Home website.
www1.eere.energy.gov/kids/roofus/printable_version/pizza_box.html
Materials needed:
Everything will be located in tubs labeled for each lab station.
One large pizza box
Newspapers
Tape
Scissors
Black construction paper
Clear plastic wrap
Aluminum foil
A piece of notebook paper
A pencil or pen
A ruler
Instructions
1. Start with pizza box folded into its box shape and closed.
2. Place the piece of notebook paper in the center of the lid of the box and trace
its outline on the lid. Set piece of paper aside.
3. Cut two the two long edges and the short edge closest to the front of the box.
of the rectangle that you just traced on the lid of the box. This should form a
flap in the lid.
104. Gently fold the flap back along the uncut edge to form a crease.
5. Wrap the underside (inside) face of this flap with aluminum foil. Tape it on
the outside so that the foil is held firmly. Try to keep the tape from showing
on the foil side of the flap. The foil will help to reflect the sunlight into the
box.
6. Open the box and place a piece of black construction paper in so it fits the
bottom of the box. This will help to absorb the sun’s heat.
7. Close the box, roll up some newspaper, and fit it around the inside edges of
the box. This is the insulation that helps hold in the sun’s heat. It should be
about 1 to 1 ½ inches thick. Use tape to hold the newspaper in place, but only
tape it to the bottom of the box.
8. Cut two pieces of plastic wrap an inch larger than the flap opening on the box
top. Open the box again and tape one piece of plastic wrap to the underside of
the flap opening. After taping one side, BE SURE TO PULL THE PLASTIC
WRAP TIGHT, and tape down all four sides so the plastic is sealed against
the cardboard. Then close the box and tape the other piece of plastic wrap to
the top of the open flap. Again, be sure the plastic wrap is tight and tape
down all four edges to form a seal. This creates a layer of air as insulation
that helps keep the sun’s heat in the box.
9. We’re ready to try it out! We’ll take chocolate chip cookies outside to place
in the box to warm up. Open the box, put the treat in the center and close the
box. Now open the flap and turn the box so the foil is facing the sun. The
shadow of the flap should go straight back on to the back of the box. Move
the flap up and down and note how it reflects the sunlight. Use your ruler to
prop up the flap so that it bounces the sunlight into the box.
10. Wait about a half hour for the box to warm up in the sun. Then enjoy your
warmed up treat !
11. It won’t get really hot, so you can’t bake things in it. We can only warm
things up.
Evaluation
1. Students will cooperate with peers within their lab group.
2. Students will follow all directions and use tools safely.
3. Teacher will evaluate progress and that all directions are being followed, by
circulating around the room during activity.
4. Design should be evaluated to see if students can make any improvements.
Solar Energy Vocabulary
1. Flat plate collector –most common solar collector for solar water-heating systems in
homes and solar space heating. A flat-plate collector is an insulated metal box with a
glass or plastic cover (called glazing) and a dark-colored absorber plate.
112. Liquid flat plate collector – Heats liquid as it flows through tubes in or adjacent to the
absorber plate. This is the simplest liquid system using household water, which is
heated as it passes directly through the collector and then flows to the house.
3. Air flat place collector - These are used basically for solar space heating. The
absorber plates can be metal sheets, layers of screen, or non-metallic materials. The
air flows past the absorber by using natural convection or a fan. Air is not a good
conductor for heat, so less heat is transferred from an air collector’s absorber than a
liquid collector’s absorber. This is less efficient than liquid collectors.
4. Evacuated tube collector - These can achieve extremely high temperatures (170
degrees F to 350 degrees F). These are more appropriate for commercial and
industrial use. More expensive than flap plate collectors.
5. Alternative energy – A “non-conventional” energy system that includes solar electric
systems, wind generator systems, and small hydro-electric systems.
6. DC – Direct Current
7. AC – Alternating Current
8. Photon – A particle of light that acts as an individual unit of energy.
9. Renewable energy – Energy from sources that are not easily depleted such as moving
water (hydro), biomass, geothermal energy, solar energy, and wind energy.
10. Solar Energy – Electromagnetic energy transmitted from the sun (solar radiation).
The amount that reaches the earth is equal to one billionth of total solar energy
generated, or the equivalent of about 420 trillion kilowatt hours.
11. Volt – A unit of electrical measurement. One volt will cause a current of one ampere
(amp) to flow through a resistance of one ohm.
12Wind Turbines as an Alternative
Energy Source: Lesson One
Developed for Middle School Level
By Darcy Welsh
SKILL OBJECTIVES
After completion of this lesson you will have the skills to:
Present your opinion on wind technology both verbally and written.
INTRODUCTION
In this lesson you will research wind turbines, test different blades and pitch of wind
turbine making comparisons of the output, formulate an opinion on using wind turbines
as an alternative energy source, and present your findings and opinion to a group in a
debate format.
ITEMS NEEDED You will need the following items:
See individual lessons for items needed in each exercise.
Use the following website to build wind turbines for exercises in this lesson.
http://wind.jmu.edu/education/activities/wind_basicpvcwindturbine.pdf
DMM SETUP See individual exercises.
CIRCUIT SETUP See individual exercises.
PROCEDURE
1. Complete exercises 1.1 through 1.4.
2. Split the class into 7 groups: farmers for wind farms, farmers against the wind farms,
town people for the wind farms, town people against the wind farms, business and
industry representatives, the wind farm company representatives, the politicians of
that district.
3. Each group will prepare a general statement on their opinion of a wind farm being
placed in their township. Strong support is needed for any statements with sources
cited. General statements will be read at the start of the debate. They should be 2-3
min in length.
4. Groups will be given two days to research in depth and formulate their point of view.
135. The third day will culminate the activity with a debate and vote. One person will be
selected to present for their group. This person can be chosen at random or decided
upon ahead of time.
6. The debate starts with each group stating their opening remarks.
7. Once everyone has made their statements, the moderator (teacher) will then recognize
speakers who wish to challenge their opponents.
8. Rebuttal time will be limited to 2-3 min.
9. Allow the last ten minutes for a "vote" on the decision with a written paragraph
stating how and why the student has selected the opinion.
CONCLUSION Formulate a conclusion from this exercise.
_____________________________________________________________
_____________________________________________________________
_____________________________________________________________
_____________________________________________________________
14Review Wind Energy: Exercise 1.1
SKILL OBJECTIVES
After completion of this lesson you will have the skills to:
Research wind energy.
INTRODUCTION
In this lesson you will research wind power from the information on the approved
websites.
ITEMS NEEDED You will need the following items:
computer
Internet access
DMM SETUP None
CIRCUIT SETUP None
PROCEDURE
1. With computer on and connected to the Internet, use the browser to navigate to
http://www.nrel.gov/wind/
2. Click on the Wind Basics under Resources.
3. Read the selections on How Wind Turbines Work and Wind Turbine
Applications. Record your notes in your Science Journal.
4. Use the browser to navigate to
http://www1.eere.energy.gov/wind/wind_basics.html
5. Click on the Energy Basics tab on the left.
6. Read each link; How Wind Turbines Work, How Distributed Wind Works,
Advantages and Challenges of its Use, Wind Energy Use Through History, and U.
S. Wind Energy Resource Potential. Record notes on each section in your
notebook.
7. Use the browser to navigate to www.need.org/needpdf/Energy From The Wind
Student Guide.pdf
8. Read Wind Farms pg 13-14. Record notes in your Science Journal from pg.
9. Use the browser to navigate to www.nrel.gov/gis/pdfs/eere_wind/eere_illinois.pdf
Note what areas have higher elevations by county in your science journal. In your
journal record your thoughts as to why these areas would be desirable locations
15for a wind farm? Note any other factors you think may be important in wind farm
site selection.
CONCLUSION Formulate a conclusion from your research.
_____________________________________________________________
_____________________________________________________________
_____________________________________________________________
_____________________________________________________________
16Test the Number of Turbine Blades and Compare Results:
Exercise 1.2
SKILL OBJECTIVES
After completion of this lesson you will have the skills to:
1. Change blades of the turbine.
2. Adjust the pitch of turbine blades.
INTRODUCTION
In this lesson you will measure the wind turbine output comparing the number of blades
from 6 ,4, 3, 2, and finally 1.
ITEMS NEEDED You will need the following items:
6 turbine blades of the same design
crimping hub
protractor tool
assembled wind turbine
fan
DMM
graph paper
DMM SETUP Select 20 DC Volt range
CIRCUIT SETUP
1. Table fan in off position
2. Connect fan to 110 Volt AC outlet
3. Distance from fan to turbine is about two feet
4. Connect black lead to black DMM lead.
5. Connect red lead to red DMM lead.
17PROCEDURE
1. Create a data table in your science journal.
2. Select 6 blades of the same design.
3. Attach the 6 blades to the crimping hub, making sure they are evenly spaced.
4. Set the pitch at 5 for all the blades using a protractor tool.
5. Attach the crimping hub to the drive shaft, check to be sure it is secure.
6. Observe the DMM as the table fan is turned on high.
7. Watch the meter for a minute and take the highest voltage reading.
8. Record the voltage in your science journal.
9. Turn the fan to off.
10. Disconnect the jumper cables.
11. Turn the DMM to off.
12. Repeat steps 2-11 with 4 blades.
13. Repeat steps 2-11 with 3 blades.
14. Repeat steps 2-11 with 2 blades.
15. Repeat steps 2-11 with 1 blade.
16. Graph your results.
CONCLUSION Formulate a conclusion from this exercise, cite data from your
graph.
_____________________________________________________________
_____________________________________________________________
_____________________________________________________________
_____________________________________________________________
18Test the Pitch of Turbine Blades and Compare Results:
Exercise 1.3
SKILL OBJECTIVES
After completion of this lesson you will have the skills to:
1. Change blades of the turbine.
2. Adjust the pitch of turbine blades.
INTRODUCTION
In this lesson you will measure the wind turbine output comparing the pitch of 3 blades.
ITEMS NEEDED You will need the following items:
3 turbine blades of the same design
crimping hub
protractor tool
assembled wind turbine
fan
DMM
graph paper
DMM SETUP Select 20 DC Volt range
CIRCUIT SETUP
1. Table fan in off position.
2. Connect fan to 110 Volt AC outlet.
3. Distance from fan to turbine is about two feet.
4. Connect black lead to black DMM lead.
5. Connect red lead to red DMM lead.
PROCEDURE
1. Create a data table in your science journal.
2. Select 3 blades of the same design.
3. Attach the blades to the crimping hub, making sure they are evenly spaced.
4. Set the pitch at 0 for all the blades using a protractor tool.
5. Attach the crimping hub to the drive shaft, check to be sure it is secure.
6. Observe the DMM as the table fan is turned on high.
197. Watch the meter for a minute and take the highest voltage reading.
8. Record the voltage in your data table.
9. Turn the fan to off.
10. Disconnect the jumper cables.
11. Turn the DMM to off.
12. Repeat steps 4-11 with the pitch at 5.
13. Repeat steps 4-11 with the pitch at 10
14. Repeat steps 4-11 with the pitch at 45.
15. Repeat steps 4-11 with the pitch at 90.
16. Graph your results.
CONCLUSION Formulate a conclusion from this exercise, cite data from your
graph.
_____________________________________________________________
_____________________________________________________________
_____________________________________________________________
_____________________________________________________________
20Test the Length of Turbine Blades and Compare Results:
Exercise 1.4
SKILL OBJECTIVES
After completion of this lesson you will have the skills to:
1. Change blades of the turbine.
2. Adjust the pitch of turbine blades.
INTRODUCTION
In this lesson you will measure the wind turbine output comparing different lengths of
turbine blades.
ITEMS NEEDED You will need the following items:
4 sets of 3 turbine blades in the following lengths: 4", 6", 8", and 10".
crimping hub
protractor tool
assembled wind turbine
fan
DMM
graph paper
DMM SETUP Select 20 DC Volt range
CIRCUIT SETUP
1. Table fan in off position.
2. Connect fan to 110 Volt AC outlet.
3. Distance from fan to turbine is about two feet.
4. Connect black lead to black DMM lead.
5. Connect red lead to red DMM lead.
PROCEDURE
1. Create a data table in your science journal.
2. Select 3 blades 4" in length.
3. Attach the 3 blades to the crimping hub, making sure they are evenly spaced.
4. Set the pitch at 5 for all the blades using a protractor tool.
5. Attach the crimping hub to the drive shaft, check to be sure it is secure.
6. Observe the DMM as the table fan is turned on high.
7. Watch the meter for a minute and take the highest voltage reading.
218. Record the voltage in your data table.
9. Turn the fan to off.
10. Disconnect the jumper cables.
11. Turn the DMM to off.
12. Repeat steps 2-11 with 6" blades.
13. Repeat steps 2-11 with 8" blades.
14. Repeat steps 2-11 with 10" blades.
15. Graph your results.
CONCLUSION Formulate a conclusion from this exercise, cite data from your
graph.
_____________________________________________________________
_____________________________________________________________
_____________________________________________________________
________________________________________________________________________
22Alternative Fuel Lesson: Driver
Education
Developed for High School Level
By Kari Hagerty
Placement of Lesson The lesson will be introduced after completion of Unit
4. The topics of Buying a Vehicle, Environmental
Concerns, and Planning Travel are all taught within
these chapters.
Objective After completing the activities compiled to create this
lesson, students will have the ability to explain the
different types of alternative fuels and use the skills
acquired to research each of them. Students will be
able to compare practicality and benefits as well as
pitfalls of owning such a vehicle. At the conclusion,
students will be able to apply knowledge to both
purchase an alternatively fueled vehicle and plan
travel.
Procedure Lesson will require 4 (50 minute) class periods.
Previous Knowledge Buying a Vehicle (Chapter 16)
Environmental Concerns (Chapter 16)
Maintaining a vehicle (fuel saving strategies) Chapter
17
Planning Travel (Chapter 18)
Calculating distance traveled using mpg of a vehicle
Prior assignments (map project/family car research
project)
Materials Needed Access to Internet/Computer Lab
Poster Board (1/pair)
Alternative Fuels Intro Worksheet
Previously completed Map Project (completed in
Chapter 18)
Family Vehicle Specs (completed in Chapter 16)
Cross Curricular Writing reflection (WAC)
Computing miles per gallon (Math)
Using map (Geography)
Alternative fuels (Science)
Computer/internet use (Technology)
23Day 1
Objective Students will be reintroduced to Alternative Fuels.
(previously introduced in Chapter 16) In partners
students will research their assigned fuel alternative
and complete the coinciding worksheet. (attached) This
will be self-guided group work. Students will then be
able to construct a poster board outlining important
facts for display.
Procedure Divide students into partners.
Students will find assigned computer and log on.
Students will retrieve Alternative fuel source and
worksheet from instructor.
Students will log onto:
http://www/afdc.energy.gov/fuels/
After completion of the worksheet students will choose
a vehicle and arrange information on poster board.
On the opposite side of the poster board students will
arrange the information of their family car. (previous
assignment)
Evaluation Teacher will continuously check for understanding by
questioning.
Teacher will monitor progress of the students.
Teacher will grade the worksheet after completion.
Teacher will observe construction of the poster boards.
Day 2 and Day 3
Objective Students will be able to recall and explain information
about the alternative fuel researched the previous day.
Students will be able to compare and contrast
different vehicles and fuel sources.
Procedure Students will be given a number within their pairs (1
or 2)
Group 1 will set up their poster board tin designated
areas of the classroom.
Teacher will determine which fuel/car the student is
promoting.
The classroom will be comparative to a car sales lot
with each student attempting to “sell” their vehicle.
The remaining students will be given a budget, and
instructed to “shop” for a new vehicle.
24Students will roam, investigate, and question, students
from group 1 about their vehicles.
Students will make a decision on what type of car will
be purchased.
Student will write a reflection supporting their choice
of purchase.
This will conclude day 2
On Day 3 the exact same format will take place with
Group 2 setting up the poster board and Group 1
“shopping”.
Group 2 will use the opposite side of the poster board.
(ex. Group 1: Family Car, Group 2: Alternative Fuel
Car)
Evaluation Teacher will monitor discussion.
Teacher will observe the “selling points” of the
groups.
Reflection will be graded based on a rubric.
Day 4
Objective Students will be able to plan a trip using their
Alternative Fueled Vehicle. Students will recall
information learned and apply it to get to their
destination safely.
Procedure Students will compare map routes of the family vehicle
(previous assignment) and possibility ofalternatively
fueled vehicle following the same route.
Students will decide, between both partners which
person’s destination is preferred.
After deciding, students will evaluate the route,
confirming it is a safe /effective way of travel.
Students will use the website
http://www/afdc.energy.gov/fuels/ to choose locations
to refuel.
Students will alter route as needed (ex. Stopping
points, rest areas, hotel)
Students will prepare route comparative to map
project.
Students will highlight any changes that have taken
place.
Evaluation Teacher will visually observe the students.
Teacher will observe discussions.
Teacher will collect map routes/changes and grade.
25ALTERNATIVE FUEL WORKSHEET
NAME: ______________________________________
Alternative Fuel Type: __________________________________________
Description:___________________________________________________
_____________________________________________________________
_____________________________________________________________
_____________________________________________________________
Benefits:______________________________________________________
_____________________________________________________________
_____________________________________________________________
_____________________________________________________________
Vehicles:______________________________________________________
_____________________________________________________________
_____________________________________________________________
How is this fuel produced?
_____________________________________________________________
_____________________________________________________________
_____________________________________________________________
How is this fuel distributed?
_____________________________________________________________
_____________________________________________________________
_____________________________________________________________
Availability in our area?
_____________________________________________________________
_____________________________________________________________
_____________________________________________________________
Emissions:____________________________________________________
_____________________________________________________________
_____________________________________________________________
Incentives and Laws:
_____________________________________________________________
_____________________________________________________________
_____________________________________________________________
Station Locations:
_____________________________________________________________
_____________________________________________________________
_____________________________________________________________
26MAP PROJECT
You will plan a trip, at least 800 miles from Streator. Once you determine
your destination, you will use Map Quest to confirm the mileage. On your
trip there are many things you must consider. Use the guidelines below to
plan your route, stops, cost of travel etc. You may use any appropriate
websites to help you complete this (ex. Hotels.com)
The maximum driving time per day is 8 hours unless you have a traveler that
can also drive. If so, you may extend daily driving time to 10 hours. This is
not overall time but actual time on the road. You will need to factor this into
your stopping points.
Fill out the attached worksheet as you go. This, along with your travel plan,
is what you will turn in for a grade after completion.
27MAP PROJECT WORKSHEET
Name: ________________________________________________________________
Travelers
Who is traveling with you? _________________________________________________
Are they able to share driving time? __________________________________________
Are there any special concerns (child, elder, handicap, medical issue)?__________
If so, how will this affect your travel?
________________________________________________________________________
________________________________________________________________________
________________________________________________________________________
Destination
Where are you going? _____________________________________________________
How many miles from Streator? _____________________________________________
What is the driving time it will take you to get to your destination? ________________
Are there any specific worries (weather, mountains, etc)? _________________________
________________________________________________________________________
Cost
What type of vehicle will you be using? _______________________________________
What is the average mpg? __________________________________________________
How many gallon tank is in this vehicle? ______________________________________
How many miles will you get with a full tank? __________________________________
Planning Travel
How many times will you need to fill your gas tank? _____________________________
Using a fuel cost calculator, approximately how much will this trip cost you in fuel
alone? __________________________________________________________________
Compare this cost to flying to this destination. You may use any airport in Illinois.
(Don’t forget to add the fuel cost to get to and from the airport as well as any parking
fees) Which is more cost effective?
________________________________________________________________________
________________________________________________________________________
________________________________________________________________________
________________________________________________________________________
Remember you are only allowed to drive 8 hours per day. Where will you need to stop
for rest? Factor in possible traffic, construction and delays, and choose a place/hotel/bed
and breakfast to rest. If your destination requires 2 stays, go ahead and plan both of those.
Overnight Stop #1
City: __________________________________________________
Hotel:_________________________________________________
Cost per night:_______________________________________
Overnight Stop #2 (if needed)
City:___________________________________________________
Hotel:_________________________________________________
Cost per night:_______________________________________
28Now create your travel plan. This will be an agenda with departure times, stop times,
eating times, fueling times, sleeping times etc. You may separate or combine any of
these.
**TRAVEL PLAN**
Departure Time: _________________________________________________________
I plan to drive ______ miles before stopping.
I will need to fuel up for the first time around ___________________ (city, state) and it
will cost approx.. $____________. It will take somewhere around ________ minutes at a
gas station.
Use the example below to create your plan.
EXAMPLE
Departing from: Streator IL
Traveling to: New Orleans, LA
Total Expected Driving Time: 14 hours and 56 minutes
Total Miles: 910
Gas Mileage: 15 gallon tank, 22 mpg : I will need to stop before 330 miles traveled for
gasoline.
Day 1
8:00 am: Depart Streator
11:30 am: Stop for fuel, lunch, and restroom in Edwardsville IL.
Estimated time at stop is 45 minutes.
12:15 depart Edwardsville IL
3:50 pm: arrive Sikeston MO restroom break
Estimated Stop time 15 min.
4:05 leave: Sikeston
5:05 arrive Cape Girardeau MO. Staying for the evening
Eating, and fueling up here.
Hotel: ABC Inn
Cost: $89 a night
Total Driving time: 8 hours 5 minutes
Total time since departure 9 hrs 5 min
Day 2
8 am : leave Cape Girardeau MO
10: 40 am: using the restroom and grabbing a snack, also topping off gas tank in
Memphis TN
29Estimated stop time 30 minutes
11:10: departing Memphis
2: 25: arriving in Jackson MS, will sit down and have lunch, get gas, etc.
Estimated stop time 1 hour 30 min.
4:00 pm: leaving Jackson
7:20 pm: Arriving in New Orleans
Total Driving time Day 2: 9 hours 20 minutes
Total Time since Day 2 departure: 11 hours 20 minutes
Total Driving Time: 17 hours 20 min.
Estimated time traveling including hotel stay 35 hours 20 minutes
Estimated time traveling not including hotel stay: 20 hours and 35 minutes
30Angular and Linear Speed of Wind
Turbines: Geometry
Developed for High School Level
By Theresa Bugelholl
PRE ASSIGNMENT
In the near future we will visit wind turbines. One of the activities we will do is to
calculate the angular speed and linear speed of the blades. This assignment will help
prepare you for the visit and assigned activities.
1. Estimate the height of the tower (Remember units):
2. Estimate the length of one blade:
3. Justify your estimates.
4. Search the internet for the tower height and blade length.
Tower Height:
Blade length:
Internet source:
5. What is the circumference of the circle traced out by the outermost part of the blade?
(Show the formula and work)
Indirect Measurement
When we are at the wind turbine, we will indirectly measure the height of the tower and
the length of one blade.
Read the section in the geometry book about methods of indirect measurement.
6. Do you think any of these methods could be used to measure the height of the tower or
the length of a blade? Why or why not.
Right Triangle Trigonometry Review:
7. Find the value of the variables:
31θ = 30˚
α = 15˚
y
x=y+z
x θ
z
45˚ 90˚
90˚ α
5 ft 5 ft
Angular Speed and Linear Speed:
Research angular speed and linear speed to answer the following questions:
8. What is angular speed? And its units?
9. What is linear speed? And its units?
For the trip to the wind turbine, please have with you:
Pencil
Calculator
Clipboard
Good attitude
This completed pre-assignment sheet
32WIND TURBINE VISIT ASSIGNMENT
Objective:
o The students will use an indirect measurement method to measure the length of a
wind turbine blade.
o The students will calculate the angular speed and the linear speed of a wind
turbine.
o The students will work in teams of two or three and compare their answers with
two other groups.
Materials:
o Stopwatch
o Estes Rocket – Altitrak
o Calculators
o Clipboards
o Assignment sheet and pencil
o Map of area including point from which to measure angle of elevations and
ground distance to wind turbine.
Previous knowledge:
Right Triangle Trigonometry
Discussion of indirect measurements and different methods
Angular and Linear speed lecture
Demonstration of Estes Altitrak use
Pre-assignment:
Wind Turbines Angular and Linear Speed Pre-assignment Sheet.
33Procedure:
The following will be performed at a wind turbine site. You will work with one or two
other students in a group. Record the names of the students in your group and the date
below. Each student must complete their own assignment sheet.
Name: Date:
Partners:
Part A: Determine the angular speed (revolutions per minute) of a blade.
1. Pick one blade and watch it through several revolutions. Time the blade through
one complete revolution. Record the data 4 times.
2. Convert the data from revolutions per second to revolutions per minute.
Suggestions:
Start and stop the stopwatch as the blade passes by the tower base.
If one revolution is too fast, or your times are not consistent, then
allow the blade to go two or three revolutions.
A B C D E
Number of Time (seconds) # revolutions / conversion Revolutions /
revolutions time (A/B) minute (RPM)
CXD
60 seconds /
minute
60 seconds /
minute
60 seconds /
minute
60 seconds /
minute
34Part B: Determine the height of the tower base (ground level to hub).
1. Go to the designated location to determine the height of the tower (see map).
Record the distance from the wind turbine from the map: ____________
2. Locate the correct wind turbine.
3. Use the Estes Altitrak to determine the angle of elevation.
Record the angle of elevation: ____________
4. Draw and label a right triangle such that the adjacent side to the angle of elevation
is the distance to the tower and the opposite side is the height of the tower
5. Calculate the height of the tower. (show work and units)
35Part C: Determine the length of a turbine blade.
1. Record the height of the tower calculated in Part B. _______________
2. Using the tower as your reference point, locate where the tip of the blade as it
passes by the tower.
3. Use the Estes Altitrak to determine the angle of elevation to the tip of the blade at
the point in number 2.
a. Record the angle of elevation: __________
b. Record the distance from the wind turbine from the map: ________
4. Draw and label a right triangle such that the adjacent side to the angle of elevation
is the distance to the tower and the opposite side is the distance from the ground
to the tip of the blade.
5. Calculate the distance from the tip of the blade to the ground.
6. To determine the length of the blade, subtract the distance in number 5 from the
distance in number 1.
36Compare your results with two other groups:
Group 1 Group 2
Names
Angular Speed
Height of tower
Length of turbine blade
Discuss the differences in your answers.
Calculate the linear speed of a bug riding the tip of the blade.
Calculate the linear speed of a bug riding on the blade 10 feet from the hub.
37Reflection
Choose one of the following:
_____ I did not enjoy this activity.
_____ I somewhat enjoyed this activity.
_____ This activity was OK.
_____ This was one of the best activities we have done. Make sure you do it next year.
Choose one of the following:
____ This activity was useless in helping me understand any of the objectives. I still do
not understand ____________________.
____ This activity helped me visualize and understand the objectives.
____ Just reading the book and a quick lecture would have been good enough for
understanding the concepts.
Choose one of the following:
_____ It was good to work in teams for this activity.
_____ I would have preferred to work independently for this project.
_____ It made no difference if I had a partner or worked independently.
Any additional comments:
38Residence: Alternative Sustainable
Energy System
Developed for High School Level
By Daniel Cornwall
This lesson will look at alternative sustainable energy system the student will use to
power their home. At least 25% of the electrical systems in the student design will be
powered through the use of alternative sustainable energy systems. In addition, the
student will work with a technical drafting student to plan the hardware, circuitry,
plumbing and mounting requirements for their system.
Lecture suggestions:
Solar Energy
Wind Turbine
Fuel Cells
Bio Fuels
Geothermal Energy
Hydroelectric Systems
Additional work suggestions (if needed):
Lab work for Solar Energy
Lab work for Wind Turbines
Lab work for Fuel Cell
Knowledge Objectives:
1. Define renewable energy.
2. Define sustainable energy.
3. List renewable energy sources.
4. List non-renewable energy sources.
5. Describe the basic principles of different types of energy sources.
6. Create a list of resources that was used to research the alternative energy used in
their design.
Definitions: To have an effective discussion about energy, we must agree on the
definition of terms.
RENEWABLE ENERGY
There are several forms of energy that are considered renewable energy:
39 Biofuel
Biomass
Geothermal
Hydro power
Solar power
Tidal power
Wave power
Wind power
Renewable energy is energy generated from natural resources, such as sunlight, wind,
rain, tides and geothermal heat, which are renewable (naturally replenished).
SUSTAINABLE ENERGY
Sustainable energy is the provision of energy such that meets the needs of the present
without compromising the ability of future generations to meet their needs.
BROADER INTERPRETATION
A broader interpretation may allow inclusion of fossil fuels and nuclear fission as
transitional sources while technology develops, as long as new sources are developed for
future generations to use.
NARROWER INTERPRETATION
A narrower interpretation includes only energy sources which are not expected to deplete
in a time frame relevant to the human race.
Resources:
U.S. Department of Energy (www.energy.gov)
National Renewable Energy Laboratory –NREL (www.nrel.gov)
U.S. Department of Energy Energy Information Administration
(www.tonto.eia.doe.gov)
Energy Efficiency and Renewable Energy-EERE (www.eere.energy.gov)
Southwest Photovoltaic (PV) Systems, Inc. (www.southwestpv.com)
National Aeronautics and Space Administration-NASA (www.nasa.gov)
Siemens (www.powergeneration.siemens.com)
Air Products and Chemicals, Inc. (www.airproducts.com)
40DAY ½
TIME: 43 minutes per day
FORMAT: Instructor lead lecture
OBJECTIVES: Energy Overview – Chapter 2
Introduction
Energy Production & Construction
National Renewable Energy Laboratory
o EXERCISE 2.1 - Review Material Available from NREL
Energy Types
o Atomic
o Chemical
o Electrical
o Heat
o Light
o Magnetic
o Mechanical
o Pressure
o Sound
Summary
DAY ¾
TIME: 43 Minutes per day
FORMAT: Laboratory work
OBJECTIVES: Renewable Energy Monitor – Chapter 5
Introduction
Installing Software
o EXERCISE 5.1 - Install Renewable Energy Monitor Software
o EXERCISE 5.2 - Become Familiar with Renewable Energy Monitor
Software
Using Measurement Software
o EXERCISE 5.3 - Connect Renewable Energy Monitor to Computer
o EXERCISE 5.4 - Measuring Resistance, Voltage, Current & Watts
o EXERCISE 5.5 - Measure Solar Panel Output with Computer Interface
o EXERCISE 5.6 - Capture and View a Plot
Summary
DAY 5
TIME: 43 Minutes
FORMAT: Laboratory work
OBJECTIVES: Solar Panels
41 Introduction
Labs
o EXERCISE 7.1 - Measure Solar Panel Output
o EXERCISE 7.2 - Power Motor with Solar Cell
o EXERCISE 7.3 - Observe Effect of Various Light Levels on Solar Cell
Summary
DAY 6
TIME: 43 Minutes
FORMAT: Laboratory work
OBJECTIVES: Wind Turbines
Introduction
Labs
o EXERCISE 9.1 - Assemble Wind Turbine
o EXERCISE 9.2 - Test Wind Turbine
o EXERCISE 9.3 - Change Wind Turbine Blades & Measure
Summary
DAY 7
TIME: 43 Minutes
FORMAT: Laboratory work
OBJECTIVES: Fuel Cells and Zero Emissions Car
Introduction
Labs
o EXERCISE 11.1 - Set Up Fuel Cell Assembly
o EXERCISE 11.2 - Purging the Fuel Cell
o EXERCISE 11.3 - Battery Powered Water Electrolysis
o EXERCISE 11.4 - Zero Emissions Fuel Cell Car Operation
Summary
DAY 8/9/10
TIME: 43 Minutes per day
FORMAT: Internet Research
OBJECTIVES: Choose Renewable Energy System for Home Design Project
Introduction
Portfolio Research
o Type of Renewable Energy to be Used
o Size and Model of Design
42o Pricing and Budget
Assemble Portfolio for initial meeting with Contractor
Schedule contractor meeting
DAY 11/12
TIME: 39 Minutes (ACCESS) per day
FORMAT: Team Meeting
OBJECTIVES: Contractor Meeting for Home Design Project
Introduction
Portfolio
o Renewable Energy Discussion
o Size and Model of Design
o Equipment Design Needs
o Timeline for Project
Contractor Requirement for Home Design Project
Schedule additional contractor meeting
DAY ???
TIME: 39 Minutes (ACCESS) per day
FORMAT: Team Meeting
OBJECTIVES: Contractor Meeting for Home Design Project
Contractor Design Project
Schedule additional contractor meeting
43Sustainable Energy Planning
Developed for Community College Level
By Mike Phillips
Summary: Students research, report on, and discuss various sources of energy.
Students analyze and evaluate energy sources and develop plans for their home and for
the country.
Context
Audience
Introductory college level/general education course in environmental science.
Skills and concepts that students must have mastered
Students must be able to identify and assess energy sources using published resources
and personal observation.
Students must be able to analyze energy sources in the context of their home and
community and assess the likely costs and benefits of using different energy sources.
Students must be able to analyze energy resources and develop usage plans that are
reasonable, effective, and appropriate.
How the activity is situated in the course
The assignment is undertaken in mid to late term. The class first covers basic concepts in
science and environmental science including scientific methodology, environmental
ethics, environmental economics, political decision-making. Students should also be
familiar with basic concepts of chemistry, physics, biology, and geology; these concepts
will be discussed and may be reviewed if necessary.
44Goals
Content/concepts goals for this activity
Students can assess the costs and benefits of a variety of energy sources. They can
research and describe the history of the source, its current uses, the positive and negative
consequences of its use, and its prospects for inclusion in a sustainable energy plan.
Higher order thinking skills goals for this activity
Students must be able to evaluate data on energy sources to develop an assessment of the
consequences of their use. Students must be able to evaluate a variety of energy sources
and incorporate their findings into the development of a comprehensive energy plan.
Other skills goals for this activity
Students must be able to use the internet to collect information. Students must be able to
share collected information with their peers. Students must be able to assemble
information and conclusions into a coherent written paper with properly cited resources.
Description and Teaching Materials
Part 1, Introduction of Energy sources (one or two class sessions):
Small groups develop lists of energy sources and report out to class. The lists
should be as broad as possible and include: human muscle, animal (muscle & oil),
plant (eating and burning), wind, moving water, coal, petroleum, natural gas,
nuclear fission, solar, nuclear fusion, batteries, hydrogen fuel cell, geothermal
Class discussion of the classification of energy sources by various characteristics
including: when used (historical, modern, developing); renewable vs non-
renewable; how used (direct, processed, converted); sources vs storage/transfer
methods. For example, wind energy has historical, modern, and potential future
applications, it is renewable, it can be used directly (sailing), processed (wind
mills), and converted (wind turbines), and it is a source. An example of a
storage/transfer method would be fuels cells or batteries.
Homework: Individual students (or groups) are assigned one to three sources to
assess in greater detail and report back to the class with their findings. The report
should include a description of how the energy source (or transfer technology)
works, current use, availability, sustainability, the costs of use (setup, operation &
maintenance), limitations/disadvantages (social, physical, technological, energy
conversion factor), environmental concerns and benefits, advantages of use,
typical time for return of investment cost, future prospects.
Part 2, Discussion of Energy sources (may take two to six (or more) class sessions
depending on level of detail/depth of discussion, time constraints):
45You can also read