S Guide T0 Raising - Countryside
←
→
Page content transcription
If your browser does not render page correctly, please read the page content below
Guide
                                        T0 Raising
                                                     s
                                                For Meat

             iamcountryside.com
Countryside Guide To Raising Rabbits For Meat              1
Index
       Raising Rabbits On The Homestead.......................................................3
                      Get Started..........................................................................4
                      Feed & Feeding...................................................................5
                      Housing & Equipment.........................................................6
                      Breeding..............................................................................7
                      Butchering...........................................................................8
                      Manure In The Garden........................................................9
                      Healthcare...........................................................................9
                      Grooming...........................................................................10
                      Home Tanning...................................................................11
                      How To Sex A Rabbit.........................................................13

   2                                                              Countryside Guide To Raising Rabbits For Meat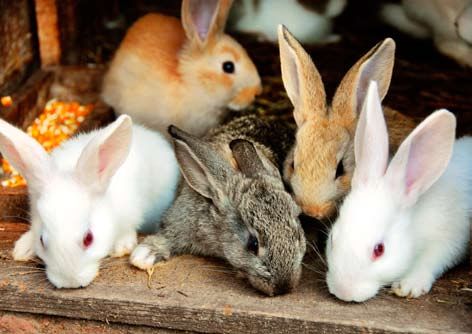
Raising Rabbits on the Homestead

                                                                           Don’t have
                                                                           room for beef?

                                                                           Don’t want to butcher a
                                                                           large animal like a pig?

                                                                           Consider rabbits!

                                                      A Very Efficient Animal

I
   t has been said that an acre of alfalfa fed to rabbits will return at least five times as much meat as that same amount of
   alfalfa fed to beef cattle. Add to that the ease with which rabbits can be cared for, the capital outlay involved, the small
   amount of space required, the ease of butchering the smaller animals (butchering them when needed reduces or eliminates
a need for freezer space), and it’s easy to see why rabbits are so often considered basic homestead livestock.
     Although a diet of grains and forages has generally been considered to yield the best rabbit production, the Rabbit
Research Center at Oregon State University discovered that “with an appropriate nutrition level, alfalfa meal can probably
replace grain in rabbit diets with no decrease in productivity.”
    Rabbit meat is also more nutritious and lower in fat than beef, pork or even poultry. It contains 20.8 percent protein as
compared to beef’s 16.3 average protein content.
    One of the reasons people raise rabbits is their well-known propensity for reproduction. While it isn’t as easy as common
folklore might lead you to believe, starting out with good stock and sticking with sound management techniques will make
things easier. Since it’s just as time-consuming and costly to house and feed a fine rabbit as an inferior one, don’t skimp on
your breeding stock.
    A productive buck and doe can provide a family with 16 pounds of meat in just three months. Even a beginner should be
able to produce four or five litters of six to eight bunnies in a year. With some experience, six annual litters is a possibility.
    Two rabbit breeds—the New Zealand White and Californian—are well known as excellent meat producers. The New
Zealand is the pink-eyed white rabbit that often appears in pet shops around Easter. The Californian has some New Zealand
in its ancestry. It is also white, but it has black markings on the nose and feet. When full grown, both breeds tip the scales at
nine to 12 pounds. At eight or nine weeks, they yield a four-pound carcass that is 55 percent meat.
    Perhaps you want something with a little more color in your home hutch. Among the older breeds to consider are the
Champagne d’Argent, Palomino, American Chinchilla and the Satin.
    Keep in mind these breeds may not have the rate of production desired on the working homestead…but then, not all New
Zealand Whites and Californians are good meat producers, either. The “strain,” as well as the breed, is important. Simply
put, a meat rabbit has been bred to produce large, healthy litters of meaty animals on a steady basis.
    Rabbits are grouped into three size categories. In the small category are the Tan, Dutch, English Spot, Havana and other
breeds. They peak at four to seven pounds and are raised for meat and laboratory use. Smaller still are the Netherland Dwarf,
Polish, Britannia Petite and other two to three pound breeds. They are not recommended for the home meat producer.

      Countryside Guide To Raising Rabbits For Meat                                                                           3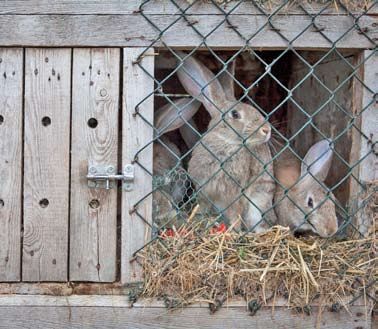
The giants are at the other end of the spectrum. The Flemish Giant
sometimes tips the scales at 20 pounds, while the Giant Chinchilla and
Checkered Giant can reach 15 pounds. Some fanciers of the big rabbits
claim they cost about the same to feed as standard-sized rabbits. Even if
that is true, the bigger animals have larger and denser bones and thicker
hides and don’t produce meat as efficiently as the medium breeds.
    Weighing in at nine to 12 pounds full-grown, the medium breeds are
large enough to be butchered at a young age, but not so big as to run up
hefty feed bills. Not surprisingly, the New Zealand and California fall into
this “just right” size category.

                                                                               A productive buck and doe can provide a family
                                                                               with 16 pounds of meat in just three months.

                                                            How does the beginner acquire those first rabbits? The American
                                                        Rabbit Breeders Association (PO Box 5667, Bloomington, IL 61702; www.
                                                        arba.net) can provide you with information on breeders in your area.
                                                        If there is a rabbit processing plant nearby, the manager or employees
                                                        should be able to recommend a supplier of young rabbits. Classified
and display ads in Countryside are another source to research. Your county extension agent might have some helpful infor-
mation, and also check with local feed dealers.
    If you’re like most would-be breeders, you’re probably ready to pull the trigger and buy the first decent-looking rabbits
out there. Don’t make that mistake! Visit as many breeders and rabbitries as possible. Take a look at different breeds (a rabbit
show is a good place for that) and make sure that raising rabbits is something that is right for you and your situation.
    Don’t be shy about taking notes and asking questions. Here are a few things you’ll want to know:
    How many litters do the rabbits average in a year? Do they breed even in winter? How many bunnies per litter? Six to
eight is a good number. While some does regularly give birth to 10 or more, it’s difficult to nurse such a large litter unless
there are foster mothers available who can care for some of the young ones.
    Also ask the breeder how long it takes for his fryers to reach a butchering weight of four pounds. How long does he wait
after the doe kindles (that’s the rabbit term for giving birth) before he rebreeds her for the next litter?
    Find out what the breeder feeds his animals. If he uses a diet made up exclusively of rabbit pellets and you want to use
some grain and forages as well in the new diet, plan on making the switch gradually.
    Ask to see any written production records that have been kept. This will give you an introduction to the various systems
and provide some ideas about how to keep your own records.
    There are many variations in breed-back schedules. Backyard breeders often find that their does do well if they are bred
back when their litters are five or six weeks old. A four-week breed-back can also work well with little stress on the doe. Her
litter should be weaned about two weeks after she has been rebred.
    Commercial breeders aiming for the highest possible production will sometimes use accelerated breeding schedules and
breed does back as soon as a week after they kindle. Such rapid rebreeding requires special feed and management and is
obviously hard on does.
    A good New Zealand or Californian doe should be able to produce fryers that weigh four pounds at eight weeks of age.
Butcher them as young as possible for the best meat. A four-pound animal produces about two pounds of meat.
    Rabbit really tastes something like chicken, and it even gets cut into eight pieces like a frying chicken. However, the bones
are smaller and the meat is all white.
    What will this lean, home-raised meat cost? It depends on the price of your feed and the animal’s feed efficiency. New
Zealands often have a feed conversion ratio of 3.5 to 1, meaning that it must eat 3.5 pounds of feed to produce one pound
of meat.
    If your feed costs 20 cents a pound, for example, it would cost 70 cents to produce a pound of meat. To get a more ac-
curate idea of total costs, you’ll need to add the cost of rabbitry equipment and a salary for your time and effort. However,
such “work” is often pleasure rather than drudgery for the homesteader.

  4                                                                               Countryside Guide To Raising Rabbits For Meat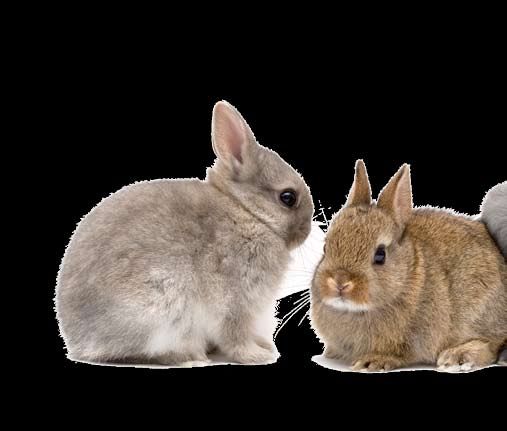
Feed & Feeding
   The homesteader may well come out ahead financially if he grows his own grains and forages rather than paying the
going price for commercial rabbit feed.
   Dr. Peter Cheeke, a nutritionist at the Oregon State University Rabbit Research Center, says that a ration of free choice
hay and salt along with limited amounts of rolled oats, barley or corn should be a satisfactory diet for homestead rabbits.
   “A bit of testing can be done to find the minimum level of rolled grain that will support the desired level of production,”
Cheeke said.
   While this diet could be a little low in protein, soybean meal added to the grain would solve that problem. Use only good
quality hay, preferably containing clover or alfalfa. The soybeans will also provide calcium and trace elements, while the
grains offer calories, protein and phosphorus.
   “Fat-soluble vitamins (A,D,E,K) will be provided by the hay and grain, as well the B vitamins, which are also synthesized
by the rabbit’s intestinal tract,” according to Cheeke.
   In his book Raising Small Livestock, (available from the Countryside Bookstore), former Countryside editor Jerome Belanger
suggested some feed formulas. The following rations meet USDA requirements for dry does, herd bucks and developing
young animals:

   #1                                            #2                                    #3
   • Whole oats or wheat 15 1lbs.                • Whole barley or oats 35 lbs.        • Whole oats 45 lbs.
   • Barley, milo or other                       • Alfalfa or clover hay 64.5 lbs.     • Soybean, peanut or linseed
   • Grain sorghum 15 lbs.                       • Salt 0.5 lbs.                         pellets or pea size cake (38 to
   • Alfalfa, clover, lespedeza or 		                                                    43% protein) 15 lbs.
     pea hay 69.5 lbs.                                                                 • Timothy, prairie or sudan hay
   • Salt 0.5 lbs.                                                                       39.5 lbs.
                                                                                       • Salt 0.5 lbs.

Here are some higher protein rations for pregnant nursing does:

  #1                                             #2                                     #3
  • Whole oats or wheat 15 lbs.                  • Whole barley or oats 35 lbs.         • Whole oats 45 lbs.
  • Whole barley, milo or other grain            • Soybean or peanut meal               • Linseed pellets or peasize cake
    sorghum 15 lbs.                              • Pellets or peasize cake (38 to         (38 to 43% protein) 25 lbs.
  • Soybean or peanut meal                         43% protein) 15 lbs.                 • Timothy, prairie or sudan hay
  • Pellets (38 to 43% protein) 20 lbs.          • Alfalfa or clover hay 49.5 lbs.        29.5 lbs.
  • Alfalfa, clover or pea hay 49.5 lbs.         • Salt 0.5 lbs.                        • Salt 0.5 lbs.
  • Salt 0.5 lbs.

A complete ration from which pellets are made but which homesteaders can feed ground and moistened may contain the
following ingredients:

                                      • 44% protein
                                      • Soybean meal 18 lbs.
                                      • 28% protein linseed meal 4 lbs.
                                      • 15% alfalfa meal 40 lbs.
                                      • Wheat bran 15 lbs.
                                      • Ground milo, barley or corn 18.5 lbs.
                                      • Ground oats 4 lbs.
                                      • Salt 0.5 lbs.

      Countryside Guide To Raising Rabbits For Meat                                                                        5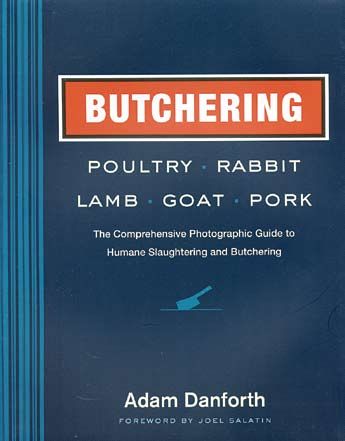
Fresh greens can supplement a rabbit’s diet of hay and grains, but they have a very high water content and must be fed
in large quantities if they are to provide a rabbit with adequate nutrition.
    Rabbit researchers have successfully raised weanlings on a diet of half pellets and half greens with no reduction in growth
rates. The pellet ration was cut in half and replaced with greens such as clover, lettuce, celery and grass, fed free choice.
    Be cautious when introducing greens to rabbits for the first time. Start by feeding small quantities so the rabbit’s system
can adjust to the new, higher moisture feed. This is especially important when dealing with rabbits that may be susceptible
to diarrhea.
    Victor Giammatteti, author of Raising Small Meat Animals, believes that greens should not be fed to bunnies less than three
months of age, to lactating does, or does in their last 10 days of pregnancy except as an occasional treat.
    Make sure the greens you use as feed are fresh and free of insecticides. Fermented greens can make a rabbit ill.
    Root crops are another source of rabbit food. Rabbits like mangle beets, carrots and rutabagas. They’ll also eat peas, corn
and sunflower seeds. Rabbit treats include apple slices, dandelion greens or a few twigs from your fruit trees.
    If pellets are used as the main feed, a mature New Zealand doe requires about four to six ounces, or 1/2 to 3/4 cup per
day. Once a doe kindles, she and her young should be provided with all they can eat.
    These recommendations vary with each individual animal’s metabolism. Watch the feed dishes. If an animal consistently
leaves food in its dish, the ration probably needs to be decreased. If the animal always seems desperately hungry, increase
the ration.
    One rabbit farmer who always likes to see his animals in sleek condition only feeds what they can eat in 30 minutes.
Anything that is left goes back to the feed bin. Don’t overfeed, as this will build up internal fat around the reproductive
organs and make breeding more difficult.
    An average dry doe will eat about 3.8 percent of her weight each day. That means a 10-pound doe eats 10 times 0.038
or 0.38 pound (six ounces) of feed per day. The amount should be divided into about 2.5 ounces of grain and 3.5 ounces of
hay. When green feed or root crops are fed, they should be limited to about 1.6 ounces per day (just over 25 percent of total
feed) when using this formula.
    Rabbits under six months of age will eat about 6.7 percent of their body weight daily. A rabbit that weighs four pounds
when weaned will need about 4.2 ounces a day, with the quantity increasing as the rabbit adds weight.
    Regardless of whether you feed homegrown crops, pellets, or a combination of the two, many breeders claim that feeding
only pellets for 10 days before slaughter will help to firm up the meat.

                                                    Housing & Equipment
    Most people know about wood and chicken wire rabbit hutches. Wasn’t that what you used to house that childhood pet
bunny? While many such cages are still in use, they are not known for durability. Stray dogs can tear them apart and make a
meal of your rabbits. They are generally difficult (and some are impossible) to keep clean. Most homesteaders will be better
off with all-wire cages.
    Rabbits enjoy chewing on wood, which is another reason to go with a metal cage. Wood also harbors odors and germs.
If you don’t mind replacing wire and doing some occasional carpentry work, go ahead and use the wood cages. However,
you’ll need to keep them high off the ground and surround the cages with sturdy, dog-proof fencing.
    Never make a cage floor out of chicken wire. One-half by one-inch 14 or 16 gauge galvanized wire makes a much sturdier
floor. The holes are also small enough so that the feet of young bunnies won’t poke through the bottom.
    Give your meat rabbits a space of 36 x 30 inches, 18 inches high. For the large breeds, expand those dimensions to 42 x 30
inches. Some breeders make the space for their big rabbits as roomy as 4 x 6 feet with a height of 24 inches.
    Materials for making all-wire cages are available through rabbitry supply houses, but the do-it-yourselfer can save money
by assembling them with used or scrounged materials. The savings are especially significant if you’ll need more than a few
cages. You will need to buy some “J” clips and a special pair of pliers to put the wire cage parts together.
    Use 14 or 16 gauge galvanized wire mesh with 1 x 2 inch spacing for the cage top and sides. As mentioned earlier, use
1/2 x 1 wire for the floor.
    The side with the one-inch spaced wire should face up since it is smoother, and the rabbits can walk on it. Metal Z-shaped
rods can be used as floor supports. They can be wired easily to the cage bottom.
    Some rabbit owners provide a small board in each cage to allow the animals to rest from walking on the all-wire flooring,
while other maintain that this is unnecessary if the rabbits have thick, heavily furred foot pads. Commercial meat rabbits
are bred specifically for this trait.
    Rabbits with thinly furred feet often get sore hocks if they walk entirely on a wire floor. Sore hocks are bruised or chafed,
and they can become infected with a variety of bacteria.
    So what’s the advantage in using wire flooring? It’s much easier to keep clean . The 1/2 x 1-inch spacing is just large
enough to allow rabbit droppings to fall through to the ground below.
    Droppings that cling to the cage will have to be brushed off regularly, and the floor will need to be cleaned periodically
with a mild germicide or butane torch. This is far easier and less messy than cleaning urine-soaked straw and droppings
off a wooden floor.

  6                                                                               Countryside Guide To Raising Rabbits For Meat
Breeders who use multiple compartment outdoor wooden hutches will be better prepared for the winter if they enclose
the hutch with wood on three sides. Some breeders make wooden panels to drop down on their wire hutches during the
winter. Rabbits need protection from wind and if you’re using wire cages, the easiest solution is to move the rabbits into a
building.
   Creative types will find a number of materials that work well for building rabbit hutches. One designer suggests using
old bread cooling racks or refrigerator shelves for door or cage dividers.
                                                          There are a few other pieces of equipment you’ll need once the cages
                                                         are set up. Nest boxes are the first priority. They are approximately 12
                                                         inches wide, 10 inches high and 18 inches long. The box should slope
                                                         about eight inches in front to give the doe easy access. Many breeders
                                                         place a six-inch wide board partially across the top of the box to give
                                                         the doe a convenient spot to perch and survey her world.
                                                             There are many variations on the basic nest box. In the past, they
                                                         were often fashioned from nail kegs. Today, modern European nests
                                                         made of plastic are built into the cages beneath floor level so the doe
                                                         has to jump down into the nest. The doe’s entrance to the nest is
                                                         covered except for 10 minutes in the morning when she is allowed to
                                                         feed her litter (she only nurses her young once or twice a day). The
                                                         Europeans say that the limited nest box access prevents accidental
                                                         deaths caused by the doe jumping on her young.
                                                             Naturally, giant breeds will need larger nests. A 15 x 24-inch box
                                                         is adequate.
                                                             Feeders and waterers are an absolute necessity. There is a handy
                                                         and inexpensive J-shaped self feeder that has an open chute-like top.
                                                         Feed is poured in from outside the cage. A small hole cut in the side
                                                         of the cage allows the foot of the J to extent inside where the rabbits
                                                         can eat the food that was poured down the chute.
                                                             Simple plastic bottle waterers with sipper tubes are the easiest
                                                         choice for the small-scale operation. Some rabbitry suppliers sell the
tubes separately, and a waterer can be made by attaching the tubes to an empty plastic soda bottle. The bottles are especially
nice, since they prevent the water from being contaminated with droppings.
   Some plastic water bottles may crack and break in freezing weather. Plastic soda bottles have some flexibility and aren’t
as prone to cracking. Don’t forget that you’ll need an extra set of waterers to use during the winter while the frozen ones
are thawing indoors.
   Some small rabbit raisers use stoneware crocks for feed and water containers. They work well enough, but it’s easier for
rabbits to scatter food and water. Food and water contamination are common. If you do use crocks, clean them thoroughly
and often.
   As your rabbits multiply, automatic watering systems might become a logical option. It is the easiest way to water a large
number of rabbits inside a building, but such systems aren’t necessary for the small home meat operation.

                                                           Breeding
    Let’s assume that you’ve found a nice pair or trio (one buck, two does) of ready-to-mate New Zealands. The rabbits have
had several weeks to get acclimated to their new surroundings. Now it’s time for the main event.
    Always take the doe to the buck’s cage for mating. A doe is highly territorial, and she is likely to fight a buck on her own
turf. Things tend to go more smoothly in the buck’s quarters, although you should be watching the pair. Some breeders have
reported leaving the scene to return and discover that the buck had been castrated by a less than amorous doe.
    If a mating is going to take place, it will usually happen in the first 30 seconds. It isn’t uncommon for the buck to fall
backwards or onto his side after ejaculation, sometimes emitting a small cry. Don’t get alarmed if this happens to you, for it
is a signal that mating has taken place.
    Many breeders return the doe to the buck an hour or two later for a second copulation. A doe is induced to ovulate by
the stimulation of the mating act itself, so a second mating could mean a larger litter.
    Try again in a few days if the mating attempt was unsuccessful. While a doe rabbit doesn’t have regular estrus cycle, some
say that her vulva will look reddish and purplish in color when she is ready to mate, smaller and pinkish if she is not.
    If your rabbits are continually unsuccessful at breeding, it could mean that you are over–feeding your doe or that you
need to look for different breeding stock.
    Once the mating has taken place, a litter of bunnies will appear on the 31st day, give or take a day. On about the 28th
day after breeding, put a nest box filled with straw or shredded newspaper into the doe’s cage. Hay, sugar cane shreddings
and other materials may be used, but try to avoid pointed or dusty things that could injure the eyes of small bunnies.

      Countryside Guide To Raising Rabbits For Meat                                                                          7
The doe will pull fur from her own body shortly before kindling. Does tend to like privacy as they prepare for birth, so it’s
rare to actually see a doe kindle her young. Don’t be fooled if the proper time has elapsed and all you see in the nest is a pile
of fur. Look more closely. Chances are that whole litter of pink bunnies is resting right under that accumulation of hair.
From birth on, make sure the doe has all the feed and water she wants. In about 10 days, the young bunnies will open
their eyes and begin exploring the nest box. They’ll venture out into the cage when they reach three weeks of age.
Opinions vary on when to remove the nest box. Some breeders remove it as soon as 10 to 15 days after kindling, while
others wait until the bunnies are five or six weeks old. Weather is one factor that will affect your decision, but as long as the
nest is dry, bunnies can tolerate the cold.
The nest box can be an excellent place for bacteria growth, and that’s one good reason to remove it early. Some breeders drill
quarter-inch holes in the floors of their nest boxes to allow for urine drainage. This helps to keep the nest a little cleaner.
If you prefer, you can leave the litter with the doe until they reach butchering size at eight or nine weeks. In that case, the
doe can easily be rebred about six weeks after the litter is born.
As you gain more knowledge and experience, you may want to try to rebreed the doe earlier, depending on how much
meat you want to produce. If you choose to rebreed her four weeks after birth, the first litter will need to be weaned at about
six weeks of age.
Just remember that you’ll need more cages to house the weanlings than if you left them with the mother until butchering.
The growth rate of the young rabbits will probably slow for the first week they are away from the doe.
Some researchers indicate that there is less stress on the young if the doe is moved to a new cage rather than the new
litter. Rabbits are territorial, and it is apparently very stressful (especially for bunnies) to be moved to new surroundings. If
a young litter is moved, they will often stop eating for several days.
Butchering
If your dining experience with rabbit has been limited to wild specimens, the white meat and sweet flavor of domesti-
cated rabbit might be a surprise. It can be cooked in dozens of ways. The German dish “hasenpfeffer” is marinated rabbit.
The meat can be roasted and stuffed or breaded and fried like fish or chicken. However you prepare it, rabbit will become
a welcome addition to the table.
Everyone develops their own personal processing style, but the following methods seem to work well for the first-time
rabbit butcher.
Prepare for butchering by nailing a board to a wall or fence. The board should be level with your head. A number six
screw embedded in the board makes a handy place to hang the rabbit as you clean it.
Have a small work table ready nearby with two buckets of cool water. An additional empty pail will be handy for catch-
ing entrails. Other than that, all you need are a chicken-sticking knife and a boning knife.
There are two common methods for killing a rabbit. The first is stunning the animal with a heavy stick. Hold the rabbit
with one hand over its loin, between the ribs and hips, and strike it with one heavy blow just behind the ears at the base of
the skull.
The second method is to hold the rabbit by its feet. Using the other, press your thumb against the back of the rabbit’s head
while bending the head backward as far as possible. Pull until you feel the head break away from the neck.
Most beginners prefer the stick method. Regardless of which method you choose, the rabbit’s throat should then be quickly
slit, the head removed and the carcass hung by a hind leg on your prepared hook for a thorough bleeding. Insert the hook
between the tendon and bone of one hind leg.
Next, cut off the rabbit’s front feet and the free hind foot. Slit the skin on the inside of both hind legs with the chicken
sticking knife and tear the hide away from the hind leg fastened to the hook. Loosen the hide from around the vent by work-
ing your fingers between the hide and body. Still forcing your fingers between hide and body, pull the hide free from the free
hind leg. Work the pelt down towards the head, freeing it with your fingers and knife. Leave the fat on the flanks, not the
hide. As soon as you can grip the whole pelt firmly with one hand, you can remove the remainder with one strong pull.
Remove the tail once the rabbit is skinned. Then slit down the center of the belly, being careful not to cut the bladder,
intestines or stomach.
Begin pulling out the entrails, using the knife to cut through some of the tissue holding the intestines to the body cavity.
Before the intestines are completely removed, cut the liver loose and remove the gall bladder, which is located on one side
of the liver. Be very careful, since any bile spilled on the carcass will spoil the taste of the meat.
Remove the heart next. Once the heart and liver are free, finish removing the intestines. Some people consider the heart,
liver and brains of a rabbit to be a delicacy. If you butcher a number of rabbits at one time, you might want to try preparing
them.
The carcass should now be placed in water to cool for about 15 minutes. If it’s left too long, it will begin to absorb water.
Cut up the carcass if you wish and cool in the refrigerator for several hours. Prepare the rabbit as you wish or freeze it.
If you have extra meat, it usually isn’t too hard to find friends or neighbors to buy it. Be aware of local and state laws on
such sales. In many cases, you’re allowed to sell home butchered rabbit meat from your homestead, but special licensing
and facilities will be needed if you want to sell to stores or have your own retail outlet. Usually, selling a few extra animals
in a low-key manner won’t draw unwanted attention.
8 Countryside Guide To Raising Rabbits For MeatA Valuable By-Product For The Garden
Don’t overlook rabbit manure. It is great for composting and easy to work with. Rabbit manure is so mild that it won’t
burn your plants when placed directly on the soil.
A 10–12-pound doe and her offspring will produce about six cubic feet of manure a year. A single doe or buck will produce
about three cubic feet a year. The high nitrogen content of these little nuggets of “black gold” is a gardener’s dream.
Many rabbit owners build worm pits beneath their rabbit cages, letting worms convert the manure into rich humus. This
also reduces odors in the rabbitry. A worm bed can be made from 8 x 10 lumber, or you can dig a pit 10–12 inches deep to
accommodate the worms and manure.
Someone counted 2,000 worms in a gallon of culture. Not only will you get plenty of worms in a gallon, but there are
also an incredible amount of eggs. Two worms will produce as many as 10,000 offspring in a year, so a gallon will be more
than adequate for the homestead worm farmer.
One worm wholesaler likes to use a mixture of half manure for his worm beds. He recommends using aged sawdust so
the resin will be deteriorated and not be harmful to the worms. Peat moss or other materials can also be added.
Start the pit about 3/4 full of the worm bedding. As the rabbit droppings accumulate, turn the beds about once a week
to stir things up. The bed should be damp, but not wet.
Since worms produce their own weight in castings every 24 hours, it won’t be long before your rabbit manure has been
converted into rich black potting soil. At the same time, you’ll also be reducing your rabbitry cleaning chores.
The size of your pits will determine how often you need to clean out the humus. Some rabbit owners say that the busy
worms have reduced the need for pit cleanouts to just twice a year. When you do clean the pits, try to avoid areas where
worm populations are especially active and laying eggs.
There are two economical methods of disease control for the home-
steader. First, prevent disease from entering your rabbitry by carefully
examining stock before you buy. A healthy rabbit will be clear-eyed and
active. Look for traces of nasal discharge or signs of diarrhea. Examine ears
for signs of mites or ringworm. Listen to the animal’s breathing. It should
be even and quiet.
When a new animal is introduced into your rabbitry, isolate it from the
rest of the stock for a week or two. This will prevent all of your rabbits from
getting a disease if it appears.
A stout stick is the second economical health care method. If a rabbit shows serious signs of disease, it’s usually more
economical to kill the rabbit rather than trying to treat the illness. Move any animal away from the rest of the herd at the
first sign of sickness.
Check your water supply if diarrhea is a persistent problem. This is especially true if you have well water. Bacteria that
won’t harm humans can sometimes cause serious problems in rabbits. The organisms can be eliminated by adding 1 cc of
chlorine bleach to every two gallons of water.
Minimizing stress will do much to prevent disease. Unusual noises, stray cats and dogs and even too many people can
upset rabbits. In some cases, stress will cause does to cannibalize their young.
Weather conditions are another factor. Rabbits should be kept in the shade during the summer. They are quite heat sensi-
tive and don’t do well in temperatures above 85 degrees.
To help keep rabbits comfortable in hot weather, freeze water in plastic gallon jugs. Place one in each rabbit’s cage to
help cool the surrounding air.
Act immediately if you see a rabbit lying limp and listless in his cage with signs of wetness around his mouth. The animal
may be on the verge of heat stroke. To lower the body temperature quickly, immerse the rabbit up to its neck in cool (not
cold) water. Make sure the rabbit is soaked to the skin. Dry it off, put it back in the cage and keep it away from drafts.
Winter poses its own set of problems, but rabbits adjust more easily to cold weather than to heat. If your rabbits are out-
doors, make sure they are well protected on three sides. It helps to place hutches against the south side of a building where
the sun’s rays can provide warmth.
Countryside Guide To Raising Rabbits For Meat 9If you raise litters in the winter, you may want to add extra bedding to nest boxes and line the nest with a piece of Sty-
rofoam cut to fit the bottom.
Some breeders save fur from summer litters to add to the winter nest or for use when does neglect to pull enough fur.
Even lining the nest with several layers of cardboard will help.
Lack of proper sanitation and ventilation is another potential disease hazard. Strong ammonia fumes from urine increase
a rabbit’s susceptibility to colds. Dirty cages create all kinds of bacteria buildup.
Disease shouldn’t be a problem for the small rabbitry that has carefully chosen stock, clean cages and good air flow
without drafts. Even so, there are a few diseases that you should know about.
Diarrhea has a variety of causes, including a change in feed or a proliferation of parasites and bacteria. Young, newly
weaned rabbits are most susceptible, so it’s wise to give them new feeds gradually.
Mucoid enteritis is one particularly troublesome disease that is often accompanied by diarrhea. Afflicted rabbits will go
off feed, sit in a hunched position with their feet underneath them and their eyes squinted.
Animals will often grind their teeth, and there will be a watery sloshing sound in the belly. Additional fiber (hay is
good) in a rabbit’s diet will sometimes ward off this disease in its early stages, but once it takes hold, the rabbit will usu-
ally die quickly.
Coccidiosis and ear mites are two of the most common parasites to afflict rabbits. Coccidia are microscopic parasites that
can invade a rabbit’s liver or intestines where they rapidly multiply. Coccidia eggs are passed via rabbit manure, and the
animal can easily reinfect itself if food or water are contaminated with manure.
Not all forms of coccidia are harmful. Rabbits can host moderate numbers of these organisms and show no ill effects.
The problem manifests itself when coccidian populations become excessive.
In severe cases, rabbits will have poor appetites, gain weight slowly, have pot bellies and sometimes chew their own
fur. Even if these outward signs aren’t present, too many coccidia can lower a rabbit’s resistance to other diseases and
sometimes cause diarrhea.
You can treat the disease by feeding pellets containing 0.1 percent sulfaquinoxaline continuously for two weeks. Don’t
use the medicated feed for another two weeks. Wait 10 days, then resume the medicated feed for another two weeks. Don’t
use the medication over long periods of time, as resistant strains of coccidia will develop.
Wire-bottomed cages, self-feeders, watering bottles and frequent cage cleaning are the best way to keep coccidia under
control.
If you see a rabbit scratch its ears often, take a close look inside the ears. If you see dark reddish-brown wax or scabs, it’s
a good indication that your rabbit has ear mites. The easiest way to treat the problem is to carefully saturate scabs and the
inside of the ear with mineral oil, baby oil or some other mild oil. Mites breathe through pores in the side of their bodies,
and the oil will suffocate them.
It is important to treat all of your rabbits’ ears with oil to keep mites from spreading. Start with rabbits that show no signs
of disease and end with those showing the worst problems to avoid further spreading of mites.
A cotton swab works well for applying the oil. Don’t be afraid to let a little oil run down into the ear passage. Continue
the treatment every day for a week. Add a small amount of rotenone to the oil to make the treatment even more effective.
Rotenone is an organic insecticide which will help kill the mites but won’t harm the rabbit.
Mites like to live in dirty hutches, so good sanitation is your best means of prevention.
Grooming
Like most animals, rabbits do a good job of grooming themselves as long as they are given clean, sanitary living quarters.
There are times when the rabbit keeper needs to do a certain amount of grooming and care. Toenails will grow too long,
since a caged rabbit has little opportunity to wear them down. Occasional instances of hutch burn or malocclusion
may require your attention.
Also known as urine burn, hutch burn is generally caused by dirty cages. It is much less common when
cages or hutches have wire floors. If left to build up in cage corners, urine, feces
and dirt will eventually irritate the delicate skin of a rabbit’s genital
area.
A doe that persistently urinates in her nest box and then
proceeds to sit in the wet hay for long periods of time is
a prime candidate for this ailment. The irritated vent or
genital area will appear reddened and chapped.
If the skin is unbroken and no signs of infection are
visible, a simple soap and water washing of the afflicted
area followed by an application of petroleum jelly should
solve this problem. That’s assuming the cage and nest box
are thoroughly cleaned out and allowed to dry.
10 Countryside Guide To Raising Rabbits For MeatIf there are signs of infection, again start with soap and water washing, then use sterile cotton to carefully press out any
pus that may be present.
Once as much pus as possible has been removed, rewash the area with a mild antiseptic. Dry gently (a hair dryer can
be used), then rub a little petroleum jelly or other ointment over the area. Continue treating with ointment daily until the
genital area returns to its normal appearance.
Never breed a rabbit that is suffering from even a mild case of hutch burn, as it may pass along bacteria to other rabbits
while mating.
Nail clipping may seem like a perilous task if you have skittish rabbits, but there are some ways to avoid scratched arms.
Begin by wearing a heavy, long-sleeve jacket or shirt. Then engage in “rabbit hypnosis.”
Turn your rabbit over on its back, either on a table or carefully cradled on your lap. Gently stroke the animal’s chest and
abdomen. Stroke only with the lay of the fur. Also gently massage the head around the temple while simultaneously talking
to the rabbit in a low monotone. The animal will begin to breathe deeply and will lie quietly with its eyes partially closed.
Get your dog nail clippers out and trim the tips of the rabbit’s nails. Be careful not to cut into the rabbit’s veins, or the
animal will bleed and suffer some pain. On your first attempt, you might want to play it safe and clip just the very tips of
the nails until the job becomes more familiar and you learn to see the location of the vein.
You must remain calm and quiet during these clipping sessions. A sudden noise or movement will rouse the rabbit from
its stupor.
Nail clipping must be done regularly on caged rabbits. Nails that grow too long can catch on cage wire and cause the
rabbit to pull a nail out, which is a nasty injury.
Malocclusion, commonly known as buck teeth, is an improper alignment of the rabbit’s front teeth. The upper two front
teeth will slightly overlap the lower two front teeth in a normal rabbit. In cases of malocclusion, the lower teeth overlap the
uppers, which prevents the rabbit from eating properly.
To avoid this problem, carefully examine rabbits before you make a purchase. If buck teeth do occur in your herd, never
mate any animals with this defect, as it is hereditary and will be passed along to the offspring.
Buck teeth will occasionally be caused by a rabbit catching its teeth on cage wire and pulling them out of alignment. Fancy
breeds such as the Lops, which are especially bred for rounded heads, are more likely to have this problem.
If you’re determined to keep a buck-toothed rabbit, you’ll have to clip its teeth regularly. A rabbit’s upper two incisors
grow an average five inches a year, while the lower incisors will grow eight inches a year. A normal rabbit wears its teeth
down naturally by chewing, but a rabbit with malocclusion will need your help.
Teeth should be clipped down to normal length every three or four weeks with wire cutters or sharp sidecutting pliers.
Failure to do this will cause your rabbit to lose weight, since he will be unable to eat properly. If left unattended too long,
the teeth will grow right into the rabbit’s flesh and cause a gruesome death.
If you do find a rabbit with a malocclusion problem, the best thing to do is to trim the teeth and quickly fatten that animal
for the table.
Home Tanning
Don’t expect perfection the first time you tan rabbit hides. It takes a fair amount of work and experience to turn out a
professional looking product. Much of the end result depends on how you handle the raw skins.
Hang your freshly butchered rabbit by the hind legs from a skinning gambrel or two hooks fastened to a board. Then
cut off the head and front legs with a slim-bladed skinning knife. Next cut around each rear leg at the hock joint and down
through the vent.
You will now be able to strip the hide from the animal in one piece, turning it inside out as you do when taking off a
T-shirt. As you strip off the skin, carefully use the skinning knife to separate the skin from the body. Remove as much
fat and tissue as possible without damaging the skin.
Slip the skinned pelts flesh side out on stretchers or drying frames made specifically for that purpose. They are
available from trapping suppliers, rabbitry supply houses and sometimes from small-town hardware or sporting
goods stores. You can also make your own by cutting a one-inch board to size, or by using sturdy wire. Place
the furs in a cool, airy place to dry. Make sure they are never exposed to the hot sun.
An old kitchen spoon will be useful for scraping off any fat or tissue that still clings to the skin. Some
people file small notches or teeth into the spoon to do an even better job. Be sure to get off as much fat, flesh,
dried blood and dirt as possible. Remove the skin from the stretcher as soon as it is dry enough. This will
prevent wrinkling or shrinking.
Some sources suggest washing the hide in warm soapy water and scrubbing it with a brush to remove
extra residue. You may skip this step if your hide is very clean and proceed to the salting process. If the
hide is washed, put it back on the stretcher to dry again.
Slit your partially dry hide up the belly. Lay it out flat, flesh side up. Pour a liberal amount of salt in the
center—at least a pound of salt per pound of hides. Rub it in with your hands, making sure to cover the
Countryside Guide To Raising Rabbits For Meat 11entire surface. Be careful not to get any salt on the fur. Fold the hide flesh sides together, roll it up, and place on a slanted
surface to drain for a day or two.
Unroll the hide, shake out the old salt and repeat the entire salting process. Drain again if needed in 48 hours and lay the
hide out in a cool, flat place to dry.
The hide is now ready to be tanned. It can be tanned immediately or stored for three to five months. If you wish to store
your hides until you have a decent number, it’s best to keep them at a temperature of 35–45°F.
When tanning fresh hides, you can skip the salting process if you soak the skins in salt water (one cup of salt for each
gallon of water) for six to eight hours.
Stored skins should be soaked in a solution of one ounce of borax per gallon of warm, soft water before proceeding with
the tanning process. Soak skins until flesh and tissue have loosened. A washing machine with an agitator works well for
this. Four to eight hours of soaking should do the trick. It’s imperative that you use only soft water when tanning. Minerals
and chemicals in hard water will result in an inferior tanned product.
Now you’re ready for the actual tanning. You’ll need to have the following tools:
Fleshing knife: This is a two-handled draw blade which is available in several styles. You can make your own fleshing
knife from machine hacksaw blades or by putting a second handle on the tip of a regular butcher knife. The manufactured
variety should provide better results.
Slicker: A slicker is a five-inch square, 1/8-inch thick piece of steel or brass. Round one edge slightly and fit the other
edge with a handle. A hardwood block can also be shaped and tapered. Use a block that is approximately 6 x 4 x 1-1/2
inches and taper one end to a dull edge. This tool is used to smooth out the finished leather and remove excess moisture
from unfinished furs.
Fleshing beam: The fleshing beam provides a smooth, rounded surface for fleshing skins. For rabbit hides, all you’ll need
is a small bench beam or stake. Either can be made from an 18-inch long hardwood plank, 1-1/2 inches thick and four inches
wide. Sand it smooth to avoid the possibility of tearing or scratching your hides. Bolt it to a bench or other sturdy surface.
Take your prepared hides; lay them fur side down over your fleshing stake or on a flat surface. Use a fleshing tool to
carefully remove any remaining traces of fat or tissue, including the tight membrane which lies next to the skin. Every bit
must be loosened and entirely removed. This takes lots of time and patience, but the end result is worth the effort.
A variety of different tanning solutions can be used. They include bark tans, oil tans and mineral tans. Some pre-mixed
tanning solutions are also sold, and they are reportedly easy to use. Many tanning formulas are poisonous, so always wear
rubber gloves and use wooden, earthenware or enamel containers to hold the tanning solutions. Gerald J. Grantz, author of
the Home Book of Taxidermy and Tanning, recommends the following formula for rabbits and other small hides.
Oxalic Acid Solution
• 1 gallon soft water
• 1 pint measure salt
• 2 ounces oxalic acid
Heat part of the water and dissolve the salt and acid crystals in it. Soak the skins in the solution for about 24 hours,
stirring occasionally. Remember, never use iron, galvanized steel or aluminium containers!
Remove hides from the acid solution and soak them overnight in a mixture of 1/2 gallon sal soda and five gallons
water. Then rinse the hides thoroughly in clear, soft water.
Now the real work begins. Gently squeeze the excess water from the hide and lay it out flat on a hard surface. Take
your slicker and push it away from you across the surface of the wet skin. Work it evenly over every inch to help remove
moisture.
Stretch the skin until it is taut and tack it to a board to dry.
Begin to work the skin flesh side down over your stake or beam before it has dried completely. Run it back and forth in a
rhythmic motion. The amount of time and energy you put into it will determine the softness and suppleness of your finished
fur. The hide will probably need to be redampened repeatedly before you’re through.
By the time you’ve worked the hide to your satisfaction, you may notice that it has become rather soiled. To clean it,
wash in warm soapy water and rinse well. Warmed cornmeal, oatmeal or plaster of Paris rubbed into the fur will also help
remove dirt. Shake out the fur when you’re done, then go over it with a vacuum cleaner.
You have now created a clean, attractive rabbit fur to sew into a garment, rug or pillow. If your first hides don’t look quite
as appealing as you expected, remember that few amateur hides do. Continue to practice, and eventually you’ll produce
attractive and useful furs.
12 Countryside Guide To Raising Rabbits For MeatHow To Sex A Rabbit
Determining the sex of a young rabbit isn’t always easy. Generally, you won’t need to sex bunnies until they are eight
weeks old. Male testicles aren’t always visible even at that age, so closer inspection is necessary.
Place the rabbit in your lap in a semblance of a human sitting position. Restrain the head and upper body against your
chest by placing one hand under the front paws. Use your other hand to part the fur around the genitals.
Once you have located the genital area, place your index finger just above there and your thumb a little bit below it. Press
downward with both fingers, at the same time gently bringing them together. The small squeezing motion, done gently, will
cause the male’s penis to protrude. In a doe, a tiny slit will be evident.
With very young bunnies, hold the animal upside down in one hand. Even in young animals, the buck’s organ will extend
enough for you to see a blunt nub when you press against the genital area. The doe’s organ will look somewhat peaked and
pointy, but when you look carefully, you’ll see a slit running from the peak of the protrusion to the anus. With some practice,
you’ll learn to distinguish the difference.
How Rabbits “Chew Their Cud”
Many people recognize larger livestock as cud-chewing animals, but few people know that rabbits and hares along with
some insects have a unique way of “chewing their cud.”
Most animals that chew their cud do so by regurgitating portions of partially digested food. Rabbits produce two sepa-
rate types of pelleted anal excretions: the regular feces and a second, softer type of pellet, which is consumed directly from
the anus.
This special soft pellet, like the cud of the cow, is partially digested feed. It provides the rabbit with B vitamins and other
nutrients which have been synthesized in the animal’s small intestine.
This habit of ingesting soft pellets is known as coprophagy. It occurs most often at night. The rabbit makes a very swift
movement, quickly bending its head between its legs to retrieve the pellets as they drop from the anus. Unless you observe
rabbits very closely, it’s easy to miss this activity.
Countryside Guide To Raising Rabbits For Meat 13Butchering Poultry, Rabbit,
Lamb, Goat, & Pork
By Adam Danforth
The Comprehensive Photographic
Guide to Humane Slaughtering
and Butchering of Poultry, Rabbit,
Lamb, Goat & Pork
Locally raised animals, humanely
slaughtered and expertly butchered—
that is the best meat we can eat. With
Adam Danforth’s full-color compre-
hensive manual, you can learn the
skills necessary to take an animal
calmly and efficiently from pasture to
freezer.
Every step of the slaughtering pro-
cess — from selecting the proper
equipment to preparing, stunning,
and bleeding the animals — is pre-
sented with careful consideration
for the animals’ well-being and your
safety. Includes scrupulous attention
to sanitation and detailed instructions
for packaging and freezing your meat
Covers
for the best quality, appearance, and
v e r y s t e p of the freshness ensuring that the animals
e g you process will nourish and satisfy
slaughterin everyone they feed. 446 Pages
process!
14 iamcountryside.com/shop • 970-392-4419 Countryside Guide To Raising Rabbits For MeatYou can also read