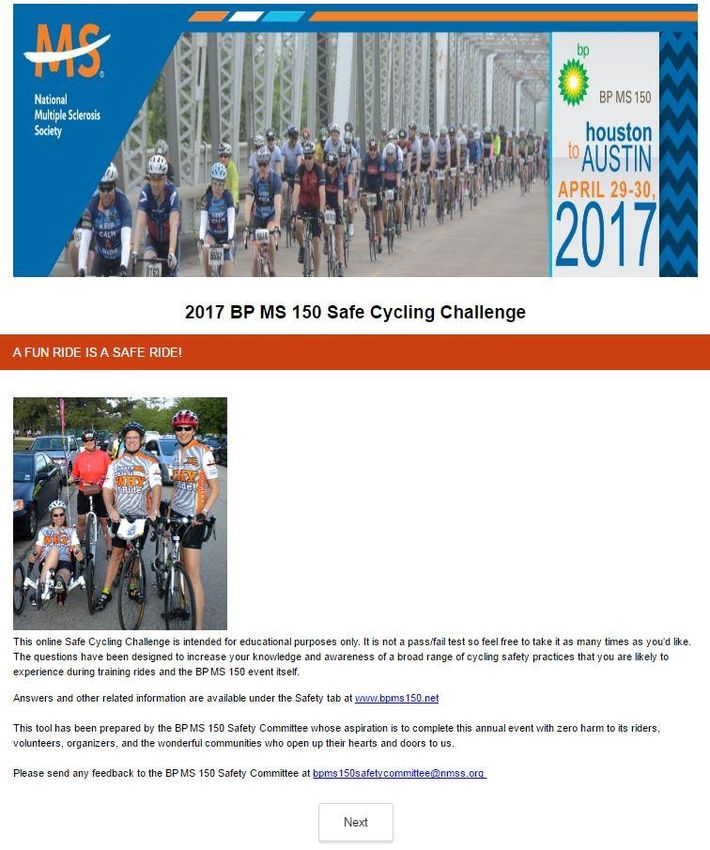
Safety Presentation - HAVE A SAFE EXPERIENCE ON THE BP MS 150 Be Patient Be Predictable Be Preventive - National MS Society
←
→
Page content transcription
If your browser does not render page correctly, please read the page content below
Safety Presentation

HAVE A SAFE EXPERIENCE ON THE BP MS 150
Be Patient…            Be Protective…
Be Predictable…        Be Proactive…
Be Preventive…         Be Proud!!!
Presentation Topics
•    Purchasing a bike
•    Bike Maintenance
•    Ride Preparation
•    Safety
•    Training
•    Event Weekend
Purchasing Your Bike: Types
•   Road – Lightest, easiest to ride long
    distances at higher speeds

•   Mountain Bike – Heavier, durable for off-road,
    more difficult to ride long distances at speed.

•   Hybrid – In between the above, the pros/cons
    are closer to a mountain bike.

•   Specialty Bikes – Recumbent, tandem, cyclo-cross, etc. –
    Consider road versions of some of these

•   If using non-road bike, consider:
      • Thinner/lighter tires
      • Handle bar options (support multiple riding positions)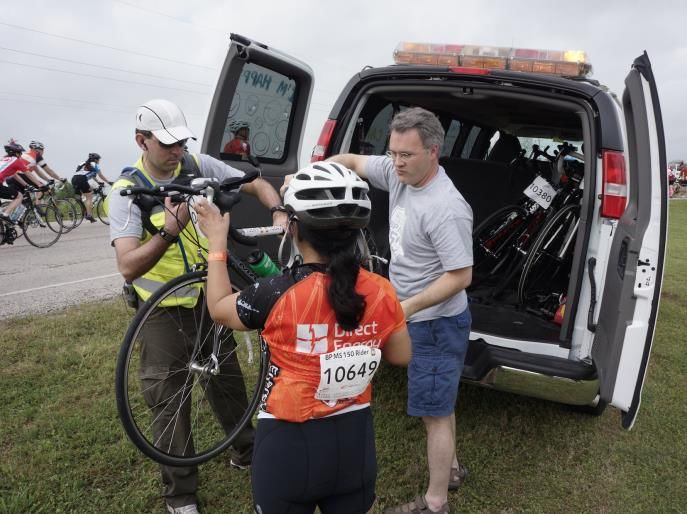
Purchasing Your Bike:
                       Material
    Steel – Traditional frame, typically heaviest, can be
                engineered for smooth ride
Aluminum – Modest cost, can be engineered for very light
              weight, tend to be stiffer frames
  Titanium – Higher cost, engineered for balance of light
                  weight and smooth ride
   Carbon Fiber – Higher cost, engineered for very light
              weight and ride comfort/control
        Other – Bamboo, wood, etc. – Limited use
             Selection usually based on budget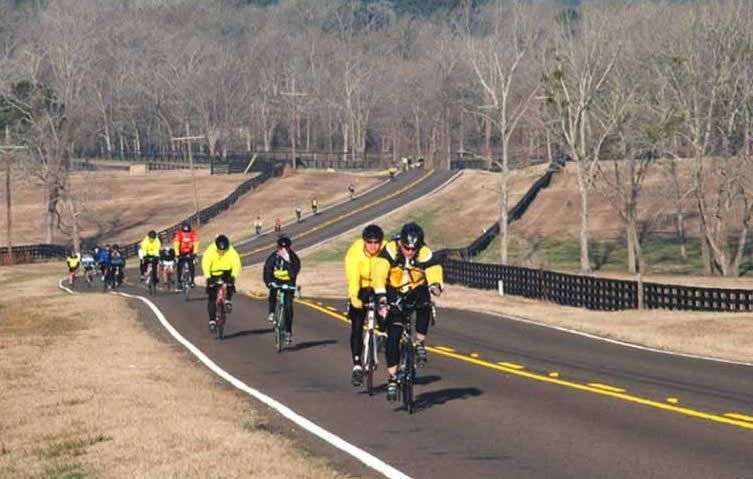
Purchasing Your Bike
•   Bike Frame – Size Matters!
    •    Get fitted for correct frame size
    •    Official BP MS 150 bike stores
•   Components
    •    Price varies – higher = lighter, smoother, faster action
•   Accessories
    •    Saddle bag packed with the following:
            •     spare tubes and tire levers
            •     CO2 cartridge &/or frame pump
            •     Cash
            •     ID/Insurance and Emergency Contact information
            •     Medications
            •     Sunscreen
    •    Lights – If riding before/after dark (white on front of bike
         and red on back of bike)
    •    Panniers/bags – If commuting or touring
Bike Maintenance: Cleaning
•   Cleaning the Bike
    • Remove Wheels
         • (use bike stand or car bike rack)
    • Wash with light soap and water
    • Clean nooks and tight spots
    • Rinse with clean water
    • Wipe dry
    • Use mild degreaser on chain
    • Finish with Bike Polish
         • “Bike Lust”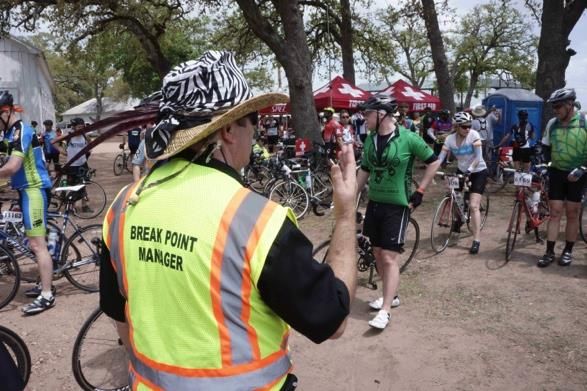
Bike Maintenance: Chain
•   Clean and Lube Chain once/month, or after rain ride
    • Spray mild degreaser on chain
    • Citrus Degreaser, Chain Brite, Simple Green
•   Wipe chain with rag to remove grease and dirt
•   Clean and wipe chain pulleys on Derailluer
•   Use Degreaser, clean and wipe chain rings
•   Relubricate w/ specialty lubricant (No WD-40!)
    • One drop per link
    • Wipe excess lube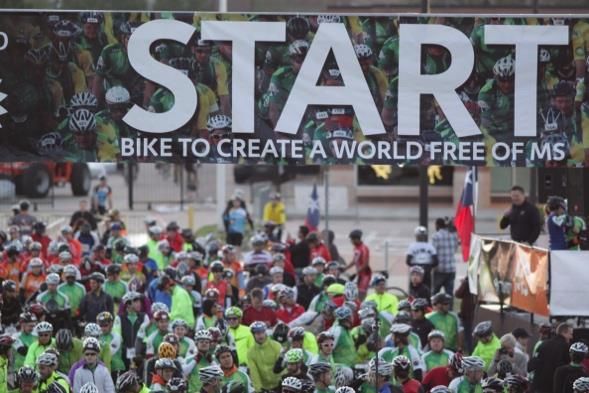
Ride Preparation
•   Bike Safety Inspection
•   ABC Quick Check
•   Cycling Equipment
•   Cycling Clothing
•   Helmet Fit
•   Nutrition
•   Hydration
Bike Safety Inspection
• Bike Safety inspections for participants are not mandatory, but are
     strongly encouraged by the National MS Society to promote a
     safe BP MS 150 .

• Bike Safety Inspections are performed by Official Bike Stores only.

• Once your bike passes the Safety Inspection, you will receive a
     BP MS 150 Safety Inspection Sticker to display on the stem of your bike

• With this sticker you are eligible for FREE labor (parts and materials are extra)
     if you need any mechanical repairs during the BP MS 150

• Bike Safety Inspections start February 15, 2016 through April 8, 2016 at NO COST
     April 9, 2016 through April 15, 2016, the safety inspection will be $15.

• Visit the BP MS 150 website for a list of Official Bike Stores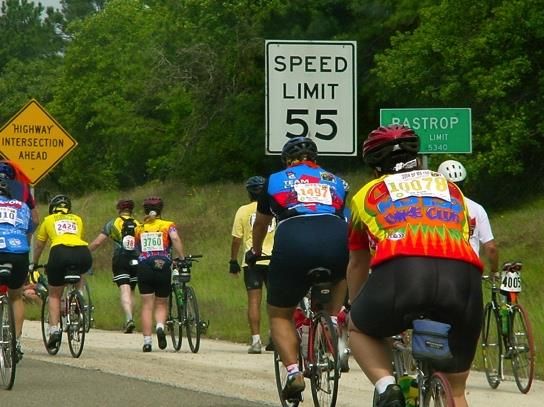
Bike Check – Every time
                                      ABC Quick Check
                         To be sure you have a safe ride every time, perform the ABC Quick
                                  Check each time before heading out on your ride

A is for Air                                                    Q is for Quick release
•Inflate tires to the pressure listed on the side of the tire   •Make sure your quick releases on your wheels are all closed
•Use a pressure gauge to ensure proper pressure
•Check for damage on tire and replaced if damaged               Check
                                                                •Check you helmet for cracks and make sure it fits properly
B is for Brakes                                                 •Check your shoes for tight cleats and straps and buckles
•Inspect pads for wear;                                          are in good repair
       replace is there is less than a ¼” of pad left           •Make sure you saddle (seat) is at the right height and
•Check cable tightness, frayed cables and alignment              the bolt is tight
       of the pads with the rims

C is for Cranks, Chain and Cassette
•Check you pedals and cranks for tightness
•Check chain for looseness and bad links
•Check derailleur for worn cogs and adjustment
•Check that your gears change smoothly

                                                                        Image courtesy of League of American Bicyclists
Cycling Equipment
• Bike proper sizing & fit is the MOST important thing!
• Helmet – NEVER ride without one! Snug fit – if pushed from front, helmet should not move
• Sunglasses – any type of glasses will protect eyes from flying objects, shatterproof are ideal
• Water Bottles (and cages to hold them mounted to bike) Or Camelbak (backpack & fanny pack styles)
• H20 and electrolyte replacement drink
• Cycling Shoes – “Clipless Pedal System” (allows you to push & pull your pedals) or Cages
• SPD – recessed into the shoe, easier for walking, often on gym spin bikes
• LOOK – protrudes from bottom of shoe; difficult to walk in, wear down & need to be replaced
• Cages – attach to pedals and allow you to wear tennis shoes, more efficient than pedals alone.
• Floor Pump – Road bike tires should be aired up before every ride, usually about 100 psi (check tire
• for psi)
• Bike frame pump (mounted to bike frame) or Co2 cartidiges and dispenser
• Under Seat Bag (Saddle bag) – to store many of the items listed in “OTHER” below
• Cycle Computer – tracks distance, cadence (how fast you’re pedaling) speed & various other metricsCycling Clothing
• Cycling Shorts – chamois = padding (tip don’t wear underwear)
• Try on several brands & styles, worth investing in a good pair
• Cycling gloves –cushion provides shock absorption & protects hands in case of fall; fingerless for
warmer weather and full finger for colder weather)
• Cycling Jersey – (back pockets provide a place to stash snacks, cell phone, jacket, etc.)
• If not wearing a jersey, consider wearing a top (long enough to cover your back when reached
forward on handle bars) that will wick sweat away from your body
• Socks – cycle specific not needed, but moisture wicking is important (warm wool pair for cold rides)
• Arm & leg warmers (easy to remove as it warms up)
• Jackets – back pockets are handy and removable sleeves let you turn jacket into a vest as it warms up
• Since the upper body is fairly inactive and you generate wind when riding it often needs extra
protectionHelmet Smart
Select a certified Helmet (ASTM or Snell sticker) proper size for your head
Helmet sits level on your head when tight
1 1 to 2 fingers between eyebrows and rim of the helmet
2 Ensure straps are not covering the ears and form a “Y” shape below the ears
3 Chin strap snug under chin – less than ½’ (less than 1 finger width between
the chin and the chin strap
*Shake your head from side to side; there should only be a little movement
In the event of an accident, a loose helmet won’t provide protection (the same
as not wearing a helmet at all)
*Replace helmet if involved in an accident or older than 3 years
Helmet Smart
Head injuries are a special concern for cyclists.
Even falling at a slow rate of speed can cause a serious head injury
Helmets must be on your head and strapped securely
while riding in the BP MS 150 – No exceptions.
Participants found not to be wearing their helmets will be disqualified
from the ride and removed from the route.Nutrition/Hydration • Nutrition – Training • Nutrition – Night before the BP MS 150 • Nutrition – Morning of the BP MS 150 • Nutrition – On the route • Hydration
Nutrition – Training
• Practice nutrition when training
• Rides 1.5 hours or longer should include carbohydrates
• Aim for 30-60g of carbs/hr. (120-240 calories)
• Avoid high fiber, fat, protein during ride
• Electrolyte replenishment drink mixes or powders such as
  Cytomax, consume water, bananas & oranges– try these out.
• Find what works best for you – gels, sport drink, solids, a
  mixture; Energy bars, protein bars and power gels are an
  easy way to re-fuel during a ride
• Remember…
  …There is no one perfect system for everyone!
Nutrition – Night Before
                  the BP MS 150
• Continue with normal high carb training diet while tapering
  exercise. Don’t go crazy carb loading
• Avoid high fat, high fiber, greasy foods or anything you know will
  upset your stomach.
• Avoid foods you are unfamiliar with
• Good examples:
   • 1-2 cups cooked pasta, 3-5 oz. lean meat, fruit, fluids
   • 1-2 cups cooked rice, 3-5 oz. lean meat, fruit, fluids
   • 6 oz. baked potato, 3-5 oz. lean meat, fruit, bread, fluids
Nutrition –
Morning of the BP MS 150
• Go with what works for you! (avoid untested foods)
• Plan ahead, if you have special dietary needs (carry those snacks with you on the ride)
find out what options are available on the ride
• Earlier you wake up, the more you can eat
• Eating 2 or more hours in advance? Can handle up to 1g of carbs/lb body weight (a little
protein is ok)
• If eating closer to start time, or need one last snack, 30g carbs within 1 hour is ok
• Examples:
• 1-2 scrambled eggs, 1 banana, toast & water/sport drink
• Bagel with jelly & water/sport drink
• Toast with fruit & water/sport drinkNutrition – On the Route • At this point, should be comfortable consuming ~60g carbs/hour • Any combination of gels, liquids, solids (energy bar and protein bars or snacks such as trail mix and fruit – bananas, oranges • Remember, sport drinks are made specifically for rapid and comfortable absorption • Aim for 20-40oz fluid each hour • Use your training knowledge/experience
Nutrition – Recovery
•   Three R’s of Recovery:
    • Rehydrate: With fluid and electrolytes
        • Consume 20-24oz for every lb. lost
    • Replenish: Glycogen (carb storage) with easily digestible
        carbohydrates
             • Chocolate Milk
             • Bagel with peanut butter
             • Yogurt with chopped fruit & honey
             • Yogurt/fruit/milk smoothie
             • Fruit
    Repair: Consume protein
Hydration
• Have a plan (test it on training rides)
• Monitor fluid status/urine color (less than 4)
• Should not lose more than 2% body weight
• Check after training rides to assess strategy
• If consistently losing more than 2%, drink more
• Each pound lost = 16oz fluid, replace with 20oz
• Waiting till thirsty = too late!
• Drink 20-40oz/hour of fluid
• Need sodium (500-1000+mg) each hour
• Sodium can be found in sports drinks, electrolyte tablets,
and salty snacks such as pretzels.Safety • Bicycle Laws • Group Riding • Passing Etiquette • Road Hazards • Controlled Intersections • Riding Safely in Hills • Safe Cycling Challenge
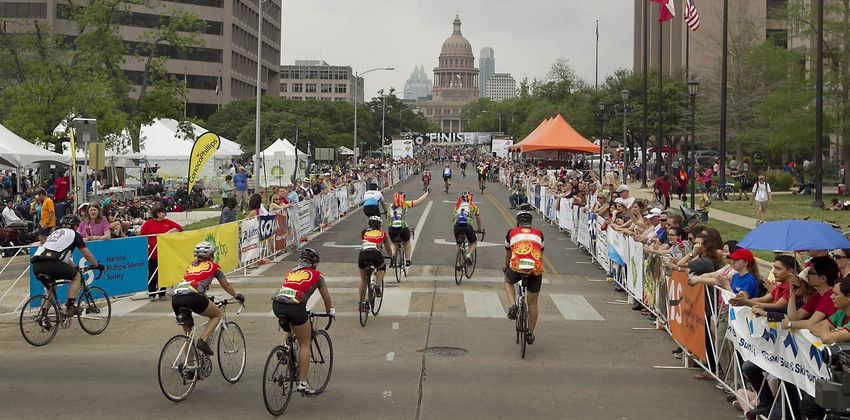
Bicycle Laws
All states consider cyclists to be vehicle operators, and give them
the same privileges and responsibilities as other drivers
•Know and Obey All Traffic Laws: The golden rule of bicycling in a group is "Be Predictable"
•Stay Right: Ride in the right portion of the rightmost lane in the direction you are traveling and leave
at least four feet between your handlebars and parked cars or other hazards (such as other riders);
leftward movement is permitted when passing slower vehicles or preparing for a left turn
•Obey All Traffic Signs and Signals: Avoid "following the leader" through traffic signs and signals; you
are required to obey all traffic signs and signals, including stopping at red lights and stop signs
•Look & Signal before You Move: Always scan behind you before changing lanes or making turns, and
perform the appropriate, continuous arm signal prior to a turn or lane change (unless arm is needed
to control the bike) and while stopped waiting to turn
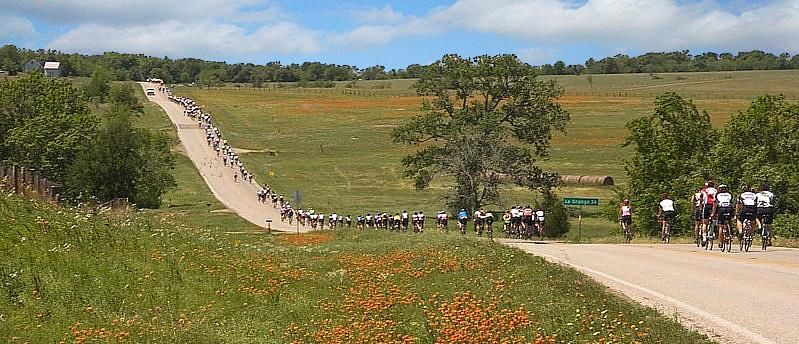
•Two at a Time: Ride no more than two abreast and do not impede traffic (if a part of the road has
been closed and dedicated to "bicycle travel only", you may ride more than two abreast)
•Hands on the Handlebars: Do not carry anything that prevents keeping your
hands on the handlebars
•Pass with Care: Do not pass at intersectionsGroup Riding
• Ride Predictably: Just like driving a car, cyclists should ride in a smooth and consistent manner
• Communicate:
• Communicate, in advance, by using verbal
and hand signals to fellow cyclists and
automobile traffic so they can predict
what you, the cyclist, will be doing
• Verbal warning examples: approaching or passing on
your left, slowing, stopping, flat, car up, car back, etc.
• Awareness:
• Be aware of others around you and ride with your head up. Image courtesy of League of American Bicyclists
• Do not use aero-bars in a group.
• Never wear listening devices on or near your ears
• Do not use your cell phone while riding your bike
• Control:
• Maintain control and speed of your bike
• never overlap your wheels with another cyclist
• Spacing: Ride no more than 2 abreastGroup Riding Skill Courses
The Group Riding Skills Course is conducted by the League of American Bicyclists
(LAB). The LAB is the Society’s education partner and a national organization
dedicated to cycling, cycling advocacy and cycling education
Course Requirements:
• Course Fee is $30 non-refundable and non-transferable.
• Students must be 18 years of age or be accompanied by a parent
or legal guardian age 21 or older.
• Course consists of 2 hours of classroom instruction and
1 hour of hands-on parking lot drills.
• Students must attend the entire class to receive course completion certification.
• Students must bring their own bike and helmet to participate in the course.
• Students should dress appropriately for cycling and bring their water bottles.
Course Schedule – More Courses Coming soon! March 11, 2017
Saturday, 9 am - Noon or 2 pm-5pm
February 4, 2017 Texas Children’s Hospital West Campus
Saturday, 9 am - Noon or 2 pm-5pm
Bike Barn – Katy March 18, 2017
Saturday, 9am – Noon or 2 pm-5pm
February 11, 2017 SWN (Southwestern Energy Company)
Saturday, 9 am – Noon or 2 pm- 5pm
Texas Children’s Hospital Meyer Building April 1, 2017
Saturday, 9 am – Noon or 2 pm-5pm
February 25, 2017 Omni Westside Hote
Saturday, 9 am - Noon or 2 pm-5pm
SWN (Southwestern Energy Company) April 8, 2017
Saturday, 9 am – Noon or 2 pm to 5 pm
Omni Westside HotelGroup Riding – Know the Lingo
Group riding has its own form of communication.
Remember to pass all communication on to the cyclist behind you in the group.
Speak loudly and clearly.
The following are the most common terms you may hear in group-sponsored rides:
• "On your left" – This means a rider is approaching your left side; move to the right (as able) to allow room for
the other rider to pass
• "Car back" – This means a car is approaching from the rear. All riders make an effort to move to the right to
allow the car to pass (in most states, the law requires cyclists to ride no more than two abreast, ensuring easier
and safer passing of cyclists by automobile traffic)
• "Gravel"/"Pothole"/"Sand"/"Tracks" – Each of these messages is to alert the riders behind you of hazardous
road conditions, relayed not only by words but also by the gesture of pointing to the hazard well in advance
• "Flat" – This indicates that a rider has suffered a flat tire and needs room enough to slow down and move to the
right side of the road or trail for repair; offer assistance if needed
• "Slowing" – The cyclist in front of you is slowing down, so use caution and prepare to stop (the common hand
signal for this is to display the palm of their hand toward riders behind them to indicate slowing and stopping)
• "Stopping" – This indicates that a rider ahead is stopping; when at a stop, do not forget to unclip from your
pedals
Group communication between teams and between individual riders is vitally
important to ensuring the safety of all riders. Therefore, headphones, cell phones,
radios, or similar devices are NOT permitted while riding.Passing Etiquette
Proper passing (& being passed) makes your ride safer and more fun
Two parties to every pass – Passer & Pasee.
• Passer: • Passee:
• Call "Approaching rider" as you • Be aware of approaching riders
get close (within 10-20 yards) (listen, NO headphones!)
• Check the road behind to
ensure no approaching • Acknowledge calls to pass -
vehicles saying "Thank You" is a GREAT
• Move over to allow enough way to do this!
room, speed up just a little and • Maintain a steady speed and line -
start the pass don't suddenly slow down or
• Call "Passing on left" as you speed up as you are being passed
pull near the rider
and don't jerk your handle bars.
• Adjust your volume for the
weather - if it's calm, you
don't need to shout, if it's
windy, you will need to raise
your voice
• Allow plenty of room before
pulling back in to the right
• Call “Thank You!” as you passRoad Hazards
Hazard examples:
• The road surface itself with holes or cracks;
• Railroad crossings/tracks – obey the signal, when clear cross tracks perpendicular
• Hazards on the road such as glass, gravel or road kill;
• Unexpected issues such a dog, pedestrian or cyclist stopped on the roadway.
Avoidance is key:
• Look ahead when riding to identify possible obstacles or problems in your path
• Plan your "escape" well in advance.
Communication:
• The leader or first person in a group of cyclists (with best forward visibility) should call
out and identify any hazards to warn following cyclists
• All other cyclists should also call out the hazard to ensure riders behind them are
prepared, as well.
Adjust your personal safety zone to fit the weather conditions
Remember safety is each rider’s responsibility!Controlled Intersections • Most intersections with Stop Lights will have Law Enforcement Officers assigned to manage traffic at the intersections. IN ALL CASES – OBEY THE OFFICER’S INSTRUCTIONS • When approaching a controlled intersection: • First control your speed • Use Hand signals and call out “Slowing” or “Stopping” • Observe the intersection from a distance • Are the riders stopped? • Are cars present or going through the intersection? • Is the officer waving cyclists through? Are there stopped cars in your lane? Take all of these conditions into consideration and be prepared to react (slow, stop, continue) If an Officer is NOT present at an intersection: OBEY the Traffic signals RED = STOP, GREEN = GO
Training – Riding Safely in Hills

•   Riding on roads that have hills presents a Safety Challenge
•   Everyone rides hills at different speeds
•   Hold a straight line, don’t weave and zig-zag on the hill
•   Be Patient - Expect speed changes from riders on hills
•   Be aware of limited sight by vehicles coming over the top of the hill
•   NEVER cross the center stripe when going up a hill!
•   Communicate and move off the road if you need to stop or walk
•   Control your speed going down a hill

•   On the BP MS 150 route there are two long, steep
    downhill descents on day 2
      • One decent is on the long route about mile 24
      • The other decent occurs as you enter Bastrop
•   You should approach these hills with caution and maintain control, speed and
    distance from other riders.

            *If the hill is a little intimidating be sure to take it at a slower pace
                                   and ride to the right of the lane
Safe Cycling Challenge
Training

•   Overview
•   Training Rides
•   Options for Training Rides
•   Training Intervals
Training Overview

•   Start with weekly rides of about 20-25 miles
•   Increase 10-20% per week
•   Initially don’t be concerned with speed
•   Keep terrain mostly flat
•   Start increasing speed and gradually add hills
•   Include short 1 hour interval workouts and/or other cross training
•   Increase hill training. Learn to use gears.
•   Target minimum moving average speed of 12-14 mph
•   Longest ride should be 70-80% of day one distance (55-80 training
    miles)
•   Taper – Reduce distance the last two weeks
Training Rides • Help get you in physical condition to complete the ride • Gradually build up distance & add hills • Include cross training activities during the week • Help you learn to ride in a group on the roads • Focus on safety and courtesy • Opportunity to test nutrition/hydration strategies • Opportunity to make a lot of new friends • Carpool to rides • Enjoy meals at local establishments, support the community • Opportunity to see Texas like you’ve never seen it before!
Training Rides: Options
•   BP MS 150 Recommended Rides (Safety & Training tab/Training/Recommended Rides)
     • Every weekend from January 10th to April 10th (except Easter)
     • Registration fee varies; charity rides
     • Well planned & supported
     • 250 – 1,200 riders
•   Official Bike Store Rides (check store web site)
     • Less structured, usually include “No rider left behind”
•   Team Rides (check with your team captain)
•   Ride with a group of your friends
     • Check recommended ride calendar to avoid conflicts
     • Check out local ride maps (online, stores, books)
     • Inspect route for road conditions, rest stops, etc.
Training Rides: Intervals • Builds up Cardio Vascular system and increases speed • Start with 2 minute intervals • Go as hard / fast as possible for 2 full minutes • Follow with rest period of 2 minutes • Rest periods are slow, coasting, almost no pedaling • Repeat 2 min Hard/2 min rest cycle 10 times • Increase to 3 min hard/rest cycle repeated 10 times • Can be done on Spin Bike, Exercise Bike, Bike Trainer or on the Road • Find a route that you can complete w/o stopping (no stoplights, stop signs, traffic issues, etc.)
Event Weekend
•   Tips for riding smart and safe
•   On the Route
•   Breakpoints
•   Route Support
•   Ride Marshals
•   SAG Support
•   Ride Friendly
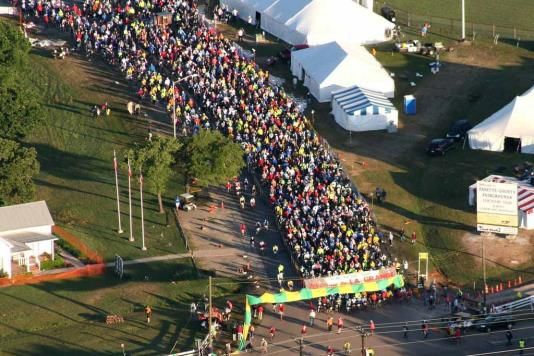
Tips for Riding Smart and Safe
• It’s a RIDE, NOT A RACE!
• Expect crowded conditions at the Start, Route Merge Points,
  Breakpoints, Lunch Stops, & Finish.
• Vehicle Traffic – The roads we use are not closed! Keep as much
  distance between you and the automobile traffic as possible. Use
  courtesy and etiquette when interacting with vehicles.
• Keep to the right unless passing. Pass on the left. Call out
  “Passing on Left.” DO NOT PASS ON THE RIGHT
• Communicate (slowing, stopping, obstacles, etc.)
• DO NOT CROSS the yellow center line.
• Ride with no more than two (2) abreast
• Be Courteous, Be Patient and Ride Friendly
On the Route
•   Do not overlap wheels with a rider in front of you
•   Control your speed. It will be slow at first until the riders spread out on the route
    (and slow again at route merge points)
•   Pay attention to riders around you (Have an escape plan)
•   Hydrate – Drink at least 1 water bottle between Rest Stops
•   Nutrition – Eat snacks about every 15-20 miles (use what you learned on training
    rides)
•   Ride your pace. Don’t try to go faster than you’re comfortable
•   Stop and take a break if you’re tired. – Pull all the way off the road to stop
•   Obey ALL Traffic Laws
Breakpoints
Breakpoints are points of high rider congestion
Use caution when entering and exiting a
breakpoint
Entering:
• Stay to the right or left of the lane depending on the placement of
the breakpoint on the right or left side of the roadway
• Announce you are stopping and then move quickly and completely
into the breakpoint.
• Communicate with hand signals and callout your intentions
• If stopping, ride ALL THE WAY INTO THE BREAKPOINT before stopping
• DO NOT STOP IN THE ROADWAY!
• If you are not stopping at a breakpoint, slow down then stay on the
appropriate side of the lane to avoid those who are entering/exiting
the breakpoint.
Exiting:
• When exiting a breakpoint do so from the down route side of the breakpoint.
• Watch for oncoming cyclists or traffic, and slowly and safely merge back into the ride.
• DO NOT STAGE IN ROADWAY AND THEN PREPARE TO START!
• Be ready to ride once you move out of the breakpoint.Ride Marshals
Route Support
Ride Marshals are registered riders who volunteer and act as Good Will
and Safety Ambassadors for the BP MS 150 and the BP MS 150
Recommended Ride series.
Bike Police
Bike Police are volunteer riders and certified law enforcement officers who serves
along the route implementing safety protocol and directing traffic when needed.
Bike Medic
Bike Medics are volunteer riders and licensed medical care providers who
provide basic medical assistance along the route until advanced medical
care arrives.
Motorcycle Marshals
Motorcycle Marshals patrol the route to assist with cycling traffic and respond
to emergencies and traffic situations.
SAG (Support Vehicles)
Special Assistance Group (SAG) vehicles provide transportation to riders who
need a lift to the next breakpoint. SAGs do not stop to make bike repairs, but they will bring riders to the
next breakpoint. SAGs only move a rider forward along the route.
To signal a SAG vehicle driver follow these steps:
1.Move safely off the road and well out of the path of other riders
2.Dismount and stand near your bike
3.Remove your helmet and wave it at the SAG vehicle
Medical Support Team
Certified medical professionals (EMTs, paramedics and nurses) who
administer first aid and who are trained in CPR. They assist along the route,
at breakpoints, lunch sites, overnight sites and at the finish line.Event Weekend:
Ride Marshals
• Ride Marshals are volunteers who help keep the ride
SAFE
• Be courteous and obey instructions from Ride Marshals
• Ride Marshals provide coaching on how to to ride safe and
coach you if they observe you doing something unsafe
• Ride Marshals have authority to notify National MS Society
staff if unsafe riding continues.
• National MS Society staff may remove a rider from the
route if necessary.
• National MS Society staff will notify Team Captains of
unsafe riders
• Ride Marshals are happy to stop and assist riders with
minor problems (flat tire, mechanical, etc.).
• Let a passing Ride Marshal know if you need assistance.Event Weekend:
SAG (Special Assistance Group)
• There are numerous SAG support vehicles on the route
• If you need a SAG Vehicle, be sure to pull completely off the side of the
road.
• To signal a SAG vehicle driver follow these steps:
• Move safely off the road and well out of the path of other riders
• Dismount and stand near your bike
• Remove your helmet and wave it at the SAG vehicleRide Friendly
• Obey Law Enforcement personnel, ride officials,
volunteers, residents & vehicle drivers
• Don’t Litter!
• Obey all State & Local Traffic Laws
• Support the Local Communities
• Respect Private Property
• Use Provided Restroom Facilities ONLY
• Curb Inappropriate Language & ProfanityYou can also read