SAML 2 QUICK START GUIDE - OCTOBER 10, 2020 - NETSUITE OPENAIR
←
→
Page content transcription
If your browser does not render page correctly, please read the page content below
SAML 2 Quick Start Guide

October 10, 2020
Copyright © 2013, 2021, Oracle and/or its affiliates. All rights reserved.

This software and related documentation are provided under a license agreement containing restrictions
on use and disclosure and are protected by intellectual property laws. Except as expressly permitted
in your license agreement or allowed by law, you may not use, copy, reproduce, translate, broadcast,
modify, license, transmit, distribute, exhibit, perform, publish, or display any part, in any form, or by any
means. Reverse engineering, disassembly, or decompilation of this software, unless required by law for
interoperability, is prohibited.

The information contained herein is subject to change without notice and is not warranted to be error-
free. If you find any errors, please report them to us in writing.

If this is software or related documentation that is delivered to the U.S. Government or anyone licensing it
on behalf of the U.S. Government, then the following notice is applicable:

U.S. GOVERNMENT END USERS: Oracle programs, including any operating system, integrated software,
any programs installed on the hardware, and/or documentation, delivered to U.S. Government end
users are "commercial computer software" pursuant to the applicable Federal Acquisition Regulation
and agency-specific supplemental regulations. As such, use, duplication, disclosure, modification, and
adaptation of the programs, including any operating system, integrated software, any programs installed
on the hardware, and/or documentation, shall be subject to license terms and license restrictions
applicable to the programs. No other rights are granted to the U.S. Government.

This software or hardware is developed for general use in a variety of information management
applications. It is not developed or intended for use in any inherently dangerous applications, including
applications that may create a risk of personal injury. If you use this software or hardware in dangerous
applications, then you shall be responsible to take all appropriate fail-safe, backup, redundancy, and other
measures to ensure its safe use. Oracle Corporation and its affiliates disclaim any liability for any damages
caused by use of this software or hardware in dangerous applications.

Oracle and Java are registered trademarks of Oracle and/or its affiliates. Other names may be trademarks
of their respective owners.

Intel and Intel Xeon are trademarks or registered trademarks of Intel Corporation. All SPARC trademarks
are used under license and are trademarks or registered trademarks of SPARC International, Inc.
AMD, Opteron, the AMD logo, and the AMD Opteron logo are trademarks or registered trademarks of
Advanced Micro Devices. UNIX is a registered trademark of The Open Group.

This software or hardware and documentation may provide access to or information about content,
products, and services from third parties. Oracle Corporation and its affiliates are not responsible for and
expressly disclaim all warranties of any kind with respect to third-party content, products, and services
unless otherwise set forth in an applicable agreement between you and Oracle. Oracle Corporation and
its affiliates will not be responsible for any loss, costs, or damages incurred due to your access to or use
of third-party content, products, or services, except as set forth in an applicable agreement between you
and Oracle.

If this document is in public or private pre-General Availability status:

This documentation is in pre-General Availability status and is intended for demonstration and preliminary
use only. It may not be specific to the hardware on which you are using the software. Oracle Corporation
and its affiliates are not responsible for and expressly disclaim all warranties of any kind with respect to
this documentation and will not be responsible for any loss, costs, or damages incurred due to the use of
this documentation.

If this document is in private pre-General Availability status:

The information contained in this document is for informational sharing purposes only and should be
considered in your capacity as a customer advisory board member or pursuant to your pre-General
Availability trial agreement only. It is not a commitment to deliver any material, code, or functionality, and
should not be relied upon in making purchasing decisions. The development, release, and timing of any
features or functionality described in this document remains at the sole discretion of Oracle.

This document in any form, software or printed matter, contains proprietary information that is the
exclusive property of Oracle. Your access to and use of this confidential material is subject to the terms
and conditions of your Oracle Master Agreement, Oracle License and Services Agreement, Oracle
PartnerNetwork Agreement, Oracle distribution agreement, or other license agreement which has
been executed by you and Oracle and with which you agree to comply. This document and information
contained herein may not be disclosed, copied, reproduced, or distributed to anyone outside Oracle
without prior written consent of Oracle. This document is not part of your license agreement nor can it be
incorporated into any contractual agreement with Oracle or its subsidiaries or affiliates.

For information about Oracle's commitment to accessibility, visit the Oracle Accessibility Program website
at http://www.oracle.com/pls/topic/lookup?ctx=acc&id=docacc

Oracle customers that have purchased support have access to electronic support through My Oracle
Support. For information, visit http://www.oracle.com/pls/topic/lookup?ctx=acc&id=info or visit http://
www.oracle.com/pls/topic/lookup?ctx=acc&id=trsif you are hearing impaired.

Sample Code

Oracle may provide sample code in SuiteAnswers, the Help Center, User Guides, or elsewhere through
help links. All such sample code is provided "as is” and “as available”, for use only with an authorized
NetSuite Service account, and is made available as a SuiteCloud Technology subject to the SuiteCloud
Terms of Service at www.netsuite.com/tos, where the term “Service” shall mean the OpenAir Service.

Oracle may modify or remove sample code at any time without notice.

No Excessive Use of the Service

As the Service is a multi-tenant service offering on shared databases, Customer may not use the Service
in excess of limits or thresholds that Oracle considers commercially reasonable for the Service. If Oracle
reasonably concludes that a Customer’s use is excessive and/or will cause immediate or ongoing
performance issues for one or more of Oracle’s other customers, Oracle may slow down or throttle
Customer’s excess use until such time that Customer’s use stays within reasonable limits. If Customer’s
particular usage pattern requires a higher limit or threshold, then the Customer should procure a
subscription to the Service that accommodates a higher limit and/or threshold that more effectively aligns
with the Customer’s actual usage pattern.

Beta Features

Oracle may make available to Customer certain features that are labeled “beta” that are not yet generally
available. To use such features, Customer acknowledges and agrees that such beta features are subject
to the terms and conditions accepted by Customer upon activation of the feature, or in the absence of
such terms, subject to the limitations for the feature described in the User Guide and as follows: The beta
feature is a prototype or beta version only and is not error or bug free and Customer agrees that it will
use the beta feature carefully and will not use it in any way which might result in any loss, corruption or
unauthorized access of or to its or any third party’s property or information. Customer must promptly
report to Oracle any defects, errors or other problems in beta features to support@netsuite.com or
other designated contact for the specific beta feature. Oracle cannot guarantee the continued availability
of such beta features and may substantially modify or cease providing such beta features without
entitling Customer to any refund, credit, or other compensation. Oracle makes no representations or
warranties regarding functionality or use of beta features and Oracle shall have no liability for any lost
data, incomplete data, re-run time, inaccurate input, work delay, lost profits or adverse effect on the
performance of the Service resulting from the use of beta features. Oracle’s standard service levels,
warranties and related commitments regarding the Service shall not apply to beta features and they may
not be fully supported by Oracle’s customer support. These limitations and exclusions shall apply until the
date that Oracle at its sole option makes a beta feature generally available to its customers and partners
as part of the Service without a “beta” label.
Table of Contents
OpenAir SAML Single Sign-on Overview ...................................................................................... 1
   SAML Single Sign-on ............................................................................................................ 1
   SAML Deployment Best Practice Guidelines ............................................................................. 2
   Deploying SAML Single Sign-on on Your OpenAir Account ......................................................... 2
   OpenAir Mobile Apps and SAML Single Sign-On ....................................................................... 3
Configuring the Identity Provider for the SAML Integration ............................................................ 4
   OpenAir SAML Metadata ...................................................................................................... 4
   SAML Assertion Attributes .................................................................................................... 5
   Configuring Microsoft AD FS 3.0 for the SAML Integration ......................................................... 6
   Configuring Microsoft Azure AD for the SAML Integration ........................................................ 12
Configuring the SAML Integration in OpenAir ............................................................................ 15
Testing the SAML Integration .................................................................................................. 18
Enabling Employees to Login Using SAML Single Sign-On ............................................................ 19
Creating a Support Case ......................................................................................................... 21
OpenAir SAML Single Sign-on Overview          1

OpenAir SAML Single Sign-on Overview
The OpenAir SAML Single Sign-on (SSO) feature lets you use an external Identity Provider service to
manage user access to your OpenAir account.

For more information about the SAML SSO feature, including a brief review of key terminology, feature
requirements and limitations, see SAML Single Sign-on.

For best practice guidelines to ensure the seamless deployment of SAML SSO on your account, see SAML
Deployment Best Practice Guidelines.

For an overview of steps required to set up and deploy SAML SSO on your OpenAir account, see
Deploying SAML Single Sign-on on Your OpenAir Account.

OpenAir Mobile supports OpenAir Single Sign-on. See OpenAir Mobile Apps and SAML Single Sign-On.

SAML Single Sign-on
Security Assertion Markup Language (SAML) is an OASIS open standard that supports secure
communication of user authentication, entitlement and attribute information between different
enterprise applications. It provides a method of secure integration with existing, on-site authentication
infrastructures without exposing these services to direct public access, and enables federation of
user identity across any number of additional services. SAML enables Single Sign-on (SSO), a scheme
that allows users to log in to one application — the identity provider — and automatically have access
to separate applications — the Service Providers — without having to log in to each of these other
applications separately.

■ The Identity Provider (IdP) validates the identity of the user and makes an SAML assertion to
  authorize access to a Service Provider. As a user, the IdP service is often a login page where you enter
  your SSO login details, or a dashboard you can use to access different enterprise applications.
■ The Service Provider (SP) consumes the SAML assertion and grants the user access to the
  application.
■ The SAML assertion uses a XML-based standard to send security information that applications
  working across security domain boundaries can trust.
■ The SP and IdP use the metadata provided during configuration to establish a circle of trust.

The OpenAir SAML SSO feature uses the SAML version 2.0 specifications. For information about the SAML
standard , refer to the OASIS website.

      Important: Review the following feature requirements and limitations:

      ■ IdP services must support SAML 2.0 and allow custom assertions in order to be used with the
        OpenAir SAML SSO feature.
      ■ OpenAir does not support multiple Identity Providers.

The OpenAir SAML SSO feature supports:

■ IdP-initiated SSO — Typically, the user goes to the IdP service, logs in, and clicks a link or a button on
  the IdP page to access OpenAir. The IdP service redirects the user to OpenAir with a SAML assertion.
■ SP-initiated SSO — Typically, the user goes to the OpenAir login page for SSO users, enters the
  company ID and user ID. OpenAir redirects the user to the IdP service with an SAML request. The

SAML 2 Quick Start Guide
SAML Single Sign-on 2
IdP prompts the user to enter a password, validates the identity of the user and redirects the user to
OpenAir with a SAML assertion.
OpenAir account administrators control who can use SAML SSO to access OpenAir.
SAML Deployment Best Practice Guidelines
This section provides best practice guidelines for deploying SAML Single Sign-on (SSO) on your OpenAir
account.
■ For an initial SAML deployment:
□ Test the SAML deployment on a sandbox account, if you have one (strongly recommended). Make
sure it works as expected before you deploy SAML to your production account.
□ When you deploy SAML to your production account, only enable a small group of OpenAir users to
login using SAML SSO. Make sure it works as expected before you enable all users to login using
SAML SSO.
■ When changing over to a new Identity Provider (IdP):
□ Test the new IdP configuration on a sandbox account. Make sure it works as expected before you
change the IdP configuration on your production account. To discuss procuring a sandbox account
for this purpose, contact your OpenAir Sales Representative.
Note: OpenAir does not support multiple Identity Providers for the same OpenAir
account. You cannot have a small group of users testing the new IdP and other users
continuing to login using the previous IdP on the same production account.
■ Always have at least one account administrator who can login to OpenAir using password
authentication. If you enable a user to login using SAML SSO, this user can no longer use the default
password authentication method to access OpenAir. Make sure at least one account administrator can
access your account in case there is an unexpected problem with SAML.
Deploying SAML Single Sign-on on Your OpenAir
Account
This section gives an overview of steps required to set up and deploy SAML Single Sign-on (SSO) on your
OpenAir account.
Important: Make sure you review the best practice guidelines before deploying SAML SSO on
your OpenAir account or changing over to a new Identity Provider (IdP) — See SAML Deployment
Best Practice Guidelines.
To deploy SAML SSO on your OpenAir account
1. Configure the Identity Provider (IdP) for the SAML integration — Import the OpenAir Service
Provider metadata XML file and configure the attributes required in the SAML assertion by the
OpenAir Service Provider. See Configuring the Identity Provider for the SAML Integration
2. Enable OpenAir SAML Single Sign-on feature — To enable the OpenAir SAML Single Sign-
on feature, contact OpenAir Support and provide the Identity Provider metadata XML file as an
attachment. See Creating a Support Case.
SAML 2 Quick Start GuideDeploying SAML Single Sign-on on Your OpenAir Account 3
Note: You may also provide the IdP Entity ID (and metadata URL, if different from the IdP
Entity ID). However, the IdP metadata XML file is required to process your request.
In some cases, you may also need to provide the IdP heartbeat URL.
OpenAir Operations engineers will import the IdP metadata and add your IdP Entity ID to the circle
of trust. OpenAir Support will advise you when the SAML SSO feature is enabled and ready for
testing.
3. Configure the SAML Integration in OpenAir — Go to Administration > Global settings >
Integration: SAML Single Sign-on and modify the settings are required. See Configuring the SAML
Integration in OpenAir.
4. Test the SAML integration — See Testing the SAML Integration.
5. Enable employees to login using SAML Single Sign-on — Create the saml_auth custom field
associated with the Employee entity form and check the corresponding box on the employee
demographic form for SAML SSO users. See Enabling Employees to Login Using SAML Single Sign-
On.
Contact OpenAir Support if you have any questions or encounter any difficulties when deploying SAML
SSO on your OpenAir account. See Creating a Support Case.
OpenAir Mobile Apps and SAML Single Sign-On
OpenAir Mobile Apps, including OpenAir Mobile for iPhone and OpenAir Mobile for Android, support
SAML Single Sign-on. Both Service Provider initiated Single Sign-on (SP-initiated SSO) and Identity
Provider initiated Single Sign-on (IdP-initiated SSO) are supported.
For information about setting up OpenAir Mobile to login using SAML Single Sign-on, see OpenAir
Mobile 3 User Guide.
SAML 2 Quick Start GuideConfiguring the Identity Provider for the SAML Integration 4
Configuring the Identity Provider for the
SAML Integration
This section describes the information you need to configure your Identity Provider (IdP) product for the
SAML integration.
Important: Note the following requirements:
■ IdP services must support SAML 2.0. In particular IdP services must support Redirect/POST
bindings, and POST responses containing the SAML authentication assertion must be digitally
signed.
■ IdP services must allow custom assertions.
■ SAML assertion encryption is optional, but recommended.
■ OpenAir does not support multiple Identity Providers. For example, you cannot use both Okta
and Microsoft Azure with the same OpenAir account.
■ Make sure you review the best practice guidelines before deploying SAML SSO on your
OpenAir account or changing over to a new Identity Provider (IdP) — See SAML Deployment
Best Practice Guidelines.
The following IdP configuration steps are required before SAML authentication assertions can be
exchanged between the IdP and the OpenAir Service Provider (SP). Specific IdP products may require
custom configuration — refer to the IdP product documentation for details.
1. Import the OpenAir Service Provider (SP) metadata — See OpenAir SAML Metadata.
2. Configure the assertion attributes required by the OpenAir SP — The attributes NameID and
account_nickname must be included in the SAML assertion. See SAML Assertion Attributes.
3. Download the IdP metadata XML file — You will need to provide the IdP metadata XML file
when contacting OpenAir Support to enable SAML SSO for your account or to change over to a
new IdP.
This guide includes configuration steps for the following Identity Provider products. These are given for
illustration purposes only. OpenAir does not support specific IdP products or product versions. Refer to
the vendor documentation for detailed and updated instructions about your Identity Provider product.
■ Configuring Microsoft AD FS 3.0 for the SAML Integration
■ Configuring Microsoft Azure AD for the SAML Integration
OpenAir SAML Metadata
The first step in configuring the Identity Provider (IdP) service for the SAML integration is to create a
Service Provider (SP) profile for OpenAir. The OpenAir SAML metadata contains the information required
to create the SP profile.
The following table shows the OpenAir SAML metadata and endpoint URLs.
SAML 2 Quick Start GuideOpenAir SAML Metadata 5
Production account Sandbox account
Metadata https://auth.openair.com/sso/metadata https://auth.sandbox.openair.com/sso/metadata
SAML endpoint https://auth.openair.com/sso https://auth.sandbox.openair.com/sso
You can download the OpenAir Service Provider (SP) metadata XML file from the metadata URL and
import the file into your IdP service, or enter the metadata URL in the IdP configuration settings to import
it directly. The SAML endpoint URL may also be referred to as the assertion consumer service URL.
Important: OpenAir introduced a new identity authentication service and SAML endpoints to
coincide with the migration of OpenAir accounts to Oracle Cloud Infrastructure, completed in July
2020. The previous SAML endpoints — https://www.openair.com/saml.pl?o=P (production) and
https://sandbox.openair.com/saml.pl?o=P (sandbox) — are deprecated and will be removed in
the April 2021 OpenAir release. Make sure you update your Identity Provider configuration to use
the new SAML metadata and endpoint before the April 2021 OpenAir release. The examples and
configurations steps provided in this guide use the SAML metadata and endpoint for the new
OpenAir identity authentication service.
Until your SAML is updated to use the new endpoint, users accessing OpenAir with Single Sign-
on can navigate to https://www.openair.com/index.pl?_sso=1 or click the Legacy SSO users can
login here link on the OpenAir login page to access the deprecated endpoint.
SAML Assertion Attributes
After you have created a Service Provider (SP) profile for OpenAir and imported the OpenAir SAML
metadata into your IdP service, you need to ensure that SAML assertions contain the required attributes
with the appropriate OpenAir login identifiers.
This following table lists both required and optional assertion attributes and the OpenAir login identifiers
they map to.
Attribute Required / Description
Optional
NameID Required OpenAir User ID — The unique user identifier (Employee ID on the
employee demographic form in OpenAir).
Important: Depending on your IdP configuration, you may
not be able to map NameID to the source attribute containing
the OpenAir User ID. For example, the IdP service may use
NameID as a transient identifier for session management. If this
is the case:
■ The assertion must contain both NameID and user_nickname
attributes.
■ Use user_nickname to send the OpenAir User ID in the SAML
assertion.
account_nickname Required OpenAir Company ID — The unique account identifier for your OpenAir
account ( Company ID on the Administration > Organization > Name &
address form in OpenAir).
SAML 2 Quick Start GuideSAML Assertion Attributes 6
Attribute Required / Description
Optional
user_nickname Optional If specified, user_nickname takes precedence over NameID for identifying
the user. Use user_nickname to send the OpenAir User ID in the SAML
assertion.
Configuring Microsoft AD FS 3.0 for the SAML
Integration
This section provides the steps to set up Microsoft Active Directory Federation Service (AD FS) 3.0 to
provide Single Sign-on (SSO) access to OpenAir using the OpenAir SAML SSO feature.
Important: The configuration steps for specific Identity Provider products are given for
illustration purposes only. OpenAir does not support specific Identity Provider products or
product versions. Refer to the vendor documentation for detailed and updated instructions about
your Identity Provider product.
To Configure Microsoft AD FS 3.0 for the SAML Integration:
1. Make sure that you have installed the following patch on your AD FS server:
■ Windows Server 2012 (R2) — KB3003381
This patch fixes the incorrect MSIS0038 error reported in AD FS 2.0 and AD FS 3.0.
2. Install AD FS 3.0 on Windows Server.
3. Download the AD FS metadata XML file from the following location:
https:///federationmetadata/2007–06/federationmetadata.xml
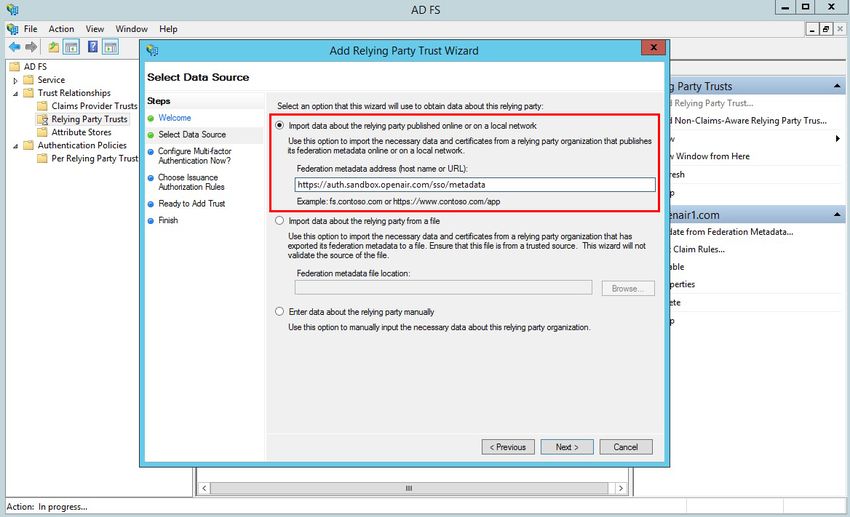
4. In AD FS 3.0, open the Add Relying Party Trust Wizard. Click Start.
5. On the “Select Data Source” step, select Import data about the relying party published online
or on a local network, and enter the Federation metadata address (host name or URL):
■ https://auth.sandbox.openair.com/sso/metadata, if testing the SAML deployment on a
sandbox OpenAir account.
■ https://auth.openair.com/sso/metadata, if deploying SAML SSO on a production OpenAir
account.
Note: Examples in this help topic use the sandbox metadata URL. To set up AD FS
SSO with your production account, replace the references to the sandbox URLs with the
production URLs.
Click Next.
SAML 2 Quick Start GuideConfiguring Microsoft AD FS 3.0 for the SAML Integration 7
The following warning appears: “AD FS Management: Some of the content in the federation
metadata was skipped because it is not supported by AD FS. Review the properties of the trust
carefully before you save the trust to the AD FS configuration database.”
Click OK
6. On the “Specify Display Name” step, enter a Display name for the Relying Party Trust, and click
Next.
7. On the “Configure Multi-factor Authentication Now?” step, select I do not want to configure
multi-factor authentication settings for this relying party trust at this time, and click Next.
8. On the “Choose Issuance Authorization Rules” step, select the option permitted by your company’s
policies or preferences then click Next.
9. On the “Ready to Add Trust” step, click Next.
10. On the “Finish” step, clear the Open the Edit Claim Rules dialog... box, and click Close.
11. In AD FS, go to Relying Party Trusts, right-click the display name you entered for the OpenAir SAML
endpoint, and click Properties.
12. On the Monitoring tab, clear the Monitor relying party box, and click Apply.
13. On the Encryption tab, click Remove, then click Yes to confirm.
14. On the Signature tab, verify that a certificate still appears in the list.
SAML 2 Quick Start GuideConfiguring Microsoft AD FS 3.0 for the SAML Integration 8
15. On the Identifiers tab, verify that Relying party identifiers includes the relevant OpenAir metadata
URL:
■ https://auth.sandbox.openair.com/sso/metadata, if testing the SAML deployment on a
sandbox OpenAir account.
■ https://auth.openair.com/sso/metadata, if deploying SAML SSO on a production OpenAir
account.
16. On the Endpoints tab, verify that the list of SAML Assertion Consumer Endpoints includes the
relevant OpenAir SAML endpoint:
■ URL: https://auth.sandbox.openair.com/sso — Index: 1 — Binding: POST
■ URL: https://auth.openair.com/sso — Index: 1 — Binding: POST
17. Click OK.
18. Set up claim rules to ensure that SAML assertions contain the required attributes with the
appropriate OpenAir login identifiers. See Creating Claim Rules to Send OpenAir Login Identifiers
as SAML Assertion Attributes.
19. To test your connection, open a web browser and navigate to the following web address:
https:///adfs/ls/IdpInitiatedSignOn.aspx
Creating Claim Rules to Send OpenAir Login Identifiers as
SAML Assertion Attributes
The type and configuration of claim rules you use depend on the values used to populate the SAML
assertion attributes (or outgoing claim type), as well as any convention used for the OpenAir User ID in
your company. This guide provides steps for the following examples:
SAML 2 Quick Start GuideConfiguring Microsoft AD FS 3.0 for the SAML Integration 9
■ NameID— If the OpenAir User ID is the same as the user’s Active Directory email address, create two
rules and map it to the NameID assertion attribute. See Mapping the Active Directory Email Address to
the NameID Assertion Attribute.
■ account_nickname — Use a constant value and map it to the account_nickname assertion attribute. See
Setting Up a Claim Rule for the OpenAir Company ID.
For general guidelines about SAML assertion attributes expected by OpenAir, see SAML Assertion
Attributes.
To create a claim rule:
1. In AD FS, go to Relying Party Trusts, right-click the display name you entered for the OpenAir SAML
endpoint, and click Edit Claim Rules....
2. Click Add rule.... The Add transform claim rule wizard appears.
3. Choose Rule Type page — Select the appropriate Claim rule template, and click Next.
■ To use values from attributes in Lightweight Directory Access Protocol (LDAP) attribute store
and associate a claim type with each of the LDAP attributes, use Send LDAP Attributes as
Claims.
■ To use a value from an incoming claim type and map it to a different claim type or map its claim
value to a new claim value in the outgoing assertion, use Transform an Incoming Claim. For
example, you can use this template to use the value from the E-mail Address from an incoming
claim type and map it to the Name ID outgoing claim type, if this is what you use as OpenAir
User ID.
■ To use more advanced options and write a custom rule in AD FS claim rule language, use Send
Claims Using a Custom Rule.
4. Configure Claim Rule page — Enter a Claim rule name, and other claim rule configuration
settings. These settings depend on the chosen claim rule template.
5. Click Finish.
Mapping the Active Directory Email Address to the NameID
Assertion Attribute
If the OpenAir User ID is the same as the user’s Active Directory email address, you can create two rules
to get the email address and map it to the NameID assertion attribute.
SAML 2 Quick Start GuideConfiguring Microsoft AD FS 3.0 for the SAML Integration 10
To map the AD email address to the NameID assertion attribute:
1. Create a claim rule using the Send LDAP Attributes as Claims template and use the following
steps on the Configure Claim Rule page. See Creating Claim Rules to Send OpenAir Login
Identifiers as SAML Assertion Attributes.
a. Click the Attribute store dropdown, and select Active Directory.
b. Click the cell under LDAP Attribute, and select E-Mail-Addresses.
c. Click the cell under Outgoing Claim Type, and select Name ID.
2. Create a claim rule using the Transform an Incoming Claim template and use the following steps
on the Configure Claim Rule page. See Creating Claim Rules to Send OpenAir Login Identifiers as
SAML Assertion Attributes.
a. Click the Incoming claim type dropdown, and select E-Mail Address.
b. Click the Outgoing claim type dropdown, and select Name ID.
c. Click the Outgoing name ID format dropdown, and select Unspecified.
d. Select Pass through all claim values.
SAML 2 Quick Start GuideConfiguring Microsoft AD FS 3.0 for the SAML Integration 11
Setting Up a Claim Rule for the OpenAir Company ID
You can create a claim rule to use a constant value and map it to the account_nickname assertion
attribute.
To set up a claim rule for the OpenAir Company ID:
1. Create a claim rule using the Send Claims Using a Custom Rule template. See Creating Claim
Rules to Send OpenAir Login Identifiers as SAML Assertion Attributes.
2. On the Configure Claim Rule page, enter the following, enter the following Custom rule:
=> issue(Type = “account_nickname”, Value = “testaccount”);
SAML 2 Quick Start GuideConfiguring Microsoft AD FS 3.0 for the SAML Integration 12
Note: Replace testaccount with your OpenAir Company ID.
Configuring Microsoft Azure AD for the SAML
Integration
Important: Microsoft Azure AD Premium is required. The Free and Basic versions of Microsoft
Azure AD only support pre-configured attributes in the SAML assertion and do not let you define
the custom attributes user_nickname and account_nickname required by the OpenAir Service
Provider.
The configuration steps for specific Identity Provider products are given for illustration purposes
only. OpenAir does not support specific Identity Provider products or product versions. Refer to
the vendor documentation for detailed and updated instructions about your Identity Provider
product.
To configure Microsoft Azure AD for the SAML integration
1. Sign in to the Azure Portal using your Azure Active Directory administrator account.
2. Browse to Azure Active Directory > Enterprise Applications > New application > Non-gallery
application. The Add your own application pane displays.
3. Enter a Name for the application (e.g. “OpenAir Sandbox” or “OpenAir Production”) and click Add.
The Application Overview screen displays.
SAML 2 Quick Start GuideConfiguring Microsoft Azure AD for the SAML Integration 13
4. Click Single sign-on on the left hand side pane, and select SAML. The SAML-based sign-on
configuration screen displays.
5. Enter Basic SAML Configuration settings:
■ Identifier (Entity ID) — Enter one of the following:
□ https://auth.sandbox.openair.com/sso/metadata (Sandbox account)
□ https://auth.openair.com/sso/metadata (Production account)
■ Reply URL (Assertion Consumer Service URL) — Enter one of the following:
□ https://auth.sandbox.openair.com/sso (Sandbox account)
□ https://auth.openair.com/sso (Production account)
■ Leave the optional fields Sign on URL and Relay State blank.
6. Add the User Attributes & Claims user_nickname and account_nickname:
1. Click Add new claim.
2. Enter the Name user_nickname.
SAML 2 Quick Start GuideConfiguring Microsoft Azure AD for the SAML Integration 14
3. From the Source attribute dropdown, select the source attribute containing the OpenAir
User ID.
4. Click Save. The attribute user_nickname is now listed in the table.
5. Repeat steps a-d for the account_nickname attribute. You may select the source attribute
containing the OpenAir Company ID from the dropdown or type the OpenAir Company ID
as a constant.
6. Delete all other attributes & claims that can be deleted.
7. Review the SAML Signing Certificate and download the Metadata XML file. OpenAir Customer
Service or Professional Services will need the Metadata XML file to enable the SAML feature or
change the SAML settings on your account.
8. Click Users and groups on the left hand side pane and assign users and group to this SAML
application. Azure AD will not issue a token allowing a user to sign into the application unless Azure
AD has granted access to the user. Users may be granted access directly, or through a group
membership. To assign a user or group to your application, click the Assign Users button. Select
the user or group you wish to assign, and click the Assign button.
SAML 2 Quick Start GuideConfiguring the SAML Integration in OpenAir 15 Configuring the SAML Integration in OpenAir The SAML integration settings form becomes available when the feature is enabled. To view or change the SAML integration settings for your OpenAir account, go to Administration > Global settings > Integration: SAML Single Sign-on. The following settings are available on the form: ■ Account Overview: SAML 2 Quick Start Guide
Configuring the SAML Integration in OpenAir          16

   □ IdP Entity ID — This is set by OpenAir Customer Service or Professional Services when enabling
     the SAML feature. The Entity ID is part of the SAML service metadata Identity Provider should
     provide in order to enable the SAML feature.
   □ SP Entity ID — This is OpenAir Service Provider Entity ID. Click the link to fetch the SAML metadata
     for OpenAir Service Provider.
■ Active Settings — This section l lets you compare the Active settings for the identity authentication
  service with the SAML configuration for your account. If these settings do not match, an error
  message appears when you go to Administration > Global settings > Integration: SAML Single Sign-
  on, and setting mismatches are highlighted on the form. To synchronize the settings and update the
  identity authentication service data, click Save on the SAML integration form.

         Note: The Active settings section is only available if the new identity authentication service is
         enabled.

■ Security Settings:
   □ Affiliate ID — If a SAML Affiliation is assigned at the Identity Provider, enter the affiliation ID
     included in the Identity Provider assertions. This is not required if the Affiliation ID is the same as
     the IdP Entity ID.
■ Protocol Settings
   □ Enable SP SSO — To use Service Provider initiated Single Sign-on (SP-initiated SSO), check the
     Enable SP SSO box.

            Note: IdP-initiated SSO is always supported once the SAML is enabled and configured. If
            you check the Enable SP SSO box, both IdP-initiated and SP-initiated SSO will be supported
            for the OpenAir web application. However, mobile users must use SP-initiated SSO, to log
            into OpenAir Mobile apps, if SP SSO is enabled on your OpenAir account.

   □ The following options are available only if SP-initiated SSO is enabled:

SAML 2 Quick Start Guide
Configuring the SAML Integration in OpenAir 17
▬ SP SSO method — Select the default bindings or method to use for Service Provider initiated
SSO requests. The two methods supported are HTTP POST Binding and HTTP Artifact Binding.
▬ SP SSO ForceAuthn— Check this box to include the ForceAuthn flag in Service Provider initiated
requests. ForceAuthn is an optional SAML feature that acts as a signal to the Identity Provider
to require some form of user interaction during the course of handling the request, overriding
the usual implicit assumption that it is acceptable to reuse authentication state from an earlier
request. The effect depends on the Identity Provider service and configuration.
■ Miscellaneous Settings — Different miscellaneous settings are available depending on whether SP-
initiated SSO is enabled:
□ If SP-Initiated SSO is enabled:
▬ Empty login user initiates SP SSO — Check this box to use Service Provider initiated SSO if the
User ID field is empty on the OpenAir login form.
▬ Hide User ID field on OpenAir SSO Login form — Check this box to hide the User ID field on
the OpenAir SSO login form if the valid Company ID is provided.
□ If SP-Initiated SSO is not enabled:
▬ SP-initiated SSO alternate login URL — Enter the URL for the Single Sign-on page users need
to be redirected to when attempting to login on the OpenAir default login page. This is also the
page users will be redirected to, if there is no user interaction within a set period.
▬ SP-initiated SSO alternate login text — Enter any message to be displayed on the OpenAir
default login page.
■ Settings for logout after redirect: By default, the screen Single Sign-on users see after they log out
includes a link to the OpenAir login page. You can change this link using the following settings.
□ Redirect Page — Enter the alternative link URL. The default link URL points to the OpenAir SSO
users login page.
□ Use link from alternate login URL or IdP’s metadata — Check this box to use either the SP-
initiated SSO alternate login URL, if specified, or the URL specified in the Identity Provider
metadata as the alternative link URL.
□ Redirect Text — Enter an alternative link text. The default link text is “login page”.
SAML 2 Quick Start GuideTesting the SAML Integration 18
Testing the SAML Integration
After the SAML Single Sign-on (SSO) feature is enabled for your OpenAir account and you have configured
the Identity Provider (IdP) service and OpenAir, use the following steps to test the SAML integration.
To test the SAML integration:
1. Go to Administration > Global settings > Integration: SAML Single Sign-on.
2. Click the Tips menu. The Tips menu should include the following test links:
■ Test SP-initiated SSO
■ Test IdP-initiated SSO
3. Click the test links to test your SAML account configuration.
SAML 2 Quick Start GuideEnabling Employees to Login Using SAML Single Sign-On 19
Enabling Employees to Login Using SAML
Single Sign-On
After the SAML Single Sign-on (SSO) feature is enabled for your OpenAir account and you have configured
the Identity Provider (IdP) service and OpenAir, you can enable your users to login using SAML Single
Sign-on (SSO). To do so, you need to add a setting on the employee demographic form using a custom
field.
To enable employees to login using SAML Single Sign-on:
1. In OpenAir, go to Administration > Global settings > Custom fields.
2. Click the Create button and select New Custom field. The New Custom field form appears.
3. Select ‘Employee’ from the Add a custom field to dropdown list and ‘Checkbox’ from the Type of
field to add dropdown list. Click Continue.
4. Enter the Field name saml_auth, check the Active box, enter the Display name SAML
Authentication. Enter a Description and Hint if required. Click Save.
Important: The Field name must be set to saml_auth.
5. Go to Administration > Global settings > Employees > [Select an Employee]. The Employee
Demographic form should now include the SAML Authentication Checkbox.
6. To enable SAML Authentication for an employee, check the SAML Authentication box on the
employee demographic form.
SAML 2 Quick Start GuideEnabling Employees to Login Using SAML Single Sign-On 20
Important: After you have enabled SAML Authentication for an employee, this
employee will no longer be able to use the standard password authentication method to
access OpenAir. Make sure you keep the SAML Authentication disabled for at least one
administrator account for troubleshooting purposes.
Tip: You can use the bulk employee change wizard to copy the value of the saml_auth field
to other user records on your OpenAir Account.
See OpenAir Admin Guide under Home > Home > Wizards.
SAML 2 Quick Start GuideCreating a Support Case 21
Creating a Support Case
If you are experiencing difficulties with OpenAir or would like to enable an optional feature, go to
SuiteAnswers through your OpenAir account and create a support case.
Our support staff and engineers will work with you to find a solution to your problem.
Important: As a part of the support case creation process you will be presented with existing
answers that may solve your problem. Take a moment to view the available answers before
proceeding to create a support case.
To create a support case:
1. Log in to your OpenAir account and select Support from the User Center menu.
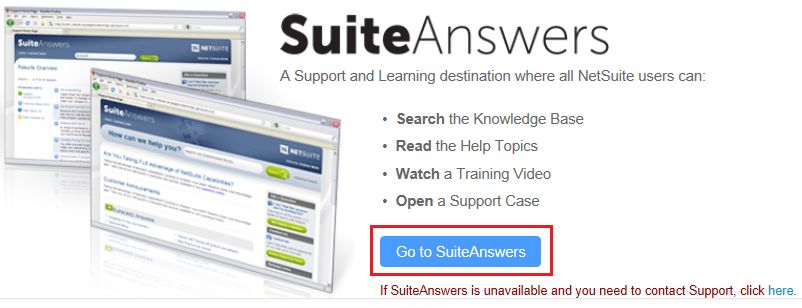
2. Click on the Go to SuiteAnswers button.
3. From the SuiteAnswers site home page, click Contact Support Online.
SAML 2 Quick Start GuideCreating a Support Case 22
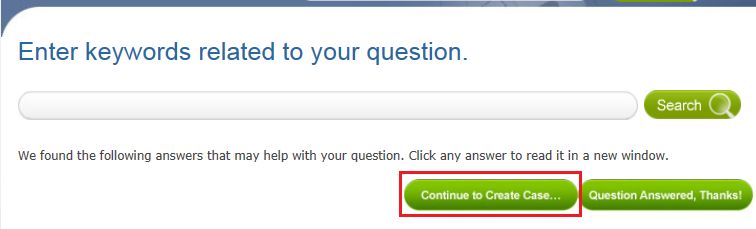
4. Enter your question keywords and click Search.
Note: If you do not have a question, i.e. you need a switch enabled, just click Search.
5. Very often the answer to your question will be displayed. If you still want to create a support case
click Continue to Create Case.
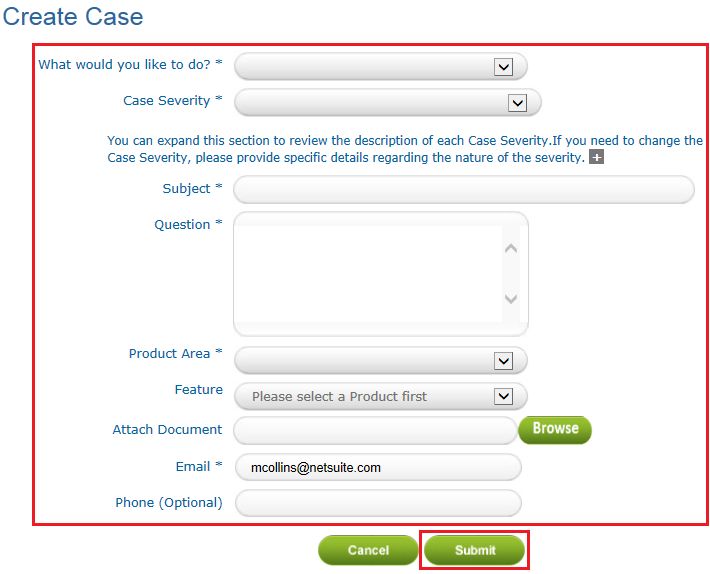
6. Fill out the Create Case form and then click the Submit. You will receive an email confirmation with
Your OpenAir Customer Care #.
SAML 2 Quick Start GuideCreating a Support Case 23
Note: An asterisk * displays after required fields.
SAML 2 Quick Start GuideYou can also read