Switch Progression Road Map - Learning Journeys
←
→
Page content transcription
If your browser does not render page correctly, please read the page content below
Learning Journeys
Switch Progression
    Road Map

        Learning Journeys: Switch Progression Road Map   1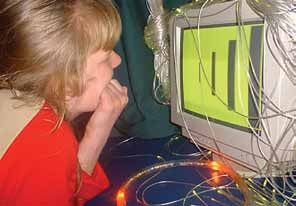
First published in 2011 by Inclusive Technology
              Copyright © 2011 Inclusive Technology
Written by Ian Bean, Special Projects Manager, Inclusive Technology
                        All rights reserved.

                     ISBN 978-1-903618-33-2
                     Editor: Alison Littlewood
                   Graphic design: Peter Butler
                 Cover photography: Peter Butler

                    Inclusive Technology Ltd
                          Riverside Court
                        Huddersfield Road
                               Delph
                              Oldham
                              OL3 5FZ
                        Tel: 01457 819790
                       Fax: 01457 819799
                 Email: inclusive@inclusive.co.uk
                      www.inclusive.co.uk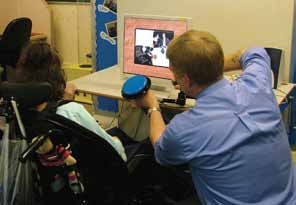
Learning Journeys
Switch Progression
    Road Map
         by Ian Bean

     www.inclusive.co.uk

         Learning Journeys: Switch Progression Road Map   3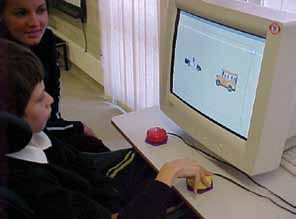
»   Contents

    Introduction                                                5
    Setting up Your Switches to use on the Computer             7
    Terminology                                                8
    Developing Appropriate Behaviour                           9
    Experiential Learning: Looking, Listening and Responding   11
    Make Something Happen!                                     16
    Two Switch Play                                            26
    One Switch or Two?                                         29
    Using One Switch                                           31
    Using Two Switches                                         35
    Introducing Formal Scanning                                38
    Choosing Independently                                     41
    Recording and Assessment                                   45
    Switch Progression Road Map                                46
    Small Steps and Key Milestones                             47
    What Software Can I Use?                                   50
    Switch Software Options                                    56
    Assistive Technology Advisory Services                     58
    Useful Websites                                            59
    About the Author                                           60

4        Learning Journeys: Switch Progression Road Map
»   Introduction

                                         Welcome to the first in our new series of
                                         Learning Journeys booklets. The Switch
                                         Progression Road Map draws together over ten
                                         years of best practice research and classroom
                                         observations from around the world into a
                                         comprehensive teaching and assessment
                                         document you can use every day. Detailing
                                         every stage of switch skills acquisition from
                                         cause and effect to confident scanning, this
                                         document will help you plan meaningful and
                                         motivating routes to success for learners using
                                         switches to access communication, learning
                                         and leisure.

The Switch Progression Road Map will help you assess a learner’s baseline, set
achievable learning milestones and provide you with all the help you need to teach these
important skills in a way which is both meaningful and motivating for your students. At
every stage along the way the booklet provides advice on which software and hardware
works best and how to set them up to personalise the learning experience.

                                         The Road Map seeks to update our knowledge
                                         of switch skills progression, beginning at
                                         an experiential level and early interaction,
                                         through the range of skills required to be able
                                         to make independent choices with a switch
                                         or switches. It breaks the process down into
                                         a series of small, achievable steps, each
                                         illustrated with teaching examples and ideas
                                         for extension. Presented as a road map with
                                         no right or wrong routes, it provides a structure
                                         of level descriptors and key milestones to help
                                         you plan for and achieve success.

                                   Learning Journeys: Switch Progression Road Map            5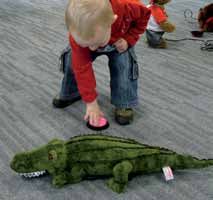
The booklet will help you choose the most
                                               appropriate software to use at each stage and
                                               show you how to adjust the settings to best
                                               meet the needs of the learner. For those new to
                                               switches, there’s a helpful guide to the basics
                                               of choosing switches and using them with the
                                               computer or battery adapted toys and other
                                               appliances.

    Watch out for forthcoming titles in the series:
             • Learning Journeys: Touch Screens and Interactive Whiteboards
             • Learning Journeys: First Steps to Communication
             • Learning Journeys: The Beginner’s Guide to ICT and Special Needs

6         Learning Journeys: Switch Progression Road Map
» Setting up Your Switches to use on the Computer
Switch Interface Computer
To connect a switch or switches to the computer requires a switch interface. Switch
interfaces connect to your computer through either the keyboard socket or a USB port.
They work by converting the switch press into something the computer can understand,
usually the press of a key on the keyboard. For example, when we use one switch, the
interface tells the computer that pressing the switch is the same as pressing the space
bar.
With switch interfaces like the Inclusive Simple Switch
Box, if we are using one switch it should be plugged into
the socket marked ‘Space’, and if we are using a second
switch it should be plugged into the ‘Return’ socket.
Return simply means that the interface converts presses
of the second switch into presses of the return or enter
key on the keyboard.
Some interfaces, such as the Inclusive MultiSwitch,
automatically detect the switch program you are using
and will set themselves up. All you need do is plug in your
switches and use them.
Some switches, such as the it-Switch from the Inclusive
Simply Works range, connect to the computer wirelessly.
The Simply Works system has the added advantage of
being able to connect six access devices to the computer
at the same time, through a single receiver: for example,
any combination of wireless keyboards, rollerballs,
joysticks and switches.
Learning Journeys: Switch Progression Road Map 7» Terminology
‘Move’ Switch and ‘Choose’ Switch
It is important to be consistent when we are talking about switches, especially when we
are talking to our learners. For simplicity we have used the term ‘choose switch’ to refer
to a single switch and a ‘move switch’ and ‘choose switch’ when using two switches.
Switch Switch
Interface Box Interface Box
Space Enter Space Enter
Choose Switch Move Switch Choose Switch
Software Settings and Options
This document makes reference to the ‘settings’ or ‘options’ in your computer software.
Most switch accessible software has options which can be used to set it up to suit the
needs of individual learners. See page 56 for a full explanation of the types of changes
you can make.
8 Learning Journeys: Switch Progression Road Map» Developing Appropriate Behaviour
In any teaching situation, we need to ensure that our students are settled and ready
to learn. This includes feeling comfortable with the positioning of equipment around
them. Be aware that some students may find this a little bewildering and sometimes a
little frightening. Always take the time to tell the student what you are doing and why:
“Here’s our music switch.” It’s important that the student is able to tolerate and accept
the positioning of equipment around them.
If the student pushes the monitor away, try moving it out of reach, or better still use the
interactive whiteboard or plasma screen. Alternatively, if the student throws the switch
from their tray, try holding it in your hand and offering it to them when it’s time to press it.
Accepting the positioning of equipment should be considered a prerequisite skill to
learning how to use switches.
Student will demonstrate appropriate behaviour when using ICT equipment
Student will tolerate the positioning of ICT equipment in relation
to their body for short periods.
Student will accept the positioning of ICT equipment in relation
to their body.
Learning Journeys: Switch Progression Road Map 9One of the most common behavioural problems we see is that of switch banging, i.e.
the repeated tapping or banging of the switch. There are a number of reasons why this
might be happening:
• The student is banging the switch to gain attention from adults.
This is most common where the student is left to work independently. Sitting
with the student and encouraging them to press the switch and move their hand
away can help reduce this.
• The student enjoys the tactile sensation of activating the switch.
Some switches provide tactile feedback to help the student understand that the
switch has been pressed. Using a switch with little or no tactile feedback (such
as the Pal Pad) can help reduce this. Encouragement to press and move hands
should also be offered.
• The student presses the switch repeatedly because they want the activity again or they
are bored with the activity.
Try changing the activity often and encourage the student to press and move
their hand away from the switch.
• The student doesn’t understand the function of the switch or what is required to activate
it.
Help the student understand the function of the switch by working hand-over-
hand.
10 Learning Journeys: Switch Progression Road Map» Experiential Learning: Looking, Listening and Responding
Experimental Learning
Looking Listening Responding
ICT is a very powerful tool we can use to provide meaningful access to the curriculum
for learners with additional needs, including those with severe and profound difficulties.
At this very early stage of learning we concentrate our efforts on providing multisensory
learning experiences designed to stimulate the senses.
For many children with additional needs ICT begins in the multisensory room, where
devices such as bubble tubes, wheel projectors, mirror balls and music are used to
provide auditory and visual stimulation, often accompanied by hand and foot massage
to help the child develop proprioceptive awareness. Some schools have installed digital
projectors or interactive plasma screens in their multisensory room to enable children
to use a computer and software, extending the multisensory experience to include
photographs, animation and video.
Many good cause and effect software titles now feature an experiential level, where
students are able to look and listen to the animations without having to control them.
Breadth is important here. Don’t restrict yourself to using just the computer or the
multisensory room. Try using music, toys or colourful tactile materials - whatever you
think will stimulate the student’s senses.
Learning Journeys: Switch Progression Road Map 11Students encounter ICT generated activities and experiences
Student shows simple reflex responses to ICT generated
experiences, for example startling at sudden noises.
Student encounters ICT experiences passively, showing little or
no interest.
At the experiential level our goal is to provide the student with a range of experiences
which will encourage them to look, listen, and hopefully respond in a positive way.
Students show emerging awareness of ICT generated activities and experiences
Student attends briefly to sounds or on-screen movement
patterns.
Student makes intermittent responses to sounds or on-screen
movement patterns.
To achieve this, we need to identify what motivates the student. Careful observation is
the key here. If for example you are using equipment in the multisensory room, make
a note of anything that triggered a positive response. It doesn’t need to be much, just a
simple sentence to say “Jenny looked intently when the yellow lights came on,” or “Jenny
smiled when the Bob the Builder music started.” Similarly, when using the computer,
observe and make notes of those things which capture the student’s interest. After a
short time you may be able to identify patterns. For example:
• Jenny likes to look at yellow.
• Jenny likes Bob the Builder music.
• Jenny tracks objects as they move across the screen.
Don’t forget to discuss this with other colleagues who may work with the student, and, if
possible, speak to their parent or carer. They may be able to help with information about
what the student likes to do when they are not with you.
Armed with this information we can now personalise a learning experience which, based
on our observations, we know that Jenny will find interesting. Big Bang Pictures for
example enables you to select specific animations and play them in a fixed or random
order. Using what we learned from our careful observations of Jenny we will be able to
identify those pictures or patterns which move across the screen and select a yellow and
black colour scheme.
12 Learning Journeys: Switch Progression Road MapPrograms in the Big Bang series also allow you to accompany the chosen animation
with your own music files, to further enhance the student’s experience. Since we know
Jenny enjoys Bob the Builder music we would set up Big Bang to use that instead of the
built-in music. In a few minutes we have created a highly personalised learning activity
just for Jenny, with all of the things we know that she enjoys and responds to.
Remember that we can also use software, toys and other devices that normally need
some form of input from the student. We simply press the switch for them. If you’re going
to use activities such as this, make a point of telling the student what you are doing.
Here’s an example:
My favourite band (experiential: looking, listening and responding)
Resources: Slideshow Maker software, twenty
images, MP3 track (two minutes or longer).
Choose images and sounds informed by previous
observations.
Settings: Switch Training – Timed Reward set to
twenty seconds.
How: Create a slideshow using twenty or more
pictures and a long MP3 music track. Change the
setting in the Slideshow Maker options to ‘Timed
Reward at 20 seconds’ (you might want to change
this to reflect the attention needs of the learner.
Remember, students with PMLD take longer to
process things).
In this activity the student listens to a favourite
piece of music while watching an animated
slideshow of images. You could all have a dance
Slideshow Maker
while the music is playing. When the music stops
show the student the switch then press it, saying
“more music”. You might want to use the student’s
hand to press the switch if they will tolerate this.
Give them lots of encouragement.
Extension Activities: Remember that you should
use whatever motivates the student to look and
listen. Try using the pause button on YouTube
videos or a favourite DVD.
Learning Journeys: Switch Progression Road Map 13It’s important with activities such as these that we cue the student into what is happening.
Tell them they are going to have “more” as you press the switch or touch the screen.
Use hand-over-hand if the student will tolerate it. This will all help the student begin
to associate the switch or touch screen with the motivating reward they are receiving.
Remember too that short sessions often work better than long sessions, where a
student’s attention may start to wane.
Student begins to respond consistently to ICT generated activities and experiences
Student shows interest or pleasure in sounds, images or
movement patterns, looking more intently and for longer periods.
Student briefly tracks objects moving in the horizontal or vertical
plane.
Student shows consistent interest in the ICT generated
experiences, reacting and showing positive responses to
familiar images, sounds and activities.
Where did that go? (Tracking objects moving on the screen)
Resources: Big Bang software.
Settings: Choose ‘Movements’ from the main
menu then select the direction and speed of
movement from the options menu.
How: Start with the slowest speed, with objects
moving left to right. The computer will display the
object moving across the screen. Encourage
the student to watch the object as it moves.
As the student becomes more proficient, try
changing the direction of movement to right to
left or up and down.
Big Bang is an excellent
Extension Activities: You might like to make program to use to introduce
up a little story about where the object (snail, visual tracking.
motorcycle rider) is going. Try using your
whiteboard or interactive plasma screen to
increase the range of eye/head movement
required to track the object.
14 Learning Journeys: Switch Progression Road MapYou can also use interactive whiteboard software, such as MyBoard, to help develop
tracking skills. Start with a dark (black) background and choose a bright object from the
Scrapbook; one of the stars works nicely. Adjust the size of the star so the student can
see it move it around the screen, encouraging them to watch where it is going. Why not
use a photo of your student and take him or her on a journey up, down and across the
screen?
Once our students are becoming more proactive and engaging with the experiences we
are offering them, it’s time to encourage them to take part. If the student will tolerate it, try
taking their hand to the input device and model for them the movements they will need
to make to start the activity. Always cue the student by telling them what you are doing,
remembering to focus on the activity rather than the input device: for example, say “more
music” rather than “press the switch.”
Occasionally, when the activity stops, do nothing for a couple of minutes and observe the
student’s response. Do they reach out and move toward the switch? Are they looking at
you to make it start again? If they are, encourage and reinforce this, giving them lots of
time to respond. Students with PMLD take much longer than other students to process
what is happening and coordinate their response. Be sure to record your observations
on your record sheet.
Student begins to be more proactive in their intentions
Student tolerates and participates in the shared exploration of
the switch, including method of activation.
Student reaches out toward the switch.
Student independently explores the switch and its method of
activation.
Learning Journeys: Switch Progression Road Map 15» Make Something Happen!
To progress from experiential ICT, our students need to develop an understanding of
cause and effect. What do we mean by the term cause and effect? Simply put, developing
cause and effect means helping a child understand that they are able to extend influence
and control over their immediate environment; that an action on their part can cause a
response, either from other people or from objects around them.
An example of this may be recording a cheery greeting onto a BIGmack single message
communicator. When the student activates the BIGmack (the action) they elicit a
response from people around them (the reaction). The key skill here is that the student
is aware that they made the effect happen by pressing the switch.
Understanding cause and effect is one of the foundation stones upon which all future
learning is built. How can we understand our place in the world if we don’t know that we
can have influence over it? Cause and effect is not something that can be taught directly,
rather our students develop their understanding through experiencing it in a range of
different contexts. A baby throwing a toy from a pram and having someone pick it up, or
pressing a button on a Jack-in-the-box to make it pop up, are both examples of cause
and effect experiences.
16 Learning Journeys: Switch Progression Road MapICT gives us a powerful set of tools we can use to provide our students with a broad
range of developmental and age appropriate experiences of cause and effect. Switches
give our students a cognitively less challenging way of interacting with ICT equipment:
simply pressing the switch makes something happen. Because of this, switches are an
ideal way to experience cause and effect. However, we should remember that for some
students with severe motor difficulties, switches will be the ONLY way they can interact
with the world around them. Make sure the student has a switch that they can use.
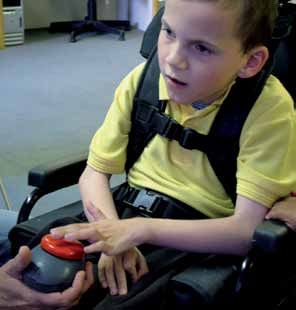
Which Switch Should I Use?
It is important that an appropriate switch is chosen and that it is positioned so the student
can use it without physical discomfort. For most of the students we work with, this will be
relatively simple. So what do we need to consider when choosing a switch?
• Is the target area of the switch big enough for the student to touch?
• Can the student see the switch against the background?
• Can the student apply enough pressure to the switch to activate it?
For most of our students, choosing a switch such as an AbleNet Big Switch or Inclusive
Technology Smoothie Switch in a bright colour will suffice. Choosing which switch to
use and how to position it for a student with a more complex condition, such as cerebral
palsy, can be very difficult. Little has been published on the subject of switch assessment,
although some information is available on the Internet and in books. The Priory Woods
School Assistive Technology Skills Progression Document offers the following advice:
An accurate assessment will be required to identify a reliable, consistent
and repeatable movement that the child will be able to make from
their normal seating position (this may include side lying benches and
standing frames if this is the child’s MOST comfortable position for
accessing the computer).
Several issues need to be considered:
• T
he child’s medical condition including expected course and prognosis
and other related medical issues, such as skin conditions, which could
affect movement.
• P
hysical functioning: which movements are voluntary and which are
involuntary? What is the range of movement? Is it accurate? How
quickly can the movement be made and how much pressure can be
applied?
• Is there any sensory impairment which may affect the use of the
equipment? Visual difficulties, hearing impairment, tactile problems?
• A
re there any known perceptual problems to consider? Hand to eye
coordination, tracking or scanning difficulties, problems with left or
right side spatial relationships?
Learning Journeys: Switch Progression Road Map 17Where the student experiences any of these difficulties, Inclusive would always
recommend you take advice from either your local authority special needs team or
one of the independent assistive technology organisations. They will be able to assess
the needs of your student and make recommendations as to which switch you should
choose and how it should be positioned.
Correctly identifying a reliable, repeatable and consistent movement, and selecting
and positioning an appropriate switch to match that movement, are critical factors for
success.
Switch use at this level can be addressed by any of the following four different skill areas
and we would encourage you to try all of these with your students. There is no right or
wrong place to start.
Make Something Happen
Press and Hold Press and Let Go Press It Again Turn On and Off
With all of these levels, it’s important that you focus the student’s attention on the activity
that results from pressing the switch rather than on the switch itself. Here’s an example
of this:
Jenny is using a Smoothie Switch to operate a Bob the Builder activity created in
Slideshow Maker. Jenny’s teacher is sitting with her and prompting her to activate the
switch by saying, “More Bob please”. Note that Jenny’s teacher is not saying “Press
the switch,” which would divert Jenny’s attention away from the screen. When Jenny
successfully activates the switch her teacher praises her and encourages Jenny to look
and listen to the reward.
Never talk about pressing the switch and always encourage the student to look at
the effect they have created. These two simple rules will help your student make the
all‑important link between their use of the switch and the resulting reward. Remember
too that we all need a reason to do things!
Press and Hold
This is where the learner is required to press the switch and hold it down in order to
trigger an effect. The best example of this is the use of switch adapted toys. The student
presses the switch and, while the switch is held down, the toy continues to move. Once
the child stops pressing the switch the effect will end.
18 Learning Journeys: Switch Progression Road MapThis is arguably one of the best ways to experience cause and effect, since the effect
only happens while the student’s hand is pressing the switch. This reinforces the concept
that the student is making the effect happen. Here’s an example:
Animal Olympics (press and hold a switch)
Resources: Two battery operated switch adapted
toys which will walk, such as a pig and an elephant.
Two switches, one of which the student can use.
Settings: If you are using a switch control box,
set it to ‘direct’.
How: Give the student one switch and you have
the other yourself. Put the toys in the middle of
a table and encourage the student to press the
switch to make the toy walk. Press your switch
at the same time as the student and race your
animals across the table. The winner is the one
who gets their toy to the other side of the table
first.
Switch Adapted Toys
Extension Activities: You might like to make up
little homes for the toys and help them reach them
using your switches.
Student uses a switch to produce a desired effect
Student will press and hold a switch to achieve a desired effect
with physical prompting (hand-over-hand).
Student will press and hold a switch to achieve a desired effect
with minimal physical prompting.
Student can press and hold a switch to achieve a desired effect.
Electrical appliances, such as bubble tubes and fibre optic lamps, can all be controlled in
this way. You will need to use a control box such as an Inclusive Click-On or a PowerLink,
and use them on the ‘direct’ setting. A number of software packages can be used at this
level too. Try the ‘movement’ levels in Big Bang for a computer activity.
While this is one of the easiest ways to understand the function of the switch, some
students, most likely those with motor difficulties, will find holding down a switch quite
hard. If this is the case, don’t worry; just try any of the other skill areas.
Learning Journeys: Switch Progression Road Map 19Press and Let Go
Most of us are familiar with the ‘press and let go’ skill. This is where the student presses
the switch to start an activity, which will play for a set period irrespective of whether the
student has released the switch or not. When working at this level we need to encourage
the student to press the switch and then release it. This can be a little more difficult for
the student to understand as the effect is not as obviously linked to the switch press as
in ‘press and hold’. Most cause and effect software works in this way by default.
Student will press and release a switch to achieve a desired
effect with physical prompting (hand-over-hand).
Student will press and release a switch to produce a desired
effect with minimal physical prompting.
Student can press and release a switch to produce a desired
effect.
Some battery toys, such as Droopy the Snoring Dog from Inclusive Technology, will work
this way by default, but most will require the use of a toy control box such as the AbleNet
Single SLAT or the Inclusive it-Control. Choose the ‘timed’ function and the number of
seconds you would like the reward to last. For some students this can be quite short,
perhaps thirty seconds or so; however, others will need a longer reward time. Mains
devices such as fibre optic lights can also be controlled in this way. On your AbleNet
PowerLink or Inclusive Click-On choose the ‘timed’ setting and the length of the reward.
Here’s an example using a mains controller:
Where are you going for your holiday? (Press and let go)
Resources: AbleNet PowerLink or Inclusive
Click‑On, a switch the student can use, a hairdryer.
Settings: Choose ‘Timed’ and set the reward time
to thirty seconds.
How: Plug the hairdryer into the controller and give
the student the switch. We are in the hairdresser’s.
The teacher stands silently behind the student,
holding the hairdryer. When the student activates the
switch the teacher begins to ‘dry’ the student’s hair
and talks in hairdresser style. When the hairdryer
stops, the teacher returns to standing silently.
Inclusive Click-On
Extension Activities: Control units can be used
with a wide range of appliances such as blenders
(to make smoothies) or foot spas (I bet there is one
in your attic!).
20 Learning Journeys: Switch Progression Road MapControl units like the Inclusive Click-On can be used to switch adapt most electrical
equipment to provide greater breadth. Try connecting a desk fan which will blow a gentle
breeze onto the student when the switch is pressed. Combining switch use with physical
effects can really reinforce the concept of cause and effect. There are a few exceptions.
Do not try and operate televisions, DVD and CD players, as these won’t work. To operate
these devices (and anything else operated by an infrared remote control) you will need a
specialist switch controller, such at the GEWA Big Jack. These controllers automatically
learn the signals from the device’s remote control then assign the ones you want to use
to the switch sockets.
Press It Again
‘Press it again’ is often called switch building, an activity where the student is required
to press the switch a number of times to receive a reward. In the past this has involved
pressing the switch to build pictures or scenes, as in the SwitchIt! software series. More
recently we have seen the value of activities where the learner is required to press the
switch to keep an activity playing, for example a musical activity in Slideshow Maker.
In these activities the learner is prompted to press the switch again when the activity
stops. Some activities will also present the learner with an on-screen switch prompt
when this happens.
You might want to try activities such as this before introducing picture building.
Learning Journeys: Switch Progression Road Map 21Here’s an example:
Be the DJ (press to keep an activity playing)
Resources: Slideshow Maker software, twenty
images, MP3 track (two minutes or longer).
Settings: ‘Switch Training – Timed Reward’ set
to fifteen seconds.
How: Create a slideshow using twenty or more
pictures and a long MP3 music track. Change
the setting in Slideshow Maker to ‘Timed
Reward at 20 seconds’ (you might want to
change this to reflect the attention needs of the
learner).
In this activity the child becomes the DJ. Every
time they press the switch, the activity will play.
You could all have a dance. Give the learner lots
of encouragement to press the switch when the Slideshow Maker
activity stops. Be aware that the learner may
start to bang the switch; encourage taking the
hand away from the switch if this happens.
Extension Activities: Play musical statues.
When the music stops, everyone in the class
has to freeze until the music starts again.
Battery operated toys are another useful tool to use at this level. You will need to use a
toy controller, such as the it-Control or an AbleNet SLAT control box, to adjust the time
that the toy will play after the switch press.
Student can activate a switch a number of times to keep an
activity playing.
Student can activate a switch a number of times to complete
a simple sequence, noticing changes after each switch press.
Another way to teach this skill is to use activities where the learner has to press the
switch a number of times to complete a simple sequence. For example, the child may
press the switch a number of times to build up a picture or scene. On the final press,
the learner is rewarded by seeing their picture animate. Some of the best activities for
teaching this skill are found in the SwitchIt! series of programs.
22 Learning Journeys: Switch Progression Road MapTeachers can choose to ‘build’ flashcards (a picture and a word), pictures or simple
stories in a customisable number of steps. You may have already introduced some of
these activities at a cause and effect level in the ‘Make Something Happen’ section. Go
into the options and choose ‘Pictures’ from the Activity Menu and ‘Three Steps’ from the
Number of Steps Menu. Each time the learner presses the switch they will introduce
another part of the picture. On the third press the picture will animate.
One of the key skills here is helping the learner to understand that after they press
the switch something will have changed on the screen. Encourage them to look at the
screen, pointing out the changes if necessary. You may encounter some switch banging:
again, encourage the learner to move their hand away from the switch and look at the
screen. Choosing pictures that you can talk about will help with this. You can choose
which pictures to use in the ‘Subjects’ menu. Be aware that some children may not yet
be able to identify an object from parts: for these children, using the stories works best.
All of the SwitchIt! programs have a number of simple stories which can be used to teach
this skill. Every time the learner presses the switch the story will move on until, at the last
switch press, the learner is rewarded with music and animation. SwitchIt! stories are not
narrated by the computer so you are free to tell the story in your own way, differentiating
the language to suit the level of the learner. You can also make your own personalised
activities. In this example we have used SwitchIt! Maker 2:
Tell a story (press more than once to complete a simple sequence)
Resources: SwitchIt! Maker 2 software, digital
photographs of a school trip, microphone.
Settings: No changes needed.
How: Create a ‘Big Book’ using SwitchIt! Maker
2 using images from a school trip. Record
a simple sentence in SwitchIt! Maker 2 to
accompany each picture.
In this activity the learner becomes the class
storyteller. Each time the child presses the
switch the page will turn and that page will be
read out to the class. SwitchIt! Maker 2
Extension Activities: Try adding a short video
clip to the last page as a special reward for
listening to the story. Use a Flip video camera
with the children to record clips throughout your
trip.
Learning Journeys: Switch Progression Road Map 23Turn On and Off
Another way to operate a switch at the cause and effect level is to use it to turn things
on and off again. This is sometimes called latching. The process is simple. The student
presses the switch to start the activity then presses again to stop it. The best example of
this would be controlling music with the Inclusive MP3 Player:
Stop right now… thank you very much (turn on and off)
Resources: Inclusive MP3 Player, music on a
memory stick, a switch the student can use.
Settings: Plug the switch directly into the Play/
Pause (middle) socket.
How: We’re playing musical statues. The
student starts the music and everyone dances
around the room. When the student presses the
switch again the music stops and everyone must
stand still. Anyone moving is out. The activity
continues until only one person is left in; they are
the winner.
Extension Activities: Try putting a switch into Inclusive MP3 Player
the ‘Next Track’ socket. Each time the student
presses the switch a different track will play.
If the student wants to listen to the track, they
simply don’t press the switch.
Student can activate a switch to start and stop an activity.
Despite being a very useful skill, little or no software works using the latching technique.
Thankfully we can practice the skill using battery toys and electrical appliances. This
requires the use of a controller, such as the Inclusive Click-On or AbleNet’s SLAT. Simply
use the ‘latching’ setting.
It’s important when we are working with students at the ‘Make Something Happen’ level
that we give them lots of opportunities to practice using the switch throughout the day.
One of the best ways to achieve this is by using single message communicators, such
as the Inclusive Smooth Talker or Ablenet’s BIGmack.
24 Learning Journeys: Switch Progression Road MapThese easy to use devices enable you to incorporate switch use into just about every
aspect of the student’s day. They can say hello in the morning, take part in storytelling or
singing and say goodbye at the end of the day. The possibilities are endless. Remember
that if your student is using a more specialist switch, for example activated by head
movement, this can plug directly into the communicator and be used to operate it.
For more information about single message communicators and how to get the best from
them, look out for the Learning Journeys: Early Communication booklet on the Inclusive
Technology website.
It can often be difficult to ascertain if a student has fully grasped the concept of cause and
effect when using switches. For example, a student may press a switch and then look at
and listen to the effects on the computer screen. Although this looks like the student has
understood that pressing the switch has triggered the reward, this may not always be
so. Some children enjoy pressing the switch for its own sake, especially if it gives some
form of tactile feedback; they pause only when they notice something happening on the
screen or when they hear new sounds which divert their attention from the switch.
Careful observation, and a sound knowledge of the student, will be useful in order to
determine that they understand THEY are making something happen by pressing the
switch. Only when we are sure the student has fully grasped the concept, and we have
observed them applying that knowledge with toys, computer software and multisensory
equipment, should we consider moving them on to the next stage…
Learning Journeys: Switch Progression Road Map 25» Two Switch Play
This level introduces the use of two switches in a free play environment, where our goal
is to allow the learner to experience using two (or sometimes more) switches, and there
is no expectation of formal scanning.
The two activity areas we will focus on are:
Playing With Two Switches
Start and Stop This or That?
All of the activities in this section require the use of two switches; however, they do
not necessarily require the learner to be able to activate them both independently. For
example, if you are working with a learner who can manage one switch but finds it
impossible to use two switches because of motor difficulties, the second switch can be
offered by the teacher, therapist, or support worker as and when it is required by the
activity. We would encourage you to try these activities irrespective of whether the child
will go on to use one or two switches with more formal scanning techniques.
26 Learning Journeys: Switch Progression Road MapThis, That or Both?
Student can differentiate between the actions of two different
switches.
Here we use two switches connected to two different activities and encourage the learner
to explore the effects they produce when activated. You could try using two different
battery operated toys or lighting effects with your Click-On. How about two different
‘action’ messages on Smooth Talkers or BIGmacks? Essentially, we’re presenting two
different ‘make something happen’ activities and giving the child the option of watching
either or both.
Remember, this is about exploration, and giving the learner the opportunity to demonstrate
a preference. Give the learner lots of time to explore the effects and try not to ask them
to ‘find’ a specific effect; there will be lots of time for questioning later in the programme.
To further develop the concept of demonstrating preference, you might like to use one
activity that you know the learner enjoys and one that you know they do not.
Start and Stop
Student can use two switches, one to start an activity, the other
to stop the activity.
Here we use two switches to operate an activity. For example, in Slideshow Maker a
learner can use two switches to start and stop a musical slideshow. This is a great way
to introduce these activities. Create an activity using music and images that you know
the learner enjoys, and let them start it by pressing the switch.
You then tell them that you think the music is ‘horrible’, and stop it by pressing the
second switch. The learner will no doubt respond by pressing the first switch to start the
music again. Try swapping this around, presenting the child with some ‘dreadful’ music
that you know they don’t like, and giving them the stop switch. You can also use this
method to give the learner control over a game of musical statues.
This ‘start and stop’ system also works well with toys and electrical devices.
Learning Journeys: Switch Progression Road Map 27Going home (use two switches to start and stop an activity)
Resources: Battery operated toy that moves
forward (elephant, pig, dog, etc.) A toy control
box such as Simply Works or an AbleNet
Choice SLAT. A cardboard box decorated as
the animal’s home.
Settings: Set to ‘Latch’.
How: The learner will take the animal home by
making it walk into the decorated cardboard
box.
In this activity the student presses the first
switch to start the animal walking, then presses
the second switch to stop the animal when it has
arrived. Give the learner lots of encouragement
if they get it right.
Extension Activities: You can make the Simply Works it-Control
activity more challenging by using circles cut
from paper as the animal’s home. Place these
on the floor in front of the toy and encourage
the learner to stop the toy when it is on the
circle. You could use different coloured circles
for more able learners, and ask them to stop
the toy on a specific colour.
There are so many possibilities for using two switches in this way. Try mixing physical
effects, for example by using a hairdryer and a fan. One switch will blow warm air onto
the learner, the other cold. Try to arrange your day to ensure that the learner can practice
these skills often.
28 Learning Journeys: Switch Progression Road Map» One Switch or Two?
As we move closer to the point where we will introduce more formal scanning systems,
we need to make a decision about how many switches the learner will use. This decision
is largely informed by the results of an access assessment, discussed earlier in this
document. If you can identify two voluntary movements the learner can make which
meet the criteria of being both reliable and repeatable, you should follow the ‘Using Two
Switches’ path. For whatever reason, if the learner is only able to cope with one switch
at this time, you should follow the ‘Using One Switch’ path.
What is our goal? Irrespective of whether we choose to proceed with one or two switches,
our goal is the same: to enable the learner to make independent choices. They will
achieve this by learning how to scan. Here’s how scanning works.
The learner is presented with a range of options that they can choose from, represented
by the boxes in the diagram below. These options are then ‘scanned’. Each choice will
be highlighted in turn (often by a red box) as in our diagram, and usually accompanied
by an auditory prompt (a short message giving the learner more information about that
box). To make a choice, the user presses his or her switch when the required option is
highlighted.
The scan moves across the row
sequentially from left to right, highlighting
each box as it goes.
The user activates the switch when the
item they require is highlighted.
When using one switch, the computer controls the scanning by highlighting each choice
and waiting a short while to give the learner an opportunity to press the switch to select
the option, before moving on to the next. The key skills that a single switch user will need
to be able to scan effectively are:
• Tracking an object as it moves across the screen (the highlight box).
• Pressing the switch within a specific time period (while the choice is
highlighted).
The single switch pathway will introduce activities to teach these skills and give the
learner lots of opportunities to practice them in a range of different contexts.
Learning Journeys: Switch Progression Road Map 29The process of scanning is the same with two switches; the only difference is that the
learner moves the highlight box by pressing a second switch repeatedly to reach the
option they require. The key skills required are now:
• Tracking an object as it moves across the screen.
• Understanding that each switch has a different function. The first moves
the highlight box and the second chooses the highlighted item (‘move’ and
‘choose’).
Again, the two switch pathway provides lots of activities that will teach and consolidate
these skills.
30 Learning Journeys: Switch Progression Road Map» Using One Switch
Effective scanning with one switch requires pressing the ‘choose’ switch while the
required item is highlighted by a scan box. Various activities can help the learner develop
the requisite timing skills. These tend to involve pressing the switch in response to
something appearing on the screen, or when an on-screen object is in a particular place.
One Switch Timing
Pop Up Positional
Pop Up
Pop up is where something ‘pops up’ onto the screen and the learner is required to
press the choose switch when they see or hear it. The learner is rewarded for pressing
the choose switch at the right time. This can be very challenging for some learners,
especially those that may have retained a startle reflex. So often these learners know
exactly when to press the switch but are unable to coordinate their movements quickly
enough. This can be hugely frustrating for them. If you are working with a student who
experiences this problem you might want to look for an alternative strategy to traditional
pop up activities. More about this later.
Student can press a switch in response to an on-screen cue.
The most common way to teach this skill is through
the use of software such as Switch Skills 1 from
Inclusive. Start with the ‘Traffic Lights’ game,
where the learner will be cued into pressing the
switch with a familiar “Ready? Set? Go!” prompt.
Remember that you can go into the program
options and change the ‘Reveal Time’ if the learner
is experiencing a startle reflex response, or if they
find it difficult to press the choose switch within the
default time of three seconds. The ‘Reveal Time’
can be set to give the child up to 30 seconds to
respond. You may also want to turn off the background music and sound effects, which
some learners will find distracting.
Learning Journeys: Switch Progression Road Map 31Another very useful program to use at this level
is Switch Skills 2 from Inclusive. This program
has the added benefit of being able to set the
‘Reveal Time’ to ‘Wait until the switch has been
pressed’. When set in this way, the program will
display the cue then wait until the learner has
pressed the switch before moving on. This is
incredibly useful as it ensures that every learner
will experience success irrespective of the time it
takes them to press the switch. The self-esteem
boost this provides can help keep them engaged
and motivated.
Switch Skills 2 also allows you to turn off the ‘Penalty’ noise which is played if the learner
presses the choose switch at the wrong time, and lets you select a personalised auditory
cue. These range from the usual beeps to pops, and even the sound of someone blowing
a raspberry.
Switch Skills 2 focuses exclusively on pop up activities. For more information about
which software to use, see our ‘What Software Can I Use?’ section at the back of this
booklet.
Using Switch Skills 1 and 2, you will be able to provide your learners with a broad range of
pop up style activities on the computer. Switch Skills 2 also extends the pop up concept,
allowing you to personalise the difficulty level to more closely match the learning needs
of the student. For example, you can change the size of the visual cues and where they
appear on the screen, or increase the challenge by having to respond to more subtle
changes.
Of course it doesn’t always have to be on the computer. You could use Smooth Talker or
BIGmack switch communicators to create off-computer games, where the outcome is to
be able to press a switch in response to a cue.
32 Learning Journeys: Switch Progression Road MapHere’s an example:
Farmyard orchestra (press a switch in response to a cue)
Resources: A Smooth Talker or BIGmack for
each learner taking part. Animal lotto cards.
Pictures of animals to place on the Smooth
Talker or BIGmack.
Settings: Record an animal noise on each
device (some learners find it fun to do these
themselves).
How: Turn over each of the cards to reveal an
animal. If the animal matches the animal on the
learner’s switch, they press the switch to make
that animal noise.
Extension Activities: Make up a short story to
tell your class, all about the animals that live on
the farm and their adventures. Every time you
mention an animal the child with that animal
Smooth Talker
noise on their device presses the switch. You
can use any combination of words or sound
effects, whatever you think the child might like.
These activities work really well for those
children who may experience startle reflex
difficulties, as you can wait however long it
might take for the learner to make the response.
Whatever type of activities we use, our expectation is that the learner will be able to
press the choose switch in response to a cue. To achieve this we must remember to
encourage the child to look at the screen, listen for any prompts, and to press the choose
switch when they notice them.
Learning Journeys: Switch Progression Road Map 33Postional
The second skill the learner needs to acquire is being able to track an object moving
across the screen and press the choose switch when it is in a specific place. This mirrors
the process of tracking a scan box as it moves through the choices and pressing the
choose switch when the required option is highlighted. Here’s another example from
Switch Skills 1:
The object the learner needs to track is a bee which travels from left to right across the
screen. The child will be prompted to press the choose switch when the bee gets near
the centre of the flower. You can adjust the time it takes the bee to travel across the
screen, giving the learner more time to coordinate their movement and press the choose
switch.
Switch Skills 3 from Inclusive focuses exclusively on positional activities and provides a
breadth of activities that can be personalised to meet the learning needs of the student.
Student can track an object as it moves across the screen,
pressing a single switch when the object is in a target area.
When learning any skill it is important to have time to practice. Remember that for
some children, using switches can be both physically and mentally tiring. Be led by
your learners. The game style of the Switch Skills series lends itself to short sessions,
repeated often, rather than mammoth forty-five minute ‘lessons’. When your learner is
demonstrating a good understanding of both the pop up and positional skills, you’re
ready to move on to Introducing Formal Scanning on page 38.
34 Learning Journeys: Switch Progression Road Map» Using Two Switches
Once the decision has been taken to work exclusively with two switches, we need to
begin to build on the work we did in the ‘Two Switch Play’ section. This involves two new
skill areas:
Two Switches Two Actions
Interacting with Objects Move and Choose
Related and Interacting Objects
Student can use two switches, each controlling part of the same
activity.
Earlier we were using two switches with what were essentially two separate ‘make
something happen’ activities. We are now going to extend that by introducing the
concept that each switch has a role to play in completing the activity. Here’s an example
of using two switches where each performs a specific function. In this case the learner is
commenting on the teacher’s performance skills.
My teacher has talent (use two switches to control an activity)
Resources: Two Smooth Talker or BIGmack switches.
Settings: Record some boos on one and cheers on the
other.
How: Present the learner with the two switches and position
them so the child can use them. Show the learner what
each switch does. Now perform some (very short) songs,
dances, or jokes to the learner, and encourage them to
respond by pressing one of the switches. Remember there
is no right or wrong in this activity.
Extension Activities: How about tying this into emotional Smooth Talker
recognition? Demonstrate to the learner that a smile gets a
cheer and a frown gets a boo. Now pull some faces for the
learner and get them to respond by pressing either switch.
Learning Journeys: Switch Progression Road Map 35Here’s another example, this time using the computer:
‘MyTube’ (use two switches to control an activity)
Resources: SwitchIt! Maker 2, four short videos
saved from Youtube or from a Flip camera.
Settings: SwitchIt! Maker 2 needs to be set for
‘No (Press the Return Key or right mouse…)’ in
the ‘Access’ menu.
How: Create a simple four page activity. On each
page add a video clip of something the learner
enjoys, from YouTube or a Flip camera. If you
need help to make SwitchIt! Maker 2 activities
you can watch instructional videos and download
a step-by-step guide from the Inclusive website.
The learner presses the move switch to cycle SwitchIt! Maker 2
through each of the videos. If the learner wants
to play one of them they would then press the
choose switch.
Extension Activities: Add more videos.
Switch Skills for Two Set One software is
also useful for teaching this skill, as all the
activities focus specifically on this area.
For example in the ‘Feed the crocodile’
game in the ‘Interacting Objects’ level,
pressing the move switch repeatedly will
change the piece of food offered to the
crocodile while the choose switch makes
the crocodile eat it.
This mirrors the way that the two switches will be used when we move toward more
formal scanning. Each press of the move switch will move the scan box along the row
of choices. When the scan box highlights the object the learner wants, they press the
choose switch.
36 Learning Journeys: Switch Progression Road Map‘Build Up’ and ‘Move and Choose’
Student can use two switches to complete simple ‘move and
choose’ or ‘build up’ activities.
In ‘move and choose’ activities we focus
on developing the learner’s ability to
press the move switch a number of
times to move something into a specific
place before pressing the choose switch
to trigger a reward. One example is the
‘Dancing Monsters’ game from the ‘Move
and Get’ level in Switch Skills for Two Set
Two. The learner presses the move switch
repeatedly to take a monster across the
floor towards a ballet dancer. When the
monster is next to the ballet dancer, the
learner is prompted to press the choose
switch to trigger the reward.
Switch Skills for Two Set Two features lots of ‘move and choose’ activities together with
a number of ‘build up’ activities, where for example the move switch is used to build up a
tower and the choose switch knocks it down. These are all superb ways for your learners
to develop and practice the skills they’ll need when moving on to more formal scanning
activities.
When your learner is demonstrating a good understanding of the ‘move and choose’
process it’s time to move them on to formal scanning activities.
Learning Journeys: Switch Progression Road Map 37» Introducing Formal Scanning
As discussed earlier, choosing with either one or two switches involves moving or
tracking an object, usually a scan box, left to right across the screen through a series of
on-screen choices. The scan box highlights each in turn and when the required object
is reached the learner presses the choose switch to select it. (Highlighting an object
usually involves displaying a coloured ‘scan box’ around the object.) Auditory cues are
often used to provide further support for the learner.
NOTE: The word ‘object’ here denotes any image, photograph or symbol that represents
that choice. For example, a symbol for orange juice might be used on a scanning
communication aid to represent the phrase “Can I have some orange juice please”. An
accompanying auditory cue might be the spoken words “orange juice”.
“Orange juice”
It’s important to remember that the use of
a coloured box to highlight the on-screen
choices might make sense to us, but can
be a little too abstract for some of our
learners. A useful tip here is to create a
‘real’ scan box from A4 colored card and
use it to make choices of real objects. For
example, at break time you could hold the
‘real’ scan box over different toys. Used in
this way, the ‘real’ scan box can help the child begin to associate the coloured box with
the choosing process. What colour should the scan box be? That depends on the learner
and what they can see. The default colour is always red. Change this only if the learner
has difficulty seeing or processing this colour.
38 Learning Journeys: Switch Progression Road MapYou can also read