USING YOUR MACINTOSH COMPUTER - A Guide to Using Your Macintosh Computer At GSFC - Macintosh Users' Guide
←
→
Page content transcription
If your browser does not render page correctly, please read the page content below
USING YOUR
    MACINTOSH
    COMPUTER
   A Guide to Using Your Macintosh Computer At GSFC

                                                Covers OS 10.8
                                                Revised 3/2013
Macintosh Users’ Guide											                        1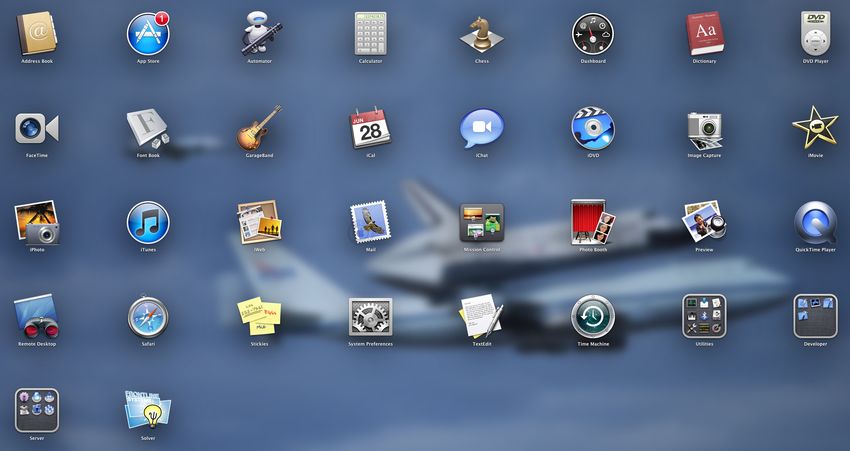
This Guidebook is a collection of How To’s, Tips and Tricks, and Best Prac-
tices for the use and care of your Macintosh computer, and is specific to Org
Codes 610, 618, & 619. It has grown out of experiences with the Goddard Macin-
tosh community, and represents a compilation of questions and answers, which we
hope will help the user utilize their Macintosh more effectively.

      Since there is a wide range of expertise in the user community, we have
based this document on the assumption that most users have a fundamental com-
puter background, and a basic familiarity with the latest Macintosh operating sys-
tem (10.8.2) supported at GSFC, plus several applications.

      This is a living document. We will continue to update and improve it as
necessary. Your input and suggestions are always welcome and very much valued.
Please contact us with any questions.

                                      Lisa Madden
                                     Charlie Seljos
                                     Vipool Rathod
                                       Keith Rice

                              ©2012 Adnet Systems

Manual Developer  . . . . . . . . . . . . . . . . . . . . . . . . . . . . . Lisa Madden

Manual Version . . . . . . . . . . . . . . . . . . . . . . . . . . . . . . . . . . .  1.0

Date Printed . . . . . . . . . . . . . . . . . . . . . . . . . . . . . . .  March, 2013

Date Revised . . . . . . . . . . . . . . . . . . . . . . . . . . . . . . .  March, 2013

This copyrighted material was produced by Adnet Systems. No part or parts of
this manual may be copied, photocopied, or reproduced in any form, or by any
means, without permission in writing from Adnet Systems. All trademarks, service
marks, products, or services are trademarks or registered trademarks of their re-
spective holders.

2                                                                     Macintosh Users’ Guide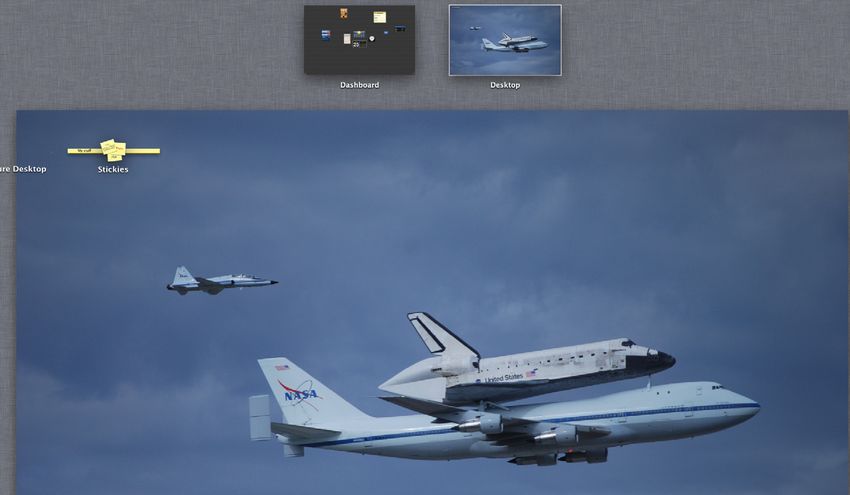
MY MACINTOSH
User Id

Computer (Host) Name

ECN (NASA) Tag Number

IP Address                  128.183.

Help Queue Email Address    pchelp@ltpmail.gsfc.nasa.gov

ESD Phone Number             1-877-677-2123 or 6-3100

The information on this page may be needed when you
submit a ticket to pchelp, or contact the ESD, so please
take the time to complete the above and keep it in a
convenient location for ready reference.

Macintosh Users’ Guide											                               3
Introuction........................................................................................... 2
TABLE OF CONTENTS   My Macintosh..................................................................................... 3
                    Table of Contents............................................................................ 4
                    Getting Started
                        Hardware................................................................................................ 5
                        The Desktop............................................................................................ 6
                    Operating System
                        The Apple Menu....................................................................................... 10
                        Apple System Profiler............................................................................... 11
                        System Preferences.................................................................................. 14
                        Stickies................................................................................................... 18
                        Addressbook/Calculator............................................................................. 19
                        Dashboard............................................................................................... 20
                        iCal/Preview............................................................................................ 21
                        Launchpad............................................................................................... 22
                        The Finder Window................................................................................... 23
                        Spotlight................................................................................................. 26
                        Sharing................................................................................................... 27
                        IP Address and Host Name....................................................................... 28
                        System/Application/User folders................................................................ 29
                        Miscellaneous........................................................................................... 31

                    Default Programs
                        Firefox/Safari/Chrome.............................................................................. 33
                        MS Office Suite.    ....................................................................................... 34
                        Fugu....................................................................................................... 35
                        NASA Phone/C Cleaner/Flip4Mac/Keka........................................................ 36
                        Symantec (SEP)........................................................................................ 37

                    Tips & Tricks...................................................................................... 38
                    Notes....................................................................................................... 40

    4                                                                                                           Macintosh Users’ Guide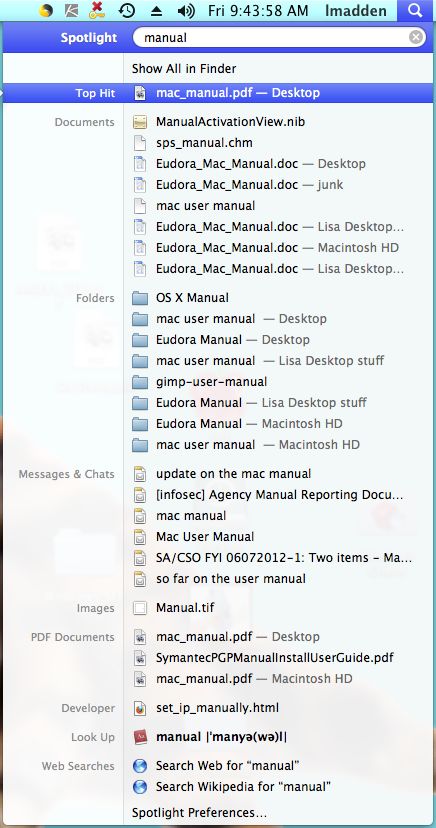
GETTING STARTED
                               Hardware
CPU
(Central Processing Unit)   The computer’s brain

The Hard Disk               The internal data storage device located with the
                            workstation. Most likely the place all your programs
                            and data are stored.

RAM                         Random Access Memory

ROM                         Read Only Memory

CD/DVD Player               Reads a CD (compact disk) or DVD (digital video
                            disk) that may be accessed but not changed, since
                            disk is read only. An audio CD is played in iTunes,
                            and a DVD is viewed with DVD Player, both found in
                            the /Applications folder.

External Drives             A portable hard drive that is connected to your mac
                            via Firewire, Thunderbolt, or USB. An external drive
                            may be used for a Time Machine backup.

The Monitor                 A display device that shows you what the computer
                            is doing and how you are interacting with it.

The Mouse/Trackball         The small hand held pointing device. When moved
                            on a flat surface, it moves the cursor, scrollbars,
                            and other objects on the monitor.

The Keyboard                Allows you to input information into the computer.
                            The command and option keys are unique to the
                            Apple keyboard.

The Command Key             A modifier key that sits on either side of the space
                            bar. It contains the a looping figure z. The
                            command key, in combination with other keys, allows
                            you to send a command to the computer as if you
                            were selecting it from the menu.

The Option Key              A modifier key used to send keyboard shortcuts. It is
                            located next to the Command Key.

Start Up Disk               Any disk that has a System folder, which contains
                            system software, and stores the information neces-
                            essary for the Macintosh to complete its startup
                            procedure.

Macintosh Users’ Guide											                                                         5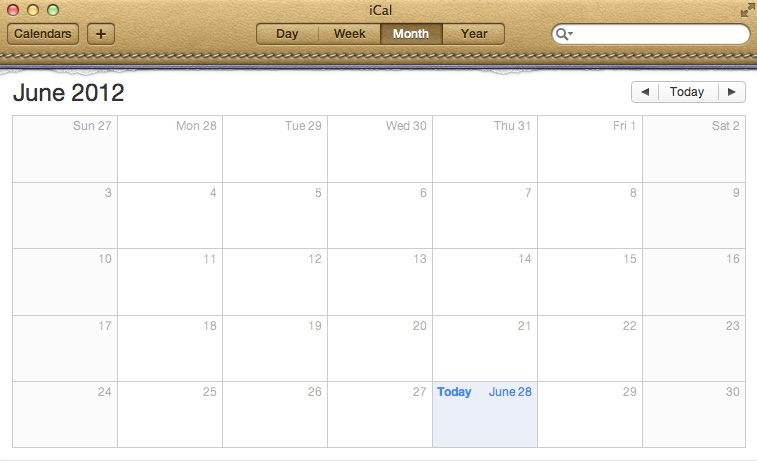
The Desktop
GETTING STARTED
                  The Finder
                         When you first start up the computer, a program called the Finder is load-
                  ed. The Finder creates a Graphical User Interface (GUI) called the Desktop. The
                  Desktop is part of each User’s home folder. The Finder displays the desktop, uses
                  menus, windows, icons, and keeps track of the files on your hard disk.
                         The Finder is always open; however, it may be hidden at various times. You
                  may make the Finder active by selecting it in the Dock, clicking anywhere on the
                  Desktop, or double clicking on the Hard Drive folder window.
                         With the mouse you point, click, and drag thru the various menus, dislog
                  boses, and icons to issue commands to the computer. To keep from switching back
                  and forth between the house and the keyboard, there are some keystroke equiva-
                  lents to perform the same commands.
                         The table below describes the keyboard shortcuts:

                        File Menu Keyboard Shortcut             Description

                        Command   +   N                         Open new Finder window
                        Command   +   Shift + N                 Create a new folder
                        Command   +   P                         Print
                        Command   +   W                         Close a window
                        Command   +   I                         Get Info
                        Command   +   D                         Duplicate
                        Command   +   M                         Make alias (shortcut)
                        Command   +   Y                         Put away
                        Command   +   F                         Find file
                        Command   +   G                         Fine file again

                        Edit Menu Keyboad Shortcut              Description

                        Command   +   Z                         Undo
                        Command   +   X                         Cut
                        Command   +   C                         Copy
                        Command   +   V                         Paste
                        Command   +   A                         Select all
                        Command   +   S                         Save
                        Command   +   Shift + S                 Save as

                         If you do not have a two-button mouse, you will need to hold down the
                  control key and click to bring up the Contextual Menu. Depending where you click,
                  Desktop, Folder, Hard Drive, you will get a different menu.
                         Keyboard shortcuts are displayed in the pull down menu lists in the top
                  Title Bar. Learning them will save you time.

   6                                                                          Macintosh Users’ Guide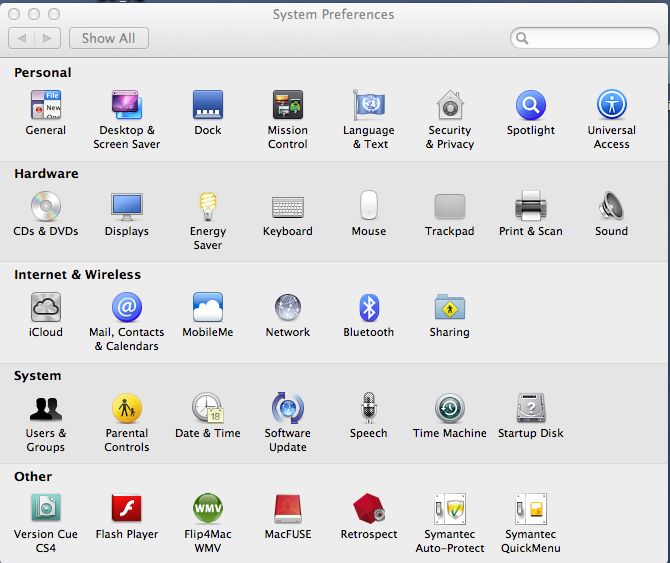
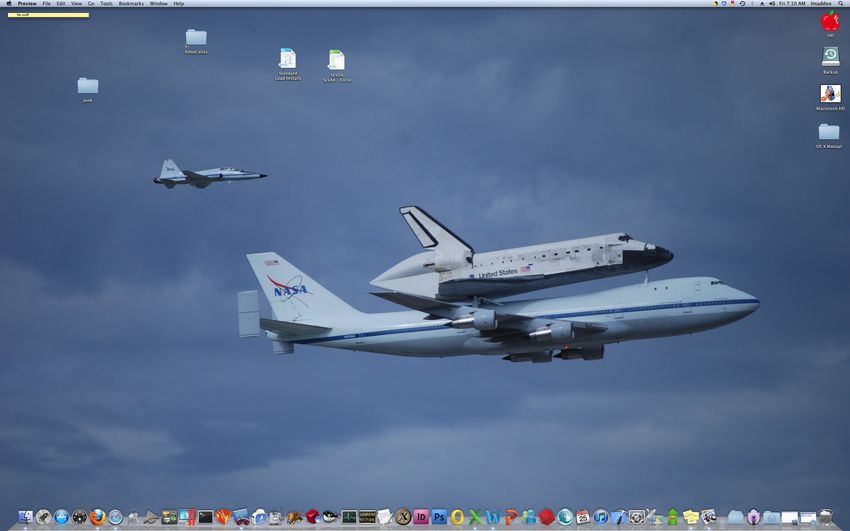
The Desktop
      The Desktop, or work area, is the background area on your monitor screen, and is dis-
played by the Finder. In reality, the Desktop is a folder in your User folder. The Finder uses
Icons to represent items present on your desktop. Icons are named to identify their purpose
and shaped to identify their function.

Apple Menu          Shortcut             Files              Title Bar                       Hard Drives

   The Dock                                                  Desktop

         Icon					                                     Description

  Apple Menu                   A pull-down list of essential operations, such as log off, shut down,
		                             and other shortcuts to various locations on the network or Hard Drive.
  Shortcut                     Alias for applications, files, folders that are housed on the Hard Drive.
  Files                        Actual physical files that are saved to the Desktop.
  Title Bar                    Contains the pull-down menus available, depending what application is
		                             open. Also shows logged in user, date/time, Spotlight quick search, and
		                             quick access to several System Preferences and programs.
  Hard Drives                  All mounted drives will show up on the right of the Desktop.
  The Dock                     May be located at the bottom, right, or left of the Desktop screen,
		                             housing shortcuts to most used Applications, Folders, and the Trash. If
		                             Application is open, a blue dot appears below the shortcut.
  Desktop                      Work area. Located in the User’s home folder on the Hard Drive.

Macintosh Users’ Guide											                                                                   7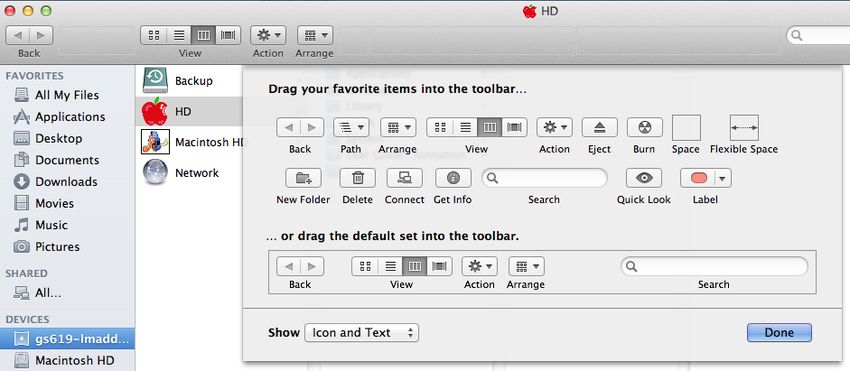
The Desktop
GETTING STARTED
                         The macintosh operating system is icon based. The Finder uses icons (small
                  pictures) to represent items on your desktop and any mounted drives (hard drives,
                  servers, external drives, shared folders).

                  SELECTING ICONS
                        Clicking on an icon selects the object. When an object is selected, it ap-
                  pears highlighted. Once highlighted, any commands chosen or keys pressed affects
                  only the selected object. To deselect an icon, click anywhere on the Desktop.

                  OPENING ICONS
                         Opening an icon will display its contents, or in the case of an Application
                  alias, launch the program itself. To open an icon, double click on it with the
                  mouse.

                  MOVING ICONS
                         Icons may be moved to other locations
                  by clicking and dragging them to the new lo-
                  cation. If you wish to arrange in a grid, al-
                  phabetically, in the Title Bar, click View/Clean
                  Up By, and then the flyout menu for Name.

                  Windows
                         Double-clicking on an icon opens the icon and displays the contents asso-
                  ciated with the icon in a window. The top of the window is the Title Bar and
                  that displays the same name as the icon. You may have a number of windows
                  open at the same time, and you may move, minimize, or change the size of win-
                  dows.
                         To Minimize an open window, click the yellow button in the upper left cor-
                  ner of that window. This puts the window in the Dock. To maximize the window,
                  click on it in the Dock and it will reopen on the Desktop.
                         To move a window, drag it by its Title Bar, and move to the new location.
                         To resize a window, drag the lower right corner to resize larger or small-
                  er. To make the window as large as it can be, click the green button in the up-
                  per left corner.
                         To close a window without quitting the Application, click the red button in
                  the upper left corner of that window. If this is a document you’ve been work-
                  ing on, and the contents are not saved, before the window closes, you will be
                  prompted to save your work. For Finder Windows, to close all open windows at
                  once, hold the Option key and click the red button on one, and all will close.

   8                                                                             Macintosh Users’ Guide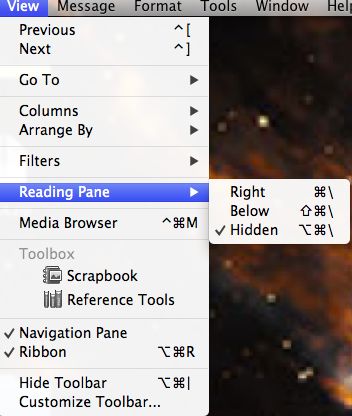
GETTING STARTED
                             The Desktop
Customizing a Finder Window
       You may customize the Title Bar of a Finder window by right (control)
clicking anywhere in the Title Bar and picking Customize. A pull down contextual
menu appears where you may pick what other options you want on that window’s
Title Bar. Click Done when finished.

Scrolling through Windows
       When a window cannot display its entire contents, the scroll bar becomes
active. A scroll bar allows you to move both horizontally and vertically through
the window to see the information that does not show, and is located on the
right and bottom sides of the window. Below is a screenshot of the General Sys-
tem Preference where you may set the Show Scroll Bars to “Always.”

Macintosh Users’ Guide											                                                        9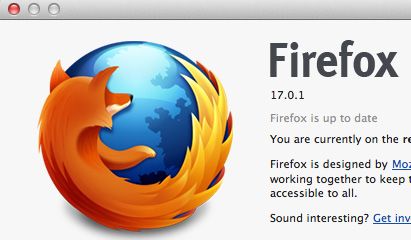
The Apple Menu
OPERATING SYSTEM
                          The Apple Menu contains
                   shortcuts to applications that add
                   functionality to your macintosh,
                   or that allow you to custom-
                   ize the mac environment. From
                   the Apple Menu, you may log off
                   or shut down the computer, for
                   instance.
                          You may also run Software
                   Update, which opens the App
                   Store, open System Preferences,
                   configure the Dock, or change your network location.   Next to some of the items,
                   you will see the keyboard equivelants.

                   About This Mac
                          When you click on About this Mac from the
                   Apple Menu, it brings up the screen at the right.
                   When you click where it has the Version number, you
                   will get some additional information, such as build
                   number and serial number of the machine, per below
                   screenshot.

                                                  When you click the “More Info....” tab you will
                                            be redirected to the Apple System Profiler. The first
                                            tab is the “Overview” tab and it gives you a quick
                                            look at what is inside the machine.

   10                                                                           Macintosh Users’ Guide
OPERATING SYSTEM
The Apple System Profiler
About This Mac (cont’d)
The next tab over is the “Display” tab and when you click this, you will
get information regarding what type of monitor is connected to your mac. In the
lower right corner you see a button for Display Preferences. Clicking on that will
bring up a dialog box showing the different
resolutions, how to set color, and other op-
tions pertaining to your display. The botton
in lower left corner of this Preference screen
has a check box to show Displays in your
menu bar. By checking this, it will make it
easier/faster to
change resolu-
tions, detect
multiple dis-
plays, and oth-
erwise change
features of your
display.
The next tab over is for “Storage” and
this will display all the drives connected to your
mac and show you how much space is being
used, and for what types of data. If you need
to repair a drive, you may click “Disk Utility”
in the bottom right corner. Keep in mind you
cannot repair a disk that you are booted from,
so if you need to repair the main hard drive,
you must boot from either the System Disk that
came with the machine, or an external bootable
drive. You may, however, verify if there is a
problem on your main hard drive.
The next tab is for “Memory” and
this will show you how much RAM (Random
Access Memory) is installed your computer,
and what slots are being used, as well as
the total number of slots available. As you
see on screenshot at left, there is 8 GB
RAM installed, in four slots, with four slots
still empty.
Macintosh Users’ Guide 11The Apple System Profiler
OPERATING SYSTEM
If you then click
the link at top right for
“Support” the below dia-
log box comes up:
By clicking the
links next to each of the
small arrows, you will get
information for your par-
ticular computer, and con-
nections to various sup-
port pages. You may also
download a User Manual
specific to your computer,
and get specs and hard-
ware support.
The link for “Ser-
vice” will bring up the
dialog box at the right.
From here you can check
service and support status
if you purchased AppleC-
are.
12 Macintosh Users’ GuideOPERATING SYSTEM
The Apple Menu (cont’d)
The Apple Menu (cont’d)
As you continue
down the Apple Menu,
you see Software Up-
date, which launches the
App Store to update any
Apple System Software,
instead of going through
System Preferences.
The App Store
takes you directly to
just that, where you may
browse through thousands
of Apps for your mac.
System Preferences launches what used to be called Control Panels, which
you may set various preferences for your mac, add/delete printers, set network
protocols, and various other controls on your system.
The Dock lets you set the position and visibility of the Dock, and other
user specific Dock preferences.
Location refers to your network location. Automatic is the default, but it
is possible to edit locations to set specific locations for different buildings, wire-
less, on-base, off-base, etc.
Force Quit should only be invoked when there is no other choice and a
program is not responding. When you click on Force Quit, it brings up a list of
all open applications. It also allows you to relaunch the Finder. If you click
this, the desktop disappears for a couple seconds and then redraws in its current
configuration.
The Sleep, Restart, Shut Down, and Log Out options in the Apple Menu are
self-explanatory.
Notice the keyboard commands to the right of several choices in the list.
Macintosh Users’ Guide 13OPERATING SYSTEM System Preferences
System Preferences are basically control panels in which you may
set preferences for how your mac system behaves. The System Pref-
erence icon looks like a box of gears and is default set in the Dock.
It may also be accessed from the Apple Menu or from within the
/Applications folder. If you would like it on the Dock and it is no
longer there for whatever reason, to get it back, simply drag it from
the /Applications folder to the Dock, and a shortcut will be put there for future
use. Use this method of drag/drop to put other shortcuts directly on the Dock.
Once you open the System Preferences, you will see many icons, per below
dialog box:
Several System Preferences are OS related and come pre-loaded on your mac.
Some are installed by third party applications, such as Flash or Symantec, and are
there to provide ease of access to set up your preferences or do updates to these
programs.
Below and on the next page there are brief explanations for these System
Preferences.
GENERAL: Where you can set various finder and appearance related preferences.
DESKTOP & SCREEN SAVER: Where you can set up what screensaver is used, how
quickly it comes on & set a hot corner for quick start. The other tab is for setting
a desktop picture.
14 Macintosh Users’ GuideOPERATING SYSTEM
System Preferences (cont’d)
DOCK: Where you may set
how your dock acts, its
position on your monitor,
and how large the icons
appear.
MISSION CONTROL: To the
right is Mission Control
System Preference. And
below is a screen shot
of how it looks when you
click to open it from the
icon on the Dock.
To create additional desk-
tops, drag your mouse to
upper left or right corners
and click the + sign.
LANGUAGE & TEXT: This sets the system language, which in our case should be
set to English!
SECURITY & PRIVACY: As part of our Standard Load/CIS Benchmarks, requiring
a pw to wake from sleep is checked and grayed out. Filevault is not enabled by
default, but will be on all laptops and on desktops with SBU/PII data. The Fire-
wall is turned on. Under the Privacy tab, nothing is set up by default.
SPOTLIGHT: Spotlight is a control panel to help you quickly find things on your
computer. When you first log in it needs to index, and this can take several
hours. Spotlight is located in top right corner of every Finder window. In the
System Preference, you can set what you want Spotlight to look at when it is
searching your system.
UNIVERSAL ACCESS: This is fairly self explanatory and is used to set up the mac
for those with disabilities.
Macintosh Users’ Guide 15OPERATING SYSTEM System Preferences (cont’d)
CD’s & DVD’s: Use this System Preference to set up how your mac handles audio,
picture, movie media, or blank CD’s and DVD’s. You may also set it to ask every
time.
DISPLAYS: Again fairly self explanatory. Use this to detect a second display or if
you connect the mac to a projector.
ENERGY SAVER: Lets you pick how long till both the display and/or the hard drive
go to sleep/power down. You may also schedule shut downs and start ups. It is
recommended for use here at GSFC to set the mac desktop machine to never put the
hard drive to sleep, because Remote Management is unable to wake a machine that
is asleep.
PRINT/SCAN: This is where you may add/delete print-
ers. The GSFC macs should be set so even a non-
administrator may add/delete. The lock is locked, but
the + and - should be available. Within this System
Preference you may also set your default printer and
paper size.
iCLOUD & MOBILEME: We do not support these at
GSFC, so they should not be enabled.
NETWORK: In the Network System Preference, this is
where you may set up how your mac connects to vari-
ous networks. Ethernet is the hard wired connection
most used at GSFC. We use manual IP configuration
here, which means an IP has
to be assigned to your com-
puter and cannot be used by
anyone else. Airport is the
wi-fi connection to connect
wirelessly to Guest, NASA, or offsite wireless networks. If
you are at GSFC in your office, you should be connected to
Ethernet, and make sure Airport is OFF. In the diagram at
left, you see the green light is visible for Ethernet, which
means this is what is being used. Having both Airport and
Ethernet connected same time will cause issues with slow-
ness and may lock up the machine.
BLUETOOTH: If you have a bluetooth keyboard or mouse, this System Preference
should be enabled and set to discoverable. If you use a wired mouse/keyboard,
make sure bluetooth is OFF.
16 Macintosh Users’ GuideOPERATING SYSTEM
System Preferences (cont’d)
SHARING: In this System Preference, you set and enable what is shared on your
computer. The most important is Remote Management, which should be set to “only
these users” with Sysagent as the user. Under “Options” for Sysagent, all boxes
should be checked. If you need to connect to your computer remotely, you should
add your user name to this list as well. Remote Login refers to SSH, so only en-
able this if you need to SSH into your computer from another.
USERS & GROUPS: This is where all user accounts are for everyone who logs into
the computer, whether local or domain account. You need to have admin rights to
make any changes to this System Preference.
DATE & TIME: The time server should be set to TIME.NASA.GOV. If you check to
show the clock with seconds, this will help you notice immediately if your computer
is truly locked up as the seconds counter will stop moving in upper right corner of
your monitor screen.
SOFTWARE UPDATE: This System Preference should be set to check for updates at
least once a week, but leave the download updates automatically unchecked so it
prompts you for all new updates before they are loaded. The updates from Apple
load via the App Store, and are mostly system-related updates. Updates for all
third party applications come directly through those vendors.
TIME MACHINE: If you have an external or separate internal drive set up for a
Time Machine backup, in this System Preference you can set up a schedule to do the
backups. You can do a “backup now” by using the Time Machine icon in the Title
Bar at top right of screen as well.
STARTUP DISK: This should be set to your Mac HD. If you have multiple bootable
drives, they will show up here, and this is where you set the drive that by default
will boot up your mac.
Under the bottom “Other” list of System Preferences are those for third party appli-
cations such as Flash, Symantec, Flip4Mac, etc. Various settings may be set through
these System Prefs, and updates checked.
We do not configure Parental Controls, Keyboard, Mouse, Trackpad, Sound, or Speech
System Preferences, but leave at their default settings. Open to familiarize yourself
with these, but if you change anything, know how to change it back if necessary!
Path and Status Bars
The Path and Status bars are not visible by default.
To make them visible at the bottom of every Finder
window, open a Finder Window, then go up to View on
the Title Bar and pick to Show Path and Show Status.
Macintosh Users’ Guide 17OPERATING SYSTEM Stickies
Stickies is Apple’s default digital post-it note application. It is convenient
and easy to use. You may either launch it from the /Applications folder, or if you
know you’ll use it often, drag it to the Dock to create a shortcut there.
If you want it to always be available, add it to your login items in the Us-
ers & Groups Preference Pane, and Stickies will launch every time you log into your
computer!
To create a new note, once application is open, under File, pick New Note (or
use Command + N on keyboard). The default is yellow, but under Color you may
choose other colors. This makes it easier to catagorize your notes.
You may also choose whether a note is a solid or translucent color and make
that the default.
If you double click the Stickie title bar, it closes it up like a window shade.
Double click again, and it opens.
18 Macintosh Users’ GuideOPERATING SYSTEM
Address Book
Address Book is exactly that, a list of your contacts.
These contacts are pulled from the Exchange server as set up
in your email.
Calculator
Your mac comes with a Calculator ap-
plication, which is found in the /Applications
folder. It functions similar to a hand-held
calculator.
There is also a Calculator Widget on
the Dashboard.
Macintosh Users’ Guide 19OPERATING SYSTEM Dashboard
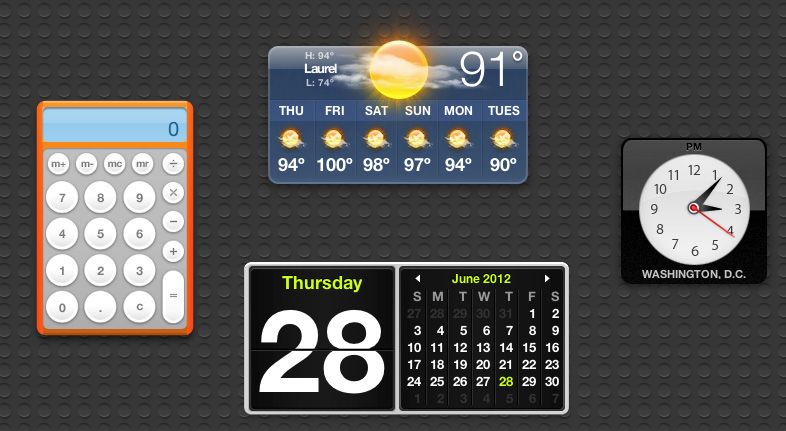
The Dashboard is where all your Widgets are kept. If you
find you use the Dashboard often, drag it out of the /Appli-
cations folder to your Dock for easy access.
When you first launch Dashboard, a few Widgets will be
active. You will notice at the bottom of the screen a +
sign in lower left corner. Click that to manage the Widgets.
To move a Widget from the bottom list, drag its icon
above the line onto the Dashboard desktop.
Those Widgets that are customizable will
have a lower case “i” in bottom right corner.
Click this and Widget will flip over so you may
enter your settings. When finished, click “done.”
20 Macintosh Users’ GuideOPERATING SYSTEM
iCal
iCal is the mac’s calendar program. While you can set iCal up to sync
with the Exchange Server, it might be better to keep iCal for personal use and
your Entourage/Outlook Exchange calendar for work-related events.
While the iCal icon in /Applications always shows July 17 as the date, if
you have iCal in your Dock, it will show the current date.
Preview
Preview is an application that may be used to open
picture files and pdf files. It is not as robust as Acrobat
Pro or Reader, but if all you need to do is print a pdf, it
is much faster!
Macintosh Users’ Guide 21OPERATING SYSTEM Launchpad
Launchpad should be on your Dock by default, but if not,
it is easy to drag it there from /Applications to create the
shortcut.
What Launchpad does is quickly bring up an icon list of
all Apple-specific applications on your mac desktop. Makes for
an easy way to find that Apple program without having to
scroll through a list that includes all third party apps. Once
you find the one you need, just click to open.
Other default applications that are self explanatory include:
Address DVD Player Facetime iTunes Mail Safari Text Edit
Book
22 Macintosh Users’ GuideOPERATING SYSTEM
The Finder Window
Unlike PC Windows, the Macintosh only puts one menu bar across the top
of the Desktop, and this menu bar applies to whatever window is active. The
menu bar below is what you see when you are in Finder.
Under “Finder” you will be able to set preferences for how the Finder be-
haves, what volumes show up on your desktop, what warnings you get, and what
shows up in a Finder sidebar window.
By checking or unchecking boxes, notice the difference
in how the Finder behaves and is displayed. Also note that
you can Empty the Trash under the Finder pull down menu,
but also Securely Empty the Trash. If you choose to do
the latter, it takes a bit longer, but what you delete can-
not be recovered.
Under the File pull down menu, you will see several
commands, such as New Folder. Note the keyboard com-
mands next to each choice.
If you wish to find out information about a file on the
Desktop, pick “Get Info” (command + I) while it is high-
lighted, for instance. Or if you are looking for a file on
the computer, pick “Find” (command + F on the keyboard)
to start the search.
Macintosh Users’ Guide 23The Finder Window
OPERATING SYSTEM
Under View you may choose how you see information in Finder windows and/
or on the Desktop. Experiment in a Finder window with the Icons, List, Columns, or
Cover Flow. Notice the Keyboard commands next to each choice.
In an open Finder Window, at the top of the window, you will see graphical
choices over “view” to pick each of the above, as well. The bottom choice, “Show
View Options” lets you customize how you view things even more. You may increase
the size of the icons or the snap to grid by
sliding the bar, or the text size. By clicking
on “Show item info” you will see sizes below
file names as in Fig A; Fig B displays how
A.
B.
you would see items if you check the box for
“Show Icon Preview”; and Fig C is the classic view
if no boxes are checked.
C.
The “Edit” pull down lets you invoke other
commands. Note the keyboard commands next to the
clickable commands.
24 Macintosh Users’ GuideOPERATING SYSTEM
The Finder Window
Under the “Go” pull down menu, you will
find several folders/volumes you can go to on
your mac, plus a listing of other computers on
your subnet under Network. In the “Go to
Folder” (shift + command + G) you can get to
otherwise invisible folders should the need ever
arise. The “Connect to Server” (command + K)
option is probably one you’ll use most often, as
this is how a mac maps to a network drive.
Via Connect to Server, you’ll be able to
map to other macs and pcs on the GSFC network
as long as they have file sharing turned on.
Below is a screenshot showing several
afp (Apple File Protocol), or macintosh, connec-
tions. If you wish to connect to a pc, instead
of afp, you would type smb (Server Message
Block). So you do not have to retype those con-
nections you use over and over, click the + sign and the connection is saved in
the “Favorites” list.
If you wish a particu-
lar connection to auto mount
when you log into your mac,
once it is mounted the first
time, drag its icon into your
login items list in System
Preferences/Users & Groups.
If the share to be mounted
needs a password, you will
be prompted before it actu-
ally mounts on the Desktop.
Don’t forget the “Help” feature either. Sometimes it can actually be very
helpful!
Macintosh Users’ Guide 25Spotlight
OPERATING SYSTEM
Spotlight is similar to “Find” in that it helps you quickly find files and fold-
ers on your computer. The spyglass icon in upper right corner of your monitor
screen is Spotlight.
When you type a word in the field
Spotlight will auto complete a list of all
files that have this word either in the file
name, or actually inside the file.
You can set what places on your
mac that Spotlight checks by going into
the Spotlight System Preference per below
screenshot:
To reindex Spotlight, open its system pref-
erence, click the Privacy tab, click the
plus (+) button, and add the volume you want to reindex. Wait a minute or two,
select the volume in the privacy area, and click the minus button to remove it.
Spotlight will index the volume again from the ground up.
It is a good idea, before reindexing the drive, to repair permissions. Also, if
the drive has just recently been indexed, give it another day or so before reindex-
ing. It’s possible that Spotlight hasn’t completely finished indexing the drive even
though you’re allowed to use it.
26 Macintosh Users’ GuideOPERATING SYSTEM
Sharing
To mount a shared folder or volume from a remote pc or mac, you use the
“Connect to Server” option under the “Go” menu in a Finder window.
If you are mounting a share/volume from another macintosh, type
AFP:// and click “connect.” If the share/vol-
ume is from a PC, type SMB://. Be sure to
add this connection to the Favorite Servers if you will need it in the future.
In order for another user to connect to a
shared folder or volume on your mac, you need to
first set up a folder for sharing. Every User has a
Public folder in their user home directory. Inside
this folder is Drop Box, which is WRITE ONLY. Users
on other macs may only put items in this folder, and
cannot see inside it. This is set up by default by the
operating system. If you want another shared folder
that others can put items into as well as get items
out of, you need to set the access permissions and
put this new shared folder in the Public folder.
Be sure to check the box for “Shared Folder.”
You may specify who has access to your shared
folder by clicking the plus (+) sign and adding users.
The default is users on your mac, but click “Network
Users” to find others on the GSFC network. Users
connect to you by the host name or IP of your mac.
NEVER PUT SBU OR PII DATA IN THIS SHARED FOLDER.
Macintosh Users’ Guide 27IP Address and Host Name
OPERATING SYSTEM
The IP Address and Host Name are unique to each computer and are two
methods by which your macintosh is identified on the GSFC network.
GSFC uses “Static IP
Addresses.” To locate your
IP address, open the Network
System Preference.
The default location
for ethernet is set to “au-
tomatic,” and the Configure
iPv4 is set to “Manually.”
Each computer is as-
signed a static IP, and will
be set up by us before you
receive it. We also set up
the DNS servers and the
Search Domains.
DO NOT CHANGE THIS INFO.
If you have a wireless card installed in your mac, you will also see an option
for Airport in the left sidebar.
The Computer Name (host name) is found in the Sharing System Preference,
and is also assigned by us. DO NOT CHANGE THIS NAME as it is what identifies
your computer in Active Directory. If you have Remote Login enabled, you and oth-
ers may connect to your mac via SSH using the fully qualified host name
Don’t forget: To log a support ticket for your macintosh, send an email to:
pchelp@ltpmail.gsfc.nasa.gov
If you are having a networking or domain account/password issue, you must contact the
ESD at 6-3100, as we do not have access to be able to assist in these areas.
28 Macintosh Users’ GuideOPERATING SYSTEM
System Folder
Your operating system is housed within the System
and Library folders, which are located at the root of your
hard drive. You should only have one of each at this level
per bootable partition on your computer. Unless you know
what you are doing, it is best not to add or delete any-
thing in these folders or you risk your computer not boot-
ing up when you restart it! Items in these folders are
used by everyone who logs into the computer.
If you do have to modify something in these folders, or anything at the root
of the hard drive for that matter, you must be an administrator on your system as
you will be prompted for an Admin user name and password.
Applications Folder
The Applications folder is also located at the root level of the hard drive and
this is the default location for all applications (programs) be to be installed on your
system. You can get to the /Applications folder by double clicking the hard drive
icon, or going up to the “Go” menu in the Title Bar and picking Applications or by
launching a new Finder window and navigating to the /Applications folder that way.
All programs installed in the /Applications folder are available to anyone who logs
onto the system.
You may drag an program’s icon to the Dock to create a shortcut so you do
not have to navigate to the /Applications folder every time you want to launch a
program. Shortcuts (Aliases) may also be created by right (control) clicking on an
icon, and from the contextual menu, picking “make alias.” This will put the alias
or shortcut in the same location as the original, but it may then be moved to the
Desktop or wherever is convenient for your purpose.
If you ever need to delete or more an application, you must use an adminis-
trator name and password to do so.
Users Folder
The Users folder is where each user who logs onto a system’s personal files
and preferences are stored. Each user has a distinct UID (User ID) that enables
files inside their user folder to only be accessible by them when they log in. Apple
will create this UID number on the fly, or as in our case at GSFC, we specify the
UUPIC as the UID when joining a computer to the Active Directory NDC domain. To
find out what your UID is, in Terminal, at the prompt, type id and return and it
should come back with your UID, GID (Group ID), and other information about your
account.
Macintosh Users’ Guide 29OPERATING SYSTEM Users Folder (cont’d)
When you look inside the /Users folder, you will
see a list of every user who logs onto the machine. We
have a local admin account (Sysagent) on every mac,
which enables us to have your computer in Apple Remote
Desktop (ARD), and lets us log onto your mac when you
are not there.
For those who use domain log in accounts, the
password to log in is the same as your email password.
Your mac will prompt you up to 30 days out (set by Ac-
tive Directory) that your domain password will expire,
and the password for logging in AND email should be
changed in System Preferences/Users & Groups. If your
mac has been “DAR’d” with FileVault2, this is the ONLY
place you should change your domain password so that
it syncs with Filevault2. To tell if you are a domain log in computer, in System
Preferences/Users & Groups, in the left sidebar, it will have your name and under it
“Admin, Managed, Mobile” if you are an administrator, and just “Managed, Mobile” if
you are a standard user. Mobile simply means that should you lose your connection
to the network, you may still log in with cached network credentials.
You can tell which user you are
logged in with when you look inside the /
Users folder because it has the small house
icon next to the logged in user. The User
Folder is also referred to as the Home Fold-
er. When you look in other non logged in
user folders, you will see that you cannot
get into any of the directories within. This
is because the UID is different, and you do not have permission to view the contents
of these directories.
In its infinite wisdom, Apple decided in OS 10.8 to make the Library folder
within each user folder invisible. The Library folder is where all your user pref-
erences are stored. Sometimes you may need to get into this folder to delete or
change files, however. In order to make the Library visible, you will need to be an
administrator on your system, and be familiar with using Terminal.
30 Macintosh Users’ GuideOPERATING SYSTEM
Miscellaneous
FORMATTING (Initializing) A DISK
Formatting a disk permanently erases all information on that disk. To format
a disk, follow these steps:
1. Connect the external drive to your mac or insert the writable CD/DVD
into the Optical Drive.
2. In Disk Utility, select the disk or volume in the list on the left sidebar.
3. Specify a format and name for the newly formatted disk/volume.
4. If you want to prevent recovery of the erased data, click the Security
Options. If you ONLY want to Securely Erase previously deleted
files without erasing the entire volume, select the volume in the left
sidebar and click Erase Free Space.
5. Click Erase.
Once the disk or volume is erased, an icon will appear on your desktop.
EJECTING DISKS AND EXTERNAL DRIVES
Ejecting a disk or external drive removes it from the desktop and allows it
to safely be disconnected from the computer. There are several ways to do this, of
course! It is a mac after all!!
1. Highlight the disk/drive icon and drag it to the trash (now an eject
symbol).
2. Highlight the disk/drive and press command + e on keyboard to eject.
3. Highlight the disk/drive and from the File menu, pick eject .
FORCE QUITTING A PROGRAM (or relaunching the Finder)
If the computer appears to be frozen (but
cursor still moves), you might need to either
force quit a program or relaunch the Finder to
force it to redraw the desktop. Hold down the
“command + option + escape” keys to bring up
the Force Quit window. Pick the offending appli-
cation and click the Force Quit button. If you
highlight the Finder, the Force Quit button turns
into a Relaunch button!!
REBOOTING THE COMPUTER
When a simple Force Quit does not work,
you may need to actually reboot the computer.
If the machine is truly frozen, hold in the power
butten until the light goes out and you hear the machine power down. Wait 5 sec-
onds and power it back up. You may see the “spinning gear” appear, which means
Disk Utility is running in the background due to the forced shut down.
Macintosh Users’ Guide 31OPERATING SYSTEM Miscellaneous (cont’d)
KERNEL PANIC
It is possible, albeit rare, that
you may encounter a serious issue
where the mac will do what is called
a kernel panic. This is the UNIX
side of the OS reporting an error.
You will see your screen fade out
and the dialog at the right appear in
several languages. The only thing you
can do at this point is shut down,
wait a few seconds, and reboot the
system. If, upon reboot, it happens again, you need to call this in, as most likely
something hardware related is causing the problem. “Bad” RAM is often the culprit,
but it could be an external hard drive, scanner, or another peripheral.
PRINTING
It is easy to set up a printer under 10.8.
Go to System Preferences/Print & Scan. Regard-
less whether you are an administrator or standard
user on your mac, you should be able to click the
+ sign to add a new printer. If not, please send
in a ticket and we will insure that this feature is
enabled on your machine.
Click to add new printer, and when that di-
alog opens, click on the icon for IP. If you know
the IP address of the network printer you wish to
add, type it in the “address” field. Underneath
this field it will tell you if this is a valid ad-
dress. If you know the host name, you may type
this in instead. The Protocol should be set to
Line Printer Daemon - LPD, and the Queue is left
blank.
If you are connected to the network and using a valid IP or printer host
name, the system should have no trouble finding it and also picking the correct
print driver. Once the printer is set up, you can make it your default by highliting
that printer in the main print/scan window and picking that option from the pull
down menu.
SAFE MoDE
To boot your computer into “SAFE MODE” hold down the Shift key on bootup.
You will see a screen letting you know mac is booting to safe mode.
SECURE EMPTY TRASH
To securely empty the trash, in a Finder window, go up under “Finder” and
pick Secure Empty Trash.
32 Macintosh Users’ GuideDEFAULT PROGRAMS
Firefox
Here at GSFC one of the web browsers we use is Firefox. To
determine which version of Firefox you are using, go up under the
Firefox name and click on About Firefox. A dialog will pop up
where the program will auto check for updates and let you know
the current version and also whether it is up to date.
If you do not have Firefox in-
stalled you may either download it
yourself or contact us and we will
push it out to you via ARD (Apple
Remote Desktop). Once you launch
it for the first time, you are given
the option to import any bookmarks
from Safari.
To set your homepage to the GSFC
site, under the Firefox name, go to
Preferences in the pull-down menu.
Under General, input: http://www.
gsfc.nasa.gov in the home page field and in the above pull down, pick show my
home page when Firefox starts!
Using these same preferences, configure Firefox the way you work, having it
save downloads to a specific folder on your hard drive, or directly to the Desktop.
Safari
Safari is the browser that comes with your mac OS. It may be set up
similarly to Firefox, and even import Firefox bookmarks (vice versa is also true).
Setting a default browser is done in the Safari Preferences, which are in
the pull down menu under the “Safari” name. Under the General tab, you will
see where to set the default browser.
Both Firefox and Safari may need Flash to show
websites properly. Flash needs to be updated on its
own, and is located in System Preferences.
Chrome
Google Chrome is yet another popular web browser. Chrome has
flash built in, and the only way to update it is to download a newer
version of Chrome!
Macintosh Users’ Guide 33DEFAULT PROGRAMS Microsoft Office Suite
We support both Microsoft Office 2008 and 2011, which includes Entourage
(email and calendar), Word (word processing), Excel (spreadsheets), and Powerpoint
(presentations).
Outlook/Entourage
The first time you launch
Outlook or Entourage, you will be
prompted to set it up. We use an
Exchange server, so set up should be
automatic with just inputting a few
pieces of information.
The name you put in Account
Description is the name that will show
up in the left side list when Outlook
or Entourage is open, and this is the
Network account name.
Click the Advanced button in
lower right of the Accounts win-
dow, and you will be presented with
the window at right. Be sure Use
SSL is checked both under Exchange
and Directory Service. Most users
here at GSFC will have their mail on
mail02, and use a directory server of
ndjsadc06. The Directory Server is
also known as the LDAP server, where
the NASA global address book is kept.
If you use PKI/Entrust, neither
Outlook nor Entourage has a plug in and
you will have to rely on your certificate
in Keychain for digital signing and also
encryption. When you click the arrows
next to Certificate under the Security
tab, yours should be there if PKI was
set up properly.
34 Macintosh Users’ GuideDEFAULT PROGRAMS
Outlook/Entourage (con’t)
If you wish the National Holidays to
be on your Calendar, you may go up under
File to Import and pick the radio button for
Holidays when you are in the calendar view.
The Reading Pane defaults to being
on the right side, but if you prefer it on
the bottom, or not be visible at all, when
in Outlook or Entourage, under View, go to
Reading Pane and make your choice.
You may also customize your Tookbar,
or hide it entirely from this same pull down
menu.
It is up to you to familiarize yourself
with the different features of the programs
in the MS Office Suite. Keep in mind that
Office 2008 and Office 2011 might look a
little different as well. The biggest change
is that Outlook replaced Entourage in 2011.
Fugu
Fugu is an FTP program and supports FTP, SFTP, SCP,
and SSH.
Macintosh Users’ Guide 35DEFAULT PROGRAMS NASA Phone
NASA Phone is a small phone application created by an
engineer at Dryden. From this application, you can find anyone
at any NASA center that is listed in the GAL (Global Address
List). We have it default set to Goddard, but from the pull
down list, you can pick any NASA Center for your search.
C Cleaner
C Cleaner is a freeware application that cleans out
unused and unwanted files from the system and internet
cache. It also provides a graceful uninstall feature for third
party programs you’ve loaded on your computer. You can use
C Cleaner to repair disk permissions and erase free space
too.
Flip Player
Flip Player (formerly Flip 4 Mac) is a multimedia player,
and enables WMV and other media files to be played in Quicktime
Player. You may also use Flip Player to export to various media
types. It is the official Windows Media Player for mac OS X, and
is supported and hosted by Microsoft.
Keka
Keka is a free file archiver for Mac OS X and the main
compression core is p7zip (7-zip port)
Compression formats supported:
7z, Zip, Tar, Gzip, Bzip2, DMG, ISO
Extraction formats supported:
RAR, 7z, Lzma, Zip, Tar, Gzip, Bzip2, ISO, EXE, CAB, PAX, ACE (PPC)
36 Macintosh Users’ GuideDEFAULT PROGRAMS
Symantec (SEP)
Symantec Endpoint Protection (SEP) is the Agency standard
antivirus program. SEP is installed in as a managed application,
which means it gets its updates through the SEP server at the
Agency level. You may also click the Yin/Yang symbol in your
Finder title bar and have Live Update update everything now, and
this will force it do an update. This is a good idea if your mac
will be away on travel or shut down for an extended period of
time.
You may check if you are connected to the SEP server by going
to the title bar yin/yang symbol looking under Management.
Not only does SEP protect your mac from viruses, it also protects other pcs
on the network from you inadvertently sending them an infected file. You can have
SEP scan your system by launching the program and clicking the “Scan” button. At
this window you will also be able to
tell the date of the virus defs on
your system, and the product ver-
sion number.
If you click on “Life Update” you will get the
screen at the left, which you can have SEP update
everything now. The server sets the schedule for
updates, but does not stop you from forcing an up-
date on your own.
Macintosh Users’ Guide 37TIPS AND TRICKS Tips and Tricks
Turning off the Trash Warning
When you empty the trash, it pops up a warning. If you do not want to see
this warning, here is how to turn that off:
In Finder Preferences, click the Advanced tab and uncheck the box to show a
warning before emptying the Trash.
-----------------------------------
To find out how Much RAM is on System
If you need to know how much, and what type of RAM is on your system, go
up under the left side Apple and to About This Mac. There you will find processor
speed, version of your OS, what type of RAM memory is installed (and how much).
If you click under OS X, you will also find out the build and serial number.
-----------------------------------
To Allot More RAM to a VMware Fusion Virtual Machine
If you use VMware Fusion to run a Windows 7 VM, you may wish to al-
lot more RAM if it is running slow. To do this, launch the VM, but do NOT launch
Windows. Go up under Virtual Machine, and in the drop down menu, pick Settings.
Once that screen comes up, pick the icon for Processors & Memory and you should
be able to use the slide bar to allot more RAM. If your mac has 4 GB RAM, do
not allot more than 2 GB to the VM or the mac side will run very slowly.
-----------------------------------
How to Boot in Safe Mode
There are times when you may wish to boot in Safe Mode (all extensions
off). To do this, hold down the SHIFT key at bootup. It will tell you it is booting
in Safe Mode. When ready to boot back up normally, just reboot and all extensions
will be turned back on.
-----------------------------------
Initializing (formatting) an External Disk
If you purchased an external drive to use for a Time Machine backup drive,
you may want to format it for mac os extended first. To do this, launch Disk Util-
ity (found in the /Applications/Utilities folder). In the left hand sidebar list, be
sure to pick the correct drive you want to format, and click the ERASE tab. There
you will see options. You want Mac OS Extended (journaled). Name the External
Drive and click to erase. If you are excessing the drive, you should do a secure
erase, which writes zeros several times. You find this under the Security Options
tab.
38 Macintosh Users’ GuideTIPS AND TRICKS
Tips and Tricks
Creating a pdf
Unless the program you are using, such as Adobe InDesign, gives you a menu
pick to create a pdf, you can do this from the print dialog box. Using MS Word as
an example, from the print menu in the bottom left corner, there is a button that
says “pdf.” Click that and in the pull down menu, pick save as pdf.
-----------------------------------
Running Permission Repair from the Command Line
If you are more command line oriented, rather than GUI, you can do a per-
mission repair from Terminal. First, launch Terminal.app from /Applications/Utilities
and at the command prompt type (you must be an administrator to do this:
sudo diskutil repairPermissions \
Hit return and input your password and hit return again. It will take awhile
to do this, but when done, type exit to quit out of Terminal.app.
-----------------------------------
Setting a default browser or email client
If you would like to set a default browser for when you click a link in
email, you must do this from within the Safari preferences! Launch Safari and up
under the Safari name, click Preferences. Under the General tab, the first option is
to pick a default browser.
For email, in order to pick a default email client, you must do this in Mail.
app. Launch Mail.app and under the Mail name, click Preferences. In the General
tab, first option is for a default email program.
-----------------------------------
How to Re-Index Spotlight
If the Spotlight application does not seem to be indexing properly, you can
re-index it by doing the following:
1. Open System Preferences
2. Click Spotlight
3. Click the Privacy Tab
4. Drag a folder or entire volume (HD) to the list
5. If prompted for confirmation, click OK
6. Remove the item or volume you just added by highliting and clicking the
- sign
7. Close Spotlight preferences
Spotlight will re-index the contents of that folder or volume (HD).
Macintosh Users’ Guide 39Notes 40 Macintosh Users’ Guide
You can also read