2018 Quality Payment Program (QPP): Self-Nomination User Guide for Qualified Clinical Data Registries (QCDRs) & Qualified Registries - September ...
←
→
Page content transcription
If your browser does not render page correctly, please read the page content below
2018 Quality Payment Program (QPP):
Self-Nomination User Guide for
Qualified Clinical Data Registries
(QCDRs) & Qualified Registries
[September 2017]

                                      1
Table of Contents

Introduction ..................................................................................................................... 3
   Purpose ................................................................................................................................. 3
   Background ............................................................................................................................ 3
Accessing the JIRA system ............................................................................................. 5
   Sign up for a JIRA account ..................................................................................................... 5
   Log in to JIRA ........................................................................................................................ 6
Tips for self-nominating ................................................................................................... 7
Creating a JIRA self-nomination ...................................................................................... 8
   How to create a JIRA self-nomination .................................................................................... 8
Filling out the 2018 self-nomination form....................................................................... 10
Adding Quality Payment Program individual measures (QCDR/Qualified Registry) ..... 15
   6 steps to add measures .......................................................................................................15
Adding Quality Payment Program eCQMs (QCDR/Qualified Registry) ......................... 17
   4 steps to adding eCQMs ......................................................................................................17
Submitting the Data Validation Plan (QCDR/Qualified Registry) ................................... 19
Uploading a Qualified Registry Data Validation Plan as an attachment ........................ 22
Uploading a QCDR Data Validation Plan as an attachment .......................................... 22
Uploading attachments (QCDR only) ............................................................................ 23
Submitting your self-nomination form ............................................................................ 24
   4 steps to submit your self-nomination form ..........................................................................24
Updating a JIRA ticket ................................................................................................... 25
Adding QCDR measures (QCDR only) ......................................................................... 26
   Adding QCDR measures with Create Sub-Task ....................................................................26
Filling out the Proposed Measure sub-task form page .................................................. 28
QCDR measure permission checklist ............................................................................ 35
Submitting a JIRA ticket ................................................................................................ 35
Withdrawing a JIRA ticket ............................................................................................. 35
Resources ..................................................................................................................... 36
   Help with JIRA ......................................................................................................................36
   Help to self-nominate ............................................................................................................36

                                                                                                                                                 2
Introduction
Purpose
The 2018 Self-Nomination User Guide helps you, potential Qualified Registry and Qualified
Clinical Data Registry (QCDR) vendors, self-nominate to qualify for the 2018 performance
period of the Merit-based Incentive Payment System (MIPS) program. You’ll find step-by-step
instructions to complete a self-nomination form and what you need to fill out and submit a
completed application for our review.
Background
If you want to participate in MIPS for the 2018 performance period as a Qualified Registry
and/or QCDR, you can find the self-nomination application in the JIRA web-based tool.
The Qualified Registry application has these tabs:
Field – You can find background information about the self-nomination process, deadlines,
and requirements.
2018 Qualified Registry Self-Nomination – You have to enter your demographic and
contact information, data collection methods, reporting options, performance categories, and
services supported. Required fields are marked with an asterisk (*).
Individual measures – You can pick the individual measures you’ll support for the 2018
MIPS performance period.
QPP- Electronic Clinical Quality Measures (eCQMs) – You can say which eCQMs you
support for the 2018 performance period.
2018 Qualified Registry Data Validation Plan – You have to tell us how you’ll validate the
data submitted for 2018 performance period. Required fields are marked with an asterisk (*).
You have to complete all of these tabs to successfully submit your self-nomination.
The 2018 Qualified Registry Self-nomination fact sheet has more information about what’s
needed to participate as a Qualified Registry.
3
The QCDR application has these tabs:
Field – You can find background information about the self-nomination process, deadlines,
and requirements.
2018 QCDR self-nomination – You have to enter your demographic and contact information,
data collection methods, reporting options, performance categories, and services supported.
Required fields are marked with an asterisk (*).
Individual measures – You can pick the individual measures you’ll support for the 2018
MIPS performance period.
QPP-Electronic Clinical Quality Measures (eCQMs) – You can say which eCQMs you
support for the 2018 performance period.
2018 QCDR Data Validation Plan – You have to tell us how you’ll validate the data submitted
for 2018 performance period.
Uploads – You can upload how you’ll benchmark, as well as your QCDR measures, and/or
data validation plan. If you decide to upload your QCDR measures, use the QCDR measure
template.
QCDR subtasks – If you’re a QCDR, you can submit your own measures for us to consider
(optional).
You have to complete all of these tabs to successfully submit your self-nomination.
The 2018 QCDR Self-nomination fact sheet has more information about what’s needed to
participate as a QCDR.
For 2018, you have to submit your complete self-nomination statement (including measures to
be supported and the data validation plan) by 5:00 p.m. Eastern Time (ET) on November 1,
2017. We have to receive acceptable versions of all your deliverables by the deadline to
consider you for the qualification process. If you intend on participating in MIPS as a qualified
registry and QCDR, you have to complete and submit a self-nomination form for each vendor
type for the 2018 performance period.
Our goal in keeping to the posted deadlines is to post timely lists of qualified vendors for eligible
clinicians who select a Qualified Registry or QCDR to submit their Quality Payment Program
data.
If you don’t meet the requirements of participation, you might be put on probation and/or might
not be able to participate as a qualified vendor now or in future program years.
You can find out more about the MIPS 2018 performance period on the Quality Payment
Program website.
4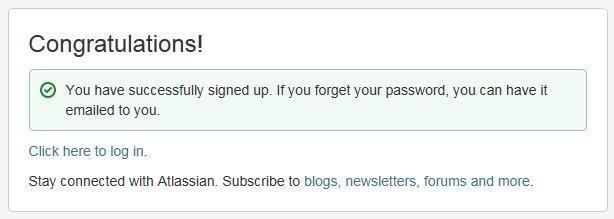
Accessing the JIRA system
Sign up for a JIRA account
If you don’t have a user account, you’ll need to make one.
4 steps for making a JIRA user account:
       1. Go to JIRA.
       2. Click on Create an Account.

       3. Fill in the fields on the Sign up screen.

                                                             5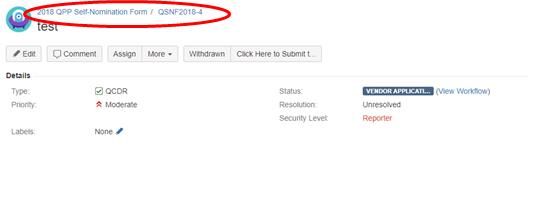
4. Click the Sign up button to make your account.
       Once your account is made, you’ll get a confirmation that looks like this:

Log in to JIRA
Two steps to log in to JIRA:
       1. Enter your Username and Password; then click the Log in button.

       If you check the Remember my login on this computer check box, you’ll automatically
       stay logged in to JIRA on the browser and computer you’re using, but your session won’t
       be saved. So, your last search, current project, etc. won’t be saved even though you’ll
       stay logged in.

       2. If you haven’t changed your JIRA home page, the dashboard will be shown. If you
          have changed it, the JIRA home page you chose will be shown instead.

                                                                                                 6
Tips for self-nominating
Here are tips to help you get ready to self-nominate:
Enter into and maintain an appropriate Business Associate Agreement with your participating
MIPS eligible clinicians. The Business Associate Agreement has to:
o Meet the requirements of the Health Insurance Portability and Accountability Act of 1996
(HIPAA) Privacy and Security Rules.
o Provides for your receipt of patient-specific data from an individual MIPS eligible clinician
or group.
o Provide for your disclosure of quality measure results and numerator and denominator
data or patient specific data on Medicare and non-Medicare beneficiaries for your MIPS
eligible clinicians and groups.
Use the JIRA self-nomination form. We won’t accept emailed self-nomination deliverables.
Get your self-nomination, measure information, and data validation plan together before you
try to self-nominate.
Know that it’ll take about an average of 10 hours to self-nominate, including the time to look at
the instructions, search existing data resources, get your data together, and complete and
review the self-nomination form.
Be aware that the system will lock after 5 hours.
Look for the required fields, which are marked with a red asterisk (*).
Don’t click Create until after you’ve finished all the required fields of all the tabs. You won’t be
able to successfully submit your application unless you’ve finished all the required fields. Once
you’ve submitted your application, you can go back and make edits until 5:00 p.m. ET on
November 1, 2017. You won’t be able to edit your submission after 5:00 p.m. ET on
November 1, 2017.
Leave comments in the Comment section whenever you review or modify your application.
You can use the Comment section to explain any updates that have been applied to the self-
nomination and/or to let us know about any changes to the QCDR measures. See “Modifying
a JIRA ticket and populating the QCDR measures” sections of this User Guide for more
information.
7Creating a JIRA self-nomination
How to create a JIRA self-nomination
1. Click Create Issue.
2. Pick the 2018 Quality Payment Program Self-Nomination Form under the Project
drop down list.
83. Pick your entity type under the Issue Type drop down – Qualified Registry or
QCDR. Make sure you’ve picked the right vendor type. If you don’t, it will affect your
application. If you’d like to self-nominate to become a QCDR and Registry, you have
to submit an application for each vendor type.
4. The appropriate self-nomination form will show up below the Issue Type drop down.
To navigate through the form’s tabs, click on the tab you want to start filling out.
9Filling out the 2018 self-nomination form
Most of the screenshots used in this User Guide were taken from the QCDR self-nomination
form. Corresponding fields of the Qualified Registry self-nomination form may be a little
different.
1. Enter your organization’s name and the QCDR or Qualified Registry’s name if it’s
different from the organization’s.
2. Enter your organization’s mailing address.
3. Enter your organization’s contact information.
4. Fill out the Application Title field. This field should include your organization name
followed by “Form Submission.”
105. Enter the names of others in your organization who will be able to see this issue.
These people have to have a JIRA account.
6. Pick from the drop down if this is a new or existing QCDR or Qualified Registry under
MIPS.
7. Pick all the years your organization has participated in MIPS and/or PQRS as a
QCDR or Qualified Registry (pick N/A if it doesn’t apply).
118. Add any other names or acronyms your organization currently uses or has used for
participation as a qualified vendor in past program years.
9. Explain how your organization meets our QCDR definition.
10. Pick whether your organization can show it has a plan to risk adjust the quality
measures data that is integrated with the measure specifications? Select Yes or No.
11. Pick whether your organization will do its own public reporting or will report through
Physician Compare. A QCDR/Qualified Registry must publicly report on one or the
other.
1212. Tell us your cost information and the type of services your organization offers. We’ll
include this information in your qualified posting.
13. Check the data collection your organization supports and pick which performance
categories you’ll be reporting.
14. Enter your program, clinical, and technical contacts.
13It’s important that you give us different contact information for each representative to
make sure you don’t miss important messages when your staff changes, has limited
access to email, etc. To make sure you get JIRA notices, please have your contacts add
ONC JIRA to their safe/approved email senders list.
15. Read the statement in the gray box and enter your name underneath to attest that
you meet the requirements for participation.
14Adding Quality Payment Program individual
measures (QCDR/Qualified Registry)
6 steps to add measures
1. To add Quality Payment Program individual measures, click the Individual Measures
tab.
2. You’ll then see the Individual Measures as shown below.
3. Follow the directions under each domain/individual measure selection window to
review and pick your Quality Payment Program individual measures. You have to
report on at least six measures, including one outcome measure or one high priority
measure.
4. Pick from the Quality Payment Program list all the individual Quality Payment
Program measures that you’ll support. Each individual measure you pick will be
shaded after you pick it.
5. If you want to verify all the measures that you’ve picked, go to the “Individual
Measures” tab and click on the blue number. It will expand so you can see all the
measures you picked.
156. After you submit your measures, your saved individual measures will show on the
Form Submission page, at the top left of the “Individual Measures” tab like this:
Your measure additions won’t be saved until your measures are completely entered. We
recommend that you have all your reference material (e.g., Measures List, etc.) ready
and with you when you’re entering your measures.
To add or edit your individual measures, see the “Modifying a JIRA ticket” section of this
User Guide.
16Adding Quality Payment Program eCQMs
(QCDR/Qualified Registry)
4 steps to adding eCQMs
1. Click the QPP – eCQMs tab. You’ll see the eCQMs lists like this:
2. Follow the directions under the QPP – eCQM list to review and the eCQMs.
173. Pick from the QPP – eCQM Measures list all of individual eCQMs that you’ll support.
Each eCQM you pick will be shaded after you pick it.
4. After you submit your eCQMs, your saved eCQMs will show on the Form Submission
like this:
18Submitting the Data Validation Plan
(QCDR/Qualified Registry)
On this tab, we’ll ask you to explain how you’ll validate the data you’re submitting to us. You
have to fill out all of the fields. You can either add your data validation plan in the JIRA pre-
formulated question fields or upload it as an attachment in JIRA. If you’re only sending your data
validation plan as an attachment, fill out each field with “see attached”. If you’re answering the
pre-formulated questions and also uploading an attachment to submit your data validation plan,
we’ll only review what you fill out in the pre-formulated fields, but not your attachments, to tell if
you meet the data validation plan requirements.
9 steps to fill out the Data Validation Plan tab
1. Add your vendor name.
2. Check whether you can benchmark (QCDR only).
If you click “Yes”, upload your benchmarking methodology, as available, as an
attachment under the Uploads tab. The name of the file should be Benchmarking
Methodology QCDR Name. See page 20 of this User Guide for more information.
3. Describe how your organization will verify eligibility in the Quality Payment Program
for each eligible clinician and/or group practice.
194. Describe how your organization will verify accuracy of Tax Identification Numbers
(TINs) and/or National Provider Identifiers (NPIs).
5. Tell us how you’ll calculate reporting and performance rates.
6. Tell us how you’ll verify the 2018 QPP and QCDR measures.
7. Tell us how you’ll complete randomized audits.
208. Tell us how you’ll complete detailed audits.
9. Check the box to attest that as required, your organization has the ability to randomly
request and receive documentation from providers to verify data accuracy. Your
organization will give us access to review the Medicare beneficiary data the 2018
Quality Payment Program QCDR-based submissions are based on or you’ll give us
a copy of the actual data (if requested for validation purposes).
21Uploading a Qualified Registry Data Validation
Plan as an attachment
If you want to upload your data validation plan as an attachment, you’ll use the Attachment
option at the bottom of the 2018 Qualified Registry Data Validation Plan tab, shown below. The
name of the file should be: 2018DataValidationPlan_. If you’re
submitting your data validation plan in an attachment, fill out the fields with “see attached.”
Uploading a QCDR Data Validation Plan as an
attachment
If you want to upload your Data Validation Plan as an attachment, you’ll use the Uploads tab,
shown below. The name of the file should be: 2018DataValidationPlan_.
You can find more information the next page. If you’re submitting your data validation plan in an
attachment, fill out the fields with “see attached.”
22Uploading attachments (QCDR only)
This tab lets QCDR applicants attach self-nomination documentation:
2018 data validation plan – you can upload your data validation plan if you don’t want to use
the JIRA pre-formulated data validation plan fields. You have to include all of the fields in your
attached document. The file name should be 2018DataValidationPlan_.
Benchmarking methodology – you can explain how you’ll benchmark your data. The file
name should be Benchmarking Methodology_.
Supplemental QCDR measures documentation – you can give your complete measure
specification for all the QCDR measures you’re submitting. You have to use the QCDR
Measure Template. You have to include all of measure specification fields in the template
when you self-nominate. The file name should be
SupplementalQCDRMeasureDocumentation_.
23Submitting your self-nomination form
4 steps to submit your self-nomination form
1. After you’ve finished all the required fields of all the tabs, click Create. You won’t be
able to successfully submit your form unless you’ve filled out all the required fields
that are marked with a red asterisk (*).
2. Once your form is filled out and you’ve finished all your edits, click “Click Here to
Submit to CMS” button to finish the submission process.
3. Save the confirmation email you get with your JIRA ticket number for your reference.
4. Export a copy of your approved self-nomination form for your records.
24Updating a JIRA ticket
To review or update your ticket, click Issues – Search for Issues OR Recent Issues, OR
Reported by Me.
1. You can also use the Quick Search button in the upper right of your screen to access
the ticket you’ve submitted.
Quick Search is character and format sensitive. Since there’s a hyphen (or dash) in the
QSNF number record, you’ll need to use the exact format in the exact case without
adding or leaving out spaces or characters to find your unique QSNF record number.
You won’t be able to find your QSNF record if you make even small changes to the
characters or format (e.g., QSNF25 or QSNF 25).
2. Once you’ve found your ticket, click Edit.
You can also edit your information by clicking on individual fields, as shown below.
o Use your scrollbar to see all the tabs at the top of the page after you come to the Edit
Issue page.
o To update or add information at any time, click the Update or Edit buttons, depending on
which screen you’re looking at. Remember, you won’t be able to update your submission
after 5:00 p.m. ET on November 1, 2017.
25Adding QCDR measures (QCDR only)
You can only add your QCDR measures after you’ve submitted your self-nomination form. After
you’ve made your ticket, follow the steps on page 21 to access your submission. You can also
use the QCDR Measure Template instead.
Use the hyperlinks at the top of the window to go back to your earlier pages instead of the Back
button:
Adding QCDR measures with Create Sub-Task
1. To add QCDR Measures, click the More button, and you’ll see a drop down list.
2. Then, click Create Sub-Task from the drop down list
263. Pick New Proposed Measure in the Issue Type field.
27Filling out the Proposed Measure sub-task form
page
Enter all required data for each new Proposed Measure, for every new Proposed Measure, until
you’ve done all 26. Required fields are marked with a red asterisk (*).
26 Proposed Measure sub-tasks:
1. QCDR measure type – Pick the QCDR measure type you’re proposing.
2. Measure ownership and permission to use – Tell us who owns the QCDR
measure and if you have permission to use it.
3. CMS assigned measure ID number – Give the approved MIPS QCDR Measure ID
that was assigned in the previous year, or enter N/A.
4. Measure title – Tell us the measure’s title. It should start with a clinical condition of
focus, followed by a brief description of action.
285. Measure description – Give us a detailed measure description.
6. Measure priority or outcome – Pick whether the measure is high priority, outcome,
or neither (N/A).
7. High priority type – Pick the high priority type.
8. National Quality Strategy (NQS) domain – Pick the domain the measure belongs
to and tell us why.
299. Denominator – Type in the eligible patient population to be counted to meet the
measures’ inclusion requirements.
10. Denominator exclusions – Type in any exclusions to the measure’s denominator.
An exclusion is anything that would remove the patient, procedure, or unit of
measurement from the denominator.
11. Numerator – Type in the clinical action that meets the measure’s requirements.
3012. Numerator exclusions – Type in any exclusions to the measure’s numerator.
Numerator exclusions are used only in ratio measures to describe what shouldn’t be
included in the numerator.
13. Denominator exceptions – Type in any exceptions to the measure’s denominators.
14. Inverse measure? – Pick whether the measure is inverse.
15. Measure type – Pick the best description of the measure type and then use the drop
down and pick the measure type.
3116. Measure scoring – Pick the scoring mechanism.
17. Ratio? – Pick whether the measure’s a ratio.
18. Range of the score(s) for continuous variable and/or ratio – If your measure’s a
ratio, pick the range of the score(s). If not continuous variable and/or ratio, enter N/A.
19. Risk adjusted? – Pick whether the measure is risk adjusted.
20. Risk adjustment score – If the measure is risk adjusted, tell us the score.
3221. National Quality Forum (NQF) ID number – Tell us the NQF ID. If you don’t know
the NQF ID number, enter numerals 0000.
22. Data sources used for the measure – Pick all that apply.
23. Number of performance rates to be submitted in the XML – Type in the number
or N/A to show the number of performance rates you submitted. If only one is
calculated, type '1'. Also, if there are multiple performance rates for the measure, tell
us the name of each performance rates.
24. Overall performance rate if more than one performance rate is to be submitted
– Tell us which rate will represent an overall performance rate for the measure or
how an overall performance rate could be calculated based on the data submitted in
the XML.
3325. Evidence of a performance gap and any study citations – Give us a summary of
a performance gap with citations to any studies you used. Don’t submit only study
citations.
26. Fill in the rest of the fields that apply.
Once you complete the form, click the Create button.
If you upload more attachments with details about QCDR Measures, see page 23 of this User
Guide.
You can see the QCDR measure(s) you save d entered on the Summary screen. You can
also scroll down to see all the information you entered.
Clicking on any line will take you into the Edit/Review screen. Use the hyperlinks, not the Back
button, at the top of the window to go back the pages you visited earlier.
34QCDR measure permission checklist
If you’re a QCDR, you have to get permission to use another QCDR’s measure by the time you
self-nominate for each performance period. Here’s the QCDR measure permission checklist:
See which measure(s) you need to ask permission to use
Find QCDR measure contacts on CMS.gov
Ask whoever owns the QCDR measure(s) for permission to use it
Get the measure owner’s permission documented
Upload the documentation for our review when you self-nominate in JIRA
Submitting a JIRA ticket
Click on the Submit button to save your whole QSNF record.
When you’re completely finished entering information in the record, click the Submit button at
the top of the page to save the whole record.
If necessary, use the Edit button to make changes to your record after you’ve submitted it.
Withdrawing a JIRA ticket
If you want to withdraw a self-nomination form that you already submitted, click on the
Withdrawn button. When you click on the Withdrawn button, your whole QSNF record will be
withdrawn from consideration to participate in MIPS as a QCDR or qualified registry.
35Resources
Help with JIRA
If you need more help with JIRA, you can check JIRA’s Online Help or get more learning JIRA
resources.
Help to self-nominate
You can use the Comment box to ask questions about filling in the form or submitting other
information. You can also see the “Modifying a JIRA Ticket” and “Populating the QCDR
Measures” sections of the User Guide for more information.
If you need more help with the Self-Nomination criteria, contact the Quality Payment Program
Service Center Help Desk by e-mail or at 1-866-288-8292 (TTY 1-877-715-6222) from 8:00
a.m. to 8:00 p.m. ET Monday through Friday. Keep your personal identifying information (like
your Social Security Number or TIN) secure by not including it in your email to the Quality
Payment Program Service Center.
The Quality Payment Program website resource library also gives more resources.
36You can also read