Headlamp - Girl Guides of ...
←
→
Page content transcription
If your browser does not render page correctly, please read the page content below
Headlamp April 2020
BC Camping Committee
Photo Credit: PJ Borghardt
IN THIS ISSUE A Message from the BC Camping
Campfire Planning Committee
Homemade Fire Starters Dear BC Guiders,
Different Types of Campfires We recognize that changes are happening
right now. The safety of our members and their
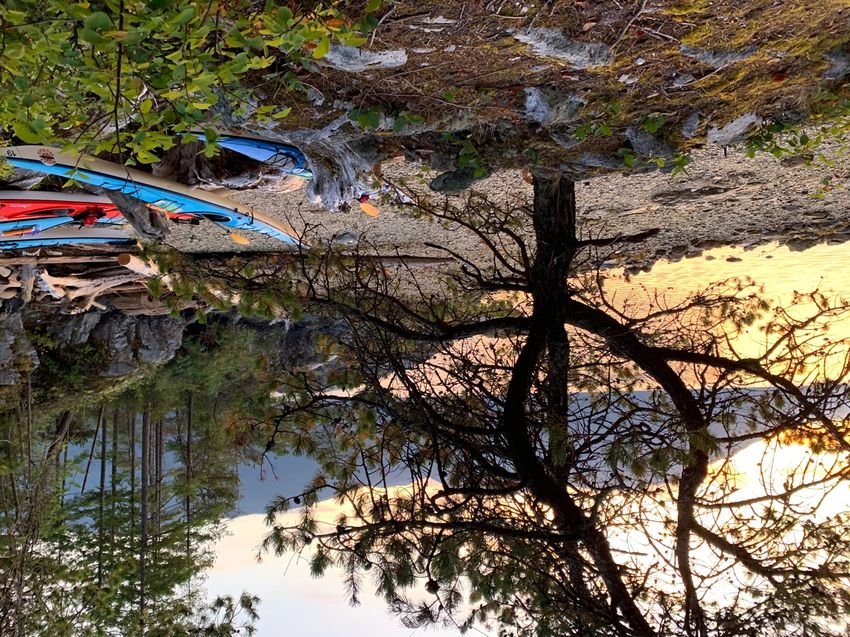
Trex – Backpacking to Elfin Lakes families is paramount and perhaps camping
will resume when it is once again safe to do so.
Be Bear Aware
We would like to thank all our Guiders for their
Precautions in Cougar Country dedication to the girls and Guiding during this
difficult time.
BC Camping Committee – BC Council – Girl Guides of Canada Ó 1
Emails
                    BC Girl Guides have changed all their emails.
                    A list of all the emails can be found at:
                    www.bc-girlguides.org/web/
                    Volunteers > Contact Us

Position:                        Email:
BC Camping Adviser               bc-camping@girlguides.ca
BC Adventure Trex                bc-adventuretrex@girlguides.ca
BC Camping Events                bc-campingevents@girlguides.ca
BC Camping Headlamp              bc-campingheadlamp@girlguides.ca

Stories for Headlamp
The BC Camping Committee is looking for great camping stories to
be featured in future Headlamp newsletters. We would love to hear
about the great things that happen at camp around the province.
Please share your wonderful and fun camp experiences. If your story
is published, you will receive a BC Camping Committee crest for
your contribution.

Send your story to: bc-campingheadlamp@girlguides.ca

New BC Camping Merchandise!
The BC Camping Committee is excited to offer new merchandise that units can
order. The Let’s Camp S’more flashlights and Under the Boughs socks are
available to order on the BC Girl Guides website: bc-girlguides.org/web/

What Girls Do > Camping > Camping Challenges >
BC Challenge Crest, Pin and Camp to Go Order Form (Excel)

BC Camping Committee – BC Council – Girl Guides of Canada Ó                   2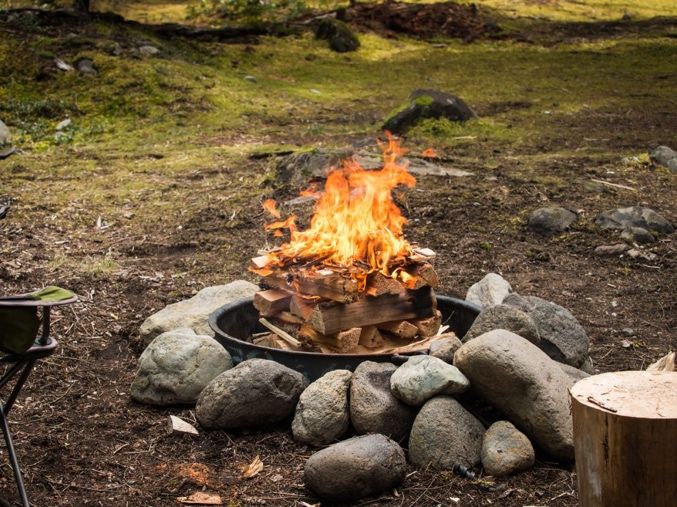
Camp Chatter Around the Province
                               The Nelson Guides, from Kootenay Area, had an amazing
                               “Community Exploration Camp” in February. They visited

                                                                                                                             Photo Credit: Anne Simonen
                               the local swimming pool, the police station, the fire station,
                               a co-op radio station and a coffee shop. What a cool
                               way to introduce the girls to a variety of places in their
                               community! The girls had lots of great questions at each
                               of their stops for their community experts. They were highly
                               engaged and learned a lot from this cool experience.

                                                                         The Fernie Pathfinders and Trex girls spent a
                                                                         beautiful sunny day in February up on a ski hill,
                                                                         learning about avalanche safety. They learned
  Photo Credit: Jessica Ward

                                                                         how to quickly put together an avalanche
                                                                         probe, and how to use it properly. They also
                                                                         got to use an avalanche shovel effectively, to
                                                                         dig a hole in the snow. Most importantly, they
                                                                         learned how to use avalanche beacons to
                                                                         locate buried avalanche victims.

                               West Coast Area (WCA) kicked off the new year

                                                                                                                                Photo Credit: Tammy Tromba
                               with a snowy hike on Cypress Mountain. Pathfinders,
                               Rangers and Trex snowshoed a 4.2 km loop to
                               Bowen Lookout. Later in January, WCA also had
                               a Snow Camp on Mount Seymour. Pathfinders,
                               Rangers, Trex and Guiders came out for a
                               weekend of hiking, snowshoeing and camping.
                               The girls got creative and made cute bear and
                               duck sculptures out of snow.

                                                           West Coast Area invited Sparks and Brownies to its Polar Bear
Photo Credit: Tammy Tromba

                                                           Picnic up on Mount Seymour Group Campsite. The girls had
                                                           an incredible time making snow sculptures, tobogganing
                                                           down a hill on giant inflatable polar bear floaties, playing
                                                           polar bear games, making polar bear crafts, snowshoeing,
                                                           drinking hot chocolate and eating tasty baked treats.
                                                           This was a great way to get the girls out to enjoy the outdoors
                                                           with their friends.

                               BC Camping Committee – BC Council – Girl Guides of Canada Ó                              3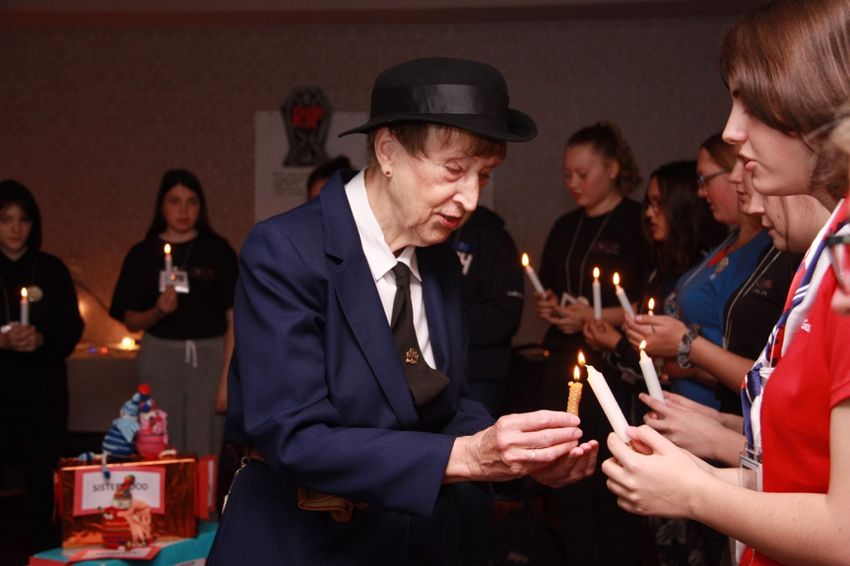
Photo Credit: Girl Guides of Canada
Let’s Sing! is an amazing music resource for adult and girl members. A team of
passionate BC Guiders compiled this resource so that Guiders and girls can learn some
fun Girl Guide songs. The comprehensive resource has four components: sheet music,
audio support, lyrics and video recordings.

Sheet Music: Each song is available as a PDF file for you to download.

Audio Support: Some songs have a vocal recording. Special thanks to GGC – Alberta
Council for songs from Come On and Sing with Us! – 95 Guiding Songs for All Ages and
GGC – New Brunswick Council for songs from Songs from New Brunswick Guide House.
Shelagh Walsh also provided songs that she recorded on the Tune Guide. If a vocal
recording is not available, piano notes are provided.

Lyrics: Words to the songs are provided as a Word document. Guiders can use the
Word files to create a personalize songbook for their unit.

Video Recordings: Some action songs showing movements are available as videos.
Please note that there are some variations in these songs due to them having been
passed down for generations.

The Let’s Sing resources are available to download on the BC Girl Guides
website: bc-girlguides.org/web/

What Girls Do > BC Program > Program Resources > Let’s Sing!

BC Camping Committee – BC Council – Girl Guides of Canada Ó                             4
Campfire Planning
A favourite Guiding tradition is sitting around a campfire
circle singing classic Girl Guide songs. This tradition brings
the girls and Guiders together and reinforces the feeling of
sisterhood and belonging. The mood, feelings and memories
that a campfire creates will be fondly remembered for years
to come. The magic of a campfire reinforces the spirit of
Guiding, uniting all that are present.

A campfire is a very special event and the gathering place should be carefully chosen.
A campfire usually has a focal point, like a real campfire, where the glow of the leaping
flames light up the atmosphere so that everyone is visible to everyone else. A lake or an
ocean can also be used as a focal point. In this case, the girls can form a semi-circle or
horseshoe encompassing the fire and the view.

A traditional campfire has a specific shape and structure. It starts out with quiet songs
then builds up to a high point. It then slowly winds down with reflective, peaceful songs
and ends with a vesper and Taps. A well-planned campfire should have a variety of
songs and activities that include:

Opening: A gathering song, thought or short reading on the theme. This will unify the
group.

Unifying: Well-known, warm-up songs where everyone can participate.

BC Camping Committee – BC Council – Girl Guides of Canada Ó                             5
Rounds, Part Songs: The participants are divided into sections and they sing the song in
parts.

Lighthearted: These silly action songs get the participants up, moving and active.

Fun and Nonsense: These are lively and noisy songs or rowdy chants and yells. A yell is a
rhythmic cry with a definite beat that reaches a boisterous climax. It is spoken loudly,
and not sung. A chant has an even rhythm where everyone repeats the same words at
the same time.

High Point: This can consist of games, yells, creative skits and fun stories. Games can
include games using songs, games with a gimmick, mime games, concentration games
and just for fun games. Stories can include interactive stories, participation stories,
inspirational stories, folktales, legends, fables and silly stories. Keep skits to 3 minutes or
less. Stories can set the mood and entertain the group if they involve the audience, use
props and have distinctive voices for the different characters.

Joyful: These can include quieter songs, semi-active songs, story songs and folk songs.

Reflective: These are inspirational peaceful songs. They may include a poem, a
reading or a serious story.

Vesper: This is a final thought in the form of a song, a short reading or a thanks. Vespers
should not be religious in nature.

Taps: Campfire closes with either Daytime Taps or Nighttime Taps.

Differences Between a Campfire and a Singalong

          Traditional Campfire                                  Singalong
 Has a theme                                    A theme is not required
 Has structure and in the shape of a            Has no structure or shape
 burning fire

 Purpose: creates a mood of sisterhood,         Purpose: fun and friendship
 belonging and unity

 Requires planning, thought and                 Occurs spontaneously
 preparation

 Songs are carefully chosen                     Song requests are welcomed
 Occurs at the end of the day or event          Occurs anytime
 Has a focal point (eg. a real or artificial    A focal point is not necessary
 fire, a lake, an ocean, etc.)

BC Camping Committee – BC Council – Girl Guides of Canada Ó                                   6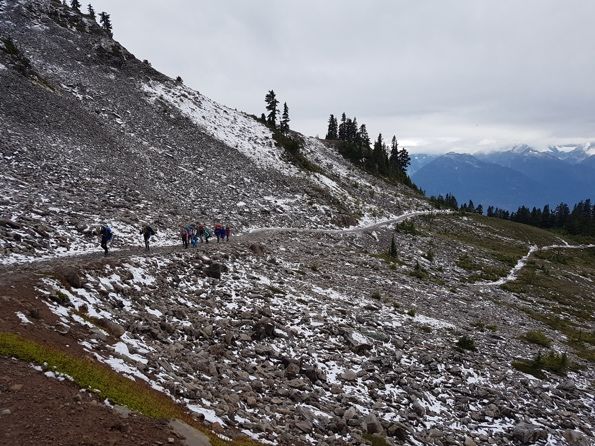
Homemade Fire Starters
You can make some easy fire starters at your unit meetings or at camp. Bring these
along to help ignite your campfires.

 Dryer Lint in Egg Carton
                large tin can, large pot, tongs, wooden spoon,
 Materials

                old oven mitts, dryer lint, cardboard egg
                carton, paraffin wax (or candles)

                1. To melt the paraffin wax, place the wax in a
                   large tin can. Place the large tin can in a
                   large pot of water. Bring the water to a
                   steady boil. Place the paraffin wax into the
 Instructions

                   large tin can.
                2. Place some dryer lint into each cup of the
                   egg carton. Do not pack too tightly.
                3. Pour some melted paraffin wax on top of
                   the dryer lint until it is completely saturated
                   and attaches itself to the egg carton.
                4. Cut the egg carton into individual cups.

 Sawdust in Egg Carton
                large tin can, large pot, tongs, wooden spoon,
 Materials

                old oven mitts, sawdust, cardboard egg
                carton, paraffin wax (or candles)

                1. To melt the paraffin wax, place the wax in a
                   large tin can. Place the large tin can in a
                   large pot of water. Bring the water to a
 Instructions

                   steady boil. Place the paraffin wax into the
                   large tin can.
                2. Place some saw dust into the milk carton.
                3. Pour some melted paraffin wax on top of
                   the sawdust.

BC Camping Committee – BC Council – Girl Guides of Canada Ó                          7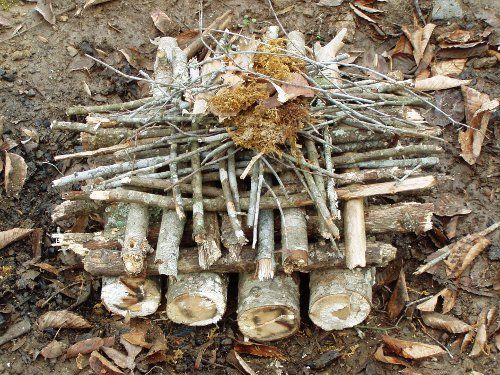
Pine Cone in Wax
                          large tin can, large pot, tongs, wooden spoon,
 Materials

                          old oven mitts, pine cone, paraffin wax (or
                          candles)

                          1. To melt the paraffin wax, place the wax in a
                             large tin can. Place the large tin can in a
 Instructions

                             large pot of water. Bring the water to a
                             steady boil. Place the paraffin wax into the
                             large tin can.
                          2. Dip a pine cone in the paraffin wax until it is
                             coated with the wax. Let it dry.

 Cotton Pad Soaked in Wax
                          large tin can, large pot, tongs, wooden spoon,
 Materials

                          old oven mitts, cotton pad, paraffin wax (or
                          candles)

                          1. To melt the paraffin wax, place the wax in a
                             large tin can. Place the large tin can in a
                             large pot of water. Bring the water to a
 Instructions

                             steady boil. Place the paraffin wax into the
                             large tin can.
                          2. Dip a cotton pad in the melted wax until
                             the pad is completely coated with the wax.
                          3. Let it dry.

 Cotton Ball in Petroleum Jelly
                          cotton balls, petroleum jelly (Vaseline), Ziploc
 Instructions Materials

                          bag

                          1. Smear some petroleum jelly onto some
                             cotton balls.
                          2. Place in a Ziploc bag for storage to prevent a
                             mess.

BC Camping Committee – BC Council – Girl Guides of Canada Ó                    8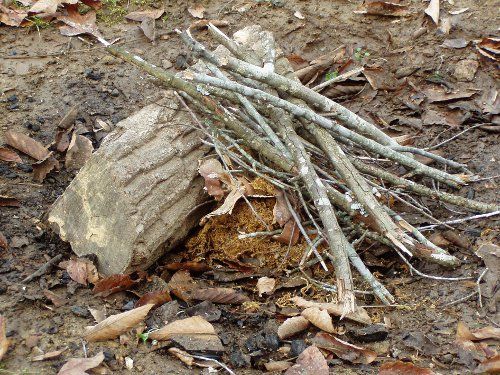
Newspaper Wrap
                candle, newspaper, waxed paper, string
 Materials

                1. Cut the candle into small 5 cm pieces.
                2. Wrap the candle piece with a strip of
 Instructions

                   newspaper and waxed paper.
                3. Twist the two ends of the newspaper so it
                   looks like a candy wrapper.
                4. Tie a string to each end of the wrapper.

 Wine Corks in Rubbing Alcohol
                wine corks, rubbing alcohol (isopropyl alcohol),
 Materials

                mason jar or Ziploc bag

                1. Soak some wine corks in rubbing alcohol.
 Instructions

                2. Store in a mason jar or Ziploc bag so that the
                   rubbing alcohol does not evaporate.

Fire Starter Accelerants
The following products can be used to help start a fire:
1.      Hand sanitizer (with alcohol)
        Apply a couple of squirts of hand sanitizer to the kindling. This will help it catch
        fire more easily.
2.      Bug Spray / Insect Repellant
        Spray some insect repellant onto the kindling to help speed things up. Do not
        apply the spray once the fire has started.
3.      Duct Tape
        Duct tape is highly flammable and will burn for a long time. Cut the duct tape
        into strips and place it on the kindling. Light one end of it to start the fire.
4.      Potato Chips
        Throw some greasy potato chips (eg. Doritos, corn chips, Pringles, etc.) into the
        fire. The fatty content of the chips will burn quickly. The greasier the chips, the
        better.
5.      Dried Orange Peel
        Dried orange peel is flammable and gives off a citrus aroma when it is burned.

BC Camping Committee – BC Council – Girl Guides of Canada Ó                                    9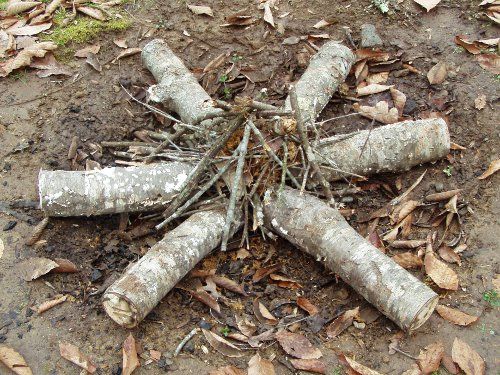
Different Types of Campfires
Before Building a Fire
There are some basic things that you need to remember when you build a fire:
- gather all the materials required to start, build and fuel a fire before striking a match,
- tinder and kindling are used to make enough heat for the fuel wood to catch fire,
- add kindling to the burning tinder and add fuel wood as the fire grows,
- always have a bucket of water right beside the fire,
- make use of present fire pits or campfire ring.
Fire Triangle
A fire requires three things to burn:
1. oxygen (from the atmosphere)
2. heat (a match or lighter usually starts a fire)
3. fuel (tinder, kindling and wood fuel that is flammable)
Three Types of Fuel
Tinder Kindling Fuel Wood
1. Dry, dead twigs on the 1. Dry, dead branches, 1. Dry wood that can be
lower branches of trees, tree bark or small twigs chopped into pieces.
pine needles, dry pine that are not on trees. 2. Thickness: It should be
cones, leaves or grass. 2. Thickness: It should be the diameter of your
2. Thickness: It should be the diameter of your wrist.
about the diameter of a thumb. 3. Length: It should be the
pencil lead. 3. Length: It should be the length of your arm.
3. Length: It should be no length from your elbow 4. Gather a stack that is as
shorter than 6 inches to your fingertips. high as your knee.
(15 cm) in length. 4. Gather about an
4. Gather two handfuls of armload of kindling for
twigs for a fire. a fire.
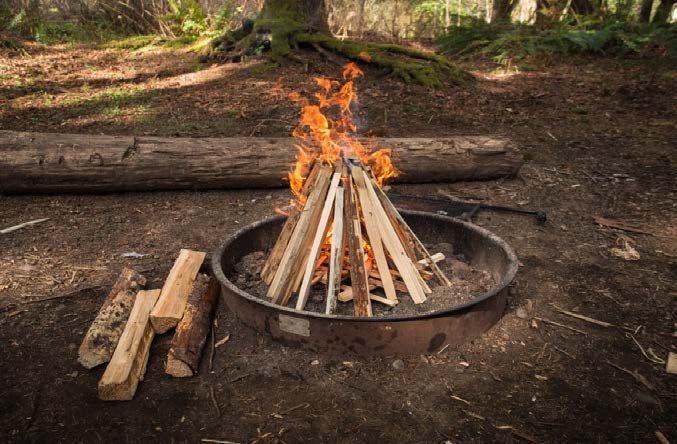
BC Camping Committee – BC Council – Girl Guides of Canada Ó 10Teepee Fire
Description Kindling and fuel wood are stacked in the shape of a conical
teepee. The teepee fire is ideal for cooking campfire meals with a
tripod grill, skewers or roasting marshmallows and hot dogs.
Pro It is the quickest, easiest and simplest fire to build that will give off a
lot of heat and light.
Con It tends to collapse and the fire might suffocate as you add more
wood.
Instructions 1. Loosely place some dry tinder in a small pile on the ground in the
middle of the fire pit.
2. Place a stick of kindling into the ground on a slant over the tinder.
3. Lean some dry kindling against the stick, in the shape of a
conical teepee, over the tinder bed.
4. Light the fire.
5. Slowly add larger pieces of kindling to the basic framework of the
campfire, making sure to keep the teepee shape.
6. Continue to add fuel wood to the fire, stacking them in a teepee
shape against the kindling.
Photo Credit: Rebecca Crawford
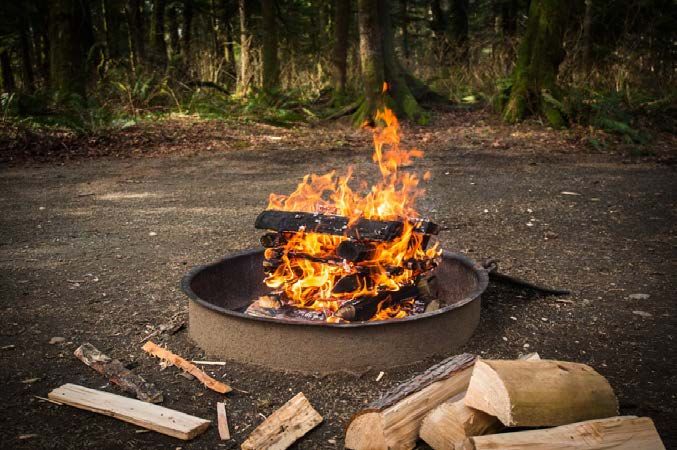
BC Camping Committee – BC Council – Girl Guides of Canada Ó 11Log Cabin Fire
Description It is a sturdy and easy large fire to build. It consists of a teepee
kindling arrangement in its centre.
Pro It is long-lasting and does not need a lot of maintenance to keep
the fire going. This type of fire is ideal when you have a variety of
fuel wood and require lots of light and heat.
Con It requires a lot of wood to burn.
Instructions 1. Place tinder in the middle of the fire pit.
2. Place a large fuel wood on the ground.
3. Place another large fuel wood about 50 cm (20 inches) apart,
aligning it in the same direction (parallel to the first log).
4. Repeat this configuration in alternating directions with each pair
of fuel wood so it starts to stack like the walls of a cube-shaped
log cabin.
5. Keep building it until it reaches a height of 15 cm (6 inches).
6. Make sure to leave some space between each piece of wood to
allow air to flow better.
6. Light the tinder.
Photo Credit: Rebecca Crawford
BC Camping Committee – BC Council – Girl Guides of Canada Ó 12Criss-Cross (Platform) Fire
Description It is a long-burning fire that will produce a nice bed of coals.
Pro It is great for cooking food and will burn for an extended period of
time (eg. five hours).
Con It may be tricky to get the fire going (eg. 30 minutes). The kindling is
susceptible to heavy rain and winds.
Instructions 1. Place a large amount of tinder on the ground.
2. Place a large piece of fuel wood on each side of the tinder.
The logs should be about 30 cm apart from each other.
3. Lay kindling across these logs and over the tinder.
4. Create several criss-cross layers, alternating the layers. Place
some going north to south and others going east to west.
5. Add larger pieces gradually.
6. Light the fuel. The hot embers will fall beneath, igniting the larger
logs.
Photo Credit: Rebecca Crawford
BC Camping Committee – BC Council – Girl Guides of Canada Ó 13Lean-To Fire
Description It is easy to build for cooking in poor weather conditions.
Pro It is a stable structure to build in rainy or windy conditions. There is
very small chance that the fire will die out.
Con It does not burn intensely and does not have good flow of air.
Instructions 1. Place some tinder on the ground.
2. Place several pieces of kindling on top of the tinder so it
resembles a tent-looking structure.
3. Start the fire.
4. As the fire burns, add more pieces of kindling and some fuel
wood.
Photo Credit: Rebecca Crawford
BC Camping Committee – BC Council – Girl Guides of Canada Ó 14Star Fire
Description This is a stylish small fire that will burn for several hours.
Pro It can be built when very little wood is available and requires little
maintenance.
Con It may take a long time to get going.
Instructions 1. Make a small teepee fire in the centre.
2. Place the ends of the fuel wood into the fire so they radiate
outward from the centre like spokes in a wheel.
3. Add extra kindling over the fuel and light it.
4. Continue to feed the fire until the radiating logs start to burn.
5. The logs can be pushed into the middle as they are consumed.
Photo Credit: Rebecca Crawford
BC Camping Committee – BC Council – Girl Guides of Canada Ó 15Pyramid (Upside Down) Fire
Description It makes a big, long-lasting fire for a large group of people or
gathering. There is very little smoke associated with this fire because
it forms a chimney that carries the smoke up and away over the
heads of people.
Pro It is good when the ground is wet because it keeps the tinder and
kindling off the ground. It requires very little maintenance.
Con You will need a large amount of wood.
Instructions 1. Place one layer of fuel wood down on the ground.
2. Add a second layer in the opposite direction.
3. Add a third layer in the opposite direction. Repeat.
4. As the stack grows looking like a pyramid, the fuel wood should
get smaller. The pyramid should have no top, with an opening
about 50 cm wide.
5. In the centre of the pyramid, build a teepee fire. Use lots of
kindling.
6. The top layer should consist of kindling and tinder.
7. When the tinder is lit, the hot embers will fall below, igniting the
layers below as the fire grows.
Photo Credit: Rebecca Crawford
To Extinguish a Fire
To put out a fire:
1. pour water on it, stir the ashes and then pour more water on until it is completely
out,
2. cover the fire with sand or dirt,
3. let the wood burn out.
Before leaving the fire, make sure that the ashes are cool to the touch and they are no
longer glowing.
BC Camping Committee – BC Council – Girl Guides of Canada Ó 16Camp Dishwashing System
Set up the wash station on a bench/table so that the girls can access it from both sides.
Equipment:
3 plastic tubs hot water bleach
biodegradable dish soap sponge scrubber spatula
compost bin
Instructions:
1. Scrape - Before washing any of the dishes, make sure to scrape off any food
scraps from the plate and bowl with a spatula into the compost bin. This will
help minimize making your dishwater dirty with food scraps.
2. Wash - Add a few drops of biodegradable soap to the Wash Tub. Add hot
water to the Wash Tub until it is about half full. Then add some cold water
until the water temperature is comfortable to touch.
3. Rinse - Add hot water to the Rinse Tub until it is about half full. Then add some
cold water to the tub until the water temperature is comfortable to touch.
4. Sanitize - Add hot water to the Sanitize Tub until it is about half full. Then
add some cold water to the tub until the water temperature is comfortable to
touch. Add one capful of bleach to the water. Note: Bleach kills bacteria.
5. Place dishes into a mesh ditty bag and hang to air dry. If there are no hooks on
the wall, set up a rope and attach ditty bag to the rope with a carabiner.
6. Dispose of grey water in the Liquid Disposal Pit for grey water. At camps, any
used water is called Grey Water. Use a strainer or j-cloth over the Liquid Disposal
Pit to catch all the food bits.
7. When dishwashing is done, pour out the Wash Tub first. Then dump the rinse
water into the Wash Tub and pour this out. Finally, pour the bleach water into the
Rinse Tub and then the Wash Tub, before dumping it out. This is to ensure that all
three tubs are disinfected.
Tips:
- Label the three plastic tubs: Wash Tub (add water and soap); Rinse Tub (add water);
Sanitize Tub (add water and bleach).
- Start boiling water for dishwashing before you sit down to eat your meal.
- Clean off your dishes as much as possible before placing them into the Wash Bin.
- Scrape excess food off the dishes into the Compost Bin and wipe off any sauces with
paper towel.
Photo Credit: Van Chau
BC Camping Committee – BC Council – Girl Guides of Canada Ó 17Heat Exhaustion and Heat Stroke
Heat Exhaustion
Description heat-related syndrome due to exposure to high temperatures or
strenuous activity
Signs -faintness -hallucinations
-dizziness -heavy sweating
-nausea -rapid, weak pulse
-vomiting -excessive sweating
-fatigue -loss of consciousness
-intense thirst -cool, pale, clammy skin with goose
-muscle cramps bumps
Treatment -take a cool shower
-use cold compresses
-stop physical activity
-drink cool water or sports drinks if fully conscious
-get to a cooler place (ideally with air conditioning)
Heat Stroke (Sun Stroke)
Description a life-threatening severe heat illness that is caused by your body
overheating
Signs -no sweating -hot, red, dry skin
-nausea -rapid, strong pulse
-vomiting -throbbing headache
-red, hot dry skin -may lose consciousness
-convulsions -body temperature is above 40°C
Treatment -do not give fluids
-drench skin with water
-remove excess clothing
-move to a cool place and rest
-call 911 or go directly to the hospital
-put ice bags on armpits and groin area
-take immediate action to cool the person until help arrives
BC Camping Committee – BC Council – Girl Guides of Canada Ó 18Trex – Backpacking to Elfin Lakes Photo Credit: Jenny Hall Us TREX Guiders have done this trail in the past with previous groups of girls but always in the winter and on deep snow. This time we planned for earlier in the year and hoped for no snow. That almost didn’t happen – we did get to hike on gravel Saturday but coming back Sunday was a blizzard! The best of both worlds! We started the day preparing for our hike in the parking lot. With so many new 1st year Pathfinder-aged girls and not a lot of backpacking experience, the first step was to rearrange packs! What gear do we actually need? What can we leave behind? Next step, hand out group gear. More weight added to our packs! Finally, it was time to go. Excitement and a little bit of nerves soon gave way to “why are we doing this?” The first part of the Elfin Lakes trail isn’t all that easy or exciting. We are hiking along an old service road and you are hiking up and up and up with new packs on your back and we start to feel the weight and it gets heavier. Us Guiders keep saying, “Wait till you see the view!” but all the girls thinking is “what view”? After several stops to re-adjust packs and to drink water, we reach the Red Heather shelter. This is where the views start! But first, lunch! After lunch, we put our packs back on and head out. Right outside the shelter are two large black bears grazing on the grasses and they could care less that we are there. After a good look at the bears, we continued on. First rule in the backcountry – be bear aware! And respect that this is their home. A short way down the trail, a mama bear with her two cubs! They are playing up the hill and not in our path, so we continue on but how exciting as many of these girls have never been so close to a bear in the wild before. A few girls wanted to take videos and pictures, so this presented us with a great opportunity to talk about what to do when we do encounter wildlife. BC Camping Committee – BC Council – Girl Guides of Canada Ó 19
On up the trail we go. The trail at this point gets
                                                                      quite gradual – it is not that steep climb
                                                                      anymore but a gentle elevation gain. And the
                                                                      views are stunning! It is absolutely amazing that
                                                                      with a short drive and a little bit of work, we get
Photo Credit: Jenny Hall

                                                                      to experience all that the wilds of BC have to
                                                                      offer. I love seeing and experiencing the
                                                                      beauty of backcountry BC with these girls. The
                                                                      looks on their faces and the awe in their eyes is
                                                                      what keeps me active as a TREX leader. I know
                                                                      most of these girls would never have
                                                                      experienced this hike if it were not for TREX and
                           GGC for implementing this choice for adventure-seeking girls. And what a shame. My
                           only hope is these girls go back to their families and talk about what they saw and
                           hopefully get their families and friends excited about exploring BC. I know the girls will
                           come away from TREX with the necessary skills needed and will be able to teach those
                           they love how to be safe in the backcountry as well. So very cool!

                           As we continue on to Elfin Lakes admiring the
                           backdrop of towering mountains, we soon
                           see the two lakes. It is still quite a bit of a hike
                           (don’t let spotting the lakes fool you, it is still
                           about 3 km to the campground). Finally, we

                                                                                                                            Photo Credit: Jenny Hall
                           arrive at our final destination. First step – set
                           up tents! Then take out our smelly food or
                           personal products and put it in a bear bag to
                           hang in a tree. Then time to explore – the best
                           part of a new camp! I chose to find a spot
                           overlooking the valley and watch the brilliant
                           sunset with a warm cup of tea.

                           After our dinner of dehydrated meals, which the girls prepared themselves ahead of
                           time, we settled in to our tents. With the right gear, even when the temperature dipped
                           to -8°C, we all kept snug as a bug! Waking in the morning to snow on the ground was a
                           fun surprise and added to our adventure! After breakfast and packing our gear back
                           up, we continued back along the same trail to the parking lot. No bears on our way
                           down but still a wonderful way to end another amazing overnight adventure with a
                           great group of girls and adults.

                           Submitted by: Jenny Hall (2nd Fraser Skies Area Trex Guider)

                            Elfin Lakes – Garibaldi Provincial Park
                            Difficulty Level         intermediate
                            Distance                 11 km each way (22 km round-trip)
                            Elevation Gain           600 metres
                            Hiking Time              4 hours each way; 6 hours to camp with younger girls

                           BC Camping Committee – BC Council – Girl Guides of Canada Ó                               20
Be Bear Aware in the Backcountry BC has some of the largest and most untouched landscapes in the world. Even viewed from the tops of isolated peaks, these habitats will often stretch as far as the horizon. With these vast and breathtaking landscapes come an abundance of wildlife, including bears. Avoiding an encounter is the best way to protect yourself and bears. Before You Go Pack bear spray and learn how to use it. Check the park website for information about bears in the area. Read notices about bears in the area when you get to the trailhead. When Camping Ensure food, garbage, dirty camp stoves, toiletries and all other smelly items are locked away in a metal bear-proof container or hung from a tree away from your campsite. Use designated campsites. If there are no designated sites, choose campsites that are away from bear signs and obvious bear foods like berries, waterways or other features that may be travel routes for wildlife. Use the triangle approach. Set up your tent, cooking area and food storage areas in a triangle pattern, about 50 metres apart. When on the Trail Make noise. Do not surprise a bear. Sing, clap or talk loudly especially near streams. Be alert. Watch for bears, their scat and tracks, strange smells or disturbed vegetation. Be aware of wind direction and speed. Be cautious when the wind is facing you. Stay together. Hike in groups. Larger groups (4 or more) are less likely to have a negative bear encounter. Use officially marked trails. Travel during daylight hours. Bears are most active at dawn and dusk. If You Encounter a Bear Stay calm. Talk in a low, calm voice. Back up slowly. Never turn your back on a bear or run. Running could trigger an attack. Do not stare. The bear will see a direct stare as a challenge. Give it space. Make sure it has a way to get away, and that you are not blocking access to a bear’s cubs or its food. If a bear approaches you or charges. Do not run! Use your bear spray as it approaches. Know how to use that bear spray! Usually, bears charge or attack because they are feeling threatened. If you do not have bear spray and the bear makes contact with you – roll on your stomach, cover the back of your neck, remain still and play dead, they will lose interest and leave. In rare cases, a bear may see a human as prey and stalk you along a trail. In these cases, try to escape into a shelter or up a tree. If you cannot escape and the bear charges, use your bear spray, lacking that, use anything at your disposal to fight off the bear (rocks, sticks, hiking poles). Submitted by: Jenny Hall (2nd Fraser Skies Area Trex Guider) BC Camping Committee – BC Council – Girl Guides of Canada Ó 21
Precautions in Cougar Country
Cougar attacks on people are rare. Attacks are usually predatory and small children,
rather than adults, are often targeted. This is because children are small in size, have
high-pitched voices and move quickly. Make sure that the small children (Sparks or
Brownies) stay close to the Guiders.

When Camping
Always ensure food, garbage, dirty camp stoves, toiletries and all other smelly items are
locked away in an animal proof container or hung from a tree away from your
campsite. Use designated campsites. If there are no designated sites, avoid campsites
that are near trees with scratch marks. Avoid camping near routes that look like travel
routes for wildlife. Use the triangle approach. Set up your tent, cooking area and food
storage areas in a triangle pattern, about 50 metres apart.

When on the Trail
Be alert. Make it a habit of looking behind you while hiking. Cougars are silent and are
“spot and stalk” creatures. Be sure to look up to see anything that may be perched in a
tree or on an outcrop that is above you. Become familiar with cougar tracks and scat.
Watch for signs of cougars like scratched trees and uneaten prey covered with
vegetation. Be aware of wind direction and be extra cautious when the wind is facing
you.
Stay together. Avoid hiking alone. Hike in groups. Larger groups (4 or more) are less
likely to have a cougar encounter.
Make noise. Talk and make a lot of noise as you hike.
Use officially marked trails. Travel during daylight hours because cougars are most
active between dusk and dawn.

If You Encounter a Cougar
Stay calm. Talk in a loud and firm voice.
Back up slowly. Make yourself look as large as possible by raising your hands and
standing on a rock. Back away slowly while keeping the cougar in view at all times.
Never run or turn your back. Avoid sudden movements.
Maintain eye contact. This reinforces to the cougar that you are not an easy target.
Give it space. Make sure it has a way to get away, and that you are not blocking
access to a cougar’s kitten(s).
Aggression. If a cougar shows aggression towards you, or begins following you, respond
aggressively. The cougar sees you as prey. Keep eye contact while shouting and
making loud noises. Stomp your feet. Use any nearby rocks, sticks or handy items to use
as weapons. Do not crouch down if you need to pick things up off the ground. If a
cougar attacks always fight back while focusing on striking its facial and eye areas. The
goal is to convince the cougar that you are a threat to it. Do not play dead! The
cougar is attacking for predatory reasons.

BC Camping Committee – BC Council – Girl Guides of Canada Ó                            22
This little guiding light of
mine
This little Guiding light of mine, (hold up an index finger) I’m gonna let it shine.
This little Guiding light of mine, (hold up an index finger) I’m gonna let it shine.
This little Guiding light of mine, (hold up an index finger) I’m gonna let it shine.
Let it shine, all the time, let it shine.

Don’t you “wh” (blow on your candle) my little light out …

Take my little light ‘round the block … (“walk” your index finger in a square)

Hide it under a bush, “Oh, No!” (cup one hand over your index finger)

This little Guiding light of mine, I’m gonna let it shine.
Don’t you (“wh”) my little light out. I’m gonna let it shine.
Take my little light ‘round the block. I’m gonna let it shine.
Hide it under a bush, “Oh, No!” I’m gonna let it shine.

NOTE: Let’s Sing! provides the sheet music, lyrics and audio to This Little Guiding Light of
Mine so girls and adults can download to learn the song.
                                                                                 Photo Credit: Van Chau

BC Camping Committee – BC Council – Girl Guides of Canada Ó                                               23
Recipes for Dehydrated Meals
Beef and Bean Chili
(Source: Jenny Hall)
Serves 3-5.
Ingredients:
1 – 1¼ pounds lean ground beef or turkey 1 large onion
½ cup bread crumbs, finely ground 1 – 2 cloves garlic
1 15 ounces can kidney or red beans, drained 3 tablespoons chili powder
1 10 ounces can tomato puree olive oil
1 14 ounces can diced tomatoes
Equipment:
non-stick frying pan dehydrator parchment paper Ziploc bags
Instructions:
At Home:
1. Work bread crumbs into ground meat with your fingers and set aside.
2. Sautee onions and garlic in a little olive oil using just enough to coat the pan.
3. Add ground meat and cook for about ten minutes until browned, stirring
continuously.
4. Add chili powder and cook for one more minute.
5. Add tomato puree, diced tomatoes and drained beans.
6. Cook until bubbling and then reduce heat to a simmer for one hour.
Dehydrate:
1. Have a taste and put the rest in the refrigerator overnight. The extra time
enhances the flavor.
2. Spread chili out on dehydrator trays covered with parchment paper.
3. Dehydrate at 125°F for 8 – 10 hours.
4. After about four hours in the dehydrator, break up any meat and beans that
might be stuck together with a spoon or your fingers to expose pieces to more air
circulation.
5. Once dry, divide dehydrated chili into one cup or larger servings and pack in
plastic Ziploc bags.
On the Trail:
1. Combine one cup chili with one cup water and let sit for about five minutes.
2. Light stove, bring to a boil and continue cooking for one minute.
3. Remove from stove and let sit.
4. Garnish with crackers, dried pita bread chips or cheddar cheese.
BC Camping Committee – BC Council – Girl Guides of Canada Ó 24Root Bark Stew
(Source: Jenny Hall)
Root bark stew makes a tasty backpacking meal of root vegetables simmered in a spicy
broth. Serves 3-4.
Ingredients:
1 tablespoon olive oil 1 tablespoon curry powder
2 medium onions, chopped 1 tablespoon ground cumin
2 cloves garlic, minced 1 teaspoon cinnamon
16 – 32 ounces chicken broth 1 large sweet potato
1 pound parsnips 3 medium turnips
1 large rutabaga ¼ cup raisins
1 14.5 ounce can diced tomatoes, drained salt and pepper to taste
Equipment:
non-stick frying pan large pot dehydrator parchment paper
Ziploc bags
Instructions:
At Home:
1. Peel and cut roots into ½ inch cubes or slightly smaller.
2. In a non-stick pan, heat oil over medium-high heat.
3. Add onion and sauté until golden for about five minutes. Add garlic, curry,
cumin, cinnamon and a splash of broth and stir another minute.
4. In a large pot, add cubed sweet potatoes, parsnips, turnips, rutabaga, raisins,
and contents of the pan. Add just enough broth to cover roots. You will probably
use closer to 16 ounces than 32 ounces. Stir.
5. Bring to boil, reduce heat, cover, and simmer until vegetables are tender for
about 10 minutes. Stir occasionally.
6. Add diced tomatoes and salt and pepper to taste. Simmer about five more
minutes.
Dehydrate:
1. In order to capture the wonderful flavors in the broth, combine the broth with a
portion of the cooked roots and turn it into bark as follows: Drain off broth into
pot. An easy way to drain the broth is to pour the contents from your cook pot
through a colander positioned over another pot. Add broth plus four cups of the
cooked roots to the blender, minus the raisins, and blend until smooth.
2. Spread ¼” thick on dehydrator trays covered with non-stick sheets or parchment
paper. Dehydrate at 135°F. The bark will dry in about eight hours and will easily
break into pieces. Dry a little longer if the bark tears rather than breaks. Arrange
remaining cooked roots on covered trays. Dehydrate at 135°F. The roots will dry
in about twelve hours. Stir pieces midway, pulling apart any pieces that are stuck
together. Roots will be pliable to hard when done with no moisture appearing
when you cut into a piece.
3. Let cool before storing or packing. Combine roots and bark into individual
backpacking meal servings along with dried chicken or beans, if desired, and
pack in plastic bags.
BC Camping Committee – BC Council – Girl Guides of Canada Ó 25You can also read