Automatic coffee maker Cafetera automática Cafetière automatique Máquina de café Automatische Kaffeemaschine Maccina per il caffè automatica ...
←
→
Page content transcription
If your browser does not render page correctly, please read the page content below
Automatic coffee maker Cafetera automática Cafetière automatique Máquina de café Automatische Kaffeemaschine Maccina per il caffè automatica
8

                      7

          6
                  5

                      4

                               3

                               2

                               1

11

                          12

              9

     10
Fig. 1 Fig. 2 Fig. 3 Fig. 4 Fig. 5 Fig. 6 Fig. 7
ENGLISH                                                               EN

Dear customer,                             3. Clean all the parts of
Many thanks for choosing to purchase an      the product that will be
Incapto brand product.                       in contact with food,
Thanks to its technology, design and         as indicated in the
operation and the fact that it exceeds       cleaning section, before
the strictest quality standards, a fully     use.
satisfactory use and long product life
can be assured.                            4. This appliance can
                                             be used by people
                                             with reduced physical,
Safety advice                                sensory or mental
and warnings                                 capabilities or lack
                                             of experience and
 1. Read these instructions                  knowledge if they have
    carefully before                         been given supervision
    switching on the                         or instruction
    appliance and keep                       concerning use of the
    them for future                          appliance in a safe way
    reference. Failure to                    and understand the
    follow and observe                       hazards involved.
    these instructions could
    lead to an accident.                   5. This appliance is not a
                                             toy. Children should be
 2. This appliance is only                   supervised to ensure
    for domestic use, not for                that they do not play
    industrial or professional               with the appliance.
    use. It is not intended
    to be used by guests in                6. This appliance shall not
    hospitality environments                 be used by children.
    such as bed and                          Keep the appliance and
    breakfast, hotels,                       its cord out of reach of
    motels, and other                        children.
    types of residential
    environments, even                     7. Always switch off
    in farm houses, areas                    the appliance and
    of the kitchen staff in                  disconnect from
    shops, offices and other                 supply if it is left
    work environments.                       unattended and before
                                             changing accessories
                                             or approaching
EN
parts that move in – Check the state of the power
use, assembling, cord. Damaged or tangled cables
disassembling and increase the risk of electric shock.
cleaning. – Do not touch the plug with wet
hands.
8. If the supply cord is – Do not use the appliance if the
damaged, it must cable or plug is damaged.
be replaced by the – If any of the appliance casings
manufacturer, its breaks, immediately disconnect
service agent or similar the appliance from the mains to
qualified person in order prevent the possibility of an electric
to avoid a hazard. shock.
– Do not use the appliance if it has
9. Never submerge the fallen on the floor, if there are visible
appliance in water signs of damage or if it has a leak.
or any other liquid or – Do not place the appliance on hot
place it under running surfaces, such as cooking plates,
water. gas burners, ovens or similar.
– The appliance must be used and
– Ensure that the voltage indicated placed on a flat, stable surface.
on the rating label matches the – The appliance is not suitable for
mains voltage before plugging in outdoor use.
the appliance. – Do not use the appliance in the
– Connect the appliance to a base case of persons insensitive to
with an earth socket withstanding a heat (the appliance has heated
minimum of 10 amperes. surfaces).
– The appliance’s plug must fit into – Do not touch the heated parts of
the mains socket properly. Do not the appliance, as it may cause
alter the plug. Do not use plug serious burns.
adaptors.
– Do not force the power cord. Never USE AND CARE
use the power cord to lift up, carry – Do not use the appliance if its
or unplug the appliance. accessories are not properly fitted.
– Do not wrap the power cord around – Do not switch the appliance on
the appliance. without water.
– Do not clip or crease the power – Do not use the appliance if the on/
cord. off switch does not work.
– Do not allow the power cord – Do not move the appliance while
to come into contact with the in use.
appliance’s hot surfaces. – Respect the MAX level indicator.EN
– Disconnect the appliance from the 12 - Cleanness brush
mains when not in use and before
undertaking any cleaning task.
– Unplug the appliance from the
mains before refilling the water tank.
Control Panel
– Store this appliance out of reach A. Flashing: Low water level /
of children and/or persons with Water tank missing
physical, sensory or reduced B. Lack of bean
mental or lack of experience and C. Lights up stably: coffee
knowledge. grounds container is full.
– Do not store the appliance if it is still Flashing: internal drip tray /
hot. coffee grounds container is
– Only use water with the appliance. missing.
– The use of bottled mineral water D. Lights up stably: Brewer is
adapted for human consumption is missing / installed improperly.
recommended. Flashing: Service door is open /
– Never leave the appliance installed improperly.
connected and unattended if is E. Lights up stably: requires to do
not in use. This saves energy and descaling.
prolongs the life of the appliance. Flashing: descaling is under
process.
SERVICE F. Empty system function is
– Any misuse or failure to follow the running.
instructions for use renders the G. ON/OFF button.
guarantee and the manufacturer’s H. Hot water button.
liability null and void. I. Strong coffee button.
J. Long coffee button.
Description Accessories
1 - External drip tray In the box, there are included:
2 - Internal drip tray - Packs of cleaning agents for the
3 - Coffee grounds container process of self-cleaning.
4 - Adjustable coffee spout - Cleaning cloth for control panel
5 - Control panel - Cleaning brush.
6 - Coffee beans container
7 - Coffee beans container cover
8 - Water tank
Machine Installation
9 - Brewer – Remove any protective films,
10 - Service door stickers and any other packing
11 - Power cord material on the appliance.EN
– Choose a safe and stable surface the appliance is preparing the cup of
with an easily reachable power coffee.
supply and allow minimum distance – When the appliance is back to
from the sides of the machine. standby mode, the coffee is ready
– Insert the external drip tray (1). It to serve.
has magnets to facilitate assembly.
– Make sure it is inserted correctly. AUTOMATIC CLEANING
– Fill the water tank with water (see DEACTIVATION
“FILLING THE WATER TANK”). – Open and remove the service door
– Fill the bean container with coffee (10) (See Fig 2 and 3)
bean (see “FILLING THE COFFEE – Press and hold the ON / OFF
BEAN CONTAINER”). button for a few seconds until 2
– Unwind and straighten the power “beeps”.
cord and insert the plug into the – That indicates that you have
socket located on the back of the disabled self-cleaning.
machine. Insert the other end of – To reactivate it, repeat operation,
the power cord into a wall socket until you hear 2 “beeps”.
with suitable power voltage. – Priming: If for any reason you find
some difficult for water to circulate,
proceed to prime the pump. To
Daily Operation do this, simply press the hot water
COFFEE icon (H) until a continuous stream of
– Switch on the appliance by water comes out.
pressing the ON / OFF button (G). TIP: The strong coffee button
– The appliance will be in standby (I), with higher coffee intensity,
mode. is recommended for espresso
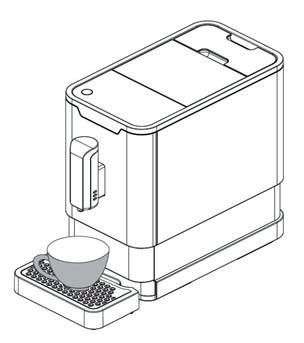
– Place a cup under the coffee spout coffee (both coffee buttons use
(4) and adjust the height of the approximately 9g of coffee). The
spout the fit the cup. volumes of the coffee buttons (I, J)
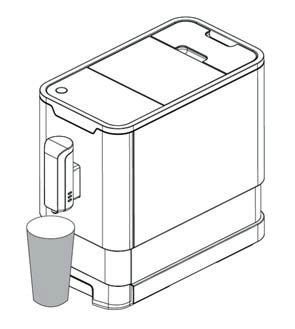
– Depending on the size of the can be adjusted (see Section OTHER
cup (too tall or too wide) you can CONFIGURATIONS / Volume of coffee
remove the drip tray (1) or adjust and water).
the position of the drip tray as
indicated in (Fig.1). FILLING THE WATER TANK
– Depending on the coffee flavor you – When icon (A) is flashing, the water
prefer, press the strong espresso tank is at a low water level and requires
button (I) or the long coffee button (J). filling.
– The espresso button pressed will – Take out the water tank using the
light on and stay on indicating that lid as a handle.EN
– Rinse the water tank with fresh water the machine will have different
and then fill the tank to the MAX level Auto-off times. (See OTHER
and place it back into the device. Make CONFIGURATIONS / MODE
sure it is fully inserted. SELECTION)
IMPORTANT: To prevent overflow of
water from the water tank, do not add
water directly into the appliance with
another container.
FURTHER SETTING
ADJUSTING THE VOLUME OF YOUR
FILLING THE BEAN CONTAINER COFFEE / HOT WATER
– When icon (B) is flashing, the – You can memorize your desired
appliance needs to be filled with volume of coffee for both strong
coffee bean. coffee and mild coffee and also the
– Remove the bean container lid. hot water from 25ml to 250ml.
– Slowly pour in the coffee beans. – When making your coffee (either
– Put the container lid back. strong coffee (I) or long coffee (J) or
IMPORTANT: Fill the coffee bean dispensing hot water (H), press, release
container with coffee beans only. and immediately hold the button you
Grounded coffee, instant coffee, sugary selected. The appliance will continue
roasted coffee and any other objects making the cup of coffee.
may damage the machine. – When the volume of coffee meets
your desired volume, release the
HOT WATER button. Two “beeps” indicates
– The appliance dispenses hot water that the volume of coffee is being
by simply pressing the hot water memorized.
button (H). When hot water button
lights up, it indicates that the GRINDING ADJUSTMENT
appliance is heating up the water. – You can adjust the grinder to
– When the hot water button turns suit the roast of your coffee by
off, the water is ready to serve. You turning adjuster knob in the bean
can always stop when you have container (Fig. 6).
enough water. – To adjust the grind size, you can
turn the adjustment knob, ALWAYS
ONCE THE USE OF THE APPLIANCE while the grinder is grinding the
IS COMPLETED: coffee. Never do the grinding
– Turn off the appliance by pressing adjustment when the grinder is
the ON / OFF button (G). not operating. It may damage the
– The appliance is equipped grinder.
with AUTO-OFF. Depending on – The dots on the adjuster knob indicate
the mode you have selected, the fineness of the grind.EN
ES
MODE SELECTION TO SELECT THE DESIRED MODE:
– The device has three different – When the machine is in standby
settings: default setting, ECO mode condition, press and hold the ON/OFF
and speed mode. In ECO mode, Button (G) for 5 seconds, and it will
the appliance helps to save more start to flash. The next buttons will give
energy. In speed mode, the user you the following indications:
can make their coffee faster than in
default setting. ECO Speed Default
– Below you will see a table with the mode mode mode
active functions of each Mode: Hot
water Lights Flas- Flas-
button ON hing hing
(H)
ECO Speed Default Strong
mode mode mode coffee Flas- Flas- Flas-
button (I) hing hing hing
Illumina- No Yes Yes
tion light Long
coffee Flas- Flas- Lights
Pre- Yes No Yes button (J) hing hing ON
brewing*
Auto shut 10min 30min 20min
off time – To change the mode, press the hot
water button (H) for ECO mode,
Cup strong espresso button (I) for speed
volumen Yes Yes Yes
memory mode and mild espresso button
(J) for default setting. Two “beeps”
*Note: What is Pre-brewing? The indicates that the mode is being
pre-brewing function moistens the selected.
grounded beans in the brewer with – If you want to keep the settings
a small amount of water before full without any change, press ON/
extraction. This expands the coffee OFF button again or wait for 5
grounds to build up a greater pressure seconds and the device will return
in the brewer which help extraction to standby mode.
of all the oils and full flavor from the
grounded beans.
Cleanign and
Maintenance
DAILY CLEANING
– Cleaning and maintenance of the
appliance are very important to
prolong its useful life.
– Remove the external drip tray (1).ESPAÑOL EN
ES
– Empty the water from the drip tray BREWING UNIT CLEANING
in the sink and wash it with fresh – Pull down the service door (10)
water. (Fig 2).
– Remove the internal drip tray (2) – Remove the service door (Fig 3).
and the coffee grounds container. – Press the brewer (9) release buttons
– Empty the coffee grounds (Fig 4).
container and wash it with fresh – Remove the brewer (9) (Fig 5).
water. – Wash the brewer with fresh water.
ATTENTION: Never remove the – Dry the brewer.
coffee grounds container to empty – Also take the opportunity to clean
it with the device at half cycle. the surroundings of the brewer.
That could happen to you when – Re-insert the brewer (9) in its
you run out of water in the middle original position and reinstall the
of making coffee. The machine is service door in its original position.
in the middle of the cycle, waiting – Place the coffe grounds container
for the tank refill to finish the (3) on the internal drip tray (2) and
cycle automatically. In that case, put it back to its original position.
you will not be able to remove it. – Place the external drip tray (1) in its
Never force it out because it could original position.
damage some components. If
you do it, it will be very difficult SELF-CLEANING
to put the complete set back in – When icon (E) light-up, it means
place. The machine will not work that the appliance needs to self-
because it does not detect the cleaning. The appliance will remain
grounds container. You can only in the best condition if this function
put it in without the internal drip is performed at least once a month
tray. Once the water tank is filled or more regularly depending on the
and the coffee grounds container hardness of water used.
is installed without the internal drip – Fully fill the water tank.
tray, the machine will continue with – Add one pack of cleaning
the cycle interrupted. Then, you agent included in the box to the
can put the grounds container + water tank.
inner tray back in and the machine IMPORTANT: Do not use vinegar
is ready for normal operation or another cleaning agent to do
again. self-cleaning of this appliance. The
cleaning agent might damage the
Note: When icon (C) is on, empty appliance.
the coffe grounds container is
necessary. – Place a large container under the
coffee spout.EN
ES
– In standby mode, press and hold EMPTY SYSTEM FUNCTION
ON/OFF Button (G) and strong – The empty system function
coffee button (I) at the same time, is recommended to be used
for 5 seconds. There will be a before long period of non-use,
“beep” sound and icon (E) and (I) frost protection and before any
will be flashing. reparation.
– Press strong coffee button (I) to – On standby mode, press and hold
confirm the self-cleaning process. the ON/OFF button (G) and the
– Icon (E) will be flashing, which mild coffee button (J) during 5
indicates that the appliance is seconds.
undergoing the self-cleaning – Empty system icon (F) will be
process. To resume back to the flashing.
standby mode, press ON/OFF – Remove the water tank from the
button (G). appliance. The empty system icon
– When all the water from the water (F) will turn on steadly, indicating
tank is being dispensed out, icon that the empty system process is
(A) and (I) will be flashing. Fill the running. You can press ON/OFF
tank with normal tap water until the (G) button before removing the
MAX position. water tank to return to the standby
– When water is filled into the water condition.
tank, icon (A) will turn off. Then, – When the empty system function
icon (I) and (E) will be light up is completed, the appliance will
continuously. Then, the appliance automatically turn off.
will continue with the descaling IMPORTANT: After performing
process, the appliance will brew EMPTY SYSTEM FUNCTION; when
half of water tank first and then you use the coffee machine again,
waiting for around 1min. After that press the hot water button (H) until
it will brew the outstanding water water come out from the spout.
from the water tank.
– When the self-cleaning process MANUAL RINSING
is completed, the appliance will – You can perform a manual rinsing
switch off automatically. cycle to clean the coffee nozzle
NOTE: To ensure the descaling after use. It is also suggested to
process can be completed, please perform a manual rinsing if the
be patient during the process and appliance has not been used for a
make sure the appliance switches long period of time.
off automatically – In standby condition, press and
hold the ON/OFF Button (G) and
hot water button (H) together.EN
– The hot water button (H) will be Anomalies and repair
keep flashing until the rinsing
process is finished. Take the appliance to an authorised
– After rinsing, the appliance will technical support service if product is
return to the standby mode. damaged or other problems arise. Do
CLEANING THE APPLIANCE not attempt to disassemble or repair
– Disconnect the power cord from the appliance yourself as this may be
the main power outlet. dangerous.
– Empty all the water from the
internal drip tray and external drip
tray.
– Use a damped cloth or non-
scratching cleaner to clean the
water stains on the appliance.
IMPORTANT: Do not use any
abrasive, vinegar or descaling
agents not included in the box to
clean the appliance.
CLEANING COFFEE POWDER
OUTLET
– Ground coffee can be sticked in
the wall of the powder outlet duct
to the coffee group after long-term
use. It is suggested to clean the
outlet following the duct to ensure
that the ground coffee can reach
the coffee maker.
– Push the service door recess area
(Fig 2)
– Take out the service door (Fig 3)
– Press the release knob of brewer
(Fig 4)
– Take the brewing unit out (Fig 5)
– Use Cleanness Brush (12) to clean
the powder outlet (Fig 7)EN
TROUBLESHOOTING
Problem Cause Solution
The appliance does not work. The appliance is not connected to Plug in and press the switch.
the mains. Check the cable and the plug.
No response in several trials of Appliance is under an Unplug the appliance. Restart
pressing on function key on the electromagnetic interference Dirt after few minutes. Clean the
panel. over the panel. panel with the cloth provided.
The coffee is not hot enough. The cups have not been Rinse the appliance at least 3
preheated. The brewing unit is times before making the coffee.
too cold.
The first cup of coffee is poor The first run of grinder does not Throw the coffee away. The
quality. pour sufficient quantity coffee other coffees will always be of
power into the brewing unit. good quality.
Coffee has no cream. Coffee bean is not fresh. Change or using appropriate
brand of coffee bean.
The touch buttons are not Not pressing the touch button Press the lower bottom part of
sensitive. from the front direction of the the icon of the touch button
appliance. from the front direction of the
appliance.
The appliance takes too long Excessive scale has built up. Descale the appliance.
time to warm up.
The water tank is removed / the The area near the water tank Wipe the water around the water
water level is very low in the connector is wet. tank connector.
Internal drip tray is filled with a Coffee powder too fine which Adjust the coffee fineness
lot of water. block the water to come out. to bigger dot during grinder
operation.
Coffee is delivered too slowly or a Coffee powder too fine which Adjust the coffee fineness
drop at a time. block the water to come out. to bigger dot during grinder
operation.
Lack of bean indicator (B) flashes Internal coffee powder outlet is To follow the steps of section
but there is still a lot of coffee blocked. (CLEANING COFFEE POWDER
bean inside the container (6). OUTLET).
You can’t putt he coffee You have removed the grounds Place the coffee grounds
grounds container and the container (3) at half cycle and now container (3) without the internal
machine does not work you can’t enter it. drip tray (2) so the machina
(keyboard with detects (3) and allows the
icons off) interrupted cycle to continue.
Then you can put the whole set
(2) + (3).ESPAÑOL EN
ES
For EU product versions Warranty and technical
and/or in case that assistance
is requested in your This product enjoys the recognition
country: and protection bof the legal
ECOLOGY AND RECYCLABILITY OF guarantee in accordance with
THE PRODUCT current legislation. To enforce
– The materials of which the your rights or interests you must
packaging of this appliance go to any of our official technical
consists are included in a assistance services.
collection, classification and You can find the closest one by
recycling system. Should you accessing the following web link: www.
wish to dispose of them, use the incapto.com.
appropriate public recycling bins You can also request related
for each type of material. information by contacting us.
– The product does not contain You can download this instruction
concentrations of substances that manual and its updates at www.
could be considered harmful to the incapto.com
environment.
- This symbol means that in
case you wish to dispose of
the product once its working
life has ended, take it to an
authorised waste agent for
the selective collection of
Waste from Electric and Electronic
Equipment (WEEE).
This appliance complies with
Directive 2014/35/EU on Low
Voltage, Directive 2014/30/EU on
Electromagnetic Compatibility,
Directive 2011/65/EU on the
restrictions of the use of certain
hazardous substances in electrical
and electronic equipment and
Directive 2009/125/EC on the
ecodesign requirements for
energy-related products.ESPAÑOL ES
Distinguido cliente: para el personal en
Le agradecemos que se haya decidido tiendas, oficinas y otros
por la compra de un producto de la marca entornos de trabajo.
Incapto.
Su tecnología, diseño y funcionalidad, 3. Antes del primer uso,
junto con el hecho de superar las limpiar todas las
más estrictas normas de calidad le partes del producto
comportarán total satisfacción durante que puedan estar
mucho tiempo. en contacto con
alimentos, procediendo
Consejos y advertencias tal como se indica en el
de seguridad apartado de limpieza.
1. Leer atentamente este 4. Este aparato pueden
folleto de instrucciones utilizarlo personas
antes de poner el con capacidades
aparato en marcha físicas, sensoriales o
y guardarlo para mentales reducidas o
posteriores consultas. falta de experiencia y
La no observación y conocimiento, si se les
cumplimiento de estas ha dado la supervisión
instrucciones pueden o formación apropiadas
comportar como respecto al uso del
resultado un accidente. aparato de una manera
segura y comprenden
2. Este aparato está los peligros que implica.
pensado únicamente
para un uso doméstico, 5. Este aparato no
no para uso profesional es un juguete. Los
o industrial. No está niños deben estar
pensado para ser bajo vigilancia para
usado por clientes en asegurar que no
entornos de hostelería jueguen con el aparato.
de tipo alojamiento
y desayuno, hoteles, 6. Este aparato no debe
moteles y otros ser usado por niños.
entornos de tipo Mantener el aparato
residencial, tampoco y su conexión de red
en casas rurales, zonas fuera del alcance de los
de cocina reservadas niños.ES
7. Desconectar el aparato eléctrico para levantar, transportar
y desenchufar la o desenchufar el aparato.
alimentación si se deja – No enrollar el cable eléctrico de
desatendido y antes de conexión alrededor del aparato.
cambiar los accesorios – No dejar que el cable eléctrico
o partes próximas que de conexión quede atrapado o
se mueven durante el arrugado.
uso, del montaje, del – No dejar que el cable eléctrico
desmontaje o de la de conexión quede en contacto
limpieza. con las superficies calientes del
aparato.
8. Si el cable de – Verificar el estado del cable
alimentación está eléctrico de conexión. Los cables
dañado, debe ser dañados o enredados aumentan el
substituido por el riesgo de choque eléctrico.
fabricante, por su – No tocar la clavija de conexión con
servicio postventa o por las manos mojadas.
personal cualificado – No utilizar el aparato con el cable
similar con el fin de eléctrico o la clavija dañada.
evitar un peligro. – Si alguna de las envolventes del
aparato se rompe, desconectar
9. No sumergir el aparato inmediatamente el aparato de la
en agua u otro líquido, red para evitar la posibilidad de
ni ponerlo bajo el grifo. sufrir un choque eléctrico.
– No utilizar el aparato si ha caído, si
– Antes de conectar el aparato a la hay señales visibles de daños, o si
red, verificar que el voltaje indicado existe fuga.
en la placa de características – No colocar el aparato sobre
coincide con el voltaje de red. superficies calientes tales como
– Conectar el aparato a una base placas de cocción, quemadores de
de toma de corriente provista de gas, hornos o similares.
toma de tierra y que soporte como – El aparato debe utilizarse y
mínimo 10 amperios. colocarse sobre una superficie
– La clavija del aparato debe plana y estable.
coincidir con la base eléctrica de la – No utilizar ni guardar el aparato a la
toma de corriente. Nunca modificar intemperie.
la clavija. No usar adaptadores de – No usar el aparato, en el caso de
clavija. personas insensibles al calor (ya
– No forzar el cable eléctrico de que el aparato tiene superficies
conexión. Nunca usar el cable calefactadas).ES
– No tocar las partes calefactadas SERVICIO
del aparato, ya que pueden Toda utilización inadecuada, o en
provocar quemaduras. desacuerdo con las instrucciones
de uso, puede comportar
UTILIZACIÓN Y CUIDADOS peligro, anulando la garantía y la
– No usar el aparato si sus accesorios responsabilidad del fabricante.
no están debidamente acoplados.
– No poner el aparato en marcha sin
agua. Descripción
– No usar el aparato si su dispositivo
de puesta en marcha/paro no 1 - Bandeja de residuos externa
funciona. 2 - Bandeja de residuos interna
– No mover el aparato mientras está 3 - Contenedor de posos de café
en uso. 4 - Salida de café ajustable
– Respetar la indicación de nivel MAX. 5 - Panel de control
– Desenchufar el aparato de la 6 - Contenedor de café en grano
red cuando no se use y antes de 7 - Tapa contenedor café en grano
realizar cualquier operación de 8 - Depósito de agua
limpieza. 9 - Grupo de café
– Desenchufar el aparato de la red 10 - Puerta de servicio
antes de rellenar el depósito de 11 - Cable de alimentación
agua. 12 - Cepillo de limpieza
– Guardar este aparato fuera
del alcance de los niños y/o
personas con capacidades físicas,
Panel de control
sensoriales o mentales reducidas o A. Parpadeante: nivel de agua bajo /
falta de experiencia y conocimiento falta el depósito de agua.
– No guardar el aparato si todavía B. Falta café en grano.
está caliente. C. Si se ilumina en continuo: el
– Utilizar el aparato solamente con contenedor de posos de café
agua. está lleno.
– Se recomienda el uso de agua Intermitente: falta la bandeja de
mineral embotellada apta para residuos interna / contenedor de
consumo humano. posos de café.
– No dejar nunca el aparato D. Se ilumina en continuo: falta el
conectado y sin vigilancia. Además, grupo de café / o está mal colocado.
ahorrará energía y prolongará la Intermitente: la puerta de
vida del aparato. servicio está abierta / instalada
incorrectamente.ES
E. Se ilumina en continuo: – Llene el contenedor de café en
requiere hacer descalcificación. grano con café (VER “LLENADO
Intermitente: la descalcificación DEL CONTENEDOR DE CAFÉ EN
está en proceso. GRANO).
F. La función Sistema Vacío se – Desenrolle y estire el cable de
está ejecutando. alimentación e inserte el enchufe
G. Botón ON/OFF. en la toma ubicada en la parte
H. Botón agua caliente. posterior de la máquina. Inserte
I. Botón café espresso. el otro extremo del cable de
J. Botón café largo. alimentación en un enchufe
de pared con el voltaje de
Accesorios alimentación adecuado.
En la caja, se incluyen:
- Paquetes de producto
descalficador para el proceso de
Operación diaria
autolimpieza. CAFÉ
- Paño para la limpieza del panel – Encienda el aparato presionando
de control. el botón de ON / OFF (G).
- Cepillo limpiador. – El aparato se sitúa en modo de
espera.
– Coloque una taza debajo de la
Instalación de salida de café (4) y ajuste la altura
la máquina de la salida para que encaje.
– Retire cualquier película – Dependiendo del tamaño del vaso
protectora, adhesivos y cualquier (demasiado alto o demasiado
otro material de embalaje del ancho), puede retirar la bandeja
aparato. de goteo (1) o ajustar la posición
– Elija una superficie segura y de la bandeja de goteo como se
estable con una fuente de muestra en (Fig 1).
alimentación de fácil acceso y – Dependiendo del sabor del café que
permita una distancia minima libre prefiera, presione el botón de café
a los lados de la máquina. fuerte (I) o el botón de café largo (J).
– Inserte la bandeja de goteo El botón de café que se presione se
externa (1). Lleva imanes para encenderá y se mantendrá encendido
facilitar montaje. Asegúrese de que indicando que el aparato está
esté acoplada correctamente. preparando la taza de café.
– Llene el depósito de agua – Cuando el aparato vuelve al modo
(consulte “LLENADO DEL DEPÓSITO de espera, el café está listo para
DE AGUA”). servir.ES
– Cebado: Si por cualquier motivo – Enjuague el depósito de agua con agua
encuentra dificultad para que circule el fresca y, luego llénelo al nivel máximo
agua, proceda al cebado de la bomba. y vuelva a colocarlo en la máquina.
Para ello, simplemente pulse el botón Asegúrese de que esté completamente
de agua caliente (H) hasta que salga un insertado.
chorro continuo de agua. IMPORTANTE: Para evitar
salpicaduras en las partes
DESACTIVACIÓN LIMPIEZA eléctricas, no agregue agua
AUTOMÁTICA directamente al aparato desde
– Como siempre puede hacer otro recipiente.
Limpieza Manualmente (Ver
ENJUAGUE MANUAL), si considera LLENADO CONTENEDOR DE
que la opción Autolimpieza es GRANO
molesta, puede anular esa función – Cuando el icono (B) parpadea,
de la siguiente manera: el aparato debe llenarse con café
– Abra y retire la Puerta de servicio en grano.
(10) (Ver Fig 2 y 3) – Retirar la tapa del contenedor de
– Mantenga pulsado el botón ON/ café en grano.
OFF durante unos segundos hasta – Vierta lentamente los granos de
oir 2 bips. café.
Eso indica que ha desactivado – Vuelva a colocar la tapa del
función autolimpieza. recipiente.
– Para volver a activarlo, repetir IMPORTANTE: Llene el contenedor
operación, hasta oir el doble bip. de café en grano con granos de
CONSEJO: El botón de café fuerte café solamente. Café molido, café
(I), con mayor intensidad de café se instantáneo, café torrefacto y cualquier
recomienda para café exprés (ambos otro objeto puede dañar la máquina.
modos de café usan +-9gr de café).
– Los volúmenes de los botones de café AGUA CALIENTE
(I, J) se pueden ajustar (consulte el – El aparato puede dispensar agua
Apartado OTRAS CONFIGURACIONES / caliente simplemente presionando
Volumen café y agua). el botón de agua caliente (H).
– Cuando el botón de agua caliente
LLENADO DEPÓSITO DE AGUA se enciende indica que el aparato
– Cuando el icono (A) parpadea, el está calentando el agua. Cuando
depósito de agua está en un nivel de el botón de agua caliente se
agua bajo y requiere llenarlo. apaga, el agua está lista para
– Levante el depósito de agua servir. Siempre puede parar
utilizando la tapa como asa. cuando tenga suficiente.ES
ES
UNA VEZ FINALIZADO EL USO DEL SIEMPRE mientras el molinillo está
APARATO: moliendo el café. Nunca haga la
– Apague el aparato presionando el regulación del molido cuando el
botón ON/OFF (G). molinillo no está funcionando. Puede
– El aparato está equipado con dañar el molinillo.
Auto-apagado. Dependiendo del – Los puntos sobre el mando de
modo que haya seleccionado la regulación indican el sentido de
máquina tendrá diferentes tiempos giro para obtener un molido más
de Autoapagado. (Ver OTRAS fino o más grueso.
CONFIGURACIONES/ SELECCIÓN
DE MODO) SELECCIÓN DE MODO
– La máquina tiene tres
configuraciones diferentes:
Otras configuraciones- configuración predeterminada,
AJUSTE DEL VOLUMEN DE CAFÉ /
AGUA CALIENTE modo ECO y modo rápido. En el
– Puede memorizar el volumen modo ECO, el aparato ayuda a
deseado de café para café ahorrar más energía. En el modo
espresso o café suave, y también rápido, el usuario puede hacer
agua caliente de 25 ml a 250 ml. su café más rápido que en la
– Para configurar la cantidad de configuración predeterminada.
líquido deseada, al preparar su café – Abajo verá un cuadro con las
(sea café fuerte (I) o café largo (J)) o funciones activas de cada Modo:
agua caliente (H), presione, suelte e
inmediatamente mantenga presionado
el botón correspondiente. El aparato
seguirá haciendo la taza de café.
– Cuando el volumen de café alcance
el volumen deseado, suelte el botón.
Se escucharán dos pitidos indicando
que el volumen de café se está
memorizando.
AJUSTE DE MOLIENDA
– Puede ajustar el molinillo para
adaptarlo al tostado de su café
girando el mando de regulación
del molido, situado en la tolva de
grano (Fig.6)
– Para regular el tamaño de molido,
puede girar el botón de ajuste,ES
Modo Modo Modo Modo Modo Modo
ECO rápido Predeter- ECO rápido Predeter-
minado minado
Ilumi- Icono Parpa-
nación No Si Si agua Luces Parpa-
salida ON dean- deando
caliente do
café (H)
Pre- Si No Si Icono
infusión* café Parpa- Parpa- Parpa-
espresso dean- dean- deando
(I) do do
Tiempo
auto- 10min 30min 20min
apagado Icono café Parpa- Parpa-
largo (J) Luces
dean- dean- ON
Memoria do do
volumen Si Si Si
taza
– Para cambiar el modo, presione el
*Nota: ¿Qué es la Preinfusión?: botón de agua caliente (H) para el
Cuando empieza a funcionar la modo ECO, el botón café espresso (I)
bomba, se produce un pequeño para el modo rápido y el botón de
paro. Durante el mismo, se café largo (J) para la configuración
humedece el café molido en el predeterminada. Se escucharán
grupo de café, con una pequeña dos pitidos que indican que se está
cantidad de agua antes de la seleccionando el modo.
extracción completa. Esto expande – Si desea mantener la configuración
ese café molido dentro del grupo sin cambios, presione (G) ON/OFF de
de café, con lo que aumenta la nuevo o espere 5 segundos para que
retención al paso del líquido, y la máquina vuelva a la condición de
aumenta la presión de trabajo, espera.
lo que ayuda a la extracción de
todos los aceites y el sabor total de
los granos molidos.
Limpieza y
mantenimiento
PARA SELECCIONAR EL MODO LIMPIEZA DIARIA
– Mientras la máquina está en modo – La limpieza y el mantenimiento del
de espera, presione y mantenga aparato son muy importantes para
presionado el botón ON/OFF (G) prolongar la vida útil del mismo.
durante 5 segundos, con lo que – Retire la bandeja de goteo externa
empezará a parpadear. Entonces (1).
soltar. Los siguientes botones – Vacíe el agua de la bandeja de
darán una serie de indicaciones. goteo en el fregadero y lávela con
agua fresca.ES
– Saque hacia afuera la bandeja de LIMPIEZA GRUPO CAFÉ
residuos interna (2) y el recipiente de – Presione la puerta de servicio (10)
posos de café (3). por debajo (Fig 2).
– Vaciar el recipiente de posos de – Saque la puerta de servicio (Fig 3).
café y lavarlo con agua fresca. Presione los botones de liberación
ATENCIÓN: Nunca saque el del grupo de café (9) (Fig 4).
contenedor de posos de café – Saque el grupo de café (9) (Fig 5).
para vaciarlo con la máquina a – Lave el grupo de café con agua
medio ciclo. Eso se le podría ocurrir corriente. A continuación, secar
hacerlo cuando se queda sin bien el grupo.
agua a mitad de hacer un café. – Aproveche también para limpiar los
La máquina queda a medio ciclo, alrededores del grupo de café.
esperando que vuelva a rellenar – Inserte nuevamente el grupo de
el depósito para acabar el ciclo café (9) en su posición original e
automáticamente. En ese caso, en instale nuevamente la puerta de
principio no podrá sacarlo. Nunca servicio en su posición original.
fuerce para sacarlo porque podría – Sitúe el contenedor de posos (3)
dañar algún componente. En caso en la bandeja interna de residuos
de hacerlo, le costará mucho volver (2) y vuelva a ponerla a su posición
a poner el conjunto completo en original.
su sitio. La máquina no funcionará – Coloque la bandeja de goteo
porque no detecta el contenedor externa (1) en su posición original.
de posos. Sólo podrá ponerlo sin la
bandeja de residuos interna. Una AUTOLIMPIEZA
vez relleno el depósito de agua – Cuando el icono (E) está
y puesto el contenedor de posos encendido, indica que el aparato
de café sin la bandeja de residuos debe someterse a autolimpieza.
interna, la máquina seguirá con – El aparato permanecerá en las
el ciclo interrumpido. Entonces mejores condiciones si esta función
puede volver a poner el conjunto se realiza al menos una vez al mes
contenedor de posos+bandeja o más regularmente, dependiendo
interna y la máquina estará de la dureza del agua utilizada.
otra vez lista para funcionar – Llene completamente el dipósito
normalmente. de agua.
Nota: Cuando el icono (C) esté – Incorpore un paquete del agente
encendido, deberá vaciar el limpiador incluido en el embalaje,
contenedor de posos de café. en el depósito de agua.
IMPORTANTE: No utilice vinagre
u otro agente de limpieza para
realizar la autolimpieza de esteES
aparato. El agente de limpieza NOTA: para asegurarse de que el
podría dañar el aparato. proceso de descalcificación pueda
– Coloque un recipiente completarse, tenga paciencia
suficientemente grande debajo de durante el proceso y asegúrese
la salida de café. de que el aparato se apague
– En modo de espera, mantenga automáticamente.
presionado ON/FF (G) y el botón
café espresso (I) a la vez durante FUNCIÓN SISTEMA VACÍO
5 segundos. Se oirá un sonido y – Se recomienda el uso de la Función
los iconos (E) y café espresso (I) Sistema Vacío antes de un período
parpadearán. largo sin uso, como protección
– Presione el botón café espresso contra heladas y antes de hablar
(I) para confirmar que empiece el con Servicio Técnico para una
processo de limpieza. reparación.
– El icono (E) seguirá parpadeando, – En estado de espera, presione y
lo que indica que el aparato está mantenga apretado el botón ON/OFF
realizando el proceso de limpieza (G) y el botón de café largo (J) juntos
automática. Para volver a la durante 5 segundos.
posición de espera, pulse botón – El Icono Sistema Vacío (F)
ON/ OFF (G). parpadeará.
– Cuando toda el agua del – Saque el depósito de agua del
depósito, haya sido dispensada, aparato. El icono sistema vacío (F)
los iconos (A) y café espresso (I) se se iluminará permanentemente,
mantendrán parpadeando. Llene indicando que el proceso de
el depósito de agua del grifo hasta Sistema vacío está en marcha.
la posición MAX. – Puede presionar el botón ON/OFF
– Cuando haya llenado y colocado (G) antes de retirar el depósito de
de nuevo el depósito, el icono (A) agua para volver a la condición de
se apagará. Entonces el icono (I) y espera.
(E) se encenderán continuamente. – Cuando se complete la Función
– Luego, el aparato continuará con de Sistema Vacío, el aparato se
el proceso de descalcificación, apagará automáticamente.
primero usará la mitad del IMPORTANTE: Después de realizar
depósito de agua, luego esperará la FUNCION SISTEMA VACÍO,
alrededor de 1 minuto, y continuará cuando vuelva a usar la cafetera,
hasta finalizar el agua restante del presione el botón de agua caliente
depósito de agua. (H) hasta que salga agua por la
– Cuando el limpiado automático boquilla.
acabe, el aparato se apagará
automáticamente.ESPAÑOL ES
ES
ENJUAGUE MANUAL prolongado. Se sugiere limpiar la
– Se puede realizar un ciclo de salida siguiendo el conducto para
enjuague manual para limpiar la asegurarse de que el café molido
salida de café después del uso. pueda llegar a la cafetera.
– También se sugiere realizar un – Presione sobre el área inferior de la
enjuague manual si el aparato no puerta de servicio (Fig 2)
se ha utilizado durante un largo – Saque la puerta de servicio (Fig 3)
período de tiempo. Presione los botones de liberación
– En posición de espera, presione y del grupo (Fig 4)
mantega presionado el botón ON/ – Saque el grupo de café (Fig 5)
OFF y el botón de agua caliente Utilice el cepillo de limpieza (12)
(H). para limpiar la salida de polvo (Fig
– El botón de agua caliente (H) 7).
seguirá parpadeando hasta que
finalice el proceso de enjuague.
– Después del enjuague, el aparato
Anomalías y reparación
volverá a la condición de espera. En caso de avería llevar el aparato
a un Servicio de Asistencia Técnica
LIMPIEZA DEL APARATO autorizado. No intente desmontarlo
– Desconecte el cable de o repararlo ya que puede existir
alimentación de la toma de peligro.
corriente.
– Vacíe las bandejas de goteo
interna y externa.
– Use un paño humedecido o un
limpiador que no raye, para
limpiar las manchas de agua en el
aparato.
IMPORTANTE: Nunca utilice
agentes abrasivos, vinagre o
desincrustantes que no estén
incluidos en la caja para limpiar el
aparato.
LIMPIEZA DE LA SALIDA DE CAFÉ
MOLIDO
– El café molido se puede pegar en
la pared del conducto de salida
del polvo hacia el grupo de café
después de usarlo por un períodoES
SOLUCIÓN DE PROBLEMAS
Problema Causa Solución
El aparato no funciona. El aparato no está conectado a la Enchufe y pulse el interruptor.
red eléctrica. Comprobar el cable y el enchufe.
No hay respuesta o se demora El aparato está bajo una interfe- Desenchufe el aparato. Reinicie
en varios intentos al presionar la rencia electromagnética. Suciedad después de unos minutos.
tecla de función en el panel. sobre el panel. Limpie el panel con el paño
suministrado.
El café no está lo suficientemente Las tazas no han sido precalenta- Enjuague el aparato al menos 3
caliente. das. La unidad de elaboración está veces antes de preparar el café.
demasiado fría.
El café no puede salir por la La función de sistema Presione el botón de agua
salida. vacío puede haberse usado. antes. caliente hasta que salga agua.
por el tubo.
La primera taza de café es de La primera molienda del molino, Tirar el café. Los siguientes cafés
mala calidad. no vierte suficientecantidad de serán de buena calidad.
café en la unidad de elaboración.
El café no tiene crema. El grano de café no Cambiar o utilizar la marca ade-
es fresco. cuada de grano de café.
Los botones táctiles no son No presiona el botón táctil desde Presione la parte inferior del
sensibles. la posición más frontal del aparato. icono del botón táctil desde la
posición frontal del dispositivo.
El aparato tarda demasiado Se ha acumulado exceso de cal. Proceda a descalcificar la
tiempo en calentarse. máquina.
Al retirar el depósito de agua, el El área cerca del conector del Limpie el agua alrededor del
nivel de agua es muy bajo pero depósito de agua está húmeda. conector del tanque de agua.
el Icono (A) no active la alerta.
La bandeja de goteo interna se Café está molido muy fino y blo- Ajuste la finura del café a un
llena con mucha agua. quea el agua para salir. punto más grueso durante la
operación de molienda.
El café sale demasiado lento o Café está molido muy fino y blo- Ajuste la finura del café a un
gota a gota. quea el agua para salir. punto más grande durante la
operación de molienda.
El indicador de falta de café (B) La salida interna de café molido Siga los pasos de la sección (LIM-
parpadea, pero todavía hay café está bloqueada. PIEZA DE LA SALIDA DE CAFÉ
en grano dentro del recipiente MOLIDO).
(6).
No puede poner el contenedor Ha sacado el contenedor de posos Ponga el contenedor de posos
de posos de café y la máquina (3) a medio ciclo y ahora no puede (3) sin la bandeja de residuos
no funciona (Teclado con Iconos entrarlo. interna (2) para que la máquina
apagados). detecte (3) y permita seguir con
el ciclo interrumpido. Luego po-
drá poner el conjunto completo
(2) + (3).ES
Para las versiones EU del aplicable a los productos
producto y/o en caso de relacionados con la energía.
que en su país aplique:
ECOLOGÍA Y RECICLABILIDAD DEL
PRODUCTO
Garantía y asistencia
Los materiales que constituyen técnica
el envase de este aparato, Este producto goza del reconocimiento
están integrados en un sistema y protección de la garantía legal
de recogida, clasificación y de conformidad con la legislación
reciclado de los mismos. Si desea vigente. Para hacer valer sus derechos
deshacerse de ellos, puede o intereses debe acudir a cualquiera de
utilizar los contenedores públicos nuestros servicios de asistencia técnica
apropiados para cada tipo de oficiales. Podrá encontrar el más
material. cercano accediendo al siguiente enlace
El producto está exento de web: www.incapto.com
concentraciones de sustancias También puede solicitar información
que se puedan considerar dañinas relacionada poniéndose en contacto
para el medio ambiente. con nosotros por el teléfono que
- Este símbolo significa aparece al final de este manual. Puede
que si desea deshacerse descargar este manual de instrucciones
del producto, una vez y sus actualizaciones en www.incapto.
transcurrida la vida del com
mismo, debe depositarlo
por los medios adecuados a
manos de un gestor de residuos
autorizado para la recogida
selectiva de Residuos de Aparatos
Eléctricos y Electrónicos (RAEE).
Este aparato cumple con
la Directiva 2014/35/EU de
Baja Tensión, con la Directiva
2014/30/EU de Compatibilidad
Electromagnética, con la Directiva
2011/65/EU sobre restricciones a
la utilización de determinadas
sustancias peligrosas en aparatos
eléctricos y electrónicos y con la
Directiva 2009/125/EC sobre los
requisitos de diseño ecológicoFRANÇAIS FR
ES
Cher client, », hôtels, motels et
Nous vous remercions d’avoir tout autre logement
acheté un produit Incapto. résidentiel, y compris
Sa technologie, son design et sa les gîtes ruraux ou les
fonctionnalité, outre sa parfaite aires de repos pour le
conformité aux normes de qualité personnel employé aux
les plus strictes, vous permettront magasins, bureaux et
d’en tirer une longue et autres milieux de travail.
durable satisfaction.
3. Avant la première
Conseils et avertissements utilisation, laver les
de sécurité parties en contact avec
les aliments comme
1. Lire attentivement cette indiqué à la section
notice d’instructions nettoyage.
avant de mettre
l’appareil en marche, 4. Cet appareil peut
et la conserver être utilisé par des
pour la con¬sulter personnes dont les
ultérieurement. Le capacités physiques,
non-respect de ces sensorielles ou
instructions peut être mentales sont réduites
source d’accident. ou des personnes
dénuées d’expérience
2. Cet appareil est con¬cernant son
uniquement destiné à utilisation, et ce,
un usage domes¬tique sous surveillance ou
et non professionnel ou après avoir reçu les
industriel. Cet appareil instructions pour un
a été exclusivement maniement sûr de
conçu dans le cadre l’appareil et ayant
d’un usage privé et non compris les risques
pas pour une utilisation possibles.
professionnelle ou
industrielle. Il n’a pas 6. Cet appareil n’est pas
été conçu pour être un jouet. Les enfants
utilisé par les hôtes doivent être surveillés
des¡ établissements pour s’assurer qu’ils
de logement tels que ne jouent pas avec
« bed and breakfasts l’appareil.ESPAÑOL FR
ES
7. Cet appareil ne doit prise de courant. Ne jamais modifier
pas être utilisé par des la prise de courant. Ne pas utiliser
enfants. Tenir l’appareil d’adaptateur de prise de courant.
et sa fiche hors de – Ne pas forcer le câble électrique
portée des enfants. de connexion. Ne jamais utiliser
le câble électrique pour lever,
8. Arrêter et débrancher transporter ou débrancher
l’appareil du réseau l’appareil.
électrique si vous – Ne pas enrouler le câble électrique
ne l’utilisez pas et de connexion autour de l’appareil.
avant de changer – Éviter que le câble électrique
tout accessoi¬re ou de connexion nese coince ou ne
élément mobile, ainsi s’emmêle.
que durant le montage, – Ne pas laisser le cordon d’alimentation
le démontage ou le entrer en contact avec les surfaces
nettoyage. chaudes de l’appareil.
– Vérifier l’état du câble électrique de
9. Si le cordon connexion. Les câbles endommagés
d’alimentation est ou emmêlés augmentent le risque
endommagé, il devra de choc électrique.
être remplacé par le – Ne pas toucher la prise de
fabricant, par un service raccordement avec les mains
après-vente ou par tout mouillées.
professionnel agréé afin – Ne pas utiliser l’appareil si son
d’écarter tout danger. câble électrique ou sa prise est
endommagé.
10. Ne pas immerger – Si une des enveloppes protectrices
l’appareil dans l’eau ou de l’appareil se rompt, débrancher
tout autre liquid, ni le immédiatement l’appareil du
passer sous un robinet. secteur pour éviter tout choc
électrique.
– Avant de brancher l’appareil au – Ne pas utiliser l’appareil s’il est
secteur, s’assurer que la tension tombé, s’il y a des signes visibles de
indiquée sur la plaque signalétique dommages ou en cas de fuite.
correspond à celle du secteur. – Ne pas placer l’appareil sur des
– Raccorder l’appareil à une prise surfaces chaudes, plaques de
pourvue d’une fiche de terre et cuisson, cuisinières à gaz, fours ou
supportant au moins 10 ampères. similaires.
– La prise de courant de l’appareil – L’appareil doit être utilisé et placé
doit coïncider avec la base de la sur une surface plane et stable.FR
ES
– Cet appareil n’est pas adéquat – Il est recommandé d’utiliser de l’eau
pour un usage à l’extérieur. minérale en bouteille propre à la
– Les personnes insensibles à la consommation.
chaleur doivent éviter d’utiliser cet – Ne laissez jamais l’appareil sans
appareil (puisque celui-ci présente surveillance lorsqu’il est branché.
des surfaces chauffantes). – Vous réduirez par la même occasion
– Éviter de toucher les parties la consommation d’énergie et
chauffantes de l’appareil, vous prolongerez la durée de vie de
pourriez gravement vous brûler. l’appareil.
– Il est recommandé d’utiliser de l’eau
UTILISATION ET PRÉCAUTIONS minérale en bouteille propre à la
– Ne pas utiliser l’appareil si consommation.
ses accessoires ne sont pas – Ne laissez jamais l’appareil sans
correctement assemblés. surveillance lorsqu’il est branché.
– Ne jamais mettre en marche – Vous réduirez par la même occasion
l’appareil sans eau. la consommation d’énergie et
– Ne pas utiliser l’appareil si son prolongerez la durée de vie de
dispositif de mise en marche/arrêt l’appareil.
ne fonctionne pas.
– Ne pas faire bouger l’appareil en ENTRETIEN
cours de fonctionnement – Toute utilisation inappropriée ou
– Respecter le niveau MAXIMUM. non conforme aux instructions
– Débrancher l’appareil du secteur d’utilisation annule la garantie et la
tant qu’il reste hors d’usage responsabilité du fabricant.
et avant de procéder à toute
opération de nettoyage. Description
– Débrancher l’appareil du réseau 1 - Plateau à residus externe
électrique, avant de remplir le 2 - Plateau à residus interne
réservoir d’eau. 3 - Bac à marc de café
– Conserver cet appareil hors 4 - Sortie de café réglable
de portée des enfants ou des 5 - Panneau de commande
personnes avec capacités 6 - Bac à grains de café
physiques, sensorielles ou mentales 7 - Couvercle bac à grains de café
réduites ou présentant un manque 8 - Réservoir d’eau
d’expérience et de connaissances. 9 - Groupe café
– Ne pas garder l’appareil s’il est 10 - Porte de service
encore chaud. 11 - Cáble d’alimentation
– N’utiliser l’appareil qu’avec de l’eau. 12 - Brosse de nettoyageYou can also read