Home Vegetable Gardening in Kentucky
←
→
Page content transcription
If your browser does not render page correctly, please read the page content below
University of Kentucky
ID-128                                                                                                                         College of Agriculture,
                                                                                                                               Food and Environment

Home Vegetable
                                                                                                                               Cooperative Extension Service

Gardening in Kentucky

Cooperative Extension Service | Agriculture and Natural Resources | Family and Consumer Sciences | 4-H Youth Development | Community and Economic Development
Contents
Plans and Preparations
Before You Begin....................................................................3
Planning Your Garden .........................................................3
Choosing a Site ......................................................................3
Organic Gardening................................................................3
Preparing the Soil ..................................................................4
Preparing a New Garden Site ............................................6
Crop Rotation .........................................................................7
Pest Control..............................................................................7
Planting
General Considerations.......................................................8
Transplants...............................................................................8
Growing More with Less Space
Intensive Gardening ...........................................................11
Container Gardening......................................................... 12
Mini‑Gardens ....................................................................... 12
One Garden Plot: Three Garden Seasons
The Spring Garden ............................................................. 14
The Summer Garden ......................................................... 14
The Fall Garden ................................................................... 15
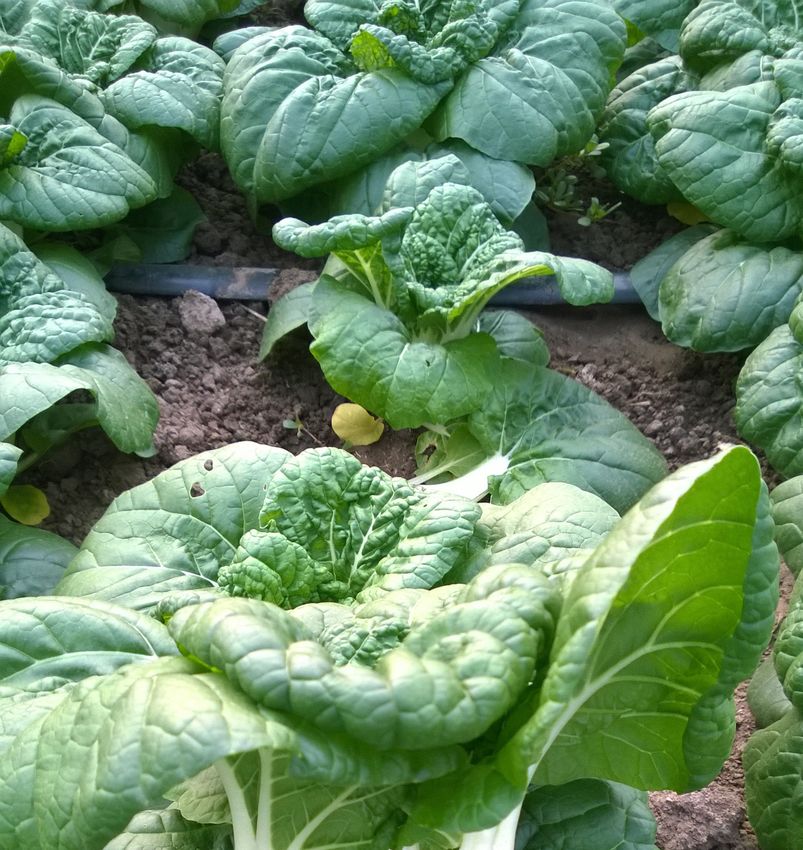
Front cover: Chinese cabbage ‘Pak Choi Asian Delight’ is a Extending the Growing Season .................................... 15
2018 Vegetable Award Winner from All-America Selections.
Chinese cabbage is a leafy vegetable that can be added to Caring for Your Vegetables
salads when picked young or added to stir fry or steamed During the Growing Season
when mature. ‘Pak Choi Asian Delight’ matures quickly in the
garden but is slower to bolt than other cultivars of Chinese Irrigating .................................................................................17
cabbage so extended harvest can be realized. In Kentucky, Mulching ............................................................................... 19
Chinese cabbage can be planted in either spring or fall but Fertilizing .............................................................................. 20
does best as a fall vegetable when planted in late summer. Compost................................................................................. 20
The flavor is more intense when harvested after a light frost. Cover Crops Protect Garden Plots ............................... 21
For more information about this and other AAS Vegetable
Winners visit the AAS web site at: www.all-americaselections. Diseases, Insects and Weeds
org. Disease Control ................................................................... 22
Insect Control....................................................................... 24
Weed Control ....................................................................... 28
Storing Vegetables ......................................................................... 29
What You Should Know about
Asparagus through Watermelons
Asparagus ............................................................................. 30
Beans........................................................................................ 31
Beets, Broccoli, Brussels Sprouts................................... 32
Cabbage, Carrots, Cauliflower........................................ 33
Chinese Cabbage, Collards, Cucumber....................... 34
Eggplant, Garlic, Kale, Leeks........................................... 35
Lettuce, Muskmelons, Mustard Greens...................... 36
Okra, Onions, Parsnips...................................................... 37
Peas, Peppers, Potatoes.................................................... 38
Pumpkins............................................................................... 39
Radishes, Rhubarb, Southern Peas, Spinach............. 40
Squash, Sweet Corn............................................................ 41
Sweet Potatoes, Swiss Chard, Tomatoes.................... 42
Turnips, Watermelons........................................................44Acknowledgments
Contributors to this publication:
Richard Durham
Department of Horticulture, Editor
John Strang
Mark Williams
Shawn Wright
Department of Horticulture
Ric Bessin
Department of Entomology
Brad Lee
Department of Plant and Soil Sciences
Emily Pfeufer
Department of Plant Pathology
For further information on home vegetable gardening, contact
Richard Durham, Department of Horticulture, University of Kentucky.
Mention or display of a trademark, proprietary product or firm in text or fig-
ures does not constitute an endorsement and does not imply approval to the
exclusion of other suitable products or firms.Plans and Preparations
Before You Begin tles because of lack of air drainage, are slow to warm up in the
spring. High ground will enable the vegetables to escape “border‑
Every aspiring gardener should follow seven steps to have a suc‑
line” freezes for an earlier start in the spring and longer harvest in
cessful gardening season:
the fall.
1. Plan your garden on paper before you begin.
If possible, choose an area with a southern or southeastern exposure
2. Select a good gardening site that is:
which warms up faster in the spring and receives the maximum
a. in full sun for at least eight hours each day,
amount of sunlight throughout the growing season. Midsummer
b. relatively level,
vegetables, other than lettuce, should not be located on the north
c. well‑drained,
side of a building or on a northern slope of a hillside.
d. close to a water source,
Plant your vegetables away from buildings, trees and other objects which
e. dries quickly from morning dew.
would shade them. Your plants need at least eight hours of direct
3. Prepare the soil properly, conduct a soil test, and add fertilizer
sunlight each day. You can grow lettuce in the shade if you must
and lime according to U.K. test result recommendations.
locate part of your garden in a partially shaded area.
4. Plan only as large a garden as you can easily maintain. Begin‑
Your garden needs water from rainfall or other sources. However, too
ning gardeners often overplant, and then they fail because they
much water can be just as damaging as too little.
cannot keep up with the tasks required. Weeds and pests must
• Examine your garden site to see how it drains and avoid areas
be managed, water applied when needed and harvesting done
that stay soggy after a rain. To evaluate how your site drains, dig
on time.
a small diameter hole to a depth of two feet and look for grey
5. Grow vegetables that will produce the maximum amount of
colors in the soil. These grey colors indicate that the soil is poor‑
food in the space available.
ly drained. Consider moving the garden to a different area or in‑
6. Plant during the correct season for the crop.
stalling raised beds.
7. Choose varieties recommended for Kentucky.
• Avoid heavy clay soils in favor of loamy soil.
8. Harvest vegetables at their proper stage of maturity. Store them
• Improve sandy soils by adding large amounts of organic matter.
promptly and properly if you do not use them immediately.
Adding organic matter can often solve minor drainage prob‑
lems; however, if the poor drainage is caused by underlying
Planning Your Garden layers of rock or hard clay (hardpan), correcting the drainage
A garden plan helps you grow the greatest amount of produce could involve the labor and expense of subsoiling with an exca‑
with the least amount of effort. To use your plan you must expect vator, laying tile or of building raised beds.
to harvest each crop as soon as it matures. Then put old plants • Locate your garden away from trees as much as possible. Tree
in the compost pile and plant a new crop. This approach is called roots can compete with your vegetables for water and nutri‑
succession planting. ents.
Grow only those vegetables that your family will eat. A • Look for a site which supports lush vegetative growth, even if
well‑planned and properly kept garden should produce 600 to it is dark green, sturdy weeds. Although you can improve poor
700 pounds of produce per 1000 square feet and may include ma‑ soil over a period of years, you can save much time and work if
ny different crops. Consult Vegetable Cultivars for Kentucky Gar- you begin with naturally rich soil.
dens (ID-133) for the latest recommendations on home vegeta‑ • Make sure to use contour rows or terraces for hillside gardens.
ble varieties. • Avoid windy locations.
Draw a scale model of your garden space when planning where
to plant. There are also a number of computer programs that can Finally, the closer the vegetable garden is to your back door, the more you
be used to plan your garden. Plant perennials like asparagus, rhu‑ will use it. You can see when your crops are at their peaks and can
barb, chives and horseradish along one side of the garden since take maximum advantage of their freshness. Also, keeping up
they may produce for six to 12 years. Tall plants such as sweet with planting, weeding, watering and pest control will be easier.
corn, tomatoes and pole beans should be planted on the north or
west side of the garden where they will not shade smaller vegeta‑ Organic Gardening
ble crops. However, summer lettuce should be grown in a partial‑
In 1990 Congress passed the Organic Foods Production Act,
ly shaded area if possible.
which mandated the creation of the National Organic Program
(NOP) and the passage of uniform organic standards. This ac‑
Choosing a Site tion was followed by over a decade of public input and discus‑
Your garden site should provide a sunny exposure, adequate sion, which resulted in a National Organic Program final rule im‑
moisture and fertile soil. Because of your property’s limitations, plemented in October 2002. These national standards set out the
however, you may be forced to select a less than ideal location. methods, practices and substances used in producing and han‑
As much as possible, let the following suggestions guide you in dling all certified organic crops and livestock. The standards in‑
choosing your garden site: clude a national list of approved non-synthetic and prohibited
Avoid putting the garden in a low spot, at the bottom of a hill or at the synthetic substances for organic production.
foot of a slope bordered by a solid fence. Such areas, where frost set‑
3Organic production is based on a system of farm‑ Figure 1. Garden plan for a family of four—layout and planting dates
(ensure 2.5 feet between rows if using a rototiller for cultivation).
ing that maintains and replenishes soil fertility without
the use of toxic and persistent pesticides and fertilizers.
Organically produced foods also must be produced
without the use of antibiotics, synthetic hormones, ge‑
netic engineering and other excluded practices, sew‑
age sludge, or irradiation. National organic standards
require that organic growers and handlers be certified
by third-party state or private agencies or other organi‑
zations that are accredited by USDA.
Home gardeners will have no need to concern them‑
selves with the many rules and requirements that go
along with organic certification. However gardening
organically in your home garden in Kentucky is just
as easy as gardening using “conventional” techniques
and inputs once you master some simple management
practices like scouting your garden often to watch
for pest or disease problems, choosing plant varieties
that will thrive under organic management, and pay‑
ing close attention to soil management by adding or‑
ganic matter to your garden, using compost, practicing
crop rotation, and utilizing cover crops. Throughout
this guide, organic alternatives to certain convention‑
al practices or inputs are included to give gardeners a
choice in how they raise vegetables.
Preparing the Soil
An ideal garden soil has a 10‑ to 12‑inch loamy sur‑
face layer overlying a well‑drained subsoil. This type of
soil can retain large amounts of water but still drains
well after a rain. After spring preparation, it stays crum‑
bly and workable without becoming hard and crusted.
It should have enough minerals for optimum growth,
and the pH should be between 6.2 and 6.8.
Few sites available for the home vegetable garden
will match the ideal in all respects. However, most
soils can be modified to provide more favorable grow‑
ing conditions. Soil improvement is really a long‑term
process, often taking several years. The poorer the soil,
the longer it will take to get optimum production from
it. However, vegetable crops will tolerate variable soil
conditions and still produce fairly well.
After a fertile garden is established, continue Code: 1 = First planting (March 15); 2 = Second planting (June 15); 3 = Third planting (Aug. 15)
amending the soil so that it will stay fertile and work‑
able. Since most gardens must be in the same location year after Repeat the procedure in different spots to get a representative
year, building up a rich soil is essential. sample of the whole garden and to get about 1 pint of soil. Mix the
The Soil Test composite sample well and put it on some paper to dry for about
After deciding on your garden site, take a soil sample and have two days at room temperature. Then take it to your county Exten‑
it tested, preferably in October or November. Use the soil test as a sion office to submit for analysis. The cost of the soil test, which
guide as you try to establish a satisfactory fertility level. The stan‑ varies with the number of elements tested, will be returned to you
dard test measures soil acidity (pH), available phosphorus, potas‑ many times over in savings of fertilizer and in the production of
sium and, if requested, calcium, magnesium and zinc. The test re‑ high yields and quality produce.
sults help determine fertilizer and lime requirements. Soil pH—Why Is It Important?
To take a soil sample, push a spade 7 inches into the soil and The term pH stands for the relationship of hydrogen ions (H+)
throw the soil aside. Take another 1‑inch slice of soil from the to hydroxyl ions (OH‑). A soil pH reading indicates on a loga‑
back of the hole the full depth of the hole. Remove all the soil but rithmic scale the concentration of ions held to soil particles and
the center 1‑ to 2‑inch‑wide core. Place this core of soil in a clean organic matter. A pH scale ranges from 0 to 14, with pH 7.0 be‑
bucket (Figure 2). ing neutral. Readings below 7.0 indicate a soil is “acid,” and read‑
4ings above 7.0 indicate “alkaline” soil con‑ Figure 2. Taking a soil sample. Figure 3. Effect of change in pH on the avail-
ability of plant nutrients.
ditions. Most of the plants we grow in our
home gardens require a soil which is slight‑
ly acid.
The soil’s pH is very important because
it directly affects soil nutrient availability
(Figure 3). Plant roots can only absorb nu‑
trients after they have been broken down
into certain ion forms. Only at certain pH
ranges can sufficient amounts of these nu‑
trients be broken into these ion forms.
When the soil’s pH is out of this range, the
nutrients are “tied up in the soil.” By adjust‑
ing the pH, we make sure that the plants
we grow can use the fertilizers and avail‑
able nutrients in the soil to their fullest po‑
tential. Most vegetables in a garden prefer
growing in soil with a pH between 6.2 and
6.8.
Autumn is an excellent time to have
your soil tested. You can then make any ad‑
justments of pH needed with limestone or
sulfur applications. Also, getting test re‑
sults in the fall helps you plan your fertil‑
izing needs for the coming year’s garden.
Contact your Cooperative Extension of‑
fice about soil testing.
Adjusting pH
If soil test results indicate that your Table 1. Rate (lb/1000 sq ft)1 of Agricultural Limestone Needed to Raise Soil pH to 6.4.
Water pH Buffer pH of Sample If Buffer pH
soil’s pH falls out of the ideal range of 6.2 of Sample 5.5 5.7 5.9 6.1 6.3 6.5 6.7 6.9 is Unknown
to 6.8, you may need to add lime or sul‑ 4.5 320 300 280 250 220 180 150 130 180
fur, depending on your soil’s pH value. If 4.7 320 300 280 240 200 170 140 120 170
the pH is too low, then your soil is too ac‑ 4.9 310 290 260 230 190 150 130 110 160
id and you should either add calcitic or do‑ 5.1 310 290 260 220 180 130 100 80 150
lomitic limestone (Table 1). If the pH val‑ 5.3 300 280 240 210 160 120 90 70 130
5.5 290 270 230 190 140 100 70 60 120
ue is too high, your soil is too alkaline and 5.7 280 260 220 170 120 90 60 50 100
you need to add sulfur (Table 2). Applying 5.9 ‑‑‑ 240 200 150 100 80 50 40 80
lime or sulfur in the fall before planting is 6.1 ‑‑‑ ‑‑‑ 180 120 80 60 40 40 60
best because you have a longer soil reac‑ 6.3 ‑‑‑ ‑‑‑ ‑‑‑ 90 60 40 40 30 40
tion time. Lime rates shown in Table 1 are 1 See AGR‑1 for limestone rates needed expressed in Tons/Acre.
in terms of agricultural limestone. By regu‑
lation in Kentucky, aglime must have a pu‑ Table 2. Suggested Application of Ordinary Powdered Sulfur to Reduce the pH of an 8‑Inch Layer
rity equivalent to 80% or higher pure cal‑ of Soil, as Indicated in pt/100 sq ft.1
cium carbonate. It must be ground fine‑ Original Pints of sulfur for 100 sq ft to reach pH of
ly enough so that 90% will pass through a pHof 4.5 5.0 5.5 6.0 6.5
Soil2 Sand Loam Sand Loam Sand Loam Sand Loam Sand Loam
10‑mesh screen and 35% will pass through 5.0 2/3 2 ‑‑‑ ‑‑‑ ‑‑‑ ‑‑‑ ‑‑‑ ‑‑‑ ‑‑‑ ‑‑‑
a screen size of 50‑mesh. The purity (% cal‑ 5.5 1 1/3 4 2/3 2 ‑‑‑ ‑‑‑ ‑‑‑ ‑‑‑ ‑‑‑ ‑‑‑
cium carbonate equivalent) is an index of 6.0 2 5 1/2 1 1/3 4 2/3 2 ‑‑‑ ‑‑‑ ‑‑‑ ‑‑‑
the amount of active ingredient per unit 6.5 2 1/2 8 2 5 1/2 1 1/3 4 2/3 2 ‑‑‑ ‑‑‑
weight, while particle size of the liming 7.0 3 10 2 1/2 8 2 5 1/2 1 1/3 4 2/3 2
1 Although aluminum sulfate often is recommended to gardeners for increasing the acidity of the soil,
material is an index of how rapidly the ma‑
it has a toxic salt effect on plants if it is used in large amounts. Small amounts are not very effective.
terial will dissolve when mixed with soil. About seven pounds of aluminum sulfate are required to accomplish the same effects as one pound
The more finely ground the liming materi‑ of sulfur.
2 Based on water pH value.
al, the faster it dissolves.
Use of Wood Ashes hardwoods, such as maple, elm, oak and beech, contains about
Wood ashes have some use as a liming material, although they one‑third more calcium mainly as the oxide, but, on exposure to
are relatively scarce. Their rather low neutralizing value rang‑ moisture, they are largely in the carbonate form by the time they
es from 30% to 70%, expressed as calcium carbonate. The ash of are applied to soil.
5Coal ash has little or no liming value. Do not use it on garden lowed in organic systems, it is far preferable to properly compost
soils because it contains a fairly high concentration of heavy met‑ the manure before using it as a soil amendment or fertilizer source.
als and other toxic compounds which may be taken up by the
Commercial Fertilizers
plants.
A continuous supply of nutrients is important for producing
For organic gardeners, only powdered or prilled elemental sul‑
high yields of quality vegetables. Commercial fertilizers are a con‑
fur can be used for lowering pH, while aluminum sulfate, a syn‑
venient and economical way of supplying these nutrients. How‑
thetic product, is not allowed. Powdered sulfur should take at
ever, they must be used properly since plants can be damaged by
least one year to oxidize and reduce soil pH, and prilled sulfur will
their improper application or excessive use.
take slightly longer. Organic growers should be conservative in the
Any fertilizer’s value can be determined by its analysis in per‑
application of soil sulfur by splitting the total application between
centage of nitrogen, phosphorus and potassium. Applying fertil‑
the fall and spring as sulfur has both fungicidal and insecticidal
izer according to soil test results allows less chance of under‑ or
action and can detrimentally affect soil biology if overused. Or‑
overfertilization (Table 3).
ganic gardeners can use any type of agricultural limestone to in‑
crease pH.
Table 3. Phosphate, potash, and nitrogen.
Preparing a New Garden Site Soil Test Level
Fertilizer (lb/1000 sq ft)
P205 K 20
As soon as the soil is workable in the spring, turn over the sod High (above 60 P, 300 K) 0 0‑1
of a new garden site by plowing, rototilling or hand spading. Pre‑ Medium (60 ‑ 30 P, 300 ‑ 200 K) 1‑2 1‑2
pare the soil at least 8 inches deep. Increase this depth each year Low (below 30 P, 200 K) 3‑5 3‑5
until you reach 10 to 12 inches. Do not work the soil when it is Nitrogen: For a continuously cropped garden where little or no
organic matter has been added, apply 2 lb of actual N/1000 sq ft before
very wet because you can damage its structure by compacting it. planting. Following heavy grass sod, apply 3 lb of actual N/1000 sq
If the soil crumbles readily rather than sticking together, you can ft before plowing. Where heavy applications of barnyard manure or
proceed safely. compost have been added, apply no nitrogen.
Continue to work the plot until the coarse, lumpy texture is re‑
placed with a fine, granular one suitable for a seedbed. Do not
overwork the soil to a powdery fine condition which will cause Sometimes simple calculations must be made to determine
surface crusting. After you have appropriately tilled the soil, add how much fertilizer to add to a garden. These examples use com‑
organic material and fertilizer as recommended. plete fertilizers. If your soil test indicates only a need for nitrogen,
If you want raised beds, throw the soil from the paths into 3‑ use a high nitrogen fertilizer such as 44-0-0 or 33-0-0 instead of a
to 4‑foot‑wide beds after adding organic matter and the recom‑ complete fertilizer such as 5-10-10 or 12-12-12 which will supply
mended fertilizer. This extra soil plus the added organic matter more nutrients that you actually need in the garden. Follow these
will raise the beds a few inches higher. If you like, boards or stones steps:
can hold the soil in place. For the last preparation step, rake the
soil surface smooth and lay off rows. Now you are ready to plant Step 1: Determine the amount of nitrogen needed for your garden.
garden size (sq ft)
seeds or set transplants. ÷ 1,000
x 2
Organic Matter = lb actual N needed
Add organic matter to the soil each spring and fall. You can also
add it as mulch during the growing season and as a green manure Example 1a: The size of your garden is 800 sq ft.
(800 ÷ 1,000) x 2
or cover crop during or after the growing season. Adding organic = 1.6 lb actual N needed
matter is the most beneficial treatment for improving and main‑
taining your garden soil. It loosens and improves the drainage and Example 1b: The size of your garden is 1,475 sq ft.
aeration of heavy clay soils while increasing the moisture‑holding (1,475 ÷ 1,000) x 2
= 2.95 lb actual N needed
ability of very light, sandy soils.
Besides helping the soil structurally, organic matter favors a Step 2: Determine the amount of fertilizer needed to supply the nitro-
buildup of organisms which in turn helps make available nutrients gen calculated above.
lb actual N needed
that were previously held in the soil in unusable forms. The organ‑ ÷ % N available in the fertilizer
ic matter itself provides nitrogen and other nutrients as it decays. = lb of fertilizer needed
The type of organic matter you should add will depend on what
Example 2a: The size of your garden is 800 sq ft, so you need to
materials are most available. Some sources are manure, compos‑ apply 1.6 lb N. The 5-10-10 fertilizer you intend to use contains
ted leaf mold, grass clippings and pine bark humus. Caution: Do 5% actual N. Convert 5% to 0.05, and plug in the numbers:
not apply fresh manure with a high nitrogen content in the spring. 1.6 ÷ 0.05
= 32 lb of 5-10-10 needed
Rabbit, chicken and sheep manure should be applied in the fall or
composted before they are used on the garden. Fresh manure may Example 2b: The size of your garden is 1,475 sq ft, so you need
also contain bacteria that are harmful to humans. to apply 2.95 lb N. The 12-12-12 fertilizer you intend to use
Use of manure in organic systems is allowed with major limita‑ contains 12% actual N. Convert 12% to 0.12, and plug in the
numbers:
tions. Raw manure must always be incorporated into the soil im‑ 2.95 ÷ 0.12
mediately following application and it must be applied 120 days = 24.5 lb of 12-12-12 needed
before harvest for all crops. Though the use of raw manure is al‑
6Apply the recommended amounts of fertilizer in the spring. • carrots, parsley, celery, celeriac, parsnip
Spread the fertilizer evenly over the garden area before plowing • potatoes, eggplant, tomatoes, peppers
or spading, or after plowing and before rototilling or hoeing in • pumpkins, squash, watermelons, cucumbers, muskmelons
preparation for planting. • endive, salsify, lettuce
If you did not have your soil tested (i.e., if you have a very limit‑
In addition, root and bulb crops are susceptible to many of the
ed garden area), the following amounts may be applied:
same soil pests so try to rotate these every year.
• small garden: 4 lb 33-0-0 or 3 lb 44-0-0/1,000 sq ft
• smaller garden: 0.4 lbs (~1/2 cup) 33-0-0 or 3 lb (1/4 cup) 44-
0-0/100 sq ft Pest Control
The goal of many home gardeners is to apply few or no pesti‑
For container gardens use a complete fertilizer (5-10-10 or 10- cides. This philosophy often results in unacceptable harvests be‑
10-10) at a rate of 1 oz/bushel (or 2 Tbs/bushel). cause the gardener is often faced with a dilemma of either ap‑
This is a modest recommendation and assumes the presence plying pesticides or experiencing a significant or total crop loss.
of some available nitrogen in the soil for plant growth. If you use While it is difficult to achieve consistent harvests from your gar‑
the same soil or area the next year, you should have the soil test‑ den without some strategy for pest control, the following princi‑
ed to prevent under‑ or over-fertilization. ples may help you use pesticides more sparingly and still achieve
Organic Fertilizers acceptable results.
Commercial organic fertilizers are just as effective as conven‑ Pest-resistant crops—Cultivars of some vegetable crops are ge‑
tional fertilizers in supplying necessary plant nutrients though netically resistant to certain pests. By choosing these cultivars,
they are often more expensive, harder to find and often act more the gardener increases their chances of avoiding problems with
slowly than commercial fertilizers. The preferred manner for specific pests. An extensive list of vegetable cultivars, including
certified organic growers to address plant nutrition is to start information regarding their genetic resistance to specific pests,
with a soil management plan that includes the extensive use of can be found in ID-133, Vegetable Cultivars for Kentucky Gar-
compost, crop rotation and cover cropping (see pages 20-21). dens (http://www2.ca.uky.edu/agc/pubs/id/id133/id133.pdf ).
Once the nutrient contributions of applied compost and turned The gardener should be aware that there are no “super” cultivars
in cover crops are calculated, then commercial organic fertiliz‑ able to resist all known pests and that some pest control may
ers, preferably from a local source, could be used to “fill the gap” still be needed to ensure a harvest. But using resistant cultivars
between what has been provided and what a future crop may should lessen the need for pesticides.
need. Spacing and sun exposure—Avoid crowding plants together in the
There are many classes of organic fertilizers ranging from con‑ garden. Crowded plants grow poorly and may become more sus‑
centrated plant material (alfalfa meal, soybean meal), animal ceptible to pests. There is also less air movement through crowd‑
slaughter by-products (blood meal, bone meal), fish by-prod‑ ed plants that may result in increased problems with disease.
ucts (liquid fish emulsion), concentrated animal manures (bird Garden plants are generally adapted to growth in full sun. Try‑
guano), rock minerals, and many micro-nutrient sources. The ing to garden in a shady backyard may result in weak, unproduc‑
majority of organic fertilizers are not as soluble in water as con‑ tive plants that are more susceptible to pests. Try to ensure that
ventional fertilizers, and thus are not as immediately available your garden receives at least six hours of direct sunlight each day.
for plant uptake. Instead, microorganisms found in the soil must Cultural practices—Make sure plants have adequate water and
break down or decompose the organic fertilizer before it be‑ nutrition. Both over- and under-watering or fertilizing plants
comes completely available to plants. The use of the word “or‑ may enhance pest problems. Proper watering and fertilizing
ganic” on a fertilizer label does not always mean the fertilizer is techniques were covered in the first part of this publication. Al‑
allowed for certified organic growing purposes due to differing so ensure that you clean up the garden once a crop has finished
state and federal regulations relating to the use of the word “or‑ or the season had ended. Many pests overwinter or continue
ganic.” Only fertilizer labels that include the words “certified or‑ their lifecycles on residue from the previous crop. Destroy or
ganic” or those fertilizers tested and labeled by the Organic Ma- thoroughly compost (better to destroy if a pest infestation is evi‑
terials Review Institute (OMRI) are truly allowed for use on a dent) crop residue once harvest is complete. Also consider rotat‑
certified organic farm or garden. ing crops that may be susceptible to soil-borne pests—see “Crop
Rotation” on this page.
Crop Rotation Scout for problems—Spy before you spray! Most home garden‑
ers are keenly aware of what’s going on in their gardens. As you
As you continue your vegetable garden from year to year, try
check germination of newly planted seeds, monitor develop‑
to avoid planting the same or closely related crops in exactly the
ment of vegetables, and harvest ripe fruit, look for problems. If
same spot more than once every three years. Rotation helps pre‑
you do see problems, are you confident in your ability to diag‑
vent insect and disease buildups. The vegetables listed together
nose them correctly? For help with diagnosis, consult other parts
below are subject to the same disease and insect problems.
of this publication, gardening books, or your local county exten‑
• chives, garlic, leeks, onions, shallots
sion office (detailed photos or samples of the problem will aid
• beets, Swiss chard, spinach
the diagnosis). A correct diagnosis is key to successful pest man‑
• cabbage, cauliflower, kale, collards, Brussels sprouts, broccoli,
agement or control.
kohlrabi, turnips, rutabaga, Chinese cabbage, mustard
• peas, broad beans, snap beans, lima beans
7Planting
General Considerations Figure 5. Compressed peat pellets make
Buying Seed plant growing easy. After you add water
to the compressed pellet, it will expand
Buy fresh, high quality seed from a lo‑ up to seven times its original size. Place
cal seed store, garden center or mail or‑ seed into the open end for germination.
der seed catalog for your vegetable garden. The pellet can be placed directly into the
planting hole.
Using seed from the previous year’s plants
is generally not recommended for the be‑
ginning gardener since such seed may not
germinate well or may not breed true. You
can refrigerate commercial seed in a glass
jar with something to dry it (for instance,
powdered milk). The seed can then be
used later.
Planting
The soil should be moist at planting time
but not overly wet. To test for moisture
content, squeeze together a handful of soil. If it crumbles readily ning can be at harvest. Beet and turnip thinnings make excellent
rather than sticking together, proceed with planting. Drop vegeta‑ greens. Radishes, onions and lettuce can be left to thin until some
ble seed into furrows in continuous rows. To make straight rows, are big enough to eat.
drive stakes at each end of the garden and pull a string taut be‑
tween them. Then draw a hoe or rake handle along the string to Transplants
make a shallow 1⁄2‑inch furrow for fine seed. Use the corner of the Why Grow Your Own Transplants?
hoe blade to make a deeper 1‑inch furrow for larger seed. Measure Having the varieties you want when you want to plant them—
the distances between rows with a yardstick. that’s the great advantage of growing your own transplants.
Empty seeds into your hand and drop them from between your The flip side of that coin is quality. If you can’t provide good
fingers. Mix dry, pulverized soil or sand with very small seeds to growing conditions, particularly plenty of bright light for grow‑
make even distribution easier. Plant the seed more thickly than ing seedlings, the quality of your homegrown plants may not be
needed in case some do not germinate. Cover the seeds and firm all you desire.
the soil lightly over them using the bottom of a hoe blade. The big advantage of growing transplants yourself is the wide
Some seeds, like carrot and parsley, take a long time to germi‑ choice of varieties available in seed. People who produce trans‑
nate—often three to four weeks. If the seeds dry out during germi‑ plants commercially tend to concentrate on a few popular variet‑
nation the seedlings will die, so be sure to keep these rows moist‑ ies of each crop. Seed catalogs offer a much wider selection.
ened. You can also put a board or a strip of plastic or burlap over If you plant the seeds at the appropriate time and the seedlings
the row to give the seedlings a warm, moist greenhouse environ‑ grow well for you, you can have transplants that are just the right
ment. Remove this cover just after the seedlings emerge. size for planting in the garden at just the right time. You can have
Thinning cool‑weather crops like broccoli and kohlrabi to plant early in the
After germination, you’ll need to thin the seedlings to correct spring and again in midsummer for a fall crop. And you can have
their spacing. When your plants have two or three leaves, pull warm‑weather crops like tomatoes for planting after the danger
up the weakest ones or pinch off the tops, leaving the rest of the of frost is past.
plants spaced correctly (see Table 4). Materials
The soil should be moist when you thin so you do not injure the You can successfully grow vegetable transplants indoors or out‑
remaining plants in the process. Do not wait for the plants to be‑ doors if you use a suitable growing structure. While a greenhouse
come overcrowded before thinning. With some vegetables, thin‑ is not essential, being able to control temperature, light, moisture
and ventilation is crucial. Day temperatures should be between
60° to 65°F for warm‑season crops. Keep the soil moist but not
Figure 4. A large tray can be sectioned into rows using a ruler or similar soggy.
sharp‑edged instrument. Once seeds are sown in the “furrows,” cover
the seeds with a growing medium using a blunt instrument or your You can buy all the materials you need for starting transplants
hand. under different brand names from local garden supply centers or
through seed and garden supply catalogs. Plant starting kits con‑
taining all the necessary equipment are also available. Some have
the seed already planted; you only need to add water and put them
in a suitable growing area.
8Fertilize the plants when the second true leaves ap‑ Table 4. Use this vegetable planting guide to plant vegetables the right way.
pear. Use a liquid fertilizer, such as 20‑20‑20 or liquid fish Distance Between:
emulsion, at rates recommended on the package. Fertilize Plants When
Number of Thinned or Planting
again in another week or two. Transplants or Transplanted Rows Depth
Pots made of peat are good for growing transplants, be‑ Vegetable Seeds per Foot (in) (in) (in)
cause plant roots can easily grow through the sides. Do Asparagus 1 crown 18 30 6‑8
not remove the peat pot when you transplant, and it will Beans, bush, lima 6‑8 seeds 4‑5 30 1‑1 ½
Beans, bush, snap 8 seeds 2‑3 30 1‑1 ½
gradually decompose. Keeping the plants in the same Beets 10 seeds 2‑3 18 ¼‑½
container reduces transplant shock and helps produce Broccoli 1 transplant 14-18 30
crops a few days earlier than scheduled. You can use egg Brussels sprouts 1 transplant per 2 ft 24 36
cartons and paper cups, but be sure to punch holes in the Cabbage 1 transplant 9‑18 30
bottoms for good water drainage. Also, cut away these Carrots 15‑20 seeds 2‑3 18 ¼
containers before transplanting. Put individual pots in Cauliflower 1 transplant 16-18 30
Celery 2 transplants 6‑8 30
plastic, metal or wooden trays for growing and for conve‑ Chard 8‑10 seeds 6‑8 30 ¼‑½
nience when you water and handle them. Chinese cabbage 4‑6 seeds 12‑15 24‑30 ¼‑½
Collards 8‑10 seeds 2‑4 24 ¼‑½
Growing Transplants Indoors Cucumbers 4‑5 seeds 24‑36 30 ½‑1
For indoor growing, sow seeds in a plant tray contain‑ Eggplant 1 transplant 18 30
ing an artificial growing medium of peat moss and perlite Endive 4‑6 seeds 9‑12 18‑30 ½
available at garden centers. Adding compost to the pot‑ Garlic, from cloves 1 clove 6 12‑18 1½
ting media at up to 25% of total volume can reduce the Horseradish 1 root 18 30 2
Kale 4‑6 seeds 8‑12 24‑30 ¼‑½
need for fertilizers later and potentially encourage seed
Kohlrabi 6‑8 seeds 3‑6 18‑30 ¼‑½
germination. Enclose the seeded trays in a plastic bag and Leeks 10‑15 seeds 3‑4 20 ½
keep them at room temperature until seedlings begin to Lettuce, head 1 transplant 12‑18 20 ¼
emerge. Then, remove the plastic and transfer the trays to Lettuce, leaf 20‑30 seeds ½ 8‑12 ¼
suitable growing areas. Muskmelons 2‑3 seeds 24‑36 60 ½‑¾
The average windowsill is one location for growing Mustard 20 seeds 3 18 ¼
New Zealand spinach 4‑6 seeds 12 30 ½
plants, but it usually does not get enough light. So, you Okra 3 seeds 12 30 1
have to use artificial light to supplement. Use cool white Onions, from seed 10‑15 seeds 4 12‑18 ¼‑½
fluorescent lamps alone, a mixture of cool white and Onions 3‑6 sets 4 12‑18 1‑2
warm white fluorescent lamps, or a mixture of cool white Parsley 10‑15 seeds 4‑6 12‑18 ¼‑½
and plant growth fluorescent lamps. Locate the lamps 5 Parsnips 12 seeds 2‑3 18 ½‑¾
to 10 inches from the foliage and operate them 12 to 18 Peas 15 seeds Do not thin 30‑48 1
Peppers 1 transplant 14‑18 30‑36
hours/day. Be sure to keep seedlings cool enough (60° to Potatoes 1 seed piece 10‑12 36 3‑5
65°F) for strong, sturdy growth after they germinate. Pumpkins 1‑2 seeds 4 ft 8‑12 ft 1
Plants should be “hardened off ” about two weeks be‑ Radishes, spring 10‑15 seeds 2‑3 12 ¼
fore planting them in the garden. That is, you toughen Radishes, winter 10‑15 seeds 2‑4 12 ¼
the plants so that they can withstand the outside envi‑ Rhubarb 1 crown per 2 ft 36 4‑5 ft
Rutabaga 4‑6 seeds 6‑8 18‑30 ½
ronment. To do so, begin exposing them to lower tem‑ Southern pea 3‑4 seeds 2‑3 30
peratures. One way is to take your transplants outside in Spinach 6 seeds 4‑6 12‑18 ¼
the daytime and bring them in at night. However, don’t let Squash, summer 2‑3 seeds in hill 24 48 1
them get caught in a frost. Reduce your watering and fer‑ Squash, winter 1‑2 seeds 48 6‑8 ft 1
tilizing of transplants to help “hardening off ” about one Sweet corn 2 seeds 8‑10 30 1‑2
week before transplanting. Do not let them dry out and Sweet potatoes 1 slip 15 36
Tomatoes 1 transplant per 2 ft 24 36
wilt, however. Turnips (roots) 6‑8 seeds 3‑4 12‑15 ½
Growing Transplants Outdoors Turnips (greens) 10‑12 seeds 2‑3 12‑15 ½
Watermelons 2‑3 seeds in hill 6‑8 ft 72 1
Structures used for growing transplants outdoors may
or may not be artificially heated.
The cold frame for housing transplants receives no artificial a base, and transplants like cabbage, cauliflower, broccoli and let‑
heat. Use the sun to its greatest advantage by locating these struc‑ tuce may be sown directly in the composted soil base.
tures on the south side of a building. Cold frames are used for
holding or “hardening off ” transplants.
Buying Healthy Transplants—
The hotbed is a cold frame structure which includes an addi‑ A Good Investment
tional source of heat. Heat may be supplied from fermenting Sometimes what appears to be a good buy because it’s inexpen‑
horse manure, electric cable or light bulbs. Transplants are usu‑ sive may turn out to be a poor investment in transplants. Trans‑
ally grown in pots set over a 2‑ to 4‑inch layer of composted soil plants which were seeded at the right time and were grown at the
or sand. If horse manure is used or if plants are grown in the bed right temperature, in abundant light and adequate moisture, will
rather than in pots, use a 4‑inch layer of compost as a base. If elec‑ be compact, with the distance between leaves very small (Table
tricity is the heat source, only a few inches of sand are required for 5). The stems will be pencil thick and rigid. Leaves will be dark
9Table 5. Transplant production data.
Soil Temp. Satisfactory
Weeks from Seed Seed Spacing (°F) Needed Average Growth Temp.
Seeding to Average Depth Seeds/ Rows for Seeds to Days to Night
Crop Transplanting4 Seedling Date (in) Inch Apart (in) Germinate Emerge Day (°F) (°F)
Cool Season1
Broccoli2 5‑7 Feb 5, July 1 ¼ 8 2 80 4‑6 65 60
Brussels Sprouts 5‑7 Feb. 5, July 1 ¼ 8 2 80 4‑6 65 60
Cabbage 5‑7 Jan. 20, July 1 ¼ 10 2 85 3‑5 55 50
Cauliflower2 5‑7 Jan. 25, July 1 ¼ 8 2 80 4‑6 65 60
Lettuce 5‑7 ¼ ‑‑ 2 75 2‑3 60 50
Onion 10‑12 ¼ ‑‑ 2 75 4‑5 65 55
Warm Season
Cucumber3 3‑4 April 1 1 2 seeds 95 3‑6 75 70
Muskmelon3 3‑4 April 1 1 per 4” x 4” pot, 90 4‑6 75 70
Squash3 3‑4 April 1 1 thinned to 1 95 5‑7 75 70
Watermelon3 (seeded) 4‑6 Mar. 25 1 85 4‑6 75 70
Watermelon3 (seedless) 4‑6 Mar. 25 1 90 4‑6 75 70
Tomato 4‑7 Mar. 15 ½ 10 2 80 7‑9 70 60
Eggplant 6‑8 Mar. 10 ¼ 10 3 80 7‑9 75 70
Pepper 6‑8 Mar. 10 ¼ 10 2 80 8‑10 70 65
1 Cool‑season crops are frost tolerant and can be set in the garden before the last frost. Warm‑season crops are susceptible to frost and should not be set
until the danger of the last frost is past.
2 Do not allow broccoli or cauliflower to become deficient in nitrogen or water or exposed to cold temperatures when they are small.
3 Seed into individual containers (peat) that may be placed directly into the soil, because these crops will not tolerate root disturbance.
4 Allow an extra two weeks growing time if grown in plant beds.
green, large and upright with no tendency to droop. Transplants Figure 6. Cold frame.
Scrap lumber can be
that are trying to produce flowers or fruit are not as desirable as used to build the basic
those which are strictly vegetative. Plants trying to produce fruit frame. The hinged top
are slow to develop good root systems to support later fruit pro‑ can be made from old
duction. windows or a frame cov-
ered with clear plastic.
Bare root plants will be slower to establish than transplants
grown in cell packs or containers. Sometimes, plants are packed
in large bundles and shipped great distances. To save space, these
plants are clipped before shipping to reduce the amount of top
growth. This is a poor practice since it not only induces transplant
shock and delays fruiting but spreads disease as well.
When purchasing transplants, be sure to ask whether the plants
have been hardened off. If not, it is important to place them in a 3. Handle the plants carefully. Avoid disturbing the roots.
cool spot and reduce water for a couple of days to acclimate the 4. Dig a hole large enough to hold the roots. Set the plants to the
plants to outside conditions. lowest leaf at recommended spacings. Press soil firmly around
the roots.
Moving Transplants to the Garden 5. Pour 1 cup of starter solution in the hole around the plant.
Whether you buy plants or grow your own, the time comes to Starter solutions are high analysis fertilizer solutions for rapid
plant them outside. transplant root development. To prepare, mix plant food with
Transplanting gives a plant more space to develop, but it will 15‑30‑15, 10‑53‑17 or 20‑20‑20 analysis at the rate of 2 Tbs/gal‑
temporarily check growth, not stimulate it. Therefore, for success‑ lon of water. Any liquid organic fertilizer, like fish emulsion, can
ful transplanting, try to interrupt plant growth as little as possible. also be used as a started solution by following the recommen‑
In doing so, peat pots give you an advantage, even though they are dations on the package.
expensive, because they do not have to be removed. Follow these 6. Put more soil around each plant, but leave a slight depression
eight steps when transplanting: for water to collect. Break off any exposed parts of peat pots so
1. Transplant on a shady day in late afternoon or in early evening that they will not act as wicks and pull water out of the soil.
to prevent wilting. 7. Shade the plants for a few days after transplanting on a very hot
2. Soak transplants’ roots thoroughly an hour or two before set‑ day by putting newspapers or cardboard on their south sides.
ting them in the garden. 8. Water the plants once or twice during the next week.
10Growing More with Less Space
Intensive Gardening Figure 7. Raised bed.
Conventional gardens, planted in rows about 3 feet apart, have
been popular for many years because they can be planted and eas‑
ily cultivated with a farm tractor or a rototiller. However, because
of the wide spaces between rows, such gardens are not very space
efficient. Gardeners with limited land area may want to plan an in‑
tensive garden.
Intensive gardens employ space‑saving techniques such as
wide‑row planting, raised beds, intercropping, succession plant‑
ing, vertical training and planting in stairstep arrangements. Ex‑
tending the growing season using plant protectors is anoth‑
er technique of intensive gardening. Lettuce, radishes and other
cool‑season crops can be grown early in the spring or late in the
fall with such protection.
Keep in mind that some intensive techniques may require more
time, labor and money than conventional techniques. Also, close‑
ly spaced plants use more water than widely spaced plants, and
competition for water may reduce yields during times of drought.
In wide‑row planting, vegetables are planted in wide rows be‑
tween narrow pathways as opposed to single rows with wide spac‑
es between the rows. The vegetables are spaced so that they will • Also, try sowing radish seeds with carrot seeds. The radishes
just touch one another at maturity. This method of gardening may germinate quickly, marking the row of slowly sprouting carrots.
reduce weed problems, although hand weeding will be more dif‑ Radishes are harvested within a few weeks, long before they in‑
ficult. Since less soil remains bare than in conventional gardens, terfere with the carrots.
usually less erosion occurs.
Be aware that vegetables prone to certain diseases should not Many other intercropping ideas will develop from your own
be planted too intensively. Tomatoes, for example, will suffer less gardening experience. Remember, however, that yields of certain
from disease if moving air dries their leaves. When placed too vegetables may be reduced when crowded.
closely, plant leaves retain moisture longer, and disease organisms Succession Planting
thrive and are easily spread from plant to plant. In succession planting, another seed or transplant immediately
Raised Beds takes the place of a harvested plant. For example, when you har‑
Raised beds increase production by conditioning the soil for ex‑ vest a lettuce plant in early summer, a Swiss chard or New Zealand
cellent root development. In an area 3 to 4 feet wide, you loos‑ spinach transplant can replace it. After harvesting an early crop of
en the soil and mix it with organic matter and fertilizer (see “Pre‑ sweet corn, you might follow with a fall crop of broccoli, spinach
paring the Soil”). Then, once you’ve constructed the raised beds or snow peas.
and permanent paths between the beds, you no longer disturb the Vertical Training
soil. Combining raised beds with other intensive practices such Vertical training involves growing plants upright rather than
as wide‑row planting, intercropping or succession planting gives horizontally. You can vertically grow vine crops, tomatoes, peas
the greatest yields in a garden. In addition, the excellent drainage and beans on wood, wire or string trellises, or in cages. Besides
in raised beds often permits early planting, though raised beds al‑ having more plants per square foot, you will also have cleaner fruit
so will dry out faster than level ground later in the season. Use that will be easier to harvest.
mulches to retain moisture in your raised beds.
Stairstep
Intercropping The stairstep arrangement is a form of vertical planting that
Intercropping involves planting different vegetables side by lends itself especially well to small plants, such as lettuce, spinach
side to take advantage of the different times of maturity, heights, and onions. Basically, stairsteps change a two‑dimensional space
spreads or rooting depths. into a three‑dimensional one, usually with wooden bins in pyra‑
• A classic example of intercropping involves corn, beans and mid shapes. You can also use metal strips, small stone walls, bricks
squash. A few weeks after sowing corn seeds, you plant pole or concrete blocks to hold the soil in place. As with raised beds,
beans close to the corn rows to use the corn stalks for support. you will need to pay careful attention to watering of plants grown
• As another example, you can set tomato transplants between in such arrangements.
lettuce plants; the lettuce matures and is harvested before the
tomato plants grow very large.
11Container Gardening Planting Procedure
Moisten the soil mix the day before you intend to plant for best
Even if you live in an apartment or condominium with only a
results. Many mixes contain a high percentage of peat, which re‑
balcony, patio or walkway available for gardening, you can still en‑
quires time to soak up water. Peat moistens faster with hot water
joy many of the rewards of vegetable gardening.
than with cold water. A drop of dishwashing soap will help wet dry
Container gardening can provide you with fresh vegetables as
potting mixes.
well as recreation and exercise. Many container‑grown vegetables
• Fill a clean container to within 1⁄2 inch of the top with the mix‑
also have ornamental value and can enhance your home. Using
ture.
containers allows you to take advantage of the various microcli‑
• Follow the seed package’s instructions for planting.
mates in your vicinity. For example, lettuce can be grown in a cool,
• Sow the seed more thickly than needed in case some do not
shaded area while heat‑loving plants, such as eggplant, can be lo‑
germinate.
cated in full sun where reflections from buildings or patio surfac‑
• Put a label with the name and variety of the vegetable and the
es add to the heat.
date of planting in each container.
Feeding and watering plants is easier if you use big containers,
• Water the seed gently with a watering can after sowing, being
since small ones need more frequent attention. Choose the con‑
careful not to wash out the seed. Or, put a burlap bag over the
tainer size to match the plant’s growth requirements.
container to reduce water impact.
Choosing Vegetables for Containers • Thin the plants for proper spacing when they have two or three
As a rule nearly all leafy vegetables will do well in containers. leaves.
Plant breeders have developed many dwarf or miniature varieties
Care
for container production.
Pay particular attention to watering container vegetables. Con‑
Crops with many fruits per plant such as tomatoes are good
tainer soils can dry out very quickly, especially on a concrete patio
choices. Table 9 lists some of the vegetables and their require‑
in full sun. Daily watering may be necessary. Water when the soil
ments for container production.
feels dry. However, do not go to extremes. The soil should not be
A 12” x 48” x 8” box makes an excellent patio herb garden.
soggy or have water standing on top of it. Apply water until it runs
Chives, garden thyme, basil, marjoram and summer savory will
out the drainage holes.
all do well in such a planter box. The sprawling growth habit of
Protect plants from very high heat caused by light reflection
the various mints, oregano and rosemary make them attractive in
from pavement or a building. If necessary, move them to a cooler
hanging baskets. Typical container sizes are listed in Table 6.
spot or shade them during the hottest part of the day. Plants may
Containers also need to be taken to a more sheltered location during severe
Material—You can use containers made of clay, wood (redwood rain or wind storms.
or cedar), plastic or metal for growing vegetables. Also consider Vegetables grown in containers should be fertilized regularly.
using barrels, flower pots or window boxes. Unusual containers Make the first application three weeks after the plants have two
will add interest to your garden. sets of leaves. Repeat once a week, using a soluble plant food at
Holes—Each container must have drainage holes in the bottom one‑half strength (according to label directions).
so the plant roots will not stand in water. If the container does not Keep a close watch for insects and diseases which may attack
already have holes, make at least four small nail holes in its sides, vegetables. Identify any problems and take appropriate control
1⁄2 inch from the bottom. measures.
Size—The container should be the proper size for the plant grow‑ After you harvest spring and early summer crops, replant the
ing in it (see Table 8 for types and sizes of growing containers). containers with vegetables for the summer or fall garden.
Planting in Containers
Some vegetable seeds are planted directly in the containers
Mini‑Gardens
where they will be growing. Others are set in as transplants. Another solution to working with limited space is to plant sev‑
Use a commercially prepared greenhouse soil mix, available at eral mini‑gardens in vacant spots around your yard instead of put‑
local garden centers or greenhouses, to grow plants in containers. ting all your vegetables in one plot. Some possible sites are near
If you’re going to have several large containers, you may want to the kitchen door, along the sunny side of the house or garage,
mix your own soil. The soil mix (Table 7) is good for container gar‑ around the outdoor grill, along a walk in a flower bed or along
dening because it is lightweight and sterile. a fence. Placed this way, vegetables serve a dual purpose as both
food and landscape plants.
Table 6. Typical container dimensions, Table 7. Soil mix for container plants. Table 8. Types and sizes of growing containers.
and their corresponding size in gallons. 1 part composted or sterilized1 garden soil Type Dia. Hgt. Vol.
Inches Gallons 1 part sphagnum peat moss (Canadian) 2 inch pot 2” 3 1/2” 1 pt
7 1/4” x 6 1/4” 1 1 part perlite 6 inch pot 6” 5 1/2” 3 pt
8” x 8” 2 1/2 cup dolomitic limestone/bushel No. 10 can 6” 7” 3 qt
10” x 10” 3 1/4 cup superphosphate/bushel 8 inch planter 8” 8” 1 1/2 gal
12” x 11” 4 1 To sterilize, put moistened soil in a cake pan 10 inch planter 10” 9” 2 1/2 gal
12” x 12” 5 and heat at 200°F for 46 - 60 minutes, or put 1/2 bushel basket 13” 9 1/2” 4 gal
13” x 13” 6 in a glass pan in a microwave oven for 15 - 20 5 gal can 11” 12 1/2” 5 gal
seconds. 1 bushel basket 17 1/2” 11 1/2” 8 gal
12Table 9. Container vegetable recommendations. Table 9. (continued)
Harvest
Harvest
Days
until
Days
until
Season/ Spacing/ Season/ Spacing/
Light Req. Container Size Varieties Light Req. Container Size Varieties
Bean (green, bush type) Peas
Warm 5 - 6” apart Romano Bush 50 Cool 4 - 6” apart Little Marvel 62
Full sun 8 - 10” deep Blue Lake Bush 58 Full sun 8 - 10” deep Sugar Ann 55
Tendercrop 54 Cascadia 58
Beets Peppers
Cool 2 - 3” apart Kestrel 53 Warm 14 - 18” apart Carmen 75
Tolerates partial 24” x 36” x 8” Red Ace 53 Full sun 1/2 - 4 gal King Arthur 59
shade Merlin 55 Gypsy Hybrid 65
Detroit Supreme 59 Hot Anaheim 77
Broccoli Hungarian Wax 65
Cool 15” apart Green Comet 55 Jalapeno 65
Full sun 12” x 48” x 8” Emperor 60 Radishes
Cabbage Early spring, Fall 1” apart Cherriette 26
Cool 12 - 24” apart Fast Vantage 65 Full sun to light Any size, 6” deep Cherry Belle 30
Full sun 10” deep shade Icicle 28
Stonehead 70
Market Prize 76 Cherry Bomb 25
Super Red 80 82 Spinach
Carrots Spring, Fall 5” apart Tyee 42
Spring, Fall 1½ - 3” apart Ya Ya 56 Full sun to light Any size, 6” deep Melody 43
Partial shade 24” x 36” x 10” shade Bloomsdale Long- 48
Sugarsnax 68
Little Fingers 65 Standing
Collards Summer Squash
Cool, Fall 6“ apart Champion 60 Warm 1 per 5 gal Black Magic (green 44
Full sun 8 - 10” deep Full Sun container zucchini)
Georgia/Southern 80
Gold Rush (yellow 50
Vates 80
zucchini)
Cucumbers Burpee Hybrid 50
Warm 12 - 16” apart Sweet Success 55 (green zucchini)
Full sun 12” x 48” x 8” Sweet Burpless 55 Sunburst (yellow 52
Hybrid scallop)
Eggplant Swiss Chard
Warm 1 per 4 - 5 gal Orient Express 58 Spring, Summer, 4 - 5” apart Bright Lights 55
Full sun container (Japanese type) Fall Any size, 6 - 8” deep Rhubarb Chard 60
Dusky 61 Partial shade Fordhook Giant 60
Blackbell 70 Tomatoes2
12“ apart Fairy Tale 50
Warm 1 per 4 - 5 gal Lizzano 65
10 - 12” deep
Full sun, at least 6 container Terenzo 56
Kale hrs/day Tumbler 49
Cool, Fall 6” apart Dwarf Blue Curled 55 Superb Super Bush 75
Partial shade 12” x 48” x 8” Vates 57
Turnips
Lettuce Cool 3 - 4” apart Hakurei 38
Early spring, Fall 4 - 6” apart, leaf; Kentucky Bibb 54 Partial shade 24” x 36” x 8” Purpletop Globe 55
Partial shade 10” apart, head Buttercrunch 75 Seven Top 42
12” x 48” x 8” Royal Oakleaf 50
Zucchini
Red Sails 45
Warm 1 per 5 gal Spineless Perfec- 45
Burpee’s Iceburg 85
Full sun container tion (green)
Onions (bulb)1 Golden Glory (yel- 50
Early spring 2” apart Walla Walla Sweet low)
Partial shade 6” deep Candy Ambassador 47
Onions (green) (green)
Early spring or 2” apart White Spanish 1 In spring, plant long day variety; in fall, plant short day variety.
September 6” deep Bunching (early) 2 Two plantings, one in mid to late April and the other in mid to late June,
Full sun will extend the tomato harvest over a longer season. Transplants should
be started four to seven weeks before planting time. Containers may be
continued moved inside to protect plants from early or late season frosts.
13You can also read