IT - Essential Endnote 20 Information Services - University of York
←
→
Page content transcription
If your browser does not render page correctly, please read the page content below
Information Services

      Essential
    Endnote 20

For Endnote X9 users, see our Essential Endnote X9 guide

                                              IT
                      www.york.ac.uk/it-services/training
Essential EndNote 20

EndNote 20 is a desktop application; versions are available for both PC and
Mac. All University of York classroom and office PCs have access to the
application and also include the Microsoft Word plug-in to allow inserting
citations from EndNote. The licence permits installation on University-
owned devices and on personal devices.

This material has been written to be used with EndNote 20 on a University
of York Windows PC. Every attempt has been made to ensure the accuracy
of the information provided, however you may find some minor differences
when working with personalised systems.

Last Updated: April 2021
~Contents~

1 ~ Overview                                               1

  1.1 - Application use                                    1
  1.2 - Library files                                      1
  1.3 - EndNote ‘home’ view                                2
  1.4 - Viewing Options                                    3

2 ~ Collecting references                                  4
  2.1 - Bibliographic databases                            4
  2.2 - Google Scholar                                     6
  2.3 - YorSearch                                          6
  2.4 - Library Catalogues                                 8
  2.5 - Manual Entry                                       8

3 ~ Managing References                                    10
  3.1 - Groups                                             10
  3.2 - Duplicates                                         10

4 ~ Styles, Reference Lists and Citations                  11
  4.1 - Creating a Reference List/Annotated Bibliography   11
  4.2 - Citations in MS Word                               11

5 ~ Additional features                                    15

  5.1 - EndNote and PDFs                                   15
  5.2 - Travelling Library                                 15
  5.3 - Adding and editing styles                          16
  5.4 - Find full text                                     17
  5.5 - Synchronisation                                    18
  5.6 - Plain Text                                         19
  5.7 - Categorised Reference lists                        19
  5.8 - Google Scholar and Full Text                       20
  5.9 - Share Reference Library                            21
  5.10 - Manuscript Matcher                                21

EndNote 20

1 ~ Overview
        EndNote 20 is a desktop application. All University of York classroom and office PCs have
        access to the application and also include the Microsoft Word plug-in to allow inserting
        citations from EndNote. The application may also be installed on personal computers
        (PC and Mac). Search for ‘Endnote’ on the UoY IT Services website for more information
        (https://www.york.ac.uk/it-services/software/a-z/endnote/).

        EndNote Web
        An online version of EndNote, commonly referred to as EndNoteWeb, is also available.
        Members of the University can sign up for a free, enhanced account.
        EndNote 20 has been designed to allow synchronisation between the desktop and
        online libraries. EndNote Web is available at:
                                       www.MyEndNoteWeb.com

1.1 - Application use
        EndNote is designed to help with referencing at all stages:

             • recording citation information
             • managing references
             • inserting and formatting citations and reference lists in MS Word
        References are stored in a personalised EndNote Library and a plug-in creates an
        additional tab in MS Word.

        The reference library can be used to produce reading lists, an annotated bibliography
        and to insert and format citations and a reference list when writing. Inserted references
        can be formatted repeatedly using a range of bibliographic styles.

1.2 - Library files
        An EndNote library consists of two parts with the same name but different extensions:

             • The main library file with the .enl extension (eg My Endnote Library.enl)
             • An additional library folder with the extension .data (eg My Endnote
               Library.data). It will have the same name as the .enl file.

        Notes If you need to copy or back-up an EndNote library, you must ensure both these
              files are retained.

               If you use a Mac, you may only see one ‘.enlp’ file, as these are ‘packaged’
               together.

                                                1
University of York
Although it is possible to create multiple libraries it is recommended you keep all
references in one library and use the Group feature to organise references.
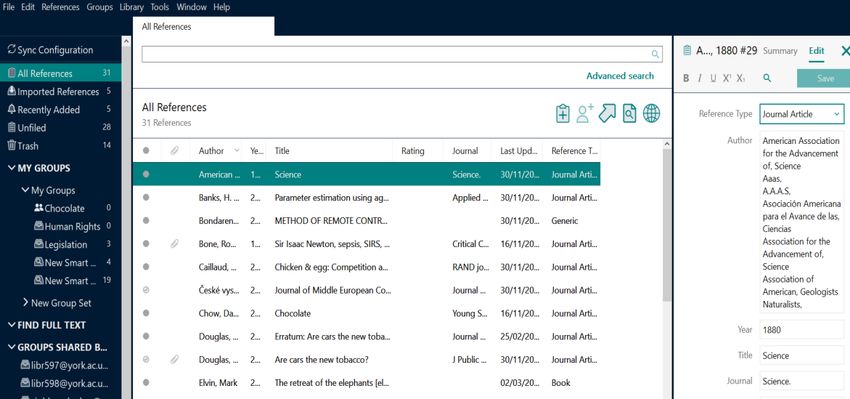
1.3 - EndNote ‘home’ view
Groups Search panel Reference panel
Column headings also
serve as sort controls
Reading indicator Reference library
Summary:
Reference library All references are listed together in the library. The sort order
can be changed using the column headings as sort buttons
Reading indicator The small circular button can be used to indicate which items
are still to be read (bold items)
Reference panel All available details for the currently selected reference are
shown in the preview pane. This panel can also be used to edit
reference information
Groups Each reference can be assigned to one or more groups, making
it simpler to manage references for multiple projects or papers
Search panel References in the library can be located using the search
feature. When connecting to a remote library catalogue this
can also be used to locate and import references – you can
Show/Hide this panel from the toolbar
2
EndNote 20

1.4 - Viewing Options

       Reference panel
       This panel, on the right by default, can display:

            • Reference – bibliographic data for the reference in editable fields
            • Preview – displays the selected reference in the current bibliographic style
            • Attached PDFs – Click on the name of the pdf to open it in another window.

                                                Reference panel

                    PDF toolbar

       Further Customisation
       Selecting Edit > Preferences gives access to further options to customise the view. Of
       particular interest are:

        Display Fields      Allows you to choose which fields will be visible, and in what order,
                            in the list of references.
                            You may also select whether all authors or only the first are shown
                            in the Author column – this does not affect searching
        Sorting             Choose words to ignore when sorting by Author or Title

                                                3
University of York
2 ~ Collecting references
The best time to collect reference information is when carrying out a literature search.
These can often be added electronically, but manual entry will sometimes be necessary.
Be prepared to try different web browsers – some browsers may be easier to use
depending on which database you use.
Reference data can usually be acquired from:
• Bibliographic databases
• Google Scholar
• YorSearch
• Library catalogues
Generally there are two different approaches that may be required:
• A one-step transfer into EndNote
• Export of a file from the bibliographic source followed by import into EndNote
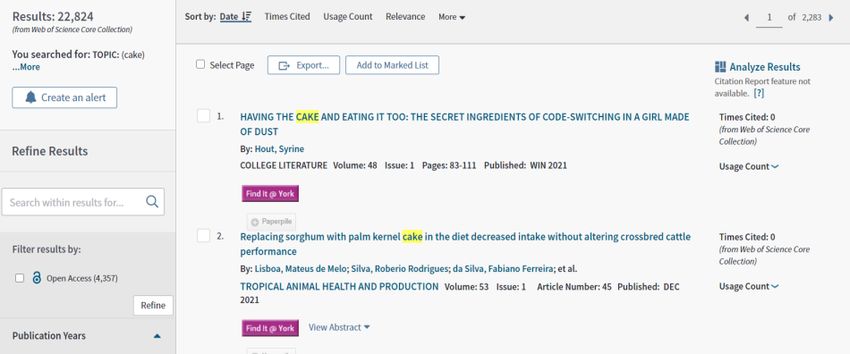
2.1 - Bibliographic databases
Most bibliographic databases include the ability to export references, but unfortunately
there is no agreed standard, so the precise method varies considerably.
2.1.1 - What to look for
Most systems will include the ability to select several references for export and a
link/button to begin the export, illustrated in these examples:
✓
Ovid
✓
✓
✓
Web of Science
4EndNote 20
✓
ProQuest
✓
✓
J Stor
The available choices will vary between systems, but it’s worth trying the following:
2.1.2 - Direct Export
1 If EndNote is available on the export list, select this option
2 If you have a choice between citation/reference only and full reference (including
abstract) then choose full reference
3 During export, you may need to choose Open or Save – try Open first
If direct export won’t work for you, try the export-import approach.
2.1.3 - Export-Import
Export
1 Even if an EndNote option is available, choose a RIS export option
2 If asked to choose Open or Save, always choose to Save the reference file on your
computer
Import
If you have saved the RIS file locally, you
will need to import it:
1 Switch to EndNote and select
File > Import > File…
2 Locate and select the downloaded RIS
file
3 Choose the Reference Manager (RIS) import option and select Import
5University of York
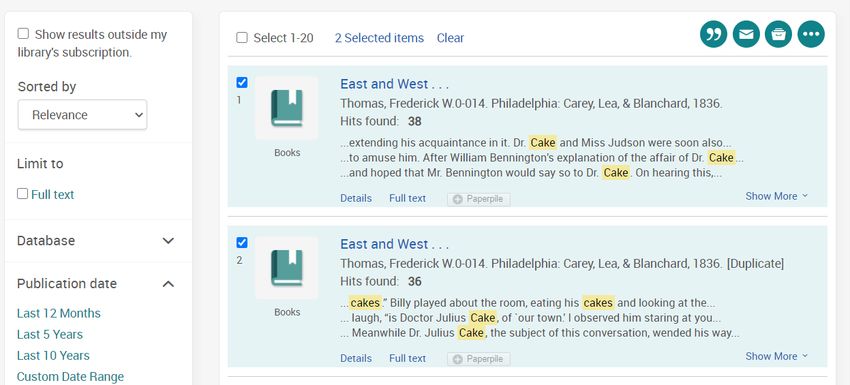
2.2 - Google Scholar
Scholar can be configured to include a reference export link with each result:
1 On the Scholar search page, select the icon with 3 bars to the top left, then choose
Settings (gear-wheel icon)
2 On the Search Results settings page, configure the Bibliography manager to Show
links to import citations into EndNote and Save the change.
2.2.1 - Importing Scholar References to EndNote
This should be a one-step import, but references must be imported one at a time.
1 After searching select the Import into EndNote link
2 As long as you have the option to Open with EndNote, choose this for a direct
import.
3 Follow the prompts in your browser to download and open the .enw file
Alternative
If the one-step option is not available or does not work you will need to Save the
reference file and follow this with an import.
Import
1 Switch to EndNote and select
File > Import > File…
2 Locate and select the downloaded
.ENW file
3 Choose the EndNote Import option
and select Import
2.3 - YorSearch
After you have located items through YorSearch you can import references one at a
time, or use the Saved items facility to import several at once.
Single Reference
1 Search for your text.
2 Select the ‘citation’ icon and select EndNote etc (RIS) > Download.
6EndNote 20
Multiple References
1 Select ‘login’ at the top-right to make sure you are signed in with your UoY account.
2 For each reference select the pin icon.
3 View your Saved items by selecting the pin’ icon at the top right of the page.
4 Select the tick box next to each text that you would like to import.
5 Select the ‘3 dots’ menu at the top of the list and select ENDNOTE ETC (RIS).
6 Follow the steps in your browser to download and click to open the file.
Alternative
If the one-step option is not available Save the reference file and import. Choosing Save
will usually place the RIS file into your Downloads folder.
Import
After exporting an RIS file:
1 Switch to EndNote and select File > Import > File…
2 Locate and select the downloaded RIS file
3 Choose the Reference Manager (RIS) import option and select Import
7University of York
2.4 - Library Catalogues
From within EndNote you can
connect to a remote library online
catalogue. Although you would not
use this for the purposes of
literature search, it can be a useful
method for obtaining the reference
of a book you have on your desk.
1 In EndNote select Tools >
Online search…
2 Locate the library in the list
(the University of York is listed
as U York) and Choose this
connection.
The connection will be added
to the Online Search list on the
left.
Searching
Once the connection is created, the search pane will locate records in the Library
Catalogue, not in your EndNote Library. Use the search tools to locate the item.
Retrieved records are automatically added to All References and can also be assigned to
groups as appropriate. Any references deleted from the Online Search list will also be
removed from All References.
2.5 - Manual Entry
To enter a new reference manually:
1 Choose References > New Reference
2 Select the appropriate Reference Type (to ensure the correct fields are shown)
3 Complete the fields needed for citations/reference lists as a minimum
8EndNote 20
Notes Authors must be Surname, Forename with multiple authors on separate lines
Put a comma on the end of an institutional author eg NHS,
Although bold, italic and underline formatting tools are provided, you should not
use these – leave formatting to the bibliographic styles
4 Choose File > Save (or Close the reference and choose to Save when prompted)
Choose the correct
reference type
Enter authors on separate lines:
Surname, Forename
9University of York
3 ~ Managing References
The principal feature for managing references is Groups, which exist in a Group Set.
3.1 - Groups
Each reference may be assigned to one or more groups. Groups help you to manage
references for multiple projects/papers, and make it easier to locate references when
inserting citations.
Creating and editing groups
Manage groups using the Groups menu or by right-clicking on an existing Group Set:
Use these controls
to manage groups
Right-click
menu
Note Deleting a Group or Group Set does not delete the references it contains.
Deleting a reference when viewing a Group removes it from the group but does
not delete the reference from the library.
Smart Groups have references added automatically based on user-defined criteria.
Adding References to Groups
1 View All References and select the references you wish to assign to a group (CTRL
allows multiple selection of non-adjacent items)
2 Choose Groups > Add references to… and select the group
Tip You can also drag selected references onto the group folder, or use right-click on
any of the selected references.
3.2 - Duplicates
Searching several bibliographic databases may result in duplicate references. To prevent
any issues when inserting citations, EndNote can locate duplicates for you to delete.
1 Choose Library > Find duplicates
2 EndNote will compile a list of duplicates and open a dialogue box to help you
decide which to keep. You can also close this dialogue and delete manually from
the duplicates list, which is temporarily listed in the Groups panel.
Note: References deleted from the Duplicates list are removed from the whole library.
10EndNote 20
4 ~ Styles, Reference Lists and Citations
EndNote includes definitions for generic referencing styles, such as APA, MLA, Harvard
and also styles for a wide range of academic journals. Additional styles can be
downloaded and you can also edit them yourself.
UoY have specific styles, which you will need to download and install. See the ‘Install
reference styles’ section on our Referencing Practical Guide for how to install specific
UoY Styles, including UoY -Harvard.
To select the appropriate reference style:
1 Go to Tools > Output styles. If your style appears on the list, select it from here.
Otherwise, select Open Style Manager.
2 Locate and select the style in the list and select the tick box to the left of the name.
4.1 - Creating a Reference List/Annotated Bibliography
A free-standing list of references can be exported:
1 View the group you wish to output as a list or select the references and choose
File > Export…
2 Enter a suitable file name and change Save as type to Rich Text Format (rtf)
3 Select the required reference Output style (the Annotated style includes abstracts)
4 Save the document to a suitable location
This document can now be viewed and edited using MS Word.
4.2 - Citations in MS Word
The installation of EndNote desktop includes the Cite While You Write ‘plug-in’, and
extra MS Word tab for working with EndNote. Citations may be inserted from within MS
Word or from EndNote and a reference list is automatically constructed.
11University of York
Insert Edit Update Reference styles
citation citations citations
Note To switch between EndNote desktop and EndNote Online, choose
Tools > Preferences and on the Application tab select which to use.
Inserting Citations – via Word
1 Position the editing cursor where you want the citations to appear
2 On the EndNote tab choose Citations > Insert Citation
3 Use the Find control to locate the reference (by author is simplest)
4 Select one or more references (CTRL for multiple selections)
5 Choose Insert for the full citations or choose the drop-down if you need to omit
the author or year
Choose to omit author or year
if the context requires it
Inserting Citations – via EndNote
1 Position the editing cursor where you want the citations to appear
2 Switch to EndNote, locate and select the reference(s) you wish to insert. You can
use your groups to make it simpler to locate the correct reference
3 Choose Tools > Cite While You Write > Insert Selected Citation(s)
12EndNote 20
Inserting Citations as Footnotes
Some bibliographic styles require citations to be entered as a footnote; to do this you
must first use the MS Word footnote feature:
1 In the document position the editing cursor where you want the footnote indicator
to appear
2 In Word, select References > Footnotes > Insert Footnote
3 This adds a footnote and leaves the editing cursor in the footnote position. Insert
the citation as normal using one of the methods above
Note If the chosen style is not intended for footnotes it may not display as expected.
4.2.1 - Reformatting Citations and Reference List
Selecting an alternative style on the MS Word EndNote tab will reformat both the
citations and reference list in the new style.
4.2.2 - Editing Citations
The citations and reference list are populated using MS Word fields. This means you
cannot use the Undo feature or edit their content directly, but must use the tools
provided.
Add page
numbers to
a citation
Edit and Manage Citations Dialogue Box
13University of York
To edit citations:
1 Place the editing cursor in the citation to be edited
2 On the EndNote tab choose Citations > Edit & Manage Citation(s)
The dialogue box enables you to:
• Add/Remove citations
• Show/Hide Author or Year from a citation
• Add pages numbers or other text to a citation
Note If the output style is not configured to display page numbers they may not appear
when inserted in the Pages section. In this case put them in the Suffix but begin
with a space and include any necessary abbreviations such as pp..
Tip You can also delete a citation by placing the editing cursor to the right of the
citation and pressing backspace-delete twice.
After making changes, on the EndNote tab choose Bibliography > Update
Citations and Bibliography to ensure the reference list is updated.
Editing the Reference List
Don’t attempt to edit the reference list. Its content is derived from the citations so any
changes will revert following an update. If you spot mistakes in a reference list you may
need to correct the original reference in EndNote.
Note To delete a reference, always remove citations.
14EndNote 20
5 ~ Additional features
The previous sections summarise the essential features you will need to use when
working with EndNote. Other useful features are described below.
5.1 - EndNote and PDFs
Many references include the URL for the online source, allowing you to view the source
directly, but you can also attach a PDF to a reference if one is available:
1 In the reference list, select the relevant reference
2 On the reference side-panel, select Summary > Attach file.
3 Locate the PDF document and choose Open to attach
4 After attaching the PDF, select ‘Edit’ from the top and select Save.
Attach PDF Open PDF
Note: PDFs are saved in the PDF folder inside the .data folder of your library.
Viewing attached PDFs
Attached PDF documents are indicated by a paperclip and can be viewed in the Preview
Panel:
1 In the reference list, select the relevant reference
2 In the Preview Panel select Attached PDFs
3 Select Open PDF to view an enlarged, readable version
Note: Reference information can sometimes be obtained from a PDF using
File > Import… and choosing the PDF option. This only works if reference
information is included in the PDF and so cannot be relied on.
5.2 - Travelling Library
After inserting citations into a Word document, all reference information is stored in
hidden form in the citations and is used to construct the reference list. The collection of
reference information specific to this document is referred to as the Traveling Library.
Some consequences are:
• You can delete and reconstruct the reference list as often as you like without
breaking anything – a useful way to fix a badly-formatted reference list or
generate a full list of references after combining separate ‘chapters’
• The embedded references can be extracted from a Word document and
transferred into the EndNote library (EndNote tab > Tools > Export to
EndNote > Export Traveling Library)
15University of York
• Editing a Word document containing embedded citations on a computer that
does not have EndNote installed does not result in loss of the citations
• Editing a Word document containing embedded citations using an application
other than MS Word is extremely likely to corrupt your citations (avoid
switching between Open Office and MS Word)
5.3 - Adding and editing styles
EndNote is supplied with an extensive range of bibliographic styles, but it is possible to
add further custom styles, either downloaded or those you edit yourself.
Folder Location
Additional styles are placed in a dedicated folder, the location of which is set in the
preferences dialogue box.
Edit > Preferences > Folder Locations > Style Folder:
In a networked environment this folder should be on a networked drive so you have
access to it in multiple locations – the York default is a folder on the H: drive (Documents
folder).
Location of folder
for additional styles
Location of folders
for additional
import filters and
online connections
Adding a downloaded style
A downloaded EndNote style is simply copied into the Folder Location given in
Preferences. This will then be available via Select Another Style… in the style drop-down
list.
Style files use the extension .ens, eg UoY - Harvard Arch.ens
Editing a custom style
Although you can edit bibliographic styles, it is not straightforward as they need to be
designed to display correctly in a wide range of scenarios. You are unlikely to need to
create one from scratch but may need to modify an existing style. To start editing an
existing style:
1 In the style drop-down, switch to the style to be edited
2 Choose Edit > Output Styles > Edit “style name”
3 Before making any changes, save a new copy: File > Save As…
16EndNote 20
4 Make the changes to the style and re-save
Some Key sections are:
Citations > Templates Fields and display for in-text citations
Bibliography > Templates Fields and display for reference lists – a separate
definition is used for each reference type
Footnotes > Templates Fields and display for reference lists that use
references as footnotes - a separate definition is used
for each reference type
Citations > Author Name Format of author names
Bibliography > Author Name
Footnotes > Author Name
Citations > Author Lists Controls when ‘et al.’ is used in reference lists
Bibliography > Author Lists
Footnotes > Author Lists
5.4 - Find full text
This feature is designed to enable you to locate the source for a reference. Some points
to note:
• You will never need to use this feature if you download the source (eg the PDF
of an article) when you import the reference into EndNote
• Find Full Text works best if the reference includes the Digital Object Identifier
(DOI). The success rate is low without this
• If the source is located, and you are working off-site, you may not have access
to full text because you have not gone via a route that can validate your
University credentials
Configuration required:
1 Choose Edit > Preferences > Find Full Text
2 Open URL Path:
http://eu.alma.exlibrisgroup.com/view/uresolver/44YORK_INST/openurl
3 Authenticate with: URL:
http://libproxy.york.ac.uk/login
17University of York
5.5 - Synchronisation
The synchronisation feature enables you to maintain a local EndNote 20 library and an
online version containing identical references. This can serve as a back-up or an
alternative means of accessing references when away from your usual workspace
Note Sync works with only one library and one EndNote Web account. It is therefore
recommended you do not create multiple libraries in EndNote 20, but instead
make full use of the grouping features to organise references for multiple
projects in single library.
Setting up synchronisation
If you have not already signed up for an EndNote Web account, do this first as you will
need the log-in email address and password to configure the synchronisation. Visit
www.MyEndNoteWeb.com and use the Sign Up link.
Use to set up sync
the first time
Configure
automatic sync
1 Launch EndNote 20 (desktop) and open the local library you wish to synchronise.
2 Select Edit > Preferences… and choose the Sync category.
3 Select Enable Sync, enter your EndNote Web Account credentials and choose OK.
After authorising your account, you will be asked to complete some registration
details (which are very similar to those requested when registering for EndNote
Web). After registering, EndNote will recommend you create a library backup. It
doesn’t take long so is worth doing.
4 On returning to the Preferences dialogue box, check your credentials are correct
and that Sync Automatically is checked.
18EndNote 20
5 Synchronisation happens automatically, but to force it choose
Sync Configuration from the left sidebar and select Sync Now
5.6 - Plain Text
Word fields are used to generate the content of citations and reference lists; fields
generally display content acquired from another source and so do not contain directly
editable text. Fields are essential for many features (including page numbers, captions,
cross references tables of contents and the functionality of the EndNote plugin)
After inserting citations, however, you may want a fully editable document; this could
be for several reasons:
• Some citations or references do not display correctly and need minor edits
• You want to avoid the risk of a reviewer’s reference management application
changing your citations/references
• You want to check the document using Turnitin
To create a ‘fixed’ version of a document, converting your citations and references to
editable text:
• Choose EndNote tab > Bibliography > Convert Citations and Bibliography >
Convert to Plain Text
This creates a copy of your document, which you should save with an alternative file
name so as not to lose the ‘original’ containing the Word fields.
5.7 - Categorised Reference lists
By default EndNote will generate one reference list from the citations in your Word
document, but you can also create a categorised list; for example, you may wish to
separate primary and secondary sources, or define some other group of references.
Note: Categorisation is applied to the existing citations in your document, not to the
references in your library.
1 After inserting citations, from the EndNote tab in Word choose Bibliography >
Categorise references > Configure categories
2 In the Configure Categories dialogue (see below):
a) First create or edit the required categories; primary and secondary sources are
there by default, but you can remove or edit these.
b) Assign each reference to the appropriate category using ‘drag and drop’.
Notes: A reference can be assigned to only one category, so if you make a mistake
simply drag it to another
19University of York
It is also possible to categorise references by reference types; this requires the
editing of the relevant bibliographic output style in EndNote to define the
category headings and reference types to be used.
New
category
Remove
category Drag to assign
Select a
category to
edit its
heading
Tip: Group References by Custom Categories is disabled by default but you can turn
categorisation on and off using the Categorize References control on the ribbon.
5.8 - Google Scholar and Full Text
When Searching using Google Scholar, in addition to configuring bibliographic links for
reference import (see Google Scholar, p6) you can configure it to show links where the
full text is available at York.
Some University managed PCs are pre-configured, but you may want to add these to
your own equipment.
1 On the Scholar search page, select the three bars icon at the top left, then choose
Settings (gear-wheel icon)
2 In the left hand menu, switch to the Library links settings page and search for the
University of York
3 Select the option University of York – fulltext@York
4 Save the settings
Choosing the fulltext@York link when searching will then link to the resource via
YorSearch.
20EndNote 20
5.9 - Share Reference Library
Share specific groups using EndNote desktop or your entire library with read-only or
read-and-write access
1 For your entire library select File > Share in EndNote. For groups, right-click on a
custom group and select Share Group
5.10 - Manuscript Matcher
Help find a journal that might be interested in publishing your paper. Start with a few
key pieces of information: manuscript title, abstract, and references. View suggested
publications from analysis and compare your options and start the process to submit
your manuscript
1 Right-click on a group in your EndNote library and select Manuscript Matcher or
select Manuscript Matcher from the EndNote plugin in Microsoft Word
2 Complete the requested online details and click Find Journals
Banks, H. T., et al. (2020). Parameter estimation using aggregate data. Applied
Mathematics Letters, 100. Available at: 10.1016/j.aml.2019.105999.
21You can also read