Orbit3 Excel Add-in User Manual - Solartron Metrology
←
→
Page content transcription
If your browser does not render page correctly, please read the page content below

®
                Orbit3 Excel Add-in
                   User Manual

z:\engineering\gdavis\pending_stuff\edcr       23636       Issue   9   Page 1 of 26
orbit3 diom2 software release\503292 - excel add-
in manual\source\503292 - orbit3 excel addin manual.docx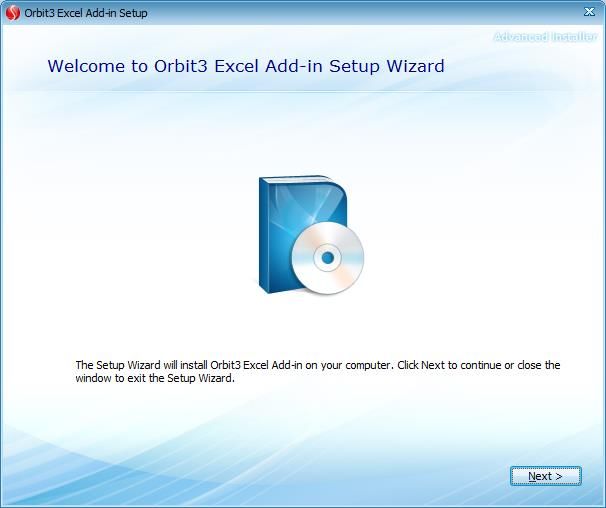
503292 - Orbit3 Excel® Add-in

Information in this document is subject to change without notice. Companies, names and data
used in examples herein are fictitious unless noted otherwise. No part of this document may
be reproduced or transmitted in any form or by means, electronic or mechanical, for any
purpose, without the express permission of Solartron Metrology.

© 2019 Solartron Metrology Ltd. All rights reserved. Orbit is a trademark of Solartron
Metrology Ltd.
Microsoft®, Windows®7, Windows®8, Windows®10, Excel® are either registered trademarks or
trademarks of Microsoft Corporation in the United States and/ or other countries.

All other brand names, product names or trademarks belong to their respective holders.

Orbit3 Excel® Add-in is not sponsored, affiliated or endorsed by the Microsoft®
corporation.

 503292 - Orbit3 Excel® Add-in                              Issue 9               Page 2 of 26
Contents
1.  Introduction ....................................................................................................................... 4
  1.1. This manual ................................................................................................................. 4
  1.2. Guidelines ................................................................................................................... 4
2. Documentation cross reference ........................................................................................ 4
3. Glossary ............................................................................................................................ 4
4. Installation ......................................................................................................................... 5
  4.1. PC System Requirements ........................................................................................... 5
    4.1.1. PC Hardware Requirements ................................................................................. 5
    4.1.2. PC Software Requirements .................................................................................. 5
  4.2. Overview ..................................................................................................................... 5
  4.3. Installing the Orbit3 Support Pack for Windows® software ......................................... 6
  4.4. Installing the Orbit3 Excel® Add-in .............................................................................. 6
  4.5. Installing the Orbit controller ........................................................................................ 8
  4.6. Connecting the Orbit Modules ...................................................................................... 8
  4.7. Disabling/Enabling the Orbit3 Excel® Add-in .............................................................. 8
5. Configuring the Orbit3 Excel® Add-in ............................................................................... 9
  5.1. Accessing the Add-in................................................................................................... 9
  5.2. Connecting to Orbit ..................................................................................................... 9
  5.3. Tool Bar Buttons explained ......................................................................................... 9
  5.4. Editing Settings ......................................................................................................... 10
  5.5. Spreadsheet Configuration........................................................................................ 11
  5.6. Orbit Network Configuration ...................................................................................... 12
    5.6.1. Module Specific Settings .................................................................................... 13
6. Using the Orbit3 Excel® Add-in....................................................................................... 15
  6.1. Taking Readings ....................................................................................................... 15
  6.2. Sample On ................................................................................................................ 16
  6.3. Controlling DIOM Outputs ......................................................................................... 16
  6.4. Using WCMs ............................................................................................................. 16
7. Examples ........................................................................................................................ 17
8. VBA Access to the Add-in ............................................................................................... 18
  8.1. Available Functions ................................................................................................... 18
  8.2. How to access the functions in VBA .......................................................................... 18
9. Compatibility.................................................................................................................... 20
  9.1. Windows OS and Office Versions ............................................................................. 20
  9.2. Orbit Modules ............................................................................................................ 21
  9.3. Orbit Controllers ........................................................................................................ 21
10. Differences between the Orbit3 and original Orbit Excel Add-ins ................................. 22
  10.1. Introduction ............................................................................................................ 22
  10.2. User interface......................................................................................................... 22
  10.3. Changing settings .................................................................................................. 23
    10.3.1. Original Excel Add-in ....................................................................................... 23
    10.3.2. Orbit3 Excel Add-in ......................................................................................... 24
  10.4. Other improvements/differences ............................................................................ 25
11. Revision History............................................................................................................ 26

 503292 - Orbit3 Excel® Add-in                                                         Issue 9                       Page 3 of 26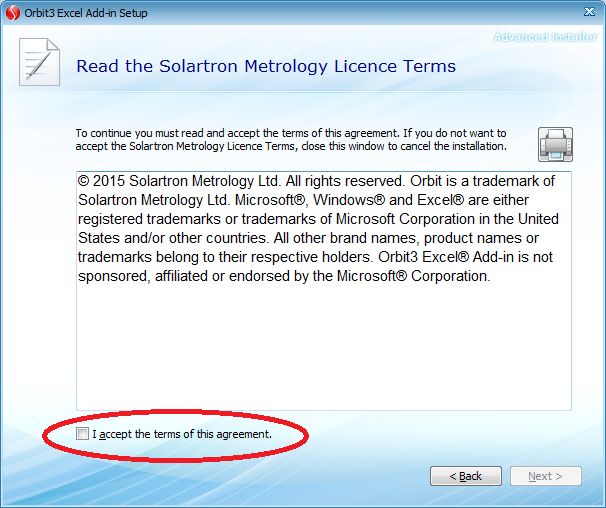
1.        Introduction
 The Orbit3 Excel® Add-in enables you to take readings from Orbit Modules forming an
 Orbit Network and place them in cells of a Microsoft® Excel® spreadsheet.
 It also takes readings from Solartron wireless devices, via a Wireless Connection Module
 (WCM).
 It works with all Solartron Orbit3 Controllers.

          1.1.   This manual
 This manual describes the installation and configuration and also provides information
 and guidance on using the software.

          1.2. Guidelines
     •    The Add-In uses the Orbit Library, which (by design) can only be connected to one
          application at a time. Thus two spreadsheets are not allowed to operate at the same
          time.
     •    Configuration settings for the add-in are stored in the spreadsheet, so it is not
          recommended to have two spreadsheets open at the same time; otherwise, settings
          may be taken from the wrong spreadsheet.
     •    The Add-In uses a hidden sheet in the spreadsheet to store configuration settings.
          Therefore, if the 'Show sheet tabs' option is unchecked (in 'Excel
          Options/Advanced/Display options for this workbook') - thereby hiding the tabbed
          pages, the add-in will not function correctly. The solution is to ensure that the work
          sheet tabs are always visible.
     •    The Add-in will only work with Office 2007 onwards. Please see the Windows
          OS and Office compatibility for more details.
     •    The add-in is only designed to work with Orbit3 products. Please see the Orbit
          Modules & Orbit Controllers compatibility sections for details.

2.        Documentation cross reference

 520439                                 Orbit3 Support pack for Windows: Contains both software and
                                        manuals for the Orbit system
 502990                                 Orbit3 System manual: Contains Orbit 3 system hardware information
 502914                                 Orbit3 Module manual: Contains Orbit 3 Module information

3.        Glossary
Terms used in this manual:

 Add-In                                  Components that can be installed on your computer to add commands and functions to
                                         Microsoft Excel
 Spreadsheet Configuration dialogue      Allows you to change how and where the readings are placed in the Excel worksheet
 box
 Orbit module                            Any device which connects to the Orbit Network and communicates using the Orbit Network
                                         protocol
 Orbit module ID                         Each Orbit Module has a unique 10-character ID to identify it on the Orbit Network
 Orbit Network controller             A device that can communicate with Orbit modules using the Orbit Network
                                      protocol. See Orbit System manual. Current Orbit Network controllers are:
                                      • Orbit USB Interface Module - single channel module for any device with a USB port
                                      • Orbit RS232 Interface Module - single channel module for any device with an RS232 port.
                                      • Orbit Ethernet Interface Module - single channel module for any device with an Ethernet port
                                      • Orbit Wireless Interface Module - single channel module for any device with a Bluetooth2 port
 Orbit Network Configuration dialogue Allows addition and removal of modules on the Orbit Network
 Box
503292 - Orbit3 Excel® Add-in                                                      Issue 9                      Page 4 of 26
4. Installation
4.1. PC System Requirements
4.1.1. PC Hardware Requirements
• Personal computer with a processor running at 1GHz or faster with 2GB or more
RAM.
• An available USB, COM or Ethernet port.
4.1.2. PC Software Requirements
• Microsoft Windows® operating system (Windows® XP, or later)
• Microsoft® Excel® 2007 or later.
o See the Windows OS and Office compatibility section for more details.
• Solartron Orbit3 Support Pack for Windows.
• .NET Framework 4.0 (installation not required for Windows 8 or later)
(installed by prerequisite if internet connection is available)
• Visual C++ 2010 SP1 x86 (MFC Security Update)
(installed by prerequisite if internet connection is available)
• Visual Studio 2010 Tools for Office Runtime
(installed by prerequisite if internet connection is available)
Note: If internet connection is unavailable,
.NET 4.0 is available at:
https://www.microsoft.com/EN-US/DOWNLOAD/confirmation.aspx?id=17718
Visual C++ 2010 SPI x86 (MFC Security Update) is available at:
http://download.microsoft.com/download/1/6/5/165255E7-1014-4D0A-B094-
B6A430A6BFFC/vcredist_x86.exe
Visual Studio 2010 Tools for Office Runtime is available at:
https://www.microsoft.com/en-GB/download/details.aspx?id=48217
4.2. Overview
This section will guide you through the steps required to complete a successful installation of
the Orbit3 Excel® add-in.
Confirm Excel 2007(or newer) is installed
Install the Orbit3 Support Pack for Windows® software
Install the Orbit3 Excel® Add-in
Install the Orbit controller
Connect the Orbit Modules
Configure & run the Orbit3 Excel® Add-in
503292 - Orbit3 Excel® Add-in Issue 9 Page 5 of 26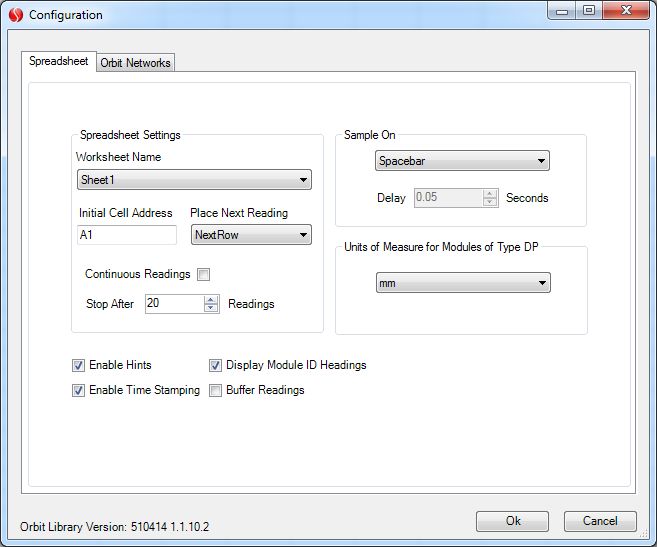
4.3.   Installing the Orbit3 Support Pack for Windows® software

Important! Please ensure that you have Administrative access rights for installing this
software.
Before you can use the Orbit3 Excel® Add-in, you must have the Orbit3 Support Pack for
Windows® software installed on your computer; this is freely available from the Solartron
website (http://www.solartronmetrology.com).
If required, refer to the Orbit3 System Manual for Orbit3 Support Pack for Windows® (ORBIT
CONTROLLER INSTALLATION AND USE section) for more details on installing the support
pack.

      4.4.   Installing the Orbit3 Excel® Add-in

  •   Important!
         o Ensure that you have Administrative access rights for installing this add-in.
         o The Add-In is installed on a ‘Per User’ basis. This means that for each user
            login, a separate install of the Orbit3 Excel® Add-in will be required.

  •   The Add-in is supplied as a Windows install.
         o To install the add-in, simply run (double click) the file: “setup.exe” and follow the
            instructions, next.

               1) Prerequisite, install required
                  software before continuing to           2) Welcome Screen
                  Orbit3 Excel® Add-in
                  installation, see PC Software
                  Requirements.

503292 - Orbit3 Excel® Add-in                               Issue 9              Page 6 of 26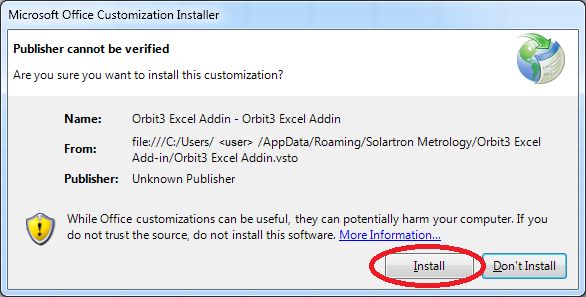
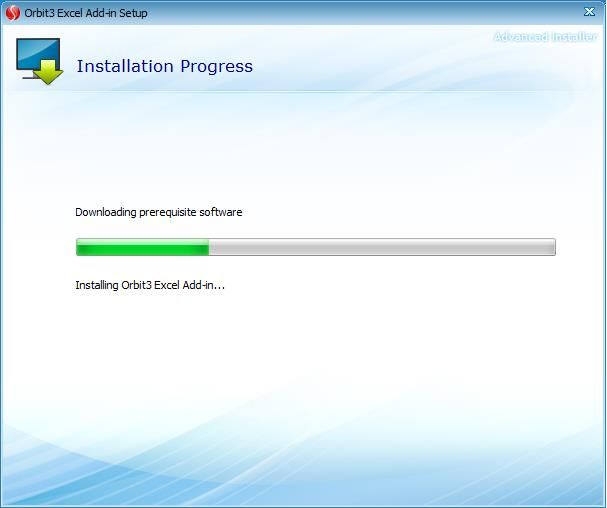
3) Click “I accept...” to start.            4) Install Orbit3 Excel® Add-in

               5) Once installation is complete,
                  a readme is available and
                  installation windows can be
                  closed

      Launching Excel

  •   The first time that Excel is opened after installation has completed will bring up the
      “Microsoft Office Customization Installer”. Click “Install” to proceed.

      Note that this only happens on the first time that the current user launches Excel.

503292 - Orbit3 Excel® Add-in                                Issue 9              Page 7 of 26
•   The software has now been loaded as an Excel Add-in. This can be accessed via the
      Orbit menu buttons on the Excel Add-Ins Menu tab.

  •   This will install this Orbit3 for Excel manual and associated example spreadsheets to
      the current user’s “My Documents” area. Shortcuts are provided in the start menu in
      folder: “Orbit3 Excel Add-in”.

  •   After the Orbit3 Support Pack for Windows® and Orbit3 Excel® Add-in have been
      successfully installed by an Administrator, a standard user may install the Add-in for
      their own use, however Administrator access rights will be required if Excel ® requires
      any additional updates.

      4.5.   Installing the Orbit controller

The desired Orbit controller (e.g. USBIM) needs to be connected to the host PC. For details
on this, please refer to the Orbit3 System Manual (502990).

      4.6.   Connecting the Orbit Modules

Connect the modules that will form the Orbit Network to the Orbit controller. The connection
depends on the type of Orbit Controller used. Please refer to the Orbit3 System Manual
(502990).

      4.7.   Disabling/Enabling the Orbit3 Excel® Add-in

If no longer required, the Orbit3 Add-in can be disabled.

                 To disable the Orbit3 Add-In & remove the Orbit menu from the Excel
                  toolbar: In Excel, select Excel Options, Add-Ins, Manage COM Add-
                            ins & uncheck the Orbit3 Excel Addin check box.

                To re-enable the Orbit3 Add-In and add the Orbit menu (having disabled it
                from the Excel toolbar): In Excel, select Excel Options, Add-Ins, Manage COM
                Add-ins & check the Orbit3 Excel Addin check box.

503292 - Orbit3 Excel® Add-in                               Issue 9             Page 8 of 26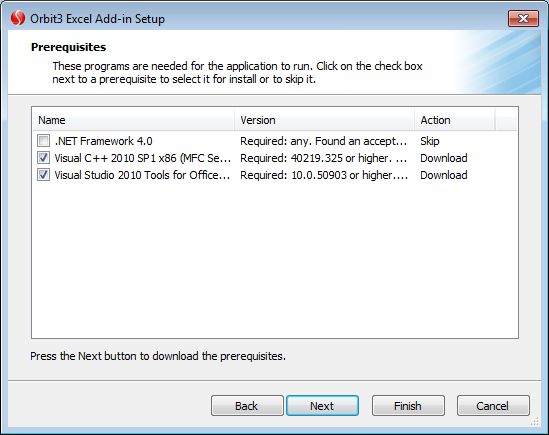
5.       Configuring the Orbit3 Excel® Add-in
       5.1. Accessing the Add-in
     • Open Excel

     •   Select Add-Ins from the Excel ribbon.
            o The Orbit3 Add-in should be visible as:

       5.2. Connecting to Orbit
Before editing settings and taking readings are allowed, the “Connect” button should be
clicked. This will connect to available Orbit networks.
Whilst connecting, the following dialogue is displayed:

After connecting the button changes to “Disconnect”.

Before taking readings is allowed, configuration settings need to be in place.

      5.3. Tool Bar Buttons explained
The tool bar displays the following buttons:

     •   Disconnect
            o This button disconnects from the Orbit networks (previously connected). Note
               this occurs automatically when the Add-in / Excel exits.

     •   About
           o Displays an About Box with the program version.

     •   Settings
            o Displays the configuration dialogue box (see Editing Settings).

     •   Take Readings
            o Starts reading Orbit modules (see Taking Readings).

     •   Zero Modules
 503292 - Orbit3 Excel® Add-in                               Issue 9             Page 9 of 26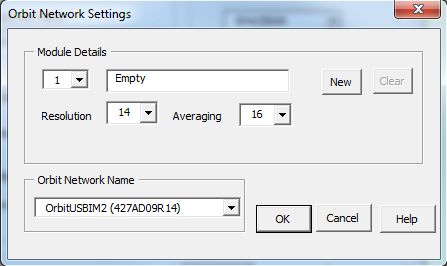
o Zeros selected or all the configured module reading(s) to zero. All subsequent
            readings will be referenced to this zero datum. Clicking the button again will
            remove this zero.

  •   Reset
        o Clicking the Reset button will set the current destination cell address to the initial
            cell address that was set via the Configuration dialogue box. Also resets the
            number of readings taken to zero.

      5.4.   Editing Settings

When Settings is selected, the Configuration dialogue box opens. This dialogue box has two
tabs:
   • The Spreadsheet tab; configures how and where readings are placed in the Excel
      worksheet.
   • The Orbit Networks tab; configures which Orbit controller and Modules are to be used

                     The Configuration Settings are saved with the workbook. Ensure you
                     save the workbook to preserve your current setup.

503292 - Orbit3 Excel® Add-in                               Issue 9             Page 10 of 26
5.5. Spreadsheet Configuration
Worksheet Name Lists the names of the available worksheets in the active workbook. Use this control to select the
destination worksheet for your Orbit readings
Initial Cell Address Sets the cell in which the first of the Orbit readings is to be placed. The address format can be for example:
A1, $A$1 or ‘Name’ format
Place next reading Use this control to select where subsequent readings will be placed. The choices are next row, next column,
same row or same column
Stop after X readings Sets the number of readings to take before automatically stopping taking readings
Continuous Readings Use this control to take readings until requested to stop.
Units Sets the unit of measure for all the Orbit readings placed on the spreadsheet
Sample On Selects the event SPACEBAR
that triggers Orbit
ENTER Using keyboard functions
readings.
ENTER (num-pad)
TIMER Automatically, using the PC system timer
DIOM Using DIOM / DIOM2 ‘Sample On’ pin. The edge is
selected via DIOM / DIOM2 module settings.
Delay (seconds) Sets the delay (in seconds e.g. 1.25) between subsequent readings when Sample On is set to TIMER. Note
that this time setting has a minimum resolution of 0.05 seconds.
Note that due to hardware, Operating System and Microsoft Excel constraints, a smaller resolution than 0.05
seconds was not achievable. For higher reading rates, the Buffer Readings option is recommended.
Enable Hints Use this to choose whether tool tips are shown when hovering over control items.
Display Module Id’s as Enables the recording of the Orbit module ID numbers as spreadsheet headings. These will be placed
headers according with the Initial Cell Address.
Enable Time Stamping Enables a time stamp to be taken, alongside the readings. The time is displayed in seconds, since ‘Take
Readings’ was started. The start date and time is also logged. These time stamps are placed on the worksheet
according with the Initial Cell Address.
Buffer Readings When this option is checked, readings are taken from the configured Orbit modules as quickly as possible,
stored to a buffer and processed onto the Excel worksheet (according with the Initial Cell Address) afterwards.
This allows the fastest reading rates to be obtained. The number of readings to take is set by the “Stop after X
readings” setting.
Note. Due to the Excel timing constraints, selecting a high number of readings will take a great amount of time
to process. Thus it is not recommended to set the “Stop after X readings” above 2500.
503292 - Orbit3 Excel® Add-in Issue 9 Page 11 of 265.6. Orbit Network Configuration
Module Specific Settings
This dialogue box allows you to add and remove Orbit modules on an Orbit Network. The
modules in this list are the modules that will be read from Excel (in the same order as they
appear on the list). Refer to the Orbit System manual for more details on configuring an Orbit
network.
• Select the Orbit Network you wish to use from the Orbit Networks list.
• Add the Orbit modules that you wish to use by using one of the following buttons:
Button Function
Notify Add This adds the module whose probe reading changes (e.g. by moving the tip of a
Digital Probe). Click “Stop Notify” to halt this process.
Find All Modules This automatically polls the Orbit Network and adds any modules detected.
Add Module This adds an individual Orbit module by its identity.
Load Network This finds any modules stored in a previous configuration (stored in ‘hotswap’ T-
Con memory).
Delete Module This deletes the selected module from the Module list.
Clear Modules This clears all modules from the Module list.
Clear TCons Clears the ‘hotswap’ T-Con memory.
Added modules will appear in the ‘Modules’ list. Select an individual module from the list to
view its details and available settings.
Note that the order of modules in this list can be changed using ‘drag and drop’.
503292 - Orbit3 Excel® Add-in Issue 9 Page 12 of 265.6.1. Module Specific Settings
Once the modules have been added, their specific settings can then be altered. Note that
different module types have different settings.
5.6.1.1.Digital Probes, AIMs and LT/LTH lasers
The following settings are available for configuring these modules:
Button / Control Function
Resolution Select the module’s resolution
Averaging Select the module’s averaging
Update Updates the module with resolution & averaging selections
5.6.1.2.DIOMs
Digital I/O Modules (DIOMs) can be directly used with the Add-in.
The DIOM is configured to have its 8 I/O lines fixed as:
• I/O Pins 1 to 6 are outputs (labelled as Config = ‘O’)
o These can be mapped to Excel Worksheet cells to provide alarm outputs from
a set of readings. See Controlling DIOM Outputs for details.
o If multiple DIOMs are on the Orbit network, each module should not be
configured to have I/O output pin mapping cells that overlap with another (i.e.
two output pins that map to the same Excel cell).
• I/O Pins 7 & 8 are inputs (labelled as Config = ‘I’)
If more I/O pins are required, multiple DIOMs can be added to the Orbit network.
• However, if multiple DIOMs are used, ensure only one module is configured for the
‘Start Reading’ trigger and ‘Sample On’ trigger.
The following settings are available for DIOM modules:
503292 - Orbit3 Excel® Add-in Issue 9 Page 13 of 26Button / Control Function
Output Pin Configuration Toggle the DIOM output pin’s default state, by clicking the desired pin’s
Default Default state: high (H) or low (L).
Input Pins Debounce Select the module’s Input Pins Debounce time – see Orbit3 module
manual for further details.
Output Pin Worksheet Name The worksheet name to be used for DIOM output pin mapping
Output I/O Pin1 Cell Address The Excel worksheet cell address for I/O Output Pin1. The other cells are
listed in the “Cell Range”
Output Pin Enable Check Box Enable the Output Pin functionality
Start Readings: I/O Pin 7 Disabled – off
Low to High – a low to high edge on the I/O pin 7 will start readings
High to Low – a high to low edge on the I/O pin 7 will start readings
Sample On: I/O Pin 8 Disabled – off
Low to High – a low to high edge on the I/O pin 8 will sample a reading
High to Low – a high to low edge on the I/O pin 8 will sample a reading
5.6.1.3.DIOM2
Digital I/O V2 Modules (DIOM2) can be directly used with the Add-in. These are an enhanced
version of the DIOM
The DIOM2 differs from the DIOM in that it has fixed IO that provides:
• 6 inputs
o labelled as Config = ‘I’
• 4 outputs
o labelled as Config = ‘O’
o These can be mapped to Excel Worksheet cells to provide alarm outputs from a
set of readings. See Controlling DIOM Outputs for details.
o If multiple DIOMs are on the Orbit network, each module should not be
configured to have I/O output pin mapping cells that overlap with another (i.e.
two output pins that map to the same Excel cell).
If more I/O pins are required, multiple DIOM2s can be added to the Orbit network.
• However, if multiple DIOM2s are used, ensure only one module is configured for the
‘Start Reading’ trigger and ‘Sample On’ trigger.
The following settings are available for DIOM2 modules:
503292 - Orbit3 Excel® Add-in Issue 9 Page 14 of 26Button / Control Function
I/O Pin Configuration Default Displays the DIOM2 pin configuration
Input Pins Debounce Select the module’s Input Pins Debounce time – see Orbit3 module
manual for further details.
Output Pin Worksheet Name The worksheet name to be used for DIOM output pin mapping
Output I/O Pin1 Cell Address The Excel worksheet cell address for I/O Output Pin1. The other cells are
listed in the “Cell Range”
Output Pin Enable Check Box Enable the Output Pin functionality
Start Readings: I/O Pin i1 Disabled – off
Low to High – a low to high edge on Input pin 1 will start readings
High to Low – a high to low edge on Input pin 1 will start readings
Sample On: I/O Pin i2 Disabled – off
Low to High – a low to high edge on the Input pin 2 will sample a reading
High to Low – a high to low edge on the Input pin 2 will sample a reading
Active States Enable the active states (HIGH = checked, LOW = un-checked) for each
input and output pin
Output Mode Sets the output ‘drive’ for all outputs. Choose between NPN, PNP and
TTL (logic). Refer to the Orbit3 module manual (DIOM2) for more details.
5.6.1.4.WCMs
WCM attached devices (e.g. Wireless Hand Tool) can be directly read via the add-in.
The WCM Configurator application (part of the Orbit Support Pack for Windows) should be
used to set up the WCM. Refer to the Orbit Module Manual (WCM Configurator Software
section) for more details.
The WCM’s device settings are viewed (as read only) as illustrated, next
This simply shows which devices are configured. If more devices are required, additional
WCMs can be used.
Note that the WCM Disconnect Period setting is advised to be set at 0 (never disconnect).
Refer to the Orbit Module Manual (WCM Configurator Software section) for more details.
See Using WCMs section for more details.
6. Using the Orbit3 Excel® Add-in
Please refer to Examples for typical usage.
6.1. Taking Readings
• Once the configuration settings have been chosen, select the ‘Take Readings’ button
on the tool bar to start receiving readings from modules on the Orbit Network. The
reading will be taken according to the configured Sample On setting.
503292 - Orbit3 Excel® Add-in Issue 9 Page 15 of 26• Click “Stop Readings” to stop, once already started.
6.2. Sample On
• If ‘Sample On’ has been set to ‘Timer’, or if the ‘Buffer Readings’ option has been
selected, readings will automatically start once ‘Take Readings’ has been clicked.
o Otherwise the selected keypress or DIOM / DIOM2 input will start the readings.
6.3. Controlling DIOM Outputs
If configured, a DIOM / DIOM2 output can be triggered directly from an Excel cell’s value. This
can be from the result of a set of readings (e.g. to set a Limit alarm output).
For example, if I/O Pin 1 is mapped to cell “E1”, then setting the value of “E1” will cause I/O
Pin 1 to change as follows:
Cell Value Action
0 The DIOM / DIOM2 output will be set LOW
>0 The DIOM / DIOM2 output will be set HIGH
Empty The DIOM / DIOM2 output will be set HIGH
Non-integer A format error will be displayed.
Adjacent I/O Pins are mapped to adjacent cells. For example, if I/O Pin 1 is mapped to cell
“E1”, then I/O Pin 2 is mapped to cell “F1”, I/O Pin 3 is mapped to cell “G1” – and so on.
See Example5 and Example6
6.4. Using WCMs
The WCM can be configured to communicate with up to 6 wireless devices. Each device has
a number of channels (e.g. 1 for a WHT). See WCM Module Specific Settings for
configuration details.
When Taking Readings, each configured device channel will use one column on the Excel
spreadsheet. Therefore, the more devices & channels configured, the more Excel columns
will be utilised.
If the channel is currently off-line (e.g. Tool off / battery flat / out of signal range), then the
reading will be returned as “unavailable”.
Note that the WCM module has no reading itself (since it is a ‘gateway’ to the wireless
devices) and is not displayed on the worksheet when taking readings.
503292 - Orbit3 Excel® Add-in Issue 9 Page 16 of 267. Examples
The Orbit3 Excel Add-in install contains examples to help you get started. These
examples are designed to show different aspects of the Add-In.
After loading the example you will need to set-up the Orbit module(s) (refer to Orbit
Network configuration).
Example 1
• Takes 5 readings from an Orbit module. A new reading is taken each time the spacebar is pressed.
• The individual readings are displayed in a table, together with the mean. The reading values are
also displayed on a bar graph.
Example 2
• Automatically takes readings from any two Orbit modules every second.
• The readings are then placed in a worksheet called ‘Reading’, and a two column graph is shown on
a worksheet called ‘Graph’.
Example 3
• Automatically takes continuous readings from an Orbit module.
• The reading is placed in a cell in the worksheet. The Limits table allows you to enter your upper
and lower limits. The graph shows a simple column display that changes colour (from red to green)
when the reading is within limits.
Example 4
• A copy of the functionality of Example 1, with an added VBA macro button to save results. Note
that this example is saved as a macro enabled workbook (.xlsm).
• The macro stores results to the MyDocuments area as a text file (Example4.txt)
• The macro code can be viewed in the Visual Basic editor.
• The visual basic editor is an integral part of Excel in the ‘developer’ tab. This tab needs to be
enabled via a check box in ‘Excel Options’.
• Note that because this spreadsheet uses macros, Excel may need its macro security changed.
Example 5
• A copy of the functionality of Example 3, with an added DIOM output (see Controlling DIOM
Outputs) linked to the Alarm (Limit Error) calculation.
• The DIOM I/O pin1 goes HIGH if the mean reading is outside of limits (Alarm = 1) and LOW if OK.
• I/O pin1 could be wired to LED to indicate a pass / fail
Example 6
• A further example of using DIOM outputs (see Controlling DIOM Outputs) linked to the Limit Error
calculations on the worksheet. This example illustrates some useful Excel spreadsheet functions .
• One DP module and a DIOM are used in this example. Two of the DIOM output pins are mapped to
Excel cells.
• A set of readings (of the DP and DIOM) is taken. The DP readings are compared against a set
limit.
• I/O Pin1 will track the latest reading to indicate greater than Limit. This is an example of
TRACKING the Limit error status.
• I/O Pin2 will process all readings to indicate if any are greater than the Limit. This is an example of
LATCHING the Limit error status.
503292 - Orbit3 Excel® Add-in Issue 9 Page 17 of 268. VBA Access to the Add-in
It is possible to access some of the Add-in functions through the VBA (Visual Basic for
Applications) Com interface. The available functions are detailed below. However, it is
necessary to firstly set up the Orbit network via the Add-in’s Settings as described in the
Editing Orbit Settings section.
8.1. Available Functions
The following functions are available to VBA though the COM interface:
• Connect - Connect to Orbit – equivalent to clicking the “Connect” button.
• Disconnect – Disconnect from Orbit - equivalent to clicking the “Connect” button.
• TakeReadings - equivalent to clicking the “Take readings” button - this causes the
reading set to start (As well as the keyboard interface, the application can be triggered
by a COM Trigger Reading function.
• StopReadings - Stop collecting the set of data - equivalent to clicking the “Stop
Readings” Button
• TriggerReading – programmatical alternative to trigger event in take readings mode
(similar to space bar for triggering) - Note this will only work if not editing a cell.
• Reset - Resets the display of readings to the user configured start cell.
• ZeroAllAsButton - Zero all - equivalent to clicking “zero all” - this toggles the zero
state.
• ZeroAll(bool ClearZero) - Zero all modules - this doesn't toggle. Instead, it requires a
parameter identifying whether zeroing or clearing modules (true clears zero, false
applies zero).
• ZeroOne_ByNetAndIdx(int NetIdx, int ProbeIdx, bool ClearZero) - Zero (or clear
zero) one Module addressed by its orbit network index and probe index (note 0 based
not 1 based).
• ZeroOne_ByIdx(int ProbeIdx, bool ClearZero) - Zero (or clear zero) One Module
addressed as a module is a list of all modules.
Example, if there were two Orbit networks. Network 0 has 3 modules on it and network
1 has 2 modules on it. Thus, there are 5 modules in total. In order to clear the first
module on network 1, it would be necessary to provide a list index of 3 (as the
parameter is 0 based, not 1 based).
• ZeroOne_ById(String OrbitID, bool ClearZero) - Zero (or clear zero) One Module
addressed by its Orbit ID
• Int GetNumberOfModules() - Returns the integer number of Orbit Modules available
(set-up) on all Orbit Networks.
Example, if there were two Orbit networks. Network 0 has 3 modules on it and network
1 has 2 modules on it. Thus, there are 5 modules in total.
• String GetModuleIdByListIdx(int ProbeIdx) - Returns a string containing the Orbit
Identity of the Orbit module at the desired list index.
Example, if there were two Orbit networks. Network 0 has 3 modules on it and network
1 has 2 modules on it. Thus, there are 5 modules in total. In order to obtain the Orbit
Identity of the first module on network 1, it would be necessary to provide a list index of
3 (as the parameter is 0 based, not 1 based).
8.2. How to access the functions in VBA
Functions within the Add-in can be accessed through the VBA interface by getting a reference
to the com object. An example of the VBA code is shown, next:
Sub CallVSTOMethod() 'procedure call
Dim addIn As COMAddIn 'Storage object for the COM Assembly
Dim automationObject As Object 'COM interface class which contains the functions
Set addIn = Application.COMAddIns("Orbit3 Excel Add-in") 'Get Reference to the assembly
503292 - Orbit3 Excel® Add-in Issue 9 Page 18 of 26Set automationObject = addIn.Object 'Get reference to instance of class with the orbit functions
automationObject.Connect 'Call functions in the library (Connect to orbit)
automationObject.TakeReadings 'Call functions in the library (Start Taking Readings)
automationObject.TriggerReading 'Call functions in the library (Trigger a read of a set of data)
End Sub
Notes
• Ensure that the exact name shown in this section is used:
o Application.COMAddIns("Orbit3 Excel Add-in") – otherwise, the add-in will not
be found and a Visual Basic error will occur.
• Multiple calls to the ‘Application.COMAddIns’ will not result in multiple instances, only
references to the original object.
503292 - Orbit3 Excel® Add-in Issue 9 Page 19 of 269. Compatibility
9.1. Windows OS and Office Versions
This table details which versions of Windows and Excel work with the Orbit3 Excel Add-in.
Office Office Office Office 2013
Windows OS Version
2003¹ 2007 2010 & later
Windows 7, 32-bit ✓ ✓ ✓
Windows 7, 64-bit ✓ ✓ ✓
Windows 8.x, 32-bit ✓ ✓ ✓
Windows 8.x, 64-bit ✓ ✓ ✓
Windows 10, 32-bit ✓ ✓ ✓
Windows 10, 64-bit ✓ ✓ ✓
1. Microsoft support for Office 2003 ended April 8th 2014
2. Office 2013 and later not supported on this Operating System
503292 - Orbit3 Excel® Add-in Issue 9 Page 20 of 269.2. Orbit Modules
This table details which Orbit Module Types work (and their associated functionality) with the
Orbit3 Excel Add-in.
Not
Extra
Module Reading Zeroing implemented
Functionality1
Functionality2
Resolution &
Digital Probe ✓ ✓ -
Averaging
Resolution &
Orbit LT Lasers ✓ ✓ Laser Beam off/on
Averaging
Laser Beam off/on,
Resolution &
Orbit LTH Lasers ✓ ✓ Low pass filter3,
Averaging
Level cut time3
Preset,
Linear Encoder (LE) ✓ ✓ -
Reference Mark
Input & Output
Digital Input Output Module
✓ functionality. -
(DIOM)
Input Debounce
Input & Output
Digital Input Output Module
✓ functionality. -
V2 (DIOM2)
Input Debounce
ReadOnSwitch,
Digimatic Input Module
✓ - ReadOnSample
(DIM)
Read Modes
RefAction,
Encoder Input Module (EIM) ✓ - Quadrature and
Encoder Modes
Resolution &
AIM (Voltage / Current) ✓ ✓ -
Averaging
Resolution &
AIM (PT100) ✓ ✓ -
Averaging
Wireless Connection
✓ ✓ Channel Readings WCM Configuration
Module (WCM)
1 This column details the modes / functionality of this Orbit Module type that are
available via the Excel Add-in.
2 This column details the modes / functionality of this Orbit Module type that are not
available via the Excel Add-in.
3 These settings for the LTH type lasers can be set via OrbitLibraryTest software (part
of the Orbit3 Support Pack for Windows). Note that these settings are non-volatile
(i.e. still retained after a power off/on cycle).
9.3. Orbit Controllers
This table details which Orbit3 Controllers work with the Orbit3 Excel Add-in.
Controller Compatibility with Excel Add-in
USBIM ✓
RS232IM ✓
ETHIM ✓
WIM ✓
503292 - Orbit3 Excel® Add-in Issue 9 Page 21 of 2610. Differences between the Orbit3 and original Orbit Excel Add-ins
10.1. Introduction
This section is only relevant for users familiar with the original Orbit Excel Add-in. It details a
list of the differences between the two versions.
At its core, the Orbit3 Add-in uses the Orbit Library, rather than the legacy (no longer
supported) Orbit dll that is used by the original Orbit Add-in.
10.2. User interface
The user interface has changed considerably. The older add-in used a two-stage tool-bar
menu system:
Original Orbit Add-in:
The Orbit3 version has one menu:
The functionality is the same but we no longer have the concept of a ‘Link’. The user clicks on
the Connect button which causes the application to search for available Orbit networks and
modules.
The new add-in no longer has a help button. Where required there are hints that appear
when the mouse is moved over an item.
503292 - Orbit3 Excel® Add-in Issue 9 Page 22 of 2610.3. Changing settings
Both versions of the Excel add-in have similar Windows dialogs for making configuration
changes:
10.3.1.Original Excel Add-in
503292 - Orbit3 Excel® Add-in Issue 9 Page 23 of 2610.3.2.Orbit3 Excel Add-in
The new Excel Add-in uses tabbed pages to switch between spreadsheet and Orbit network
configuration settings (as detailed in the Configuration section)
Whereas the Excel Spreadsheet settings screen is very similar to the older Excel add-in, the
Orbit Networks settings screen offers an easier view of all available Orbit networks and the
modules on each of them. This information is displayed within two adjacent list boxes that
resize with the window. Additionally, there exists a splitter bar between the two lists allowing
the user to adjust the width of both to suit the contents.
New functionality added here:
• When a module is added to an Orbit network, its type is displayed in the Module Type
box that also updates to reflect the module type of the currently selected module from
the module list.
• A tick box indicates if the selected module supports Read Burst mode.
• Read Burst mode is now supported and will be used by default unless one or more
modules on a network don’t support it, in which case this Excel add-in will revert to a
more compatible Read method.
• A drop-down box has been added where waning messages may be displayed.
Warnings will typically be an indication that a certain mode of operation such as Read
Burst mode is not supported by one or more modules on a specific Orbit network.
With no issues the word “None” will be displayed. The first warning in the list will be
displayed; others may be viewed by clicking on the down arrow.
• ‘Find All Modules’, ‘Load Network’, ‘Clear TCons’ and ‘Add Module’ buttons have been
added to perform the specified actions.
• To change the order of modules on a network a drag and drop mechanism has been
implemented. First click anywhere within the Module list and then click and hold the
left mouse button on the module to be moved. All the time the mouse button is
pressed, the selected item may be dragged to the desired position in the list.
Releasing the mouse button will perform the actual move - provided that the mouse
pointer is within the module list. Note: Pressing the Escape key will cancel the drag and
drop operation.
• The Update button, when clicked will write the ‘Resolution’ and ‘Averaging’ values
(selected by using the two drop-down boxes) to the currently selected module. As per
the older add-in, these values are stored in the worksheet settings and are re-applied
when this is re-opened (after being saved). The currently selected module’s resolution
and averaging values are selected and displayed in the respective drop-down boxes.
• The counts of both the available Networks and the modules connected to these
networks are displayed underneath the respective lists. Any configured modules not
found (i.e., not plugged in) are marked as “unavailable” and do not contribute to the
connected count.
• The Delete Module button allows the user to remove the selected module from the
currently selected Orbit network. This matches the functionality of the Clear button in
503292 - Orbit3 Excel® Add-in Issue 9 Page 24 of 26the older add-in, but has a more descriptive label to differentiate it from the Clear
Modules button described next. As per the older add-in, the user may undo this delete
by clicking on the Cancel button.
• The Clear Modules button prompts the user if they wish to remove all modules from the
currently selected Orbit network. As per the older add-in, the user may undo this
delete by clicking on the Cancel button.
• The Refresh button will update the list of modules to reflect the current status. This is
useful if modules are either connected to Orbit networks or disconnected from them
whilst within this settings dialog window. For example, modules unplugged whilst in
this dialog window will have their descriptions updated with the word “unavailable” after
this Refresh button has been pressed. Closing the Configuration dialog window and
re-opening it will have the same effect.
• It is now possible to display the Orbit Module Ids as headers of the reading
rows/columns.
• For informational purposes, the version of the software Orbit Library being used is
displayed at the bottom left of the dialog window.
The new add-in has a set of buttons much the same as the older Excel add-in:
The main difference is that they have a textual description and the Connect button acts as a
toggle to switch between connect and disconnect.
10.4. Other improvements/differences
• If the user is editing a spreadsheet cell i.e., the cell is in edit mode, this prevents any of
the add-in buttons for the old Excel add-in from responding. The new add-in will take
the cell out of edit mode and respond to the button press.
• Handling of Orbit networks (e.g. USBIM’s) either not plugged in or identified by the
computer is handled differently with the new add-in. The old add-in can crash under
certain conditions such as clicking on the Ok button instead of the Cancel button, and if
no networks are connected it can just crash altogether. The new add-in will display a
list of missing networks and give the user the option to remove them from the
configuration if they are no longer required. Missing network modules not removed
from the configuration will be marked as “unavailable” in the network list.
• Option to connect to WIM Orbit controllers included.
• The 31 module limit per network does not apply to the new add-in.
503292 - Orbit3 Excel® Add-in Issue 9 Page 25 of 26• The new add-in does not display error codes for faulting module conditions. Instead,
textual descriptions of the issues are displayed in the cell where a module’s reading
would have been placed.
• The new Excel Add-in does not use the VBA project object model. This means there
are no requirements to set macro settings in Excel’s Trust Center or to save workbooks
as Excel Macro-Enabled (*.xlsm) files.
• Creating a chart on a separate Excel tabbed page by selecting a range of worksheet
values and pressing the F11 key causes the legacy VBA add-in to close. The new
add-in works as expected.
• Configuration Options to include Module Identity Headings, Time Stamps and Buffer
Readings added – see Spreadsheet Configuration section.
11. Revision History
REVISION DATE COMMENTS
1 10/07/15 Initial issue
2 23/07/15 Orbit Modules & Orbit Controllers Compatibility tables added.
3 04/08/15 Added Documentation cross reference, WIM controller connection and updated Installing the Orbit3
Excel® Add-in section
4 29/09/15 Added Date/time stamp and Buffer readings options in Spreadsheet Configuration section . Updated
Installing the Orbit3 Excel® Add-in section.
5 19/05/16 Added VBA Access to the Add-in section.
6 25/10/16 Updated Installing the Orbit3 Excel® Add-in.
7 22/10/18 Added DIOMs & Examples 5 & 6
8 15/11/18 Added WCMs
9 06/03/18 Added DIOM2
503292 - Orbit3 Excel® Add-in Issue 9 Page 26 of 26You can also read