Cloud Agent for Windows - Installation Guide Agent Version 4.0, 3.1, 3.0, 2.1 August 24, 2020 - Qualys, Inc.
←
→
Page content transcription
If your browser does not render page correctly, please read the page content below
Cloud Agent for Windows
Installation Guide
Agent Version 4.0, 3.1, 3.0, 2.1

August 24, 2020

         Verity Confidential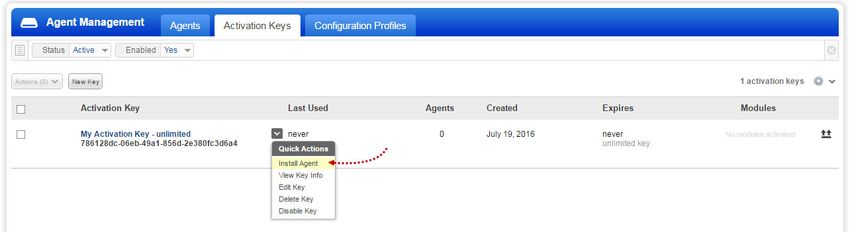
Copyright 2016-2020 by Qualys, Inc. All Rights Reserved. Qualys and the Qualys logo are registered trademarks of Qualys, Inc. All other trademarks are the property of their respective owners. Qualys, Inc. 919 E Hillsdale Blvd 4th Floor Foster City, CA 94404 1 (650) 801 6100
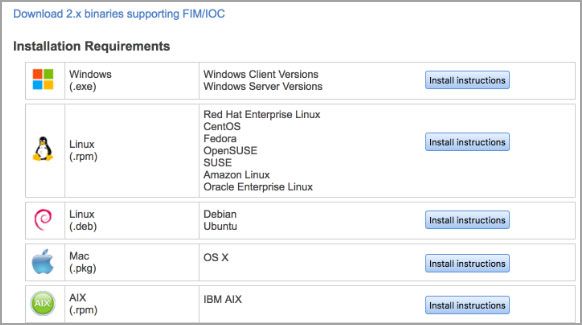
Table of Contents
Preface................................................................................................................ 4
About Qualys ........................................................................................................................... 4
Contact Qualys Support.......................................................................................................... 4

Get Started ........................................................................................................ 5
Qualys Cloud Agent Introduction..........................................................................................               5
Cloud Agent Platform Availability Matrix ............................................................................                   5
A few things to know... ...........................................................................................................     5
    Cloud Agent requirements...............................................................................................             5
    What are the installation steps? .....................................................................................              5
    Get help with troubleshooting.........................................................................................              6

Installation ......................................................................................................... 7
Tips and best practices ........................................................................................................... 8
Cloud Agent Windows hotfixes needed ................................................................................ 8
How to download the Agent installer ................................................................................... 9
Installation steps ................................................................................................................... 10
    What you’ll need............................................................................................................. 10
    Steps to install Agents .................................................................................................... 10
    What happens next?....................................................................................................... 10
    You might also be interested in... ................................................................................. 10
Certificate Support ................................................................................................................ 11
Anti-Virus and HIPS Exclusion / Whitelisting .................................................................... 11
Upgrading the Cloud Agent .................................................................................................. 12
Uninstalling the Cloud Agent............................................................................................... 13

Proxy Configuration ...................................................................................... 15
What do I need to know?...................................................................................................... 15
QualysProxy syntax............................................................................................................... 17
Multiple Proxy Server support in Proxy URL and PAC Files (Windows Agent 3.1 or later) 17
Use cases ................................................................................................................................ 19

Cloud Agent Preparation for Cloning / Gold Image ............................ 20
Scan on Demand and Scan on Startup ..................................................... 22
     Registry Configuration.................................................................................................... 23

                                                                       3
Preface
About Qualys
Preface
Welcome to Qualys Cloud Agent for Windows. This user guide describes how to install
cloud agents on hosts in your network.
About Qualys
Qualys, Inc. (NASDAQ: QLYS) is a pioneer and leading provider of cloud-based security and
compliance solutions. The Qualys Cloud Platform and its integrated apps help businesses
simplify security operations and lower the cost of compliance by delivering critical
security intelligence on demand and automating the full spectrum of auditing,
compliance and protection for IT systems and web applications.
Founded in 1999, Qualys has established strategic partnerships with leading managed
service providers and consulting organizations including Accenture, BT, Cognizant
Technology Solutions, Deutsche Telekom, Fujitsu, HCL, HP Enterprise, IBM, Infosys, NTT,
Optiv, SecureWorks, Tata Communications, Verizon and Wipro. The company is also a
founding member of the Cloud Security Alliance (CSA). For more information, please visit
www.qualys.com.
Contact Qualys Support
Qualys is committed to providing you with the most thorough support. Through online
documentation, telephone help, and direct email support, Qualys ensures that your
questions will be answered in the fastest time possible. We support you 7 days a week,
24 hours a day. Access support information at www.qualys.com/support/.
4Get Started
Qualys Cloud Agent Introduction
Get Started
Thank you for your interest in Qualys Cloud Agent!
This document tells you all about installing Qualys Cloud Agent for Windows. We’ll tell
you about Requirements, Installation Steps, Proxy Support, Certificate Supports, Anti-
Virus and HIPS Exclusion / Whitelisting, Best Practices and more.
Qualys Cloud Agent Introduction
Qualys Cloud Platform gives you everything you need to continuously secure all of your
global IT assets. Now with Qualys Cloud Agent, there’s a revolutionary new way to help
secure your network by installing lightweight cloud agents in minutes, on any host
anywhere - such as laptop, desktop or virtual machine.
Get informed quickly on Qualys Cloud Agent (CA).
Video Tutorials
Cloud Agent Platform Introduction (2m 10s)
Getting Started Tutorial (4m 58s)
Cloud Agent Platform Availability Matrix
Refer to the Cloud Agent Getting Started Guide for information on supported operating
systems and versions.
Click here for the hotfixes needed
A few things to know...
Cloud Agent requirements
- Your hosts must be able to reach your Qualys Cloud Platform (or the Qualys Private
Cloud Platform) over HTTPS port 443. Log into the Qualys Cloud Platform and go to Help >
About to see the URL your hosts need to access.
- To install Cloud Agent for Windows, you must have Local or Domain administrator
privileges on your hosts. Proxy configuration is supported. Learn more
What are the installation steps?
Our Cloud Agent UI walks you through the steps to install agents on your hosts. Once the
agent is installed you will need to provision it using our agent configuration tool.
5Get Started
A few things to know...
Get help with troubleshooting
We recommend you inspect the agent’s log file located here:
C:\ProgramData\Qualys\QualysAgent
Note: Due to security permissions, it may not be possible to access the QualysAgent folder
directly. Copy the QualysAgent folder to another location to inspect the log files.
On XP and Server 2003 log files are located here:
C:\Documents and Settings\All Users\Application Data\Qualys\QualysAgent
Learn more
Troubleshooting
Error messages
6Installation
Installation
It’s easy to install Cloud Agent for Windows. We’ll walk you through the steps quickly.
Qualys provides installers and packages coded for each supported operating system. It's
not possible to use an agent coded for one platform on another platform. You can use
software distribution tools like SCCM, Intune, BigFix, rpm, Casper, etc to install the agent
onto target machines. You can install Cloud Agent into gold images including VM
templates and cloud provider images such as Amazon AWS, Microsoft Azure, and Google
Compute Platform.
Qualys Platform supports detection of duplicate agent IDs and automatically re-provisions
the duplicate agents. Refer to Cloud Agent Preparation for Cloning / Gold Image for
information on how to install an agent into a gold image without initial provisioning. This
is the recommended method to prevent duplicate asset records.
If you are using software distribution tools, ensure that you package the Qualys-provided
installer along with the specific Activation Key and Customer ID strings. Do not package
up the artifacts that are installed by the agent into your own installer as the installation
environment is keyed for that specific machine when the agent is installed. Including
these artifacts will create duplicates that the platform may not be able to easily de-
duplicate.
Keep in mind - Depending on your environment, you might need to take steps to support
communications between agent hosts on your network and the Qualys Cloud Platform.
Tips and best practices
Cloud Agent Windows hotfixes needed
How to download the Agent installer
Installation steps
Proxy Configuration
Certificate Support
Anti-Virus and HIPS Exclusion / Whitelisting
Upgrading the Cloud Agent
Uninstalling the Cloud Agent
7Installation
Tips and best practices
Tips and best practices
What is an activation key? You’ll need an agent activation key to install agents. This
provides a way to group agents and bind them to your subscription with Qualys Cloud
Platform. You can create different keys for various business functions and users.
Benefits of adding asset tags to an activation key Tags assigned to your activation key
will be automatically assigned to agent hosts. This helps you manage your agents and
report on agent hosts.
Running the agent installer You’ll need to run the installer from an elevated command
prompt, or use a systems management tool.
Be sure to activate agents to provision for any modules licensed in your subscription -
Vulnerability Management (VM), Policy Compliance (PC), File Integrity Monitoring (FIM),
Endpoint Detection and Response (EDR), or Patch Management (PM). Activating an agent
for a module consumes a module license. You can set up auto activation by defining
modules for activation keys, or do it manually in the Cloud Agent UI.
What happens if I skip application activation? Agents will sync inventory information only
to the cloud platform (IP address, OS, DNS, NetBIOS names, MAC address, installed
software).
How many agents can I install? You can install any number of agents but can activate an
agent for a product module only if you have a license for that module. The Agents tab in
the Cloud Agent UI tells you about your installed agents.
Check to be sure agents are connected Once installed agents connect to the Qualys
Cloud Platform and provision themselves. You can see agent status on the Agents tab -
this is updated as agents check-in. If your agent doesn’t have a status, it has not
successfully connected to the cloud platform and you need to troubleshoot.
Cloud Agent Windows hotfixes needed
The following hotfixes are required for the Cloud Agent to run and connect to the Qualys
Platform from older Windows operating systems.
Hotfix KB Article Archive Language Platform
Windows XP SP3+ x86 SHA2 Cert 968730 375554_ENU_i386_zip.exe English i386
Hotfix
Windows Server 2003 SP2+ x86 968730 375510_ENU_i386_zip.exe English i386
SHA2 Cert Hotfix
Windows XP SP3+ x64 & Windows 968730 375531_ENU_x64_zip.exe English x64
Server 2003 SP2+ x64 SHA2 Cert
Hotfix
Note: Archive names may change in the future.
To acquire these hotfixes contact Microsoft Support.
8Installation
How to download the Agent installer
How to download the Agent installer
Here’s how to download an installer from the Qualys Cloud Platform and get the
associated Activation ID and Customer ID.
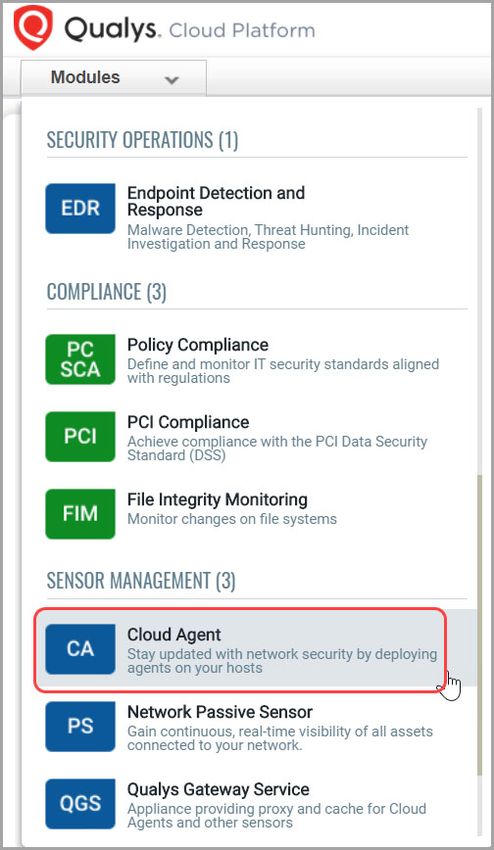
Log into the Qualys Cloud Platform and select CA for the Cloud Agent module.
Choose an activation key (create one if needed) and select Install Agent from the Quick
Actions menu.
9Installation
Installation steps
Click Install instructions next to Windows (.exe).
What happens? The Agent installer is downloaded to your local system, and in the UI
you’ll see the associated Activation key ID and Customer ID - copy and paste this to a safe
place, you’ll need it to complete the installation manually or through software
distribution tools.
Installation steps
What you’ll need
To install cloud agents, you’ll need to download the Cloud Agent installer and get the
associated ActivationID and CustomerID. Just log into the Qualys Cloud Platform, go to the
Cloud Agent (CA) module, and follow the installation steps for Windows (.exe) to get
everything you need.
Cloud Agent requirements
Steps to install Agents
Copy the Qualys Cloud Agent installer onto the host where you want to install the agent,
and run the command or use a systems management tool to install the agent as per your
organization's standard process to install software.
> QualysCloudAgent.exe CustomerId={xxxxxxxx-xxxx-xxxx-xxxx-
xxxxxxxxxxxx} ActivationId={xxxxxxxx-xxxx-xxxx-xxxx-xxxxxxxxxxxx}
What happens next?
We’ll start syncing asset data to the cloud!
Once installed an agent connects to the Qualys Cloud Platform and provisions itself. The
agent will download its associated Configuration Profile (and follow any settings defined),
download manifests for any activated modules, and start collecting asset metadata for
each module to send to the Qualys Cloud Platform.
You might also be interested in...
Proxy Configuration
Certificate Support
10Installation
Certificate Support
Anti-Virus and HIPS Exclusion / Whitelisting
Certificate Support
Qualys Cloud Platform certification uses SHA2-512. Windows XP and Windows Server
2003 do not include SHA2 support by default so you must install a SHA2 hotfix on these
systems, otherwise certification will fail.
Click here for the hotfixes needed
Looking for something more?
Microsoft KB Article on SHA-256 support
Anti-Virus and HIPS Exclusion / Whitelisting
Have Anti-Virus, EDR, or HIPS software installed? It's required that the following files,
directories, and processes are excluded or whitelisted in all security software installed on
the system in order to prevent conflicts with the Cloud Agent.
Agent processes
QualysAgent.exe - this is the Qualys endpoint service
QualysAgentUI.exe - this is the Qualys user interface service
QualysCloudAgent.exe - non-MSI installer needs access to disk and registry locations (see
below)
setup.exe - non-MSI installer needs access to disk and registry locations (see below)
uninstall.exe - this is the Qualys endpoint service uninstaller - needs r/w/d access to
following disk and registry locations
Processes under ProgramData\Qualys\QualysAgent, if Qualys Patch Management is
activated on the agent
Processes under Program Files\Qualys\QualysAgent, allows Qualys FIM driver to be loaded
and unloaded, if Qualys File Integrity Monitoring is activated on the agent
File whitelisting
%PROGRAMDATA%\Qualys\QualysAgent - we read/write/create/delete files in this
directory and sub-directories
%ProgramFiles(x86)%\Qualys\QualysAgent - this is where the service and uninstall are
installed. The service will create processes so AV/EDR/HIPS needs to make sure to unblock
this action
On x64 systems, the agent is located at: %ProgramFiles%\Qualys\QualysAgent
11Installation
Upgrading the Cloud Agent
Registry whitelisting
HKEY_LOCAL_MACHINE\SYSTEM\CurrentControlSet\services\QualysAgent - this is where
the agent setup installs the service into the system.
HKEY_LOCAL_MACHINE\SOFTWARE\Qualys - this is where breadcrumb information lives
to merge agent and appliance scanner results. The agent needs c/r/w/d access here; setup
needs to create the key; uninstall needs ability to delete the key.
QualysAgent.exe
Calls CreateProcess to launch external processes as needed
Calls CoCreateInstance to instantiate COM objects
Creates/Reads/Writes/Deletes files out of its ProgramData directory
Creates/Reads/Writes/Deletes from the HKLM\Software\Qualys registry key
Enumerates and reads from required file and registry locations
Upgrading the Cloud Agent
The Qualys Platform can be used to upgrade agents to newer available versions when
agents check into the platform, depending on the settings in the Configuration Profile.
Software distribution tools can package the Cloud Agent installer of a newer version as
already installed agents in those cases are not configured for auto-upgrade.
The Windows Cloud Agent installer supports a command line argument ("PatchInstall")
that enables an upgrade-in-place of the installed agent so that it retains the agent UUID,
Customer ID, and Activation Key configuration on the system.
*REQUIRED: It is required for software distribution tools to use a specific command line
argument to upgrade existing installed Windows agents. If not, the installer will generate
a new agent UUID which will create a duplicate host record in the Qualys platform (two
entries with different agent UUIDs for the same hostname).
QualysCloudAgent.exe PatchInstall=TRUE
Note: When using the "patchinstall" argument, do not append the Customer ID or
Activation Key arguments.
Tell me about self-patch The Cloud Agent automatically upgrades through self-patching.
For successful self-patching the Cloud Agent needs access to the following Revocation
servers for the host to receive the public root certificate used to sign the agent binaries:
http://ctldl.windowsupdate.com/
http://rb.symcd.com/
http://rb.symcb.com/
Note: This is required only for agents upgrading from 2.0.2 - 2.0.6 to 2.1.x.
12Installation
Uninstalling the Cloud Agent
Uninstalling the Cloud Agent
Uninstalling the agent from the Cloud Agent module UI or API
When you uninstall a Cloud Agent using the Cloud Agent module user interface or Cloud
Agent API, the agent, its asset record, any licenses for activated modules, and any
associated data and assessment findings are removed from the Qualys subscription.
Agents checking into the Qualys Platform will uninstall locally from the system (service,
Program Files, and Program Data), but will keep the registry entry with agent Host ID
(Agent UUID), Activation Key, Customer ID, and other registry keys. This facilitates
keeping the same agent personality if an agent is re-installed onto the same asset, and to
support agentless tracking for authenticated scans.
Uninstalling the agent from the host itself
When you uninstall a cloud agent from the host itself using the Uninstall utility, the
agent, its license usage, and scan results are still present in the Qualys Platform
subscription.
Uninstalling locally from the system (service, Program Files, and Program Data) will keep
the registry entry with agent Host ID (Agent UUID), Activation Key, Customer ID, and other
registry keys. This facilitates keeping the same agent personality if an agent is re-installed
onto the same asset, and to support agentless tracking for authenticated scans.
Uninstall.exe Uninstall=True
During uninstallation, do not use the Customer ID and Activation Key arguments.
To remove the agent’s asset record, license, and assessment findings from the platform,
use the Cloud Agent module user interface or Cloud Agent API to uninstall the agent. This
can be performed after the agent has been uninstalled from the local system.
Note: The Uninstall.exe program must be called from outside the Qualys directories to
delete the Qualys directories as part of the uninstallation, else the installer will stop and
exit with an error.
Clean Uninstall
The default uninstall behavior retains the Agent UUID, Customer ID, and Activation Key
on the system. This supports two use cases: a new agent installation will re-use the
original Agent UUID so there is a consistent lifecycle of that asset in the platform; and, for
cases where authenticated scanning is enabled for Agentless Tracking and needs the
UUID is preserved.
The Windows Cloud Agent installer supports a clean uninstall capability, for those cases
where it's needed that the Agent UUID, Customer ID, and Activation Key are removed from
the system. Provide the following arguments to the installer:
Uninstall.exe Uninstall=True Force=True
13Installation
Uninstalling the Cloud Agent
Installing the agent on a system that has a clean uninstall performed will create a new
Agent UUID for that system and will potentially create a duplicate host record in the
platform if the original host record was not removed using the "uninstall" action in the
Cloud Agent UI or API.
Note: The Uninstall.exe program must be called from outside the Qualys directories to
delete the Qualys directories as part of the uninstallation, else the installer will stop and
exit with an error.
Sample Clean Uninstall agent commands
For 64 bit agents:
"%programfiles(x86)%\qualys\qualysagent\uninstall.exe" Uninstall=True Force=True
For 32-bit agents or version 1.6 agents:
"%programfiles%\qualys\qualysagent\uninstall.exe" Uninstall=True Force=True
14Proxy Configuration
What do I need to know?
Proxy Configuration
Cloud Agent Windows proxy settings are stored in the Qualys registry hive, reference a
PAC file URL stored in the Qualys registry hive, or determined if the system is configured to
use WPAD.
Software distribution or systems management tools can set the proxy configuration for
the agent when installing the agent or after the agent has been installed.
A companion utility installed with the Cloud Agent called QualysProxy.exe can be used
optionally by software distribution tools, system management, or manually to set the
proxy configuration for the agent. The QualysProxy.exe utility is the only method that will
encrypt any required proxy authentication credentials during the setting of the proxy
configuration
QualysProxy lets you:
- Configure proxy server(s) and port
- Configure proxy username and password credentials
- Configure PAC file URLs for cases when WPAD is not available
- Enable/disable WPAD detection
What do I need to know?
Tell me about installation The QualysProxy tool, and proxy tool updates, are installed
with the Cloud Agent installation and updated, if necessary, as Cloud Agent versions are
upgraded.
On all 2.x+ agent versions on x86 and x64 systems, the Qualys Proxy is located at:
C:\Program Files\Qualys\QualysAgent\QualysProxy.exe
On all 1.x agent versions on x86 systems, the Qualys Proxy is located at:
C:\Program Files\Qualys\QualysAgent\QualysProxy.exe
On all 1.x agent versions on x64 systems, the Qualys Proxy is located at:
C:\Program Files (x86)\Qualys\QualysAgent\QualysProxy.exe
15Proxy Configuration
What do I need to know?
Run from elevated prompt The proxy tool must be run from an elevated command
prompt by right clicking the command prompt start menu item:
… or by typing cmd into the Search/Run start menu edit control and right clicking on the
cmd.exe menu item:
Systems management software and remote registry management can be used to set the
proxy servers. The QualysProxy.exe command line interface (CLI) tool is designed to be
used in shell scripts executed by systems management software. When execution of the
tool completes, the ERROR_LEVEL will be set to 0 (zero) on success, and non-zero on error.
No User Interface window is displayed to the user.
Changes made through the proxy tool happen automatically and there’s no need to
restart the agent service. Changes can be verified by inspecting the Agent’s log.txt file:
C:\ProgramData\Qualys\QualysAgent
On XP and Windows Server 2003, the Agent's log.txt file is located here:
C:\Documents and Settings\All Users\Application
Data\Qualys\QualysAgent
All connection errors will be logged and proxy configuration archived each time the Agent
attempts to communicate with the cloud.
16Proxy Configuration
QualysProxy syntax
QualysProxy syntax
QualysProxy [/u [/n ] [/pProxy Configuration
Multiple Proxy Server support in Proxy URL and PAC Files (Windows Agent 3.1 or later)
This proxy configuration can be used with the Qualys Gateway Service or third-party
proxy servers. There is no requirement that the failover proxy servers need to be on the
same subnet as the first proxy server; as long as the Cloud Agent can connect to other
proxy servers even on other subnets, the agent will use those proxy server(s) if the first
proxy server is not available.
Define multiple proxy servers in the Proxy URL using semi-colon separated values. For PAC
files, refer to the PAC file vendor's documentation that defines how to configure multiple
proxy servers.
18Proxy Configuration
Use cases
Use cases
Example 1 – Set proxy and port number
The following example shows how to set a proxy and port number:
QualysProxy /u http://my-proxy:8080
Example 2 - Define multiple proxy servers used for failover
The following example shows how to set a proxy and port number:
QualysProxy /u http://my-proxy-1:8080;http://my-proxy-2:8080
Example 3 - Define multiple ports on the same proxy server for failover
This can also be used to configure the Cloud Agent to use the Cache Port first and Proxy
Port second (as failover) on a single Qualys Gateway Appliance.
The following example shows how to set different port numbers for the same proxy
server:
QualysProxy /u http://my-proxy:8080;http://my-proxy:1080
Example 4 – Set proxy and credentials
The following examples shows how to set a proxy (default port: xxx) along with proxy
credentials:
QualysProxy /u http://my-proxy /n ProxyUsername /p ProxyPassword
Example 5 – Tell agent to use PAC file
The following example shows how to tell the cloud agent to use a PAC file directly in lieu
of allowing it to be found through WPAD:
QualysProxy /a http://my-pac-file-server/QualysAgent.pac
Example 6 – Specify credentials for use with PAC file
The following example shows how to specify credentials for use with a PAC file. The
credentials will get passed to the resulting proxy URL:
QualysProxy /n ProxyUsername /a ProxyPassword /a http://my-pac-
file-server/QualysAgent.pac
19Cloud Agent Preparation for Cloning / Gold Image
Cloud Agent Preparation for Cloning / Gold
Image
The Qualys Cloud Agent supports configuration and deployment into cloned images in
physical, virtual, and cloud environments (including Amazon AWS and Microsoft Azure).
The Cloud Agent is created with a universally unique identifier (UUID) as its Agent ID as
part of the provisioning process between the agent and the Qualys Platform or Private
Cloud Platform. Each Cloud Agent must have a truly unique Agent ID or else there will be
issues with management and reporting.
Follow these best practices deployment guidelines to ensure UUIDs generated are truly
unique across agent deployments in cloned or gold images.
This method is for all supported versions of Windows.
1.) Install the operating system, applications, and patches.
- Create a snapshot of the Gold Image before proceeding.
2) Verify that there is no network connectivity on the Gold Image instance to the Qualys
Cloud Platform or deployed Private Cloud Platform(s) for the installation process of the
Cloud Agent, which can include, but not limited to:
- Turn off networking to the Gold Image from the virtualization manager
- Manage the Gold Image in a network that does not have network connectivity
- Create a bogus entry in the local hosts file (located at
C:\Windows\System32\drivers\etc\hosts) for the DNS name of the public POD or PCP that
the agent connects to, e.g. 127.0.0.1 (make sure to remove this entry before the Gold Image
is cloned)
- Create a temporary Windows firewall rule to block the Cloud Agent process from
communicating over the network (make sure to remove this entry before the Gold Image is
cloned)
3) Install the Qualys Cloud Agent and configure it using your assigned Activation ID and
Customer ID.
- The Cloud Agent will attempt to connect to the Qualys Platform to provision. Without
connectivity, the agent will remain in an unprovisioned state pending its next successful
connection to the Qualys Platform.
4) Verify that the agent was not provisioned. (Note: internally, the agent refers to the
Agent ID as "HostID".)
- The registry key "HostID" must not exist at: HKEY_LOCAL_MACHINE\SOFTWARE\Qualys
- If the registry key exists, the agent in the Gold Image was provisioned and thus will not
be suitable for cloning. In this case, revert the image snapshot to prior to the installation
of the Cloud Agent and start the process again.
20Cloud Agent Preparation for Cloning / Gold Image
5) If this is not the last application or service to be installed in the Gold Image, shut down
the Cloud Agent service and set its auto-start to "Disabled" so that the agent doesn't start
and provision itself during the remainder of the Gold Image configuration; make sure to
set the Cloud Agent service to "Automatic" start before cloning the Gold Image.
6) Shut down the Gold Image and make it available for cloning.
7) Upon start-up of a cloned image, the Cloud Agent will start, connect to the Qualys
Platform, get provisioned, and generate its UUID for that running cloned instance.
Alternative approach: You can install the Cloud Agent into instances in domain join
script(s) as part of the final installation/provision for hosts. This approach greatly
simplifies the gold image installation but requires additional processing during the
domain join.
Not following these procedures (or if Software Distribution Tools are not configured
correctly when deploying or upgraded agents) can create duplicate host records in the
Qualys Platform. When there are two host records of the same hostname, one record has
the old Agent UUID (which is no longer used) and the other has the new Agent UUID
(which is used between the agent and platform). If this occurs, usually the "Last Checked
In" date of the old Agent UUID record is the date when the reprovisioning occurred with
the agent now using the new Agent UUID. All new vulnerability, compliance, and asset
inventory information is associated with the new Agent UUID and host record.
If there are duplicate host records due to different Agent UUIDs being generated, you can
remove the old host records / Agent UUIDs by uninstalling them via the Cloud Agent
module user interface or the API. This does not affect the functionality of the agent
communicating using the new Agent UUID.
If there are larger numbers of duplicate agents that is impractical or cumbersome to
remove yourself, contact Qualys Customer Support.
21Scan on Demand and Scan on Startup
Scan on Demand and Scan on Startup
Cloud Agent Windows 3.0 introduces client-side initiated "ScanOnDemand" and client-
side initiated "ScanOnStartup" functions. This feature is used to trigger the agent to
initiate an on-demand manifest collection or when the agent service starts for supported
activated modules: Vulnerability Management, Policy Compliance and Inventory.
This capability is introduced to primarily support patch management use cases where one
needs to verify that newly installed patches have remediated the associated local host
vulnerabilities.
Scan on Demand is a single use execution that is initiated manually on the host itself,
using locally or remotely executed scripts or GPO, or from software distribution tools at
the end of a patch deployment job.
Scan on Startup is a configuration option, that once set, will initiate a manifest scan when
the Qualys Agent service starts up. The primary use case is to reassess the asset when a
patch deployment job requires the host to reboot to fully remediate the vulnerability or
when a gold images are being built to verify that there are no vulnerabilities in the image.
In addition to initiating Scan on Demand or setting the Scan on Startup, you can set the
CPU Limit to a performance value for the on demand or startup scans. This CPU Limit is
only for the on demand or startup execution and is separate from the CPU Limit set in the
Configuration Profile. The most common use case is setting a high CPU Limit or no throttle
(100%) for this scan so that the agent portion of the processing can be run as fast as
possible. This allows for fast collection as part of patch deployment jobs during change
management windows while keeping a low performance profile for normal production
usage.
Note: This feature only manages when the agent initiates a manifest scan to collect the
requisite metadata. After collection, the agent calculates the delta changes and sends any
changes to the platform for processing. Platform processing is per the normal assessment
pipeline for assessments to be available in VM reports, API, VM dashboard, PC Reports,
and AssetView. The Scan on Demand feature does not change or accelerate the normal
assessment pipeline for assessment processing on the platform.
22Scan on Demand and Scan on Startup
Registry Configuration
The configuration for this feature is set and managed in Qualys Agent hive in the registry.
This allows integration into patch deployment and gold image workflows without
requiring access to the Qualys platform UI or API.
The agent monitors the Qualys registry hive at
HKLM/Software/Qualys/QualysAgent/ScanOnDemand key in real-time for specific values
and initiates the scan for each supported manifest based on the values set. The root key is
created for new 3.0 version installations or when an older agent upgrades to 3.0. The keys,
data, and values to configure and execute the scans need to be set manually, via scripts,
or via registry configuration tools.
HKEY_LOCAL_MACHINE
SOFTWARE
Qualys
QualysAgent
ScanOnDemand
Inventory
CpuLimit
ScanOnDemand
ScanOnStartup
Vulnerability
CpuLimit
ScanOnDemand
ScanOnStartup
PolicyCompliance
CpuLimit
ScanOnDemand
ScanOnStartup
UDC
CpuLimit
ScanOnDemand
ScanOnStartup
23Scan on Demand and Scan on Startup
Registry Configuration Settings
The following table describes the configuration settings and functionality for the Scan on
Demand and Scan on Startup feature.
Module Key Value Type Data Description
Inventory CpuLimit REG_DWORD 2 - 100 Sets the CPU Limit (%) for the
(decimal) execution.
Key is not required.
Default value is 100 if no value
exists or the data is not valid.
Inventory ScanOnDemand REG_DWORD 0 - completed Setting a data value of "1" will
(decimal) 1 - execute now initiate the on demand scan.
2 - in progress The data value will change to
"2" when the scan is in
progress.
The data value will change to
"0" when the scan is complete.
Inventory ScanOnStartup REG_DWORD 1 A data value of "1" will
(decimal) configure the agent to execute
the scan when the agent
service starts up.
After a completed scan, the
scan interval for this manifest
is reset.
No execution if there is no
value or the data is not valid.
Vulnerability CpuLimit REG_DWORD 2 - 100 Sets the CPU Limit (%) for the
(decimal) execution.
Key is not required.
Default value is 100 if no value
exists or the data is not valid.
Vulnerability ScanOnDemand REG_DWORD 0 - completed A data value of "1" will initiate
(decimal) 1 - execute now the on demand scan.
2 - in progress The data value will change to
"2" when the scan is in
progress.
The data value will change to
"0" when the scan is complete.
Vulnerability ScanOnStartup REG_DWORD 1 A data value of "1" will
(decimal) configure the agent to execute
the scan when the agent
service starts up.
After a completed scan, the
scan interval for this manifest
is reset.
No execution if there is no
value or the data is not valid.
24Scan on Demand and Scan on Startup
Module Key Value Type Data Description
PolicyCompli CpuLimit REG_DWORD 2 - 100 Sets the CPU Limit (%) for the
ance (decimal) execution.
Key is not required.
Default value is 100 if no value
exists or the data is not valid.
PolicyCompli ScanOnDemand REG_DWORD 0 - completed Setting a data value of "1" will
ance (decimal) 1 - execute now initiate the on demand scan.
2 - in progress The data value will change to
"2" when the scan is in
progress.
The data value will change to
"0" when the scan is complete.
PolicyCompli ScanOnStartup REG_DWORD 1 A data value of "1" will
ance (decimal) configure the agent to execute
the scan when the agent
service starts up.
After a completed scan, the
scan interval for this manifest
is reset.
No execution if there is no
value or the data is not valid.
UDC CpuLimit REG_DWORD 2 - 100 Sets the CPU Limit (%) for the
(decimal) execution.
Key is not required.
Default value is 100 if no value
exists or the data is not valid.
UDC ScanOnDemand REG_DWORD 0 - completed A data value of "1" will initiate
(decimal) 1 - execute now the on demand scan.
2 - in progress The data value will change to
"2" when the scan is in
progress.
The data value will change to
"0" when the scan is complete.
UDC ScanOnStartup REG_DWORD 1 A data value of "1" will
(decimal) configure the agent to execute
the scan when the agent
service starts up.
After a completed scan, the
scan interval for this manifest
is reset.
No execution if there is no
value or the data is not valid.
25Scan on Demand and Scan on Startup
Example
Configuration example for CPU Limit of 100%, Scan on Demand data of "1" to execute
immediately, and Scan on Startup data of "1" to execute on agent service startup.
Functionality Notes
If the agent is already performing a manifest collection or is in the delta
upload/PendingDelta state, the agent will not initiate the on-demand or on-startup scan.
This ensures data integrity between the agent and the platform for the in-progress scan.
Network Blackout Windows take precedent.
- Scan on demand or scan on startup when the agent is in a network blackout window
will still execute, but the delta will not upload to the Qualys platform until the agent is out
of a network blackout window.
- If the agent is in a network blackout window that is preventing the previous scan's delta
to be uploaded, the scan on demand or scan on startup will not execute until the previous
scan's delta upload is fully completed.
- The agent will not execute an on-demand or on-startup scan for a manifest type that is
not assigned (activated).
26You can also read


