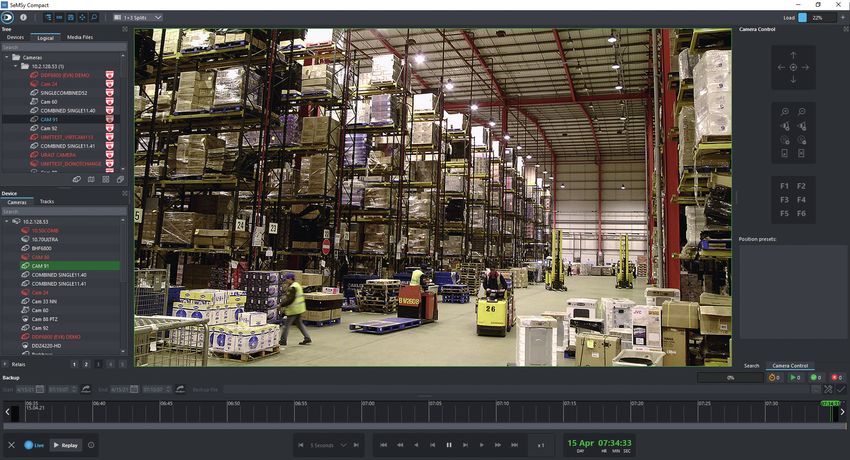
SEMSY COMPACT HEMISPHERE - OPERATION - DALLMEIER ELECTRONIC
←
→
Page content transcription
If your browser does not render page correctly, please read the page content below
REV. 1.0.1 | 2021-06-08

 OPERATION

 Hemisphere®

SeMSy® compact
 VERSION 5.1.19
Copyright © 2021 Dallmeier electronic GmbH & Co.KG

The reproduction, distribution and utilization of this document as well as the communication of its contents to others
without express authorization is prohibited. Offenders will be held liable for the payment of damages.

All rights reserved in the event of the grant of a patent, utility model or design.

The manufacturer accepts no liability for damage to property or pecuniary damages arising due to minor defects of
the product or documentation, e.g. print or spelling errors, and for those not caused by intention or gross negligence
of the manufacturer.

Figures (e.g. screenshots) in this document may differ from the actual product.
Specifications subject to change without notice. Errors and misprints excepted.

All trademarks identified by ® are registered trademarks of Dallmeier.

Third-party trademarks are named for information purposes only.
Dallmeier respects the intellectual property of third parties and always attempts to ensure the complete identification of third-party trademarks and
indication of the respective holder of rights. In case that protected rights are not indicated separately, this circumstance is no reason to assume that
the respective trademark is unprotected.

This product includes software developed by the OpenSSL Project for use in the OpenSSL Toolkit (http://www.openssl.org) and cryptographic software
written by Eric Young (eay@cryptsoft.com).
Contents

Chapter 1: INTRODUCTION 6
1.1 Validity 6
1.2 Disclaimer 6
1.3 Documents 6
1.3.1 This Document 7
1.3.2 Other Applicable Documents 7
1.4 Typographical Conventions 7

Chapter 2: GENERAL NOTES 8
2.1 Intented use 8
2.2 Warranty 8

Chapter 3: LOGIN 9

Chapter 4: USER INTERFACE  12
4.1 Customizing the User Interface 12
4.2 System information 14

Chapter 5: CONNECTION 15
5.1 System Tree 15
5.1.1 Activating a connection 16
5.1.1.1 Activating a PRemote connection 17
5.1.2 Disconnecting 18

Chapter 6: OPERATION 19
6.1 Presets 19
6.1.1 Saving a Preset 19
6.1.2 Deleting Presets 20
6.2 Virtual Walks 20
6.2.1 Saving Virtual Walks 20
6.2.2 Deleting Presets 22
6.3 Relays 23

Chapter 7: SPLITS 24
7.1 Split Views 24
7.2 Split Exchange 25
7.3 Full-Screen Mode 26

 SeMSy® Compact – Software Version 5.1.19| REV. 1.0.1 | © 2021 Dallmeier 3
Chapter 8: PLAYBACK 27
 8.1 Search Functions 28
 8.1.1 User Defined Search 28
 8.1.2 Fast Search 29
 8.1.3 SmartFinder 30
 8.1.4 SmartFinder: Evaluation of VCA metadata 31
 8.1.4.1 Example: SmartFinder Search Parking Garage 34

 Chapter 9: ZOOM 38

 Chapter 10: PICTURE PROCESSING 40
 10.1 Filter functions & Picture processing 40
 10.2 Pixelisation 42

 Chapter 11: CAMERA CONTROL 43
 11.1 Operating the camera 43

 Chapter 12: SEDOR® ANALYSIS APPLICATIONS 46

 Chapter 13: AUTOTRACKING 51
 13.1 Activation 51
 13.2 Configuration 52

 Chapter 14: SAVING IMAGES 54
 14.1 Save Current Image 54
 14.2 Save Mirror Cut 55

 Chapter 15: BACKUP  56
 15.1 Create A Backup 56
 15.2 Create Backup Of Multiple Tracks 57
 15.3 Panomera® Backup 58
 15.4 Split Backup File 59

 Chapter 16: PERFORMANCE MONITOR  60

 Chapter 17: DASHBOARD 62
 17.1 Dashboard Events 63
 17.2 Dashboard Counting 64

 Chapter 18: PROTOCOL 66

4 SeMSy® Compact – Software Version 5.1.19| REV. 1.0.1 | © 2021 Dallmeier
Chapter 19: PANOMERA® FUNCTIONS 68
19.1 Grid 68
19.2 Overview-module 69
19.3 Blend Borders 69
19.4 Quick-Zoom 70
19.4.1 AUTO-Mode 70
19.4.2 OVERVIEW-Mode 71
19.5 Eco-Mode 72

 SeMSy® Compact – Software Version 5.1.19| REV. 1.0.1 | © 2021 Dallmeier 5
Introduction

 1.1 VALIDITY
 The contents of this document are based on the released recorder firmware versions 5.1.19.
 Figures (screenshots) in this document may differ from the actual product.

 1.2 DISCLAIMER
 Note that

 • certain comfort functions are only available in connection with a valid maintenance license on the
 recorder. Refer to the notes with the respective sections in this document for more information.
 • certain functions and features are only available if supported by the used hardware.
 • the functional range of your device depends on the ordered equipment or device variant and may
 differ from the contents of this document.
 • certain functions and features may require purchasing a license.

 1.3 DOCUMENTS
 The product documentation contains several documents that are supplied with your device in a printed
 form and/or on a digital medium.
 Further technical documentation for your device, if available, is published exclusively on the website
 www.dallmeier.com.

 Read the available product documentation carefully and thoroughly before using your device.
 Always observe and follow the contained instructions, notes and warnings as well as the technical data
 in the currently valid product specification of your device.

 Keep all documents in legible condition and in a suitable location for future reference.

 Regularly check the website www.dallmeier.com for the latest product documentation updates.

6 SeMSy® Compact – Software Version 5.1.19| REV. 1.0.1 | © 2021 Dallmeier
1.3.1 This Document
This document “SeMSy® Compact - Operation“ contains detailed information on how to operate the web-
based graphical user interface of the software.
The target audience of this document is traingeschulted video security operators.

1.3.2 Other Applicable Documents
 Product Specification
The product specification contains detailed technical data, features and characteristics of the respective
software.
The target audience of the document is trained system integrators (video security/ surveillance systems
installation contractors).

 Configuration
The document entitled “Configuration” contains detailed information concerning the configuration of
the device.
The target audience of the document is trained system integrators (video security/ surveillance systems
installation contractors).

1.4 TYPOGRAPHICAL CONVENTIONS
For reasons of clarity and readability, various text formatting elements and types of emphasis are used in
this document:

 NOTICE

 NOTICE indicates measures to prevent device and/or property damage due to improper
 configuration of the device or faulty operations.

Instructions are indicated by arrows (▶).
▶ Always carry out instructions one after the other in the sequence described.

Expressions highlighted in bold and dark gray usually refer to the name of an application, product or
function or indicate a user interface control element (button, check box, drop-down list, menu item, etc.).

 Paragraphs in italics provide information on basic principles, special features
 and efficient procedures as well as general recommendations.

 SeMSy® Compact – Software Version 5.1.19| REV. 1.0.1 | © 2021 Dallmeier 7
General notes

 2.1 INTENTED USE
 SeMSy® Compact is a stand-alone video management software for the comprehensive control and evalu-
 ation of video security systems on a dedicated workstation. In addition to the fast and intuitive display of
 live views, the integrated functions support efficient evaluation of recordings.

 SeMSy® Compact offers a variety of functions for the management of the entire system. These range
 from integrated user administration and a customizable user interface to functions for creating and
 managing local backups. All functions are perfectly coordinated and are operated together on a dedi-
 cated workstation.

 2.2 WARRANTY
 The General Terms and Conditions of Business (AGB) applicable at the time of conclusion of the contract
 are decisive.

8 SeMSy® Compact – Software Version 5.1.19| REV. 1.0.1 | © 2021 Dallmeier
Login
By default SeMSy® Compact is set to start by itself on booting the work station, with the login procedure
handled by auto login.
It is still possible to enter the login dialog with this setting active, by pressing the left Ctrl key during the
start of SeMSy® Compact.

For manual start and login, proceed as follows:

 The factory-set User is “Administrator”.
 The factory-set Password is “admin”.

 NOTICE

 Risk of abuse by unauthorized users!
 ▶ Change the factory-set default Password and set up appropriate user accounts as soon
 as possible (see “User Management” on page 16).

▶ Boot the workstation.
▶ Open SeMSy® Compact.

The User login dialog is displayed.

Fig. 3-1

▶ Enter Username and Password.
▶ Confirm with OK.

 SeMSy® Compact – Software Version 5.1.19| REV. 1.0.1 | © 2021 Dallmeier 9
The user interface is displayed according to the set up preferences.

 Fig. 3-2

 ▶ Proceed as follows.

 License check
 The basic license for access by SeMSy® Compact is included with the SeMSy® Recording Server software.
 SeMSy® Compact can only access one SeMSy® Recording Server with one basic license. If a floating
 license is aquired, the basic license is converted to a floating license. The floating license allows multiple
 SeMSy® Compacts access to one SeMSy® Recording Server, according to the license number.

 If Dallmeier devices of the 3rd and 4th generation are included in the device list, and no compatibility
 dongle is connected, the Dongle dialog is displayed.

 Fig. 3-3

 ▶ Select the relevant option using the radio buttons (see below).
 ▶ Confirm with OK.

 • Always continue without dongle
 With this option, you only have access to SeMSy® devices. The Dongle dialog no longer appears at
 launch.

10 SeMSy® Compact – Software Version 5.1.19| REV. 1.0.1 | © 2021 Dallmeier
• Continue without dongle once
 This option provides access to SeMSy® devices once. The Dongle Options dialog reappears at launch.

• Unlock dongle by input of its serial number
 This option is needed for Dallmeier devices of the 3rd and 4 Generation. Compatibility dongle and
 license code are required to proceed.

 The dongle can be activated later on using the ? help-button (check dongle).

 SeMSy® Compact – Software Version 5.1.19| REV. 1.0.1 | © 2021 Dallmeier 11
User Interface

 4.1 CUSTOMIZING THE USER INTERFACE
 The user interface can be adapted to individual needs and requirements in various ways.
 After login the user interface is displayed depending on the selected preferences:

 Fig. 4-1

 Menu bar Show/hide functions Split views
 Performance monitor System tree Active split
 Image settings Playback control Camera functions

 Show/Hide Functions

 Fig. 4-2

 ▶ Click their respective Icons to show/hide functions of SMAVIA Viewing Client:

 System-Tree Device Configuration

 Backup Camera control Search

 Further information on the individual functions can be found in the corre-
 sponding chapters of this document.

12 SeMSy® Compact – Software Version 5.1.19| REV. 1.0.1 | © 2021 Dallmeier
Modification of elements
Elements of the user interface can be modified by drag and drop. They can either be moved to a new
location or enlarged or reduced in size.

Fig. 4-3

▶ Use drag and drop to change the user interface as necessary.

Full screen mode
▶ Show or hide the Windows header bar above the menu bar by pressing F11.

Info box
▶ To get quick information about a specific device or button, move the mouse pointer over the required
 element and wait briefly.

Fig. 4-4

 The info box closes automatically when you move the mouse.

 SeMSy® Compact – Software Version 5.1.19| REV. 1.0.1 | © 2021 Dallmeier 13
4.2 SYSTEM INFORMATION
 The About dialog provides detailed information about the system, for example about the processor
 (CPU), graphic card (GPU), and random access memory (RAM). This information can be exported into a
 text file and saved to the harddisk.

 This data can be especially helpful in case you need to contact customer
 support.

 ▶ Open the dialog via ?>About.

 Fig. 4-5

 ▶ Click the Save info button.
 ▶ Choose an appropriate location for the text file, enter a file name and save.
 ▶ Click OK, to close the dialog.

 The file can be opened with a text editor of your choosing.

14 SeMSy® Compact – Software Version 5.1.19| REV. 1.0.1 | © 2021 Dallmeier
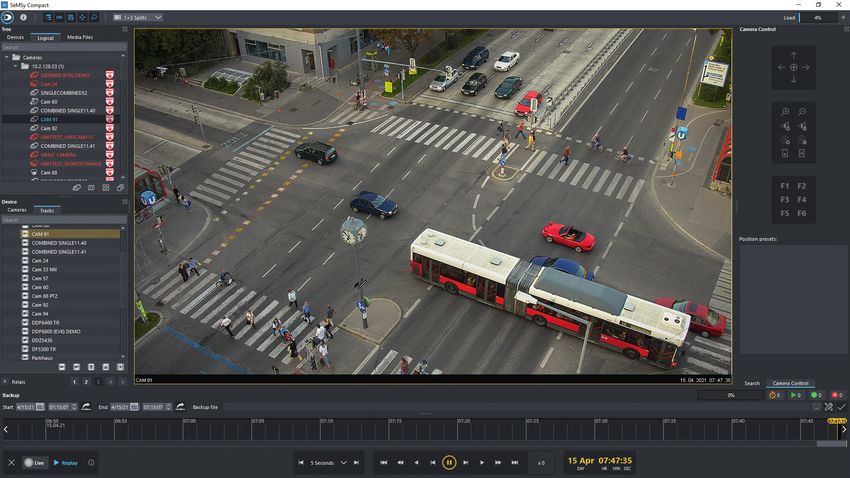
Connection
To access the live display or recorded tracks, a connection to the recorder/camera must be established.
The System tree is used for this purpose.

5.1 SYSTEM TREE
The System tree directory allows practical and efficient management and use of recorders, cameras,
presets and virtual tours.
The system tree structure is divided into four tabs. At the top are the Devices and Logical tabs.
Devices is intended as a tab for managing the various components of the system.
Logical offers not only the possibility to create your own structures, and thus the use of
SeMSy® Compact to individual needs. Logical cameras, location plans, presets and virtual tours are also
created and managed here.
In addition, various icons for filtering the different elements in the directory of the system tree can be
found in the lower area of the tab.

In the lower part of the system tree are the tabs Tree and Device.
Under Device there are buttons for manually triggering relays of the corresponding device. With Tree you
return to the directory of the system tree.

 The system tree can be hidden or re-displayed via the corresponding button in
 the menu bar.
 By default, the system tree is displayed automatically.

Fig. 5-1

 System-Tree Tabs Devices/Logical Icons for activation Tabs Tree/Device

 SeMSy® Compact – Software Version 5.1.19| REV. 1.0.1 | © 2021 Dallmeier 15
5.1.1 Activating a connection
 Recorders, cameras, tracks, presets and virtual tours already created in the system can be activated via
 the system tree.

 ▶ Click to select the split in which the element is to be activated.

 Fig. 5-2

 ▶ Drag and drop he corresponding icon of the element into the required split.
 ▶ If necessary, enter the correct password.

 The connection is now established and the live image is displayed.

16 SeMSy® Compact – Software Version 5.1.19| REV. 1.0.1 | © 2021 Dallmeier
5.1.1.1 Activating a PRemote connection

The optional PRemote-HD feature transcodes high-resolution video streams (live and playback) for trans-
mission in low-bandwidth networks. It allows resource-saving
and independent of the recording settings with SeMSy® Compact or a SeMSy® Workstation.

 This function is only available in combination with the optional license
 “DLC - PRemote HD” on the recorder. This license also includes the DMVC Server
 function for access with the mobile application Dallmeier Mobile Video Center.

 The PRemote option is only available in the context menu of the recorder if it
 has been correctly configured for the use of the function beforehand.
 The procedure for this is described in the document “SeMSy® Compact Configu-
 ration” under “Set up PRemote connection”.

▶ Open the context menu of the required recorder in the system tree by right-clicking.

Fig. 5-3

▶ Activate the checkbox PRemote.
▶ Drag and drop the corresponding icon of the element into the required split.

The PRemote connection to the selected camera is now established.

 SeMSy® Compact – Software Version 5.1.19| REV. 1.0.1 | © 2021 Dallmeier 17
5.1.2 Disconnecting
 ▶ Select the split to be separated with one click.

 ▶ Click the Cancel icon (far right in the playback control).

 The connection is now disconnected.

 Multiple selection
 If several splits are to be separated at once, all required spits can be marked by holding down the Ctrl key,
 and then closed as described above.

18 SeMSy® Compact – Software Version 5.1.19| REV. 1.0.1 | © 2021 Dallmeier
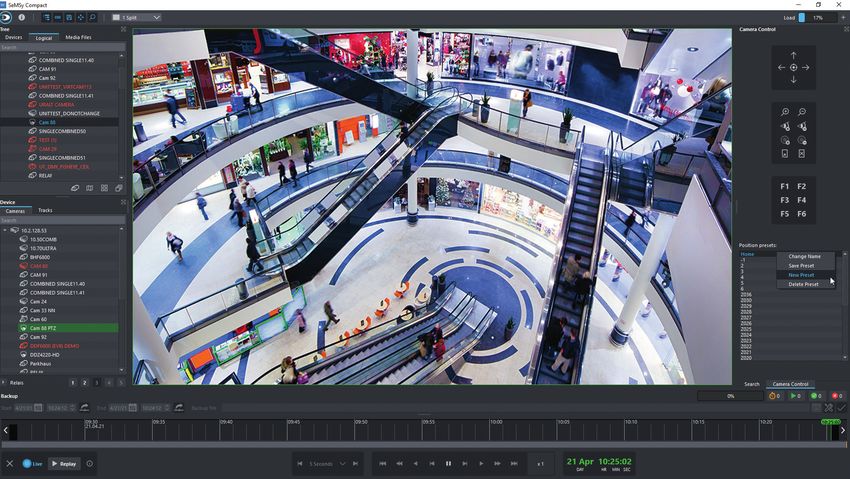
Operation

6.1 PRESETS
Presets can store complete split views (including user-defined flexible split views) with the recorders and
cameras activated in them. These can then be activated quickly and easily via the system tree in the Logi-
cal tab, making operation much easier.

6.1.1 Saving a Preset
Follow the steps below in order to save a preset:

▶ Select the Logical tab in the system tree.
▶ Choose the required split view.
▶ Activate the required recorders and cameras in the splits.
▶ Right-click in the empty area of the Logical tab.
▶ Select New > Preset.

The New preset dialog is displayed.

Fig. 6-1

▶ Enter a Preset name.
▶ Enable the Split full screen mode checkbox if required.
▶ Enable the Full screen mode checkbox if required.
▶ Click Save.

The preset is saved and the dialog is finished.

 If the checkbox Split full screen mode is activated, the control panel and System
 Tree are automatically hidden and the preset is displayed in full screen mode
 by activation of the preset. A double-click in the active split will disable the full-
 screen mode again.

 SeMSy® Compact – Software Version 5.1.19| REV. 1.0.1 | © 2021 Dallmeier 19
6.1.2 Deleting Presets
 ▶ Select the preset in the Logical tab.
 ▶ Press the Enf key,
 ▶ Confirm the following dialog.

 The preset is deleted and the dialog is closed.

 6.2 VIRTUAL WALKS
 In a virtual walk, cameras/recorders can be automatically activated one after the other in a split. In addi-
 tion, it is possible to individually define the duration of each live display and to approach camera posi-
 tions of PTZ cameras.

 6.2.1 Saving Virtual Walks
 ▶ Select Logical in the System tree.
 ▶ Right-click the empty space in the Logical tab.
 ▶ Select New > Virtual walk from the context menu.

 The New virtual walk dialog is displayed.

 Fig. 6-2

 ▶ Enter a Virtual walk name.
 ▶ If necessary, enter a Delay between repeats (in minutes).

20 SeMSy® Compact – Software Version 5.1.19| REV. 1.0.1 | © 2021 Dallmeier
The option Repeating interval in minutes allows to set a break between the end
 and the new beginning of the virtual walk. If set to 0 the virtual walk runs in a
 loop without a break.

▶ Click New.

The Virutal walk command dialog is displayed.

Fig. 6-3

▶ Select the necessary camera.
▶ Set up a Display duration (in seconds) and a Camera position.
▶ Activate the relevant check-boxes.
▶ Confirm with OK.

The camera is now displayed in the Command list.

 SeMSy® Compact – Software Version 5.1.19| REV. 1.0.1 | © 2021 Dallmeier 21
Fig. 6-4

 ▶ Repeat the steps in order to add more cameras to the walk.
 ▶ Click OK in order to save the walk.

 The virtual walk can now be activated as described above.

 6.2.2 Deleting Presets
 ▶ Select the Virtual walk in the Logical tab.
 ▶ Press the Enf key,
 ▶ Confirm the following dialog.

 The preset is deleted and the dialog is closed.

22 SeMSy® Compact – Software Version 5.1.19| REV. 1.0.1 | © 2021 Dallmeier
6.3 RELAYS
The Device tab allows to operate and control the relays of a connected recorder.

 Refer to the documentation of the recorder for the configuration of the contact
 inputs and relays.

▶ Activate the required recorder as described above.
▶ Switch to the Device tab at the bottom of the system tree.

Fig. 6-5

▶ Click the required number button at the bottom to close a relay.
▶ Click the button again to open the relay again.
▶ Click the Tree button to return to the System Tree.

 SeMSy® Compact – Software Version 5.1.19| REV. 1.0.1 | © 2021 Dallmeier 23
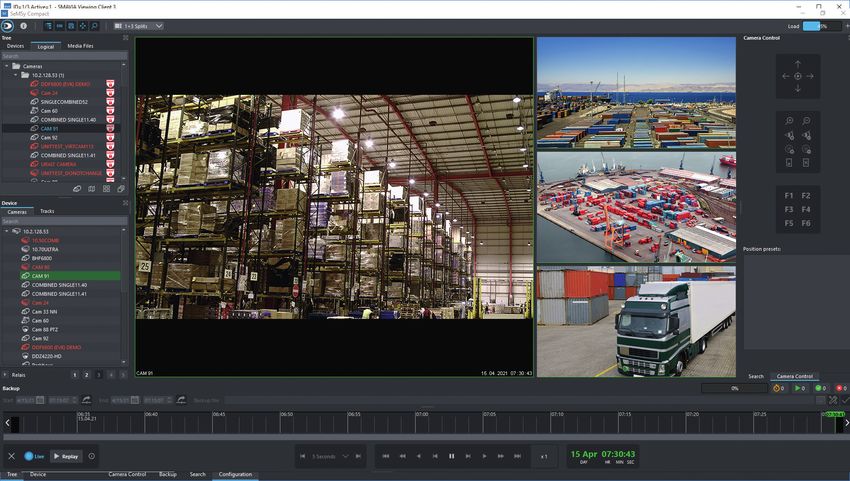
Splits
 SeMSy® Compact offers different split views. These can be selected depending on requirements and in
 each split view cameras/recorders can be enabled.

 7.1 SPLIT VIEWS

 Fig. 7-1

 ▶ Select the required split view.
 ▶ Enable cameras, recorders or virtual walks in each split as described above.

 Split views with the enabled cameras/recorders can be saved as presets (see
 “Presets” on page 19)

24 SeMSy® Compact – Software Version 5.1.19| REV. 1.0.1 | © 2021 Dallmeier
7.2 SPLIT EXCHANGE
In order to display the image of a split in a different split, a simple move by drag and drop is enough. The
corresponding cameras are changed automatically and in real time, the evaluation does not need to be
interrupted.

Fig. 7-2

▶ Open the context menu by moving the mouse pointer to the top of the split.
▶ Click the strip of the context menu and drag and drop the required camera to the desired split.

Fig. 7-3

The cameras are exchanged in real-time.

 SeMSy® Compact – Software Version 5.1.19| REV. 1.0.1 | © 2021 Dallmeier 25
7.3 FULL-SCREEN MODE
 A split can quickly and easily displayed in full-screen mode. At the same time, the control panel and an
 enabled System Tree is hidden in addition.

 ▶ Select the required single-split.

 Fig. 7-4

 ▶ Double-click the selected single-split to display it in full-screen mode.

 Fig. 7-5

 ▶ Double-click the split to exit full-screen mode and to return to split view.

26 SeMSy® Compact – Software Version 5.1.19| REV. 1.0.1 | © 2021 Dallmeier
Playback
The playback mode allows to play a recorded track in the active split. In addition, various search functions
are available for the evaluation of the recording.

▶ Enable the playback mode of a camera track by clicking the Replay button.

Fig. 8-1

Fig. 8-2: Operating Panel Playback Mode

▶ Control the playback with the buttons of the playback control.
▶ Use the Track slider button in order to navigate quickly in the track.
▶ Use search functions for accurate evaluation (see below) if required.
▶ Click the Live access button in order to finish playback mode and to switch into the live mode of the
 camera.

 SeMSy® Compact – Software Version 5.1.19| REV. 1.0.1 | © 2021 Dallmeier 27
8.1 SEARCH FUNCTIONS
 The extensive search functions allow accurate evaluations of recordings.

 Note that the full search functions are only available in conjunction with a
 valid maintenance license for the recorder.

 8.1.1 User Defined Search
 The User Defined Search allows the direct jump to a specific point in time.

 ▶ Enable the playback mode of the required track as described above.
 ▶ Click the Search button.
 ▶ Select the Simple search tab in the control panel for the search functions.

 Click the Date box.

 The calendar is displayed.

 Fig. 8-3

 ▶ Select the required date with the displayed calendar.

28 SeMSy® Compact – Software Version 5.1.19| REV. 1.0.1 | © 2021 Dallmeier
▶ Enter the Time using the keyboard or using the arrow buttons.

▶ Click the Jump to Timepoint button.

The image captured at the entered date will be displayed.

▶ Export or print the image as described in the chapter “Saving Images” on page 54, if required.
▶ Use the playback controls in order to navigate through the track if required.
▶ Repeat the search in order to evaluate additional images of the track if required.
▶ Click the Search button in order to exit the search function and to switch to the playback mode.
or
▶ Click the Live access button in order to exit the search function and switch to live mode.

8.1.2 Fast Search
The Fast search allows to search in specific time intervals (Days, Hours, Minutes, Seconds) before and
after a specific starting position.

▶ Enable the playback mode of the required track as described above.
▶ Set the required position with the Track slider in the track
or
▶ Jump to a specific point in time as described under “User Defined Search” on page 28.

Fig. 8-4

▶ Select the required Time unit.
▶ Click the arrow bu ttons to jump back and forth in time, according to the chosen time interval.

The image captured at the relevant point in time will be displayed.

▶ Export or print the image as described in the chapter “Saving Images” on page 54, if required.
▶ Use the playback controls in order to navigate through the track if required.
▶ Repeat the search in order to evaluate additional images of the track if required.
▶ Click the Search button in order to exit the search function and to switch in the playback mode.
or
▶ Click the Live access button in order to exit the search function and switch to live mode.

 SeMSy® Compact – Software Version 5.1.19| REV. 1.0.1 | © 2021 Dallmeier 29
8.1.3 SmartFinder
 The SmartFinder function allows to search for images with motion in a defined image area.

 Note that
 • this function is only available if the required camera is enabled for the
 SmartFinder search on the recorder.
 • the SmartFinder search works only with active database.

 ▶ Enable the playback mode of the required track as described above.
 ▶ Click the Search button.
 ▶ Select the SmartFinder tab in the control panel for the search functions.

 Fig. 8-5

 Set a Period Of Time.
 ▶ Right-click in the playback split in order to open the context menu.
 ▶ Select Playback > Set point in time.
 ▶ Enter the required start time in the Determine point in time dialog.

30 SeMSy® Compact – Software Version 5.1.19| REV. 1.0.1 | © 2021 Dallmeier
▶ Click the Set start time button in the search control panel.

The start time is entered in the Start box.

▶ Procedure analogous in order to set the Stop time.

 The Start and Stop time can be entered directly from the respective dropdown
 boxes. The difference in the input via the Determine point in time dialog is in
 the display of the corresponding image at the specified time in the playback
 split.

Finishing a SmartFinder Search
▶ Click the Search button in order to exit the search function and to switch in the playback mode.
or
▶ Click the Live access button in order to exit the search function and switch to live mode.

8.1.4 SmartFinder: Evaluation of VCA metadata
In the most recent version of SeMSy Compact® the SmartFinder function has been expanded to include
searching by VCA metadata.
The metadata provided by the camera serve as broad base for targeted search for relevant event in the
recorded footage.
For detailed information about VCA refer to the documentation of the respective camera.

 Active alarms on base of this data is are not supported.

Configuration
SeMSy Compact® does not have to be configured extra for the search by metadata using the SmartFinder
function.

Operation
Basic operation of the SmartFinder function remains the same (see “SmartFinder” on page 30).
The search can now be limited to object types and filters for certain events with the corresponding
checkboxes. In addition, the minimal duration of a captured event (tracking duration) can be set up with
a slider.

 SeMSy® Compact – Software Version 5.1.19| REV. 1.0.1 | © 2021 Dallmeier 31
Fig. 8-6: Search with SmartFinder and VCA metadata

 The smart combination of these options reduces the displayed results to a relevant minimum. Only a few
 sequences in the result have to be checked for the sought-after event. This usually reduces the effort of
 the evaluation enormously.

 Note the “Example: SmartFinder Search Parking Garage” on page 34.

 Note that the options Object type and Filter are not displayed if the camera
 does not feature VCA technology.

32 SeMSy® Compact – Software Version 5.1.19| REV. 1.0.1 | © 2021 Dallmeier
Visualization with sensor grid
It is recommended to activate the sensor grid at the start of the evaluation, in order to visualize the ob-
jects detected by the video content analysis during playback.

 Note that activating the sensor grid is not necessary for evaluation with Smart-
 Finder, it only provides a visual aid.

▶ Activate the check box under Program > Configuration > Analytics > Always show sensor grid

Fig. 8-7 General activation of the sensor grid

 SeMSy® Compact – Software Version 5.1.19| REV. 1.0.1 | © 2021 Dallmeier 33
8.1.4.1 Example: SmartFinder Search Parking Garage

 The tail light of a vehicle in the parking garage was damaged in an unexplained manner. The SmartFinder
 search should now be used to determine how the damage occurred.

 Fig. 8-8

 ▶ Right-click the required area in the active split.

 Fig. 8-9

 ▶ Select SmartFinder Search.
 ▶ If necessary, open the search function.

34 SeMSy® Compact – Software Version 5.1.19| REV. 1.0.1 | © 2021 Dallmeier
Fig. 8-10

▶ Select a suitable period for the search.

Fig. 8-11

▶ Select the relevant Object type

Here in the example, we first want to clarify whether the damage was caused by a person.

▶ Click Search.

 SeMSy® Compact – Software Version 5.1.19| REV. 1.0.1 | © 2021 Dallmeier 35
Fig. 8-12

 Thumbnails of the relevant events in the selected area are now displayed in the right margin. In the time-
 line, the detected events are marked in blue.

 ▶ Click the thumbnails or markers to jump to the corresponding event.
 ▶ Click the Play button to evaluate the video material at the selected location.

 Fig. 8-13

 The man with the suitcase moves past the vehicle (green marker) without touching it.

36 SeMSy® Compact – Software Version 5.1.19| REV. 1.0.1 | © 2021 Dallmeier
Fig. 8-14

The third event shows a man kicking the rear light of the vehicle. The searched period of the recording is
thus found, and can now be exported for further use as a backup, for example (“Backup” on page 56).

Fig. 8-15

 SeMSy® Compact – Software Version 5.1.19| REV. 1.0.1 | © 2021 Dallmeier 37
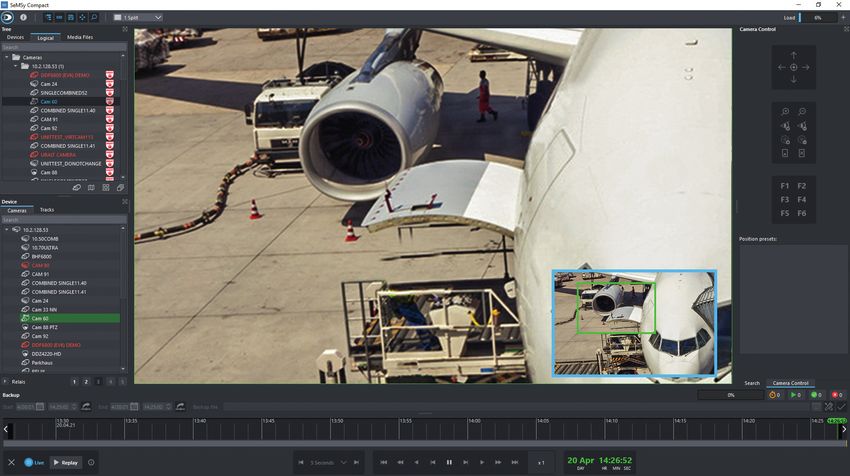
Zoom
 The zoom function makes it possible to enlarge image sections in a split view.

 The functions are available both in live mode and during playback.

 Settings and image adjustments affect only the display on the monitor, not the
 recording itself.

 ▶ Enable the required camera as described above.

 Fig. 9-1

 ▶ Move the mouse wheel forward to start the zoom process.

 The additional zoom window is displayed in the split on the bottom right.

38 SeMSy® Compact – Software Version 5.1.19| REV. 1.0.1 | © 2021 Dallmeier
Fig. 9-2

▶ Move the mouse wheel up or down in order to zoom in or to zoom out the desired image detail.
▶ Move the yellow marker in the additional zoom window by drag and drop, to shift the image in the
 split quickly.
▶ Move the additional zoom window to the desired location in the split by drag and drop, if required.
▶ Zoom out the image completely, in order to disable the additional zoom window.

 With a camera change the image detail is preserved. The zoom will be restored
 at the next activation of the camera.

 SeMSy® Compact – Software Version 5.1.19| REV. 1.0.1 | © 2021 Dallmeier 39
Picture Processing
 The Picture processing function allows to customize the brightness, contrast and color. In addition, differ-
 ent filter functions allows an image optimization.

 The functions are available in live mode and in playback mode.

 The display settings are saved for each camera, but affect only the display on
 the monitor, not the recording on the track.

 10.1 FILTER FUNCTIONS & PICTURE PROCESSING
 ▶ Activate the required split.
 ▶ Activate the required camera/recorder.
 ▶ Move the mouse pointer to the upper edge of the split to open the context menu.
 ▶ Select the Picture processing button.

 Fig. 10-1

 Flip Vertical Flip Horizontal
 The Flip Vertical function enables a vertical mirroring of the display, the Flip Horizontal function a hori-
 zontal mirroring of the dispay.

 Rotate Right Rotate Left
 With the Rotate Right / Rotate Left buttons, the display can be rotated in the respective direction.

 Auto Contrast Auto Color
 The buttons Auto Contrast / Auto Color optimize the display with the respective function.

 Auto Wizard
 The Auto Wizard function allows automatic ad optimization in all areas.

 Contrast
 The image contrast can be adjusted with the slider.

 Brightness
 The image brightness can be adjusted with the slider.

 Color
 The image color can be adjusted with the slider.

40 SeMSy® Compact – Software Version 5.1.19| REV. 1.0.1 | © 2021 Dallmeier
Sharpness
The image sharpness can be adjusted with the slider.

DNR
The DNR function allows reducing digital noise in four stages with the slider.

Deinterlace mode
The Display button controls the deinterlacing. Thus, compression artifacts can be reduced when the en-
coding (for example, images with a lot of movement). The image display can be adjusted in four stages:
normal deinterlaced mode, extended deinterlaced mode, field mode, frame mode.

Delay eode
With the Delay option the time delay is reduced in the live image display. If it comes during rapid se-
quence of images to an improper representation, the time delay of coding in different stages can be cus-
tomized: Adaptive Delay, Low Delay, 100 ms Cache, 200 ms Cache, 400 ms Cache, 800 ms Cache, 1000 ms
Cache, 1200 ms Cache.

 Default/Reset all
With the Default/Reset all button all the individual settings are reset to their default values.

▶ Adjust the required settings.
▶ Click the Configuration button in order to close the Picture processing control panel.

 SeMSy® Compact – Software Version 5.1.19| REV. 1.0.1 | © 2021 Dallmeier 41
10.2 PIXELISATION
 Due to reasons of data protection, it might be necessary to render moving objects like cars or people
 unrecognizable via pixelisation.

 ▶ Right-click on the desired split.
 ▶ Activate pixelisation under Image > Pixelisation (Live) > Activated.

 Fig. 10-2

 Moving objects will now be blurred according to the chosen settings. To change the parameters of the
 configuration do as follows:

 ▶ Right-click on the desired split.
 ▶ Activate the dialog Pixelisation under Image > Pixelisation (Live) > Configure pixelisation.
 ▶ Adapt the settings as necessary.
 ▶ Close the dialog by clicking OK.

 Only the live display is pixelated. The recorded material remains unchanged.

42 SeMSy® Compact – Software Version 5.1.19| REV. 1.0.1 | © 2021 Dallmeier
Camera Control
Pivoting PTZ cameras can be operated with the control buttons in SeMSy® Compact. In addition, camera
positions can be saved.
In order to enable the camera control for PTZ cameras proceed as follows.

11.1 OPERATING THE CAMERA
▶ Activate the live view of the required camera in a split as described above.
▶ Open the camera control operation panel via the Camera control button.

Fig. 11-1

Controls

Fig. 11-2

 Control buttons Center

 Zoom in Zoom out

 SeMSy® Compact – Software Version 5.1.19| REV. 1.0.1 | © 2021 Dallmeier 43
Functions

 Fig. 11-3

 Focus in Focus out Open iris

 Close iris Open camera menu Close camera menu

 Function buttons

 With the F1 and F2 button preconfigured functions at the camera can be acti-
 vated. Via the “Alt” button The buttons F3 to F6 are available by pressing the
 Alt button.

 ▶ Control the camera with the corresponding button.
 ▶ Click the Camera control button in order to close the camera control again.

 Saving Camera Positions
 ▶ Enable the control for the required camera as described above.
 ▶ Move the camera to the required position.
 ▶ Right-click the required position button in the control panel.

 The context menu is displayed.

44 SeMSy® Compact – Software Version 5.1.19| REV. 1.0.1 | © 2021 Dallmeier
Fig. 11-4

▶ Click Save position.

The camera position is saved on the selected position button.

▶ Click the position button in order to enable the camera position.

Entering a Name for the position Button
▶ Right-click the required position button.

The context menu is displayed.

▶ Click Change name.

The Change name dialog is displayed.

Fig. 11-5

▶ Enter a name.
▶ Confirm with OK.
▶
The name is displayed on the position button.

 SeMSy® Compact – Software Version 5.1.19| REV. 1.0.1 | © 2021 Dallmeier 45
Sedor® Analysis Applications
 SEDOR® analysis applications are always active on recording systems. SeMSy® Compact allows for the
 deactivation (disarmed) and activation (armed) of the analysis applications by contact events.
 Contact events are triggered by the Contact IN interface on the appliance (HW), an Ethernet I/O interface
 or by an external application over the DaVid protocol (IP).

 For the optimal use of the functions described in this document the most recent
 version of the following software is required:

 • IPS-10 000 (most recent software version; at least 9.7.10 SP D)
 • SeMSy® Compact
 • PGuard advance
 Assignment of the function

 Fig. 12-1

 ▶ Open the user interface of the appliance.
 ▶ Open the Contact IN dialog over Interfaces > Contact IN.
 ▶ Select the required contact (Global or Camera).
 ▶ Set SEDOR - arm/disarm as a function.
 ▶ Click the P button in the Function column.

 The Contact Parameter dialog is displayed.

46 SeMSy® Compact – Software Version 5.1.19| REV. 1.0.1 | © 2021 Dallmeier
Fig. 12-2

▶ Set the activation (Arm) or deactivation (Disarm) of the analysis application.
▶ Set the execution of the action for the required Cameras.
▶ Select the Cameras with a click on the corresponding button if required.
▶ Confirm with OK.

 Use the Function n. c. of the same contact to activate (arm) a deactivated
 (disarmed) analysis application again.
 This configuration allows for the connection of an On/Off switch.

Assignment of the resolution

Fig. 12-3

 SeMSy® Compact – Software Version 5.1.19| REV. 1.0.1 | © 2021 Dallmeier 47
▶ Activate the IP check-box to trigger the contact event by an external application over the DaVid
 protocol (Ethernet).
 Or:
 ▶ Activate the HW check-box to trigger the contact event by the Contact IN interface on the appliance.
 Or:
 ▶ Click the P button in the ONVIF column to trigger the contact event by an Ethernet I/O interface
 (Ethernet).

 Display of the status
 The external SeMSy® Compact software allows for the display of the SEDOR® analysis status.

 Fig. 12-4

 ▶ Open the Configuration dialog over (Dallmeier-Icon) > Camera.

 ▶ Activate the check-box Display “arm/disarm” state (SEDOR) checkbox.
 ▶ Confirm with OK.

 The display of status icons is highly recommended!

 The status of the analysis application is indicated with the active and inactive

 Fig. 12-5

48 SeMSy® Compact – Software Version 5.1.19| REV. 1.0.1 | © 2021 Dallmeier
Activating the analysis
▶ Open the Edit Device dialog with the context menu of the camera in the Devices tree.
▶ Select the Settings tab.

Fig. 12-6

▶ Activate the Allow disarming cameras check-box.
▶ Confirm with OK.

Deactivating the analysis
▶ Open the context menu of the camera in the Devices tree.

Fig. 12-7

▶ Click Disarm Channel(s).

 The context menu of the recorder allows for the deactivation of the analysis of
 all cameras.

The Disarm dialog is displayed.

 SeMSy® Compact – Software Version 5.1.19| REV. 1.0.1 | © 2021 Dallmeier 49
Fig. 12-8

 ▶ Set the duration of the deactivation (disarmed) in the Timer (hh:mm) field.
 ▶ Confirm with OK.

 The corresponding analysis application is deactivated immediately. After expiry of the set duration, it is
 automatically activated again.

 Note the displayed status icons (right, top)!

50 SeMSy® Compact – Software Version 5.1.19| REV. 1.0.1 | © 2021 Dallmeier
AutoTracking
SeMSy® Compact Auto Tracking uses the VCA data of Dallmeier network cameras and Panomera® sys-
tems. While the video stream is displayed (live and playback), the analysis data allows the detection
of image areas with moving persons or objects. These areas are displayed optimally zoomed in a detail
split and ensure a targeted attention control during the evaluation.

 Note that the Auto Tracking funcion is only available in conjunction with a
 valid maintenance license for the recorder.

13.1 ACTIVATION
▶ Select a split view suitable for AutoTracking.

Fig. 13-1

▶ Activate the required camera in the split.
▶ Open the context menu by back-clicking in the split.
▶ Select Image > Auto Tracking > Activated.

Fig. 13-2

 SeMSy® Compact – Software Version 5.1.19| REV. 1.0.1 | © 2021 Dallmeier 51
13.2 CONFIGURATION
 In the configuration menu of the AutoTracking function, you can make various settings and (de)activate
 the function, if not already done.

 ▶ Select Image > Auto Tracking > Configure Auto Tracking (see above).

 Fig. 13-3

 ▶ Select the Object types and Data sources relevant for your application.
 ▶ Adjust the amount of zoom with the slider.
 ▶ If the GPS objects should be merged, activate the corresponding checkbox.

52 SeMSy® Compact – Software Version 5.1.19| REV. 1.0.1 | © 2021 Dallmeier
3 4

 1 5

 2

Fig. 13-4

❶ Complete Overview
While displaying the overview image of a Panomera®, SeMSy® Compact processes the detected events in
real time and marks all persons and objects with color-coded detection frames.

❷ Multiple AutoTracking
If the detection time of a person or object exceeds the set threshold value, the corresponding image area
is automatically displayed in a new split. For this, the person is zoomed in and tracked in detail over the
entire object space.

❸ Multiple Monitoring
SeMSy® Compact evaluates all events of the captured object space and simultaneously observes all mov-
ing persons or objects in almost real time, regardless of whether the events occur in the foreground or
background.

❹ Simultaneous Display
The automatic and simultaneous display of moving persons or objects in detail splits is principally unlim-
ited. According to the resolution of the monitor, views with different numbers of splits can be selected,
depending on the individual requirements for the size of the detail splits.

❺ Lossless capturing
A Panomera® always captures and records the entire object space. The detailed display of interesting
areas with the AutoTracking function is of no importance. Unlike conventional PTZ cameras with a track-
ing function, Panomera® recordings always cover the entire scene and enable the evaluation of each
individual event.

 SeMSy® Compact – Software Version 5.1.19| REV. 1.0.1 | © 2021 Dallmeier 53
Saving Images
 The functions for saving images allow both single images and image sequences to save locally. The func-
 tions are available in the live mode as well as at playbacks.

 ▶ Move the mouse pointer to the upper edge of the split to open the context menu.

 Fig. 14-1

 14.1 SAVE CURRENT IMAGE
 In order to save the current image in live mode or during playback, proceed as follows:

 ▶ Click the Save current picture on shoot track button .

 The Export/Print dialog is displayed.

 Fig. 14-2

 ▶ Select the required option (see below).
 ▶ Click OK.
 ▶ Save the image.

 The Modified (WYSWG) option allows to print the image with all the individual
 image changes – as it is displayed on the screen. With the Original option the
 unaltered original image is printed – as it is stored in the track.

54 SeMSy® Compact – Software Version 5.1.19| REV. 1.0.1 | © 2021 Dallmeier
14.2 SAVE MIRROR CUT
In order to save a cut out of images in live mode or during playback, proceed as follows:

▶ Click the Start/Stop mirror track recording button .

The Save as dialog in the Windows Explorer is displayed.

▶ Enter a name for the image sequence.
▶ Select a directory if required.
▶ Click Save.
▶ Click the Start/Stop mirror track recording button in order to stop the mirror track recording.

 SeMSy® Compact – Software Version 5.1.19| REV. 1.0.1 | © 2021 Dallmeier 55
Backup
 The Backup function allows to backup image sequences of a track or multiple tracks simultaneously.
 Backups can also be saved to external storage media. In addition, a large backup file can be split into
 several smaller files.

 Backups can be played in SeMSy® Compact as local tracks.

 15.1 CREATE A BACKUP
 In order to create a backup from a track proceed as follows:

 ▶ Activate the playback mode of the required camera as described above.
 ▶ Click the Create backup button in order to open the backup control panel.

 Fig. 15-1

 Backup settings Start backup

 Set Start And Stop Time Of The Backup
 ▶ Enter the date and time in the appropriate fields.
 or
 ▶ Open the calendar with a click on the corresponding button and set the date there with a click on the
 required day.
 or
 ▶ Use the Set current time as start time, Set current time as stop time or Set track start as start time and
 Set track end as stop time buttons to set start and end.

 The Set Current Start Time/Stop Time buttons use the current position of the
 slider in the playback control as a reference.

 ▶ Open the file manager with a click on the button ... .
 ▶ Enter a suitable name for the backup.
 ▶ Click Save.

 The path and name of the backup are now set and displayed under Backup file.

56 SeMSy® Compact – Software Version 5.1.19| REV. 1.0.1 | © 2021 Dallmeier
▶ Click the Backup Settings button and make the necessary changes here if necessary (see below).
▶ Click the Start Backup button to start the backup process.

The running backup process is displayed in the Backup working dialog:

Fig. 15-2

Cancel backup
It is possible to cancel a running backup. If the Backup working dialog is currently active, the Cancel
backup button is displayed instead of the Start backup button.

15.2 CREATE BACKUP OF MULTIPLE TRACKS
The Set filter criteria set dialog allows to create a backup of multiple tracks with the same start and stop
time simultaneously. Extended filter criteria can restrict the backup is saved separately (for temporal
limitation) on images with the selected markers.

▶ Activate the required camera as start track for the backup as described above.
▶ Define Start and End times, File path and backup names as described above.

▶ Click the Backup settings button.

The Backup settings dialog is displayed.

Fig. 15-3

▶ Select the other required Cameras.

 SeMSy® Compact – Software Version 5.1.19| REV. 1.0.1 | © 2021 Dallmeier 57
▶ Enter Extended filter criteria if required.
 ▶ Confirm with OK.
 ▶ Click the Start backup button.

 The current backup process is displayed in the Backup working dialog:

 Fig. 15-4

 The selected tracks will be successively saved and displayed in the Track bar.
 A backup file with the entered name of the backup and the camera name per track are created.

 15.3 PANOMERA® BACKUP
 Backing up a Panomera® multifocal sensor system works similar to the above described procedure for
 backup. The difference is in the way of the Filter dialog: only one Panomera® multifocal sensor system
 can be secured, but individual modules (streams) can be highlighted in the backup.

 ▶ Activate the required camera as start track for the backup as described above.
 ▶ Define Start and End times, File path and backup names as described above.
 ▶ Open the Backup settings dialog.

 The Panomera Backup Filter dialog is displayed.

 Fig. 15-5

 ▶ Enable the Save only visible modules checkbox (see below) if required.
 ▶ Confirm with OK.

58 SeMSy® Compact – Software Version 5.1.19| REV. 1.0.1 | © 2021 Dallmeier
The modules of a Panomera® multifocal sensor system that have been highlighted with the zoom func-
tion (that are visible on the display) are secured with high resolution in a backup next to the overview
module.
If a Panomera® multifocal sensor system zoomed all the way out before a backup, all modules (single
streams) will be secured in addition to the overview module. So can be zoomed without degradation in
all display areas of the backup playback.
If only a subarea should be secured in high resolution there must be zoomed into the image area. The
backup is created from the modules visible in the display in addition to the overview module.

▶ Finally, click the OK button.
▶ Exit the backup mode as described above.

15.4 SPLIT BACKUP FILE
This optional function allows the distribution of backup files into several smaller files. The size of the split
files can be set depending on the requirements. In addition, upon completion of the backup, the connec-
tion to the camera/recorder can be disconnected automatically.

▶ Click the Backup settings button.

The Backup file split dialog is displayed.

Fig. 15-6

▶ Enable the Activate splitting checkbox.
▶ Select the Size (MB).
▶ Enable the Disconnect after backup checkbox if required.
▶ Confirm with OK.

All backups that are larger than the defined value will be splitted automatically.

 SeMSy® Compact – Software Version 5.1.19| REV. 1.0.1 | © 2021 Dallmeier 59
Performance Monitor
 The Performance Monitor provides an overview of the utilization of CPU, memory (RAM) and graphics
 card. It permanently shows the power reserves of the workstation, thereby supporting optimal operation
 and utilization of the system.

 The Performance Monitor is permanently displayed in the menu bar:

 Fig. 16-1

 Detail View
 If required, the monitor can also be opened in a separate window with detailed, graphical display:

 ▶ Click the + button in the display of the Performance Monitors in the menu bar.

60 SeMSy® Compact – Software Version 5.1.19| REV. 1.0.1 | © 2021 Dallmeier
Fig. 16-2

▶ Check the load on the system by using the detailed graphical overview.
▶ Close the Performance Monitor window via the x button.

System Info
The Performance Monitor dialog allows you to access the System Info dialog directly.

▶ Click the System Info button to get detailed information about the performance of the system.

 SeMSy® Compact – Software Version 5.1.19| REV. 1.0.1 | © 2021 Dallmeier 61
Dashboard
 Panomera® Multifocal Sensor Systems and cameras with integrated Video Content Analysis (VCA) detect
 motions, persons and objects in the uncompressed image.
 The SeMSy Compact Dashboard displays the data of the event types Line Crossing, Intrusion Detection
 (image above) and Object Counting in a separate window as a bar chart. Besides a basic overview of all
 events, individual cameras can be selected for the evaluation of the recorded events during the course of
 the day. This view also supports the direct display of the corresponding recordings with the SmartFinder
 function.

 Licensing
 The SeMSy® Compact Dashboard function is licensed with a code that is en-
 tered on the connected recording system. The recording system also has to have
 a valid license for the use of comfort functions and maintenance.

 ▶ Right-click on the required recorder in the Devices tree.

 Fig. 17-1

 ▶ Select Dashboard Events or Dashbaord Counting.

62 SeMSy® Compact – Software Version 5.1.19| REV. 1.0.1 | © 2021 Dallmeier
17.1 DASHBOARD EVENTS

 1
 2

 4

 3

 6 5

Fig. 17-2

❶ Overview
The upper section of the dashboard displays the total number of Line Crossing and Intrusion Detection events stored
in the database of the recording system. The bar graph is color-coded and already provides information about the
detected object types, such as people or vehicles.

❷ Filter
On the right side of the dashboard, filters allow for the limitation of events relevant for further evalua-
tion. Besides the definition of the period of interest, the displayed event types can also be defined
here.

❸ Camera List
All Panomera® systems and cameras that have detected corresponding events within the set time period
are displayed in the middle of the dashboard. In addition to the camera names, graphic symbols
for the respective camera type facilitate orientation.

❹ Day View
This area displays the events of each camera for each day of the set time period. On the right side the
relevant object types for this evaluation can be filtered.

 SeMSy® Compact – Software Version 5.1.19| REV. 1.0.1 | © 2021 Dallmeier 63
❺ Detail View
 When a day is selected for a camera in the day view, the corresponding events are displayed in the lower
 part of the dashboard during the course of the day and colored according to object types. This
 evaluation shows in detail when and how often the events were
 triggered by the respective object types.

 ❻ Display
 The detailed view can be used directly for the evaluation of the recordings of the events displayed. A
 click on a column of the diagram transfers the event data to the SmartFinder function, which then allows
 targeted navigation through the corresponding recordings.

 17.2 DASHBOARD COUNTING
 Here you can read the counting statistics for different detected object types.

 1

 2

 4

 3

 5

 6

 Fig. 17-3

 ❶ Camera list
 The different cameras that are detected by the statistics are displayed here. In addition to the camera
 names, graphic symbols for the respective camera type facilitate orientation.

 ❷ Calendar
 The calendar allows you to easily set the specific time to be displayed in the diagram.

64 SeMSy® Compact – Software Version 5.1.19| REV. 1.0.1 | © 2021 Dallmeier
❸ Zoom functions
The zoom functions allow you to enlarge or reduce the size of certain areas. To do this, use the corre-
sponding buttons.

❹ Update statistics
Once the required settings have been made, this button can be used to update the display.

❺ Detail View
Here the selected time period is displayed in detail, which has been enlarged using the zoom function,
for example.

❻ Day View
Here the counting results of the whole day are displayed pictorially to keep an overview of the whole
event.

 SeMSy® Compact – Software Version 5.1.19| REV. 1.0.1 | © 2021 Dallmeier 65
Protocol
 The protocol allows to record all actions of the user. The stored data in the Protocol list include the Type
 of message, Period and the actual User.

 In order to open the Protocol proceed as follows.

 ▶ Open Program > Protocol.

 The Protocol dialog is displayed.

 Fig. 18-1

 The Protocol can be filtered by the following criteria:
 • Type of message
 • Period
 • User

 ▶ Activate/deactivate the required messages if necessary.
 ▶ Enter the Start time and Stop time if required.
 ▶ Select the required User from the drop-down list if required.

 The Protocol is updated automatically.

 ▶ Click the Close button to close the Protocol.

66 SeMSy® Compact – Software Version 5.1.19| REV. 1.0.1 | © 2021 Dallmeier
Delete protocol
▶ Click the Delete button.
▶ Confirm the subsequent info dialog.

Print Protocol
▶ Click the Print button.

The Print dialog is displayed.

▶ Select the required printer.
▶ Confirm with OK.

Export Protocol
▶ Click the Export button.
▶ Save the protocol file.

 SeMSy® Compact – Software Version 5.1.19| REV. 1.0.1 | © 2021 Dallmeier 67
Panomera® Functions
 The multifocal sensor system Panomera® distinguishes itself through a completely new lens and sensor
 concept.
 To make optimum use of this system, and in order to adapt it to a specific location, SeMSy® Compact of-
 fers different functions. Those are only usable with a Panomera®® camera.

 19.1 GRID
 In the SeMSy® Compact, it is possible to display the grid of each camera module (zones of the respective
 individual streams) of a Panomera® camera.
 So, there is an overview of the layout of the master / slave modules.

 ▶ Activate a Panomera® camera as described above.

 Fig. 19-1

 ▶ Click F1 in order to display the grid.
 or
 ▶ Open the context menu and choose Image > Panomera® > Show sensor grid.
 ▶ Click F2 in order to disable the grid again.
 or
 ▶ Deactivate the sensor grid using the context menu.

 Refer to the documentation “Configuration” of the corresponding Panomera®
 camera.

68 SeMSy® Compact – Software Version 5.1.19| REV. 1.0.1 | © 2021 Dallmeier
19.2 OVERVIEW-MODULE
Because a Panomera® guarantees a uniform resolution over the entire scene, data transfer requires large
capacities.
To minimize the risk of a lagging picture caused by large data packages, one can use the Overview-mod-
ule.
The Overview-module behaves like a regular single sensor camera, and thus drastically reduces the data
volume needed for image transmission. Using the overview-module is especially recommended when
multiple users are working in a single system.

Apart from that, the Overview-module can be used as “demo-mode”, to demonstrate Panomera® effect,
by comparing it to a regular Panomera® split.

Fig. 19-2

Display Overview-module
▶ To only display the Overview-module, press F3.
or
▶ Open the context menu of the split and choose Image > Panomera® > PROXY

Hide Overview-module
▶ Press F4, to return to multifocal-view.
or
▶ Deactivate the option PROXY via the context menu.

19.3 BLEND BORDERS
A Panomera® multifocal sensor system always provides an image that is composed of the individual im-
ages of the respective modules. Edges may form at the edges of the individual images.

▶ If necessary, activate the function for edge merging in the context menu of the active Panomera® split
 under Image > Panomera® > Blend borders.

 SeMSy® Compact – Software Version 5.1.19| REV. 1.0.1 | © 2021 Dallmeier 69
19.4 QUICK-ZOOM
 It is possible to zoom into a Panomera® split with the mouse immediately. In order for this to work, two
 splits are necessary. Depending on the mode the Panomera® is operating in, it behaves differently when
 it is opened.

 19.4.1 AUTO-Mode
 In AUTO-mode one can still observe the overall proceedings with small network utilization, while also
 viewing certain areas in detail. The splits highlighted in color always depend on the original split, even
 when the track mode is changed.

 Fig. 19-3

 ▶ Click the necessary spot in the split, and drag and drop it with the Alt button pressed into another
 split.
 or
 ▶ Click the necessary spot in the split with the Alt and Strg buttons pressed, to activate the zoom area in
 the next free split.

 The selected area is now shown enlarged in the corresponding split and highlighted in color.

 It is possible to repeat this process in order to create several zoom areas.

 Fig. 19-4

70 SeMSy® Compact – Software Version 5.1.19| REV. 1.0.1 | © 2021 Dallmeier
You can also read