THE UNIVERSAL MUSIC SOURCE - User Manual - Lindemann Audio
←
→
Page content transcription
If your browser does not render page correctly, please read the page content below
1

THE UNIVERSAL MUSIC SOURCE

User Manual
                             www.lindemann-audio.com
                             www.lindemann-audio.com
2
Welcome Table of Content
Congratulations on the purchase of this device and thank you very much
Important safety Network Configurations 20 ⠸
for selecting a LINDEMANN product. We wish you pleasant hours of music information
3 ⠸
listening and long evenings with your favourite recordings. The musicbook app 22 ⠸
Scope of Delivery 4 ⠸
With the musicbook series you have chosen one of the technologically most Navigation Bar 23 ⠸
advanced and best sounding audio systems. We develop and build our de- Front View 5 ⠸
Source View 24 ⠸
vices in Germany and have put all our passion and more than 20 years of
Rear View 6 ⠸
experience into this exceptional product which soundwise leaves nothing Music Server 25 ⠸
to be desired. Discover a new quality of music reproduction that opens up IR Remote Control 7 ⠸
large rooms in a completely relaxed manner and puts vocalists virtually USB Input 27 ⠸
within reach in your living room. Happy listening! Connection Variants I-III 8 ⠸
Online Services 28 ⠸
Network Connection 11 ⠸
Your LINDEMANN team My Files 30 ⠸
CD Function 12 ⠸
Favourites 31 ⠸
Bluetooth 13 ⠸
CD 32 ⠸
Overview USB-Audio Interface 14 ⠸
Analog Inputs
Model Versions
Digital Inputs
Bluetooth 33 ⠸
Device Settings 15 ⠸
USB Audio
CD Player
Bluetooth
Streamer USB-Audio 34 ⠸
Network Connection 19 ⠸
Digital 1-4
35 ⠸
Analog 1-2
musicbook 10 DSD 0 0 Settings 36 ⠸
musicbook 15 DSD 0 Technical Specifications 38 ⠸
musicbook 20 DSD 0
musicbook 25 DSD
This product complies with the European directives 2006/95/EG (Low Voltage Directive), © 2016 Lindemann audiotechnik GmbH
2004/108/EG (EMV Directive) and 2009/125/EG (ErP Directive).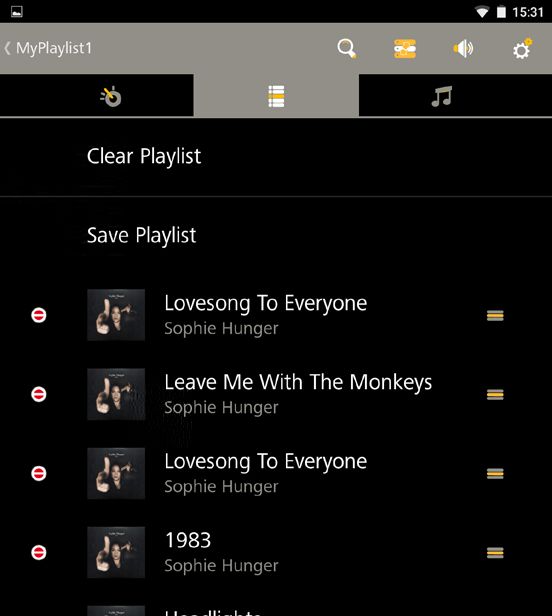
3
Important safety information
Read this user manual carefully.
Carefully observe all NOTES. The manual is designed to help you to prop-
erly use your new Lindemann product so that you can enjoy all its fea-
tures. Keep this user manual for future reference.
• Before connecting the device, check to see if your power supply matches the • Have repair and maintenance work performed by qualified customer service
values specified on the type plate. The type plate is located on the bottom of the personnel only. Do not try to repair the device yourself. Do not remove or open
device. the device cover; otherwise, you could come into contact with dangerous volt-
• When connecting the device, use the included power cord or another appropri- ages or be exposed to other hazards. Contact your Lindemann dealer or Linde-
ate power cord. Operation without protective grounding is not permitted and is mann audiotechnik directly to receive qualified customer service.
dangerous. • Electronic equipment is not household waste but must be disposed of properly
• Connect the device with a proper power socket and route the cable so that it can- in accordance with Directive 2002/96/EC on electrical and electronic waste. At
not be crushed or kinked. Make sure that the power cord remains undamaged the end of its useful life, dispose of this device at a designated public collection
and constantly accessible. point.
• To prevent fire or electric shock, do not expose this device to rain or moisture.
The device must not be operated outdoors. Protect the product from dripping or
splashing fluids, and do not place any objects filled with water (such as vases) on
the product or in its vicinity. As with all electronic devices, liquids should never
be allowed to penetrate into product.
• Do not make any changes to the product or its accessories. Unauthorized chang-
es may compromise safety, regulatory compliance, and proper function of the
device. The warranty is voided in such cases.
• Do not expose the device or the IR remote control to extreme heat, including di-
rect sunlight and fire. Allow waste heat generated during operation to dissipate
freely. Never operate the device in closed cabinets or near heat sources such as
radiators or stoves.
• Set up the device so that the back of the device with the power switch is always
accessible. Do not use this device unattended. If you will not be operating the
device for an extended period of time, turn it off using the power switch on the
back or unplug the power cord. If you notice smoke or a burning smell during
operation, discontinue using the device immediately by turning off or unplugging
the power cable from the power socket.
• To clean the device, unplug the power cord and clean the surface with a dry cloth
or with a little glass cleaner. Make sure that the device is completely dry before
you reconnect it with the power cord. Never use solvents (such as acetone or
lacquer thinner) to clean the device.
www.lindemann-audio.com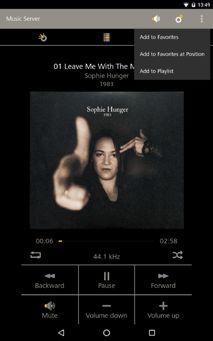
4

    Scope of Delivery

                          musicbook DSD
                        ⠸ The musicbook DSD is a converter-preamp with Bluetooth, USB Audio,
                          CD player (musicbook 15/25) and streamer (musicbook 20/25).

                          WLAN Antenna and Bluetooth Antenna
                        ⠸ Antenna for rear side mounting on the musicbook DSD. Will be required for WLAN and/or
                          Bluetooth operation.

                        ⠸ Infrared Remote Control
                          IR remote control with built-in rechargeable lithium ion accumulator.

                        ⠸ LAN Cable
                          CAT 6 patch cable (5 m /16 ft.) for connecting the musicbook DSD to the router.

                        ⠸ USB Cable
                          USB cable (1 m / 3 ft.) for connecting the musicbook DSD to your computer.

                        ⠸ USB Charging Cable
                          USB charging cable (1 m / 3 ft.) for recharging the IR remote control.

                        ⠸ Power Cord
                          Power cord with Schuko plug (2 m / 6 ft.) for connecting the unit to the mains grid.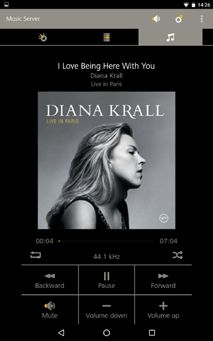
5

Front View
                                                       Multi-function wheel for volume control (turn left/right), mute (tip once
                                                       briefly), input selection (tip and turn left/right at the same time) and CD
                                                                                                                                   ⠸
                                                        player functions. All other functions can be controlled by means of the
                                                                                        included IR remote control or via the app.

                                                                                                                                         OLED Graphics Display
                                                                                                                                         (optically bonded)
                                                                                                                                       ⠸
                                                                                                                                         with nearly 180° viewing
                                                                                                                                         angle.

                 Standby LED
             ⠸
                 flashing yellow in standby mode.

               USB-A port (USB host) (only musicbook 20/25) for docking storage media such as external harddisks or USB
             ⠸ sticks. Recharge function for tablets and smartphones up to 2.1 A (depending on device). Recharge port for
               remote control.

                       Headphone output (¼“ / 6.35 mm): analog class A amplifier for consummate enjoyment of music with
                                                                                                                         ⠸
                                  headphones. (32–300 ohms). Volume control via app, IR remote and multi-function wheel.

                 High-class CD drive (only musicbook 15/25) for CD playback. CD text ready. All CD functions controllable via app,
             ⠸
                 IR remote and multi-function wheel.

               Standby Key for turning on and off the unit. Very low energy consumption in operation mode due to intelligent
             ⠸ power supply. Standby function selectable via app between energy saving (0.5 W consumption) and network
               standby (4 W consumption).

                                                                                                                                       www.lindemann-audio.com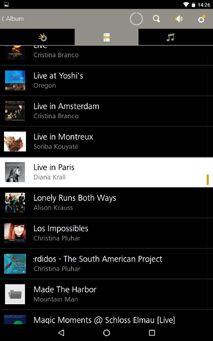
6

    Rear View
       Balanced (XLR) and unbalanced (RCA) line outputs which can be used independently and
       simultaneously. Load stable output stages for use with long cables, e. g. to connect active ⠸
                                                                      speakers or a subwoofer.

           Two analog inputs for connecting e. g. a phono preamp or a tuner.
           Analog preamp circuitry and analog volume control for optimum
         ⠸ resolution and trouble-free operation even with low volume levels.                            WLAN antenna for the wireless connection between
           Non-magnetic, hard gold-plated RCA sockets for a loss-free signal                           ⠸ your musicbook DSD and the WLAN router. Playback of
           transmission.                                                                                 music files up to 24 bit and 96 kHz in WLAN mode.

            Bluetooth antenna for the wireless connection
      between your musicbook DSD and e. g. a smartphone ⠸                                               Power switch for a full disconnection of the
                                                                                                                                                     ⠸
         or tablet. High sound quality due to AAC and aptX.                                                  musicbook DSD from the mains grid.

           USB-B port (USB device) to operate the musicbook DSD on a computer.
          Music playback in studio quality (PCM, DSD, DXD) up to 24 bit and 384 kHz ⠸
                                     and of DSD files up to DSD 256 in native mode.                       IEC plug for connection to the mains grid. ⠸

                                                                                                         Ethernet LAN connection for using the
            Four digital inputs: optical and coaxial. Max. resolution up to 24 bit and                   network player on the router.
       192 kHz coaxial or 24 bit and 96 kHz optical. Connectivity for external digital                 ⠸
                                                                                                         Playback of music files up to 24 bit and
                                                                                       ⠸
                              sources like TV, Blu-ray player or an external CD drive.                   192 kHz and DSD 64 in LAN mode.
                       Intelligent DSD re-sampling of all digital inputs and sources.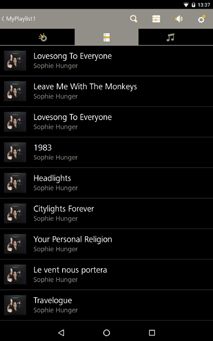
7

IR Remote Control
      LED: glows yellow in transmission mode or red when recharging the
       accumulator (goes off when fully charged). Flashes red in case of a ⠸   ⠸ Standby key: turns the unit on and off.
                                                           charging fault.
                                                                               ⠸ Set key: opens the menu for the device configuration.

                                                                                   Display key: switches between track, artist, album and
                       SET keys: used for input selection. Those keys also     ⠸
                                                                           ⠸       time/track display of CD text or meta data.
                double as navigation keys (up, down) in the settings menu.
                                                                                   Info key: for the status display of the most important settings.
                                                                               ⠸
                                                                                   Use the up/down keys to call up additional information.
                    OK key: confirms any selection in the settings menu. ⠸
                                                                                 Volume keys: to lower (Vol -) or increase (Vol +) the volume level.
                                     Mute key: mutes the audio playback. ⠸     ⠸ Those keys also double as navigation keys (left, right) in the
                                                                                 settings menu.

CD Function Block:

                                                                                   Number keys: for the direct selection of a CD track and
                                                                               ⠸
                                                                                   also to input numbers in the settings menu.

                                                                                   Stop/eject key: stops the CD when pressing the key once /
                  Repeat key: to repeat a single track or the whole album. ⠸   ⠸
                                                                                   ejects the CD upon a second push.

                     Search keys: forward and backward search function. ⠸

                                                                                   Skip keys: skip to the next/previous track with CD playback,
                                                                               ⠸
                                                                                   Bluetooth, USB Audio and streamer.

                                                                                   Play/Pause key: play or pause with CD playback,
                                                                               ⠸
                                                                                   Bluetooth, USB Audio and streamer.

NOTE: The network functions can be controlled
                                                                                   USB mini port: to recharge the lithium ion accumulator.
                             only via the app.                                 ⠸
                                                                                   Charge status may be called up with the Info key.

                                                                                                                            www.lindemann-audio.com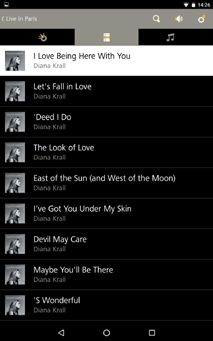
8

    Connection Variant I
    musicbook DSD with active speakers
                                                           Active loudspeakers wired
                                                           through the balanced outputs

                                                           Active loudspeakers wired
                                                           through the unbalanced outputs

    Connection Variant I:
    Connecting active loudspeakers is the easiest way to enjoy music with the musicbook        600 ohms in balanced operation mode. The integrated preamp, the ample connectivity
    DSD. You only need signal cables of appropriate length to establish the connection         for analog and digital sources and the possibility to play back CDs or listen to music from
                                                                                                                                                                                           ⠸
    between the outputs of the musicbook DSD and the inputs of the active speakers. The        a network harddisk drive, a streaming service or web radio make the musicbook DSD an
    musicbook DSD can easily drive long cables and delivers up to 8 V of output voltage into   extremely versatile signal source.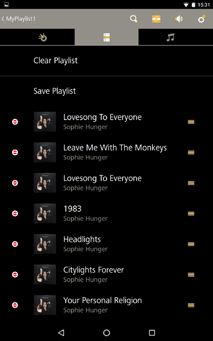
9

Connection Variant II
musicbook DSD with power amp
musicbook 50/55 + passive speakers

                                                                                                                                  musicbook 20/25 DSD

                                                                                                                                  musicbook 50/55

Connection Variant II:
For using passive speakers on the musicbook DSD, you need a suitable power amplifier.    with existing power amps. Since both outputs can be used simultaneously, you may link
With the musicbook 50 or the musicbook 55 we are presenting class D power amps           e. g. a power amplifier and an additional subwoofer to the device.
which meet the very highest demands on sound quality. An intelligent signal detector                                                                                             ⠸
switches on the amplifier automatically when a music signal is present and turn it off
again if the music has stopped. But the musicbook DSD can also be ideally combined

                                                                                                                                                         www.lindemann-audio.com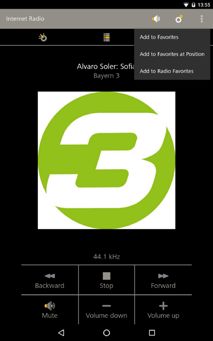
10

 Connection Variant III
 musicbook DSD in combination with an existing hi-fi system

 Connection Variant III:
 If you are already using a complete hi-fi system with a preamp or an integrated am-
 plifier, you can connect the musicbook DSD to an analog input of the amplifier. To this ⠸
 end the onboard volume control of the preamp in the musicbook DSD can be bypassed
 (menu item uFixed Line Outputt in the settings menu) and will then become effective
 only when used with a headphone.
11

Selection of Digital and Analog Inputs
musicbook DSD

The musicbook DSD offers 4 digital and 2 analog inputs. These can be selected in three
different ways:

• via the musicbook app......

• via the IR remote control.....................

• via the multi-function wheel.................................

             Selection via the app (mb 20/25 only)                          Selection via the IR remote control                          Selection via the multi-function wheel
                                                                                                  PCM    48         DSD   128

                                                                                                        Digital 3

 • Start the musicbook app.                                       • Tip the SET up or SET down keys on the remote until         • Press on the centre of the multi-function wheel on the
                                                                    the desired input is shown.                                   musicbook. Keep the wheel pressed while turning it
 • Open the source view and select the desired
                                                                                                                                  clockwise or counterclockwise.
 • input Digital 1–4 or Analog 1–2.                               • Under Inputs in the settings menu you can rename the
                                                                    inputs and fade out inputs which are not needed.            • The display will show the inputs Digital 1–4 and Analog
 • After selecting the source, you will enter the                                                                                 1–2 from which you may pick your choice.
 • play view of the app.
 • The sources may be renamed in the source view of the
   app. See page 35.

                                                                                                                                                               www.lindemann-audio.com
12
Using the CD Player
musicbook DSD
• With the label side face up, gently push an audio CD into • Icon for CD ejection: in the CD line of the app’s source
the CD drive slot until the CD is automatically pulled in. view.
Important note: The drive pulls in the CDs and also ejects them again automatically. • By pressing the display key on the remote control, you
Don’t try to push a CD into the device or pull it out against the resistance of the can switch the display between time/track, album,
drive. This will damage the load mechanism. Damages to the load mechanism are artist and track (only if CD text is available).
not covered by warranty. PCM 44.1 DSD 128
PCM 44.1 DSD 128 Pink Floyd
• After a few seconds the display will show the number of
tracks and the overall playtime of the CD. 7 23:06 PCM 44.1 DSD 128
Another Brick in
• For all other user functions you can either use the
remote control, the app or the multi-function wheel on
the unit.
Device control via multi-function wheel (wheel control)
Device control via app and IR remote control • Volume control (turn left/right).
• Play/Pause.
• Search (only on IR remote). • Play/Pause: press shortly.
• Search/Skip (app). • Stop/Eject: press and hold > 1 sec.
• Skip (skip to the next or previous track). • Skip: press and hold while turning left/right.
• Repeat one (repeat a single track). Note: Under uCD Drivet in the remote settings menu, uWheel Controlt
and uResumet can be turned on and off. See page 17.
• Repeat all (repeat the whole album).
• Stop/Eject (only on IR remote)
• Number keys for direct track selection. 1234545......13
Bluetooth Playback
musicbook DSD
The musicbook DSD is equipped with a top-class Bluetooth adapter. It supports the aptX and
AAC transmission standards. Both deliver a sound quality which is barely different from CD
reproduction.
However, the connected smartphone also must support those standards.
The music playback via Bluetooth can be controlled with the Play/Pause and Skip +/Skip -
keys on the remote or the app. If meta data are available, you can select between album,
artist and track with the display key on the remote.
Connecting your smartphone to the musicbook
1. First mount the supplied screw antenna to the corresponding connector.
2. Using the IR remote or app select uBluetootht as source.
3. Open the settings on your smartphone and go to Bluetooth.
4. Select the musicbook here.
5. After a few seconds the display will read uConnectedt.
6. After the connection has been established successfully, the display will show the
name of the smartphone and the transmission standard.
Note: More setting options such as uPairingt, uAutoconnectt and uVisiblet can be
found in the settings menu of the remote under uBluetootht. See page 17.
www.lindemann-audio.com14
USB Audio Interface
musicbook DSD
The musicbook DSD is equipped with a USB interface which enables you to play back
USB operation on the Mac (OSX 10.6.4 or higher)
music from a computer in studio quality. In this operation mode the musicbook replaces
the internal soundcard of the computer. The interface supports high-resultion music 1. Using the supplied USB cable, connect the USB input on the rear of the musicbook DSD
files up to 384 kHz PCM and DSD playback up to DSD 256 in native mode. The interface to a free USB port on your Mac.
of the musicbook DSD is fully compatible with USB Audio Class 2.
2. Now open the uAudio MIDI Setupt utility and select the musicbook from the list of the
shown devices which appears as uLINDEMANN HighResAudiot. In the settings menu
A crucial prerequisite for an optimum sound experience with a computer is the use of a select uUse this Device for Sound Outputt. Under uFormatt you can now manually
high-quality USB cable and a playback software that supports high-resolution formats set the sample rate and the bit resolution. A detailed installation guide is found on our
and offers some comfort such as an automatic sample rate switching. We have had website.
positive experiences with software programmes like Audirvana, Pure Music and J.River
Media Center. We recommend the use of an audiophile playback software such as Audirvana, Pure Music
or J.River Media Center. Only that way you will be able to enjoy all features like automatic
For the use of an Apple computer no special driver is required. sample rate switching, sample rate converter or DSD playback. For more information con-
tact the respective supplier.
Windows computers, however, need to be run with a special driver for high resolutions.
This driver can be found in the download area on our website together with a driver
installation guide.
USB operation on Windows PC (Windows 7, 8, 10)
1. Windows computers require an ASIO driver for running high-resolution USB Audio
devices. This is available on our website in the "Downloads" area. Install the driver
before connecting the musicbook to your computer for the first time. Please follow the
installation guide on our website.
2. After successful installation connect the USB input of the musicbook to a free USB
port on your computer. Open the usoundt settings in the PC’s usystem control
panelt. Define the musicbook, which appears as uLINDEMANN HighResAudiot, as
standard output device and set the desired resolution and sample rate manually under
uProperties/Advancedt. A detailed installation guide can be found on our website.
We recommend the use of an audiophile playback software like J.River Media Center or
Foobar to take full advantage of all features such as automatic sample rate setting and
up-sampling. You will find the installation guides at the respective suppliers.15
Settings Menu
musicbook DSD
The settings menu of the musicbook is only navigated by the IR remote control. With it you
can configurate the hardware of the musicbook according to your personal preferences. Digital 1 - Digital 4
There is a multitude of setting options which will be described hereafter. Please note: this
menu is not identical with the settings of the app. Scrolling
Analog 1 - Analog 2
Inputs
Brightness
Bluetooth
Main View
• First make yourself a little familiar with the navigation USB-Audio
in the menu:
Metadata
• Pressing the uSettings keyt will take you into the
menu, a second push will get you out again.
General Display & Brightness
Main Menu
Inputs
Filter PCM
• The display will read: General
DAC Settings
Network
Re-Sampling
PreAmp Settings
• The menu is navigated with the uupt, udownt, uleftt,
urightt keys and the uOK buttont on the remote.
Factory Default Line Output Level
Network
• The current selection is indicated by the softkey high- Headphone Level
lighted in yellow. Confirm your selection each time by WLAN Setting
pressing the uOK buttont. Fixed Line Output
Status
Balance
CD Drive
Wheel Control
Resume
Pairing
Bluetooth
Autoconnect
Visible
www.lindemann-audio.com16
Settings Menu
musicbook DSD
Inputs - Digital 2 General - DAC Settings - Filter PCM
1. Go to Inputs, select the desired input, followed by Name or Enabled. 1. Go to General, select DAC Settings, followed by Filter PCM.
2. With uNamet you can assign new names to the inputs. For this purpose use the up, 2. With uFilter PCMt the characteristic of the anti-aliasing filter in PCM mode can
down and left, right keys. Confirm each time with the OK button. Use the left, right be switched between uSlow Roll-Offt and uSharp Roll-Offt. This setting has no
arrows to create blank spaces or for corrections. Confirm the new naming in the OK influence on the DSD operation!
softkey.
General - DAC Settings - Re-Sampling
3. With uEnabledt those inputs which are not needed can be removed from the
selection. Select uInput enabledt for an active input and uInput disabledt for a 1. Go to General, select DAC Settings, followed by Re-Sampling.
disabled input. Confirm each time with the uOK buttont. 2. With uRe-Samplingt the function of the integrated sample rate converter is deter-
General - Display & Brightness - Scrolling mined. In the unativet setting the SRC is not enabled and the digital data are pro-
cessed unalteredly. In the uPCMx2x4x8t setting the digital data are converted into
1. Go to General, select Display & Brightness, followed by Scrolling.
the DXD studio format (352.8 or 384 kHz respectively). In the uDSDx2x4t setting the
2. By uScrollingt we understand the scrolling of the meta data text. You can select digital data are converted into the DSD 128 or DSD 256 format.
between uofft, uone timet and uont. With off the text will never run through,
with uont the text will run through repeatedly within short intervals, and with General - PreAmp Settings - Line output Level
uone timet only after the text has been altered. 1. Go to General, select PreAmp Settings, followed by Line Output Level.
General - Display & Brightness - Brightness 2. With uLine Output Levelt the output level at the outputs is set. Select between
ulowt, umidt and uhight. The maximum output voltage corresponds to 1V, 2V and
1. Go to General, select Display & Brightness, followed by Brightness.
4V (unbalanced) or 2V, 4V and 8V (balanced).
2. With uBrightnesst the display brightness is adjusted. Select between
ulowt, umidt and uhight.
General - PreAmp Settings - Headphone Level
1. Go to General, select PreAmp Settings, followed by Headphone Level.
General - Display & Brightness - Main View
2. With uHeadphone Levelt the output voltage at the headphone output is set. Select
1. Go to General, select Display & Brightness, followed by Main View.
between ulowt, umidt and uhight. The maximum output voltage corresponds to
2. With uMain Viewt you can change between three different display views: uTextt, 1V, 2V and 4V.
uText + Infot and uVolume + Infot. In the Text setting only uTextt will be shown,
General - PreAmp Settings - Fixed Line Output
the uText + Infot setting will show you the text together with the information about
the current sample rate, and in the uVolume + Infot setting you will see a volume 1. Go to General, select PreAmp Settings, followed by Fixed Line Output.
display together with the information about the current sample rate. 2. With uFixed Line Outputt you can turn on or off the volume control on the musicbook.
General - Display & Brightness - Metadata The output voltage is then set to maximum (which corresponds to a set value of 99).
Caution: only select this setting option if you are running an amplifier with a volume
1. Go to General, select Display & Brightness, followed by Metadata. control after the musicbook. Otherwise your power amplifier will be overdriven and
might destroy your speakers.
2. With uMetadatat you can enable or disable the display of the meta data text.
If uMetadatat has been disabled, only the respective active source is displayed.17
Settings Menu
musicbook DSD
General - PreAmp Settings - Balance Bluetooth - Pairing
1. Go to General, select PreAmp Settings, followed by Balance. 1. Go to Bluetooth and select Pairing.
2. With uBalancet volume differences between the channels can be levelled if the 2. With uPairingt you can edit the stored list of devices which were recently con-
listening position is not ideal. Use the left, right keys to adjust the balance. Confirm nected successfully to the musicbook. In Autoconnect mode the musicbook will
with the uOK buttont. connect automatically as soon as it finds a device that was already connected to the
musicbook. With uUnpairt this list will be deleted. With uPairt the musicbook is
General - Factory Default manually set to standby mode and ready to connect to other Bluetooth equipment.
1. Go to General and select Factory Default.
2. With uFactory Defaultt the device can be reset to delivery condition. Confirm with Bluetooth - Autoconnect
the OK button to start the procedure. Please note: all settings you have done so far 1. Go to Bluetooth and select Autoconnect.
will be reset.
2. With uAutoconnectt the musicbook will automatically connect to the last connected
Network - WLAN Setting device. All devices that were previously connected to the musicbook are stored in an
1. Go to Network and select WLAN Setting. internal list. If a device is not available, the musicbook will try to connect to the next
device in the list. With uUnpairt this list will be deleted.
2. With uWLAN Settingt the password for the WLAN operation can be entered via the
remote control. For this purpose use the up, down and left, right keys. Confirm with the
uOK buttont each time. Use the left, right arrows to create blank spaces or for correc- Bluetooth - Visible
tions. Confirm the input in the OK softkey. See also page 20: WLAN configuration. 1. Go to Bluetooth and select Visible.
Network - Status 2. With uVisiblet you can determine if the musicbook shall be visible for other Blue-
1. Go to Network and select Status. tooth devices. In the uNot mode the musicbook is not shown to other Bluetooth
devices. In the uYest mode it is visible as standard. This function can be useful, if
2. With uStatust you can call up essential information about the WLAN connection. you want to prevent external devices from getting access to the musicbook.
Use the uupt, udownt keys to have further information displayed.
CD Drive - Wheel Control
1. Go to CD Drive and select Wheel Control.
2. With uWheel Controlt the CD player control via the multi-function wheel can be
enabled or disabled.
CD Drive - Resume
1. Go to CD Drive and select Resume.
2. With uResumet you can determine the properties of the CD player upon selecting a
different input. With Resume disabled, the CD player will continue to run in the back-
ground; with Resume enabled, it will restart from the track location where the other
input was selected before.
www.lindemann-audio.com18
musicbook DSD
Lindemann Audiotechnik de.pinterest.com/LindemannAudio
pinterest
facebook
Note: The following pages apply only to streaming models musicbook 20/25 DSD19
Network Connection
musicbook 20/25 DSD
WLAN
router
Music Server (NAS)
Control point
smartphone
or tablet
Netwok Connection:
The musicbook 20/25 DSD is equipped with a UPnP/DLNA network player. This allows Storage). The versatile functions of the musicbook 20/25 DSD can be conveniently oper-
to play back music from various digital media like e. g. streaming services, web radio, ated via the app. The core element within the network is the WLAN router. It receives the
⠸
network attached storage (NAS) as well as USB storage media. For network operation commands from the app and passes them on to the musicbook.
you will need a WLAN router with internet access, a smartphone or tablet (WLAN oper-
ation) with the musicbook app and a storage medium like an NAS (Network Attached
www.lindemann-audio.com20
Network Configuration
musicbook 20/25 DSD
One condition for the use of the network player is a functional home network which com- Wireless operation via WLAN:
prises at least a WLAN router with internet access and a smartphone logged in on this rout-
er for running the app. Please download the musicbook app from the App Store (Apple) or For the configuration of the WLAN connection it is necessary to perform the above steps
from Google Play (Android). If you have already a music collection on an NAS, connect this first. During the input of the WLAN data the musicbook remains connected to the WLAN
one to the WLAN router as well. To ensure a troublefree operation of the musicbook 20/25 router via the LAN cable. Before starting the procedure, please mount the WLAN antenna.
DSD in a local network, please follow the instructions in this chapter step by step. However,
in case of problems it is advisable to consult a network expert.
WLAN configuration with the musicbook app
NOTE: Even if you have planned a wireless only operation via WLAN, it does make sense for
the initial start-up to connect the musicbook 20/25 DSD to your router via a LAN cable. You
should acquaint yourself a little with the operation of the network player and the app before 1. Select the Settings icon in the app.
switching to WLAN mode. For entering the WLAN access data via the app a LAN connection
is absolutely necessary. The LAN cable will only be removed after entering the WLAN data.
Operation with a LAN cable: Settings u
Discover Devices
1. If you had switched on the musicbook, you need to turn it off now and connect the
device to a free LAN port on your WLAN router by means of the supplied LAN cable. 2. Select uDevice Settingst. Application Settings
2. Now turn the device on again. The device will Device Settings
log in to the network. This may take some time
(up to 5 minutes). About
Info
3. The network status can be requested with the Network: LAN
uINFO buttont on the remote control. IP Mode: DHCP Device Settings u
IP: 192.168.1.XXX
Device Name
4. Now open the musicbook app on your
smartphone or tablet. Network
5. The app will now show the musicbook and its IP address (Discover Devices). 3. Select uNetworkt. Sound
6. Tip on the musicbook to link it with the app. UPnP Control
7. The musicbook is now ready for network operation. Energy Saving
Software21
Network Configuration
musicbook 20/25 DSD
4. Select uConfigure WiFit. WLAN configuration with the remote control
The WLAN connection can also be configured by means of the remote control. In this
5. Select uSSIDt. case it is not necessary to make a connection via LAN cable. This may often simplify
the procedure. Before starting the procedure, please mount the WLAN antenna.
6. Select your home network from the list of discovered networks.
1. Open the Settings menu, navigate to uNetworkt, with the up/down keys and tip on
7. If under Security unknown is shown, the WLAN encryption was not recognised auto- uWLAN Settingt. Select your WLAN network (SSID).
matically (e. g. with iOS devices). Select the WLAN encryption of your WLAN router (e.
g. WPA2). We recommend the following settings: Cipher = AES/TKIP and Security = 2. Now enter the password for your WLAN router with the left/right/up/down keys. With
WPA2 the < > icons the input can be navigated, e. g. to correct a wrong character. Upon
entering the password confirm with OK. A good bet: numbers can be entered directly
8. Choose your uPasswordt and enter the password for your WLAN access. via the number keys on the remote control.
9. Confirm with uApplyt. 3. SSID and password will be displayed again for a check. Confirm uApplyt with the
uOK buttont.
10. Also confirm the IP setting (DHCP) with uApplyt.
4. The musicbook will now establish a
11. Disconnect the LAN cable immediately from the musicbook. WLAN connection. This requires 20-30
seconds, but may also take several
12. The musicbook will now establish a WLAN connection. minutes, depending on the router. Upon Connected!
correct password input the display will
read as follows:
13. The change to WLAN requires 20-30 seconds, but may also take several minutes,
depending on the router.
14. Check the WLAN connection by pressing the INFO button on the remote control. 5. Upon false input the display will read as
follows: Connection refused!
15. If LAN is still displayed, please Info
switch off the musicbook on the rear Network: WLAN (80%)
side. Make sure that no LAN cable is IP Mode: DHCP
connected and reboot the device. SSID: My W-LAN
www.lindemann-audio.com22
The musicbook App
Overview
The musicbook app is available for devices with either Android or iOS operating system. You by the online store and your smartphone or tablet. The apps show minor deviations in their
can download the Android app from Google Play and the iOS-App in the App Store. Enter visual presentation. The differences are shown in the graphics below. Moreover, deviations
“musicbook“ into the search mask of the respective store and select the app musicbook will occur as a function of the size and resolution of your display and also depending on the
from Lindemann audiotechnik. For the installation follow the further instructions provided version of your operating system.
tNavigation bar
tNavigation bar
iOS Android
NOTE: To avoid graphical and system-related problems with the app, we strongly recom- and under the Android operating system from version 4. In this manual the layout of the
mend you to always load the latest version of the operating system for your smartphone Android version is used to explain the app. However, all descriptions apply equally to iOS
or tablet. The musicbook app is executable under the iOS operating system from version 9 devices.23
The musicbook App
Navigation bar
Source view
Tipping on the source icon will get you straight to the view pictured left. Select the
desired source here. From the source view you will be directed to the browse view
t Navigation bar (depending on the source) or straight to the play view.
Source Browse Play Settings
q q q q
Browse view
The browse view presents the folder structure of the source in which you are navi-
t Sources gating. The folder structure is shown completely with all its levels and is specified by
the source. The app has no influence on the pictured content. The navigation within
• Music Server the browse view is done by selecting the corresponding folders and also via the back
function in the upper lefthand corner.
• USB Input
• Online Services
• Playlist Play view
• Favorites When playing back music, the current track plus the cover or (with web radio) the
• CD logo of the radio channel will be shown. Tipping on the cover will call up a list of the
available additional information: track, artist, album, genre, bit rate, format, sample
• Bluetooth rate, server. In the play view for the digital and analog inputs (Digital 1–4, Analog
• USB-Audio 1–2) the input name is displayed. With the digital sources also the current sample
rate is shown.
• Digital 1–4
At any time you may switch between source view, browse view and play view;
• Analog 1–2 meanwhile the track in play will continue to play.
Settings
Under Settings you will find a settings menu where you can configure the streamer.
www.lindemann-audio.com24
The musicbook App
Source view
The following sources are available in the source view:
Here you select the UPnP/DLNA server in t CD The CD player can be fully operated via the
your home network from which you want app. In the right-hand column you will find the
to play back music. Several servers may be icon to eject the CD.
t Music Server
logged in on the home network at the same
time, all of which can be operated via the t Bluetooth The musicbook 20/25 is equipped with a
musicbook app. high-quality Bluetooth receiver which
supports the good-sounding AAC and aptX
Via the USB-A port on the front of the music- formats.
book 20/25 you can play back music tracks
t USB Input from external storage media like USB sticks t USB-Audio Via the USB-B port on the rear of the music-
or USB harddisks. The interface supports DSD book you can establish a connection with a
64 and PCM up to 192 kHz. computer and play back directly from there.
The interface works in asynchronous mode
The musicbook 20/25 enables you to access and supports DSD 256, DXD and PCM up to
online services like e. g. internet radio, podcast 384 kHz.
and streaming services. This requires that
t Online Services t Digital 1–4 Here you can select and name external digital
the WLAN router, where your musicbook is
linked to, is logged in on the internet and your sources connected to the musicbook.
connection is fast enough.
t Analog 1–2 Here you can select and name external analog
Under Playlist your personal playlists are sources connected to the musicbook.
t Playlist stored. Tip on the desired playlist to browse
through it.
Under Favorites you can save your often
t Favorites
heard radio stations, albums or tracks.25
The musicbook App
Source view Music server
Under uMusic Servert you will find all available music servers on the network. After track. Note: Always use the latest version of the music server software, e. g. Twonky
selecting the server and the presentation, you will be directed to the browse view. Here you from 8.2. Configure this software according to your personal preferences.
select e. g. an album and a track. The app will jump straight to the play view and play the
Select music server Find server Select order
By tipping on uMusic Servert you Tip on the music server of your Here you can define how your music
will get into the browse menu of choice. collection is sorted. The preselection,
your NAS. which you will be shown, depends on
the settings of your music server
(e. g. Twonky).
www.lindemann-audio.com26
The musicbook App
Source view Music server
Select album Select track Play view
Select the desired album. Select the desired track. The music is now played back. With
Backward/Forward and Play/Pause
you can navigate in the album. With
Vol+/Vol-/Mute you can set the
volume level.27
The musicbook App
Source view USB Input
The USB input (host) on the front of the device is designed to play back USB storage media medium will open. Pick the desired folder/album/track. The app will open the play view.
like USB sticks or USB harddisks. These need to formatted in the FAT 32 format. Select Please note: no covers will be transmitted via the USB input.
uUSB Inputt. in the source menu. The browse view with the content of the storage
Operation in play view
• With Forward , Backward you can either skip to the next or previous
track or search within the track. Tip briefly on the corresponding softkey to skip
to the next or previous track. For searching tip and hold the softkey a little
longer.
• With Play/Pause you can start or stop the playback.
• With the Repeat-Icon the repeat function is called up. You can choose
between two options: Repeat One und Repeat All .
• Upon tipping on the placeholder in the middle of the play view, the meta data will be
shown.
• Mute and Vol+/Vol- serve to adjust the volume level or mute the playback
respectively.
www.lindemann-audio.com28
The musicbook App
Source view Online services
Under uOnline servicest various service providers are available who offer catalogues with registration with the respective provider. For an optimum sound quality we recommend a
radio stations, podcasts or music. Music streaming services are fee-based and require a subscription with FLAC 44 resolution, i. e. in CD quality.
Online services Browse view Radios Browse view Podcasts Browse view TIDAL
Tipping on uOnline servicest will Frequently visited radio stations can Frequently listened podcasts can Streaming services like TIDAL are
open the overview of the available be stored at the radio service under be stored at the podcast service subject to charge. First you need to
services. Pick the desired offer here. uFavoritest or in the source menu under uFavoritest or in the source open an account with the respective
under uFavoritest. menu under uFavoritest. provider. In order to use the service,
See Favorites. See Favorites. you then need to enter your user
name and your password and con-
firm with LOGIN.29
The musicbook App
Source view Online services Search function
Under uOnline servicest you will find the search funtion in the corresponding browse view of the streaming
service, radio or podcast. Note: the specific search within a service is only possible there and must be distin-
guished from the general search via the app.
Open search Enter station Start search Search result
In the browse view of the online Enter the name of the station with Tip on uSearcht in the right upper Tip on the search result to play back
services tip on uRadiost and here the keyboard. Confirm with OK corner to start the search. the radio station.
again on uSearcht. The search (or Done with iOS).
dialogue will open.
www.lindemann-audio.com30
The musicbook App
Source view Playlist
Under uPlaylistt you can organise your personal favourite songs in playlists. loaded playlist is indicated top left in the navigation bar as uCurrent Playlistt.
You may create several playlists and name them (e. g. Classic, Jazz, Pop). The Playlists can be edited, i. e. stored, deleted and changed in their order.
Add track Select playlist Select track Edit Playlist
Tip on the uAdd tot icon in Tip on the playlist to which you Tip on uPlaylistt, in the source To edit a playlist tip on the Edit
the play view. Now tip on want to add the track. With view to browse through its content. icon in the browse view. With the
uAdd to Playlistt. uNew Playlistt you can After selecting a track you will be Re-order icon on the right you can
also name a new playlist. directed straight to the play view. change the track order. With the De-
uCurrent Playlistt is the lete icon on the left single tracks are
currently loaded playlist. deleted. After editing confirm with
uSave Playlistt.31
The musicbook App
Source view Favorites
Under Favorites you can store frequently listened radio stations, albums or tracks.Tip on Upon selection (e. e. a radio station) the app will switch to the play view and the selected
uFavoritest in the source view. The app will now list your favorites in the browse view. favorite is played back. The favorites can be used like the station keys on a tuner.
Add favorites
• Android: In the play view mode tip on the uAdd tot icon in the upper
right-hand corner to add a radio station or track to your favorites.
Confirm with uAdd to Favoritest.
• iOS: In the play view mode tip on the uAdd tot icon in the upper
right-hand corner to add a radio station or track to your favorites.
Confirm with uAdd to Favoritest.
Now you can call up the respective radio station or track directly under
uFavoritest in the source menu.
www.lindemann-audio.com32
The musicbook App
Source view CD
Select uCDt in the source view. The app will now list all tracks on that CD in the browse view. After selecting a track,
the app will switch to the play view and play the selected music track.
CD player operation with the app
• With Forward , Backward you can either skip to next or previous track
or search within the track. Tip briefly on the corresponding softkey to skip to the
next or previous track. For searching tip and hold the softkey a little longer.
• With Play/Pause you can start or stop the playback. Holding it longer has
the same function as the Stop key on the remote control.
• With the Repeat-Icon the repeat function is called up. You can choose
between two options: Repeat One and Repeat All .
To eject a CD tip on in the source view.
NOTE: With CDs containing text information these will be shown both in the browse and
play view. If there are no CD text information available, the tracks will only be listed by
numbers.33
The musicbook App
Source view Bluetooth
The Bluetooth receiver of the musicbook DSD allows to play back music which is stored on will jump straight to the play view and show the meta data of the selected track. Browsing and
smartphones and tablets. Tip on uBluetootht in the source view. Connect your smartphone cover image are only possible on the connected smartphone.
to the musicbook. For this purpose use the Bluetooth settings of your smartphone. The app
The app as remote control for the Bluetooth receiver
• With Forward , Backward you can skip to next or previous track. Tip
briefly on the corresponding softkey to execute the order.
• With Play/Pause you can start or stop the playback.
• Upon tipping on the placeholder in the middle of the play view, the meta data will be
shown.
• Mute and Vol+/Vol- serve to adjust the volume level or mute the
playback respectively.
www.lindemann-audio.com34
The musicbook App
Source view USB audio
The USB audio input on the back of the device is used to play back music via a computer. Tip data format (PCM or DSD) and the sample rate. Browsing and cover image are only possible
on uUSB-Audiot in the source view. The app will jump straight to the play view and show the on the connected computer.
The app as remote control for the computer
• With Forward , Backward you can skip to next or previous track.
Tip briefly on the corresponding softkey to execute the order.
• With Play/Pause you can start or stop the playback.
• Upon tipping on the placeholder in the middle of the play view, the meta data
will be shown.
• Mute and Vol+/Vol- serve to adjust the volume level or mute the
playback respectively.35
The musicbook App
Source view Digital 1–4 Analog 1–2
Four digital inputs Renaming of the digital and analog inputs with iOS devices:
The four digital inputs (2 x optical, 2 x coaxial) offer connections for digital sources like In addition to the digital/analog inputs, the uRename icont will be shown on the
TV, DAB tuner, Blu-ray or an external CD drive. right side of the source view. After tipping on this icon a window will open where you
can rename the source, e. g. TV or Tuner. Confirm with uDonet top left the menu
bar) or with uReturnt.
Two analog inputs
The two analog inputs offer connections for analog sources such as a tuner or phono
preamp.
Renaming
The input identifiers for the external digital and analog sources are specified ex The input will now appear in the source view with its new name.
works as Digital 1–4 and Analog 1–2. These can be changed individually.
Renaming of the digital and analog inputs with Android devices:
Press and hold the respective input line for about 1 sec. A window will open where
you can rename the digital source, e. g. TV or Tuner. Confirm with OK.
www.lindemann-audio.com36
The musicbook App
Settings
First open the app settings with the Icon. .
The following options will appear:
| Discover Devices | Application Settings | Device Settings
Discover Devices • Cache
The app collects data in the cache for a speedy navigation. This applies in particular
Discover Devices shows all the musicbooks which are available on the network.
to covers. If they were loaded once, the page layout will be much faster in the future.
Connect the app with the musicbook by tipping on the softkey.
When changing the UPnP server or in case of problems with the image buildup it is
advisable to clear the cache.
¾¾ With Android devices: press uClear Cachet .
¾¾ With iOS devices: press uPurget .
Device Settings
• Device Name
Application Settings The network name may be altered. Under the Discover Devices menu item your
• Autoconnect musicbook will the appear with the newly assigned name.
This function enables to automatically connect with the musicbook. If this function • Network
has been disabled, the musicbook will be listed under the menu item Discover Here you can look at the current network information.
Devices, and you will need to select the device manually with each app start. ¾¾Configure LAN/WLAN (see Network Configuration, p. 20).
• Show Album Art • Sound
If available, the app will show covers. To access the music files faster, this function ¾¾Balance
can be adapted or turned off: The Balance function helps straighten out level differences at the listening
¾¾Always: The cover is always shown. spot, if this is not located in the optimum listening position. To this end you
¾¾Directories and Web Radio: The cover is not shown in the browse lists. can set different volume levels for the left and right loudspeaker. The Balance
It only appears in the play view. control range is ±6 dB.
¾¾Never: No covers will be shown. ¾¾App Volume Limitation
• Play MyFiles This function is used to limit the maximum volume level which can be con-
After enabling this function, music files which are stored on the smartphone or trolled via the app. Drag the volume scale (0 to 99) to the desired value. The
tablet can be played back. App Volume Limitation can be disabled.37
The musicbook App
Settings
• UPnP Control ¾¾Internet
The musicbook 20/25 is a UPnP-compliant network player and therefore controllable Occasionally we will provide firmware updates for the musicbook 20/25
through any UPnP control point software. The UPnP control support can be disabled. via internet. By tipping on uCheck for Updatet followed by uInternett
the app will search for updates. If an update has been found, this will be
• Energy Saving
indicated and you can press uStart Updatet. Please follow the further
The energy saving-function reduces the standby power consumption to 0.5 W. In the
instructions provided by app. This procedure may take several minutes.
energy saving mode the musicbook 20/25 cannot be switched on or off with the app.
• Software NOTE: This function requires a stable internet connection.
This menu item allows to view information regarding the software version. After
tipping on uCheck for Updatet the app will search for software updates on a USB
The display of the musicbook 20/25 will
stick or on the internet.
read:
¾¾USB
If you have stored an update on a USB stick, please proceed as follows:
1. Plug the USB stick into the USB-A port on the front side of the musicbook. NOTE: Please do not switch off the musicbook 20/25 under any circumstances during
2. Select uCheck for Updatet. this update process.
3. Select uUSBt. About
4. Select uStart Updatet.
Here you can find information about the app version.
The procedure may take several minutes.
NOTE: Please do not switch off the musicbook under any circumstances during this
update process.
www.lindemann-audio.com38
Technical Specifications musicbook DSD
Overview
All-metal housing (¼“ / 6.5 mm wall thickness) with high-quality multi-function wheel. Op- gold-plated audio connectors. 6-fold multi-layer pc board. Ultra high-grade SMD components
tically bonded, monochrome OLED display with nearly 180° viewing angle. High-quality, like e. g. closely tolerated metal film resistors and foil capacitors.
Preamplifier Network player
Analog preamp circuit with super precise analog volume level control. Separate output UPnP/DLNA compatible audio renderer with Control Point apps for iOS and Android.
stages for the balanced and unbalanced outputs. Both outputs can therefore be used at Supports HD formats, meta data and gapless playback. Network connection via LAN
the same time. and WLAN.
Headphone amplifier USB audio interface
Analog class A amplifier circuit with high-current output stages for excellent sound PCM (DXD) and also DSD 128 in DoP mode or DSD 256 in native mode. For these
quality. Headphone volume adjustable independently of the outputs. Recommended resolutions the computer requires a special playback software like e. g. J.River
headphone impedance range: 32–300 ohms. Headphone volume controllable via Media Center, Audirvana or Pure Music.
remote.
Bluetooth adapter
Digital-analog converter
The musicbook DSD has a top-of-the-range Bluetooth adapter. Due to the aptX and
Intelligent re-sampling of all digital sopurces in DSD 128 or DSD 256. Fully balanced AAC transmission standards a sound quality can be achieved which comes close to
D/A converter that works in dual-differential mono mode and is used purely as a filter CD resolution.
(100 kHz). Highly stable DPLL masterclock for perfect jitter performance. Optionally the
converter may also be run in native mode or with re-sampling in PCM 384 kHz (DXD).
IR remote control
CD drive
High-class metal remote control with acrylic glass cover. Integrated Li-ion accu-
Premium slot-in CD drive (Teac). Plays CDs and CD-Rs. CD text-capable. mulator which can be recharged on the device. Controls all functions except for the
CD player is controllable via IR remote and app. network player.39
Technical Specifications musicbook DSD
Detailed technical specifications
(measuring conditions: 230 V, 50 Hz, 20°C)
• Supply voltage range: 100V – 240 V, 50 - 60 Hz.
• Dimensions: 280 x 220 x 65 mm (W x D x H). CD drive
• Weight: 3.50 kg • Slot-in drive (TEAC) with premium mechanism
• Power consumption: 0.5 W Stand-by, 4 W Network Stand-by, 30 W maximum. • Superb reading properties and CD text support
• Excellent jitter performance
Network player
• Ethernet: 10/100 Mbit/s.
• WLAN: 802.11b, g, n. 2.4 GHz band. WEP, WPA, WPA2 security support. Digital/Analog Converter
External screw antenna. • Inputs: two optical (up to 96 kHz) and two coaxial digital inputs
• DHCP and static IP support. (75 ohms, up to 192 kHz) for SPDIF signals (LPCM)
• USB 2.0 host interface: Full-speed and high-speed mode. Charging of smart- • THD & Noise: < 0.001% (@ 0dBFS)
phones and tablets up to 2.1A. Support for mass storage devices with FAT16/32 • Dynamic range: > 130 dB
file systems, such as USB sticks, USB hard drives, smartphones, and tablets. • D/A converter resolution: 352.8/384 kHz, 32 bit or DSD 256
(nur Android). • Converter architecture: two AK 4490 DACs in dual-differential mono mode,
• Internet radio: Tune-In (airable). AK 4137 re-sampler
• Streaming-Dienste: TIDAL • Master clock: ultra-low jitter dual-frequency DPLL-Clock
• Gapless playback with WAV, AIFF, FLAC, ALAC, MP3 and DSD • Jitter reduction of re-sampling process: > 60 dB
• Metadata support • Output voltage: 4 V @ 0dBFS unbalanced, 8 V @ balanced
Subject to technical modifications; Measurement data are typical values!
• Supported formats: MP3 up to 320 kbit/s VBR/CBR | WAV and AIFF up to 192 kHz /
24 bit | FLAC up to 192 kHz / 24 bit | ALAC up to 96 kHz / 24 bit | AAC | Ogg Vorbis |
WMA (Standard only, no Pro and Lossless) | DSD 64 Analog Pre-Amplifier
• Inputs: analog line level inputs (RCA) with 20 kOhms input impedance.
Bluetooth-Interface Maximum input voltage: 8 V unbalanced
• Outputs: one balanced (XLR) and one unbalanced (RCA) line level outputs.
• Supported formats: SBC, AAC, aptX Outputs are independent. Maximum output level: 8 V unbalanced,16 V balanced.
• Metadata support • Headphone connection: ¼“ (6.35 mm) jack socket for headphones with
• Bluetooth profile: AVRCP, A2DP 32 – 600 ohms impedance
• Volume level control range: 0 to 99 with the following characteristic:
0 to 20 in 2 dB steps / 21 to 60 in 1 dB steps / 61 to 99 in 0.5 dB steps
USB-Interface
• Balance control range: +/- 6 dB in 1 dB steps
• Resolution PCM: 44.1 kHz – 384 kHz, 24 bit • Gain: 0 dB
• Resolution DSD: DSD 64–DSD 128 (DoP-mode), DSD 64–DSD 256 (Native DSD-mode) • Fixed line output (FLO): equals volume set to maximum (99), output voltage:
• USB 2.0 Device Interface: USB-Audio Class 2 compatible (High-Speed Mode), 4 V @ 0dBFS unbalanced, 8 V @ 0 dBFS balanced.
asynchronous mode. • Frequency response: 0 – 200 kHz (-3 dB)
• Master-Clock: Ultra-Low-Jitter, Dual-Frequency DPLL-Clock • THD & noise:Lindemann audiotechnik GmbH
Am Anger 4
D-82237 Wörthsee
Germany
Tel.: +49 (0) 8153 95 33 39 0
Fax: +49 (0) 8153 95 33 39 9
info@lindemann-audio.de
www.lindemann-audio.comYou can also read