Callagur Manual CREATING EVENT WEBSITES - TERRAPINN
←
→
Page content transcription
If your browser does not render page correctly, please read the page content below
Callagur Manual
CREATING EVENT WEBSITES

TERRAPINN
MARCH 2019
CONTENTS

 OPEN EXISTING OR CREATE NEW.................................................................................................................................................... 2
 MAIN DETAILS - MAIN ..................................................................................................................................................................... 2
 MAIN DETAILS – MISC / SEO ........................................................................................................................................................... 5
 SOCIAL NETWORKING ..................................................................................................................................................................... 7
 MAIN DETAILS - STRAP .................................................................................................................................................................... 9
 MAIN DETAILS – IMAGES .............................................................................................................................................................. 10
 MAIN DETAILS – TOGGLES ............................................................................................................................................................ 10
 MAIN DETAILS – STATS ................................................................................................................................................................. 10
 CONTACTS ..................................................................................................................................................................................... 12
 EVENT MENU ................................................................................................................................................................................ 13
 HOME PAGE .................................................................................................................................................................................. 15
 HOME PAGE SECTIONS ................................................................................................................................................................. 15
 CONTENT EDITOR .......................................................................................................................................................................... 16
 IMAGE SLIDERS ............................................................................................................................................................................. 19
 SCHEDULED SECTIONS .................................................................................................................................................................. 19
 SITE SECTIONS ............................................................................................................................................................................... 22
 PAGE CONTENT ............................................................................................................................................................................. 24
 PROGRAMME & SEMINARS .......................................................................................................................................................... 25
 LOADERS ....................................................................................................................................................................................... 26
 AUTOMATED PDF AGENDA ........................................................................................................................................................... 28
 UNIVERSE MANAGER .................................................................................................................................................................... 29
 CUSTOMER SERVICE ...................................................................................................................................................................... 30
 FORMS 5........................................................................................................................................................................................ 31
 PACKAGES ..................................................................................................................................................................................... 35
 SALESFORCE .................................................................................................................................................................................. 36
 APPENDIX I – FONT STYLE SETS ..................................................................................................................................................... 37
 APPENDIX II – MENU GUIDELINES ................................................................................................................................................ 39

                                                                                                                                                                                      Page | 1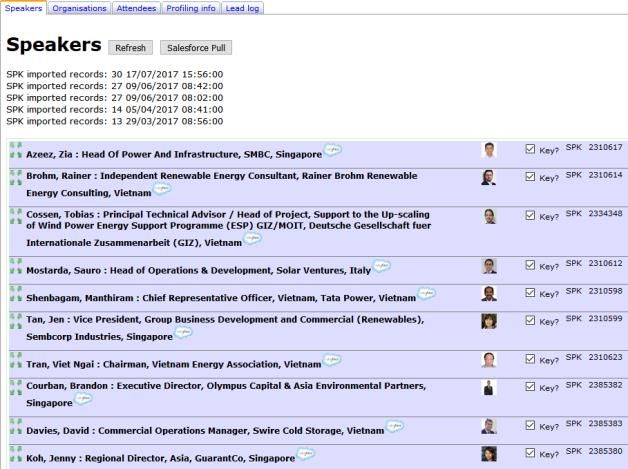
OPEN EXISTING OR CRE ATE NEW

1) Go to http://callagur.terrapinn.com

2) Login using your Username & Password

3) To add a new event, click Add [Event] in the top right corner of your screen

4) To open an existing event click on Search at the top of the left hand navigation
   a) Search by Event Name / EID / date range

MAIN DETAILS - MAIN

5) Event Name: as it will appear to customers (must include the year and region –
   full event name)

6) Short Name: this will become your WEB PAGE TITLE - very important for SEO and
   readability. Words you use here are used heavily by search engines to guide users
   on to relevant sites.
           a) make it sensible
           b) strip out year, location, pointless words (eg. “The”)
           c) you only have 25 characters so make them count - no obscure
                words/acronyms unless they are broadly used by the industry
           d) Short Name is also used for tweeting purposes

7) Colourway: used for the colour of your text hyperlinks. There are 8 options to
   choose from, please pick a based on the colour of your logo and image – keep it
   tasteful, not garish!

8) Salesforce Project Edition ID: this is the 18 character “SFDC Project Edition ID”
   from the finance tab in Salesforce

    *** If you do not add a Project Edition ID then none of your leads will appear in
    Salesforce

                                                                                        Page | 2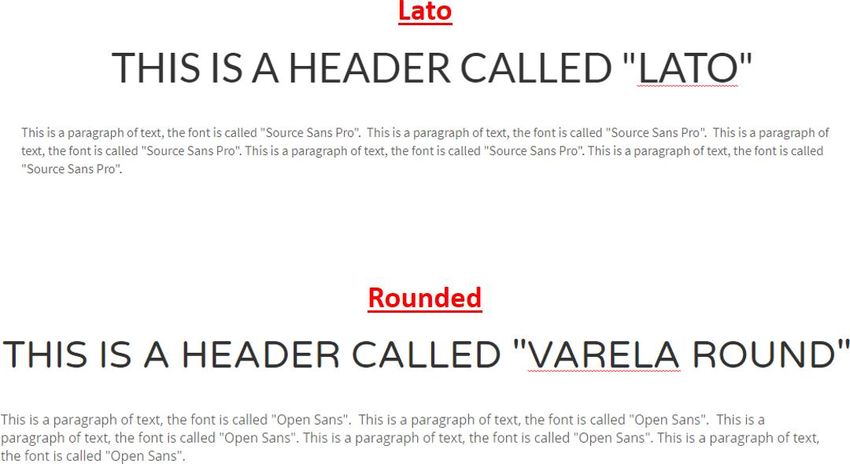
9) Pre-folder & Webfolder: this is the text that will appear after the base URL
   (www.terrapinn.com)

                                        HINTS

 ❖    Use “conference” or “exhibition” as the pre-folder if possible. This enables you
      to keep the same url year on year - which will ensure you get the best SEO!!!

 ❖    The URL should be optimised i.e.
      www.terrapinn.com/exhibition/power-electricity-world-vietnam

 ❖    Do not repeat words in the URL
      www.terrapinn.com/asia/asia-investment-summit
      is not good, choose “conference” as the pre-folder instead

 ❖    Use your full event name with hyphens in place of spaces. No numbers or any
      other punctuation. Skip words such as “the” “and”

10) Event Status: this will be “Not live” until the site is put live
    a) Set to “Cancelled” to remove from the server

11) EID references:
    a) Last year’s event: enter last year’s EID (to pull past speakers / past attendees
        list)
    b) Seminars: enter EID to pull seminars from another site
    c) Agenda: enter EID to pull agenda from another site
    d) Parent event: enter parent EID to enable this site as a profile website only
        (not full site)

12) Event Start Date / Event End Date (dd/mm/yyyy)

13) GMT from local time: enter how many hours GMT is from local time of the event.
*** Australian / Asian / Middle Eastern / African events will be
minus XX hours eg “-8” hours for Singapore because GMT is 8 hours BEHIND the
event local time.

14) Controlling Office: this is your office – from which the event is organised

15) Event Region: region where the event will be held

16) Event Country: country where the event will be held

17) Site Template: Responsive v1

18) Form Template: Forms v6

19) CRM version: Salesforce (PA#)

                                     Start           Big                      Huge
 Australia                           $500K $1mil

                                                                                          Page | 3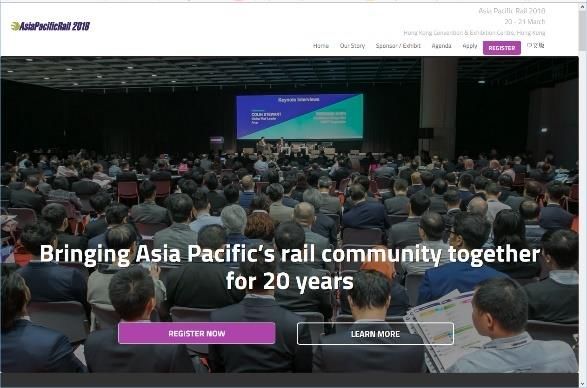
UK                             £400K £800K
 USA                            $500K $1mil
 ME                             $500K $1mil
 Singapore                      $500K $1mil
 South Africa                   R 3mil      >R 3mil R 6mil
20) Event Size: We have classified our events for many years by revenue

21) Event Shortcut: create a shortened URL for printing

*** Instead of www.terrapinn.com/exhibition/power-electricity-world-vietnam the
shortcut URL is: www.terrapinn.com/powervietnam

22) SAVE CHANGES

23) Take note of your EventID at the top of the screen

                                                                                  Page | 4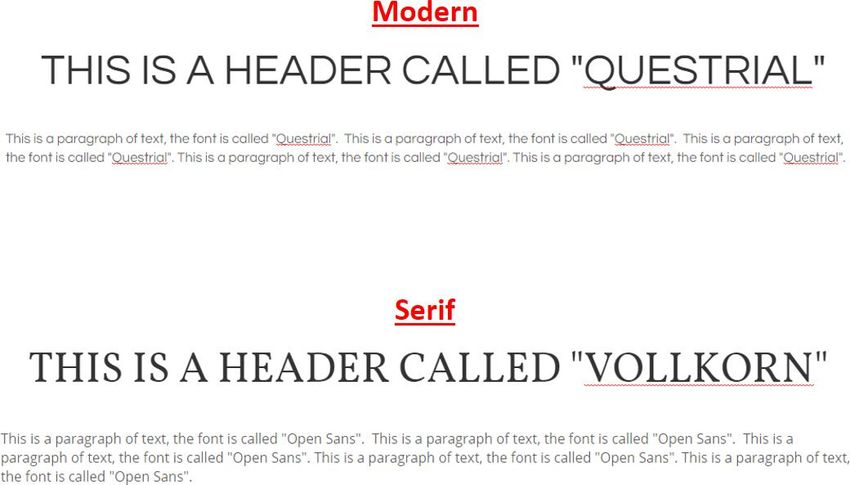
MAIN DETAILS – MISC / SEO

24) Forward event pages: this is crucial for your search rankings ONLY if you are not
    using the same URL

    a) once your event has finished you must forward the old website to next year's
       website to retain all the search rankings that you've built up over the last
       year
    b) open the admin for the event that has finished
    c) URL to forward this event to: enter the last part of the URL of the new event
       – the bit after www.terrapinn.com
    d) Date to forward event: enter today's date
    e) click Save Changes
    f) DO NOT BUILD

*** It can take up to 24 hours for a site to be forwarded

25) Event Synopsis: enter a description for your event that is rich in keywords (max
    300 characters)

26) Search Engine Synopsis: this is the summary that appears on search engines such
    as Google under the “natural/organic search listings” (do not repeat the event
    name, max 150 characters) Words you use here are used heavily by search
    engines to guide users on to relevant sites.

27) Event Keywords: these are the keywords used when searching on terrapinn.com
    (approx 8-10 KEYwords)

28) Post-registration (DELEGATE) popup full URL: this is the URL for referral
    campaigns. It is a button that will appear on the Confirmation page once the
    customer has completed a delegate registration

29) Post-registration (VISITOR) popup full URL: this is the URL for referral
    campaigns. It is a button that will appear on the Confirmation page once the
    customer has completed a visitor registration
30) Visitor Promo explanation: ignore

31) Stats tracking code: this is where you can enter custom CSS. Leave this blank
    unless instructed by Adrian Ford

32) Community: select the most relevant – you can only choose 1. This will
    determine which Industry your event is listed under on terrapinn.com. See
    appendix for community mapping.

33) Interest(s): you can choose multiple (hold down “Ctrl”)

34) Networking: select your networking provider

                                                                                        Page | 5
Links

35) Brochure: enter the full URL of your Brochure Download link from “Document
    Download Manager” (under the “Loaders” section). Make sure you use download
    from form link
    This link will be used for the placeholder [[LINK_BRO]]

36) Prospectus: enter the full URL of your Prospectus Download link from
    “Document Download Manager” (under the “Loaders” section). Make sure you
    use download from form link
    This link will be used for the placeholder [[LINK_PROSPECTUS]]

37) Nominate Now: enter the full URL of your Awards Nomination form / survey.
    This link will be used for the placeholder [[LINK_NOMINATE]]

Site Settings:

If in doubt about any of these settings, leave them as they are by default (ticked or
unticked)

38) Dev Mode: whenever you are making significant changes to your site ensure ‘Dev
    Mode’ is ticked. This enables you to build and preview a Development version of
    your website without over-writing the live (customer-facing) site

39) Uses SSL: Ticked by default (leave ticked). This means your website will be on a
    secure domain (https).

40) Uses contact – n/a

41) Uses 24hr clock: eg. 24hour clock = 14:00 vs 12 hour clock = 2.00pm

42) Show speaker countries: this will show the countries of each speaker in the
    event programme and speakers list

43) Show location panel – n/a

                                                                                        Page | 6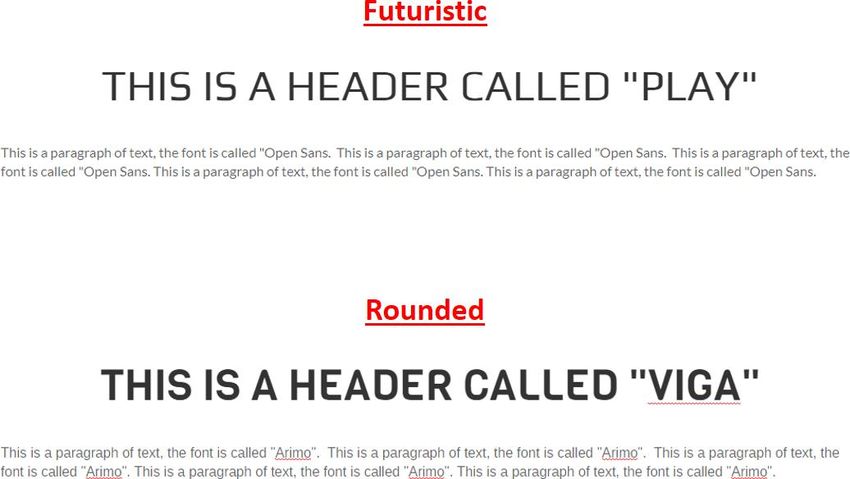
44) Show social networking: ticking this enables the floating social networks icons
    which appear on the left-hand side of the website.

                              SOCIAL NETWORKING

 Twitter Account: enter the name of the twitter account (your handle)
 eg. https://twitter.com/telecoms_world

 Hash Tag: this is the tag you use when chatting about this specific event
 eg. #TWME

 LinkedIn Account: enter your LinkedIN group account ID number
 e.g. https://www.linkedin.com/groups?gid=5063681

 Facebook: enter your page name/ID
 eg. https://www.facebook.com/telecomsworldme

 Google plus: enter your google plus ID number (21 digits)
 e.g. https://plus.google.com/108798144791878391762

 Youtube: enter your youtube username
 e.g. http://www.youtube.com/user/TECHXevent

 Flickr: enter your albumn ID
 eg. https://www.flickr.com/photos/129250505@N04/sets/72157664915058912

45) Show collocation panel – n/a
46) Show agenda snippets – n/a

47) Larger speaker rotator: tick this

48) Organisations (from Universe): ticking this will pull sponsors / exhibitors / media
    partners / associations from all events in your universe

49) Speakers (from Universe): ticking this will pull speakers from all events in your
    universe

50) Speakers alphabetical listing? Ticking this will show your speakers in order from
    A-Z surname

51) Show blog feed – n/a

52) Programme uses streams: tick this if your conference agenda is multi-streamed

53) Ask for promo code (forms v6): ticking this adds a text box to the registration
    forms asking “Have a promo code?”

54) Ask for referral code (forms v6): ticking this adds a text box to the registration
    forms asking “Have a referral code?”

55) Hide freemium speakers: ticking this hides ‘seminar’ speakers from your speaker
    page

56) Show EXH with sponsors: ticking this shows exhibitors AND sponsors in the
    rotating [[SPONSOR_PANEL]]

                                                                                          Page | 7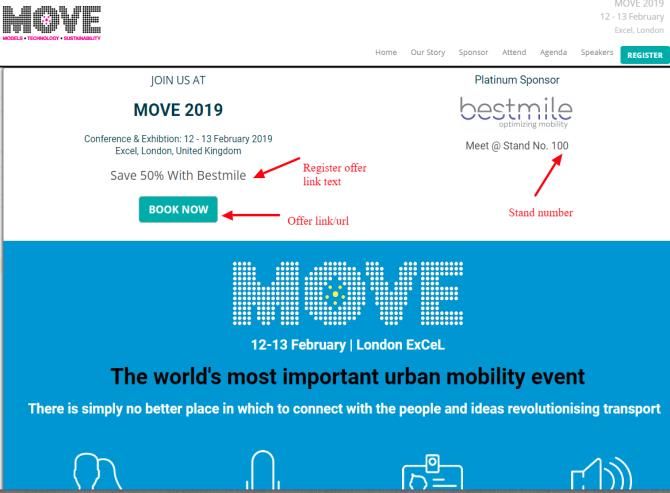
57) Booking fee? – n/a

58) CS badge on enquires? To remove the Customer Service badge from your
    enquiry form, untick this box

59) Web invoicing? – n/a

60) Auto PE creation? – n/a

61) Credit card only? – n/a

62) Onsite QR scanning? If your event is doing QR scanning onsite, tick this box

63) Round Speaker photos?: tick this for round photos in the [[SPEAKER_ROTATOR]]
    or uncheck for square photos

64) Speakers row count: choose how many rows of speakers to display in
    [[SPEAKER_ROTATOR]]. Speakers appear in 5 columns.

65) Sponsors row count: choose how many rows of sponsors/exhibitors to display in
    [[SPONSOR_PANEL]]

66) SAVE CHANGES

67) Installing Ingo: Once you’ve completed the Getting Started form, Ingo will send
    you an email containing 4 widget IDs.

https://cdn.ingo.me/widgets/8B18B5E6DC2E4705BE6D55FF30DAF63D.js

    Extract the ID numbers and plug them into the Ingo ID section (for umbrella
    events, do this for each EID). You will need to log in to your Ingo account to get
    the ‘Unique ID.’

    Click Save Changes. Clear your browser cache and test the entire registration
    process to make sure it is installed on your site correctly.

                                                                                         Page | 8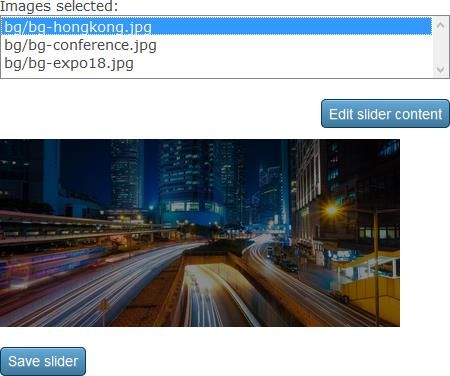
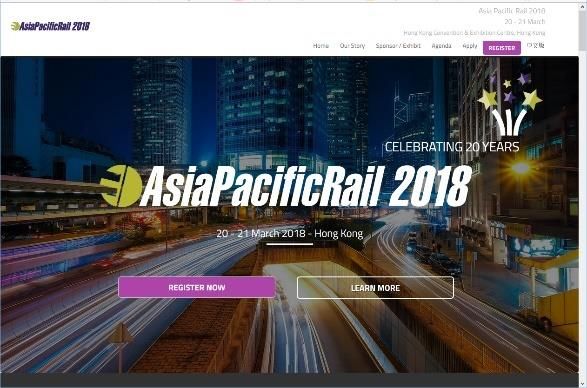
MAIN DETAILS - STRAP

68) Positioning Statement: it should be something like "Powering Vietnam’s future"

69) Add the Event Venue

70) Add the Event City

71) Day setup: This determines which pages are available to you in the Event Menu

*** The Day setup is for THIS EVENT ONLY – not other events in the same Universe

72) SAVE CHANGES

                                                                                     Page | 9
MAIN DETAILS – IMAGES
73) Background colour: this is the background colour of your sub-menu items (that
drop down).
*** Use a dark colour so that your menu sub-titles are easy to see – the text of your
menu sub-items will be white (and change to “menu colour” when hovered over
74) Menu colour: this is the of your sub-menu items when you hover over them
*** use “Colorcop” to select this colour from your event logo
75) Select background image: select the image you want as the main background for
your sub pages (content pages). This needs to have been uploaded to loaders >
images > background images to appear in this dropdown.
*** Image Specs = approx 1200 x 800 .JPG
Keep the file size small (should be able to get it to under 100kB)
The image will stretch to cover the page, so if your page content is long the
resolution of the image could be poor – keep this in mind when selecting the
image.
76) Event website fonts: You choose from several “font style sets “
*** When choosing fonts, keep in mind your branding and the type of event you’re
promoting, e.g. Futuristic might be appropriate for a tech audience but not for a
more traditional audience like mining.
If you require other fonts to match your brochure you must get the name of the
font from the designer and send it to a Adrian Ford to setup. (Examples of font sets
in Appendix)
77) Terrapinn.com Logo: add your event logo. This appears on Terrapinn.com and in
your website header.
*** Max width = 170x, max height = 90x, .GIF only
78) Event icon – n/a
79) Tablet header – n/a
80) Event website logo – n/a
81) SAVE CHANGES
MAIN DETAILS – TOGGLES
Page | 10Ignore this section
MAIN DETAILS – STATS
This is where you copy/paste any additional tracking code or pixels you want on your
website, e.g. Facebook, Twitter, LinkedIn, Hotjar or Wisepops.
Do not insert codes for AdWords/Google Ads or Google Analytics. These are
automatically applied to your site with Google Tag Manager.
Website stats – this will put code across all webpages
Registration conversion – this will put code only on delegate confirmation pages
Visitor conversion – this will put code only on visitor confirmation pages
Download – this will put code only on download confirmation pages
Page | 11CONTACTS
82) From the “Duties” drop down box, select a job function
83) Choose your “Office” from the below options:
Australia
England
Middle East
Singapore
South Africa
Total Telecom
USA
TFT Europe (for Terrapinn Training)
Central Team
84) Select the contact person from the “Staff” drop down box
85) Click Add/Update
86) Click [Shown] to toggle between Shown and [Hidden] This determines whether
that person’s details are visible on the Contacts page of the website
87) Repeat for each job function
*** You MUST complete a Contact person for Marketing Manager and Customer
Service
UPDATING CONTACT DET AILS
❖ All contact details shown on the website are pulled from the person’s profile
on the Intranet (Love the Turtle).
❖ To amend the details or add a photo got to Love the Turtle, company
directory for your office, and find your record. Click ‘edit’ and update your
record.
❖ Then update the “Contacts” page in Callagur (do a show/hide toggle) and
Build to pull the latest changes through to your website
❖ Remember to ALWAYS update the Customer Service web forms if
somebody leaves the company, or important autoresponder emails may not
come through.
Page | 12EVENT MENU
88) Choose pages from the “Core page choices” on the left and double-click or use
the arrow button to move it to the right panel “Event pages/menu”
89) You can rename the menu items if needed
90) Drag and drop to change the order in which the pages appear
91) To make an item appear in the heading of the menu tick ‘Header’.
You can have a maximum of 7 headings in the menu
92) To add a new/custom page type the page name into the
“Insert custom page” box then click “Insert” to add it to your menu.
Once you click the update button the url will be created for the new page eg.
Past-speakers.stm
93) To link directly to a url, rather than a content page, insert the url in the “Custom
URL” text box
94) To add an Exhibitor Directory, select “Exhibitor Directory” from the “Core page
choices” and add it to the menu. Content is automatically populated and visitors
can browse exhibitors by topic/profile or keyword search.
The profile each SPEX is listed under in the directory is pulled from the Sales
Profile field in the Salesforce Opportunity.
If you want to list SPEX under more than one profile in your directory, go to the
Business Profile field in the Salesforce Project Attendance. Enter the Sales
Profiles in a list separated by pipes with no spaces in between.
Rolling Stock/Material Rodante|Power and Energy/Electrificación-Energía|Steel-
Wheelsets/Ruedas-Acero|Track-Track Products/Vía-Productos de vía
The values you enter in the Business Profile section will override
whatever is in the Sales Profile.
95) You can use placeholders in the “Custom URL” textbox such as
Salesforce ‘Sales Profile’
[[LINK_PROSPECTUS]]
[[LINK_BRO]]
[[LINK_ENQ]]
[[LINK_REG]]
96) To hide a content page tick “Hide”
97) To open the menu item in a new tab tick “New tab” Salesforce ‘Business Profile’
98) UPDATE
*** See Appendix for Menu guidelines for conferences & exhibitions
Page | 13Page | 14
HOME PAGE

99) Create your sections to match your flatplan

100)    Click “Edit” to create / edit each section

101)    Reorder the sections using the green arrows – drag and drop

102)    You can untick “Live” to hide the section

103)    “Update” before leaving this page or you will lose your changes

HOME PAGE SECTIONS

104)    Name your section

105) Background image: a large photo/image which will stretch the full screen
   width. You can overlay text / logos onto it.
   This image needs to have been uploaded to loaders > images > background
   images to appear in this dropdown.

*** Image Specs = approx 1680 x 600 / 700 / 800 .JPG
The image will stretch to cover the section, if your image is too small the resolution
will be poor when viewed on large screens

106) Background solid colour (hex): full width colour background. You can overlay
   text / logos onto it.
   Get your HEX codes using ColorCop

107)    Background fade: select % of fade for the overlay

108) Background video: insert the URL to the video which has been loaded to the
   server (i.e. data/WLCA.mp4)

109) Minimum height: minimum height in pixels for that section. Set to “800” or
   “700” or “500” if you have a background image that you don’t want cut off

110)    Show divider: inserts a divider between sections

111) Background scroll: the background image will move at a different speed than
   the foreground content while scrolling. i.e. Parallax effect

                                                                                         Page | 15
CONTENT EDITOR
112) Make sure “Show Blocks” is on
113) Use “Insert Bootstrap templates” to build your content. Bootstrap is a grid
system that makes your site responsive (the content resizes on different devices
/ screen sizes). For more guidance on bootstrap
https://getbootstrap.com/docs/3.3/examples/grid/
TEXT
114) Place your cursor inside the and start typing (or cut and paste from a
TEXT FILE – NOT FROM WORD, PPT OR PDF!
115) You can change:
a) “Styles” eg. h1, h2, h3, h4, p
b) “Text colour”
c) “Background colour”
d) “Text alignment”
e) “Formatting” eg. bold, italic, underlined
IMAGES
116) Upload and insert images using the “Image Gallery”
a) You can load multiple images at the same time using drag and drop from
your PC
b) Double click an image to insert it
c) Add “Alternative text” to the image for SEO. Alt text should be unique,
descriptive and incorporate keywords if possible/relevant.
d) Make sure you delete the dimensions – this will allow the image to resize
responsively without distortion. Break down wide images so they stack nicely
on mobile, otherwise they shrink down so small they become unreadable.
e) To center the image click on the “Advanced” tab and in the “Stylesheet
Classes” box type “img-center”
HYPERLINKS:
117) Select your text, click the hyperlink icon and add your hyperlink URL
118) You can change:
a) “Link type” eg. URL, Email, Anchor
b) “Target” eg. new window, this window, popup window (default is this
window)
Page | 16BUTTONS:
119) In the place you want the button to appear, enter the text you want on your
button eg. REGISTER NOW
120) Select (highlight) the text and click on the hyperlink button
121) Enter your URL on the Link Info tab e.g. [[LINK_REG]]
122) Click on the ADVANCED tab
Button Style Enter this code in
123) Enter this exact text in the “Stylesheet Classes” box: “Stylesheet Class
btn btn-default
124) You can also change the size of the button:
a) For large buttons add: btn-lg
b) For small buttons add: btn-sm btn btn-primary
c) For extra small buttons add: btn-xs
d) To have buttons fill the block add: center-block
btn btn-success
125) Click “OK”
btn btn-info
btn btn-warning
btn btn-danger
Your MENU colour btn btn-default bt
ANIMATIONS:
126) You can add animation to your IMAGES using the templates provided in your
homepage section settings.
127) Select a template then replace the template image with your own image
128) You can see examples of the animations here:
http://daneden.github.io/animate.css
*** Use these wisely – you don’t need to animate every element on your page.
These can add a bit of style to your content but too much animation is distracting and
looks tacky.
Page | 17PLACEHOLDERS:
129) Placeholders are used to pull data / images / links automatically from the
database onto your site
130) An up-to-date list of placeholders can be accessed from Callagur
131) To use a placeholder:
a) Place your cursor inside the [DIV] where you want it to appear and click on
the placeholder button
b) Type in the placeholder name without the double brackets [[ ]]
c) Click “OK”
KEY SPEAKERS:
132) Key Speakers are featured using the [[SPEAKER_ROTATOR]] placeholder
133) Select your key speakers from the full list of speakers under Global Sections >
Salesforce > Speakers in Callagur
a) You will need to click “Salesforce Pull” to retrieve the Speakers list and
photos / bios from SFDC (takes up to 20 mins)
b) Only select speakers with photos
c) Tick “Key” to select
d) Reorder the speakers using the green arrows – drag and drop
Click “Update”
134) Under Main details > Misc / SEO you can set the Speakers row count:
choose how many rows of speakers to display in [[SPEAKER_ROTATOR]]. Max 3
rows. Speakers appear in 5 columns.
*** Speaker photos need to be uploaded to Salesforce as 200x200px, jpg or png
format, max image size 45KB. These need to be high quality/res images – no
exceptions.
HINT
❖ If your speaker’s Job Title is very long you can shorten it in SFDC on
the Project Attendance record – the field is called “Short Job Title (for
website)”
SPONSORS
PANEL:
135) Sponsors (and exhibitors) are featured using the [[SPONSOR_PANEL]]
placeholder
Page | 18136) Go to Global Sections > Salesforce > Organisations
137) Use the buttons to pull information across from SFDC (multiple buttons can
be pushed at the same time. Takes up to 20 mins)
a) Refresh = use this to see if the updates have come through yet
b) Pull SPN = updates the Sponsor information
c) Pull EXH = updates the Exhibitor information
d) Pull MPN = updates the Media Partner information
e) Pull ASS = updates the Association information
138) Once the updates have run you can
a) Enter the Sponsorship level that you want to appear above each sponsor logo
eg. “Gold Sponsor”
b) Reorder the sponsors using the green arrows – drag and drop
c) Click “Update”
139) Under Main details > Misc / SEO you can set the Sponsors row count:
choose how many rows of sponsors to display in [[SPONSOR_PANEL]].
140) Under Main details > Misc / SEO you can choose to include Exhibitors with
Sponsors in the rotator by ticking Show EXH with sponsors
*** Sponsor/exhibitor logos need to be uploaded to Salesforce as 200x200px, jpg
or png format, max image size 45KB. These need to be high quality/res images – no
exceptions.
HINT
❖ The website won’t sync properly unless the EID is input into the
Project Edition in SFDC and the SFDC Project Edition ID is input into
Callagur
IMAGE SLIDERS
Instead of a static image, you can create a slider for the header section of your
homepage that rotates different background images and content. Make sure you
keep the file size down as much as possible as this can slow your site down.
Page | 19141) Loaders > Images > load all the images you want to use
a) Ensure background images are saved in the background images folder
*** Image Specs = approx 1680 x 600 / 700 / 800 .JPG
The image will stretch to cover the width of the slider, if your image is too small the
resolution will be poor when viewed on large screens. All slides should be the same
size otherwise they will crop to be the height of the 1st slide.
142) Loaders > Image sliders
a) New > Load
SETTINGS
b) Name = name the slider e.g. “Hero v1”
c) Animation = select fade or slide
d) Max items = the max number of images you’re going to use
e) Loop = tick so that the slider is continuous and doesn’t stop at the final image
f) Featured = tick for homepage slider
g) Hover pause = tick to pause the slider animation when the user hovers over
it
h) Show Nav = tick to show navigation for the slides (dots that appear at the
bottom of the slider to flick between slides)
i) Direction = slides can animate horizontally or vertically
j) Min items = 1
k) Item width = 0 (for full width)
l) Slide speed = the time for each slide is visible > set to approx. 6000 (6 secs)
m) Animation speed = the ‘transition’ speed for each slide > set to approx. 1000
(1 sec)
n) Delay = the start time > set to approx. 500 (1/2 sec)
ADDING IMAGES & CONTENT
o) Double click an image from “Images Available”
p) In “Images selected” click on your image and click “Edit slider content”
q) URL = the url you want to link it to (you can use a different url for each
image)
r) External = tick if you want the url to open in a new window
s) SEO = the alternative text you would normally add when uploading an image
(for SEO)
t) Align = select to align content to the top or bottom of the background image
u) Use the HTML editor to add content to your background image
v) ‘Update’
w) Repeat for each slide
x) “Save Slider”
ADDING YOUR SLIDER TO YOUR PAGE
Page | 20y) Your slider will now have 4 digit ID number next to the slider name – make
note of this.
z) Go to the page you want to add slider to and add a placeholder
SLIDER ID=XXXX (use your 4 digit slider id)
*** Do not use the pipe character “|” in your slider – it is not compatible.
SCHEDULED SECTIONS
You can create sections on your site that are scheduled to show during
specific date ranges, instead of updating the same section every week or
month to promote your most current offer.
143) In the Menu, go to Site Sections, then create a New Section.
a) Give your section a title, then tick the box that says Time Sensitive.
b) Enter the start and end dates dd/mm/yyyy for how long you want the
section to appear live on your homepage.
c) Enter the content for your timed section in the editor below and click
Save Section at the top when you’re finished.
d) Go back into your saved section in the dropdown and note the ID
number assigned to your section.
e) In the Menu, go to Homepage and create a New Section. In the
content editor enter a placeholder containing the ID for your time
sensitive section, e.g.
section ID=3711
The content you created in Site Sections will pull through this
placeholder and will be visible on your site during the time frame you
specified. You can also use this placeholder on your content pages.
Page | 21SITE SECTIONS
Here you can add copy to your registration / ‘choose your package page’
You can add whatever copy / html you like here to encourage people to book.
144) Go to Site sections in the menu
145) Use the drop down to select Registration (above packages) and click “Load
section”
146) Enter your copy using the HTML editor
147) Save Section
148) If the copy doesn’t show straight away, go to Info > Useful links (show) >
click Refresh Forms Cache
Landing pages for Exhibitors, Sponsors, Media Partners and Speakers
You can also create landing pages for your Exhibitors (EXH), Sponsors (SPN), Media
Partners (MPN) and Speakers (SPK) to encourage referral marketing.
149) Use the dropdown to select the type of landing page you want to create and
click “Load Section”
150) Enter the design and copy you want on your landing page. A header and
footer containing the event name, location, dates, company logo, stand number
and ‘Book Now’ CTA are automatically generated.
151) In Salesforce, go into the Project Attendance for your EXH/MPN/SPK/SPN.
Under Logo & Profile, click “Landing Page” to get the custom link to share. This
link will appear in the ‘Referral Marketing’ Channel in Google Analytics.
If the default company logo uploaded to Salesforce is too small to use on the
landing page, upload a larger one and paste the link in the “Big Image URL”
section.
If you want to promote a special referral offer on the landing page, create the
registration link in Callagur then paste it into the “Offer link/url” section in
Salesforce Project Attendance. Use the “Register offer link text” field to change
the text on the CTA button.
Mass updates to Landing Pages
To easily make mass updates to your landing pages, use the “Mass Update SPEX
for Landing Pages” option in the list view dropdown in the Project Attendance
section of Salesforce.
In the Project Attendance tab, select ‘Mass update for SPEX Landing Pages’ from the
dropdown, then click Edit.
Page | 22Change the filter criteria so the first field contains your Project Edition or Combo, and
enter the Project Edition Types you want to be able to mass edit. Click Save.
Then select the Project Attendances you want to edit (you can select all at the top in
the ‘Action’ column.
Next, click the ‘Mass edit SPEX landing page’ button
Now you will be able to edit the offer text, offer link and stand number. Save your
changes.
You will see the changes you’ve made pull through on your landing page.
Page | 23PAGE CONTENT
These are the “single pages”. Content sits in a central panel 1200 px wide.
152) Select the page you want to edit from the drop down list. The items that
appear here are those you created in your “Event menu”
153) Click “Edit”
154) Title (SEO): A title tag is an HTML element that specifies the title of a web
page. Title tags are displayed on search engine results pages (SERPs) as the
clickable headline for a given result, and are important for usability, SEO, and
social sharing. The title tag of a web page is meant to be an accurate, keyword-
driven and concise description of a page's content.
155) Description (SEO): Meta descriptions are HTML attributes that provide
concise summaries of webpages. They commonly appear underneath the blue
clickable links in a search engine results page (SERP). Use your keywords and
keep these around 150 characters.
SEO titles and descriptions should be unique per page, relevant and descriptive. If
you leave these fields blank, the defaults will be used (page menu title, event SEO
description).
156) Make sure “Show Blocks” is on
157) Use “Insert Bootstrap templates” to build your content. Bootstrap is a grid
system that makes your site responsive (the content resizes on different devices
/ screen sizes)
158) Place your cursor inside the and start typing (or cut and paste from a
TEXT FILE, e.g. Notepad – NOT FROM WORD, PPT OR PDF!
159) SAVE
Page | 24PROGRAMME & SEMINARS
Your Conference Manager needs to add their agenda to Salesforce – there is a
manual for this on the Salesforce homepage and they can talk to the SFDC Admin if
they need help
160) Go to the content page where you would like the agenda to appear
161) Add the relevant placeholder – there are a number of placeholders which will
format the programme differently
PLACEHOLDER
[[PROGRAMME Day=1]] pulls day 1 of the full conference programme from salesforce.com
[[PROGRAMME Day=2]] pulls day 2 of the full conference programme from salesforce.com
[[PROGRAMME Day=3]] pulls day 3 of the full conference programme from salesforce.com
[[STREAM DAY=1 ID=CST000571]] shows only specified stream id (here 'CST000571') plus plenary items for given day
[[WORKSHOPS Day=1]] pulls day 1 of workshops from salesforce.com
[[WORKSHOPS Day=2]] pulls day 2 of workshops from salesforce.com
[[SEMINARS Day=1]] pulls day 1 of seminars from salesforce.com
[[SEMINARS Day=2]] pulls day 2 of seminars from salesforce.com
[[AGENDA_FILTERED]] show all agenda content (not seminars) in one mobile friendly page
Page | 25LOADERS
IMAGES
162) Select where you want to load the images to:
a) Event Library
b) Background images
163) Click Image Upload
a) Click Browse and navigate to the image on your PC
b) Add a filename (optional)
c) Select an image size (optional)
d) click “Upload now”
164) or Click Multiple image loader
a) drag and drop images from your PC
b) or click “Select File”
c) select multiple image by holding down “Ctrl”
d) click “Upload”
DOCUMENTS
For loading documents OTHER THAN those that appear behind a form eg. Floorplan,
Exhibitor Manual forms, Marketing Manual forms
165) Click Multiple Document upload
a) drag and drop documents from your PC
b) select multiple docs by holding down “Ctrl”
c) click “Upload”
166) Under Documents you will see all docs loaded for this event (including those
behind forms)
a) You can search, sort, rename, copy CDN link to clipboard and remove docs
here. Use PDFs wherever possible – maximum file size is 12MB.
DOCUMENT DOWNLOADER MANAGER
For loading documents that are to appear behind forms eg. Brochure, Prospectus
167) Click “Load Doc”
168) Page heading: you don’t need to repeat event name here – the page will
have your website header
169) Document to attach: click Browse and navigate to the document on your PC
170) Lead type: select either Sponsorship Sale or Delegate Sale to determine
which SFDC lead queue the lead will go into
Page | 26171) Lead source: select either Brochure, Content, Video, Other or Prospectus to
indicate the document type
172) Community: select the same community you selected in the Main set up
173) Region: select the relevant regions (can be multiple)
174) Interests: select the relevant interest codes (can be multiple)
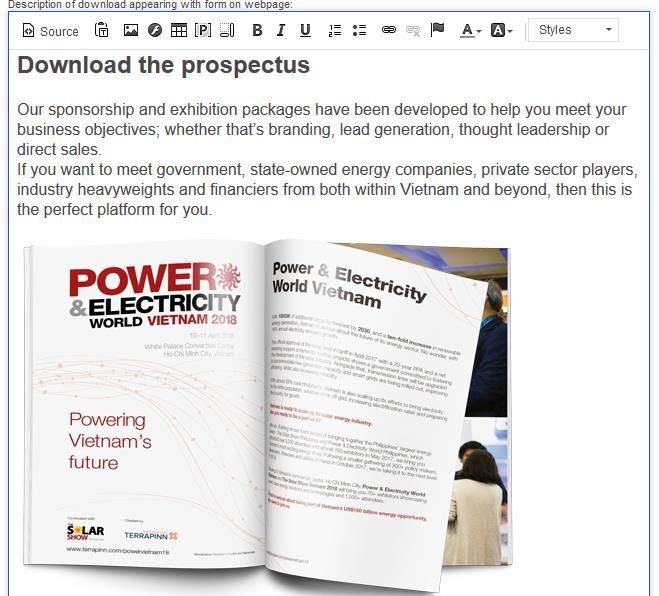
175) Description of download appearing with form on webpage: add the copy
(including images) that will appear on the page next to the download form.
a) Make it descriptive and full of benefits
176) Email notification to user after download: add the copy that will be sent in
the email with the document to the person who downloads
177) Click “Save”
178) To retrieve the URL of the document:
a) Click “Load doc”
b) Under “links” click [Download from form]
c) Copy the link- do not use the direct download link
179) For Brochure or Prospectus downloads paste this link into
Main details > Misc / SEO under the links section
a) This is the link used for:
[[LINK_BRO]]
[[LINK_PROSPECTUS]]
EVENT NEWS
You can add a scrolling news section under your menu bar
180) Enter the news announcement then pipe ‘|’ then the url you want to link to,
like below.
a) Enter each news item is on its own line
b) NO spaces before or after the pipe
c) Click SAVE
Page | 27AUTOMATED PDF AGENDA
The automated PDF agenda has been created to save time and money in design and
deliver the client the latest agenda. You do not have to use this document instead of
the brochure.
*** The PDF agenda is created when the agenda is published in Salesforce, and
updated each time the agenda is published in SFDC
181) Make sure your agenda is in SFDC and has been published
(since 8 June 2017)
182) Loaders > Document download manager
a) [NEW] > Load doc
b) Page Heading: “Latest Agenda”
c) Pick file: rather than upload the file, you pick the file in the drop down, it will
be called “latest-agenda-EID.pdf”
d) Upload an image and write copy for the “description of download appearing
with form….”
e) SAVE
f) Get the Download from form link
g) Use this link (or as a button / image) anywhere on your site or in emails
HINTS
❖ This is an automated PDF built from the Conference Days in Salesforce
and some details in Callagur. If there is weird spacing between
sessions or between bullets, it’s because the HTML has been
corrupted because the agenda has been incorrectly pasted into SFDC.
You should be pasting word > notepad > Salesforce.
❖ You can insert a section from another document into this agenda. For
example, if you have designed an agenda overview. To inset this, load
a pdf file called “agenda-overview-reference.pdf” – this whole
document will be inserted into the latest agenda PDF immediately
after the contents page. The document must be named exactly as it’s
written here and must be a PDF.
❖ Remember, you do not have to use this document instead of the
brochure. But it does mean you aren’t constantly needing to spend
time and money on design updates to agendas. And the client is
always downloading the very latest agenda.
❖ For the agenda in Salesforce to generate for your event, you must
have published the agenda after the 8th June 2017.
Page | 28UNIVERSE MANAGER
**This is where you tell the systems that you want speakers, sponsors, exhibitors
and partners to be shared across more than one website**
183) Give your universe a name (main event name), tick live and click ‘create’
184) To link further events (colocations or profile pages) to this universe enter
each EID and ‘insert’
185) Tick one event as “Master”
186) Click “Update”
Page | 29CUSTOMER SERVICE
*** This section determines who receives copies of Enquiry Forms, Brochure
Downloads and Registrations – you MUST complete this before setting your event
website live
187) Select Form Type
a) Select Staff Member
b) Click Add, repeat
188) “Enquiry – General” = Brochure Download
189) You must add at least 1 staff member to every form type
HINT
❖ When staff leave, you must remove their name from the email
recipients list
Page | 30FORMS 5
This is where you add your pricing and event packages
190) From the tabs select Event Product Setup
EVENT CORE SETUP
Products for the Event
191) Select the Products that make up your event (these will show as ‘benefits’ on
your registration page) eg. Conference 23 Days
a) Select Edit next to the product Description
b) Tick the box Used to select it
c) You can change the Alias if you need to (this is what the customer sees on
the website)
d) Tick Pack if the product is to appear as part of a package
e) Tick Add On if the product is an Optional Extra item
f) Click Update
g) Repeat for each product in your event
Currencies for the Event
192) Select the Primary currency for your event
a) Select Edit next to the Currency
b) Tick the box Used to select it
c) If you are taking registrations in more than one currency and this is your
main currency, place a tick in the box Primary
d) Click Update
e) Repeat for any secondary currencies – tick the box Used
Workshops for the Event
193) Add in the details of your Workshops
a) Enter the Name (for internal purposes)
b) Enter the Alias (this is what the customer sees – it should be the full Title of
the workshop)
c) Enter a SAP code (i.e. W1, W2 etc…)
d) Select which Day the Workshop is on from the drop down list
e) Place a tick in the box Live
f) Click Add
g) Repeat for each Workshop
Page | 31Industry Price for Event (Concession)
194) Add in the details of any industry discounts
a) Enter the Description i.e. “pharmaceutical pass”
b) Enter the discount Dis % that these people are entitled to (discount from full
base price)
c) Enter the Start Date and End Date
d) Tick Live
e) Tick Advertise
f) Click Add
g) Repeat for each industry discount
Retention Campaigns for Event
195) Add any other discounts you wish to offer i.e. retention, association
discounts, sponsor discounts, speaker discounts, etc.
a) Enter the Description i.e. “Past delegate loyalty discount”
b) Enter the discount Dis %
c) Enter the Start Date and End Date
d) Tick the box Live
e) Click Add
f) Repeat for each retention discount
g) All retention discounts are set to be hidden by default.
*** Our booking policy remains the same – the biggest discount will be applied but
discounts cannot be combined (e.g. industry plus group plus retention is not
possible).
OPTIONAL ITEMS
196) If you have included any “Add On” products, you should enter their price
here
a) Select Edit next to PackDesc
b) You can change the Alias if you need to (this is the name as it will appear on
the website)
c) Enter the cost in the event currency
d) Click Update
e) Repeat for each “Optional Extra” for your event
*** These can only be purchased in conjunction with a package, they cannot be
purchased on their own
Page | 32PACK BUILDER
197) Create the Packages that you will be selling on the event (these can include
“free” packages such as Free Expo Pass”)
a) Click Add New Package
b) The Pack Desc will be automatically generated for you on completion
c) Set the Pack Alias (i.e. “2-day Premium Pass” – keep it short and simple!) This
is what the customer sees.
d) Set the Base Price for this Package – get this from your GM/FM
e) The Pack Code will be automatically generated for you on completion
f) Build a Pack by adding products from the Event Core Setup, using the blue
arrows. Note: for Expo passes on PAID packages, use the [EXH] option, for
Expo passes on FREE packages, use the [VIS] option. The product Description
from Event Core Setup will appear in ‘Build a Pack’ menu on the left, but the
Alias name will appear on the right in ‘Product Item’ when added to the pack.
g) Set “Birds” (Earlybird discounts)
i) Default Birds are set as the standard 4 tier structure
ii) You can edit % Dis and Week Start Exhibition Passes on PAID packages versus FREE packag
h) Build Workshop Rules: Choose the rule from the right-hand column which
fits your package
i) Add it using the Left Blue Arrow
ii) Choose the workshop options from the left-hand column
iii) Add them using the Right Blue Arrow
iv) The rules will appear in the centre column
*** Most of the time the “AND” ”OR” operators are not necessary, only use them if
you are selecting from a list across multiple days or times
i) Concession Discounts & Retention Discounts: select which discounts you
want to offer for this package
i) Tick Live
j) Click SAVE
k) Repeat for each Package
Page | 33EVENT LINKS
Marketing Links
198) General = link to the registration web form for proofing / validation purposes
and for use in marketing
199) Concession = one link per industry price. You don’t need to use these as your
industry prices are already advertised on your website forms.
200) Retention = link to the discount forms. This is where you will pick up your
“Hidden Links” for use in emails or for sending out to
speakers/sponsors/associations, etc.
Delegate Sales Links
201) From the drop down list select the relevant DS Manager
a) click Add
b) One link per delegate sales person
c) This is the link to their personalized booking form that they should use in all
communications
HINT EVENT
PACKAGE
❖ To setup the Delegate Sales team members your Marketing Director GRIDS
must first add each DS member to the Delegate Sales Group within
Love The Turtle
View and
print a
summary
grid of all your Packages with the pricing structure and discounts.
Page | 34PACKAGES
Once you’ve built your packages you can change the group discounts here and re-
order how the packages are viewed on your registration page
202) Select the package
a) Enter the % discount
b) Range start = the minimum number of people in the group booking
c) Range end = the maximum number of people in the group booking
d) Submit
203) Click Change Order
a) Drag and drop the packages into the order you’d like
b) Click submit changes
204) Under ‘Get a package link’ you can create links to your packages that:
- Go directly to a package’s form page (bypassing package selection). No need
to enter anything in the blank fields, just click ‘Get Link.’
- Automatically apply retention or concession discounts. For Retention
discounts, enter the Key only (from Event Core Setup). For Concession
discounts, go to the Event Links section in Forms 5 and use the alphanumeric
value after ‘C=’ in the Concession link, e.g.
https://secure.terrapinn.com/V5/step1.aspx?E=9964&C=3854VGML
- Specify a number of delegates required for a package, e.g. used 2 for 1 deals.
Just enter the number of delegates in the field.
- Credit DS with the registration. Go to the Event Links section in Forms 5 and
use the ID for your delegate sales person, e.g.
https://secure.terrapinn.com/V5/step1.aspx?E=9964&DS=3160&SalesRep=G
alat
Page | 35SALESFORCE
This is where you can pull Speakers / Organisations / Attendees and Profiling info
from the Project Edition record in SFDC onto your website.
Speakers and Organisations are covered in the HOMEPAGE > CONTENT EDITOR
sections of this manual
PROFILING INFO
You can add up to 5 profiling questions for Buyers and another 5 for Sellers. Or you
can ask both Buyers and Sellers the same questions (these are in addition to the
standard form questions) which are :
i) Do you provide solutions & products for this industry?
ii) What is your role?
Use profiling questions to match Buyer and Sellers at shows. Questions sit under the
Project in Salesforce, so they are roll over year on year.
In Salesforce
205) In SFDC go to the PROJECTS tab
a) Search for and open your PROJECT
b) Scroll down to the “Project Profiling” section
c) Add your question
d) Select whether the question is for Buyers / Sellers or Both
e) Select whether the answer is Single option or Multiple options
f) Add your answer options
g) Repeat for each question
In Callagur
206) Salesforce > “Profiling info”
207) Click “Pull Profiling”
208) Once imported you can reorder the questions – drag and drop
209) Update
Go to Masterlist with Profiling report in Salesforce to see a breakdown of who
responded to your profiling questions and the answers they submitted. Remember to
replace the Project Edition ID with the one for your event.
Page | 36APPENDIX I – FONT STYLE SETS
Page | 37Page | 38
APPENDIX II – MENU GUIDELINES

Conference Website Menu
 Home      Our Story         Sponsor                 Agenda              Attend                Blog     Register
           The Big Idea      Why Sponsor?            Schedule            Why attend                     Register
           Photos/Videos     Who should sponsor      Keynotes            Who should attend              Contact us
           News/Blog         Floor plan              All speakers        Networking
                             Sponsor List            Workshops           Venue
                             Post-show report        Brochure            Accommodation
                             Sponsorship             Awards              Attendees
                             Prospectus

Exhibition Website Menu
 Home      Our Story         Sponsor/Exhibit            Agenda            Attend               Blog      Register
           The Big Idea      About the Expo             Schedule          Why attend                     Register
           Photos/Videos     Why exhibit?               Keynotes          Who should attend              Contact us
           News/Blog         Why sponsor?               All speakers      Networking
                             Who should                 Workshops         Venue
                             exhibit/sponsor
                             Floorplan                  Seminars          Accommodation
                             Exhibitor list             Brochure          Attendees
                             Post-show report
                             Exhibitor toolkit
                             Sponsorship
                             Prospectus

❖ Top navigation (in grey) must be represented as shown, apart from Blog which is optional.
❖ Sub-topics below are all the things that must be covered in each dropdown section, apart from optional items shown in
  italics.
❖ Multiple topics can be condensed in the same page as long as it’s all covered.
❖ If you don’t have enough content when the website is launched, use highlights from last year.
❖ This includes floorplan, speakers, sponsors, attendees, etc.
❖ Launch events should contain as much content as possible.

Community mapping
 Community Name                    Umbrella                            Terrapinn.com Listing
 ACevents Community Holder         Public Sector                       [Do not use]
 Digipharm                         Life Science & Health               Health
 Digital Signage                   Enterprise Technology               Technology
 Oil & Gas Post                    Energy & Resources                  Energy
 Shale World                       Energy & Resources                  Energy
 Tech X                            Enterprise Technology               Technology

                                                                                                                    Page | 39
The Followers Enterprise Technology Technology
Total Asset Finance & Investment Finance
Total BioPharma Life Science & Health Health
Total Blue Sky Transport & Logistics Transport
Total Customer Marketing Retail
Total Delivery Retail & Entertainment Retail
Total Education Education Education
Total Electricity Energy & Resources Energy
Total Health Life Science & Health Health
Total Learning Leadership & Management Management
Total Mining Energy & Resources Energy
Total Orphan Drugs Life Science & Health Health
Total Payments Retail & Entertainment Retail
Total Rail Transport & Logistics Transport
Total Real Estate Real Estate & Hospitality [Do not use]
Total Retail Retail & Entertainment Retail
Total Supply Transport & Logistics Transport
Total Synbio Life Science & Health Health
Total Telecom Telecoms & Media Telecoms
Total Trading Finance & Investment Finance
Totally Unmanned Transport & Logistics Transport
Vaccine Nation Life Science & Health Health
You Bet Retail & Entertainment Retail
Page | 40You can also read