FOR HOUSEHOLD USE ONLY USAGE DOMESTIQUE SEULEMENT
←
→
Page content transcription
If your browser does not render page correctly, please read the page content below
READ THESE OPERATING INSTRUCTIONS CAREFULLY BEFORE USING THE MACHINE.
                LIRE ATTENTIVEMENT CE MODE D’EMPLOI AVANT D’UTILISER LA MACHINE.
         LEER CON ATENCIÓN ESTE MANUAL DE INSTRUCCIONES ANTES DE UTILIZAR LA MÁQUINA.

      FOR HOUSEHOLD USE ONLY
    USAGE DOMESTIQUE SEULEMENT
    R

C   US
IMPORTANT SAFEGUARDS SHORT CORD INSTRUCTION
When using electrical appliances, basic safety precautions should always be followed to
ENGLISH
reduce the risk of fire, electric shock, and/or injury to persons, including the following:
1. Read all instructions and information in this instruction book and any other literature A short power supply cord is provided to reduce the risk of tripping over or becoming entangled
included in the carton referring to this product before operating or using this with a longer cord.
appliance.
2. Do not touch hot surfaces (i.e. steam wand, portafilter). Use handles or knobs. The cord should be accessible after installation of the machine in order to disconnect it at
3. To protect against fire, electric shock, and personal inury, do not place cord, plugs, or any moment if necessary.
appliance in water or other liquid.
4. This appliance must be kept out of the reach of children. Longer extension cords are available at retailers authorized to sell electrical accessories, and
5. Unplug from outlet when not in use and before cleaning. may be utilized if care is exercised in their use. If an extension cord is used:
6. Allow to cool before putting on or taking off parts, and before cleaning the appliance. • The marked electrical rating of the extension cord should be at least as great as the
7. Do not remove the portafilter during brewing cycles as there is a danger of burns. electrical rating of the appliance.
8. The use of accessory attachments not recommended by the appliance manufacturer • If the appliance plug is grounded, the extension cord should be a 3-wire grounded
may result in fire, electric shock, or personal injury. extension cord.
9. Do not use outdoors. • The longer cord should be arranged so that it will not drape over the countertop or
tabletop, where it may be pulled on by children or accidentally tripped over.
10. Do not let cord hang over edge of table or counter, or touch hot surfaces.
11. Do not place on or near a hot gas or electric burner, or in a heated oven.
12. This machine was designed to process normal household quantities only. Not suitable
for continuous operation or commercial use.
13. Do not operate any appliance with a damaged cord or plug, if the appliance malfunctions,
or has been damaged in any manner. Return appliance to an authorized service facility
for examination, repair, or adjustment.
14. Do not use if the water tank is not filled.
15. Always use cold water. Warm water or other liquids could cause damage to the
appliance.
16. When plugging in the machine, always turn appliance “OFF”, attach power cord to the
machine first, then plug cord into wall outlet. To disconnect, always turn appliance
“OFF”, then remove plug from wall outlet.
17. Use extreme caution when using hot steam.
18. Do not use appliance for other than intended use.
SAVE THESE INSTRUCTIONS • II • • III •1 GENERAL INFORMATION 2 FEATURES
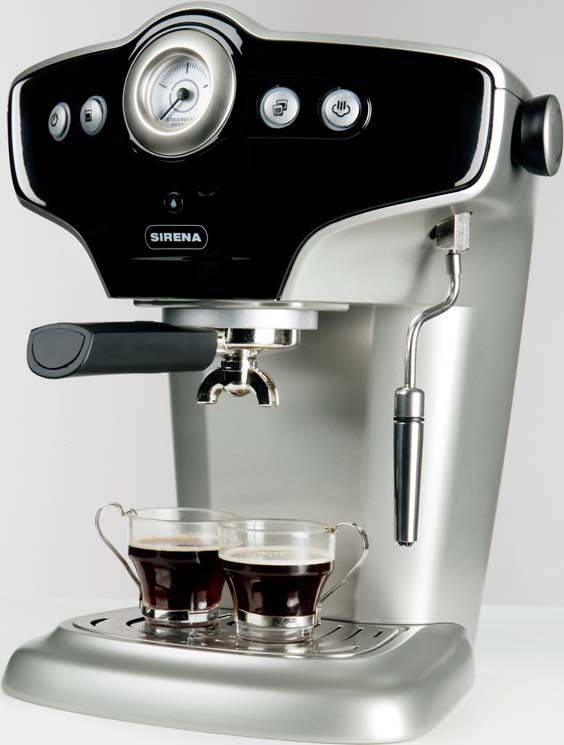
This espresso machine is made for pulling one or two shots of espresso, and features a swivel hot water • Commercial Quality Portafilter: Includes a patented back pressure adapter to ensure great espresso
ENGLISH
and steam wand. The controls on the front of the machine are labeled with easy-to-read symbols. extraction
The machine has been designed for domestic use and is not suitable for professional, commercial, or • Dual brewing spout
continuous use. • Auto shut off after 90 minutes of inactivity
• Soft grip portafilter handle
• Ground coffee filter for making single or double shots (included)
Warning. No liability is assumed for any damage caused by: • Pod capable with ESE pods (pod filter included)
• Two user-programmable brew settings
• Incorrect use not in accordance with the intended uses;
• Easy reading status lights show when machine is ready to brew or steam
• Repairs not carried out by authorized customer service centers;
• Blue LED light indicates when water tank is empty
• Tampering with the power cord;
• Steam wand with pannarello adapter for easy frothing of milk for cappuccinos or lattes
• Tampering with any part of the machine;
• Rapid Steam™ boiler for quickly switching from brewing to frothing
• The use of non-original spare parts and accessories;
• Temperature gauge
• Failure to descale the machine;
• Cup-warming surface
• Failure to assemble or failure to insert portafilter correctly;
• Stainless steel coffee boiler
• Failure to clean portafilter thoroughly (see section 9).
• 15-bar pump pressure to ensure proper extraction
• Usage of machine at temperatures below 32°F (0°C).
• Sturdy all-metal housing
In these cases, the warranty is not valid. • 57.5 oz removable water tank for easy cleaning and refilling
• Adjustable and removable drip tray
• Removable power cord
1.1 For ease of reading
TECHNICAL DATA
Nominal voltage See label on the appliance
Power rating See label on the appliance
Power supply See label on the appliance
A warning triangle draws attention to all the instructions that are important for user safety. Please follow
these instructions carefully to avoid serious injury. Housing material Metal and thermoplastic
Dimensions (w x h x d) 13 in x 15 in x 12 in
Weight 21 lbs
This symbol is used to highlight important information to ensure optimal use of the machine.
Power cord length 47 in
Control panel Front
Portafilter Pressurized
1.2 How to use these operating instructions Water tank capacity 57.5 oz / removable
Pump pressure 15 bar
Keep these operating instructions in a safe place and make them available to anyone else who may use the
Brewing boiler material Stainless steel
espresso machine.
Rapid Steam™ generator material Die cast alloy
For further information or if you experience any problems, please contact an authorized service center, or Safety devices Hydraulic circuit over-pressure safety valve
visit our website: www.starbucks.com/sirena
Subject to engineering and manufacturing changes due to technological developments.
The machine conforms to the European Directive 89/336/EEC (Italian Legislative Decree 476 of 04/12/92)
concerning electromagnetic compatibility.
•2• •3•A 3 SAFETY REGULATIONS
ENGLISH
Do not place machine in contact with water when plugged in: danger of short circuit!
Steam and hot water can cause scalding! Never direct the hot water/steam jet toward parts of the body;
handle the steam wand with care: danger of scalding!
Intended use
The espresso machine is intended only for domestic use.
Do not make any technical changes or use the machine for unlawful purposes as this would create serious
hazards. The espresso machine must only be used by adults.
Power supply
Connect the espresso machine only to a suitable socket.
The voltage must correspond to the indication on the machine’s label.
B C Power cord (Fig. A)
Never use the espresso machine if the power cord is defective.
If any parts or components of the machine are damaged, they will be replaced by the manufacturer.
Please call 1-800-933-7876.
Do not pass the cord around corners, over sharp edges or over hot objects, and keep it away from oil.
Do not use the power cord to carry or pull the espresso machine.
Do not pull out the plug by pulling on the power cord or touch it with wet hands.
Do not let the power cord hang freely from tables or shelves.
Protecting other people (Fig. B)
Make sure children cannot play with the espresso machine; children do not realize the danger associated
with household appliances.
Do not leave the espresso machine packaging within the reach of children.
Danger of burning (Fig. C)
D E Never direct the jet of hot steam and/or hot water towards yourself or others.
40 cm
16 in
Always use the handles or knobs provided.
Do not disconnect (remove) the portafilter during espresso dispensing or immediately after brewing ends.
During the warming up phase, hot water may drip from the brew unit. This is normal.
Positioning
Place the espresso machine in a safe place, where no one can overturn it or be injured.
Do not turn over or tip machine when it has water in it, as water will leak out.
Hot water or steam may spill out: danger of scalding!
20 cm
Keep the machine upright when water is in the water tank.
8 in
20 cm Do not keep the machine at a temperature below 32°F (0°C); freezing may damage the machine.
8 in Do not use the espresso machine outdoors.
20 cm Do not place the machine on hot surfaces and close to open flames to prevent the casing from melting or
8 in
being damaged.
•4• •5•Cleaning (Fig. D)
Before cleaning the machine, you must deselect all buttons and remove the plug from the socket.
ENGLISH
Wait for the machine to cool down. Never immerse the machine in water!
It is strictly forbidden to tamper with the inside of the machine. There are no user serviceable parts inside 1
the machine. 2 10
6
Space for use and maintenance (Fig. E) 11a
To ensure that the espresso machine works properly and efficiently, the following conditions are
recommended:
13 11b
• Choose a level surface;
• Select a location that is sufficiently well-lit, clean, and near an easily reachable power socket; 4 3
• Allow for a minimum distance from the sides of the machine as shown in the illustration.
12
Storing the machine
If the machine is to remain out of use for a long time, perform the following steps:
• Empty the water tank and clean surfaces that have come in contact with coffee;
• Thoroughly rinse the portafilter and its components, wipe the brew unit, and rinse the drip tray and grill;
• Turn off the machine, and unplug it from the socket;
7
• Store it in a clean, dry place, out of the reach of children; 5
• Keep it protected from dust and dirt.
Servicing / Maintenance
8
In case of failure, faults or a suspected fault after dropping, immediately remove the plug from the socket.
Never attempt to operate a faulty machine. 14
Servicing and repairs may only be carried out by authorized customer service centers, listed in the back of
the instruction manual.
All liability for damages caused by maintenance not carried out in a professional manner is declined.
Fire safety 9
In the event of fire, use carbon dioxide extinguishers (CO2). Do not use water or dry-powder extinguishers.
15 17 23 19 21
16 18 20 22
24
•6• •7•Key to machine components F G
1 Cup warming tray
ENGLISH
2 Control panel
3 Hot water/steam wand
4 Pressurized portafilter
5 Drip tray + grill
6 Hot water/steam knob
7 Water tank lid
8 Water tank
9 Power cord
10 Ground coffee filter (for single or double shots)
11a Rubber gasket adapter (backpressure adapter)
11b Plastic support peg
12 Pod filter
13 Brew unit
14 Removable steam handle
H I
15 ON/OFF button Activates and deactivates the machine
16 ON/OFF light ON: machine is turned on and able to function
OFF: machine is off
17 Single espresso button Brews one single quantity (one shot) of espresso (dispensed quantity is
user programmable)
18 Single espresso Steady ON: machine is at the correct temperature to brew espresso or hot
light water
Slowly blinking: machine is warming up to brew espresso or hot water
Quickly blinking: machine is preparing to brew a single shot of espresso,
or the machine is in programming mode
19 Double espresso Brews a double quantity (two shots) of espresso (dispensed quantity is
button user programmable)
20 Double espresso Steady ON: machine is at the correct temperature to brew espresso or hot
light water
Slowly blinking: machine is warming up to brew espresso or hot water J K
Quickly blinking: machine is preparing to brew a double shot of espresso,
or the machine is in programming mode
21 Steam button Selects the steam function
22 Steam light Steady ON: machine is at the correct temperature to dispense steam
Slowly blinking: machine is warming up to dispense steam
23 Temperature gauge Indicates when the boiler has reached the ideal temperature for brewing
(the machine is ready to brew when lights 18 and 20 are illuminated and
fixed)
24 Water light Steady ON: Indicates the water tank needs to be filled
Quickly blinking: the machine’s water circuit needs to be primed (see
section 4.5)
•8• •9•L M R S
ENGLISH
N O T U
1/2 full 3/4 full
P Q V W
• 10 • • 11 •4 INSTALLATION 4.5 Priming the water circuit
For your own safety and that of other people, please strictly follow the “Safety Regulations” in section 3. The machine’s water circuit must be primed in the following cases: before using the machine, for the first
ENGLISH
time out of the box, or after long periods of inactivity, and when the water tank becomes empty.
4.1 Packaging The machine indicates the need to prime the water circuit when the water light is blinking (24).
The original packaging has been designed to protect the machine during transport. • Press the main power button (15). The button lights will start blinking slowly. This means the machine is
It is recommended to keep the packaging for future transport. warming up. The blinking will stop when the machine is warmed up and ready to use.
• Place a container below the steam wand. Open the hot water/steam wand by turning the knob (6)
4.2 Installation instructions clockwise all the way.
Before installing the machine, observe the following safety precautions: • Wait until the water light (24) stops blinking.
• Close the hot water/steam wand, by rotating the knob (6) counter-clockwise all the way.
• Place the machine in a safe area: on a flat, stable surface, away from water and moisture; • The machine has been primed when the water light (24) shuts off.
• Make sure the machine is out of the reach of children; • Remove and empty the container.
• Avoid placing the machine on very hot surfaces or near open flames.
The machine will give best performance if the unit is allowed to fully heat up prior to pulling a shot of
The espresso machine is now ready to be connected to the power supply. espresso. For best results when making espresso, you will need to preheat the portafilter. A preheated
portafilter will result in warmer coffee and will help retain the espresso’s flavourful taste.
4.3 Connecting to the power supply
• Insert the portafilter into the machine without coffee, and place a cup beneath the portafilter. (Fig. H)
Before turning on the machine, make sure that the hot water / steam knob is closed. • Press the coffee button (17). Allow the machine to dispense water through the portafilter.
• We suggest you dispense a couple of shots of water through the portafilter to heat it up to the optimal
• Electric current can be dangerous! Therefore, it is essential to follow the safety regulations carefully. temperature.
• Never use faulty electrical cords! Faulty electrical cords and plugs must be replaced immediately by • When not brewing a cup of espresso, leave the cleaned portafilter attached to the machine. This will
authorized customer service centers. ensure the portafilter remains preheated.
• The voltage of the appliance has been set by the manufacturer.
• Check that the voltage supplied matches the indications on the label on the bottom of the appliance. The machine is now ready to dispense espresso and steam; please see related sections for operating
• Connect the power cord to the machine as shown in Figure F. details.
• Connect the plug end of the power cord to a socket with suitable voltage.
• You can preheat your cups by placing them on the cup warming tray. (Warm cups will help retain the NOTE: The temperature gauge is a general indicator of the machine temperature. When the
espresso’s crema and aroma.) machine is warming up, the coffee lights (18 and 20) will blink. The machine is warmed up
and ready to use when the coffee lights remain fixed. Even if the temperature gauge is in the green
NOTE: The machine is equipped with an energy saving system. The machine will area, the machine is ready to use only when the coffee lights remain fixed.
automatically shut off 90 minutes after its last operation. To turn the machine on, press the
power button (15). 4.6 Drip tray adjustment
The drip tray can be adjusted according to the size of the cup(s) used.
When using small espresso cups or shot glasses used to prepare espresso, we recommend raising the drip
4.4 Filling the water tank
tray to the higher position, for optimal crema (Fig. G). If larger cappuccino or latte cups are used, lower the
• Lift and remove the water tank lid (7). drip tray. (Fig. H)
• Remove the water tank (8) using the handle provided on the inside.
• Rinse and fill it with filtered water, taking care not to overfill. To lift the drip tray height, proceed as follows:
• Replace the tank; press down firmly. Replace the lid (7). • Remove the drip tray grill and the drip tray. (Fig. I)
• Turn the “X” support upside down so that the hinges match up with the reference marks inside the base
For best results, only use cold, filtered water to fill the tank. Never use sparkling water. The quality of the machine as shown in the figure. (Fig. J and Fig. K)
and filtration of the water to fill the tank will affect the final flavor of the espresso. • Place the drip tray and the grill back into place. (Fig. L)
Hot water or any other liquid may damage the tank. Do not turn on the machine without water in the
tank; always make sure there is enough water in the tank.
• 12 • • 13 •5 PULLING SHOTS Brewing a Single Shot
Warning! Do not remove the portafilter during coffee dispensing or immediately after brewing. For best results when making espresso, you will need to ensure the unit is fully warmed up and the
ENGLISH
Wait 20 seconds while pressure is relieved in the filter: Danger of burning! portafilter is preheated. A preheated portafilter will result in a higher temperature of coffee and will help retain
the espresso’s flavourful taste. We suggest you dispense a couple of shots of water through the portafilter
to ensure it has been heated to the optimal temperature.
Warning! After pressing the coffee button(s), do not remove the portafilter immediately if
coffee does not flow out. In case this occurs, switch off the machine, and wait at 2-3 minutes
• Insert the plastic support peg (11b) into the portafilter body (4) along with the rubber gasket adapter
before removing the portafilter from the brew head.
(11a). Then insert the ground coffee filter (10) into the portafilter (4) body. (Fig. N)
• Holding the handle towards the left, fit the rim of the empty portafilter into the brew unit (13), as shown in
The machine is fitted with a special pressurized portafilter (4), which allows you to pull either one or two Figure P.
shots of espresso with the same filter basket for ground coffee (10). • Turn the portafilter from left to right until it firmly locks in place; you may have to hold the base of the
machine to keep it from turning.
• To brew espresso, the machine must be turned on with the ON/OFF button (15). Wait until the brew • Release the grip from the portafilter.
lights (18 and 20) illuminate and remain fixed. • Preheat the portafilter by pressing the brew button (17). Place a cup beneath the portafilter. Water will
• During brewing, the machine ready lights located on the espresso buttons (18 and 20) may flash on and dispense out of the portafilter (this operation is only necessary for the first espresso during each use).
off; this operation should be considered normal. • Caution! The water will be very hot!
• Before use, make sure that the hot water/steam wand (6) is closed and the water tank contains enough • To pull one shot, insert 7 grams or one scoop of espresso in the ground coffee filter basket (10). This will
water. correspond to approximately 1/2 full portafilter. (Fig. O)
• Do not remove water tank when unit is brewing. • Clean any espresso residues from the edge of the portafilter.
• Insert the portafilter into the brew unit (13) from the bottom, and turn the portafilter from left to right until it
locks into place. (Fig. P)
• Take one preheated cup and place it under the portafilter; check that it is correctly placed under the
dispensing holes.
5.1 Brewing Espresso • Press and release the single espresso button (17). The button light (18) will blink quickly when preparing
to brew the espresso.
Using the Pressure Adapter (rubber gasket adapter and plastic support peg)
• The machine will dispense a single shot (1 fluid ounce) of espresso.
The Sirena is equipped with a special pressure adapter (11a) and plastic support peg (11b) that assist in
Brewing a Double Shot
creating a full body espresso with crema, even if the grind is not perfect. This adapter and peg are to be
used when making single and double shots, and will help you make a great shot of espresso with a high
• Preheat the portafilter, as described above in “Brewing a Single Shot”.
quality crema. The pressure adapter (11a) and plastic support peg (11b) are offered as replacement parts by
• To pull a double shot, insert approximately 14 grams or two scoops of espresso in the ground coffee filter
the manufacturer. To order new parts, please call 1-800-933-7876.
basket (10). This will correspond to approximately 3/4 full portafilter. (Fig. O)
• Clean any espresso residues from the edge of the portafilter.
• Insert the plastic support peg (11b) into the portafilter (4). Then insert the rubber gasket adapter (11a),
• Insert the portafilter into the brew unit (13) from the bottom, and turn the portafilter from left to right until it
with the curved side facing down, as shown in Figure M.
locks into place. (Fig. P)
• Insert the ground coffee filter (10) into the portafilter (4). (Fig. N)
• Take one or two preheated cups and place them under the portafilter; check that they are correctly
• Brew a single or double espresso as described in the sections below.
placed under the dispensing holes.
• Press and release the double espresso button (19). The button light (20) will blink quickly when preparing
Note: When using pre-ground coffee, you must first insert the plastic support peg (11b) into
to brew the espresso.
the portafilter, along with the rubber gasket adapter (11a), and then insert the ground coffee
• The machine will dispense a double shot (2 fluid ounces) of espresso.
filter (10), as shown in Figure N.
The espresso quantities can be programmed according to your personal tastes (see section 5.3).
Note: The Sirena utilizes a self tamping method when brewing espresso: the coffee is tamped
when the portafilter is inserted into the brew head. For optimal brewing, it is better to avoid • When the programmed quantity of espresso has been reached, the brewing stops automatically.
tamping the coffee in the portafilter. • Remove the cup(s).
• Wait a few seconds, then remove the portafilter and empty it from remaining espresso grounds.
Note: Keep the ground coffee filter basket (10) clean by removing and rinsing it every time
with water (see section 9). For deep cleaning, remove the filter basket (10), rubber gasket
• 14 • • 15 •adapter (11a) and plastic support peg (11b). Take care not to lose the adapter or its support peg. The 5.3 Programming the Quantity of Espresso
adapter will not function properly without the plastic support peg.
When using the machine for the first time, the brew buttons (17 and 19) have been programmed to brew the
ENGLISH
pre-defined quantity of espresso. These quantities are one fluid ounce for a single shot and two fluid ounces
for a double shot.
5.2 Espresso Pods This programming can be modified according to your personal tastes.
Note: When preparing espresso using espresso pods, you must remove the rubber gasket The programming of each brew button is independent from the other. To re-program the buttons, proceed as
follows below. The buttons can be re-programmed at any time. The programmed quantity will be kept in the
adapter (11a) and plastic support peg (11b) from the portafilter. With the use of pods, only
machine’s memory even if it has been turned off.
one single shot of espresso can be brewed at a time.
• Make sure the machine is turned on.
• Remove the ground coffee filter (10) from the portafilter (4) by pulling it out. • Insert the appropriate filter with pre-ground coffee (see section 5.1).
• Remove the adapter (11a) and plastic support peg (11b) from the portafilter. • Position the cup(s) that will be used beneath the dispensing holes.
• Insert the pod filter (12) into the portafilter (4). (Fig. Q) • Press the desired brew button (17 or 19), and keep it pressed. The button will blink during programming.
• Holding the handle towards the left, fit the rim of the empty portafilter into the brew unit (13). (Fig.P) • When the desired espresso quantity is reached, release the button. The machine is now programmed to
• Turn the portafilter from left to right until it firmly locks in place; you may have to hold the base of the always brew the same quantity of espresso.
machine to keep it from turning.
• Release the grip from the portafilter.
• Place a cup beneath the portafilter. Preheat the portafilter by pressing the brew button (17).
• Water will dispense out of the portafilter (this operation is only necessary for the first espresso during
each use). 6 TIPS FOR CHOOSING COFFEE
• After the water dispensing has finished, wait a few seconds and remove the portafilter from the machine As a general rule, any type of coffee blended for espresso available on the market can be used.
by turning it from right to left; empty out the remaining water.
• Insert the pod in the portafilter; make sure the paper filter of the pod does not overhang from the However, coffee is a natural product and its flavor changes according to its origin and blend. This machine
portafilter edge. has been specially developed by Starbucks for Starbucks espresso and decaf espresso blend, in order to
• Insert the portafilter in the brew unit (13) from the bottom. Turn the portafilter from left to right until it locks produce the same flavor profile found in our cafes.
in place. We recommend trying different varieties of beans and roasts to determine what kind of espresso taste you
• Take one preheated cup and place it under the portafilter; check that it is correctly placed under the prefer.
dispensing holes.
Espresso should always be dispensed by the portafilter in an even flow. If the espresso does not flow out
• Press and release the single espresso button (17). of the portafilter easily and has a “dripping” effect, it is an indication that the grind is too fine, or there is too
• The brewing stops automatically when the programmed quantity of espresso has been reached. Remove much coffee in the portafilter, blocking the flow of water through the grinds. This will have an effect on the
the cup. espresso’s taste, so we recommend checking the flow of the espresso.
• Wait a few seconds, then remove the portafilter and dispose of the used pod.
The speed of espresso dispensing can be modified by slightly changing the amount of espresso in the filter
Note: Keep the pod filter (12) clean by removing and rinsing it every time with water (see and/or using a different espresso grind.
section 9).
• 16 • • 17 •BEFORE PERFORMING ANY OPERATION RELATED TO STEAM OR HOT WATER DISPENSING, • Press the steam button (21) to deselect the steam function.
CHECK THAT THE STEAM WAND IS DIRECTED OVER THE DRIP TRAY. • After pressing the steam button, the machine automatically returns back to its normal mode for brewing
espresso and hot water.
ENGLISH
Warning! Always make sure the portafilter is inserted before steaming or dispensing hot water. • IMPORTANT: Prime the water circuit as described in section 4.5 to rinse the inside of the steam
wand of any residual milk (also see section 9).
The same operation can be used to heat other beverages.
7 HOT WATER DISPENSING • After this operation, clean the steam wand with a damp cloth.
Danger of scalding! Dispensing may be preceded by short sprays of hot water. The steam
wand can reach high temperatures; do not touch it with bare hands.
• Turn on the machine, if not already on, with the main power button (14); the power light (15) illuminates. 9 CLEANING AND MAINTENANCE
• Wait until the brew lights (18 and 20) illuminate and remain fixed. Warning! To avoid serious injury and electrical shock, it is essential to turn off and unplug the
• Place a container or a glass under the steam wand. Sirena, and allow it to completely cool off before cleaning.
• Open the hot water/steam knob (6) by turning it clockwise all the way.
• When the desired quantity of hot water has been dispensed, rotate the hot water/steam knob counter- Cleaning and maintenance operations can only be carried out when the machine is cold and disconnected
clockwise (6). from the power supply.
• Remove the container with hot water.
• Do not immerse the machine in water or place any of its components in a dishwasher.
• Do not use sharp objects or harsh chemical products (solvents) for cleaning.
• Never use harsh cleaning agents, especially those containing alcohol, solvents, or abrasive materials on
8 STEAM DISPENSING / STEAMING MILK your Starbucks Sirena Espresso Maker.
• Wipe all external surfaces with a damp cloth; then wipe the surfaces dry to preserve the exterior of your
Danger of scalding! Dispensing may be preceded by short sprays of hot water. The steam machine.
wand can reach high temperatures; do not touch it with bare hands. • Do not dry the machine and/or its components using a microwave and/or conventional oven.
• We recommend cleaning the water tank and filling it with fresh water daily.
• After heating or steaming a beverage, always dispense a small amount of hot water out of the steam
Warning! Always make sure the portafilter is inserted before steaming or dispensing hot water. wand to clean the inside of the steam wand, and clean it on the outside with a damp cloth.
- If you notice a residue build-up on the tip of the steam wand, or if water flow out of the steam
Note: If the steam function is selected, but not used for a period of 1 minute, the machine will wand seems to be restricted, submerge the steam wand in a tall container of hot water. Allow the
automatically exit the steam function mode. steam wand to soak in this hot water overnight. Then clean the steam wand with a damp cloth, and
run some water through the steam wand to remove any internal residue. (Fig. T and Fig. U) This
For best steaming results allow the unit to fully warm up before steaming. preventive measure can reduce or eliminate the need for more intensive cleaning; however, the
machine must still be descaled on a regular basis (section 10).
• Turn on the machine, if not already on, with the main power button (15); the power light (16) illuminates.
• Empty and clean the drip tray daily. (The drip tray and grill are dishwasher safe, but we recommend
• Wait until the brew lights (18 and 20) illuminate and remain fixed. Make sure the steam wand is directed
over the drip tray and the portafilter is inserted into the machine. hand-washing both parts.)
• Press the steam button (21). The brew lights (18 and 20) turn off. The steam light (22) starts to blink. • To clean the portafilter, proceed as follows:
• The machine is ready for steam dispensing when the steam light (22) remains fixed. - Remove the filter (10 or 12) from the portafilter. Immerse it in hot water and wash it thoroughly,
• Place a container below the steam wand and open the hot water/steam knob (6) by turning it clockwise making sure to remove any remaining coffee grounds from the filter basket holes. If necessary, use
all the way for a few seconds, so that residual water exits from the steam wand. Shortly after, a steady a small pin to clean out any clogged holes. (Fig. V)
jet of steam will be dispensed. (Fig. R) - If soap is used, rinse thoroughly.
• Close the knob (6) by turning it counter-clockwise, and remove the container. - If inserted, remove the rubber gasket adapter (11a) and plastic support peg (11b) and wash them
thoroughly.
To guarantee the best results when steaming milk, always use cold milk. - Rinse the internal part of the portafilter thoroughly, making sure to remove any remaining coffee
• Immerse the steam wand in the milk and open the knob (6) by turning it clockwise all the way; turn the grounds by pressing on the inside part of the portafilter, as shown in (Figure W).
container with slow upward movements so that it is warmed evenly. (Fig. S) • At least once per month, clean the brew head from any coffee grounds, using a damp towel.
• After using the steam for the desired time, close the knob (6) by turning it counter-clockwise; remove the • Descale your machine regularly, following the descaling instructions in section 10 of this manual.
container with the warmed milk/beverage. • Turn off the machine by pressing the power button (15), and unplug the machine from the power outlet
after each use.
• 18 • • 19 •10 DESCALING 12 LEGAL INFORMATION
Limescale normally forms with the use of the appliance. Descaling is necessary every 3-4 months of use of • These instructions contain the information necessary for the correct use, operation, and accurate
ENGLISH
the machine, every 500 cycles, and/or if you notice a reduction in water flow. maintenance of the appliance.
• This information and the observation of the instructions form the basis for safe, risk-free use, operation,
If you want to descale the machine yourself, you can use a non-toxic and/or non-harmful descaling product
and maintenance of the appliance.
for espresso machines, commonly available in stores.
• The manufacturer will be not responsible in any case of damage suffered to any party due to any
We recommend using the Starbucks Barista Cleaner or a natural citric acid based portafilter fault, incorrect insertion, or incorrect cleaning of the portafilter.
decalcifying agent. Use one packet of Starbucks Barista Cleaner mixed into one full tank • For further information, or should particular problems arise, please contact your local dealer or the
of water. It is best to let the Starbucks Barista Cleaner dissolve completely in warm water prior to manufacturer directly.
adding to cold water in the tank. For best results, descale every 3-4 months or every 500 cycles. • Please note that the contents of these instructions for use are not part of a previous or already existing
covenant, agreement, or legal contract and that the substance has not been changed.
• All the manufacturer’s obligations are based on the relative purchase agreement which also contains full,
Warning! Never use vinegar as a descaler. exclusive regulations concerning the warranty procedures.
• Read decalcifying agent directions. Make sure the machine is turned off. Insert the correct proportion of • The contractual warranty regulations are neither reduced nor extended on the basis of these
decalcifying agent into the water tank. Fill the water tank with water, and mix thoroughly. Replace the tank. explanations.
Be sure to remove the portafilter (4) from the brew head (13). • These instructions for use contain information protected by copyright law.
• Remove the single screw holding the flat, round screen underneath the brew head (13). The water will now • Photocopy or translation into another language is not permitted without the manufacturer’s prior written
be able to dispense in one solid stream. Place a container under the brew head (13) and another container consent.
under the steam wand (3).
• Turn on the machine and immediately run one cup of the solution through the steam wand by turning the 13 DISPOSAL
hot water knob (6) clockwise. Close the knob by turning it counter-clockwise. Now dispense one cup of
• Put unused appliances out of service.
the solution through the brew head (13), by pressing the brew button (17 or 19). DO NOT use the steam
• Disconnect the plug from the socket and cut the electrical cord .
function during the descaling process (simply let the water flow through the steam wand).
• At the end of its life, take the appliance to a suitable waste collection site.
• Turn the machine off and let the solution sit for 1/2 hour (30 minutes). This allows the descaling solution
to dissolve internal mineral build-up. Please note: Do not let solution sit longer than the recommended time.
• Turn the machine back on and run the majority of the solution through the machine, alternating between
the brew head (13) and steam wand (3). Please note: DO NOT run the machine out of water.
• Turn the machine off (before water tank is empty), and remove the tank. Rinse and refill the water tank
with fresh, filtered water and reinsert the tank.
• Turn machine on and run 3-4 tanks of fresh water through the machine to rinse. Again, alternate between
dispensing water through the brew head (13) and the steam wand (3).
• Turn off the machine and unplug it from the power outlet. Let the machine cool thoroughly.
• Replace the brew head screen in the brew head (13) with the smooth side of the screen facing down.
Please note: DO NOT use the machine until the brew head screen has been replaced.
If you are using a product other than one recommended, it is important to always follow the
manufacturer’s instructions shown on the pack of the descaling product.
11 REGULAR SERVICING
Regular servicing by an authorized service center prolongs the life and reliability of the machine.
Keep the original packaging as a protection for future transport.
• 20 • • 21 •Problem Possible cause Solution
The machine does not Machine is not connected to the Connect the machine to the power
ENGLISH
turn on. power source. source.
The espresso is too cold. The portafilter has not been Preheat the portafilter (section 5.1).
preheated.
Cold cups. Preheat the cups on the warming plate
or warm with hot water.
Milk froth does not form. The steam wand is clogged. Ensure the steam wand is clean and
the air hole at the top is clear.
The milk is too warm. Use cold milk.
Espresso does not brew. The LEDS 16, 18, 20 and 22 blink Prime the water circuit as described in
rapidly at the same time. section 4.5.
The espresso is Too little espresso in the portafilter. Add espresso (section 5).
dispensed too fast; the The grind is too coarse. Use a finer grind of espresso; make
crema does not form. sure you are using the back pressure
adapter (rubber gasket adapter) for
single and double shots.
Espresso is old or not suitable. Use fresh ground espresso.
Espresso is not No water. Refill tank with water (section 4.4).
dispensed, or dispensed The grind is too fine. Use a coarser grind.
only in drips. Espresso is packed too tightly in the Shake the ground espresso in the
portafilter. portafilter.
Too much espresso in the portafilter. Reduce the quantity of espresso in the
portafilter.
The hot water/steam knob (6) is Close the knob (6) by turning it
open. counter-clockwise all the way.
The machine has limescale build-up. Descale the machine (section 10).
The filter in the portafilter is clogged. Clean the filter (section 19) and
portafilter.
Pods not suitable. Change type of pod (use only single
pods).
The rubber gasket adapter and Insert the rubber gasket adapter and
plastic support peg is missing. plastic support peg (see section 5.1).
Espresso is dispensed The portafilter is incorrectly inserted Insert the portafilter correctly (section
from the edges. in the brew unit. 5).
Upper edge of the portafilter is dirty. Clean the rim of the portafilter.
The gasket of the brew unit is dirty. Clean the gasket of the brew unit.
Too much espresso in the portafilter. Reduce the quantity of the espresso.
Pod is not inserted correctly. Insert the pod correctly.
The machine does not The hot water/steam knob is open. Close the hot water/steam knob by
dispense water after the turning it counter-clockwise. Then
tank has been refilled. open the knob again, by turning it
clockwise.
Please contact the service center for any faults not covered in the above table, or when the
suggested solutions do not solve the problem.
• 22 • • 23 •PRÉCAUTIONS IMPORTANTES 15. Utiliser toujours de l’eau froide. L’utilisation d’eau chaude ou d’autres liquides pourrait
endommager l’appareil.
Lors de l’utilisation d’appareils électriques, afin de réduire les risques d’incendies, de chocs 16. Lorsqu’on branche la machine, éteindre toujours l’appareil en appuyant sur « OFF »,
électriques et/ou de blessures, il est indispensable de respecter toujours les précautions de brancher le cordon d’alimentation tout d’abord à la machine et ensuite à la prise de
sécurité principales, y compris les suivantes : courant sur le mur. Pour débrancher, éteindre toujours l’appareil en appuyant sur « OFF
1. Lire toutes les instructions et les informations dans ce manuel et dans tout autre » et ensuite enlever la fiche de la prise de courant sur le mur.
document contenu dans l’emballage concernant le produit avant de mettre en marche 17. Agir avec prudence lorsqu’on utilise de la vapeur chaude.
ou d’utiliser cet appareil.
FRANÇAIS
18. Ne pas utiliser l’appareil pour toute autre utilisation non prévue.
2. Ne pas toucher de surfaces chaudes (par exemple la buse de vapeur, le porte-filtre).
Utiliser les poignées ou les boutons.
3. Afin d’éviter tout incendie, choc électrique et blessure, ne pas plonger le cordon, la fiche GARDER CES INSTRUCTIONS
ou l’appareil dans l’eau ou dans n’importe quel liquide.
4. Cet appareil doit être conservé hors de portée des enfants.
5. Débrancher de la prise de courant lorsque l’appareil n’est pas en service et avant son
nettoyage. INSTRUCTIONS SUR LE CORDON COURT
6. Laisser refroidir l’appareil aussi bien avant de retirer et de mettre en place ses accessoires
qu’avant de le nettoyer. Votre appareil est muni d’un cordon électrique court afin d’éviter de trébucher ou de
7. Ne pas enlever le porte-filtre pendant les cycles de distribution puisque cela pourrait s’emmêler avec un câble plus long.
causer des brûlures. Après l’installation de la machine, le cordon doit être toujours accessible afin de pouvoir la
8. L’utilisation d’accessoires non recommandés par le constructeur de l’appareil pourrait débrancher à tout moment, le cas échéant.
engendrer des incendies, des chocs électriques et des blessures. Des cordons plus longs sont disponibles chez les revendeurs autorisés à la vente de matériel
9. Ne pas utiliser à l’extérieur. électrique et ne peuvent être utilisés que si l’on prend toutes les précautions d’usage. Si on
10. Ne pas laisser le cordon pendre des bords de la table ou du plan de travail, ni toucher utilise une rallonge :
des surfaces chaudes. • La tension électrique de fonctionnement marquée sur la rallonge doit être au moins
11. Ne pas placer près du feu ou sur une cuisinière, électrique et à gaz, ou dans un four égale à celle de l’appareil.
chaud. • Si la fiche de l’appareil a une connexion de terre, la rallonge devrait être une rallonge
12. Cette machine n’a été conçue que pour gérer des quantités à usage domestique. Cet de terre à 3 fils.
appareil n’est pas adéquat pour une utilisation continue ou à usage commercial. • La rallonge ne devra pas encombrer le plan de travail ou le dessus de table, afin
13. Ne pas utiliser l’appareil avec un cordon ou une fiche détériorés, en cas de mauvais d’éviter que les enfants la tirent ou trébuchent accidentellement.
fonctionnement de l’appareil ou après son endommagement de n’importe quelle
manière. Renvoyer l’appareil à un centre d’assistance agréé pour tout contrôle,
réparation et réglage.
14. Ne pas utiliser si le réservoir à eau n’est pas rempli.
• II • • III •1 INFORMATIONS GÉNÉRALES 2 CARACTÉRISTIQUES
Cette machine à café expresso est conçue pour la préparation d’une ou de deux doses de café expresso • Porte-filtre de qualité commerciale : inclut un adaptateur de la pression de retour breveté pour assurer
et est munie d’une buse d’eau chaude et de vapeur. Les commandes sur le panneau de la machine sont une très bonne distribution de café expresso
indiquées par des symboles faciles à comprendre. Cet appareil est à usage domestique et n’est pas indiqué • Buse de distribution double
pour toute autre utilisation professionnelle, commerciale ou continue. • Arrêt automatique après 90 minutes d’inactivité
• Poignée à prise douce du porte-filtre
• Filtre à café moulu pour la préparation d’une ou de deux doses de café (inclus)
Avertissement. On décline toute responsabilité pour tout endommagement causé par : • Dosette de type ESE (filtre à dosette inclus)
• Réglages de distribution programmables par deux utilisateurs
• Usage impropre non conforme aux utilisations prévues ;
FRANÇAIS
• Indicateurs d’état faciles à comprendre qui montrent si la machine est prête à distribuer du café ou de la
• Réparations non effectuées par un centre d’assistance clients agréé ;
vapeur
• Altération du cordon d’alimentation ;
• DEL à lumière bleue indiquant que le réservoir à eau est vide
• Altération d’un composant quelconque de la machine ;
• Buse de vapeur avec adaptateur pannarello qui permet d’émulsionner le lait facilement pour préparer du
• L’emploi de pièces de rechange et d’accessoires non d’origine ;
cappuccino ou des boissons à base de lait
• Défaillance pendant le détartrage de la machine ;
• Chaudière Rapid Steam™ pour passer rapidement de la distribution à l’émulsion
• Mauvais assemblage ou mauvaise introduction du porte-filtre ;
• Indicateur de la température
• Nettoyage incomplet du porte-filtre (voir section 9).
• Plaque chauffe-tasses
• Usage de la machine à moins de 32°F (0°C).
• Chaudière à café en acier inoxydable
Dans ces cas-là, la garantie n’est pas valable. • Pression de la pompe à 15 bars pour assurer une distribution adéquate
• Châssis résistant entièrement en métal
• Réservoir à eau amovible de 57,5 onces pour faciliter le nettoyage et le remplissage
• Bac d’égouttement réglable et amovible
1.1 Pour faciliter la lecture • Cordon d’alimentation détachable
CARACTÉRISTIQUES TECHNIQUES
Tension nominale Voir plaquette sur l’appareil
Puissance nominale Voir plaquette sur l’appareil
Un triangle d’alerte met en évidence les instructions à retenir pour la sécurité de l’utilisateur. Suivre atten- Alimentation Voir plaquette sur l’appareil
tivement ces instructions afin d’éviter de graves blessures. Matériau du châssis Métal et thermoplastique
Dimensions (l x h x p) 13 pouces x 15 pouces x 12 pouces
Ce symbole souligne des informations visant à assurer le fonctionnement optimal de la machine. Poids 21 Iivres
Longueur du cordon d’alimentation 47 pouces
Tableau de commande Façade
Porte-filtre Pressurisé
1.2 Comment utiliser ce mode d’emploi
Contenance du réservoir à eau 57,5 onces / amovible
Garder ce mode d’emploi dans un endroit sûr et le mettre à la disposition de toute autre personne qui pour- Pression de la pompe 15 bars
rait utiliser la machine à café expresso. Matériau de la chaudière de distribution Acier inoxydable
Matériau du générateur Rapid Steam™ Alliage moulé sous pression
Pour plus d’informations ou en cas de problèmes, contacter un centre d’assistance agréé ou bien consulter
Dispositifs de sécurité Soupape de sécurité de surpression du circuit hydraulique
notre site web : www.starbucks.com/sirena
Cela peut faire l’objet de modifications de l’ingénierie et de la fabrication à cause des développements tech-
nologiques.
Cette machine est conforme à la directive européenne 89/336/EEC (Décret Législatif Italien 476 du
04/12/92) en matière de compatibilité électromagnétique.
•2• •3•A 3 NORMES DE SÉCURITÉ
Ne pas mettre la machine en contact avec de l’eau lorsqu’elle est branchée : danger de
court-circuit ! La vapeur et l’eau chaude peuvent provoquer des brûlures ! Ne jamais diriger le jet de
vapeur ou d’eau chaude vers des parties du corps ; utiliser la buse de vapeur avec attention : dan-
ger de brûlures !
Utilisation prévue
La machine à café expresso est prévue exclusivement pour un usage domestique.
FRANÇAIS
Ne pas effectuer des changements techniques ni utiliser la machine dans des buts illégaux parce que cela
pourrait entraîner de graves dangers. La machine à café expresso doit être utilisée uniquement par des
adultes.
Alimentation
Ne brancher la machine à café expresso qu’à une prise appropriée.
B C La tension doit correspondre à l’indication sur la plaquette de la machine.
Cordon d’alimentation (Figure A)
Ne jamais utiliser la machine à café expresso si le cordon d’alimentation est défectueux.
Le constructeur remplacera n’importe quel composant endommagé de la machine. Appeler le numéro
1-800-933-7876.
Ne pas placer le cordon autour de coins, sur des extrémités tranchantes ou sur des objets chauds et eviter
tout contact avec de l’huile.
Ne pas utiliser le cordon d’alimentation pour transporter ou tirer la machine à café expresso.
Ne pas debrancher en tirant le cordon d’alimentation, ni le toucher avec des mains mouillées.
Ne pas laisser pendre le cordon d’alimentation des tables ou des étagères.
Protection des autres personnes (Figure B)
S’assurer que les enfants ne jouent pas avec la machine à café expresso ; les enfants ne s’aperçoivent pas
des dangers liés aux appareils électroménagers.
Ne pas laisser l’emballage de la machine à café expresso à portée des enfants.
D E
40 cm
16 in
Danger de brûlures (Figure C)
Ne jamais diriger le jet de vapeur ou d’eau chaude vers soi ou vers d’autres.
Utiliser toujours les poignées et les boutons fournis.
Ne pas enlever le porte-filtre pendant la phase de distribution du café expresso ou tout de suite après sa fin.
Pendant la phase de chauffage, il se peut que de l’eau chaude coule du groupe de distribution. Cela est
normal.
Positionnement
20 cm
8 in
20 cm
Mettre la machine à café expresso dans un endroit sûr, où personne ne puisse la renverser ni se blesser
8 in avec. Ne pas tourner ou renverser la machine lorsqu’elle contient de l’eau parce que l’eau sortirait. L’eau
20 cm chaude et la vapeur pourraient sortir : danger de brûlures ! Tenir la machine verticale lorsque le réser-
8 in
voir contient de l’eau.
•4• •5•Ne pas entreposer la machine à une température au-dessous de 32°F (0°C) ; le gel pourrait endommager
la machine. Ne pas utiliser la machine à café expresso à l’extérieur.
Ne pas placer la machine sur des surfaces chaudes ou près de flammes nues afin d’éviter que le châssis ne
fonde ou soit endommagé.
1
Nettoyage (Figure D) 2 10
6
Avant de nettoyer la machine, il faut désélectionner tous les boutons et enlever la fiche de la prise. Laisser
refroidir la machine. Ne jamais plonger la machine dans l’eau ! 11a
Il est sévèrement interdit de modifier la partie intérieure de la machine. Il n’y a pas de parties pouvant être
réparées par l’utilisateur dans la machine.
FRANÇAIS
13 11b
Espace pour l’usage et l’entretien (Figure E) 4 3
12
Pour un fonctionnement optimal et efficace de la machine à café expresso, il est conseillé de :
• Choisir une surface plane ;
• Choisir un endroit bien éclairé, propre et près d’une prise électrique afin de l’atteindre facilement ;
• Prévoir une distance minimum à partir des côtés de la machine comme l’image le montre.
Entreposage de la machine
7
Si la machine doit rester inutilisée pendant longtemps, suivre ce procédé :
5
• Vider le réservoir à eau et nettoyer les surfaces qui étaient au contact du café ;
• Rincer complètement le porte-filtre et ses composants, essuyer le groupe de distribution et rincer le bac
d’égouttement et la grille ;
• Éteindre la machine et la débrancher de la prise ; 8
• L’entreposer dans un endroit propre et sec, hors de portée des enfants ;
• La protéger de la poussière et des saletés. 14
Réparation / Entretien
En cas de pannes, défauts réels ou présumés après une chute, débrancher immédiatement le cordon
d’alimentation de la prise. 9
Ne jamais essayer de mettre en marche une machine défectueuse.
Les réparations et les entretiens ne peuvent être exécutés que par les Centres d’assistance agréés, dont la
liste est contenue dans le manuel fourni avec la machine.
On décline toute responsabilité pour les endommagements dus aux entretiens exécutés de façon non pro-
fessionnelle. 15 17 23 19 21
Normes en cas d’incendie
En cas d’incendie, utiliser des extincteurs à anhydride carbonique (CO2). Ne pas utiliser des extincteurs à
eau ou à poudre.
16 18 20 22
24
•6• •7•Description des composants de la machine F G
1 Plaque chauffe-tasses 10 Filtre à café moulu (pour la préparation d’une
2 Tableau de commande ou de deux doses de café)
3 Buse d’eau chaude/de vapeur 11a Joint en caoutchouc (adaptateur de la pres-
4 Porte-filtre pressurisé sion de retour)
5 Bac d’égouttement + grille 11b Support en plastique
6 Bouton d’eau chaude/de vapeur 12 Filtre à dosette
7 Couvercle du réservoir à eau 13 Groupe de distribution
8 Réservoir à eau 14 Poignée de la vapeur détachable
FRANÇAIS
9 Cordon d’alimentation
15 Bouton ON/OFF Bouton ON/OFF
16 Voyant ON/OFF Sur ON : la machine est allumée et prête à l’emploi
Sur OFF : la machine est arrêtée
17 Bouton pour une seule Cela distribue une seule quantité de café expresso (une dose). La quan-
H I
dose de café expresso tité distribuée peut être programmée par l’utilisateur.
18 Voyant d’une seule ON allumé fixe : la machine est à la bonne température pour distribuer du
dose de café expresso café ou de l’eau chaude
Clignotant doucement : la machine est en phase de chauffage pour la
distribution de café ou d’eau chaude
Clignotant rapidement : la machine est en train de se préparer à la distri-
bution d’une dose de café expresso ou bien elle est en mode de program-
mation
19 Bouton pour deux doses Cela distribue deux quantités de café expresso (deux doses). La quantité
de café expresso distribuée peut être programmée par l’utilisateur.
20 Voyant de deux doses ON allumé fixe : la machine est à la bonne température pour distribuer du
de café expresso café ou de l’eau chaude
Clignotant doucement : la machine est en phase de chauffage pour la
distribution de café ou d’eau chaude
Clignotant rapidement : la machine est en train de se préparer à la dis-
tribution de deux doses de café expresso ou bien elle est en mode de J K
programmation
21 Bouton de la vapeur Il sélectionne la fonction de la vapeur
22 Voyant de la vapeur ON allumé fixe : la machine est à la bonne température pour distribuer de
la vapeur
Clignotant doucement : la machine est en phase de chauffage pour dis-
tribuer de la vapeur
23 Indicateur de la tem- Il indique le moment où la chaudière a atteint la bonne température pour
pérature la distribution (la machine est prête à la distribution lorsque les voyants 18
et 20 sont allumés fixes)
24 Voyant de l’eau ON allumé fixe : il indique que le réservoir à eau doit être rempli
Clignotant rapidement : le circuit hydraulique de la machine doit être
amorcé (voir la section 4.5)
•8• •9•You can also read