KALTURA MEDIASPACE GUIDE - LANGARA IWEB
←
→
Page content transcription
If your browser does not render page correctly, please read the page content below
Kaltura MediaSpace Guide
Kaltura MediaSpace is an online media hosting/streaming service similar to YouTube. You
can use MediaSpace to upload, edit, and share your media with other users.

For uploading and embedding audio and video in Brightspace, skip to Sharing Media in
Brightspace by D2L.

Logging In
Click here for a video demo.

Note: The following instructions are for accessing your MediaSpace account from the
MediaSpace website. If you’re already logged in to Brightspace, you can access your
MediaSpace account by opening the My Tools menu and clicking My Media.

Go to https://stream.langara.ca and click on Login at the top right corner of the screen.
From the user menu, click Login.

Log in using your Computer User ID and password (e.g. jsmith99).

Once you are logged in, the user menu will look like this:

                          Educational Technology | 1 | 2021-04-26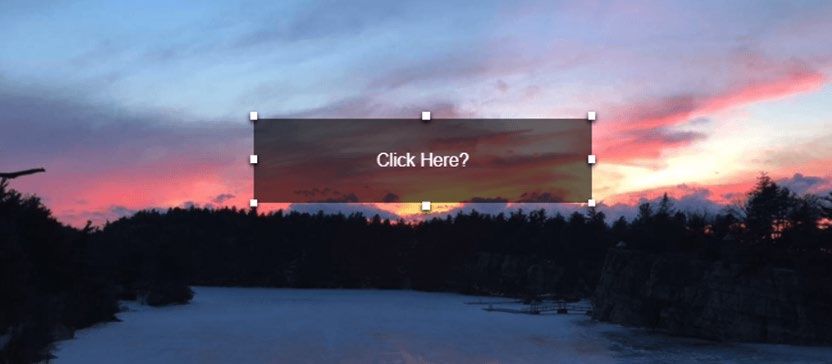
The User Interface
Click here for a video demo.

The MediaSpace website is a responsive interface, which means that it will appear
differently depending on the size of your screen. In fullscreen, desktop mode, you will see
the navigation menu displayed horizontally on the left, with the search box and the user
menu at the top right.

On a smaller or mobile screen, the navigation menu and search box are collapsed into the
top left corner and are accessible by clicking on the “hamburger” menu. Your user menu will
still appear at the top right.

                          Educational Technology | 2 | 2021-04-26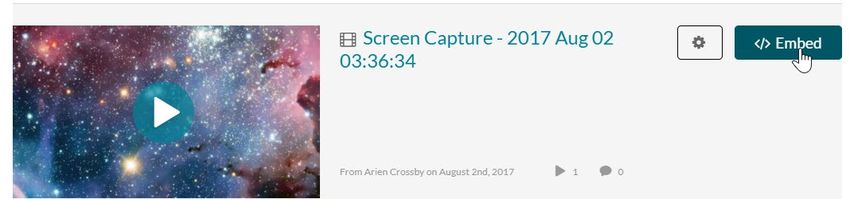
The User Menu
The User Menu is where you will find most items relating to both media you own, and
media that has been shared with you. When you are logged in, the User Menu consists of:

   •   My Media – Your home on MediaSpace; media you own, and media that has been
       shared with you, will appear on this page (My Media is the part of MediaSpace you
       can access in Brightspace)
   •   My Playlists – Your playlists, and controls for creating new playlists
   •   My Channels – Students cannot create Channels, but if your instructor has shared a
       Channel with you, it will appear here

My Media in Brightspace
Click here for a video demo.

You can access your My Media from within Brightspace by going into a course and
selecting My Tools > My Media. The My Media interface in Brightspace is nearly identical
to that on the MediaSpace website, with a few exceptions:

   •   The User Menu does not appear inside Brightspace
   •   YouTube is not an Add Media option in Brightspace
   •   The Downloads and Collaboration sections of Edit are not available in Brightspace

To upload video to MediaSpace in Brightspace, see Uploading Media. To insert media into
your Brightspace course, see Sharing Media in Brightspace.

                         Educational Technology | 3 | 2021-04-26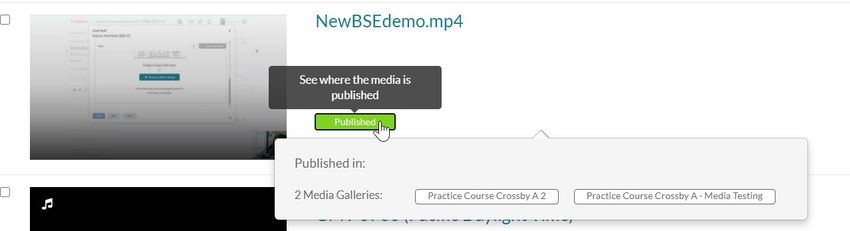
Uploading Media
Click here for a video demo.

In your My Media, click on Add New. From the menu, select your preferred method of
adding media.

Option A: Media Upload
Click here for a video demo.

Media Upload is used to upload a video or audio file from your hard drive to MediaSpace.
Click on the Add New button and select Media Upload.

On the Upload Media screen, click the “Choose a file to upload” button.

                         Educational Technology | 4 | 2021-04-26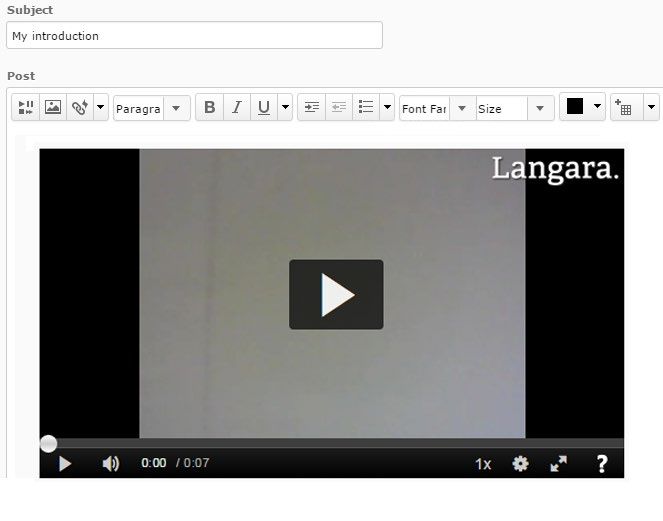
Locate the file on your computer.

Note: There is a 2GB size limit on media files. Anything larger than 2GB will not upload
correctly.

Once you have added the file, you will see a progress bar indicating the progress of your
upload. Once it’s finished, you will see the words “Upload completed!” and several
additional fields will appear below.

You should always fill out as much information about your video as you can, but make sure
to include a Name and any tags that might help you find the video later (like the class name
and number – e.g. ENGL1117 – the semester in which you uploaded the video, or a
description of the subject matter).

                          Educational Technology | 5 | 2021-04-26
Click Save.

Note: New uploads are set to Private by default. Once you have saved your media, you will
be given the option to keep it Private, or to set it to Unlisted or Published, or add it to one or
more Channels.

If you’re only planning to share the video in Brightspace, you can leave it set to Private. The
video will still be available to anyone in your course who can see the place where you
embedded the video.

Make any desired changes, and then click Save again.

Option B: Web Recorder
Click here for a video demo.

The Web Recorder is a browser-based recorder that captures video from your webcam
only. To use it, go to Add New > Web Recorder, and grant permission to use your webcam
and microphone if your browser requests it.

Then just click the red circle to start the recording. Click the square to stop the recording.

Once you’re done recording, you can preview the video, then choose either Record
Again, Download a Copy of the video to your hard drive, or click the Use This button to
save the video to your My Media library.

If you click Use This, you will be asked to give the video a Name, a Description, and Tags
and Usage rights, if desired, before publishing or saving the video.

Note:The Web Recorder is not compatible with Safari or Microsoft Edge.

                           Educational Technology | 6 | 2021-04-26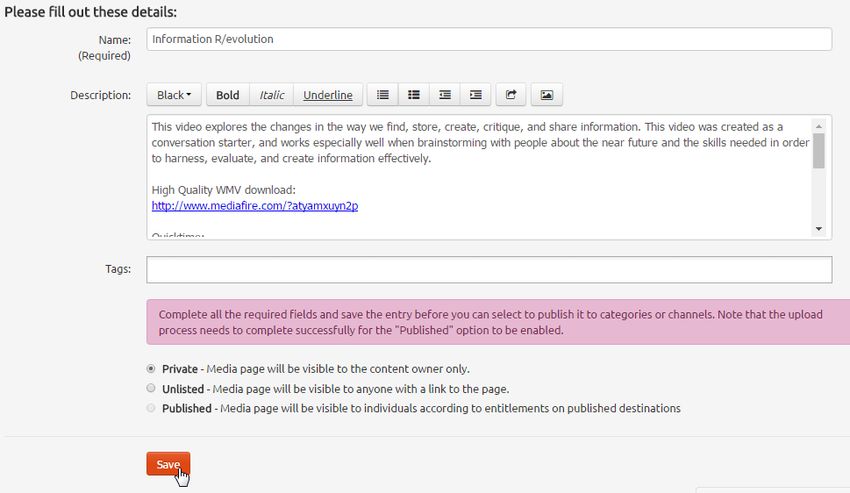
Option C: Kaltura Capture Desktop Recorder
Click here for a video demo.

Kaltura Capture is a downloadable desktop application that offers screen capture, voice
recording, and webcam recording, and uploads your videos directly into your My Media
library.

Click on Add New and select Kaltura Capture.

Click here for instructions for using Kaltura Capture.

Note: Kaltura Capture requires the download and installation of a desktop application, and
only works in Windows or Mac environments.

Note: New uploads are set to Private by default. To set publication status on your Kaltura
Capture videos, you will need to select the media in My Media, and select Publish from the
Actions menu.

Option D: Add videos from YouTube
Click on Add New and select YouTube.

MediaSpace allows users to index public YouTube entries in MediaSpace. Media can then
be published to channels, added to playlists, or otherwise shared with other users.

In the Video Page Link field, simply type or copy-and-paste the URL of a YouTube video
(Note: the YouTube import tool only supports public YouTube videos). Click Preview.

                         Educational Technology | 7 | 2021-04-26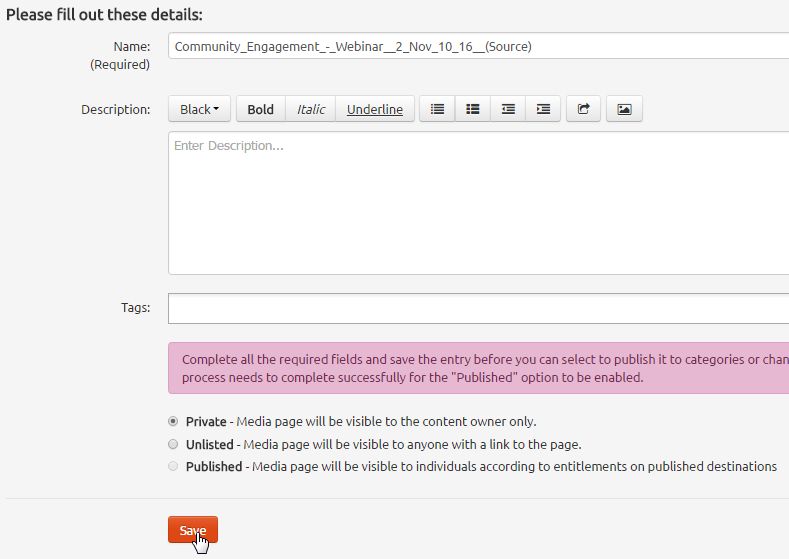
Play the YouTube video to verify your choice. Then fill out the details in the fields that
appear below. By default, the Name and Description fields will auto-fill with the information
from the original YouTube video.

Make any changes you wish to make, set the publication status of the video, and
click Save.

                          Educational Technology | 8 | 2021-04-26
Downloading Media
You can grant permission for other users to download the media you upload to
MediaSpace.
Note: This feature is not available in Brightspace.
1. Navigate to the media item you want to edit
2. Click on Downloads
3. From the Available Formats list, tick the box(es) next to each format you want to
make available to other users, e.g. "Original" or "720p"
4. Click Save; the Downloads link will now appear for other users accessing your video
Educational Technology | 9 | 2021-04-26Sharing Media
Publishing Media
New uploads are set to Private by default. Once you have saved your media, you will be
given the option to keep it Private, or to set it to Unlisted (which are not searchable, but
can be shared with other users by giving them the URL) or Published (which can be made
available to other users via Channels or playlists. )
Note: If you plan to embed the media on iWeb, CourseWeb, or another site, by using the
Share button and copy-pasting embed code, it is not necessary to set media to Published.
The embed code method overrides all other privilege settings.
If you wish to add the media to a channel, click on Published and choose the channel from
the list that appears below.
Make any desired changes, and then click Save again.
You can now click Go To Media to view the media, or Go To My Media to see the media
listed with your other files.
Educational Technology | 10 | 2021-04-26Sharing Media in Brightspace
Click here for a video demo.
The HTML Editor and Insert Stuff
In Brightspace, you can upload and/or insert Kaltura videos anywhere you find the HTML
Editor.
The Brightspace HTML Editor
In the HTML Editor, click the Insert Stuff button. The Insert Stuff window will appear.
In the Insert Stuff window, select My Media as the source.
Educational Technology | 11 | 2021-04-26You now have several options for inserting media. You can:
• insert media that you previously uploaded to your My Media library
• upload a file from your computer (and then insert it)
• record video or audio directly using the Web Recorder, or
• start a screen capture using Kaltura Capture (Kaltura Capture must already be
installed on your computer for this option to work, and is only available on Windows
or Mac computers. Click here for more information on using Kaltura Capture.)
Insert Media from your My Media Library
Note: If you attempt to embed a media item immediately after uploading, it may still be
processing and therefore will not be found when you search for it. Allow for processing time
before attempting to insert media files in your course, especially if you have uploaded a
large file.
Search for the media item you want to insert, or scroll down until you see it in the list. Next
to the desired item, click the Embed button.
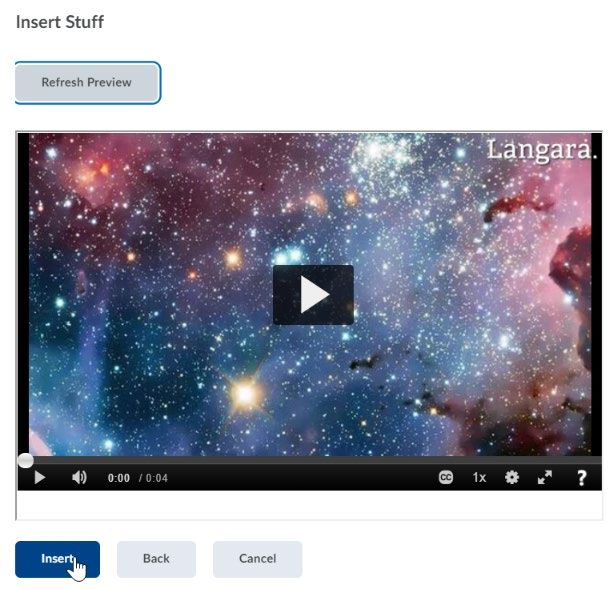
Next you will see a preview of the video as it will appear in your course. You can play the
video to ensure it’s working correctly.
Educational Technology | 12 | 2021-04-26When you’re done, click Insert to insert the video into your course.
The Insert Stuff window will close, and you will be able to see the embedded video inside
the HTML Editor.
Make any further edits you wish to make to the content item (adding text, etc.), and then
save and close.
The video will now appear in your course.
Note: Kaltura and Assignment folders – If you are submitting a video or audio file to an
Assignment folder, use Insert Stuff to add the video to your media library and embed it in
the HTML Editor of the Assignment folder. Do not attempt to use “Add a File” to upload your
Kaltura video.
Instructors: When setting up an Assignment folder that will require students to submit a
video, and will not require any additional file attachment, choose the “Text Submission”
option under Submission Type.
Educational Technology | 13 | 2021-04-26The Media Gallery
In Brightspace, your instructor may choose to make use of the Media Gallery. The Media
Gallery is a course-specific collection of media published by your instructor (and sometimes
your fellow students), and is visible to the entire class. Items in the course Media Gallery
are only visible from within that course.
You can access the Media Gallery from My Tools > Media Gallery. To add items to the
Media Gallery, go to My Tools > Media Gallery and click Add Media. Your My Media
library will load. Find the media you want to add to the Media Gallery, and check the box to
the left of the item to select it.
Once you’re done selecting items, click the Publish button at the top right of the screen to
publish it to the Media Gallery.
You can also click Add New to upload or record new media and publish it to the Media
Gallery. Any media you add to the Media Gallery via Add New will also be added to your
own My Media library.
After publishing an item to your course’s Media Gallery, you will see a Published label
appear next to it on your My Media page in Brightspace. If you click on the label, you can
see in which courses the item has been published.
Educational Technology | 14 | 2021-04-26This label only applies to its status in that Brightspace course, and will not make it public or
accessible outside of that course. Click here to learn more about the Publishing status of
Kaltura MediaSpace media entries.
Please note that not all instructors use the Media Gallery, and may choose to have you
embed your media in other parts of the course instead, like the Discussions tool, or in
Assignments or Quizzes. Always refer to the instructions provided in your course for where
you should post your media items.
Educational Technology | 15 | 2021-04-26Media Links and Embed Code
Note: Direct media links (other than embed code) are not available in Brightspace, only
from the MediaSpace website.
Sharing Unlisted Media/Sharing a Link to Media
Unlisted media can only be viewed by people with the direct URL. To acquire the URL:
1. Browse to the media you want to share
2. Click the Share button under the video
3. Click Link to Media Page
4. Copy the link to your clipboard
Grabbing Embed Code
Embed code can be used on other websites, like CourseWeb, to embed videos. To acquire
the embed code:
1. Browse to the media you want to share
2. Click Embed
3. Choose the player size you want
4. Choose the Start/Stop time, if you want the embed to use a different start/stop time
than the length of the full video
5. Click the Responsive Video toggle to make sure your video will be viewable on all
screen sizes
6. Copy the embed code to your clipboard
7. Paste into the appropriate area of the other website
Note: Sharing with these methods will override any privacy settings on the video; e.g. a
Private video will still be viewable.
Using Collaboration Settings
MediaSpace allows you to assign new owners to your media, as well as granting editing
and publishing rights to other users.
Note: Collaboration settings are not available in Brightspace.
Changing Media Ownership
Note: Changing the media owner will remove the item from your My Media and remove all
of your rights to the item.
1. Browse to the media you want to edit
2. Click Collaboration
3. Click the Change Media Owner button
Educational Technology | 16 | 2021-04-264. Start typing the username of the new owner in the “Enter user name” field, and
select it once it appears below
5. Click Save
Granting Editing and Publishing Rights to Other Users
You can grant editing and publishing rights to other users. A Co-Editor may make changes
to the original media item and its settings. A Co-Publisher gains the ability to Share the file
and publish it elsewhere, but cannot edit the file itself.
1. Browse to the media you want to edit
2. Click Collaboration
3. Click the +Add Collaborator button
4. Start typing the username of the new owner in the “Enter user name” field, and
select it once it
5. Select permission level: Co-Editor, Co-Publisher, or both
6. Click Save
Adding Media to a Channel
Channels are user-curated media collections. Most require membership in order to view or
participate. If your instructor has given you access to a Channel, follow these steps to add
your media:
1. Select My Channels from the User drop-down menu
2. Change the View filter menu from Channels I Manage to Channels I am a member of
3. Click on the Channel to which you would like to add content
4. Click on the Add to Channel button
5. If the media you want to add has not yet been published, click Filters and select All
Statuses
6. Check the box to the left of the item you want to add
7. Click Publish
Playlists
Playlists are personal collections of media items; you are the only one who can add and
remove items from a playlist. Playlists can be shared with other users or embedded outside
of MediaSpace, and can be accessed from User Menu > My Playlists.
Creating a Playlist
1. Browse to the media that you would like to add to a playlist.
2. Click on Actions and select “Add to playlist”
Educational Technology | 17 | 2021-04-263. In the Create a new playlist field, enter a name for your playlist and click the Create
button
4. The new playlist name will appear in the Select Playlists list below; make sure its
box is ticked, and click Save
Adding Media to a Playlist
1. Browse to the media that you would like to add to a playlist.
2. Click on Actions and select “Add to playlist”
3. Tick the playlist’s box in the Select Playlists list below, and click Save
Removing Media from a Playlist
1. Navigate to user menu > My Playlists
2. Click on the playlist
3. Click the red “X” next to the media you want to remove
4. In the Delete Confirmation window, click Delete
Managing a Playlist
After you’ve created the playlist, you can preview it, reorder media in the playlist, and copy
the playlist’s embed code.
1. From the user menu, select My Playlists
2. Click on the playlist
3. For the selected playlist, you can
a. Delete the playlist – click the Delete Playlist button
b. Reorder media in a playlist – click and drag from the left edge of playlist items
c. Remove videos from the playlist – see “Removing Media from a Playlist”
d. Copy the playlist’s embed code to place it on a website – click Embed and
copy the code to your clipboard
Tags
Tags are used across all levels of organization. Tags can be used on an individual basis,
for your own private collections, or standardized across public or shared collections, e.g.
“Library” might be applied to all videos posted by Langara Library.
All tags on published videos are added to MediaSpace’s tag collection, which means that
they will appear as suggested tags on all new videos, allowing users to cross-reference
public videos without using Channels.
Educational Technology | 18 | 2021-04-26Managing Media
Trimming a Video
You can trim out parts of any video using the Editor. The Trimming tool allows you to edit
your videos by setting new start and end times for your media.
Note: Trimming changes the original file, and the change cannot be reversed.
1. In My Media, click on the entry you want to trim.
2. Click the Actions menu and click Launch Editor.
3. Click and drag the yellow handles on the timeline (bottom of screen) to move the
markers to new start and/or end times.
4. Click Save. The newly-trimmed video will appear in your My Media.
Creating a Video Clip
In MediaSpace, you can create clips from existing videos; each clip becomes its own new
media entry.
The clipping tool enables you to edit your videos by setting the start time and end time of
your clip.
1. In My Media, click on the entry you want to trim.
2. Click the Actions menu and click Launch Editor.
3. Click and drag the yellow handles on the timeline (bottom of screen) to move the
markers to new start and/or end times.
4. Click Save a Copy. The new clip will appear in your My Media.
Managing Chapters and Slides
Chapters are like bookmarks, which can be used to navigate through a video. You can use
chapters to mark the beginning of a new topic, highlight important segments, or help
navigate through a longer video. You can add, edit and delete chapters and slides in
the Timeline tab under Edit in your My Media.
A Slide is a visual element synchronized to the main media. Slides can be viewed inside
the player, simultaneously with the media.
After Chapters and Slides are created, the player will display the Navigation Panel: a list of
chapters and slides available alongside the main video content.
Educational Technology | 19 | 2021-04-26Adding or Editing a Chapter
1. Go to your My Media page and click Edit near the entry you want to edit.
2. Select the Timeline tab. Here you can view all the chapters and slides in the video.
3. Place the cursor on the timeline and click the Create Chapter icon to create or
update a chapter, or click on the cue point for the chapter you want to edit to view its
properties.
After you create a chapter, you can:
• add or modify the Chapter Title
• add or modify the Chapter Description (optional)
• add Search Tags (optional, but recommended)
4. Click View in Player to see your changes.
Educational Technology | 20 | 2021-04-26Deleting a Chapter
1. Go to your My Media page and click Edit near the entry you want to edit.
2. Select the Timeline tab. Here, you can view all the chapters and slides in the video.
3. Click on the cue point of the chapter you want to delete from the video.
4. Click Delete Chapter.
5. A confirmation box will appear: click Delete to confirm.
Adding or Editing a Slide
1. In My Media, click Edit next to the entry you want to edit.
2. Select the Timeline tab. Here, you can view all the chapters and slides in the video.
3. Click to place the cursor on the timeline and click the Create a new slide button to
add a slide, or click on the cue point for the slide you want to edit to view its
properties.
4. After you select or upload a slide, you can:
• add or modify the slide image
• add or modify the slide title
• add or modify the slide description (optional)
• add search tags (optional)
Educational Technology | 21 | 2021-04-265. Click View in Player to see your changes.
Deleting a Slide
1. In My Media, click Edit next to the entry you want to edit.
2. Select the Timeline tab.
3. Click on the cue point of the slide you want to delete.
4. Click Delete Slide.
5. A confirmation box will appear. Click Delete to confirm.
Hotspots
You can use the Hotspots tool to add clickable areas to your videos. These hotspots can
lead to other videos, forms, other websites, load files, link to citations, an earlier or later
point in the video, or simply be a bit of text that appears over the video.
1. In My Media, click on the entry you want to trim.
2. Click the Actions menu and click Launch Editor.
3. Click the Hotspots icon on the lefthand side (the third icon from the top).
4. Use the Hotspot tools to choose:
a. Where in the timeline you want your hotspot to appear
b. Where on the video you want your hotspot to appear (click and drag)
c. Add text or a link (optional)
d. Adjust the shape, colour, transparency, and font of your hotspot
For more information, click here.
Replacing Media
In Kaltura, you can replace media and retain the entry’s data, URL and other settings. The
time-based metadata (like chapters and slides) will remain, though after replacement it will
probably be out of sync and will need to be adjusted.
1. In My Media, click Edit next to the entry you want to replace.
2. In Edit Media, select the Replace Video tab.
Educational Technology | 22 | 2021-04-263. Select Upload from Desktop. Locate the file on your hard drive and select it.
4. After the upload is complete, click either Approve, to replace the video, or Cancel
Replacement to cancel.
Deleting Media
1. Locate the video in My Media and click on Edit.
2. Click Delete Media to delete the entry.
Captions in MediaSpace
Creating Captions
Click here for a video demo.
Adding captions to videos makes them more accessible to various groups, including
deaf/Deaf/hard-of-hearing people, people with sensory processing disorders, and people for
whom English is a second language, among others. It also creates a transcript that can be
downloaded by viewers.
Machine captioning (automatic captioning done by computer) is available to all users on
Langara’s Kaltura MediaSpace platform, both from the website at https://stream.langara.ca,
and from within Brightspace via My Tools > My Media. See the steps below.
1. Go to your My Media library and click on the entry (video or audio) you want to
caption
2. Below and to the right of your video, click Actions > Caption and Enrich
3. Scroll down to the bottom of the Order Captions area and click the Submit button (do
not change any of the dropdown menu options: Service, Source Media Language –
currently, only English is available – or Feature)
Turnaround averages about 30 minutes. Once your caption file has been created, it will be
automatically attached to your video and available via the “CC” closed captioning button at
the bottom of any media player.
Captions using this service are hosted briefly on a U.S. Server during the captioning
process, but are deleted once the captioning file has been completed.
Editing Captions
Captions created using the MediaSpace machine captioning service are about 85%
accurate. You can edit your captions for accuracy using the built-in caption editor.
1. Navigate to your media entry and click Actions > Edit
2. Click on the Captions tab below the media entry
3. Click the Edit Captions button to access the caption editor
4. Edit your captions as desired; remember to save often
Click here for a video demonstration of the Closed Caption Editor.
Educational Technology | 23 | 2021-04-26Media Creation Resources
General Resources
• LinkedIn Learning – All Langara students and staff have access to LinkedIn Learning,
which contains plenty of resources on video capture and editing. Log in with your
Computer User ID and password.
o iMovie tutorials
o General video editing
• Using Windows 10 Video Editor – The official guide on using Windows 10’s built-in video
editor.
• The Basics of Video Editing – Lifehacker article by Adam Dachis.
• Vimeo Video School – Created by the Vimeo staff for “beginners of all backgrounds.”
Capturing Media
Your methods for capturing video or audio may vary, but the three most common methods
are via webcam, smartphone, and dedicated camera (a handheld camcorder or digital
camera). Most of these devices will either have a single interface (like the camera) or a
preloaded (native) application for capturing video.
Webcam
Webcam video is often most easily captured in the same programs you will use for editing
(iMovie, Windows Video Editor), while the others will require you to import the captured
video files into another program for editing.
• Web Recorder The Web Recorder is a browser-based webcam recorder built into
Kaltura MediaSpace. Click here to learn more.
• Capturing webcam video with Windows Video Editor
• Capturing webcam video with iMovie
Smartphone
A Smartphone will be the most easily-accessible capture device for most people.
• In iOS, the native video recording app is the Camera app. This has the virtue of a
simple, easy-to-understand interface, but offers limited options for changing settings like
resolution quality. These videos can be easily imported into iMovie.
NOTE: It’s good to remember that Apple-captured video files (iPhone, iPad) will be
most easily edited on a Mac. PC-based editing programs like Windows Video Editor
may not accept Apple formats like MOV, although some third-party video editing
programs may be able to import Apple files.
Educational Technology | 24 | 2021-04-26• Android devices will always come with some kind of pre-loaded video recording app
(usually called Camera, as in iOS), but the interface will vary by device and the version
of your operating system.
Dedicated Camera
If you’re using a dedicated camcorder or digital camera to record your videos, you will
need to first record the video and then import it into a desktop editing program.
Screen Capture
If you want to capture activity on your computer screen (e.g. Powerpoint slides with
narration read into your microphone), there are several software options available:
• Kaltura Capture
Kaltura Capture is a downloadable desktop application (Windows/Mac only) that
offers screen capture, voice recording, and webcam recording, and uploads your
videos directly into your My Media library.
• Click here for more information on using Kaltura Capture
• Click here for a video demo of the Kaltura Capture controls
• Free/open-source
o Jing (download/can store online)
o CamStudio (download)
o Screencast-o-matic (online/runs in browser)
• Paid/Available Through Langara (Most of these applications are available through
your department or are installed in specific labs. Contact IT about availability.)
Note: many of the links below may lead to later versions than the ones installed on-
campus. If these links don’t answer your questions, try searching Google or
Lynda.com for the version you are using.
o Adobe Captivate
o Camtasia
Editing functions are usually built into the screen-capture application; refer to the guides for
each piece of software for instructions. For screen capture software that runs in your
browser, you will need to save/export the finished video to your computer before uploading
it to Kaltura.
TIP: Some screen-capture programs will default to Flash Video file formats that Kaltura
cannot use, like SWF. Make sure to save in a MediaSpace-friendly file format like MP4.
Educational Technology | 25 | 2021-04-26Editing Video
You can perform some basic video editing functions in MediaSpace after uploading your
files, like trimming your video, cutting out sections, and creating clips (new copies of
sections of your media entry), as well as functions like creating Hotspots. See the Managing
Media page for help using the Trim, Clip, and Hotspot tools.
For more advanced editing tasks, MacOS and Windows both have native (free) video
capturing/editing applications, and there are numerous free and paid basic editing
apps available for iOS and Android (though most have fairly limited features). There are
also a number of free third-party and retail desktop applications available, such
as Avidemux and AVS Video Editor.
Note: There is a 2GB size limit on media files. Anything larger than 2GB may not upload
correctly.
Windows
In Windows, the native application is now called Video Editor. In older versions of Windows,
it was known as Windows Movie Maker (pre-Windows 7) or Windows Live Movie
Maker (Windows 7).
• Basic video editing in Windows Video Editor
Mac OS X
MacOS machines will come free with iMovie, a good basic video editor.
• Basic video editing in iMovie
Free Third-Party Video Editing Applications
There are numerous free third-party editing applications available. A few of the most
popular are listed below, but there are many to choose from.
• Avidemux – recommended
• Shotcut
• VideoPad
• Lightworks – for slightly more advanced users: check out the beginner’s guide.
• Some others
Educational Technology | 26 | 2021-04-26Retail Video Editing Applications
If you want to go the more advanced route, there are a number of more professional-level
video editing suites available for purchase. These are a few of the industry standards:
• Adobe Premiere (Windows, OS X)
• Final Cut Pro (OS X)
• Sony Vegas (Windows)
Advanced
By default, MediaSpace converts and compresses any uploaded video into a variety of
formats playable on a wide range of devices, so it’s not necessary to fully understand all the
details of video resolutions, codecs and formats. If, however, you are having trouble
uploading files, it’s a good idea to check and see whether your files conform to Kaltura’s
preferred formats and codecs. Most video editors will offer you options when
saving/exporting/publishing a video file including resolution, codecs, and file size. If you
want to know more, see the section below.
File Size and Resolution
• Kaltura has a file size limit of 2GB. A number of factors may affect file size;
generally, a higher-quality file will take up more storage space. When saving your
videos, try to keep them well under 1GB in size. The larger a file the longer it will
take to upload and process. If a file is too big for Kaltura, you will get an error and be
unable to upload it. (Here is a good basic explanation of file compression.)
• Resolution refers to the visible dimensions of a picture or video, usually quoted
in width x height in pixels. For example, a resolution of 1024 x 768 means a video
is 1024 pixels wide by 768 high; this is a pretty standard sized setting for a computer
monitor.
• Choose the highest quality possible, unless you are having difficulty with file size.
Kaltura will convert your video into multiple different formats and resolutions, and this
is easier to do with higher-quality input.
File Formats
The following file formats are supported by Kaltura:
o Supported Video File Formats:
flv, asf, qt, mov, mpg, mpeg, avi, wmv, mp4, m4v, 3gp, vob
o Supported Image File Formats:
jpg, jpeg, bmp, png, gif, tif, tiff
o Supported Audio File Formats:
flv, asf, wmv, qt, mov, mpg, avi, mp3, wav, mp4, wma, 3gp, vob
Educational Technology | 27 | 2021-04-26Codecs
A video file contains a vast amount of information, so most video files are compressed so
that your computer can read and play them. Codec stands for “code/decode” or
“compressor/decompressor,” and codecs are contained in most video files. There are a
number of different video and audio codecs, and the common ones vary by file format. It’s
best to refer to the guides for specific programs to figure out which codec you should be
using (or if you need to worry about the codecs at all), but for reference, the following
codecs are supported by Kaltura.
• Video Input Codecs supported by Kaltura
Divx (Div3/4/5)/DX50, DV, H263, H264/AVC, MPEG-4 Visual, MPEG-1/2, MJPG,
MP42/3, IV40/50 (Indeo codecs), RV30/40, RMVB, FLV1/4, VP3/5/6/7/8, SVQ1/3
(Sorenson), XVid, Theora, WMV1/2/3, VC1, VP8, ProRes 422, ICOD, DVCPRO.
PXLT
• Audio Input Codecs supported by Kaltura
MP3, MP1/2, AC3, AAC, Vorbis, AMR, PCM, WMA7/8/9, WMSpeech, FLAC, QDM2,
RA, Nellymoser, Cook, GSM, SPEEX
• Links to more information on video codecs and formats:
o https://en.wikipedia.org/wiki/Comparison_of_video_codecs
o https://en.wikipedia.org/wiki/Comparison_of_container_formats
o https://lifehacker.com/5893250/whats-the-difference-between-all-these-video-
formats-and-which-one-should-i-use
Educational Technology | 28 | 2021-04-26You can also read