Late-Breaking News About Logic Express 8
←
→
Page content transcription
If your browser does not render page correctly, please read the page content below
Late-Breaking News
About Logic Express 8

This document provides updated information about Logic Express 8 and covers these
topics:
 “Late-Breaking News About Logic Express 8.0.2” on page 2
 “Late-Breaking News About Logic Express 8.0.1” on page 8
 “Late-Breaking News About Logic Express 8” on page 15
 “Corrections to the Logic Express Documentation” on page 41
 “Accessing the Late-Breaking News Document” on page 45

For more information about Logic Express (overview, technical specifications, and so
on), visit the Logic Express website at http://www.apple.com/logicexpress.

                                                                                       1
Late-Breaking News About Logic Express 8.0.2
Logic Express 8.0.2 is a maintenance release that addresses isolated reliability and
stability issues, along with minor corrections to the following areas of the application:
 Working With Markers in the Bar Ruler (p. 2)
 Working With Tracks (p. 3)
 Creating Your Arrangement (p. 5)
 Recognizing the Color of Inactive Takes (p. 6)
 Viewing the Load Meters (CPU/HD) (p. 6)
 Key Command Changes (p. 7)
Working With Markers in the Bar Ruler
This section provides some minor changes with regard to how you work with markers
in the Bar ruler.
Deleting Markers or Creating a Cycle From a Marker
When using the playhead to zoom in or out, it is easy to accidentally move markers in
the Bar ruler.
To avoid this issue in Logic Express 8.0.2, you are now required to hold down the
Command key when doing the following:
 Dragging a marker down out of the Bar ruler to delete it
 Dragging a marker into the top part of the Bar ruler to create a cycle
Editing Marker Names
Prior to Logic Express 8.0.2, it is possible to edit a marker name in the Bar ruler by Shift–
Control–double-clicking a marker.
In Logic Express 8.0.2, this is done by Option–double-clicking a marker.
2
Working With Tracks
This section outlines some corrections with regard to working with tracks.
Renaming Tracks in the Track Header
The Tab key now works correctly when renaming tracks in the track header.
 Using Tab, after entering text in the text input field, confirms the current edit and
activates the next (lower) track for editing.
 Using Shift-Tab, after entering text in the text input field, confirms the current edit
and activates the previous (upper) track for editing.
Resizing the Track List
It is no longer an issue to locate the point at which you can resize the track list.
To resize the track list:
1 Position the pointer over the dividing line between the track list and the composition area.
Resize pointer
2 When the arrow pointer changes to the Resize pointer, drag the line to the left or right.
3
Indicating the Mute State of Regions
You can now clearly distinguish between muted and unmuted regions on muted tracks.
 Muted regions are indicated by a dot that precedes the region name; the audio or
MIDI data section is displayed in gray.
 Unmuted regions are indicated by a gray surrounding frame (no dot precedes the
region name).
Unmuted regions
on a muted track
Unmuted and
muted regions on
a muted track
4
Creating Your Arrangement
This section discusses changes that have been made within the Arrange window.

Clicking Region and Track Names in the Inspector
In Logic Express 8 and Logic Express 8.0.1, the results of clicking region and track
names, or their disclosure triangles, in the Region and Track Parameter boxes are not
consistent.

In Logic Express 8.0.2, the correct behavior is as follows:
 Clicking the disclosure triangle operates the disclosure triangle, showing or hiding
   the contents of the Region or Track Parameter box.
 Double-clicking the region or track name opens a text input field, allowing you to
   edit the region or track name.

   Result of clicking the                                 Result of double-clicking
   disclosure triangle                                    the track name

Packing Selected Regions Into a Folder
Packing selected regions into a folder behaves as expected in Logic Express 8.0.2:
 If all selected regions are located on different tracks, a new folder track will be created.
 If all selected regions are located on the same track, the folder will be created on that
  very track, and not on a separate folder track. When moving a folder with just one
  content track between tracks of matching type, the content will always play back via
  the channel strip of the hosting track.

                                                                                                 5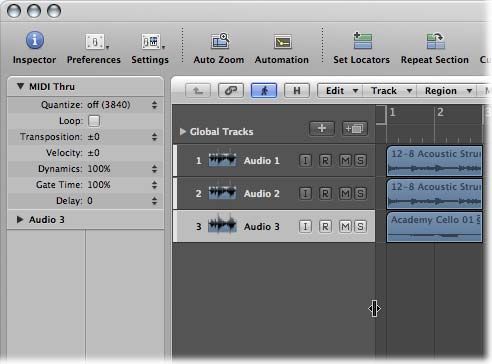
Recognizing the Color of Inactive Takes
      In Logic Express 8.0.2, it is no longer an issue to recognize the color of an inactive take,
      as inactive takes are surrounded by a frame in the chosen color.

                                     Inactive take

      Viewing the Load Meters (CPU/HD)
      In Logic Express 8.0.1, it is not possible to open the load meters as a separate window
      via a menu command. The following change addresses this issue in Logic Express 8.0.2.

      To open the load meters as a separate window:
    m Choose Options > Audio > System Performance from the main menu bar.

6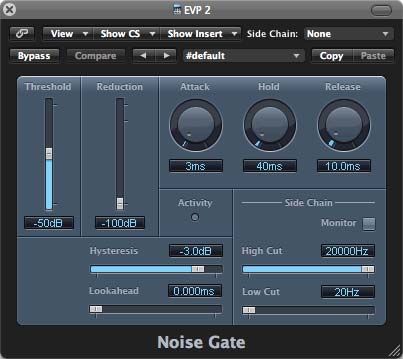
Key Command Changes
This section covers changes to key commands in Logic Express 8.0.2.

Renamed Key Command
The following key command has been renamed:

Old name                                     New name
Split Regions/Events by Locators             Split Regions/Events by Locators or Marquee Selection

Reassigned Key Commands
Since Mac OS X v10.5 Leopard occupies keyboard shortcuts that were used in
Logic Express key commands, the following changes have occurred in the default key
command sets:

Key command                        Old assignment                  New assignment
Set Locators by Marker and         Command–Up Arrow                Option–Command–Up Arrow
Enable Cycle
Set Locators by Previous Marker    Command–Left Arrow              Option–Command–Left Arrow
and Enable Cycle
Set Locators by Next Marker and Command–Right Arrow                Option–Command–Right Arrow
Enable Cycle
Zoom Horizontal Out                Control–Left Arrow              Command–Left Arrow
Zoom Horizontal In                 Control–Right Arrow             Command–Right Arrow
Zoom Vertical Out                  Control–Up Arrow                Command–Up Arrow
Zoom Vertical In                   Control–Down Arrow              Command–Down Arrow

Additional Key Commands
The following key commands have been added:
 Un/disclose Take Folder
 Flatten Take Folder
 Flatten and Merge Take Folder
 Rename Take or Comp
 Delete Take or Comp
 Export to New Track

                                                                                                     7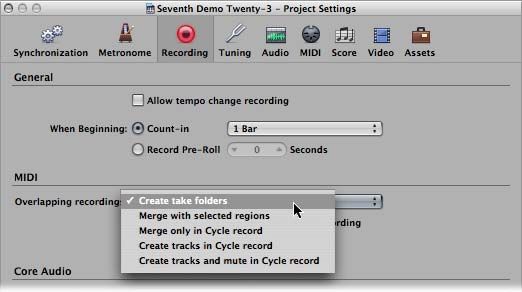
Late-Breaking News About Logic Express 8.0.1
Logic Express 8.0.1 is a maintenance release that addresses isolated reliability and
stability issues, along with minor corrections to the following areas of the application:
 Using the Right Mouse Button to Open the Tool Menu (p. 8)
 Copying and Pasting Audio Configurations (p. 8)
 Color Changes to Giant Bar and Giant SMPTE Displays (p. 9)
 Displaying SMPTE View Offset (p. 9)
 Disabling Text Input in Marker Text Mode (p. 10)
 Transient Display in the Beat Mapping Track (p. 11)
 Managing Projects (p. 12)
 Channel Strip Level Fader Display (p. 13)
 Hiding the Transport Bar (p. 13)
 Creating Overlapping MIDI Recordings (p. 14)
 Renamed Key Commands (p. 14)
Using the Right Mouse Button to Open the Tool Menu
Right-clicking now works as expected when the Right Mouse Button: Opens Tool
Menu setting is chosen in the Logic Express > Preferences > Global > Editing tab.
 Right-double-clicking in the working area of the active window resets the assigned
tool to the Pointer tool.
 Right-clicking in the working area of the active window opens the Tool menu with
the Pointer tool (and not the currently selected tool) located under the mouse cursor
position.
 When you choose a tool from the Tool menu by right-clicking, the tool is assigned to
the left mouse button.
Copying and Pasting Audio Configurations
There is no longer an issue to copy and paste entire mixer setups between projects.
To copy an audio configuration:
1 Select the project that contains the setup you want to copy.
2 Open the Mixer.
3 Choose Options > Copy Audio Configuration.
To paste an audio configuration:
1 Select the target project.
2 Open the Mixer.
3 Choose Options > Paste Audio Configuration.
8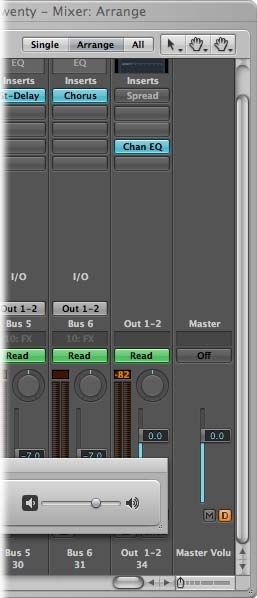
Color Changes to Giant Bar and Giant SMPTE Displays
There is no longer an issue to distinguish clearly between the Giant Bar and Giant
SMPTE Display windows, as a specific color has been reassociated with both windows.
 Bar display position values are in green.
 SMPTE display position values are in blue.
Displaying SMPTE View Offset
There is no longer an issue to individually set each open Transport bar window and
Giant SMPTE Display window to display SMPTE time with or without SMPTE view offset.
To access the Use SMPTE View Offset setting on an individual basis:
m Control-click (or right-click) any open Transport bar display area.
m Control-click (or right-click) any open Giant SMPTE Display area.
9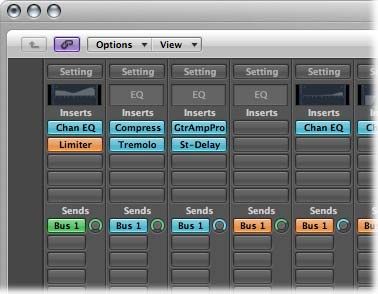
Disabling Text Input in Marker Text Mode
The Marker Text Edit button, located in all Marker Text areas, now works as expected.
Marker Text Edit button
 Active: Marker text editing is possible.
 Inactive: Marker text editing is not possible.
To activate text editing mode, do one of the following:
m Enable the Marker Text Edit button.
m Double-click in the Marker Text area.
m Double-click a marker name in the Marker List (if the Marker Text area is not open).
To deactivate text editing mode:
m Disable the Marker Text Edit button.
Note: Deactivating the Marker Text Edit button prevents any unwanted text edits,
which can easily happen if you use key commands while the Marker Text area is open.
10Transient Display in the Beat Mapping Track
When using the Beat Mapping track in Logic Express 8, it is difficult to identify
transients, due to the waveform overview being too small. The following changes
address this issue in Logic Express 8.0.1:
Normal view Zoomed view
Waveform Zoom tool Arrange window grid in
Beat Mapping track
 The Waveform Zoom tool (located to the left of the horizontal zoom slider in the
Arrange area) now affects both the waveform in the audio region and the waveform
in the Beat Mapping track.
 The waveform display now fills the whole Beat Mapping track.
 The Beat Mapping track now also displays a grid-like layout, as displayed in the
Arrange area.
11Managing Projects
This section provides some minor corrections and additional information with regard
to how projects are managed.
Saving a Project
When you use the File > Save As command to save your project to a new location
(outside the current project folder) and select the Include Assets checkbox, the new
project folder will contain all audio files used in the “old” project’s Arrange area. The
“Copy external audio files to project folder” checkbox does not affect this behavior.
Consolidating a Project
The menu command to leave used audio files (File > Project > Consolidate > Audio
Files: Leave Them) has been removed from the Consolidate Project dialog.
If, for some reason, you don’t wish to include used audio files, don’t enable the Include
Assets checkbox in the Save As dialog.
Relative and Absolute Recording Paths
In order to correct some issues with regard to project management and recording
paths, both relative and absolute recording paths are now used in Logic Express 8.0.1.
 Relative recording path: When a project is saved with Include Assets selected, and the
recording path is pointing to a location inside the project folder, the recording path
will be “relative.” This means that the recording path for the audio data will move
with the project, making it possible to move the project folder in the Finder or use
the Save As command.
 Absolute recording path: When manually setting a recording path (File > Project
Settings > Recording > Core Audio Recording Folder) outside the current project
folder, the recording path will be “absolute.” This means that the recording path for
the audio data will always remain the same, even after using the Save As command
to save as a new project or when moving the project file in the Finder. This is
important if you prefer to record all audio data into a single location outside the
project folder.
Note: When a Logic Express 8.0.1 project, with a relative recording path, is opened in
Logic Express 8, Logic Express will ask for the recording path again.
12Channel Strip Level Fader Display
In Logic Express 8, the channel strip Level fader display omits the decimal digit when
displaying three digits and the minus symbol. Logic Express 8.0.1 resolves this issue by
omitting the minus symbol instead.
Before view After view
Hiding the Transport Bar
Hiding the Transport bar works as expected in Logic Express 8.0.1.
To show or hide the Transport bar, do one of the following:
m Enable (to show) or disable (to hide) the Transport setting in the Arrange window View
menu.
m Position the pointer in the space between the Arrange area and Transport bar. When
the mouse pointer turns into the Resize pointer, drag up (to show) or down (to hide).
Resize pointer
13Creating Overlapping MIDI Recordings
The following MIDI Recording project settings could not be accessed in Logic Express 8:
 Create tracks in Cycle record
 Create tracks and mute in Cycle record
Logic Express 8.0.1 addresses this issue by providing these settings in the “Overlapping
recordings” menu in the MIDI section of the Recording Project Settings window (File >
Project Settings > Recording).
 Create tracks in Cycle record: In Cycle mode, recording over an existing MIDI region
will automatically create a new track for each cycle repetition. When you stop
recording, you can work with each newly recorded region independently of the
others.
 Create tracks and mute in Cycle record: In Cycle mode, recording over an existing MIDI
region will automatically create a new track for each cycle repetition. Each previous
track is automatically muted while recording. When you stop recording, you can work
with each newly recorded region independently of the others.
Renamed Key Commands
The following key commands were renamed in Logic Express 8.0.1:
Old name New name
Go to Last Play Position Go to Last Locate Position
Stop and Go to Last Play Position Stop and Go to Last Locate Position
Play or Stop and Go to Last Play Position Play or Stop and Go to Last Locate Position
Merge Regions Merge Regions/Notes
14Late-Breaking News About Logic Express 8
This section provides information on additions and changes made to Logic Express 8
after the Logic Express 8 documentation was completed.
General Changes to Logic Express 8
The following outlines information on general application enhancements or changes.
Key Commands
This section covers changes to key command behaviors.
New Logic Express 8 Default Key Commands
When installing Logic Express 8 on a system with existing Logic 7 preferences, the
Logic 7 key commands are not automatically imported. The Logic Express 8 default key
command set—matching the connected keyboard and chosen language—is
automatically used.
To import your Logic 7 key commands into Logic Express 8:
1 In the Key Commands window, choose Options > Import Key Commands.
2 Select the Logic 7 preferences file in the file selector—you can find it in
~/Library/Preferences/Logic/com.apple.logic.express.
Logic Express 8 will inform you about all changes which apply to your key command
set at this point.
Note: Some Logic 7 commands may work differently—or may not be functional at all
in Logic Express 8.
To switch back and forth between the Logic Express 8 and Logic 7 key command sets,
you need to export the Logic 7 key command set in the Logic Express 8 format.
To export a key command set in Logic Express 8:
1 In the Key Commands window, choose Options > Export Key Commands.
2 Type a name such as “My Logic 7 Key Commands” and click Save.
You can access this newly saved key command set in the Options > Presets menu of
the Key Commands window.
15Additional Key Commands
The following key commands have been added to Logic Express 8.
Additional Nudge Key Commands
Logic Express 8 now provides the following nudge key commands:
 Set Nudge Value to Sample
 Nudge Region/Event Position Right by Sample
 Nudge Region/Event Position Left by Sample
 Nudge Region/Event Length Right by Sample
 Nudge Region/Event Length Left by Sample
 Nudge Region/Event Length Right by SMPTE Bit
 Nudge Region/Event Length Left by SMPTE Bit
 Nudge Region/Event Length Right by 1/2 Frame
 Nudge Region/Event Length Left by 1/2 Frame
 Nudge Region/Event Length Right by 5 Frames
 Nudge Region/Event Length Left by 5 Frames
Additional Playback Key Commands
Logic Express 8 now provides the following playback key commands:
 Stop or Play From Last Position
 Play or Stop and Go to last Play Position
Hard-Wired Key Commands
The following key commands are now hard-wired to specific keys, and can not be
changed. These key command assignments are dimmed (and therefore inaccessible) in
the Key Commands window:
 New: Command-N
 Open: Command-O
 Save: Command-S
Renamed Key Commands
Some key commands were renamed to more accurately describe their functionality
when you have made a marquee selection (for full details, see “Marquee Operations”
on page 23).
Key Combination Area and Modifier Checkboxes Are Now Dimmed
The key combination area and modifier checkboxes in the Key Commands window are
now always dimmed, as they are display-only fields (you can not edit these fields
directly). Use the Learn buttons when you need to change a key command assignment.
16New Preferences and Project Settings
The following preferences and project settings have been added to Logic Express 8.
New I/O Safety Buffer Preference
A new I/O Safety Buffer checkbox has been added to the Logic Express > Preferences >
Audio pane. It is found below the I/O Buffer Size menu.
When activated, Logic Express uses an additional buffer to process audio output
streams. This provides a safeguard against crackling noises which may occur when
using very low I/O buffer size settings. Essentially, it provides a little more time for the
CPU to finish processing the output buffer data.
You should note that use of the I/O Safety Buffer preference will increase the output
latency, and therefore the round trip (input plus output) latency. You may, however, be
able to choose a smaller I/O buffer size when the I/O Safety Buffer preference has been
activated.
Obviously, you should always aim for the lowest possible latency, without introducing
unwanted artifacts. The I/O Safety Buffer preference may help, but if you find that it
doesn’t improve things on your system (or suit your use of Logic Express), then disable
it (and select a larger I/O buffer size setting).
Note: You must click Apply Changes, which re-launches the audio engine, before changes
to these parameters take effect. Closing the Preferences window has the same effect.
17New Bypassing Control Surfaces Preference
A new “Bypass All while in background” checkbox has been added at the top of the
Logic Express > Preferences > Control Surfaces > Preferences pane.
Activating it allows you to share your control surface with other applications, when
Logic Express 8 is not the active program.
New Video Output Project Setting for Digital Cinema Desktop
When you set the Video Output menu to Digital Cinema Desktop (found in the File >
Project Settings > Video pane), the new Anamorphic checkbox appears.
In some rare cases (such as when a 4:3 video signal contains a 16:9 picture), Logic Express
may not recognize the video format automatically. Enable this checkbox if your video
appears horizontally compressed or stretched.
Changed Automatic Backup Copies Behavior
When you save a project, Logic Express 8 now saves up to ten (10) backup copies in the
project folder’s Project File Backups folder. The backup files are named after the project
file, with numbers 00 to 09 appended to the project name.
18Using Apple Remote With Logic Express 8
You can use your Apple Remote to control Logic Express 8 from a distance. A short click
offers the following functions:
Play or Stop Previous track
Rewind Forward
Next track
MENU Record
A long click offers the following functions:
Stop
Fast Rewind Fast Forward
MENU
Note: The Apple Remote is compatible with Apple products introduced in 2005 or later
that have a built-in Infrared (IR) receiver. Front Row is not available while Logic Express
is running.
19Arrange Window
This section provides information on new features and functions in the Arrange window.
Interface Changes
These changes include graphical enhancements and new or altered behaviors that
improve usability.
Playhead Position
The position of the playhead has been enhanced as follows, avoiding potential
problems when editing the cycle:
 When one ruler is displayed: The playhead starts in the lower half of the Bar ruler.
 When two rulers are displayed: The playhead starts at the top of the Bar ruler. You can
click on the top or bottom third of the Bar ruler to position the playhead. Clicking the
middle third allows you to edit the cycle.
Disabled Cycle No Longer Shows Edit Handles
When you disable a cycle in the Bar ruler, the cycle handles disappear, indicating that it
can not be edited.
More Space Between Track Header Record and Other Track Buttons
The space between the Record and adjacent track header buttons has been increased.
This reduces the risk of accidental track arming/recording.
20Changes to Region Appearance
Several graphic changes have been made to the appearance of regions.
Region Loops
Region loops are now displayed with less color, making them easier to differentiate
from regions.
Region loops
Muted Regions Include Colored Outline
When you mute a region, the gray body of the region is now framed in the region color.
This makes it easier for you to identify tracks or regions associated with muted regions.
Region Content Is Always Displayed
The Arrange window View > Region Content setting has been removed, as content is
now displayed by default.
Coloring Regions
If all regions on a particular track are selected (and no regions on other tracks are
selected), coloring them alters the hue of all selected regions. This also changes the
color of the selected track’s channel strip (making the behavior identical to the one
that applies when no region is selected).
21Opening the Editing Area
Double-clicking regions in the Arrange window opens or closes the associated editor.
This now works as follows:
 The first double-click opens the editor, and displays the contents of the clicked region.
 Double-clicking the displayed region a second time closes the editor.
 Double-clicking a different region displays the newly-clicked region in the open
editor. The editor is assigned key focus.
Note: When the editor is linked, clicking the region once displays the region in the
editor as well, but the Arrange window retains key focus.
Track Selection Changes
Logic Express 8 includes the Preferences > Global > Editing > Select Regions on Track
Selection preference. If enabled, region selection behaves as in earlier Logic versions—
selection of a track automatically selects all regions on the track lane (or regions within
the cycle or autopunch area if Cycle or Autopunch modes are enabled).
Disable the preference if you don’t want regions to be automatically selected when the
track header is chosen. When the preference is disabled:
 Option-clicking the track header or associated channel strip will continue to select
the track and all associated regions.
 Option-Shift-clicking will add the selected track’s regions to the current selection.
Transmitting MIDI Events on Track Selection
You now need to Option-click a MIDI track to transmit the track instrument bank/
program change, volume, and pan parameters—a standard click will not transmit this
information. (Only active parameters in the Instrument Parameter box are sent.)
22Marquee Operations
The new Bar ruler marquee stripe can be used as a selection and navigation tool. When
activated, a thin marquee stripe is shown at the top of the Bar ruler. You can simply
drag in this area to create a marquee (selection area).
Marquee stripe
To activate the marquee stripe:
m Click the note icon at the right-hand end of the Bar ruler, and choose the Marquee
Stripe setting from the menu.
To make a marquee selection:
m Click-drag in this area to create a marquee stripe selection area (also shown on selected
Arrange tracks).
To remove the marquee selection:
m Click outside the marquee selection.
To add or remove individual tracks from the marquee selection:
m Shift-click on track names in the track list.
Editing the Marquee Selection Length or Position
You can extend or reduce the length of the marquee selection by moving the start or
end point of the marquee to:
 Transients in audio regions
 Note on or off positions in MIDI regions
 Region start or end positions
To change the marquee start or end point:
m Use the Left or Right Arrow keys to modify the marquee end point.
These are the default Select Previous (or Next) Region/Event, or set Marquee End to
Previous (or Next) Transient key commands, which behave as described above,
dependent on the type of region selected (when the marquee stripe is visible).
23m Hold Shift while using the arrow keys to move the marquee start point.
These are the default Toggle Previous (or Next) Region/Event, or Set Marquee Start to
Previous (or Next) Transient key commands, which behave as described when the
marquee stripe is visible.
To move the entire marquee, either:
m Press Shift-Home, the default Select First, or Shift Marquee Selection Left key command.
m Press Shift-End, the default Select Last, or Shift Marquee Selection Right key command.
Playback With an Active Marquee Selection
Playback starts at the left border, and ends at the right border, of an active marquee
selection. If you create a marquee selection while Logic Express 8 is running, however,
playback will not stop at the end of the marquee selection.
Recording With an Active Marquee Selection
If you start recording when a marquee selection is active, the following happens:
 Autopunch mode is automatically enabled, and the autopunch locators are set to
match the marquee selection. The marquee selection is removed (in essence, it’s
replaced by the autopunch locators).
 All tracks within the marquee selection are record-enabled; all other tracks are
record-disabled.
Using the Marquee Selection to Create Track Automation Nodes
When you edit automation data that is spanned by a marquee selection, two
automation nodes are automatically created at the left, and two at the right, border of
the marquee selection. This provides a quick way to define and create automation data
by converting the marquee selection into automation nodes.
You can edit the automation
data spanned by a marquee
selection to convert the
marquee selection into
automation nodes.
24Changed Key Commands
When a marquee selection is active, the following (key) commands behave differently:
 “Zoom to fit Selection vertically and horizontally, store Navigation Snapshot”
(default: Control-Option-Z) and “Zoom to fit Selection horizontally, store Navigation
Snapshot”: Both key commands change the current zoom level to fit the marquee
selection.
 Deselect All (default: Shift-Command-A): Deselects all current selections, including the
marquee selection.
 Select All Following (default: Shift-F) and Select All Following of Same Track/Pitch
(default: Shift-Option-F): Both key commands extend the marquee selection—over
all tracks within a marquee selection—to the project end point.
 Select Inside Locators (default: Shift-I): Sets the marquee selection to match the locators.
 Deselect Outside Locators (default: Shift-O): Removes the portion of the marquee
selection that does not fall within the locators.
 Scroll to Selection: Moves the visible section of the edit window to mirror the
marquee selection.
Renamed Key Commands
The following key commands were renamed—to more accurately describe their
functionality when you have made a marquee selection:
Old name New name
Select Next Region/Event Select Next Region/Event, or Set Marquee End to Next Transient
Select Previous Region/Event Select Previous Region/Event, or Set Marquee End to Previous
Transient
Toggle Next Region/Event Toggle Next Region/Event, or Set Marquee Start to Next Transient
Toggle Previous Region/Event Toggle Previous Region/Event, or Set Marquee Start to Previous
Transient
Select First Select First, or Shift Marquee Selection Left
Select Last Select Last, or Shift Marquee Selection Right
Set Region/Event Start to Set Region/Event/Marquee Start to Playhead Position
Playhead Position
Set Region/Event End to Set Region/Event/Marquee End to Playhead Position
Playhead Position
25General Changes to Linear Editing Windows
The following behaviors now affect all linear editing windows, including the Arrange
window.
Zooming With the Playhead
You can now use the playhead to zoom in or out. Simply drag the top of the playhead
(the section in the Bar ruler) up or down.
Time Linear Bar Ruler Views
The appearance of the Bar ruler can be changed by clicking the small note or clock
icon at the ruler’s right-hand edge. This opens a menu of alternate Bar and (SMPTE)
Time display settings, including the new time linear views. These ensure that grid lines
and region lengths are altered with tempo changes. (The bar linear views of previous
Logic Express versions spaced grid lines and region lengths consistently, even when the
project contained tempo changes.)
To activate a time linear view:
m Choose the Time, or Time and Bar setting from the menu.
To activate a bar linear view:
m Choose the Bar, or Bar and Time setting from the menu.
Enhanced Beats From Region Function
The Beats from Region function in the global Beat Mapping track has been enhanced,
allowing you to use automatic beat mapping in a more musical way. You can now
choose between two algorithms in the Set Beats by Guide Region(s) dialog:
 Tolerate missing or additional events: This new algorithm only uses tempo relevant
transients for the beat mapping process (selection is based on the project’s current
time signature). This avoids drastic tempo changes, which are usually undesirable.
You should use this algorithm for audio regions.
 Use exactly all existing notes: This algorithm uses every detected transient for the
automatic beat mapping process. You’ll only get usable results when using this
algorithm to analyze (MIDI) regions that provide a note for each tempo significant
transient.
26To use the new Beats from Region algorithm:
1 Select the region you want to map the project tempo display to, then click the Beats
from Region button in the Beat Mapping track.
Note: You will achieve the best results with reasonably tight percussive material. The
algorithm will not work well on recordings of performances that have been played too
far off the bar, or provide inconsistent tempo information. The same is true for very
complex, layered drum tracks or melodic material that doesn’t provide enough
transient information.
2 In the enhanced Set Beats by Guide Region(s) dialog, choose the new “Tolerate missing
or additional events” algorithm.
3 Choose the most appropriate note value in the Note Value menu.
The Note Value defines the timing resolution that is used to create the map.
4 Click OK to perform the automatic beat mapping process.
Logic Express scans the region for transients that provide a consistent tempo, and
inserts tempo changes into the Tempo track—thus mapping the tempo display to the
region. Transients that are not consistent with the found tempo are ignored.
∏ Tip: To make sure that a certain beat is always part of the beat mapping process,
assign the respective transient manually before using the Beats from Region function.
The resulting map will always contain this manually mapped position. If Logic Express
is not able to find a consistent tempo, you should try the following: Manually map (up
to) two significant beats and click the Beats from Region button again. The two manual
mapping points define a resulting tempo that will be used as the basis for automatic
beat mapping. If this method fails, record a MIDI region which contains synchronized
regular notes, and use this as a guide region.
To automatically beatmap audio material that contains tempo changes:
1 Cut the audio material at the precise position of any tempo changes.
2 Lock the SMPTE position of each audio region.
3 Select the first region and perform the automatic beat mapping process as described
above.
4 Continue with all following audio regions.
27Changes to Other Windows
This section provides information on changes to existing, or new, features and
functions in other windows.
Changed Link Behavior
The new interface of Logic Express 8 has improved the link behavior of the Piano Roll
and Hyper Editor windows.
Piano Roll Editor
The Piano Roll Editor Link button now has only two states: On and Off. On behaves as
follows:
 If you select a single region in the Arrange area, the Piano Roll Editor only displays
the contents of this region—with start and end markers shown in the Bar ruler.
 If you select multiple regions in the Arrange area, the Piano Roll displays the contents
of all selected regions.
The new interface makes the Piano Roll Editor’s Hierarchy button and Show Selected
Regions Only setting obsolete, so they were removed.
28Hyper Editor
The Hyper Editor Link button now has only two states: On and Off.
Switching it on activates Content Link: The Hyper Editor always displays the contents
of the region selected in the Arrange area. The display updates whenever the selection
changes.
The new interface makes the Hyper Editor’s Hierarchy button obsolete, so it was removed.
Piano Roll Editor Auto Zoom
The Piano Roll Editor’s View menu offers the new Auto Zoom setting. When active, a
newly opened Piano Roll Editor will automatically switch to a horizontal zoom level that
displays all events in all selected regions.
Audio Bin
The Audio Bin tab now provides a quick way to locate missing audio files: Simply click
the exclamation mark beside the audio file name to trigger the find process.
Click here to trigger the
find process.
Missing region
Opening Windows
The Open Window commands in the Window menu (and associated key commands
such as Open Score Editor: default assignment: Command-3) now check if a window of
the requested type is open in the current screenset.
 If the requested window type is in the background of the screenset, it is brought to
the foreground.
 If the requested window type is already in the foreground, another window of the
requested type is opened.
 If the requested window is not open in the current screenset, it will be opened.
This behavior streamlines window management, avoiding accidental launches of
multiple windows of the same type.
29Recording
This section discusses changes to Recording functions.
Changes to Take and Comping Operations
The following changes have been made to the Logic Express 8 take and comping
functions.
Selecting Takes
You can now use one of the following methods to select takes:
 When viewing a closed take folder: Control-click the take folder, then choose the
desired take from the shortcut menu.
 When viewing an open take folder (and a take, not a comp is active): Simply click the
desired take—you no longer need to click the take header. Option-clicking anywhere
on an audio take (region header or body) selects the complete take. To reactivate the
comp you were working on, choose it from the Take Folder menu.
Opening Multiple Take Folders
You can now Option-click the disclosure triangle of multiple selected take folders to
open them all.
Recording Over Existing Regions
When you record over an existing region, a take folder is only created if one of the
following applies:
 The new recording overlaps the existing region by a length which exceeds the
count-in or pre-roll duration you have set (in File > Project Settings > Recordings).
 The new recording overlaps the existing region by more than 50%.
Selected Audio Tracks Are Automatically Record-Enabled
If you start recording when no audio track is record-enabled, the selected audio track is
now automatically record-enabled.
30Mixing
The following outlines changes to Mixer functions.
Low Latency Safe Function
When Low Latency mode is active, you have access to the Low Latency Safe setting—in
each individual Send menu—of audio and software instrument channel strips. It is also
available in aux channel strips that are hosting live input signals.
In normal circumstances, activation of Low Latency mode mutes the signal paths of all
sends that create a latency which exceeds the set Low Latency Mode Limit. Switching a
particular send to Low Latency Safe mode will keep the send signal path open.
Please note that the signal path of the send signal (beyond the send) is not subject to low
latency processing, and will be delayed in accordance with the current plug-in delay
compensation setting. Given this behavior, use of the Low Latency Safe setting on sends
routed to effects such as distortion, modulation, or rhythmic delays is not ideal. It may,
however, be of particular use for reverbs—especially in cases where the current plug-in
compensation delay time falls within the range of a reverb’s pre-delay time.
To activate or deactivate the Low Latency Safe function for a particular send:
m Click-hold on the desired Send slot, and choose Low Latency Safe from the menu.
Note: You can only access this Send menu setting when Low Latency mode is active,
and the respective channel strip is in record or live mode.
31Changed Send and Insert Colors
Logic Express 8 uses the following color scheme for sends and inserts, making it easier
for you to recognize sends that are not using Low Latency Safe mode:
Post pan send
The orange Send slot
indicates that the send is
not switched to Low
Latency Safe mode.
Pre fader, pre pan
Pre-pan send, not using
Low Latency mode
Post fader, pre pan Post fader, post pan
 The color of the Send slot denotes pre or post fader routing, or Low Latency Safe
mode. Pre fader send slots are displayed in green, post fader send slots in blue.
 The color of the Send level knob ring denotes pre or post panorama routing. A green
ring denotes pre-pan, a blue ring post-pan routing.
 When Low Latency mode is enabled, sends and inserts appear as follows:
 Sends: Only sends which are low latency safe remain blue (or green)—all others
turn orange.
 Plug-ins: All Insert slots which are Low Latency mode disabled turn orange.
Handling Multiple Channel Strips
There are many situations where you may need to reconfigure more than one channel
strip at a time. Logic Express 8 provides the following features which can accelerate
these types of tasks.
Deselecting Multiple Channel Strips
You can now deselect multiple selected channel strips by clicking either an unselected
or selected channel strip in the Mixer (previously, you had to click an unselected channel
strip or the Mixer background). In either case, the clicked channel strip will be selected.
32Inserting and Removing Plug-ins When Multiple Channel Strips Are Selected
Inserting and removing plug-ins when multiple channel strips are selected now works
as follows:
 You can simultaneously insert either instrument or effect plug-ins into several
selected channel strips.
 You can click any of the used or unused Insert or Instrument slots on any of the
selected channels.
 Choosing an effect or instrument from the Plug-in menu inserts the selected plug-in
into all selected channel strips—if the corresponding Insert or Instrument slot is
empty on the other selected channel strips. Existing plug-ins on other channel strips
are not changed.
 When you replace a plug-in, all existing plug-ins in the associated slot number (of
other selected channel strips) are also replaced by the newly chosen plug-in. This also
applies if the corresponding Insert slots of other selected channel strips are empty.
 Removing a plug-in (when multiple channel strips are selected) removes all plug-ins
from the corresponding slot number in all selected channel strips.
 Double-clicking the EQ area on the upper portion of a channel strip inserts the
Channel EQ in the first empty Insert slot of all selected channel strips. Hold Option to
insert the Channel EQ into the first Insert slot of all selected channel strips, and move
any existing plug-ins one slot down.
Editing Automation of Grouped Tracks
If the Automation Mode group setting is enabled for a mixer group, the following
offline automation edits now apply to all tracks within the group.
 Volume
 Pan
 Mute
 Sends 1 to 8
 Creating a node
 Deleting a node or a selection
 Changing or scaling the value of a node or selection
 Changing the position of (moving) a node or selection
 Copying a node selection by Option-dragging
 Converting a marquee selection into automation nodes (“Using the Marquee
Selection to Create Track Automation Nodes” on page 24)
33New Dim Button in Master Channel Strip
The Master channel strip now features a Dim button to the right of the Mute button.
Dim button in
Dim button
Transport bar
Click to turn on Dim
Level mode.
This button mirrors the speaker button to the left of the Transport bar’s Master level
slider (if shown): Activating it turns on Dim Level mode.
34Loading Different Channel Strip Setting Types
Hold Option when opening the Channel Strip Settings menu to access the settings of
different channel strip types (shown at the bottom of the menu):
This is handy if you’ve created a nice effect chain for your software instrument channel
strips, and want to use it for an audio channel strip or vice versa.
Swapped Position of Mute and Solo Buttons
The positions of the channel strip Mute and Solo buttons were swapped, making them
consistent with the button order shown in the Arrange window track headers.
I/O Labels Window Also Available Via Main Menu Bar
You can now open the I/O Labels window from both the Mixer > Options menu, and
also from the main menu bar, by choosing Options > Audio > I/O Labels.
35Changes to Logic Express Instruments and Effects
The following section covers changes to instrument and effect plug-ins.
General
The items discussed below apply to all plug-ins.
New Compare Button Behavior in Plug-in Window
The plug-in window’s Compare button now uses the following scheme to indicate the
plug-in setting’s state:
No changes have been made You are listening to the setting
to the plug-in setting. saved with the project.
Plug-in setting has been edited.
Click to compare the edited setting
with the one saved in the project.
 Black and disabled: The current plug-in setting is saved in the project—no changes
have been made to the plug-in parameters. As examples, if you load a new plug-in
setting, or save an edited plug-in setting in a project, the Compare button is black
and can not be clicked. Text is dimmed.
 Blue: When you edit a plug-in setting, the Compare button turns blue—indicating
that you have made changes to the plug-in parameters, but have not saved the
edited plug-in setting in the project. Text is shown in white.
 Black: When you click a blue Compare button, it turns black (with white text),
indicating that you are listening to the setting that was originally saved with the
project. Click the Compare button again to switch back to the edited plug-in setting.
The plug-in button turns blue, indicating that the setting has not yet been saved
with the project.
Factory Folder in Settings Menu and Library
If a plug-in’s Factory folder contains sub-folders, the Factory folder is no longer
displayed in the Settings menu or Library. This allows you to directly access the factory
settings from the sub-folders, which are now shown at the top hierarchy level.
New Default Location for Audio Unit Settings
Logic Express 8 now uses the following default location to save Audio Unit plug-in
settings (presets): ~/Library/Audio/Presets/Apple.
Logic Express 8 continues to scan the old location (~/Library/Application Support/
Logic/Plug-In Settings) for Audio Unit plug-in settings files. This ensures that your
existing setting files will be accessible in the plug-in header’s Settings menu.
36Ultrabeat
Control-clicking (or right-clicking) the Parameter Offset row—in Step mode—opens a
shortcut menu which contains the following commands:
 Alter: Randomly changes the currently selected parameter’s values for all steps.
 Randomize: Same as Alter, but random parameter alteration is more pronounced.
As a tip, it may be worthwhile saving your sequence data before experimenting with
these commands.
 Delete: Deletes all steps for the currently selected parameter.
Note: The Reset button functionality—and button label—changes to Delete (function
is as described above) when clicked once.
EXS24 mkII
The following enhancements have been made to the EXS24 mkII.
Opening the Instrument Editor
 You can now only open the Instrument Editor from the EXS24 mkII Parameters
window. The global Open EXS24 Instrument Editor key command was removed.
 When you open the Instrument Editor when no instrument is loaded, a new
instrument is automatically created.
New Select Group of Last Played Key Setting
The Instrument Editor’s Group menu now offers the Select Group of Last Played Key
setting. When you enable this setting (it is dimmed if you are not in Group view), you
can switch between groups by pressing a key on a connected MIDI keyboard. This is
useful when you want to adjust the velocity of an instrument’s groups, for example.
37Support of External Instrument Editor
The EXS24 mkII now allows you to use external instrument editing software, such as
Redmatica’s Keymap, to edit your EXS instruments.
To open your EXS instruments in an external instrument editor:
1 Choose Options > “Open in external Instrument Editor” in the EXS24 mkII Parameters
window.
2 In the ensuing file selector, browse to and select the desired instrument editor software.
3 Repeat step 1, but choose the “Open in [name of external instrument editor]” command.
This is the same command as above, but it is automatically renamed once an external
instrument editor has been assigned.
4 Edit the instrument in the external instrument editor, then use the external instrument
editor to send the instrument back to Logic Express.
Important: You need to save the edited instrument in Logic Express—not the external
editor—to make any instrument changes permanent.
To reassign the external instrument editor:
m Hold Option while choosing Options > “Open in [name of external instrument editor].“
38Improved RAM Management
In Logic Express 8, the EXS24 mkII can address its own memory space. This means that
all instances of the EXS24 mkII can use as much RAM as is available on the system.
To take advantage of this:
 You must have at least 5 GB of RAM installed on your computer.
 Virtual Memory must be enabled for the EXS24 mkII.
To enable Virtual Memory for the EXS24 mkII:
1 Choose Options > Virtual Memory in the EXS24 mkII Parameters window.
2 In the Virtual Memory window, select the checkbox labeled Active.
You should note that the amount of RAM available for use by the EXS24 mkII is
determined by several factors, including:
 The amount of physical RAM you have installed.
 How much RAM other open applications are using.
 How much RAM Logic Express is using. This can be affected by the number and size
of audio files in the project, and other plug-ins used. Third party sampler plug-ins, in
particular, may significantly affect the amount of RAM that Logic Express uses.
39Effects
The following section outlines new effect plug-in options and functions.
SubBass
The following minor changes to the interface of the SubBass plug-in better reflect the
use of its sliders and signal flow:
 The Mix slider has been renamed to Freq. Mix.
 A label has been added to the Output section, and the Dry and Wet sliders are no
longer visually separated by a line.
Modulation Delay
The following changes have been made to the Modulation Delay plug-in:
 The LFO 1 Rate knob has been renamed LFO 1 L/R Rate.
 The LFO 2 Rate knob has been renamed LFO 2 L/R Rate.
 The Intensity slider has been renamed to Mod. Intensity.
 The True Analog menu (extended parameters) is now a button, which has been
renamed to All Pass. The associated Analog Left and Analog Right sliders (and fields)
are labeled All Pass Left and All Pass Right.
Clip Distortion
The Sum LPF knob is now named LP Filter, as it more clearly indicates functionality.
Noise Gate
An Activity LED has been added to the Noise Gate. It is lit whenever the plug-in is
actively processing a signal.
40Corrections to the Logic Express Documentation
The following section contains information on errata in the Logic Express
documentation, resulting from changes made to Logic Express after the
documentation was completed.
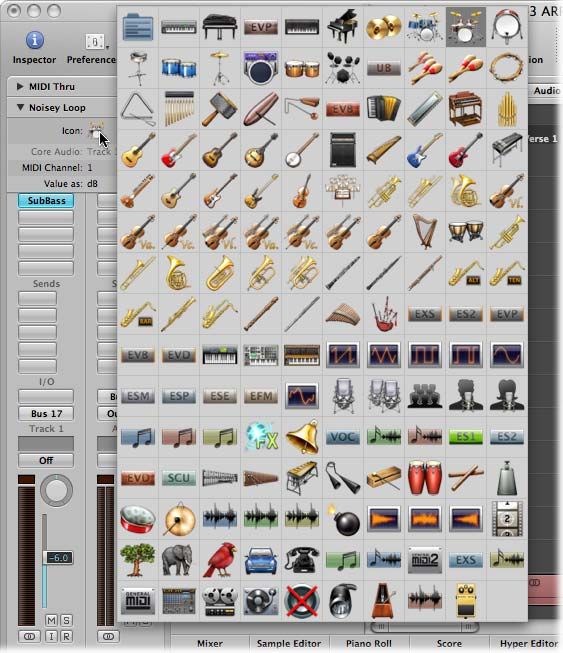
Improved Icon Selector
The icon selector was enhanced after the screenshots were taken for the Logic Express 8
User Manual. All icons are now displayed in a broad grid-like layout.
Up to 32767 User Created Track Icons
Logic Express 8 supports up to 32767 track icons. This means that Logic Express 8
displays all track icon files that start with a number from 1 to 32767 in the icon selector.
41Colored Buttons
The buttons listed below are now colored when enabled:
Link button in Same Level Link mode
Link button in Content Link mode
Hide button when no tracks are hidden
Hide button when tracks are hidden.
Catch button
MIDI In button (in MIDI editors)
MIDI Out button (in MIDI editors)
Page View/Linear View button (in Score Editor only)
Speaker/Play button (in Sample Editor, Bin, Browser)
Loop button (in Sample Editor, Bin)
Display Details button (in Tempo List)
Marker Text Area button (in Marker List)
Bypass button (in plug-in window)
42Link button (in plug-in window)
Compare button (in plug-in window; also see “New Compare
Button Behavior in Plug-in Window” on page 36)
Cycle button (in Transport bar)
Pause button (in Transport bar)
Play button (in Transport bar)
Record button (in Transport bar)
Auto Input Monitoring button (in Transport bar)
Pre Fader Metering button (in Transport bar)
Low Latency Mode button (in Transport bar)
Autopunch button (in Transport bar)
Replace button (in Transport bar)
Sync button (in Transport bar)
Metronome (Click) button (in Transport bar)
43Catch Button in Marker List
The Catch button in the Marker List was added after the screenshots were taken for the
Logic Express 8 User Manual.
Location of Preference Files
The Logic Express 8 User Manual states that the Logic Express preference files are stored
in your ~/Library/Preferences/Logic folder. This is incorrect. They are stored in your ~/
Library/Preferences folder.
Changes to Content Catch Mode
The Content Catch Mode description on page 73 of the Logic Express 8 User Manual
states that Content Catch mode is initially equivalent to Content Link mode, the only
difference being that when the playhead reaches the next region on the same track,
the contents of this region are then displayed.
This is only correct if the Logic Express > Preferences > Global > Catch > “Catch content
by position if Catch and Link are enabled” preference is switched on. As this preference
is switched off by default in Logic Express 8:
 Content Catch mode follows the playhead position within the displayed region, but
does not update to show the contents of subsequent regions as the playhead passes
over them.
 Content Link mode, when enabled, will update to show the content of each region as
the playhead passes over them.
Changes to Setting Up the Metronome
Both the Logic Express 8 User Manual and the Logic Express 8 Instruments and Effects
document state that Klopfgeist is inserted into instrument channel 128, by default. This
is incorrect. Logic Express 8 uses instrument channel 256 as the metronome channel.
Changes to Recording Delay Parameter
The screenshot on page 99 of the Logic Express 8 User Manual shows an incorrect unit
of measure for the Recording Delay parameter. It should read “Samples” and not “ms.”
Changes to Mackie HUI Auto Enable Controls
The Logic Express 8 Control Surfaces Support document (page 172) states that several
controls (FADER, PAN, PLUG IN, MUTE, and SEND) activate or deactivate the playback
and recording of certain parameter automations. While this statement is true for
recording, it is not true for playback.
44Changes to Freezing Tracks The Logic Express 8 User Manual states that you can individually freeze audio or software instrument tracks. However, when working with multi output software instrument tracks, such as Ultrabeat, the Freeze function (Freeze button in the track header) is not available. Accessing the Late-Breaking News Document This document is published online and may be updated as newer versions of Logic Express 8 are released or new information becomes available. To check for recent updates, do the following: m In Logic Express, choose Help > Late-Breaking News. If Safari is the default web browser for your system, the Late-Breaking News PDF file is displayed directly in Safari. Other web browsers may not be able to display PDF files directly, in which case the PDF file is downloaded to the default download location. © 2008 Apple Inc. All rights reserved. Apple, the Apple logo, Logic, and Ultrabeat are trademarks of Apple Inc., registered in the U.S. and other countries. Finder and Safari are trademarks of Apple Inc. April 25, 2008 019-1182
You can also read