Lights, Smart Plugs & Garage Door Control
←
→
Page content transcription
If your browser does not render page correctly, please read the page content below

Installation, Configuration & User Manual
                                                                      for
Lights, Smart Plugs & Garage Door Control

                              Need this manual in a larger format? Download a copy
                                                            www.izone.com.au

       Airstream Components Pty Ltd reserves the right to change or modify the design, specifica ons, so ware, hardware, firmware or Apps at any me
                                                             without prior wri en or oral no ce.
Table of contents
Sec on                                    Descrip on                                 Page
       Forward                                                                         6
  1.0 iZone garage door                                                                7
  1.1 iZone garage door controller installa on                                         7
  1.2 iZone reed switch installa on                                                    8
  1.3 iZone garage door controller configura on                                         9
  1.4 iZone garage door controller —how to operate                                    10
  2.0 iZone power                                                                     11
  2.1 iZone smart plug—specifica on                                                    11
  2.2 iZone smart plug—installa on                                                    12
  3.0 iZone lights                                                                    13
  3.1 iZone lamp specifica ons                                                         13
  3.2 iZone downlight specifica on                                                     14
  3.3 iZone downlight installa on                                                     15
  4.0 SMART PHONE / TABLET CONTROL                                                    16
  4.1 Quick setup guide                                                               16
  4.2 Equipment                                                                       18
 4.2.1 Standard light & power control                                                 18
 4.2.2 iZone light & power control with op onal wireless wall switches & repeaters    19
  4.3 System requirements for smart phone or tablet control                           20
                                                                                            2
Table of contents
Sec on                                    Descrip on                Page
 4.4     Installa on instruc ons for smartphone or tablet control   21-24
 4.5     Se1ng up your iZone app                                    25-26
 4.6     Configura on using a smart device                            27
4.6.1    Name a device                                              27-28
4.6.2    Grouping devices                                           29-30
4.6.3    Grouping switches, bu ons and sensors                      31-34
4.6.4    How to delete an device or switch from your system         35-36
4.6.5    How to change the bridge on an exis ng system               37
4.6.6    Advanced configura on                                        38
 4.7     App user manual                                             39
4.7.1    Home screen                                                 39
4.7.2    Summary screen                                              40
4.7.3    Device layout screen                                        41
4.7.4    Colour picker                                               42
4.7.5    White wheel                                                 43
4.7.6    Special effects                                              44
4.7.7    Device details                                              45
4.7.8    Device control                                              46
4.7.9    Group set up                                                47
4.7.10   Device occupancy strategy setup                             48
                                                                            3
Table of contents
Sec on                                        Descrip on                        Page
 4.7.11    Favourites                                                            49
4.7.11.1   Assigning and edi ng favourites                                       50
 4.7.12    Schedules                                                             51
4.7.12.1   Se>ng and edi ng a schedule                                           52
 4.7.13    Se>ng an alarm                                                        53
4.7.13.1   Snooze or cancel the alarm                                            54
 4.7.14    Music                                                                 55
   5.0     TOUCH SCREEN CONTROL                                                  56
   5.1     Equipment for control with wall mounted colour touch screens          56
  5.1.1    Integrated iZone light, power, garage door, irriga on & AC control    57
   5.2     Installa on instruc ons for touch screen control                     58-60
   5.3     Installing and pairing wireless switches /sensors                     61
   5.4     Configura on                                                           62
  5.4.1    Name an device                                                        62
  5.4.2    Grouping switches and sensors                                        63-64
  5.4.3    How to delete an device or switch from your system                    65
  5.4.4    Advanced configura on                                                 66-67
   5.5     Touch screen user manual                                              68
  5.5.1    Main menu                                                             68
                                                                                        4
Table of contents
Sec on                                 Descrip on        Page
  5.5.2    Home screen                                    69
  5.5.3    Summary screen                                 70
  5.5.4    Device layout screen                           71
  5.5.5    Colour picker                                  72
  5.5.6    White wheel                                    73
  5.5.7    Special effects                                 74
  5.5.8    Device details                                 75
  5.5.9    Group set up                                   76
 5.5.10    Switch occupancy strategy setup                77
 5.5.11    Favourites                                     78
5.5.11.1   Assigning and edi ng favourites                79
 5.5.12    Schedules                                      80
5.5.12.1   Se>ng and edi ng a schedule                    81
 5.5.13    Se>ng the me                                   82
 5.5.14    Changing the home screen colour                83
   6.0     TROUBLE SHOOTING, FAQ, WARRANTY, ASSISTANCE    84
   6.1     Trouble shoo ng                               84-87
   6.2     FAQ                                           88-91
   6.3     Product warranty policy                        92
   6.4     Further assistance                             93
                                                                 5
Forward

iZone lights, smart plugs and garage doors can be controlled from a number of different devices as follows:
•    Smart phone or tablet
•    A wireless switch
•    An iZone colour touch screen
•    A combination of two or more of the above devices

The iZone lights, smart plugs and garage doors need to be configured using a smart phone or touchscreen. There are subtle differences
between smart phone / tablet configuration and touch screen configuration. We recommend you use the appropriate part of this manual to
assist you when setting up your iZone system. Once configured correctly using one method, the configuration will be correct on other devices.

Lamps and Downlights are configured in exactly the same way and the appearance of each does not differ on the touch screen or the App

This installation and user manual has been divided into six parts as follows:
1.0 iZone garage doors—Installation, configuration, operation
2.0 iZone power—Smart plug, specification, installation,
3.0 iZone lights—Specification, installation
4.0. Smart phone or tablet — installation, configuration and user manual
5.0 iZone Touch Screen — installation, configuration and user manual
6.0. Trouble shooting, FAQ, warranty and assistance

                                                                                                                                                6
1.0 Garage door controller
1.1 iZone garage door controller installation                                                                  Connect to dedicated voltage free
                                                                                                          terminals in the garage door controller.
iZone smart plug.                                        iZone voltage free relay                               Check iZone website for terminal
A er pairing it must be                                                                                       connec ons of different makes and
changed in the configura on                                                                                                               models.
area to a “Garage Door”.                                                                                         h p://izone.com.au/resources/
A er installa on and                                                                                                 Or contact your garage door
reconfigura on, test the                                                                                                            manufacturer
opera on of the door several
 mes to ensure correct
opera on. If the door does not
operate correctly change the
pulse length, then re-test.

                                                                                                                     1
                       Garage                                                                                        2
                        door
                       control
                                      If only single GPO
                                                                                    Exis ng garage door
Exis ng garage door                   provided install a double
                                                                                          power supply
GPO                                   adaptor (not provided in
                                      CGDK )
                                                                                                               Exis ng garage
CGDK includes: 1 x iZone smart                                                                                  door opener
plug (CGPO), 1 x iZone voltage free
relay (CVFR) complete with
Australian 3 pin plug, 1 M long
                                                                                Pair and group the reed
240V lead and 1.75M long voltage
free lead, 1 x reed switch and                                                 switch to the system and
magnet (CRS)                                                                         mount onto door /
                                                                                                  frame

                                                                                                                                                7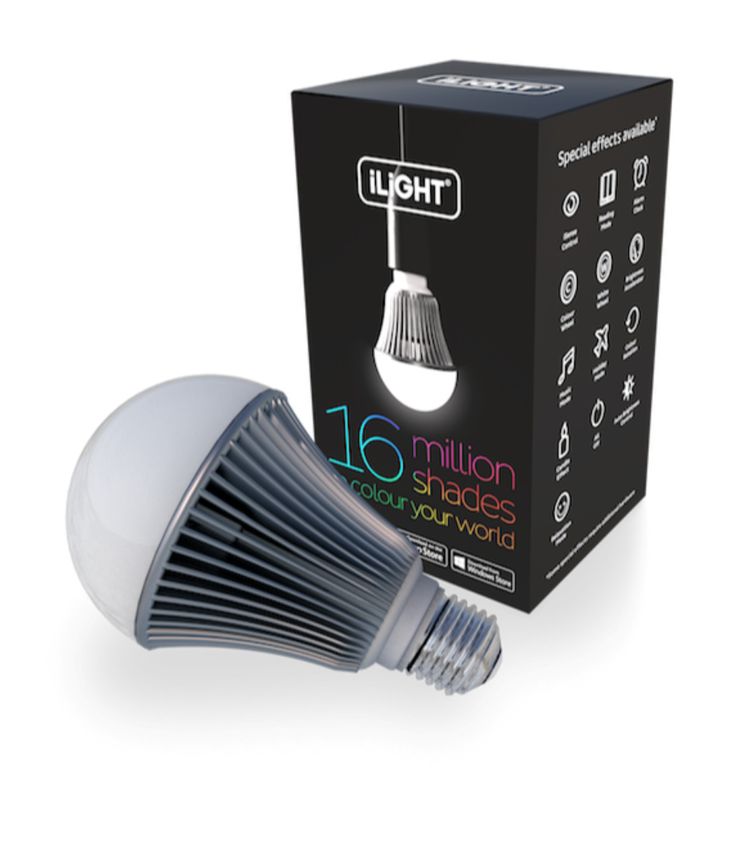
1.2 iZone reed switch installation
Handy tips:
1. After removing your reed switch and magnet from the           later.
   packaging, open the switch by using a small screw
                                                              4. Put the PCB back in the casing and click it closed.
   driver in the slots on the top and bottom.
                                                              5. Using the double sided tape on the two parts, install
2. Remove the PCB and turn over to reveal the battery.
                                                                 them as shown below.
   Insure the battery protector has been removed.
                                                              6. Group the switch to the device that you want to control
3. Press and hold the small switch on the end of the PCB.
                                                                 and test it to make sure it operates correctly.
   A blue LED will illuminate on the PCB. At the same time
   press the pair button on your screen and the LED will      7. Adjust the position of the magnet if required to get the
   flash rapidly indicating that it is paired. Make a note of    most reliable performance
   the number displayed on the screen so its easy to group
                                                                                                                                                        Installation
                                                                                                                                                              Mount
Specification                                                                                                                                            4 to 8mm apart
Power supply                   CR1632 - 3 volt coin battery                                                                                                                      switch
Control frequency              433 Hz
                                                                                                                                     Magnet
                                  o           o
Operating                      -5 C to +40 C
temperature range
Environment                    Suitable for indoor use only
                                                                                                                            For best results align
Reed switch                    Height: 43 mm                                                                                      markings
                               Width: 25 mm
                               Depth: 14 mm
                               Weight: 12g
Magnet                         Height: 24 mm
                               Width: 9mm                                                                                            Face orienta on marking
                                                                                                                                     (Should face each other)
                               Depth: 10 mm
                               Weight: 6 g                                                                                                                        Pairing hole
                                                                                                                                                                                          8
1.3 iZone garage door controller configuration
1.   Install the wiring to the garage door as indicated above
2.   Name your smart plug (Garage Door)
4.   Pair the Reed switch for the Garage Door and group the Garage Door Smart Plug
     and the Reed Switch
5.   Go to the detail section for the Garage Door Smart plug and change it from a
                                                                                                           Set up a group for
     standard Smart Plug to a Garage Door controller.                                                      the Garage door
6.   Test and adjust Pulse length as required                                                              controller and the
                                                                                                           associated Reed
                                                                                                           Switch

                                                                                                           Test the Garage
                                                                                                           door and adjust the
                                                                                                           pluse length to
                                                                                                           ensure the door
                                                                                                           operates correctly

                                                                                                           Press here to
                                                                                                           change the smart
                                                                                                           plug to a Garage
                                                                                                           Door controller

         Smart Plug named
              Garage Door
                                                                                                           Pair the Reed switch to be
                                                                                                           used to indicate if the garage
                                                                Press here to go to   Details sec on for   door is open or closed. Set
                                                                the details rela ng     Garage Door        the group for the Reed Switch
                                                                to the Garage Door                         to the same group as the
                                                                                                           Garage Door controller
                                                                                                                                        9
1.4 iZone garage door controller— how to operate
1.   Once the configuration is complete a new Garage Door icon will appear
2.   If you only have one garage door pressing the icon will open / close the garage door.
3.   If you have multiple garage doors press the garage door icon to display all the garage doors configured and control each one as your
     require. If any door is open the icon will show as “Open”. If all the doors are closed the icon will show as “Closed”.
4.   You can still use your existing garage door remote control to operate your garage door(s) as well as on your phone or tablet.

                                                                                                                        Garage Door icon will appear if
                                                                                                                        a Garage Smart plug has been
                                                                                                                        configured as a Garage door.

                                                                                                                        (Indica ng one of the doors is
                                                                                                                        currently Open)

                                                                                                                        (Indica ng all doors are
                                                                                                                        Closed)

                                                                                                                                                    10
2.0 iZone Power
2.1 iZone smart plug - specifications
For model numbers: CGPO
Power supply Input: 240VAC 50Hz
Power consumption Maximum 1.5 Watts switched on
Minimum 0.7 Watts switched off
Pair bu on
Manual
Connection Australian GPO and Australian Plug On / Off
bu on
Maximum connected 10 amps
load permitted
Control frequency 433 Hz
Operating temperature -5oC to +40oC
range
Environment Suitable for indoor use only Plug to go into an
Australia 240V GPO or
power board
Size & Weight Height: 107 mm
Width: 44 mm
Depth: 37 mm (Excludes prongs)
Plug 240V electrical
load in here:
240V 10amp
112.2 iZone smart plug - Installation
For model numbers: CGPO
Certification AS/NZS 60598.2.2; AS/NZS 61347.2.13; C Tick N29007;
Installation • Switch the power at the wall outlet on.
• Plug the iZone smart plug into the wall outlet
• Pair the iZone smart plug to the iZone Bridge (See pairing an iZone smart plug)
• Name the iZone smart plug on your touch screen , smart phone or tablet
• Plug the appliance to be controlled into the iZone smart plug.
• Control your appliance via the touch screen , smart phone or tablet , or iZone wireless switch or the on / off button
on the iZone smart plug.
123.0 iZone Lights
3.1 iZone Lamp specifications
For model numbers: CL5E27 and CL5B22
Power supply Input: 240VAC 50Hz
Power consumption Maximum 9.0 Watts on full brightness
Minimum 0.22 Watts in standby mode
Connection E27 Screw fitting or
B22 Bayonet fitting
Brightness Maximum 644 Lumens
Efficiency 71 Lumens / Watt (Cool White)
Control frequency 433 Hz
Operating temperature range -5oC to +40oC
Environment Suitable for indoor use only
Size & Weight Height: 122mm
Diameter: 70mm
Weight: 166g
133.2 iZone downlight specifications
For model numbers: CL5DB, CL5DS, and CL5DW
Connection 2 Pin Australian GPO plug
Power supply Input: 220 — 240V AC, 66mA ~ 50Hz
Transformer Custom transformer included. Output: 25V DC ~ 280mA
The driver supplied is SELV EQUIVALENT
Power lead 1.2 meters
Power consumption Maximum 9.0 Watts on full brightness (Cool white)
Minimum 0.22 Watts in standby mode
Brightness Maximum 644 Lumens
Efficiency 71 Lumens / Watt (Cool White)
Control frequency 433 Hz
Operating temperature range -20oC to +50oC
Environment IP44 rated
Suitable for indoor use only. Suitable for alfresco, porch and
bathroom use.
Rating Suitable for residential or commercial use in Australia and New
Zealand. Used where air transfer is not permitted or not desired
between living space and roof space (there will be no air transfer
between spaces even if there is no insulation covering the
luminaire). These luminaires have been tested to 90oC and will
automatically reduce in brightness to prevent over temperature.
Size Height: 69 mm (51 mm without antenna cover)
Face Diameter: 109.6 mm
Hole cut size: 90 mm
Weight Weight: 154 g (excludes transformer and lead)
143.3 iZone downlight Installation
For model numbers: CL5DB, CL5DS, and CL5DW
Certification AS/NZS 60598.2.2; AS/NZS 61347.2.13; C Tick N29007; IP44; IC-4
Installation This product must be installed by a qualified licenced electrician in accordance with AS/NZ 3000:2007 Electrical
installations.
Warning this product is not suitable for mounting on tubular material.
Please note: Accidental contact with live parts does not rely on the luminaire enclosure.
• Ensure power supply is isolated before starting any work
• Ensure downlight is located with minimum clearances from combustible building material as shown below:
Combus ble building
materials
HCB +25mm
Non combus ble
insula on material
SCB +25mm
Ceiling
• Connect mains power cable
• Rotate spring clips up and gently insert downlight into hole
• Configure downlight—see details in manual
154.0 SMART PHONE / TABLET CONTROL
4.1 Quick setup guide
1. Download the iZone Light & Power App (iLight Controller)
2. Connect the wireless light bridge to your modem Ethernet port. Plug the bridge into a GPO
For iZone Lamps and Downlights
3. Install the iZone lamp / downlight . (one at a time).
4. Turn on the power to the installed iZone Lamp / Downlight. It will flash red
5. Press the “Pair” button on the home screen and the light will flash green 3 times then remain green
6. Repeat steps 3 to 5 for other Lights
7. Start controlling your Lights via the App
164.1 Quick setup guide (Cont)
For iZone Smart Plugs
4. Turn on the power at the wall outlet
3. Install the iZone smart plugs . (one at a time). The on/off switch will flash red if it has never been paired
5. Press the “Pair” button on the side of iZone smart plug and the pair button on the home screen
simultaneously. The on / off button will flash blue to indicate it is pairing
6. Name your smart plug on the app
7. Start controlling your smart plugs via the App
174.2 Equipment
4.2.1 Standard iZone Light & Power control
Customers
router or
modem
CLB
Lights Wireless
Light Bridge
Smart Plugs
Smart phone or
tablet
4 Lights and 2 Smart plug system
shown above
A maximum of 128 Lights / Smart plugs can
be controlled by a single system
184.2.2 iZone Light & Power control with optional wireless wall
switches & repeaters
CRFL (op onal)
Wireless switch Customers
with occupancy sensor router or
and light intensity modem
meter including AC
thermostat
CLB
CR (op onal) Wireless
Wireless Repeaters Light Bridge
Smart phone or
tablet
iZone Lights
iZone Smart Plugs
194.3 System requirements for smart phone or tablet control
Smartphone or Tablet
• You will need a smartphone or tablet. The following platforms are
supported: Apple and Android.
System Requirements
iOS SOFTWARE REQUIREMENTS
• Compatible with iPhone, iPod touch, and iPad. iOS 6.0 and higher.
ANDROID SOFTWARE REQUIREMENTS
• Requires Android: 2.1 and higher.
WiFi modem or network switch
• You will also need a compatible WiFi modem or network switch with a spare RJ 45 access port. Some WiFi modems, firewalls and security
settings are not compatible with the iZone bridge and will need to be changed, or your modem replaced, to enable the iZone app to
operate.
204.4 Installation instructions - for smart phone or tablet
1. Download the iZone Light & Power App
a. You will need an account with the manufacturer of your phone to enable you to download Apps from their respective store.
b. Apple—Apple App Store
c. Android—Google Play Store
d. Login to the respective store.
e. To search for the iZone Light and Power App type “iLight Controller” into the stores search menu.
f. Select iLight Controller and download the App
2. Connect the bridge to your computer network via an Ethernet port.
214.4 Installation instructions for smart phone or tablet (continued)
3. The power pack and bridge can be separated if required.
Use a Philips screw driver to remove the two screws at
the base.
Separate the two halves. Remove the power adaptor and discard the base.
4. Plug the bridge into a power outlet, switch the power outlet on. It is recommended to locate the bridge in the centre of the
building and as high as possible to maximise the range.
Installing iZone Lamps and Downlights
5. Remove one iZone Lamp or Downlight, one at a time from the packaging and install it . (one at a time).
6. Switch the power on to the Light
a. If the light has never been configured the Lamp / Downlight will flash red, continuously.
224.4 Installation instructions for smart phone or tablet (continued)
7. Press the pair button on the App home screen and the Light will flash green three times, and remain green when it has been
successfully paired .
8. Repeat the process one Lamp / Downlight at a time until all the Lamps / Downlights have been paired. You are now ready to configure,
name and control the Lights on your App.
If a Lamp / Downlight does not turn red when it is first switched on, it may have been configured already or configured to another system.
See section - Change bridge to return an iZone Light back to its factory settings.
Installing iZone Smart Plugs
6. Switch the power on at the wall outlet
5. Remove iZone smart plug from the packaging and install it . (one at a time).
5. Press the “Pair” button on iZone smart plug and on the home screen simultaneously. The on / off
button will flash blue to indicate it is pairing
6. Name your smart plug on the touchscreen or app
6. Repeat the process for other smart plugs
7. Start controlling your smart plugs via the App
234.4 Installation instructions for smart phone or tablet (continued)
Pairing iZone wireless switches, buttons & sensors
Remove the front cover from the
switch (3 bu on switch shown Install the AAA ba eries
here). You will need to use a
screw driver to release the clips
iZone AC temperature sensor
To Pair the Switch
Press and hold down the
Centre LED
“Pair” bu on. The centre LED
on the switch will light up
blue.
At the same me press the
Pair bu on on the App
If the switch is to be used as an The centre LED will flash to
iZone AC room temperature indicate it has been paired to
sensor you need to set the zone the system
number it is controlling from here
Light sensor
244.5 Setting up your iZone app
Using your iZone App in your local WiFi area • You can only have access to the system from outside
• Press the iZone button on your phone or tablet. your local WiFi range after you have successfully
registered your system on World Wide.
• To register your system you must :
• A nine digit number will appear on at the top of the screen. This is • Be inside the WiFi area your system is connected to.
you system ID number. Press on the nine digit number and you will • On the App press Register Now.
go into the App. Now you can name your system using the “Rename”
button. • Complete all the fields making sure you get the Suburb,
State and Postcode 100% correct to ensure the correct
weather data is displayed on your Nexus screen (if fitted)
• You must agree to the Worldwide Terms.
• The App will display all the systems it finds in this WiFi
area and will simultaneously register all devices
displayed.
000002195 • Make sure you remember your password as you will need
Once you are registered for World Wide
it when you login via World Wide
access you can press here to access your
system • When you login to World Wide there is an option to save
your username and password (Login and Remember Me).
We recommend you select this option to make it faster
To register your system for use outside your and easier to login to your system remotely.
local WiFi area press here. You must be
inside the WiFi area that your system is • To reduce the data usage there may be a slight delay
connected to in order register your system . between changing a setting on your phone, and the
system updating, when using World Wide.
Follow the prompts and complete all the
fields. You must get the address correct to • Do not use iZone World Wide when you are in your WiFi
enable the correct weather data to be zone unless you have turned off the WiFi on your smart
displayed on the Nexus screen phone or tablet.
254.5 Setting up your iZone app (continued)
c. Install and pair additional repeater modules as required to ensure full and reliable coverage across the whole building.
d. Once your devices are up and running you can test your remote login. To do this you need to simulate being outside your WiFi area:
- On your smart phone go to settings and turn your WiFi OFF
- Open the iZone App
- Click on iZone Light and Power
- Type in your email address and your password
- We recommend you press “Login & Remember Me” to avoid having to type in the email address and password in future.
- Select the system you are controlling
- Try switching a light on or off
e. Please note when operating the system remotely there can be a delay of up to 1 minute for the commands to be executed.
f. Don’t forget to switch your WiFi back on.
264.6 Configuration using a smart device
4.6.1 Name a device
Name a Lamp, Downlight or Smart Plug
It is recommended that you name your light or appliance for ease of use.
1. To name your light or appliance go to the summary.
2. Press the current name.
When a device it paired it
will automa cally
generate a name. Press
here to change name
3. Press the current name. This will take you to the Details
screen.
Press here to change name
274.6.1 Name a device (continued)
4. Using the Backspace button , delete the existing name and type in your new name.
5. Press return to save
Press here to save the new name
284.6.2 Grouping Devices
1. To group a number of Lights and / or Smart Plugs go to the summary.
2. Press the name of the device you would like to group.
Press here to go to the
device details
3. This will take you to the Details screen.
Press here to change the
group this device is
associated with.
294.6.2 Grouping devices (continued)
4. This will take you to the Group Setup screen.
Indicates this device is not grouped and
operates independently
Indicates this group controls
a light or power func on
Press here to change the group number
Press to save
Press here if the group Press here if the group
relates to a light or power relates to an iZone Air
func on condi oning func on
Press here if you are grouping an iZone switch bu on to
perform the “All Off” func on
Enter a Group number between 1
and 128
Press here if you are grouping an iZone switch bu on to
perform the “All On” func on
5. Enter the new Group number then press Save.
304.6.3 Grouping switches, buttons & sensors
1. To group a switch with one iZone Light or Smart plug or to group a number of iZone Lights and Smart plugs go to the summary.
2. Press the name of the device (Light or Smart plug) that you would like to group this switch to. This will take you to the details screen.
Device name. Press here
to go to details screen
3. Press the “Group” to enter the Group setup screen
Press here to go to the group set up screen
314.6.3 Grouping switches, buttons & sensors (continued)
4. This will take you to the Group Setup screen.
Sensor and switch numbers are automatically
populated when the switch is paired to the
A Typical Switch Switch S#
system
(S3)
Bu on B1
Light L3 & L4 are in the same group and will Bu on B2
operate as one.
Bu on B3
Occupancy
sensor “O”
Bu on No. 1 on Switch No. 2 is used to
control Light L3 & L4.
Light intensity
Occupancy sensor on Switch No. 2 is used sensor “I”
to control L3 & L4
The Light Intensity sensor on Switch No. 2 is used
to auto control brightness of L3 & L4.
Press here to change the group number and
to configure the func on of the switch
324.6.3 Grouping switches, buttons & sensors (Lights)
Press here to configure this bu on to Indicates that Switch 1 Bu on 3 is currently
control a Light or smart plug group. being set up.
Press here to configure this bu on to
control an air condi oning zone or AC
system.
Press here to configure this bu on to be able Press here to set the group you want to
to operate in the same manner as the “All control
lights Off” bu on on the App
Indicates that Switch 1 Bu on 3 will control
Press here to configure this bu on to be able the devices in group 8
to operate in the same manner as the “All
lights On” bu on on the App
Using the key pad type in the group
number
334.6.3 Grouping switches, buttons & sensors (AC)
Press here to configure this bu on to Indicates that Switch 1 Bu on 1 is currently
control a light or smart plug group. being set up.
Press here to configure this bu on to
control an air condi oning zone or AC
system.
Press here to configure this bu on to be able Press here to set the AC zone number you
to switch the AC system on and off want to control
Indicates that Switch 1 Bu on 1 will control
the Zone 1. Pressing this bu on will toggle
zone 1 from “Closed” (red glowing bu on) to
“Climate” (blue glowing bu on)
Using the key pad type in the group
number
344.6.4 How to delete a device from your system
On the home screen Press here to delete a device.
It is recommended that the
press the Config button.
device you want to delete is
connected and powered. This
Type in the password “wamfud” will ensure the device is
and you will be taken to the returned to its factory default
system Config screen se>ngs ready for pairing to
another system.
354.6.4 How to delete a device from your system (continued)
Press here to delete device L3
364.6.5 How to change the bridge on an existing system
Follow this procedure to change the bridge:
1. Remove the exis ng bridge
2. Switch all Lights ON at the power source (light switch)
In the event that your bridge is
3. Wait 15 minutes. All Lights should default to cool
damaged, missing or stops working
white and full brightness.
and needs to be replaced you must
follow these instructions. 4. Switch the first Light OFF and immediately back ON at
the power source. Within 30 seconds press the “Change
Because all the Lights and switches Bridge Icon”
have been paired to a previous
5. The first Light should turn red. It has now been
bridge it will be necessary to first
returned to its default factory se>ng.
return each Light to its factory
default setting so that it can be re- 6. One at a me, repeat this process (4 to 5) for the
paired to the new bridge. remaining Lights, un l all the Lights have been reset to
their factory se>ng.
7. Install the new bridge.
8. Pair the iZone AC system to the new bridge first. (if
one is installed)
On the home screen 9. Now pair all lights, switches, smart plugs etc as per
press the Config button. normal. It should flash green 3 mes and remain green
indica ng it has paired with the new bridge.
Type in the password “wamfud” 10. Label and group all devices as per normal
and you will be taken to the 11. Your system is now ready to operate via its new
System Config screen bridge.
12. If this is a stand alone system (Not connected to an
iZone AC system), you will need to register the new
bridge ID on iZone World Wide. Contact
support@izone.com.au to delete the old bridge ID from
iZone World Wide.
374.6.6 Advanced configuration
Press here to pair a device
Press to go to back to the home
page Press here to delete a device
Press here to go to Group Setup
screen
Press here to change the radio
frequency channel. If this is changed
all RF devices must be deleted
before changing channel. All RF
devices must be re-paired a er the
channel has been changed.
Press here to manually configure
the bridge se>ngs
Press here to lock the system to
prevent changes being made
Press here to view a list of devices
and their so ware revisions in this
system
Press here to change the custom
password
Press here to change the bridge
Press here to manually sync the Press here to change how the izone Light
izone Light & Power system to the & power system and the smart phone /
smart phone / tablet’s me tablet will automa cally sync their me.
384.7 App user manual
Logout of the current system
4.7.1 Home screen
Press to here to change Light
colours, brightness, whites
Press here for a summary of devices
installed.
Press to ac vate a schedule
or to configure a new
schedule.
Press to access device special
Press here to view devices in Layout effects menu
mode
Press here to select the music to
play.
Press to ac vate a favourite
mode or to configure a new Press here to switch all devices Off.
favourite . Only devices that are configured for
“All Off” func onality in the details
sec on will be controlled when
Press here to switch all devices On.
pressing this bu on
Only devices that are configured for
“All On” func onality in the details
sec on will be controlled when Press to name your system. You
pressing this bu on can have up to 5 different systems
on your App. Naming them helps
you to easily iden fy each system
Press to pair a device
Press to access advanced
configura on se>ngs
39Press Colour and then the %
4.7.2 Summary screen brightness to change colours
Press to go to the main menu page
Press FX and then % brightness to
add a Special Effect to the device
Indicates Light colour and that this Light
is ON. Press here to switch the Light OFF Indicates this device is OFF
Indicates device is OFF. Press here to Indicates this device has:
switch the device ON.
L3 a) no power and has been switched
off at the wall switch / GPO. Switch
“on” power to enable device to be
Default name. Automa cally generated
controlled, or
when device is first paired. Press here to
change name b) lost communica ons with the
bridge or is out of range
Indicates this device will
device name. Press here to change automa cally come on in conjunc on
name or access details with an alarm clock se>ng. Press to
access FX menu for this device
Indicates this light’s brightness is
51%. Press to change
404.7.3 Device layout screen
Indicates page name. Press to
Press to go to home page
change
Indicates Light colour and the Light is ON.
Press here to switch this Light OFF
Indicates this page is locked. Press
“Unlock” to modify the layout
Indicates this device has been switched off
at the wall switch / GPO. Switch on power The same name Indicates
to enable device to be controlled. these two Lights are in the
same group
Indicates this devices’s name.
Indicates light is OFF. Press here to
switch light ON.
Press here to go back to the previous Press here to scroll to the next page
page
414.7.4 Colour picker
Indicates Light name that is being
controlled. Press here to go to light
details Press to go to Special Effects menu
Current colour selected. For very fine
colour selec on see details screen
Current colour selected
Press here to select a primary colour
Press here to go to the white wheel
Press here to switch this Light OFF
selec on
Slide here to decrease or increase the
brightness of this Light. (For very fine
tuning see details screen
Press here to go back to the previous Light
Press here to go to next Light
42Indicates light that is being controlled.
4.7.5 White wheel
Press to go to special effects menu
Press to go back to the home page
Current white selected (90% warm
white). Move dial to change from
warm to cool white
Press here to go to maximum
warm white
Press here to go to maximum
cool white
Press here to go to the colour
Press here to switch this Light OFF
picker selec on
Slide here to decrease or increase
the brightness of this Light. (For very
fine tuning see details screen
Press here to scroll back to previous
Light
Press here to go to next Light
434.7.6 Special effects
Indicates device name being controlled
Press to ac vate best white for
Press to go to back to main menu
reading and concentra on
Press here to switch this device OFF
Press to rotate through the
primary colours. Use in
Toggle here to change the speed that this
conjunc on with accelerator for
Light changes from Off to full brightness and
varying effects
from full brightness to Off
Press to ac vate best white for relaxing
Press here to for this device to
switch on randomly between
Press to ac vate candle effect
6:20pm and 10:48pm when you
are away on holiday
Press to set alarm . device will come on
when this alarm is ac vated. (only
available on smart device App) Press here to ac vate circadian
ligh ng to match standard
Press to ac vate occupancy sensor for this circadian rhythm.
device. Dedicated hardware is required for
this feature to be enabled
Switch Auto brightness control on /
Press to select music and to control Light to off here. Dedicated hardware is
the rhythm of the music. (only available on required for this feature to be enabled
smart device App)
Slide here to set the target
brightness when opera ng in Auto
brightness mode. Dedicated
hardware is required for this
feature to be enabled
Press here to scroll to the previous Press here to scroll to the next device
444.7.7 Device details
To navigate here from the Home
screen press > Lights > Light
name
Press to go back to the summary screen
Press here to change the name
Indicates you are in the device details menu
Current name for this device
Press here to change the group
Type of device installed
number. 0 or - will ungroup this
device and it will operate
The group that this device belongs to. All independently
lights, smart plugs , switch bu ons and
sensors in this group will operate Press here to change the page that
together you want this device to be
displayed on in Layout mode
Device status . Showing as Manual. If “No
Power” is indicated this has been turned off
Press here to fine tune the light
at the switch
colour. Input the exact RGB mix
required
Press here to fine tune the exact
Scroll down to the control page where you light brightness level.
can set up associated control scenarios.
454.7.8 Device control
To navigate here from the Home
screen press > Lights > Light
name > scroll down Press here to fine tune the colour.
Input the exact RGB mix required
Press here to fine tune the exact
Press to go back to the summary screen brightness percentage.
Press here to change the group
number. 0 or - will ungroup this
device and it will operate
When this switch is on (Green) this device independently
will switch off when the “All Off” bu on
on the home screen is pressed
When this switch is on (Green) this device
will switch on when the “All On” bu on Indicates that the occupancy sensor
on the home screen is pressed on Switch No. 1 is used to control
this device. Press here to set up the
occupancy controlling strategy
Indicates bu on 1 on switch 1 has been
configured to switch this device group On
Indicates that the Light Intensity
and Off
sensor in Switch No. 1 has been
configured to auto control brightness
for this device.
464.7.9 Group set up
To navigate here from the Home
screen press > Lights > name > Indicates this bu on has not been
Group grouped and will operate independently.
Press to go to device details page
- Lights, smart plugs and switches are
Bu on No. 2 on Switch No. 1 is used to automa cally sorted by group number
control the iZone air condi oning unit.
Bu on No. 1 on Switch No. 1 is used to
control all devices associated with Group 8.
(Walter & L2)
Occupancy sensor on Switch No. 1 is used
for all Lights associated with Group 8
Press here to change the group
Light Walter & L2 are in the same group (8) number for this occupancy sensor
and will operate as one.
The Light Intensity sensor in Switch No. 1 is
used to auto control brightness to Walter &
Light ID. This number is automa cally L2.
generated by the system
Press here to change the group number
for this light intensity sensor
Press here to change the group
number for this bu on
This Light has been named Work Bench
474.7.10 Device occupancy strategy setup
Indicates that the occupancy sensor on Press to save this strategy
Switch No. 1 is being setup. Every
occupancy sensor on the system must have
its own strategy
Press here to change delay 1
The me taken without detec ng
movement before the first ac on
Press here to change the
percentage brightness the Light is
adjusted to at the end of delay 1.
Currently set at 24% of full
The ac on to occur a er delay 1
brightness
The me taken without detec ng Press here to change delay 2
movement a er the second ac on
Press here to change the
percentage brightness the Light is
adjusted to at the end of delay 2.
The ac on to occur a er delay 2
Currently set at Off
Indicates this device will automa cally
switch back on once movement is detected.
Switch this func on off if you require the
user to manually switch the light off and
then back on to reset the sensor
484.7.11 Favourites
To navigate here from the Home Press here to setup and
screen press > Favourites edit favourites
Tip!
Set up your Lights and smart
plugs using the Colour Picker,
White Wheel, and Special FX
features then save this set up as a
favourite
Press the favourite you would
like and the devices will
automa cally change all the
se>ngs for this favourite.
Indicates this favourite
has not been named.
494.7.11.1 Editing favourites Press here to save.
Indicates current favourite
being changed.
Press here to change the
name of this favourite.
Indicates what mode you
device name.
want each device to operate
in when this favourite is
used. Change each device
se>ng to suit your
requirements for this
favourite.
If you require a different se>ng to
those indicated, go to your device
summary and change the se>ng to how
you would like them to operate for this
favourite. Then return to the edit
favourite screen, exclude any devices
Indicates these devices have been
you do not want to be affected by this
excluded from this favourite.
favourite and press the save bu on
Blue ck indicates that this device is
included in this favourite
504.7.12 Schedules Press here to set up or edit a
To navigate here from the Home schedule on any favourite
screen press > Schedules
Tip!
Indicates an automa c me
Set up your favourites first and then
schedule has been enabled
schedule the time you want the for this favourite.
favourite to come on and go off.
Enable the schedule or disable it if you
don’t want the schedule to operate.
Schedules are automatically disabled
in holiday mode.
Indicates the schedule has
not been enabled
Any of your favourites can be set to automa cally
start at any me of your choosing. Press here to
enable the me based schedule for favourite (Red)
514.7.12.1 Setting and editing a schedule
To navigate here from the Home
screen press > Schedules > Edit
Press here to save your new
> The schedule you want to
se>ng.
modify
Indicates current schedule that Press to add the days you
you are changing or se>ng. want this schedule to run
on.
Spin hour, minute and AM/
PM to set the start me
Press here if no stop me
is required.
Spin hour, minute and AM/
PM to set the stop me
524.7.13. Setting an alarm
Press here to save your
alarm se>ngs
Tip:
Set your accelerator to
“Wake” setting for those
Press here to enable /
Lights used for alarms,
disable this alarm.
so that the light comes on
very slowly.
Press here to set the days of
the week you want this
Spin to adjust the hours,
alarm to work on
minutes and AM / PM.
534.7.13.1 Snooze and cancel the alarm
How the alarm and snooze
functions display and are
controlled may vary from smart
device to smart device.
Indicates current date and
me.
Slide to the le and a 10
minute snooze bu on will
This is displayed when the
appear. Press the snooze
audible alarm sounds.
bu on for a 10 minute delay
before the alarm sounds
again. You can also switch
Slide to the right to stop the the alarm off from the
alarm. When the alarm is snooze mode. Hit the X
stopped the device will turn bu on.
on.
544.7.14 Music
To navigate here from the Home screen
press > Music
To select which Light you want to sync
with the music you need set the Light to
music in the special effects menu .
List of last 5 songs played.
Current song playing
In Custom mode you can
change the colours of the
Lights from this screen
using the RGB sliders Press here to allow the
system to select different
colours automa cally.
To sync the lights to an Press to stop the music
external sound source,
press Microphone and
place the device close to
the sound source
Press to pause the music
555.0 TOUCH SCREEN CONTROL
5.1 Equipment for control with wall mounted colour touch
screens
Customers
router or
modem
CC220
CT24AC
CLB
Wireless
Light Bridge
Lights
Smart plugs
CCTS
4 Light system with 1 colour touch screen shown
above
Note:
A maximum of 128 devices and 12 wall mounted colour touch
Some special effects are not available on the wall
screens can be configured to operate as a single system
mounted colour touch screen
565.1.1 Integrated iZone light, power, garage door, irrigation & AC
control
Zone 1
Zone 2
Zone 3
Zone 4 Smart phone or
CCTSL tablet
Zone 5 Wireless garden Customers router or
irriga on modem
(Max 24 sta ons)
CC220 CRFL (op onal)
Wireless device switch
CT24AC with occupancy sensor
and light intensity
Garage meter including AC
C320# door thermostat
5 Zone system with 1
colour touch screen
shown above
A maximum of 14 zones, AC Unit CLB
128 light / power devices Wireless
and 12 colour touch screens Lights Light Bridge
can be supported by one
iZone Smart Plugs
combined iZone system
575.2 Installation instructions for touch screen control
1. If using smart phone or tablet control as well as touch screen control it is possible to use either method to install devices. Below is a
description on how to install your Lights and smart plugs if you only have an iZone touchscreen without a smartphone or tablet control
2. Connect the bridge to your computer network via an Ethernet port on your
modem.
3. Plug the bridge into a power outlet and switch the power outlet on. It is recommended to locate the bridge
in the centre of the building and as high as possible in order to maximise the WiFi range.
a) Pair the bridge to the air conditioning system by pressing and holding the Pair button on the Light bridge while simultaneously pressing
the Pair button in the air conditioning section of the iZone touch screen
+
4. The power pack and bridge can be separated if required
Using a Philips head screw driver remove the two screws at the base.
585.2 Installation instructions for touch screen control only (continued)
Separate the two halves. Remove the power adaptor and discard the base.
Installing iZone Lamps and Downlights
5. Remove the lamp / downlight from the packaging and install the light (one at a time). Only configure one light at a time.
6. Switch the power on to the Light. If the Light has never been configured the light will flash red.
=
7. Press the Pair button on the touchscreen and the Light will flash green 3 times then remain green once it has been paired successfully.
=
8. Repeat the process one light at a time. You are now ready to configure, name and control the lights on your touch screen.
If a light does not turn green when it is first switched on it may have been configured already or configured to another system. See the
section on trouble shooting and how to return a light back to its factory default settings.
9. If required install and pair repeaters as required to ensure full and reliable coverage across the whole building.
595.2 Installation instructions for touch screen control only (continued)
Installing iZone Smart Plugs
5. Remove iZone smart plug from the packaging and install it . (one at a time).
5. Press the “Pair” button on smart plug and on the iZone Light and Power home screen simultaneously.
The on / off button will flash blue to indicate it is pairing
6. Name your smart plug on the touchscreen
6. Repeat the process for other smart plugs
7. Start controlling your smart plugs via the touchscreen
605.3 Installing and pairing wireless switches / sensors
Remove the front cover from the
switch (3 bu on switch shown Install the AAA ba eries
here). You will need to use a
screw driver to release the clips
iZone temperature sensor
To Pair the Switch
Press and hold down the
Centre LED
“Pair” bu on. The centre LED
on the switch will light up
blue.
At the same me press the
Pair bu on on the screen
If the switch is to be used as an The centre LED will flash to
iZone room temperature sensor indicate it has been paired to
you need to set the zone number the system
for the zone it is controlling here
Light sensor
615.4 Configuration
5.4.1 Name an device
It is recommended that you name your devices for ease of use.
1. To name your device go to the summary.
2. Press the current name. This will take you to the setup screen.
device name. Press here
to change name
3. Press the pencil adjacent to the current name.
4. Delete the existing name and type in your new name.
5. Press enter to save
Press here to change the name
625.4.2 Grouping switches & sensors
1. To group a switch with an device or group of devices go to the device summary.
2. Press the name of the device you would like to group this switch with. This will take you to the Lamp details screen.
device name. Press here
to group
3. Press the pencil adjacent to the “Group”.
Press here to go to the group set up screen
635.4.2 Grouping switches & sensors (continued)
4. This will take you to the Group Setup screen.
Sensor and switch numbers are automatically
populated when the switch is paired to the
A Typical Switch Switch S#
system
Bu on B1
device L3 & L6 are in the same group and Bu on B2
will operate as one.
Bu on B3
Occupancy
sensor O1
Bu on No. 1 on Switch No. 3 is used to
control device L3 & L6.
Light intensity
Occupancy sensor on Switch No. 3 is used sensor I1
to control L3 & L6
The Light Intensity sensor in Switch No. 3 is
used to auto control brightness of L3 & L6.
Press here to change the group number.
Different prefixes can be used to control
different systems. See table below for the
prefixes available at the me of prin ng.
Light Groups LG#
AC Zones ZG#
AC Unit On/Off AC
645.4.3 How to delete an device or switch from your system
9. To delete a device from your system. Follow the procedure below:
a. Switch the device On.
b. On the home screen press the Config button.
c. Type in the password “wamfud”.
d. Press the pencil adjacent to Delete a device
Press here
e. Press the radio button adjacent to the device to be deleted
f. If it is a working device it will flash red repeatedly
g. This device has now been returned to its factory default setting
655.4.4 Advanced configuration Press to go to home page
Only use this func on if you need to change the Press here to pair an device or
bridge in an exis ng system. switch
Follow this procedure to change the bridge:
Press here to delete an device or
1. Remove the exis ng bridge switch
2. Switch all Lights ON at the power source (light
Press here to go to group setup
switch)
screen
3. Wait 15 minutes. All Lights should default to
cool white and full brightness. Press here to change the radio
frequency channel. If this is
4. Switch the first Light OFF and immediately
changed, then all RF devices must
back ON at the power source. Within 30 seconds
first be deleted before changing
press the “Change Bridge Icon”
the channel. All RF devices will
5. The first Light should turn red. It has now need to be paired again a er the
been returned to its default factory se>ng. channel has been changed.
6. Pair this Light as per normal. It should flash
green 3 mes and remain green indica ng it has Press here to lock the system to
paired with the new bridge. Switch this Light off. prevent changes being made to the
layout screen
7. One at a me, repeat this process (4 to 6) for
the remaining Lights, un l all the Lights have Press here to change the tag lines
been reset and paired to the new bridge. that display at the bo om of the
screen
8. Your system is now ready to operate via its
new bridge Press here to view a list of devices
and their so ware revisions in this
system
Press here to customise your
system password
Press here to scroll to the Config screen if
applicable Press here to go back to the home
screen
665.4.4 Advanced configuration (continued) Press to go to home page
When this op on is selected the only way to
control the Light is via the Touchscreen, Light RF
switch or via the App. The exis ng 240Volt light
switch can only be used to switch the Light on if
it‘s last se>ng on the App was “on”. Press here to find which switches
and bu ons are which. Press a
bu on on a switch and the
Press here if you want you Lights to come on system will tell you the Switch
a er a power failure or when the light switch number and bu on number you
has been switched off and back on a er 10 last pressed
seconds. The Lights will come on at their last
known “on” mode. For example, if the last me
a light was “on” and was at blue 50% brightness
and is switched off via the App. If the Light is Press here to go to the diagnos cs
then switched off and back on a er 10 seconds sec on. Here you can scroll through
at the light switch it will turn on blue at 50% the Lights installed in the system
brightness. and view variables such as internal
Light temperature, Light sensor set
point and actual, movement
detec on and any overrides that are
taking place due to temperature,
Press here if you want your Lights to come on
light intensity or lack of movement.
a er a power failure or when the light switch
has been switched off and back on a er 10
seconds. The Lights will come on at 100% cool
white even if they had been previously switched
off at the touchscreen or set to a different
colour or brightness. This is the factory default
se>ng
Press here to go back
675.5 Touch screen user manual
5.5.1 Main menu
System date and me
Press here to control
Press here to control your air your systems lights
condi oning system
(See iZone manual for details)
Press to set system me
and date. This can also be
set automa cally to sync
with your smart phone or
tablet.
Press to change screen
se>ngs
Press to ac vate or
deac vate this touch
screen’s audio feed
back (beep on touch).
685.5.2 Home screen
Press here to go back to Main System date and me
Menu
Press here for a summary of Lights
installed.
Press to here to change light
colours, brightness, whites
Press here to view devices in Layout
Press to access ligh ng special
mode
effects menu
Press to ac vate a favourite
mode or to configure a new Press to ac vate a schedule
favourite or to configure a new
schedule
Press here to switch all devices Off
Press here to switch all liLghts On
Press to pair an device or switch
Press to access advanced
configura on se>ngs
Tag line this will vary depending on WiFi connec on
the installa on company.
695.5.3 Summary screen Press to go to Special Effects menu
Press to go to Colour change menu
device name. Press here to change
name or access details Press to go to home page
Indicates this Light is in Reading
mode special effect. Press here to
change
Indicates Light colour and Light is ON.
Press here to switch Light OFF Indicates this Light is OFF
Indicates this Light’s brightness is
set at 85% of maximum. Press to
Indicates Light is OFF. Press here to change
switch Light ON.
Indicates this Light is in holiday
mode special effect. Press to change
Default name. Automa cally generated
when Light is first paired. Press here to
Indicates this Light has been
change name
switched off at the wall switch / GPO.
Switch on power to enable Light to
Indicates this device has: be controlled.
a) no power and has been switched off at
the wall switch / GPO. Switch on power to Indicates this Light’s brightness is
enable device to be controlled. being automa cally controlled. Press
b) Has lost communica ons with the bridge to change
or is out of range
Indicates this Light is opera ng in
Candle special effect. Press here to
Press here to scroll up to view previous
change special effect.
page
Press here to go back to home page
Press here to scroll down to view more
devices
705.5.4 Device layout screen Press to go to Special Effects menu
Press to go to Colour change menu
Indicates page name. Press to change
Press to go to home page
Indicates Light colour and Light is ON.
Press here to switch Light OFF
Indicates this page is unlocked. In
this mode you can change the
layout posi on of each device. Press
here to lock layout. When the
Indicates Light is OFF. Press here to layout is locked you can press any
switch Light ON. device to switch it on and off
provided it has power.
Indicates this device has:
a) no power and has been switched off at
the wall switch / GPO. Switch on power to
enable device to be controlled. The same name Indicates
these two Lights are in the
b) Has lost communica ons with the bridge
same group
or is out of range
Indicates this device group name. to
change
Press here to scroll up to previous page
Press here to scroll down to next page Press here to go back to home page
715.5.5 Colour picker
Indicates Light that is being controlled.
Press here to go to Light details) Press to go to home page
Current colour selected. For very fine
colour selec on
Press here to select a primary
colour
Press here to go to the white
Press here to switch this Light OFF
wheel selec on
Press to go to Special Effects menu
Slide here to decrease or increase
the brightness of this Light. (For very
Press here to scroll up to previous Light fine tuning see details screen)
Press here to scroll down to next Light
Press here to go back
725.5.6 White wheel
Indicates Light that is being controlled.
Press here to go to Light details Press to go to home page
Current white selected. For very fine
colour selec on see Light details
Press here to go to the colour
Press here to select a primary
wheel selec on
colour
Press here to switch this Light OFF
Press to go to Special Effects menu
Slide here to decrease or increase
Press here to scroll up to previous Lights the brightness of this Light. (For very
fine tuning see Light details screen
Press here to scroll down to next Lights
Press here to go back
73Press to go to home page
5.5.7 Special effects
Press to ac vate best white for
Indicates device being controlled reading and concentra on
Press here to switch this device OFF
Press to rotate through the
primary colours. Use in
conjunc on with accelerator for
Toggle here to change speed this Light varying effects
changes when switched on and off
Press here to for this device to
Press to ac vate best white for relaxing
switch on randomly between
6:20pm and 10:48pm when you
Press to ac vate candle effect are away on holiday
Green icon indicates this device will Press here to ac vate Circadian
automa cally turn on when the alarm clock ligh ng to match standard
is switched off. (Can only be selected on circadian rhythm.
smart device App)
Press here to go to the colour
Press to ac vate occupancy sensor for this picker for this Light
device. Dedicated hardware is required for
this feature to be enabled
Slide here to set the target
brightness when opera ng in Auto
Green icon indicates this Light will beat to brightness mode. Dedicated
the rhythm of the music. (Can only be hardware is required for this
selected on smart device App) feature to be enabled
Switch Auto brightness control on /
off here. Dedicated hardware is
Press here to scroll to the next device
required for this feature to be enabled
Press here to scroll to the previous Press here to go back to home page
745.5.8 Device details Press to go to home page
Indicates device that is being changed
Press here to change the name
device ID number . This is generated by the
system when first paired
Press here to change the group
Current name for this device number. 0 or - will ungroup this
device and it will operate
Type of device installed
independently
The group that this device belongs to. All
Press here to change the page
devices , switch bu ons and sensors in
you want this device displayed on
this group will operate together
in Layout mode
device status . No power indicates this
Press here to fine tune the colour.
device has been removed from the fi>ng
Input the exact RGB mix required
or the power has been turned off at the
light switch
Press here to fine tune the
brightness.
Indicates this device will be
Indicates that Bu on No. 1 on Switch No. 3 included in the All Off strategy on
is used to control this device. the home page. Press to exclude
from the strategy
Indicates that occupancy sensor No. O1 on
Switch No. 3 is used to control this device Indicates this device will be
included in the All On strategy on
Indicates that the Light Intensity sensor in the home page. Press to exclude
Switch No. 3 is used to auto control from the strategy
brightness to this Light.
Press here to adjust the occupancy
strategy
Press here to scroll to the next device
755.5.9 Group setup Press to go to home page
Indicates this device has not
been grouped and will operate
independently
device ID. This number is automa cally
Press here to change the group
generated by the system
number.
devices and switches are sorted by group
Press here to change the page
you want this device displayed on
in Layout mode
device L3 & L6 are in the same group and
will operate as one.
Press here to change the group
number for this device
Bu on No. 1 on Switch No. 3 is used to
control device L3 & L6.
Press here to change the group
number for this bu on
Occupancy sensor No. O1 on Switch No. 3 Press here to change the group
is used to control L3 & L6 number for this occupancy sensor
The Light Intensity sensor in Switch No. 3 is Press here to change the group
used to auto control brightness to L3 & L6. number for this light intensity
sensor
Press here to scroll up
Press here to go back to device
Press here to scroll down details
76You can also read