LIVE WALLPAPER CREATOR - STEP 5: PUBLISH YOUR LIVE WALLPAPER TO THE ANDOID MARKET
←
→
Page content transcription
If your browser does not render page correctly, please read the page content below
LIVE WALLPAPER CREATOR
                (Patent Pending)

           STEP 5:
      PUBLISH YOUR LIVE
   WALLPAPER TO THE ANDOID
           MARKET
  http://www.youtube.com/watch?v=2AC8XDh0nNM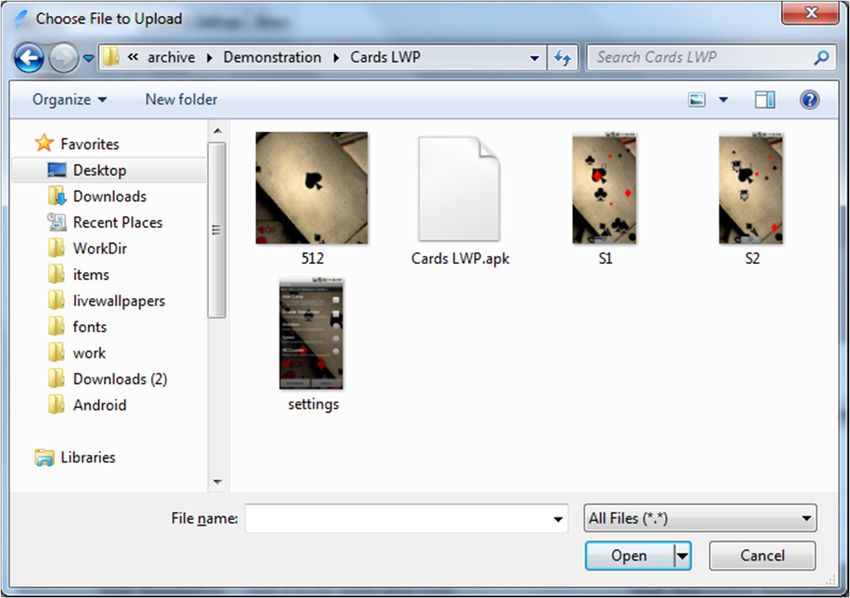
Prerequisites
• To publish on the Android Market, you must have a registered
  developer account: http://market.android.com/publish.
• To sell your publications on the Android Market you must have a
  registered Google Checkout account: http://checkout.google.com.
• Once you set up your developer account on the Android Market, you
  will have the option of setting up and linking a Google Checkout
  account.
• A the time of writing this tutorial, the cost to set up an Android
  Market developer account is $25.
• Google Checkout does not cost anything to set up.
• We highly recommend you read through all terms of service before
  registering.

Accessing the Publisher
• Once you have an Android Market developer
  account, you may begin publishing your live
  wallpapers.
• If the LWP Creator is not running, start it up.
• Now go to the Publisher tab.
• In the publisher tab, you will see a browser
  pane, and a project pane.
• The browser pane, will automatically load the
  Android Market sign-in page.

Publisher Legend
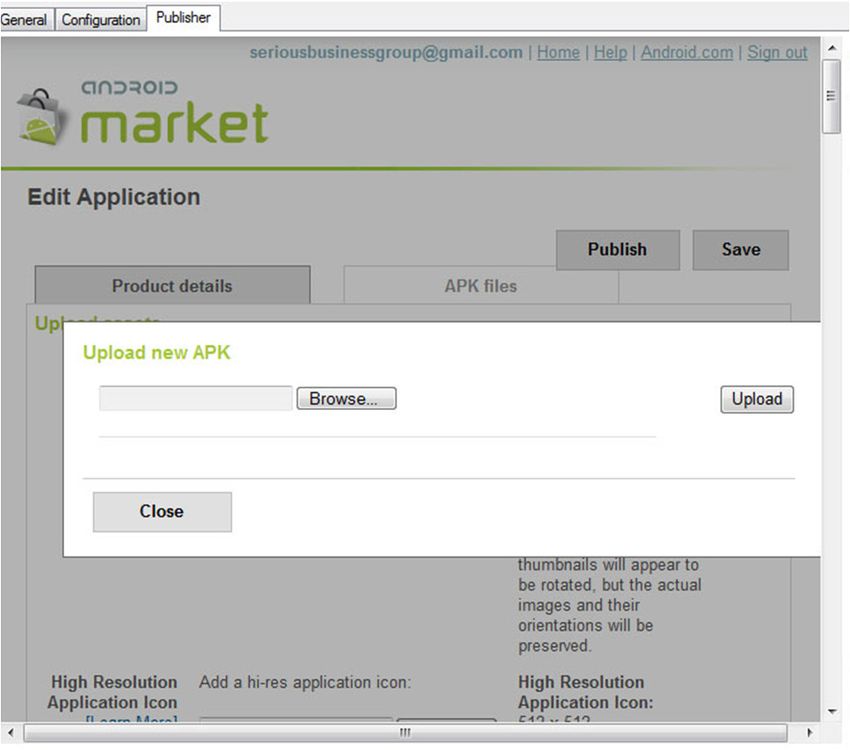
Upload Application
• Once you sign in, you will be presented with
  the developer console.
• In the bottom right corner of the browser
  pane, click on Upload Application.
• You will be prompted to upload a new APK.
• An APK is essentially a compiled application
  file. In this case, it is your live wallpaper.
• To select an APK, click Browse and navigate
  to your archive folder.

Upload Application (cont.)

Upload Application (cont.)

•   All applications built with LWP Creator will be located in the archive folder.
•   There are 2 versions, Demo/Free and Full.
•   Each version of the application will have its own folder with its own set of folders and
    files.
•   Inside each application folder, you will find a built and signed APK file of your live
    wallpaper.
•   Select the APK you wish to upload, and click “Open”.
Upload Application (cont.)
                                               1

                                  2

• Click Upload and wait for the APK to be uploaded.
• Once it is finished uploading, you will see some information pertinent to your
  live wallpaper.
• Click Save.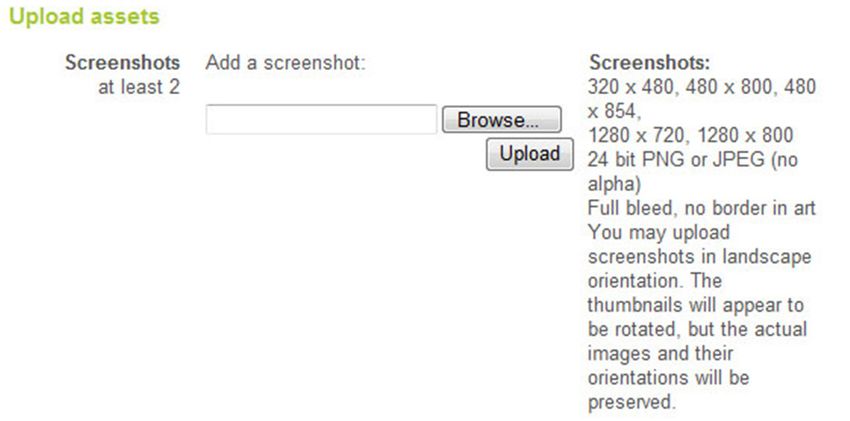
Application Details

You will now be asked to provide the
following details about your live wallpaper:
  1.   Upload assets.
  2.   Listing details.
  3.   Publishing options.
  4.   Contact information.
Upload Assets
• Assets are essentially media that you will use to promote your
  product.
• Some assets are mandatory such as the screenshots and the high
  resolution application icon, and some are optional such as a
  promotional graphic or a YouTube video.
• You should already have all the mandatory assets prepared from
  before, so go ahead and begin by uploading the screenshots.
• Click on Browse beside the screenshots field in the browser pane
  and navigate to the folder where you saved the screenshots. As
  previously stated, we recommend saving them into the live
  wallpaper folders, which is where they were saved for this tutorial.
• Once you have located the screenshot, double-click on it and then
  click Upload in the browser pane.
• To upload more screenshots, click add another and repeat the
  process.
Uploading Screenshots

              2
 1

                   3
                        4

 6
                            5
High Resolution Application Icon • High Resolution Application Icons are used by the Android Market to display your application entry in full-featured browsers. • For example, if someone was to browse the Android Market using a desktop or laptop, they would see the High Resolution Application Icon, instead of a much smaller icon meant for mobile users. • The LWP Creator automatically creates an image to be used for this icon and calls it 512.jpg (because it is 512x512 pixels in size). • This image is located in the application folder, along with the APK. • To upload the icon, click on Browse beside the High Resolution Application Icon field in the browser pane, and navigate to your application folder. • Double-click on a file called 512.jpg, and then click Upload in the browser pane.
Uploading the High Resolution
      Application Icon

   1                2

                           3
        5                           4

                        GRRREAT
                        SUCCESS!!
Listing Details
• Listing details consist of:
1. Language.
2. Title.*
3. Description.*
4. Recent Changes.
5. Promo Text.
6. Application Type.*
7. Category.*
• LWP Creator will automatically fill out the mandatory fields (marked with *).
• The title and the description will be loaded from the descriptions.txt file that
you set up earlier.
• To populate these fields, you need to select your company profile from the
Company drop-down menu in the top right corner.
• Expand the Archive category, as well as the date category which will identify
when you built your live wallpaper.
• Click on the live wallpaper you wish to publish (Cards LWP in this example),
and watch as the mandatory fields get filled out.Populating the Listing Details
1
2
3
You can make changes to the text if desired. For example, since
Cards LWP is only 10 characters and we are allowed a
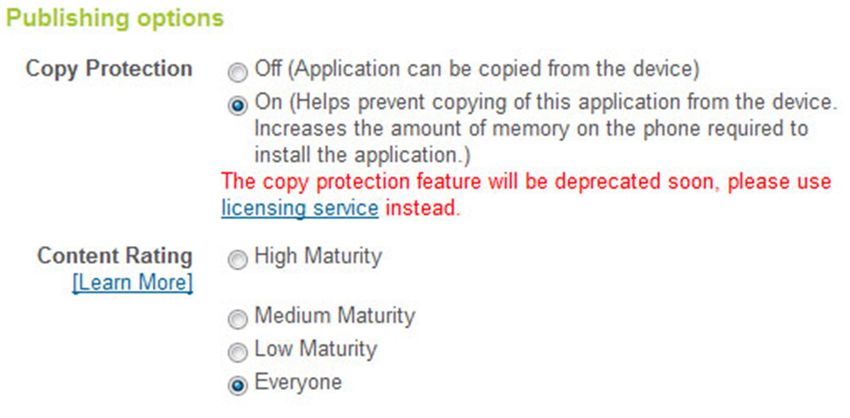
maximum of 30, we changed the title to Cards Live Wallpaper.Publishing Options
• LWP Creator will automatically set Copy Protection to On, and Content Rating to
Everyone.
• It is, however, your preference to enable or disable Copy Protection, and your
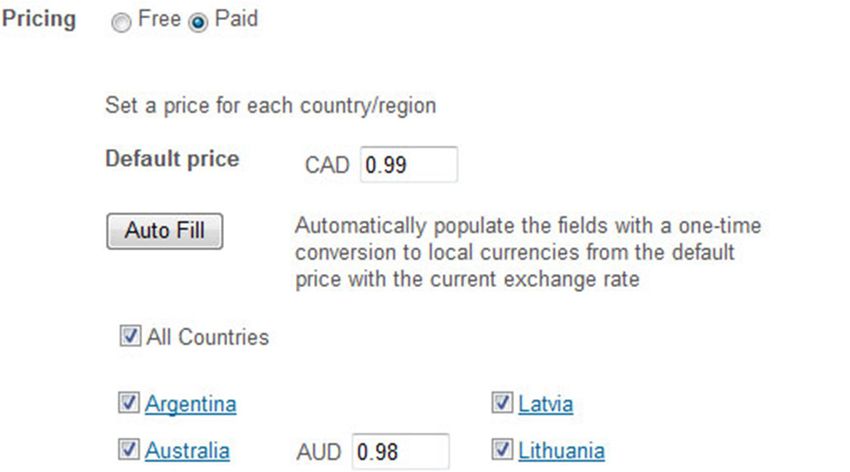
responsibility to change Content Rating if it needs to be changed.Pricing
1
• You can only set up the pricing if you
have registered a Google Checkout 2
account.
• Pricing will be set to Free by default.
• To set the price, click on Paid and set
the desired price.
• You can then click on Auto Fill to 3
convert your default price to other
currencies.
• Keep in mind that some converted
prices may be lower than the required
minimum for those countries, in which
case you will have to manually make
adjustments.
• You may also choose which countries
the application will be sold to, by
checking and unchecking the boxes
beside their corresponding countries.Contact Information and Consent
• Fill out whatever contact
information you want the
people to see.
• Contact information can
be pre-set in your
developer account
settings if desired.
• We highly advise you to
read through all the
documentation that
requires your consent.
• We will NOT be held
responsible if your
application violates the
Android Market rules!
CLICK AND READ!!!
• Once you are ready,
check both consent boxes
and scroll up to the top of
the browser pane.Activating the APK • Now that all the applications details have been filled out, you have to activate the APK you uploaded earlier. • Click on APK files in the browser pane. • You will see that there are no active APKs, but there is a new APK, which can be activated. • To activate the APK, scroll to the right, and click Activate. • You can now either Publish your application, or Save it if you plan to publish it later. In this tutorial we will go ahead and publish the live wallpaper we created.
Activating the APK (cont.)

                       1

                             3
Your live wallpaper is now
        published!               2
Published
Once published, your live wallpaper will appear in the developer
console. In the console you can view some statistics, view errors
and make changes to your applications.Overview Checklist • You have successfully registered for an Android Market Developer account • You have successfully registered for a Google Checkout account (only if you want to sell your applications) • You have successfully uploaded your APK • You have filled out the application details • You have activated your APK and published your application
CONGRATULATIONS!
You have completed the fifth and final step
  to creating your own Live Wallpapers!
Conclusion
We hope you use Live Wallpaper Creator to fill
the Android Market with some wonderful and
           creative live wallpapers!
Remember to follow the Android Market rules!
   We will not be held responsible if your
applications violate the Android Market rules!

       GOOD LUCK AND HAVE FUN!
Live Wallpaper Creator
Copyright © 2011 Serious Business Group.
All rights reserved.You can also read