Replacing Shutter Curtains in Screw-Mount Leicas
←
→
Page content transcription
If your browser does not render page correctly, please read the page content below
Replacing Shutter Curtains in Screw-Mount Leicas
Christopher Kuni
Revised 11-09
You can install new shutter curtains in your screw-mount Leica or similar
camera; this article shows you how to do it. I am not a pro but an amateur
camera repairer and restorer. I have replaced shutter curtains in a handful of
cameras including several Leicas, from the model A through the IIIf, and early
Canons. This is not an exhaustive treatise on Leica shutters or their repair but a
description of some techniques that I have not seen published elsewhere. You
should have at least a fundamental understanding of focal plane shutters and
general camera repair techniques, and I assume that you have opened, cleaned,
and lubricated the camera that needs the new curtains. The details described
here will vary somewhat depending on camera model. The references at the end
include several books and articles that I have found helpful.
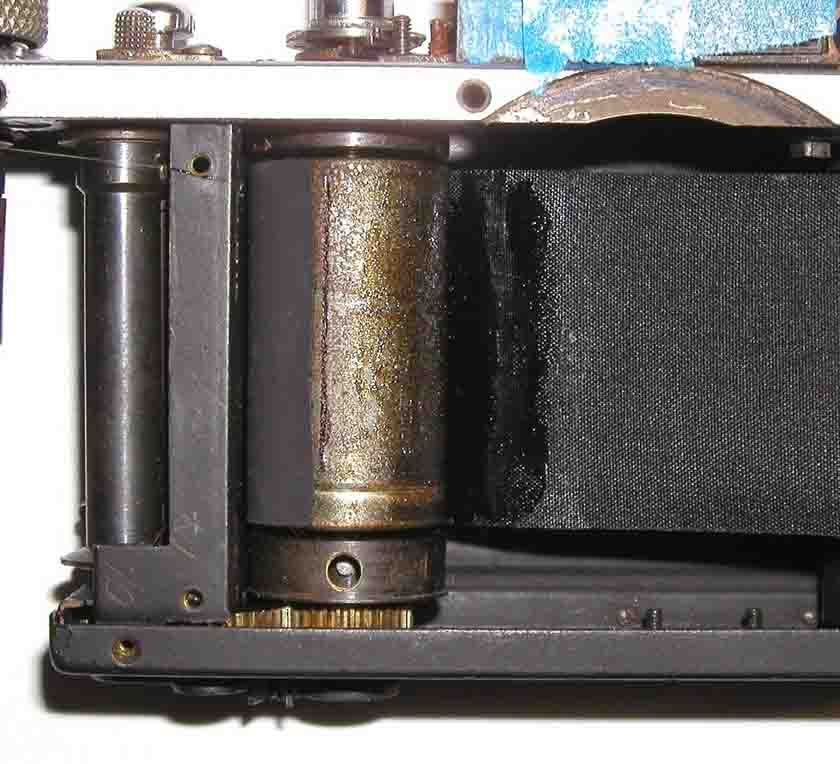
Shutter curtains can be installed after the drum and rollers have been
removed from the camera or with them in place. There are two main
advantages to the first approach. First, Leicas are crowded inside, so it’s easier
to attach the curtains and curtain tapes to parts that are spread out on the
bench. Second, removal of these parts allows proper cleaning and lubrication of
some of the bearing surfaces that are difficult to reach if disassembly is only
partial.
A disadvantage to the out-of-camera method is the increased complexity
of the project. In particular, reassembly of the multiple shafts, sometimes with
loose bearing balls, in the shutter crate is tricky and can be frustrating.
Furthermore, this method relies on very accurate initial positioning of the
curtains and curtain tapes on the rotating parts and on precise duplication of the
old curtains and tapes. If you are working on a camera with damaged or absent
curtains or tapes, this method might be impractical. I have never seen published
information on exact dimensions or positioning of these parts (with a couple of
minor exceptions that I’ll describe later).
The in-camera method described here allows essentially arbitrarily
accurate adjustment of the curtains and tapes. The trick is to use small pieces of
double-sided tape to bond the ends of the curtains and their tapes to the drum
and rollers temporarily. After accurate positioning is obtained, the curtains and
curtain tapes are cemented. Then the double-sided tape is removed and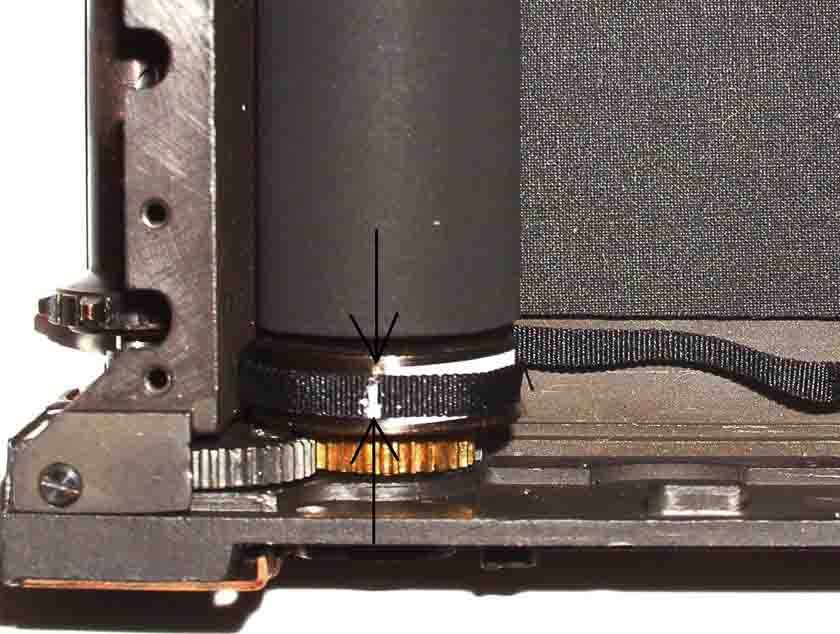
replaced with cement. The photos show a Leica IIIa and a IIIf undergoing
curtain replacement.

        For this method to be possible, it’s necessary to wrap the closing curtain
with its lath and tapes around the drum twice after its end is attached to the
drum, because the rotation of the drum is limited by shutter gearing. As such,
the curtain and its tapes can’t be wound completely onto the drum by simply
rotating it as would be done with the parts out of the camera. Getting the
curtain and lath around the drum in tight quarters is possible if 1) the closing
curtain latch shaft and spring and the slow speeds retard rod (if present) are
removed from the camera, and 2) the lath is not too long. Condition 1 is easily
met. Condition 2 may require grinding a little from the ends of the lath.

       Figure 1 gives dimensions representative of curtains and tapes that I have
measured; the curtains in this photo were bought ready-made and were used in
the IIIf. These dimensions should always work, but they are unlikely to be close
enough to those of your old parts to allow direct replacement without adjustment
of attachment points on the drum. The curtain width is simply the length of the
central closing curtain part of the drum and will vary a little with camera model.
I made the curtains and tapes shown in the photos of the IIIa from scratch,
cutting curtains and tapes from bulk material. I made the laths from a coping
saw blade by grinding off the teeth, cutting to length, and grinding the notches
for the tapes. If you make your own curtains, be careful to cut their ends at
precise right angles to their edges.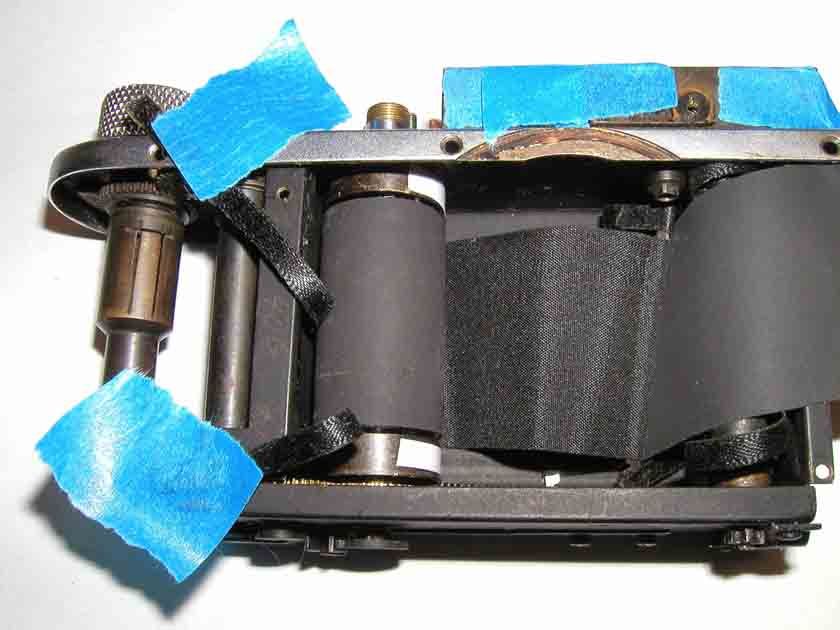
FIGURE 1.

        Each curtain is folded around its lath with the rubberized side in, i.e. in
contact with the lath. The tapes are folded around the laths in the same sense
as the curtains so that the free ends of the tapes are on the opposite side from
the free end of the curtain. I have never sewn the curtains onto the laths,
instead using cement only, and have never had a failure; my oldest such repair
dates from the 70s and is still intact. A drawback of this technique is that the
difference from factory curtains is immediately obvious; if you desire exact
replication of the factory appearance, either sew the curtains on the laths or buy
ready-made parts. In this latter case, if the only parts available are for IIIc and
IIIf, you can use them on earlier Leicas and early Canons after a little trimming.

       The parts at the bottom of the shutter crate that take place in shutter
action should be in place. It’s convenient for the wind knob and the winding
gear train at the top of the camera to be in place. Remove all baffles and the
rangefinder lever. Be sure to thoroughly clean and lubricate the mechanism
before installing the curtains.

        The closing curtain is installed first. You will need an accurate reference
line at or near the point where the end of the curtain will be attached to the
drum. This line, a meridian of the cylindrical drum, that is, a line on the
cylinder’s surface that is parallel to its axis, will serve as a guide to locate the
curtain end precisely parallel to the axis of the drum. There may be an old glue
line that can serve as your reference line; if not, scribe a meridian on the drum
with a fine marking pen by using the edge of the image aperture as a guide
(Figure 2). The drum is held against the stop that limits its rotation after the
shutter has been released. Point the pen toward the axis of the drum; this line
will then be the approximate location of the attachment of the curtain to the
drum.

FIGURE 2.

         A little to the left (clockwise as viewed looking down on the drum from the
top of the camera) of the reference line, stick a length of double-sided tape a
little shorter than the width of the curtain and a few millimeters (mm) in width
(Figure 3). I use thin plastic carpet tape; cloth carpet tape is too thick. Then
peel off the backing from the carpet tape and attach the non-rubberized side of
the end of the closing curtain, being careful to keep the edge exactly parallel to
your reference line (Figure 4).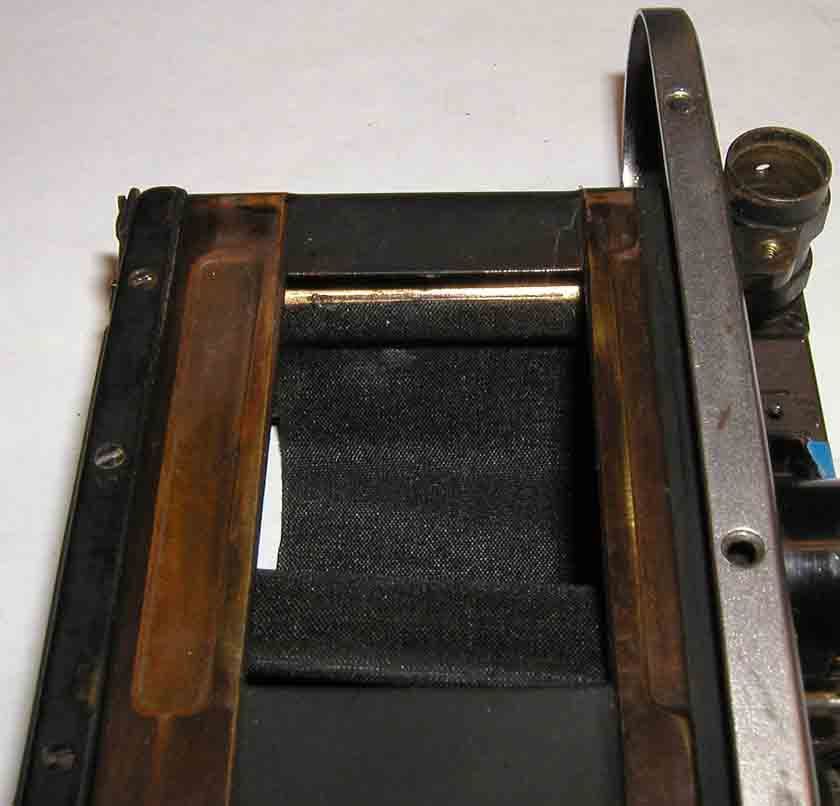
FIGURE 3.

FIGURE 4

        Now you must wrap the closing curtain around the drum clockwise. This
will require pulling its tapes around the drum to the left and then behind it, and
then teasing the lath along the same path. This maneuver is greatly facilitated
with a tool made from thin cardboard to which a patch of double-sided tape is
applied at one end. You can use a business card cut in half lengthwise. Stick
the ends of the closing curtain tapes to the end of the tool and pull them
through, followed by the lath and then the curtain (Figures 5 and 6). Then do it
again. If the lath refuses to be teased around the drum, it may be too long to fit
and require a little shortening with a Dremel or similar hand grinder.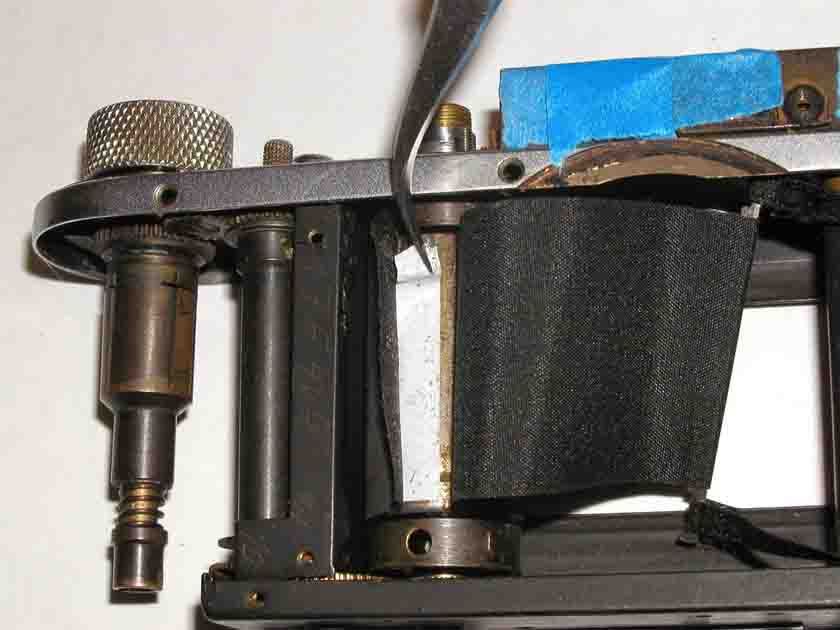
FIGURE 5.

FIGURE 6.

      Next, continue the cardboard tool behind the spring rollers and then
toward the front of the camera (Figures 7 and 8). Remove the curtain tapes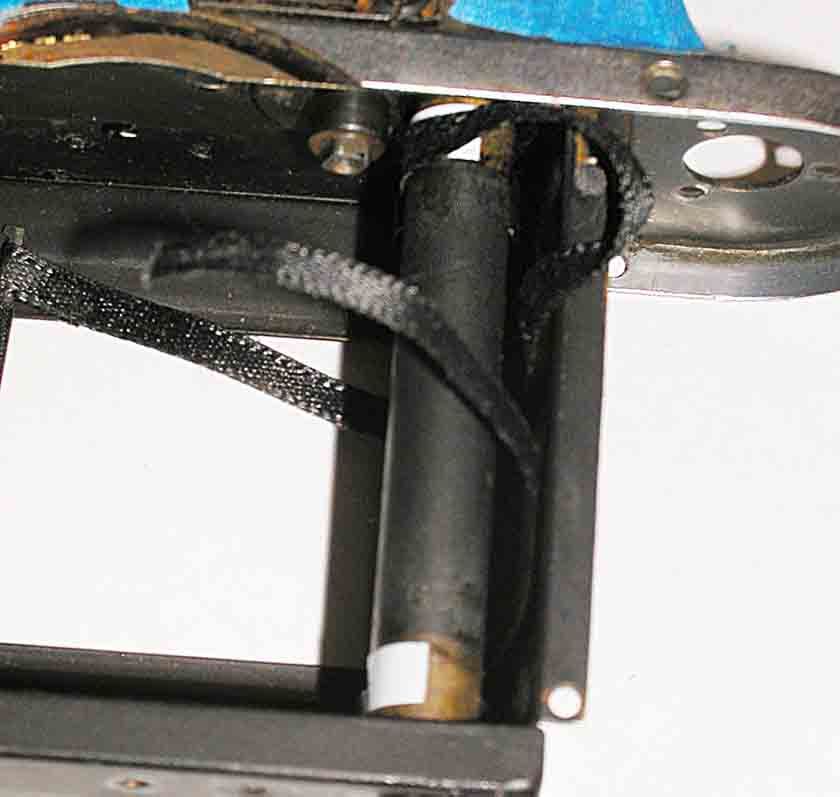
FIGURE 7.

FIGURE 8.

from the tool and attach them to the closing curtain spring roller using small
pieces of double-sided tape (Figure 9). The curtain tape ends can be attached
anywhere around the circumference of the roller, but (assuming they are the
same length) they must be attached on the same meridian so that one tape
doesn’t pull one edge of the curtain ahead of the other. The positions of the
curtain tapes along the axis of the roller should correspond to the positions of
the tapes at the lath when it is near the drum with the shutter wound. The
edges of the curtain tapes will be near the inner edges of the guide rollers but
should not override the edges.
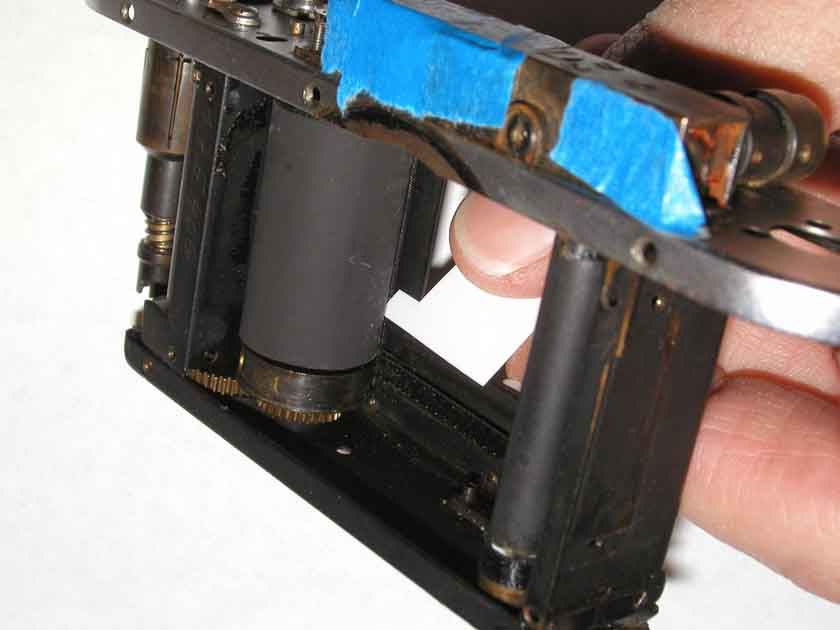
FIGURE 9.

       An alternative method of temporarily conveying stiffness to the curtain
tapes is shown in Figures 10 and 11. Here Scotch transparent tape is applied to
the end of the curtain tape so that it can be pushed behind and around the
spring rollers of a IIIf.

FIGURE 10.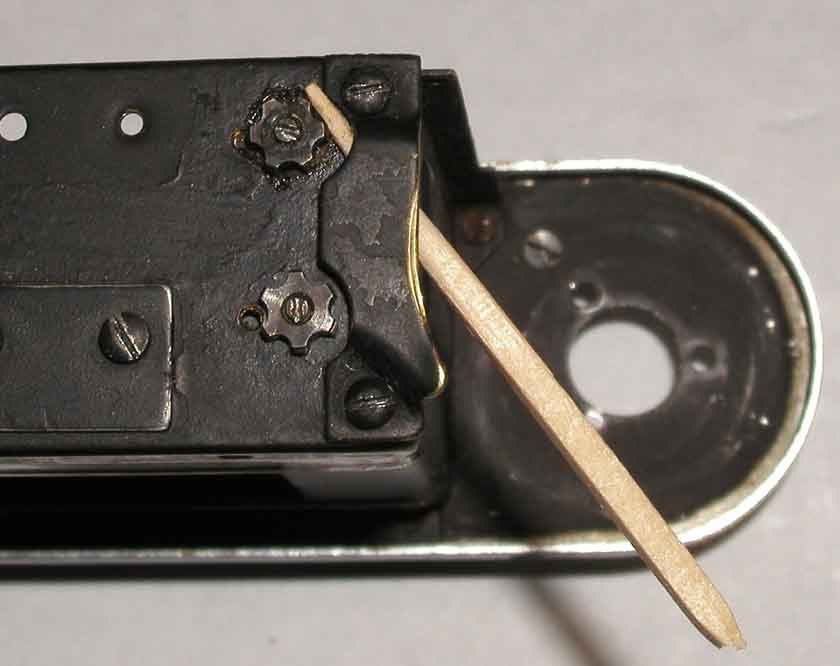
FIGURE 11.

         Now you can tense the closing curtain roller spring and test the operation
of the curtain. Replace the closing curtain latch shaft and its spring, being
careful not to pass the shaft under a loose loop of curtain. From its neutral
position, rotate the spring tensing adjustment screw counterclockwise 2 turns to
simulate tension in the operating shutter. If you’re working on an early camera
with tiny lock screws, and the spring lock nuts are not reliably preventing
rotation of the shaft, avoid repeated removal and reinstallation of the screws by
temporarily locking the spring nut with a toothpick (Figure 12). Wind the
advance knob until it stops. Press the shutter release button. The latch will
arrest the motion of the curtain as long as the button is held down. The closing
curtain should operate normally, except that its attachment point on the drum
will likely need adjustment.
FIGURE 12.

       I have not found an official Leitz specification for the position of the
curtains relative to the image aperture. However, the Canon manual of the
reference list specifies a distance of 3.1 or 3.5mm (depending on camera model)
from the edge of the closing curtain to the left edge (as you face the front of the
camera) of the image aperture when the closing curtain is held by its latch,
ready to be released by the opening curtain cam. I’ve measured this distance as
close to 3mm in several screw-mount Leicas and early Canons in which I believe
the shutters are original. If this setback is too short, the closing curtain will
encroach on the left side of the image aperture before release, especially at slow
speeds. If the setback is too long, the curtains may bounce back into the right
side of the image aperture after the shutter has been released.

       Make an L-shaped gage in which the short arm of the L projects 3mm
beyond the long arm. With the closing curtain retained by its latch (not by the
winding mechanism), check the setback as shown in Figure 13. To adjust this
setting, you’ll need to remove the closing curtain tapes and unwind the curtain
and tapes to expose the attachment point. Don’t forget to remove the latch shaft
and spring first! Move the curtain attachment point a distance equal to the
difference between the required and actual setbacks. Replace the latch shaft
and spring, and tense the roller spring.
FIGURE 13.
Once the setback is correct, check parallelism between the curtain edge
and the edge of the image aperture. Do this by advancing the curtain just
beyond the edge of the image aperture and observe the gap (Figure 14). If the
edges are not parallel, and the curtain has been cut square and attached parallel
to the axis of the drum, it may be that the tapes are not of equal effective
length. You can adjust this inequality by moving the tapes’ attachment points on
the roller by slightly slackening the side that seems to be relatively short or
slightly tightening the other side. This method should not be used to
compensate for an improperly attached or non-square curtain, in which case you
may achieve parallelism, but one side of the curtain will be loose and floppy.FIGURE 14.
When all is well, the edges of the curtain, the curtain tapes, and the
edges of the image aperture will all be parallel. In Figure 15 these conditions are
very nearly met; the curtain tapes override the guide rollers very slightly, a
condition that I decided to live with. If the curtain tapes try to angle off the
horizontal, their positions along the axis of the spring roller may be in error or
their effective lengths may be unequal.
FIGURE 15.Now very carefully mark the attachment points of the closing curtain tapes on the spring roller, relax the spring, and detach the tapes. Remove the latch shaft and spring, and then unwind the curtain one turn from the drum. Starting at the double-sided tape, cement the curtain to the drum. I do this in several stages, allowing the cement to set at each stage (Figure 16). Then remove the double-sided tape and cement this portion of the junction (Figure 17). Next, feed the curtain and tapes around the drum, reattach them to the spring roller, and follow a similar procedure of cementing them. If you’ve carefully marked their positions and are feeling confident, skip the double-sided tape attachment and go directly to cementing. FIGURE 16.
FIGURE 17.

       Now install the opening curtain and its tapes. The curtain and tapes can
be attached in either order; here I describe the attachment of the tapes first.
Maneuver the opening curtain tapes and its lath behind the closing curtain tapes;
in the operating shutter, the closing curtain is in front of the opening curtain. A
narrow version of the cardboard tool is useful for pulling the tapes around the
ends of the drum, as there’s less clearance now that the closing curtain is
wrapped around central portion of the drum (Figure 18). Or you can use the
Scotch tape method.

FIGURE 18.
With the drum in the released position, the attachment point of the opening curtain tapes on their drums will be almost out of sight, at about the 2:00 o’clock position as viewed from the top of the camera. These points are usually a few mm in front of (clockwise to) the edge of the closing curtain on its drum when the central and end parts are held in the released clockwise position. There is no way (that I know of) to localize the tape ends precisely on the same meridian, because there’s no convenient reference that can be used at both drum ends. For this reason, expect more trial and error in localizing these tapes. Stick on small lengths of double-sided tape on the drum ends as shown in Figure 19, and attach the curtain tapes. Because the ends are difficult to see, place adjacent marks on the opening curtain tapes and their drums at convenient points; these marks will be used later to keep track of changes in the attachment positions. I’ve found that white correction marker pens work well for placing small marks on the curtain tapes. The arrows in Figure 20 point to a white mark on the lower curtain tape and a nearby tiny scratch on the adjacent drum. FIGURE 19.
FIGURE 20.

        The end of the opening curtain can be attached anywhere around the
circumference of the spring roller, but it’s critical to achieve parallelism between
the end of the curtain and the axis of the roller. If there’s no glue line, scribe a
meridian line along the surface of the roller as you did on the drum. To keep the
roller from rotating during this and following procedures, I temporarily stuff a
small piece of dense foam plastic between the roller and the side of the shutter
crate. Attach the usual strip of double-sided tape to the roller, and, working
from both front and rear of the camera, attach the rubberized side of the
opening curtain to the roller; it should be centered between the inner edges of
the guide rollers, and its edge should be perfectly parallel to the meridian line.
Figure 21 shows the meridian line and double-sided tape on the roller, behind
which is the white foam plastic wedge. In Figure 22 the edge of the curtain has
been attached.
FIGURE 21. FIGURE 22.
Remove the plastic foam wedge and install the latch shaft and spring.
From the neutral points turn the spring adjustment screws clockwise 2 turns on
the closing roller and 6 turns on the opening one. These settings are done with
the drum in the released clockwise position and the opening curtain and closing
tapes wound around their rollers. The shutter should operate at this point,
although the opening curtain will no doubt need adjustment. Fortunately, if the
curtain was carefully attached to its spring roller, all of the adjustment can be
accomplished at the drum. The closing curtain should overlap the opening
curtain 3 mm. As with the closing curtain setback, I have not found a Leitz
specification for the overlap, although the Canon manual specifies 3 mm; my
measurements of presumably original Leica shutters confirm 3 mm in several
cameras. (So both the setback and the overlap are 3mm.) Adjust the opening
curtain attachment points on the drum for 3 mm overlap.

      To check parallelism of the edges of the opening and closing curtains,
wind the shutter part way and then turn the closing curtain portion of the drum
separately to create a narrow slit (Figure 23).

FIGURE 23.

How close to parallel must the edges be? A rough estimate can be made by
calculating the width of the slit at the highest shutter speed. For example, in the
IIIf of Figure 23 the transit time of the slit for all speeds on the high speed dial is
1/30 second (not all IIIf’s are the same in this regard). The slit transit distance
is 36mm. At the 1/1000 setting, 1/30 divided by 1/1000 multiplied by 36mm is
close to 1mm, the theoretical width of the slit at 1/1000. This means that if the
slit is off parallel by only 1mm, the exposure difference from top to bottom of the
image can be very significant. At worst, the slit could be completely closed its
narrow end; at best, the slit width would vary from 1mm at its narrow end to
2mm at its wide end, a full 1-stop difference in exposure between top and
bottom. For earlier cameras in which the transit time is only 1/20 sec, the slit
width is proportionately narrower, increasing the precision requirement still
more. In reality the slit widens and accelerates as it traverses the image
aperture, so for most of its travel things aren’t quite as bad as this calculation
would suggest. Nevertheless, the slit width should vary by significantly less than
1mm from top to bottom. When the attachment points of the opening curtain
and tapes are satisfactorily located, cement them in stages as for the closing
curtain and its tapes. There’s room to do this without detaching the opening
curtain from its spring roller.
For detailed instructions on shutter adjustment, see Lyells’ The Leica IIIf.
Here’s a synopsis of that reference. Attach the shutter speed dial and, if there is
one, the flash synch cam, as these parts have rotational inertia that will affect
shutter operation. With the shutter in the released position, that is, both laths at
the right side of the image aperture, rotate the closing curtain spring adjustment
1 3/4 turns counterclockwise from its neutral position and the opening curtain
spring 3 turns. At 1/30 second the shutter may operate with these settings,
although more opening curtain tension may be required for reliable release of
the closing curtain latch; increase tension 1/2 turn at a time until the closing
curtain is released reliably. Now set the shutter at 1/500. Hold the camera with
a light behind it, release the shutter, and check for an open slit across the full
width of the image aperture. It’s likely that none or only part of the left side of
the aperture will show light. Continue to increase opening spring tension until
you see light across the entire width of the image aperture.
At this point some kind of shutter tester is required. You can use a TV
screen if it’s an older set with a CRT; flat panel TVs won’t work. The TV should
be tuned to a station to assure locking of the raster frame rate to the standard
frequency. Or make a rotating drum tester from a coffee can, DC motor, and
rheostat; see the last entry on the reference list.
Adjust the opening curtain tension in 1/4-turn increments for even
exposure across the image aperture at 1/500. Then adjust the 1/500 and
1/1000 eccentric studs on the closing curtain latch for accuracy at these speeds.
If you’re working on a pre-IIIc Leica, there are no adjusting studs. In this case
adjust the opening curtain tension for even exposure across the image aperture
at the camera’s highest shutter speed and accept the result. The only legitimate
way to significantly change the high speeds in these older cameras is to move
the attachment points of the opening curtain tapes on the drum; but if theoverlap is correct, and there are no malfunctions, the speeds will be reasonably
accurate (but nowhere near as accurate as in modern electronic shutters).
I’ve found that in pre-IIIc Leicas, Lyells’ recommended 1 3/4-turn closing
curtain tension often results in transit times faster than the desired 1/20 second.
You may want to try less tension in these cameras.
Regarding problems, any source of friction will increase tension
requirements and decrease speed accuracy and repeatability. Typical sources
are stiff shutter cloth, curtains or tapes dragging on baffles or torn pieces of film,
and insufficient cleaning and lubrication. Pre-IIIc Leicas have a small brass
shroud that fits around the flanged gear at the lower end of the sprocket roller.
If the shroud is bent even a little, it can rub against the gear or the flange. This
is the flange that is pushed down by the shutter release shaft or the advance-
rewind lever; if it is bent downward even slightly, it can rub on the shroud when
the release button is depressed. I suspect that the flange is sometimes bent
down by careless and forceful removal of the take-up spool if the end of the
spool catches on the flange.
References
The Leica-Type Shutter. S.L. Love. National Camera, Inc. Excellent explanation
of how they work. Not much repair information. (This book and The Leica IIIf
below are out of print but can be found online).
Focal Plane Shutters. http://www.pentax-
manuals.com/manuals/service/focal%20plane%20shutters.pdf. Part of a Pentax
manual. Excellent description of shutters with some valuable service
information.
The Leica IIIf. Larry Lyells. National Camera, Inc. Superb repair text. Focuses
on the IIIf but is useful for other models. Good information on out-of-camera
curtain replacement and on a clever in-camera method in which portions of the
old curtains and tapes are left in the camera.
Leica Camera Repair. Ed Romney. Romney Publishing. Basic repair text
(nothing on shutter replacement) with many useful exploded diagrams of screw-
mount Leicas through the IIIf.
Camera Disassembly for Shutter Adjustment, Repair, and Replacement. Jay
Javier. http://jay.fedka.com/index_files/Page455.htm. Good article on Fedcameras that is applicable to screw-mount Leicas. Shows the out-of-camera method. Leica Repair Handbook. Tomas Tomosoy. Amherst Media, Inc. Useful basic repair and restoration tips. However, only 18 of 139 pages are specifically on screw-mount models. Leica IIIf Servicing Instructions. Ernst Leitz GMBH. Promising title and publisher, but disappointing in its lack of shutter replacement information. Lots of IIIf diagrams. Many details on tensions, torques, dimensions, etc., but not very relevant to shutter replacement. This is a reprint of an old factory manual. Canon Rangefinder Camera Service Manual and Parts List. Model IV-S2. Canon Camera Co, Inc. Similar to the Leica factory manual, but with more practical information. The Leica Drum Shutter Tester. S.K. Grimes. http://www.skgrimes.com/idcc/. Details of a rotating drum tester that could be duplicated by the amateur.
You can also read