STAR WARS: REBELS TABLE GUIDE - BY SHORYUKENTOTHECHIN PAGE 1 OF 29
←
→
Page content transcription
If your browser does not render page correctly, please read the page content below
Page 1 of 29

Star Wars: Rebels Table Guide
   By ShoryukenToTheChin

                          7

                  6

                              8   9
              5                       10

                      4

          3
                                      11
      2

  1
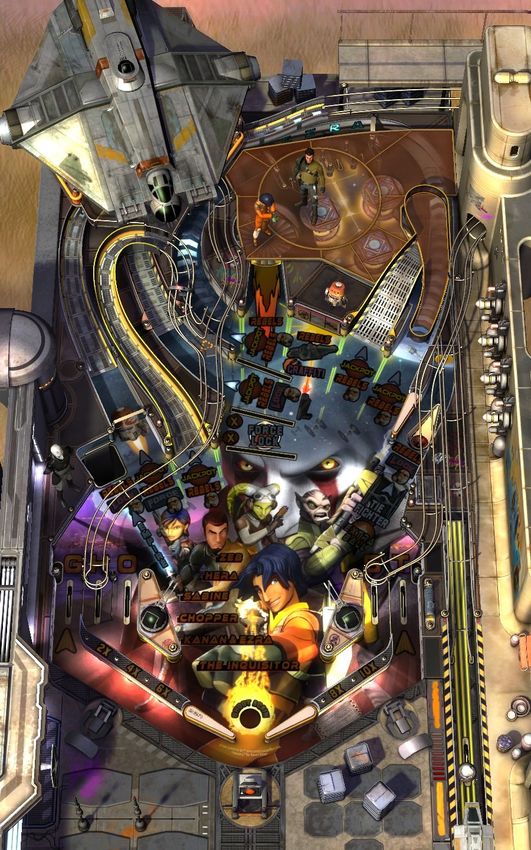
Page 2 of 29

Key to Table Overhead Image –

   1. Imperial Sink Hole
   2. Left Orbit
   3. Mission Ramp
   4. Multiplier Targets
   5. Cross Ramp
   6. Bumper Mini - Orbit
   7. Thruster Ramp
   8. Graffiti Targets/Sink Hole
   9. Right Ramp
   10. Right Orbit
   11. Tie Saucer

In this guide when I mention a Ramp, Lane, Hole etc. I will put a number in brackets which will correspond
to the above Key, so that you know where on the Table that particular feature is located.
Page 3 of 29

                                       TABLE SPECIFICS
  Notice: This Guide is based off of the Zen Pinball 2 (PS4/PS3/Vita) version of the Table on default
controls. Some of the controls will be different on the other versions (Pinball FX 2, etc...), but everything
                                    else in the Guide remains the same.

INTRODUCTION
This Table is based on the animated series known as Star Wars: Rebels. The Series is set 5 years before Star
Wars Episode IV: A New Hope & 14 years after the fall of the Galactic Republic and the Jedi Council in Star
Wars Episode III: Revenge of the Sith.

Star Wars: Rebels Table sees you play through various key events in the TV series incorporating the many
characters of the show. Table incorporates the usual Star Wars themed music, and various audio works from
the TV series itself.

I hope my Guide will help you understand the Table better.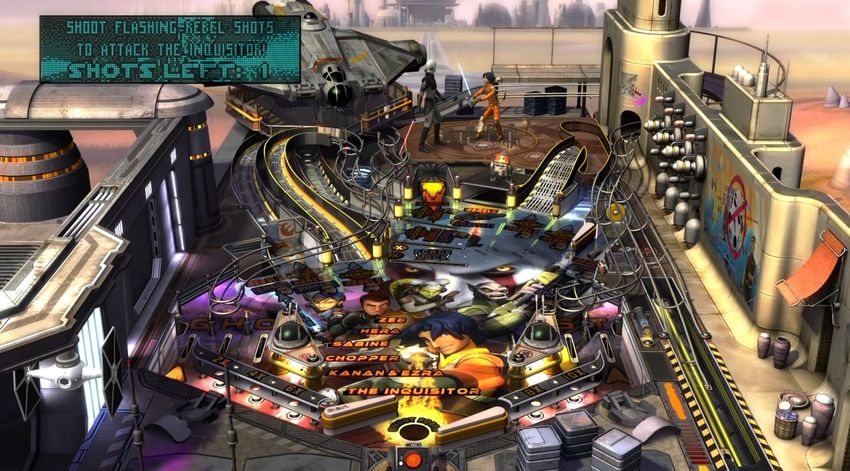
Page 4 of 29

Table Mechanics
Ramp Hits & Combos -

Hitting either the Bumper Mini – Orbit (6), Right Ramp (9) &/or Right Orbit (10) when lit (pulsating
Arrows, this will alternate between the 3 Lanes) will collect a Letter of ‘STAR WARS’ each time. If you
manage to collect them all; each Lane will carry a single Jackpot, and therefore hitting them will gain
said Jackpot. The Ramp score level will also be increased each time this mechanic is activated.

To produce Combo shots simply hit successive lanes fast enough to accumulate Combos. Every hit Lane
lights up specific Arrows on other Lanes, these tell you that they are to be hit to advance the Combo. These
Arrows can be seen on the Image below.

Preforming a 10 hit Combo will light up Extra Ball at the Tie Saucer (11); collect it by sending the Ball into
it.
Page 5 of 29

Skill Shot - *Variable Score Award – 1 Million Points for a clean roll-
through*
At the start of each Ball you will have the opportunity to score a Skill Shot. This is done by having the Ball
launch with just enough momentum to roll down the flashing ‘EZRA’ Rollover above the Bumper.

You can switch which of the 4 Rollovers are flashing by pressing the Flipper Buttons. Below is how I
manage to get the Ball to roll down the ‘R’ Rollover –

      Power Gauge – As
       you pull back the
      Plunger (Analogue
         Stick on your
      Controller controls
       this). The Gauge
         will increase.

Now I tend to have the Power Gauge at just shy of full power. It usually results in the Ball rolling down the
‘R’ Rollover. Depending on how true the Ball rolled down the flashing Rollover you can be awarded 1
Million Points for an Untouchable Skill Shot (Ball rolls through without bouncing a lot). Now after each
Skill Shot collected the amount given out will increase by 500,000 Points.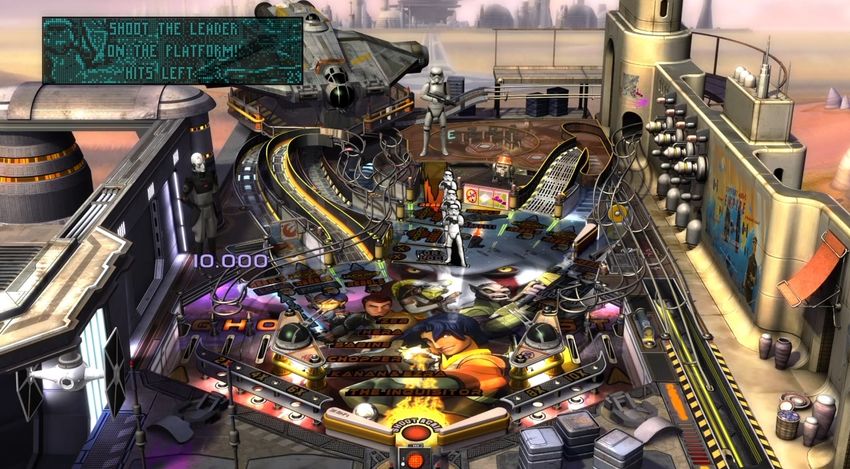
Page 6 of 29

Super Skill Shot *1 Million Points for Cross Ramp (4) & 1.5 Million Points for Bumper Mini – Orbit
(5)* –

You can instead go for a Super Skill Shot by sending the Ball out of the Launch Lane with about half of
Power Gauge filled.

       Power Gauge – As
        you pull back the
       Plunger (Analogue
          Stick on your
       Controller controls
        this). The Gauge
          will increase.

This will then cause the Ball to roll back down towards the Top Right Flipper; with this Flipper you can now
hit either of these to score a Super Skill Shot –

                                                                             Bumper Mini – Orbit (6) –
                                                                           Hitting the Ball through this will
                                                                           award you more Points than the
                                                                           Cross Ramp (4). On Ball 1 you
                                                                             will gain 1.5 Million Points.

                                                                           Cross Ramp (5) – On Ball 1 you
                                                                              will gain 1 Million Points.
Page 7 of 29

Kick Back & Ball Save
Kickbacks –

The Kickbacks on this Table are activated by hitting all the Slingbacks, of which there are 8 in total -

Once a Slingback is hit it remains lit solid, although you can switch which Slingbacks are lit by hitting the
Ball at the Bumpers. Now when all 8 have been hit, the Left Kickback will then become activated and you
can now repeat the process to activate the Right Kickback.

                 *Note - This Table doesn’t reset the Kickbacks earned if you lose a Ball*

Ball Save -

Ball Save can be manually activated once you have both Kickbacks activated, and once again repeat the
Kickback activation process but instead it will activate the Ball Save this time.
Page 8 of 29

Extra Balls
There are 5 Ways to achieve an Extra Ball;

Collect the Extra Balls by hitting the Ball into the Tie Saucer (11) -

   •   Method 1: After finishing 3 Main Modes; look later in the Guide at the section titled ‘Main Modes’
       for information on how to get this Extra Ball.

   •   Method 2: Gained as a random award from the Graffiti Reward; look later in the Guide at the
       section titled ‘Graffiti Random Reward’ for information on how to get this Extra Ball.

   •   Method 3: Maximizing the Bonus Multiplier; look later in the Guide at the section titled ‘Raising
       the Multiplier’ for information on how to get this Extra Ball.

   •   Method 4: Starting all of the 3 Imperial Sabotage Modes; look later in the Guide at the section
       titled ‘Hurry Up Modes – Imperial Sabotage Modes’ for information on how to get this Extra Ball.

   •   Method 5: Reaching a 10 hit combo count; hit successive lanes fast to accumulate a high enough
       combo count to be awarded with an Extra Ball.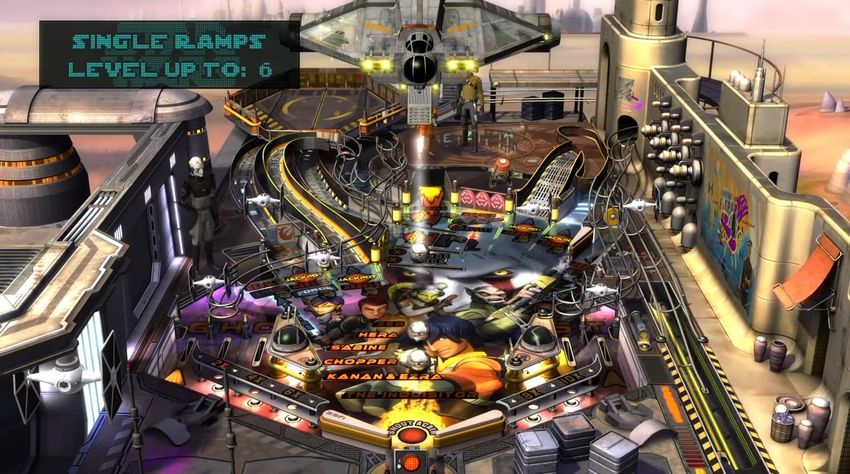
Page 9 of 29

Raising the Multiplier
To raise the Bonus Multiplier you will need to hit the 2 Multiplier Targets (4) –

Once you hit them the Multiplier will be raised to 2x times. Repeat this process to raise it again to 4x times,
each time it will raise by 2x times until it maxes out at 10x times. After which you will light EXTRA BALL
at the Tie Saucer (11)

                          *Note – Multiplier Level resets upon draining the Ball.*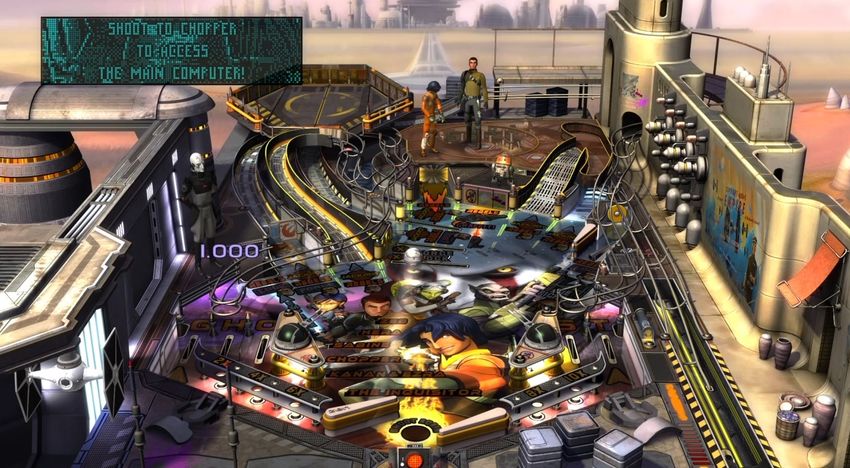
Page 10 of 29

Graffiti Random Award
Hitting the Ball at the Graffiti Targets (8) –

Each time those Targets are hit a Letter of ‘GRAFFITI’ will be collected, and once you gain all of those
Letters the Targets drop down and reveal a Sink Hole

You will then be taken to the Right side of the Table where Sabine will do some Graffiti on the wall. You
will also see various awards be displayed on the Dot – Matrix, you can wait for one to be chosen or just
press the ‘Launch’ Button to stop it on the award displayed. These random awards can range from Point
base Bonuses to an EXTRA BALL.
Page 11 of 29

The Collector
You will need to complete the ‘EZRA’ Letters by rolling down the 4 Rollovers above the Bumpers. You can
alternate the lit Rollover using the Flipper Buttons, as to have the Ball roll down an un-lit Rollover to make
the process faster.

Now the objective of this Mode is to find Imperial Helmets for Ezra. The Lanes will have lit Helmet
Notification Lights on them, and when the Lanes are hit the Light will go out.

The goal is to find the Lane that the Helmet is hiding in, once that is done, the Mode will be completed.
Page 12 of 29
Hurry Up Modes
Imperial Sabotage Hurry Up Modes
You start-up these Hurry Up Modes by hitting the Ball into the Imperial Sink Hole (1) a total of 3 Times.
If you start-up all 3 of the Imperial Sabotage Modes then you will light up Extra Ball at the Tie Saucer (11),
hit that Saucer to collect it.
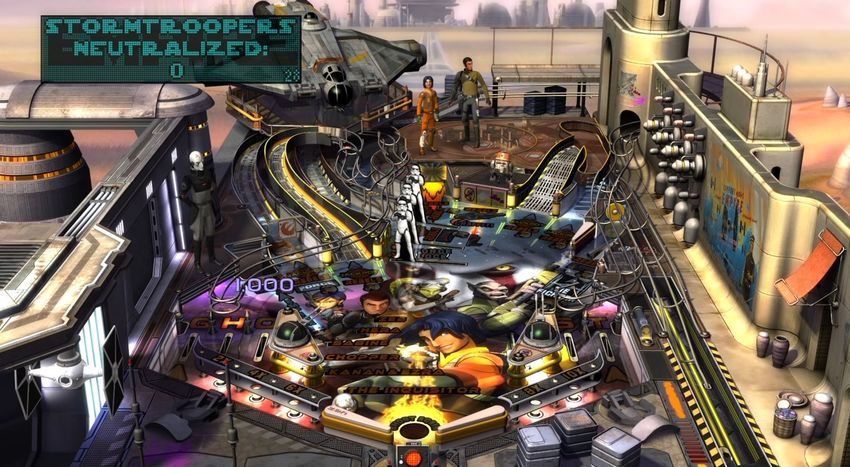
Stormtrooper Rendezvous *30 Seconds*
Hit the Stormtrooper Cardboard Cut-Outs as many times as you can within the time limit. The more that’s
hit, the greater the score given will be.Page 13 of 29 Agent Chopper *30 Seconds* Once this Mode starts hit the Ball at the Graffiti Targets/Sink Hole (8). You will then be transported to the Chopper Mini – Playfield. You will need to hit the Drop Targets to open a gap to send the Ball behind them to complete the Mode, but remember the more Targets you hit down will cause the score awarded to be greater. Steal The Crates *30 Seconds* Once this Mode begins Crates will be dropped at various points on the Table Playfield. Simply hit them and hide them by hitting the Imperial Sink Hole (1).
Page 14 of 29

Cowboy Jedi Hurry Up Mode
To activate this Hurry Up you will need to continuesly send the Ball to the Bumpers via the Bumper Mini –
Orbit (6) &/or Right Orbit (10). Each time the Ball will bounce around them, you will see 3 Stormtroopers
on the Dot – Matrix with decreasing counters (10, meaning hit each Bumper 10 times) each time the Ball
bounces on a Bumper.

Once they have been hit enough times the Mode will begin; to defeat Agent Kallus you need to hit the 3
Drop Targets down.

Once that is done, hit the Ball into the revealed Sink Hole before the timer expires.
Page 15 of 29

Tie Ambush Hurry Up Mode
Hit the Ball into the Tie Saucer (11) a total of 3 times to start-up this Mode.

Upon doing so, 6 Tie Fighters will attack.

You will need to shoot them down before your Health percentage (displayed on Dot – Matrix reaches ‘0’),
this is simple as each time you press a Flipper Button you will shoot at the Tie Fighters. Basically just keep
the Ball alive and constantly use the Flippers, you will be sure to complete this Mode.
Page 16 of 29

                                  Multiball Modes
There are 3 Multiball Modes on this Table –

Ghost Multiball Mode *3 Balls/4 Balls with Add-A-Ball Mechanic*

Activation –

You will need to first lock 3 Balls. To start the Ball Locking process you will need to light up all the Letters
of ‘GHOST’ on the In’s & Outlanes. Use the Flipper Buttons to change which of the Rollovers are lit, so
that the Ball always rolls down an unlit Rollover. –

Once that is done a timed locking sequence will begin. You will have a short time frame to lock a Ball into
either the Imperial Sink Hole (1) or Tie Saucer (11).

You will need to repeat this process again to lock a further 2 Balls. The last Ball to lock will start the
Multiball Mode by locking it into the Cross Ramp (5). Once done the Multiball Mode will begin.
Page 17 of 29 Mode itself - A 3 Ball Multiball will then start. There are 6 available Jackpot Lanes – • Left Orbit (2) • Mission Ramp (3) • Cross Ramp (5) • Bumper Mini – Orbit (6) • Right Ramp (9) • Right Orbit (10) Once you hit all the Jackpot Lanes you will need to relight them by completing the ‘GHOST’ Rollovers again as you did for the Ball locking process. There is also an Add-A-Ball feature at the Graffiti Targets/Sink Hole (8) also hitting the Ball into that Sink Hole will raise the base Jackpot Value. The Multiball Mode will continue as long as you have more than a single Ball alive on the Playfield. Otherwise the Mode will end, and you will need to repeat the above activation process to re-enter this Mode.
Page 18 of 29

Force Multiball Mode *2, 3 or 4 Balls*

Activation –

To start the Ball locking process you will need to continuously hit the Spinner located at the Left Orbit (2)
entrance. As it is spun around you will see on the Dot – Matrix that the Letters of ‘FORCE’ will begin to fill,
once those are filled the locking mechanic becomes active at the Thruster Ramp (7).

This locking sequence is timed so hit as many Balls as you can up that Ramp, up to 4 Balls can be locked.
Remember the more Balls are locked, then the higher the Jackpot Lanes & Value will be in the Multiball
Mode. Once this has been achieved the Multiball Mode will begin.

Mode itself -

Depending on how many Balls were locked will correspond to the amount of Balls given out in this
Multiball. Hit the Jackpot Lanes to score Jackpots -

The Multiball Mode will continue as long as you have more than a single Ball alive on the Playfield.
Otherwise the Mode will end, and you will need to repeat the above activation process to re-enter this Mode.
Page 19 of 29

Thruster Multiball Mode *2, 3 or 4 Balls*

Activation –

You will need to hit the Thruster via the Thruster Ramp (7) 3 times to gain access to the Spindisk. Then hit
the Spindisk another 3 times to lock the Ball.

Once a Ball is locked, you will need to hit the Spindisk another 3 times and then hit the Ball into it to lock
another Ball. Once 2 Balls are locked you will have the option to continue locking Balls or to start the
Multiball now (2 Ball Multiball). Cycle through these options using the Flipper Buttons & select using the
‘Launch’ Button.

Mode itself -

Now depending on the amount of Balls locked will then correspond to the Jackpot Value at the Spindisk
(via the Thruster Ramp (7)) as well as the number of Balls within the Spindisk within the Multiball. An
example would be sending 3 Balls into the Spindisk at the same time.

The Multiball Mode will continue as long as you have more than a single Ball alive on the Playfield.
Otherwise the Mode will end, and you will need to repeat the above activation process to re-enter this Mode.
Page 20 of 29
Main Modes
The 6 Main Modes can be started in any order; they are started by hitting the Mission Ramp (3) with an
increasing number of shots (each time you complete a Main Mode the number increases by 1, but resets if
you lose a Ball).
Also note that you don’t have to complete the Modes to progress to the Wizard Mode, only to finish them.
After starting the Mode, simply trap and hold the Ball with either of the Flippers and let time expire. Once
time expires, you will have to make a "Final Shot" for points. This "Final Shot" will not go away before you
can start a new Mode. This "Final Shot" can be made on any Lane (all will be flashing). After making the
Final Shot, you are free to start the next Mode.
If you manage to complete the Mode, you will not have to make the "Final Shot", and will earn millions of
points.
Completion of 3 Main Modes will result in lighting Extra Ball at the Tie Saucer (11). Hit the Ball there to
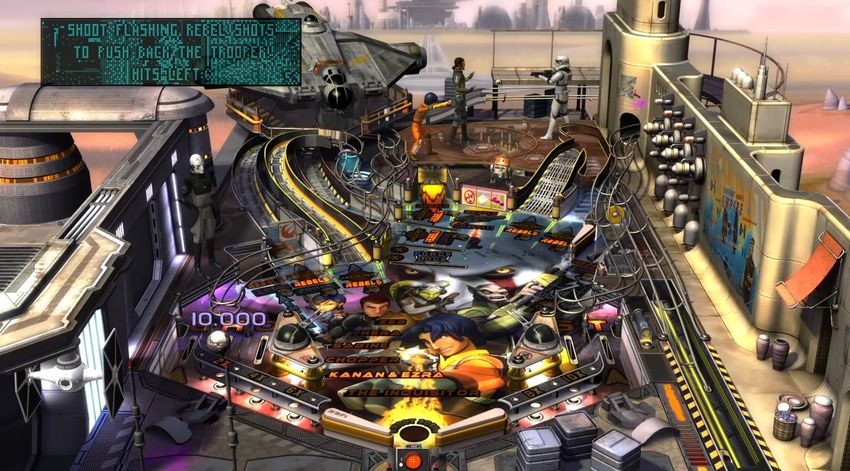
claim it.Page 21 of 29 Main Mode 1 “Hero of Lothal” – Kanan & Ezra *Timed 60 Seconds* You have 60 Seconds to hit enough flashing Lanes to get the Stormtrooper to mind his own business. If you take too long between your shots then the “Hits Required” will start to increase. The hits required starts out at 6, so you should try to always be hitting a flashing Lane. Once you have hit enough of the flashing “Rebel” Lanes the Mode will be completed.
Page 22 of 29

Main Mode 2 “Ghost Smuggling” – Hera *Timed*
Once this Mode starts you will have 30 Seconds to hit the Ball into these places on the Playfield to load the
Cargo –

   •   Imperial Sink Hole (1)
   •   Thruster Ramp (7)
   •   Graffiti Targets/Sink Hole (8)
   •   Tie Saucer (11)

Once that is done you will need to hit the flashing Lanes to avoid the enemy fire. You will need to do this
for 60 Seconds; this is because the Ship needs to charge up its engines to enable light speed. You also need
to make sure you don’t take 100% as your ship will be destroyed and the Mode will fail.

Once light speed is achieved the Mode is completed.
Page 23 of 29

Main Mode 3 “Entanglement” – Zeb *Timed 30
Seconds*
The objective of this Mode is to hit the Stormtrooper Commander via the Thruster Ramp (7) a total of 3
times before the timer expires. There will be 3 Stormtrooper Cut-Outs blocking your path, simply hit them
to drop them down for a few Seconds or wait for an opening. Note that hitting the Stormtrooper Cut-Outs
will increase the overall timer by a few Seconds.

Once you hit the Commander 3 times, the Mode will be completed.
Page 24 of 29

Main Mode 4 “Art Attack” – Sabine *Timed*
You will need to detonate 3 explosions to complete this Mode. This is done by first hitting the required
amount of flashing “Rebel” Lanes to acquire the Bomb Ball. To start you will only need to hit 1 of the
flashing Lanes –

Then you will have a few seconds to hit the Bomb Ball into the Tie Saucer (11) –

After that is done you will need to repeat the above process for the 2nd and 3rd Bombs, but note that the
required amount of flashing Lane hits required for the Bomb Ball will increase by 1 each time.

After the 3rd Bomb Ball is successfully detonated, the Mode will be completed.
Page 25 of 29

Main Mode 5 “Chopper on Duty” – Chopper *Timed*
The objective of this Mode is to get Chopper to the Mini – Playfield to fix the Shields. This is done by
hitting the Ball towards Chopper via the Graffiti Targets/Sink Hole (8) –

This will then take you to the Mini – Playfield –

You will need to hit all 14 Panel Targets on the Mini - Playfield within the time limit. Move Chopper left &
Right with the Left & Right Flipper Buttons, so as to make the Ball bounce back up towards the Targets. If
the Ball drains, simply hit the Ball back up the Mini – Playfield via the Graffiti Targets/Sink Hole (8). If you
hit all of the 14 Panel Targets within the time limit. The Mode will be completed.
Page 26 of 29

Main Mode 6 “It’s A Trap!” – The Inquisitor *Timed*
The objective here is to defeat the Inquisitor; this is done by hitting him with 3 Bomb Balls. To get a Bomb
Ball you will need to hit the Ball into 1 of these –

   •   Imperial Sink Hole (1)
   •   Graffiti Targets/Sink Hole (8)
   •   Tie Saucer (11)

Once that is done the Ball will be transformed into a Bomb Ball. Now hit that Ball up the Thruster Ramp (7)
to hit the Inquisitor.

For the next 2 you will need to hit the other flashing Holes to get the Bomb Ball. Just rinse and repeat, once
the 3rd Bomb Ball hits the Inquisitor the Mode will be completed.
Page 27 of 29

 Wizard Mode – “Fire Across The Galaxy”
The Wizard Mode (Fire Across The Galaxy) will be available as soon as you finish (remember you don’t
need to complete them, just finish them) all 6 Main Modes. To start the Wizard Mode you will then need to
sink the Ball into the Imperial Sink Hole (1) –

Once the Wizard Mode begins; the 1st Stage requires you to hit the flashing “Rebel” Ramps a total of 3
times, but they are ever changing so just wait till a Lane you’re comfortable with is flashing to hit it.
Page 28 of 29

Although the last of the 3 shots required will always be the Sink Hole at Graffiti Targets/Sink Hole (8) -

Now after that 3rd shot the 2nd Stage of the Wizard Mode will begin -

You will now need to hit every Lane, Hole and Saucer on the Playfield of which there are 10 in total, once it
has been hit the flashing “Rebel” Light will go out. Basically it’s an endurance game both you and the
Inquisitor have 10 Shots to hit, whichever hits them all first wins. Make sure you don’t hit an already hit
Lane as this will give the Inquisitor a hit instead.

Once you hit all 10 before him, the Wizard Mode will be completed. The Table will then reset, it also
will reset if you fail the Wizard Mode meaning you would need to repeat the Main Modes all over again.
Page 29 of 29

Special Thanks to all the Zen Studios Forum Community! Members such as shogun00, Cloda,
skyway73, tenorhero, DiscoKing & surf1der. I couldn’t have completed the Guide without your
help either directly or indirectly - you are all awesome!!!

In closing I hope you enjoyed this Table, I certainly have and I hope by using this Guide it increases that
Fun factor for you and everyone else who plays with you.

Check out the other Tables available, they are all available to download on the Xbox Live Marketplace in
Add-Ons section or download it straight from the PFX2 Platform itself. Zen Pinball 2 on PlayStation
Network, Zen Pinball on the Apple AppStore, Zen Pinball 3D on Nintendo 3DS and Zen Pinball THD on
Android Marketplace.

Thanks for viewing my Guide; any feedback would be greatly appreciated -

“Pinball, good is it not? Yes?!!!”

Yours
ShoryukenToTheChin
You can also read