Temperature - Heidolph Instruments
←
→
Page content transcription
If your browser does not render page correctly, please read the page content below

Temperature
Controlled Shaking
Leading Safety Standards Superior Ease of Use Reduced Cost of Ownership
Operating Manual Page 2
Platform Shaker Hei-MIX Titramax 100/101/1000,
Vibramax 100/110 and Rotamax 120.
Operating manual must be read before initial start-up.
Please follow the safety instructions provided.
Please keep for future reference.
Original-Betriebsanleitung Seite 28
Plattformschüttler Hei-MIX Titramax 100/101/1000,
Vibramax 100/110 und Rotamax 120
Betriebsanleitung vor Erstinbetriebnahme unbedingt lesen.
Sicherheitshinweise beachten.
Für künftige Verwendung aufbewahren.
Operating Manual

                    Contents

About this Document Inhaltsverzeichnis                                                                             4
Version and variants............................................................................................4
About this manual...............................................................................................4
Symbols and keywords.........................................................................................5

Safety Instructions                                                                                                6
General safety instructions...................................................................................6
     EU Declaration of Conformity..........................................................................6
     Intended use...............................................................................................6
     Installation / electrical safety ........................................................................7
     Qualifications of employees............................................................................7
Obligations of the operator...................................................................................7
     Installation site............................................................................................7
     Modifications to the device.............................................................................8
     Employee safety...........................................................................................8
Safety during use................................................................................................9
Disposal.............................................................................................................9

Device Description                                                                                              10
Device overview................................................................................................10
    Vibramax 100 overall view...........................................................................10
    Vibramax 110 overall view...........................................................................10
    Titramax 100/101/1000 overall view.............................................................11
    Rotamax 120 overall view............................................................................11
    Control panel.............................................................................................11

Start-Up                                                                                                        12
Setting up device..............................................................................................12
Connect/disconnect power cord...........................................................................12
Switch unit on and off........................................................................................13

Operation                                                                                                       14
Mounting vessels...............................................................................................14
    Secure vessels on shaker plate.....................................................................14
Shaking mode...................................................................................................16
    Continuous mode........................................................................................17
    Timer mode...............................................................................................17
Contents

Cleaning and Maintenance                                                                                       18
Cleaning...........................................................................................................18
Maintenance.....................................................................................................18

Troubleshooting                                                                                                19
Possible errors and how to resolve.......................................................................19

Assembly                                                                                                       20
Electrical connections.........................................................................................20

Disassembly and Storage                                                                                        21
Dismantling, transportation and storage...............................................................21
    Dismantling...............................................................................................21
    Transportation and storage..........................................................................21

Accessories and Spare Parts                                                                                    22
Scope of delivery...............................................................................................22
Accessories.......................................................................................................22

Attachments                                                                                                    23
Technical data...................................................................................................23
    Performance range / admissible load.............................................................24

Service                                                                                                        25
Contact / Technical Service.................................................................................25
Warranty..........................................................................................................26
Confirmation of condition....................................................................................27
About this Document

Copyright                        About this Document
This operating manual is protected by copyright and is exclusively intended for the
internal use of the purchaser.
Handing over this operating manual to third parties, reproducing it in any type or form
–in part or in full – and utilizing and/or communicating its contents is prohibited without
prior written approval from the manufacturer.
Any violations will result in an obligation to provide compensation for damages. Other
claims remain unaffected.

 Version and variants
Version
This manual describes the function, operation and maintenance of the Hei-MIX Titramax
100/101/1000, Vibramax 100/101 and Rotamax 120 platform shakers.

    Version        Alteration date
       1.2         04/2019

Variants
The device is available in different variants. Certain features or functions are only
available in specific product variants. These variants are described in this operating
manual.

 About this manual
This operating manual is an integral part of the device described here.

                   ➜➜ Carefully read through this operating manual and observe all of the
                      safety instructions and warnings notices.
                   ➜➜ Ensure that every user has carefully read the operating manual
                      before using the device for the first time.
                   ➜➜ Store this operating manual so that it is accessible to all users at
                      all times.
                   ➜➜ Pass the operating manual on to any subsequent owner.
                   The current version of this operating manual can also be found at:
                   https://heidolph-instruments.com/en/service/downloads/operation-
                   manuals#Shakers & Mixers (Hei-MIX Titra- Vibra- Rota- 100)

In addition, also observe the local regulations at the installation site.

                                               4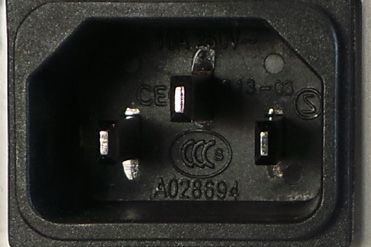
About this Document

 Symbols and keywords
Standardized symbols and signal words are used in this operating manual to warn against
any dangers and provide important instructions. These instructions must be strictly
observed to avoid accidents and damage.
The following terms and basic symbols are used:

    Symbol       Additional signal words / explanation

   Warning       The yellow triangle indicates hazardous situations. It is used in
    signs        combination with the following signal words:
                 DANGER:
                 Indicates a hazardous situation which, if not avoided, will result in
                 serious injury or death.
                 WARNING:
                 Indicates a hazardous situation which, if not avoided, may result in
                 serious injury or death.
                 CAUTION:
                 Indicates a hazardous situation which, if not avoided, may result in
                 property damage and minor or moderate injury.
  Prohibitory    Prohibited:
     signs
                 The red circle indicates a situation that should be avoided under all
                 circumstances and which, if not avoided, may result in serious injury
                 or death.
  Mandatory      Must be observed:
    signs
                 The blue circle indicates important information. Please observe this
                 information to avoid any property damage.

Other symbols used:
    Symbol       Description
       ➜         Handling instruction, action required
       ✓         Result of action

       ▪         List of information
       ▪
       ▪
       a.        List of variants
       b.
       c.

                                            5
Safety Instructions

                                          Safety Instructions
 General safety instructions

EU Declaration of Conformity
                         This device complies with the following EC-Directives*:
                         ▪▪ 2006/42/EC Machinery Directive
                         ▪▪ 2014/30/EU Electromagnetic Compatibility Directive

*Also see the attachment “EU Declaration of Conformity”.

The device has been manufactured according to state-of-the-art technology and in
compliance with recognized safety regulations. However, risks may still arise during
installation, operation and maintenance.
➜➜ Please ensure that the operating manual is available at all times.

The device may only be used under the following conditions:
➜➜ Only operate the device if it is in a technically perfect condition.
➜➜ Only operate the device if you are properly aware of the risks and required safety
   measures.
➜➜ Only operate the device in accordance with the instructions given in this operating
   manual.
➜➜ If any information is ambiguous or missing, ask your superior or contact the
   manufacturer.
➜➜ Do not operate anything on the device without authorization.
➜➜ Only use the device in accordance with its intended use.

Intended use
The device may only be operated by authorized personnel.

The device is suitable for the           ▪▪   Shaking
following uses:                          ▪▪   Mixing
                                         ▪▪   Emulsifying
                                         ▪▪   Suspending
                                         ▪▪   Separating
                                         ▪▪   Dissolving
                                         ▪▪   Staining
The device may be operated               ▪▪   Chemistry
in research laboratories,                ▪▪   Pharmacy
other laboratories and                   ▪▪   Biology
production facilities in the             ▪▪   Environmental analytics
following sectors:                       ▪▪   Basic research
                                         ▪▪   Similar research laboratories

Uninteded use/Reasonable foreseeable misuse
Any use which deviates from the device‘s intended use is considered to be improper. The
manufacturer is not liable for damage that occurs as a result. The risk is borne by the
operator alone.
When used in medical and food sectors the operator alone is responsible for compliance
with the applicable regulations and standards.

                                                           6
Safety Instructions

Installation / electrical safety
▪▪   The device may only be connected up if the available power supply voltage corre-
     sponds to the information stated on the rating plate for the device.
▪▪   The power supply connection must be easily accessibly at all times.
▪▪   An RCD circuit breaker (residual current circuit breaker) must be fitted to the
     electrical system in the building so that the device is disconnected from the power
     circuit in the event of a fault.
▪▪   Repairs may only be performed by electricians authorised by Heidolph Instruments.
▪▪   Never operate the device with a damaged power cord.
▪▪   Always turn the device OFF and disconnect the power cord before carrying out any
     maintenance or repair work.

Qualifications of employees
▪▪   The device may only be operated by trained personnel.
▪▪   The device may only be operated by persons who have been instructed and super-
     vised in its proper use by trained specialist personnel.
▪▪   The device may only be operated by specialist personnel who are above the legal
     minimum age.
▪▪   Other persons may only work on the device under the constant supervision of experi-
     enced and trained specialist personnel.
▪▪   This operating manual must be read and understood by all persons working with the
     device.
▪▪   Personnel must receive safety training that ensures responsible and safe working
     practices.

 Obligations of the operator

Installation site
▪▪   The device must be installed in a suitable location.
▪▪   The device must be installed on a firm and stable surface.
▪▪   Ensure that the device and all of its components are easily accessible at all times.
▪▪   Maintain a sufficient safety clearance to, in particular, any moving and/or hot
     equipment components.
▪▪   It is not permitted to place or store any objects such as accessories, tools or
     chemicals within this clearance area during operation.
▪▪   All screw connections must be securely tightened.
▪▪   It is not permitted to operate the device near to highly flammable or explosive
     substances.
▪▪   Operate the device in conjunction with an extractor hood, if working with potential
     harmful media (see DIN EN 14175 and DIN 12924).

                                              7
Safety Instructions

▪▪   The device is designed for indoor use only and under the following ambient condi-
     tions:
     Ambient temperature           5 - 31 °C at 80 % relative humidity
                                   32 - 40 °C decreasing linearly to a
                                   maximum 50 % relative humidity
     Installation altitude         0 - 2,000 m above sea level
     Contamination level           2
     Overvoltage category          II
     Permissible supply            ± 10 %
     deviations

▪▪   If the device is operated in corrosive atmospheres, the service life of the device will
     decrease based on the concentration, duration and frequency of the exposure to the
     corrosive atmosphere e.g. concentrated hydrochloric acid (HCI).

Modifications to the device
▪▪   It is not permitted to make any unauthorised modifications or changes to the device.
▪▪   Do not attach or install any parts that have not been approved by the manufacturer.
▪▪   Unauthorized modifications or changes will void the EC Declaration of Conformity for
     the device and operation of the device will no longer be permitted.
▪▪   The manufacturer is not liable for any damage, dangers or injuries that result from
     unauthorized modifications and changes or due to the non-observance of the instruc-
     tions in this manual.

Employee safety
➜➜ Ensure that the device is only operated by qualified specialist personnel and trained
   employees.
➜➜ Observe the following instructions to avoid any personal injuries and property
   damage:
   - Laboratory regulations
   - Accident prevention regulations
   - Hazardous Substance Act
   - Other generally accepted occupational health and safety regulations
   - Local regulations

                                               8
Safety Instructions

 Safety during use
➜➜ Wear the appropriate clothing when working on the device (protective clothing,
   protective glasses and, if necessary, safety gloves).
➜➜ Do not use the device in potentially explosive areas. The device is not protected
   against explosion. There is no explosion or ATEX protection available.
➜➜ Do not carry out work with naked flames in the vicinity of the device (risk of
   explosion).
➜➜ Do not operate or assemble devices in the vicinity which are emission or radiation
   sources (electromagnetic waves) for the frequency range (3*1011 Hz to 3*1015 Hz).
➜➜ Do not operate or assemble appliances in the vicinity of the device which constitute
   emission or radiation sources for ionizing radiation or in the ultrasonic range.
➜➜ Do not operate the device where adiabatic compression or shock waves might occur
   (shock wave combustion).
➜➜ Do not use substances, where the energy input due to mixing might pose a hazard.
➜➜ Do not spill liquids over the device or any parts of it.
➜➜ Remove any accidentally spilled liquids immediatly.
➜➜ Eliminate errors immediately.
➜➜ Always switch the device OFF after use.
➜➜ Avoid putting pressure on the display when you are not operating the device.
➜➜ Do not use abrasive material to clean the surface. Only wipe with damp cloth.

 Disposal
                       ➜➜ Check the device components for hazardous substances and
                          solvents.
                       ➜➜ Clean all components before disposal.
                       ➜➜ Dispose of the device in accordance with the relevant
                          national regulations.
                       ➜➜ Dispose of the packaging material in accordance with the
                          appropriate national regulations.

                                            9
Device Description
Device Description
Device overview
Vibramax 100 overall view
Clamping rollers
(optional)
Attachment Platform shaking:
(optional) circular vibration
orbit 3,0 mm
Control panel
Vibramax 110 overall view
Test tube attachment
(optional)
Platform shaking:
circular vibration
orbit 1,5 mm
Control panel
10Device Description
Titramax 100/101/1000 overall view
Titramax 100: Orbit 1,5 mm
Titramax 1000: Orbit 1,5 mm
Titramax 101: Orbit 3,0 mm
Microtiter plates
(optional)
Platform shaking:
circular vibration
orbit 1,5 / 3 mm
Control panel
Rotamax 120 overall view
Example:
petridishes
Platform shaking:
Rotating
orbit 20 mm
Control panel
Control panel
Rotating knob: Select mode switch:
set speed „rpm” timer/continuous
Rotating knob:
set time ON/OFF
switch
11Start-Up
Start-Up
Setting up device
Warning:
Risk of slipping device!
As a result of vibrations generated during operation the device might
slide off the table top.
The surface must be smooth and clean and should be properly leveled.
➜➜ Locate the shaker on a stable, horizontal surface.
➜➜ Clean surface and feet with a damp cloth and ethanol regularly.
Connect/disconnect power cord
Connect power cord
The power cord comes with a three-wire
plug and a recess on the bottom side.
Unit plug Power cord
The socket is located on the back side of
the unit.
✓✓ The device is switched OFF.
➜➜ Connect plug to the socket with the
recess facing down.
➜➜ Push plug up against socket until
securely attached.
➜➜ Connect plug to power socket.
Unit socket
Disconnect power cord
➜➜ Disconnect plug from power socket first.
➜➜ Then disconnect plug from socket on unit.
12Start-Up
Switch unit on and off
The ON/OFF switch is situated on the front
panel.
Switch unit on
➜➜ Press the On/Off switch on the upper
side.
✓✓ The green control light switches on.
✓✓ The unit is switched on.
Switch unit off
➜➜ Press the On/Off switch on the lower
side.
✓✓ The green control light switches off.
✓✓ The unit is switched off. Ein-/Aus-Schalter: Ein-/Aus-Schalter:
Gerät eingeschaltet Gerät ausgeschaltet
13Operation
Operation
Mounting vessels
Secure vessels on shaker plate
Use optional attachment to secure vessels on shaker plate:
➜➜ To secure vessels on shaker plate, use optional adaptors (see chapter „Spare parts
and accessories” and chapter „Assembly”).
➜➜ At low shaking speed, low-profile vessels like petri dishes may be placed directly on
the non-skid rubber plate.
A single flask should be arranged in the middle of the shaker plate.
Several flasks should be distributed equally on the plate.
TITRAMAX 100 / TITRAMAX 101 / TITRAMAX 1000
➜➜ Place microtiter plates directly in
indentations in the rubber mat.
✓✓ Microtiter plates are positively locked
in these indentations.
✓✓ The rubber mat can be removed easily
for cleaning or replacement.
VIBRAMAX 100 / ROTAMAX 120 / attachment with clamping rollers
Vessels of different sizes can be secured
by an optional attachment with clamping
rollers. Vessels clamped at the same time
by two clamping rollers must have the
same diameter.
➜➜ Secure attachment on the shaker plate
with the wing bolts supplied.
➜➜ Place vessels on the anti-skid rubber
mat.
➜➜ Clamp vessels on both sides with the
clamping rollers.
14Operation
VIBRAMAX 110 / attachment for test tubes
➜➜ Place a single test tube on the rubber
mat by hand and softly push tube
downwards.
Caution:
Possible risk of exertion
There is a possible risk of
exertion due to physical force
required to holding test tube in
place.
Do not use the device any longer
than recommended in the direc-
tive 2002-44 EC on vibration
strain.
Several test tubes may be shaken at the
same time, using the optional test tube
attachments.
➜➜ Secure attachment on the shaker table
with the wing bolts supplied.
➜➜ Plug test tubes into “collets”.
✓✓ The test tubes will be secured by the
collets.
15Operation
Shaking mode
Warning:
Risk of injury!
Returning power after a power cut off will restart shaking mode. There
is a risk of injury in the vicinity of moving parts of device.
Before working with the device or in the vicinity ensure all controls are
switched to “0” or “OFF” mode, when device is not moving.
Caution:
Risk of breakage and spillage
If the vessels are not attached securely they may fall out and spill the
sample.
Prior to switching the unit on ensure that all vessels are securely
fastened.
Warning:
Risk of poisoning
Open vessels and too high vibration frequencies may result in samples
splashing.
▪▪ Close all vessels tight especially if sample is dangerous or toxic.
▪▪ Adjust vibration frequency step by step until you have reached the
required rpm settings..
▪▪ Wear safety glasses and especially with dangerous and toxic samples
appropriate protective clothing.
Warning:
Risk of injury!
High speeds in combination with high loads and/or a tall assembly may
lead to an unstable device. As result the device may start moving and
slide off the table top.
When working with with high loads and/or a tall assembly, increase the
speed with care and watch for the devices stability. Ensure the device
is installed in such a way as it can not collide with the surrounding
environment or slip off its work surface.
At high loads (load bearing capacity of shaker plate) and high
frequency of shaking, always make reference to load graph as
applicable for your item (see chapter “Technical data”, section
”Performance range, permissable load”).
When using shakers inside conditioning cabinets, make reference
to ambient conditions (see chapter “Safety, Operating company’s
obligations”, section “Installation site”).
16Operation
When using shakers inside conditioning cabinets, make reference
to ambient conditions (see chapter “Safety, Operating company’s
obligations”, section “Installation site”).
You can choose from two shaking options:
▪▪ Continuous mode: The unit starts and stops shaking as soon as you switch it on or off.
▪▪ Timer mode: The time for shaking can be set between 0 and 120 minutes. The unit
stops shaking when the time has elapsed.
Continuous mode
✓✓ Select mode switch is positioned to Drehknopf „Timer” Drehknopf „Drehzahl”
continuous mode „0”.
➜➜ Turn item on with ON/OFF switch.
➜➜ Set speed with rotating knob „Speed”.
✓✓ Actual speed appears in the 3-digit
digital display.
➜➜ Reduce speed with rotating knob.
➜➜ Turn item off with ON/OFF switch.
Umschalter Einstellung „Dauer”
Timer mode
➜➜ Select mode „Timer” with select mode
switch.
➜➜ Set time with rotating knob „Timer”.
➜➜ Set speed with rotating knob „Speed”.
➜➜ Turn item on with ON/OFF switch.
✓✓ When time has elapsed an acoustic
signal will be audible and shaking
action will stop.
➜➜ Reduce speed with rotating knob.
➜➜ Turn item off with ON/OFF switch.
Select mode switch: Select mode switch:
“continuousr” “timer”
17Cleaning and Maintenance
Cleaning and Maintenance
Cleaning
All surfaces of the unit allow for cleaning with a damp cloth and if required a mild soap
lotion.
Warning:
Risk of electric shock!
If the device is still connected to power during cleaning, you might get
in contact with live parts due to accidentally entering liquids.
Prior to cleaning:
▪▪ ensure that the device is switched OFF
▪▪ ensure that the plug is pulled from the electric socket.
Caution:
Damage to the device
Accidentally entering liquids will cause the device to fail .
Only wipe with a damp cloth. Never use a soaked cloth.
Attention:
Risk of damage to the surfaces
All of the surfaces may be damaged by improper cleaning.
Never use:
▪▪ Chlorine bleach or any cleaning agent containing chlorine
▪▪ Solvent-bearing agents (e.g. acetone)
▪▪ Ammonia
▪▪ Abrasive cleaning agents such as scouring agents, cleaning wool or
agents with metallic particles
As a result of vibrations generated during operation the device might
slide off the table top.
To ensure a stable position clean surface and feet with a damp cloth
and ethanol regularly.
Maintenance
The unit is maintenance-free. Any necessary repair must be performed by an authorized
Heidolph distributor.
Please contact Heidolph Instruments or your local Heidolph Instruments distributor.
18Troubleshootimg
Possible errors Troubleshooting
and how to resolve
Malfunctions Possible reason Troubleshooting
On-/Off switch does not No power ▪▪ Check size and shape of
enlighten plug and compatibility to
your electrical socket
▪▪ Check circuit breakers
Light diode defective Contact your local Heidolph
Instruments distributor
Unit stops shaking Pre-set timer elapsed Restart timer, if necessary
Thermal motor circuit Wait 20 minutes, decrease
breaker triggered by motor overall load
overload.
▪▪ Mechanical parts broken Contact your local Heidolph
▪▪ Electronic failure Instruments distributor
If you experience a malfunction which can not be resolved, please contact your authorized
Heidolph Instruments distributor immediately.
19Assembly
Assembly
Electrical connections
▪▪ Fuses must only be replaced by a professional electrician.
▪▪ Repairs to the device must only be carried out by a qualified electrician
approved by Heidolph Instruments. Improper repairs could result in serious
dangers. Please contact your specialist dealer if the device needs to be repaired.
Warning:
Risk of electric shock
The device must be connected to an earthed power socket.
The rated voltage for the device and the supply voltage must be the
same. The rated voltage for the device can be found on the rating plate
on the rear of the device.
The device is supplied with a grounded power cord. In case the original
plug is replaced, the new plug must have a protective conductor!
If the device is still connected to power while changing the fuse, you
might get in contact with live parts.
Prior to replacing the fuse ensure that the unit is switched off and pull
the plug from the electric socket. Only use original spare fuses from
Heidolph Instruments.
After changing a fuse check the device for safe operating condition
according to IEC 61010-1.
Rating plate Fuse
Color code for electrical connections:
Europe North America
GREEN/YEL- PE: Protective PE: Protective
GREEN
LOW conductor (Earth) conductor (Earth)
BLUE N: Neutral conductor WHITE N: Neutral conductor
BROWN P: Phase BLACK P: Phase
The device is connected to the mains with the power cord supplied. The power connection
is located on the rear of the housing.
For countries where a different plug than the standard plug supplied is used:
▪▪ The plug supplied may only be changed by a professional electrician.
▪▪ If you wish to use an adapter, ensure that it is grounded and approved in accordance
with the local regulations.
▪▪ Wiring, adapter and plug must at least meet the electrical power stated on the rating
plate.
20Disassembly and Storage
Disassembly and Storage
Dismantling, transportation and storage
Dismantling
Warning:
Risk of injury!
While the device is plugged in you might be at harm if the device is
accidentally switched to ON mode.
Prior to dismantling device ensure that the device is switched off and
the plug is pulled from the electric socket.
✓✓ The device is switched off.
➜➜ Disconnect plug from power socket.
➜➜ Disconnect plug from socket on the device.
➜➜ Remove all vessels.
➜➜ Disassemble attachments.
Transportation and storage
➜➜ Store and transport the device and its components only if they were emptied, cleaned
and dismantled.
➜➜ To carry the device wear safety gloves and lift the unit from below.
➜➜ Store and transport the device and parts of device in the original packing material or
alternatively in an adequate container to prevent damage.
➜➜ Seal the package carefully against unauthorized or accidental opening.
➜➜ Store the device in a dry and frost-free place.
Improper storage and transportation may result in damages to the
system and the mechanical components.
Avoid any kind of shocks during transportation.
21Accessories and Spare Parts
Accessories and Spare Parts
Scope of delivery
Component Variant Quantity Product number
Hei-MIX Titramax 100* 1 544-11200-00
(one of
Titramax 101* 1 544-11300-00
these variants)
Titramax 1000* 1 544-12200-00
Vibramax 100* 1 544-21200-00
Vibramax 110* 1 544-31200-00
Rotamax 120* 1 544-41200-04
Operating Manual English / German 1 01-005-002-34
Warranty registration / Confirmation of condition 1 01-006-002-78
EC Declaration of Conformity 1 01-001-025-06
Power cord 1 depending on country
* The product numbers are valid for 230 V devices in the european comunity. Please contact Heidolph Instruments for
further product numbers on country specific varieties.
Accessories
Component Quantity Product number
Fuse for 230 V (device needs 2 fuses) 1 14-002-015-23
Fuse for 115 V (device needs 2 fuses) 1 14-002-015-45
Vibramax 100 Attachment with 2 clamping rollers 1 549-81000-00
Rotamax 120
Clamping roller (additional) 1 11-008-007-08
Attachment for 1 549-82000-00
49 test tubes, 12 mm Ø
Vibramax 110
Attachment for 1 549-83000-00
36 test tubes, 16 mm Ø
Additional accessories are shown in the general catalog or on our website at
www.heidolph-instruments.com
22Attachments
Attachments
Technical data
Plarform shakers Hei-MIX
Standard supply voltage 230-240 V 50/60 Hz oder 115 V/60 Hz)
Device fuses M 1,25 A (230 V) oder T 2,0 A (115 V)
Protective class 1
(IEC 61140)
Protection class IP30
(IEC 60529)
Sound pressure level < 50
(dB(A))
(based on IEC 61010)
Overheat protection self-resetting
Speed control analog
Operation mode timer / continuous
Modell Hei-MIX Titramax Titramax Vibramax Vibramax Rotamax
100/101 1000 100 110 120
Dimensions (wxdxh) 245x310x125 320x375x125 245x310x125 245x310x146 245x310x125
(mm)
Load capacity (kg) 2 5 2 2 2
Drive shaded pole motor asyn- shaded
chronus pole motor
motor
Motion circular vibration circular rotation
vibration
Orbit (mm) 1,5 / 3 1,5 3 1,5 20
Rotation speed (rpm) 150 - 1.350 150 - 2.500 20 - 300
Supply power (W) 31 46 33
Weight (kg) 5,5 6,5 5,5 5,0 5,5
23Attachments
Performance range / admissible load
Hei-MIX Titramax 100/101/1000 2,0
Hei-MIX Vibramax 100
1,5 Permissable Undue
range range
Load kg
1,0
0,5
100 200 300 400 500 600 700 800 900 1000 1100 1200 1300 1350
Speed rpm
Hei-MIX Vibramax 110
2,0
Permissable Undue
range range
1,5
Load kg
1,0
0,5
500 1000 1500 2000 2500
Speed rpm
Hei-MIX Rotamax 120 2,0
Permissable Undue
1,5
range range
Load kg
1,0
0,5
50 100 150 200 250 300
Speed rpm
24Service
Service
Contact / Technical Service
Questions / Repair work
If any aspect of installation, operation or maintenance remains unanswered in the
present manual, please get in touch with the following address.
For repairs please call Heidolph Instruments or your local authorized Heidolph
Instruments distributor.
Warning!
Danger of poisoning!
Contaminated devices can lead to severe injury or death of our
employees!
When shipping items for repair that may have been contaminated by
hazardous substances, please:
▪▪ advise exact substance
▪▪ take adequate protective action towards our parts receiving and
service personnel
▪▪ mark the pack in accordance with Ordinance on Hazardous
Substances
A “Confirmation of Condition” form can be found at the end of this operating manual.
➜➜ Prior to shipping the device for repair, complete a copy of this form and submit it in
advance.
Contact details:
Heidolph Instruments Germany
Heidolph Instruments GmbH & Co. KG
Technical Service
Walpersdorfer Str. 12
D-91126 Schwabach / Germany
Tel.: +49 – 9122 - 9920-74
Fax: +49 – 9122 - 9920-84
E-Mail: service@heidolph.de
www.heidolph.com
Heidolph Instruments North America
Phone: 1-866-650-9604
E-mail: service@heidolph.com
www.heidolphNA.com
Heidolph Instruments United Kingdom
Phone: 01799 - 5133-20
E-mail: service@radleys.co.uk
www.heidolph-instruments.co.uk
All other countries
You will find contact details of your local Heidolph distributor at
www.heidolph.com
25Service
Warranty
Heidolph Instruments provides a 3 year warranty for the
products described here (excluding glass and wearing parts) if
you register using the warranty card enclosed or online
(www.heidolph.com). The warranty period begins with the date
of purchase. The serial number is also valid without registration.
This warranty covers material and manufacturing defects.
In the event of a material or manufacturing defect, the device shall be repaired or
replaced free of charge under the terms of the warranty.
Heidolph Instruments shall not assume liability for any damage incurred as a result of
improper handling or transport.
Warranty claim?
➜➜ Please notify Heidolph Instruments or your local Heidolph distributor if you wish to
make a warranty claim.
26Service
Confirmation of condition
➜➜ In the case of repair, copy and complete the Confirmation of condition orm and send
it to Heidolph Instruments.
1. Details about the device
Product number
Serial number
Reason for repair
2. Has the device been cleaned, decontaminated/sterilized?
Yes No
3. Is the device in a condition which does not represent any health threats for the staff of
our service department?
Yes No
If not, which substances has the device
come into contact with?
4. Legally binding declaration
The customer is aware of being legally liable to Heidolph Instruments
for any damages arising from incomplete and incorrect information.
Date Signature
Company stamp
The shipper is responsible for the return of the goods in well packed
Please note condition, suitable for the mode of transport.
Sender information
Name, first name
Company
Department, research group
Street
Zip code, city
Country
Phone
E-mail
27Original-Betriebsanleitung
Inhaltsverzeichnis
Zu diesem Dokument Inhaltsverzeichnis 30
Version und Varianten........................................................................................30
Über dieses Handbuch........................................................................................30
Symbole und Signalwörter..................................................................................31
Sicherheitshinweise 32
Allgemeine Sicherheitshinweise...........................................................................32
EU Konformitätserklärung............................................................................32
Bestimmungsgemäße Verwendung................................................................32
Installation / Elektrische Sicherheit...............................................................33
Qualifikation der Mitarbeiter.........................................................................33
Pflichten des Betreibers......................................................................................33
Aufstellort..................................................................................................33
Änderungen am Gerät.................................................................................34
Sicherheit des Personals..............................................................................34
Sicherheit während der Benutzung.......................................................................35
Entsorgung.......................................................................................................35
Gerätebeschreibung 36
Geräteübersicht................................................................................................36
Vibramax 100 Gesamtansicht.......................................................................36
Vibramax 110 Gesamtansicht.......................................................................36
Titramax 100/101/1000 Gesamtansicht.........................................................37
Rotamax 120 Gesamtansicht........................................................................37
Bedienfeld.................................................................................................37
Inbetriebnahme 38
Gerät aufstellen................................................................................................38
Netzkabel anschließen / lösen.............................................................................38
Gerät ein- und ausschalten.................................................................................39
Bedienung 40
Gefäße fixieren..................................................................................................40
Fixierung der Gefäße auf dem Schütteltisch....................................................40
Schüttelbetrieb starten.......................................................................................42
Dauerbetrieb..............................................................................................43
Betrieb mit Zeitschaltuhr.............................................................................43Inhaltsverzeichnis
Reinigung und Wartung 44
Reinigung.........................................................................................................44
Wartung...........................................................................................................44
Fehlerbehandlung 45
Störungen und deren Beseitigung........................................................................45
Montage 46
Elektrischer Anschluss........................................................................................46
Demontage und Lagerung 47
Abbau, Transport und Lagerung...........................................................................47
Abbau.......................................................................................................47
Transport und Lagerung...............................................................................47
Ersatzteile und Zubehör 48
Lieferumfang....................................................................................................48
Zubehör...........................................................................................................48
Anhang 49
Technische Daten..............................................................................................49
Leistungsbereich / Maximale Belastung..........................................................50
Service 51
Kontakt / Technischer Service.............................................................................51
Garantieerklärung..............................................................................................52
Unbedenklichkeitserklärung................................................................................53Zu diesem Dokument
Urheberschutz Zu diesem Dokument
Diese Anleitung ist urheberrechtlich geschützt und ausschließlich für den Käufer zur
internen Verwendung bestimmt.
Die Überlassung dieser Anleitung an Dritte, Vervielfältigungen in jeglicher Art und Form
– auch auszugsweise – sowie die Verwertung und/oder Mitteilung des Inhalts sind ohne
schriftliche Genehmigung des Herstellers nicht gestattet.
Zuwiderhandlungen verpflichten zu Schadenersatz. Weitere Ansprüche bleiben
vorbehalten.
Version und Varianten
Version
Diese Anleitung beschreibt Funktion, Betrieb und Bedienung der Plattformschüttler
Hei-MIX Titramax 100/101/1000, Vibramax 100/101 und Rotamax 120.
Version Änderungsdatum
1.2 04/2019
Varianten
Das Gerät ist in verschiedenen Ausstattungsvarianten erhältlich. Bestimmte Merkmale
oder Funktionen sind nur in bestimmten Ausstattungsvarianten verfügbar. Die Varianten
sind in dieser Anleitung beschrieben.
Über dieses Handbuch
Diese Betriebsanleitung ist Bestandteil des hier beschriebenen Gerätes.
➜➜ Lesen Sie diese Betriebsanleitung sorgfältig durch und beachten
Sie alle Sicherheits- und Warnhinweise.
➜➜ Sorgen Sie dafür, dass jeder Benutzer des Gerätes vor
Inbetriebnahme die Betriebsanleitung sorgfältig gelesen hat.
➜➜ Bewahren Sie diese Betriebsanleitung so auf, dass sie jederzeit für
jeden Benutzer zugänglich ist.
➜➜ Geben Sie diese Betriebsanleitung an den Nachfolge-Besitzer
weiter.
Die aktuelle Version dieser Betriebsanleitung finden Sie auch unter:
https://heidolph-instruments.com/de/service/downloads/
betriebsanleitungen#Schüttel- und Mischgeräte (Hei-MIX
Titra- Vibra- Rota- 100)
Beachten Sie darüber hinaus die örtlichen Bestimmungen am Aufstellort.
30Zu diesem Dokument
Symbole und Signalwörter
In dieser Betriebsanleitung werden standardisierte Symbole und Signalwörter verwendet,
um Sie vor Gefahren zu warnen oder Ihnen wichtige Hinweise zu geben. Beachten Sie
diese Hinweise unbedingt, um Unfälle und Schäden zu vermeiden.
Die folgenden Begriffe und Grundsymbole werden verwendet:
Symbol Zusätzliche Signalwörter / Erläuterung
Warnzeichen Das gelbe Dreieck weist auf eine gefährliche Situation hin. Es wird in
Kombination mit den folgenden Signalwörtern verwendet:
GEFAHR:
Weist auf eine unmittelbar gefährliche Situation hin. Nichtbeachtung
führt zu schweren Verletzungen oder Tod.
WARNUNG:
Weist auf eine möglicherweise gefährliche Situation hin. Bei
Nichtbeachtung drohen schwere Verletzungen oder Tod.
VORSICHT:
Weist auf eine möglicherweise gefährliche Situation hin.
Nichtbeachtung führt zu Sachschäden und kann zu leichten bis mittel-
schweren Verletzungen führen.
Verbots- Unbedingt vermeiden:
zeichen
Der rote Kreis weist auf eine Situation hin, die unter allen Umständen
vermieden werden sollte. Bei Nichtbeachtung drohen schwere
Verletzungen oder Sachschäden.
Gebots- Unbedingt beachten:
zeichen
Der blaue Kreis weist auf eine wichtige Information hin. Bitte beachten
Sie diesen Hinweis, um Sachschäden zu vermeiden.
Weitere verwendete Zeichen:
Symbol Erläuterung
➜ Bedienungsanweisung, Handeln erforderlich
✓ Ergebnis der Handlung
▪ Aufzählung von Informationen
▪
▪
a. Aufzählung von Varianten
b.
c.
31Sicherheitshinweise
Sicherheitshinweise
Allgemeine Sicherheitshinweise
EU Konformitätserklärung
Das Gerät entspricht den folgenden EG-Richtlinien*:
▪▪ 2006/42/EG Maschinen-Richtlinie
▪▪ 2014/30/EU EMV-Richtlinie
*Siehe hierzu auch beigelegte „EU-Konformitätserklärung”.
Das Gerät ist nach dem Stand der Technik und den anerkannten sicherheitstechnischen
Regeln gebaut. Dennoch bestehen beim Installieren, Arbeiten und Instandhalten
Gefahren.
➜➜ Betriebsanleitung bitte stets verfügbar halten.
Das Gerät darf nur unter folgenden Bedingungen benutzt werden:
➜➜ Betreiben Sie das Gerät nur, wenn es in technisch einwandfreiem Zustand ist.
➜➜ Betreiben Sie das Gerät nur, wenn Sie über das nötige Sicherheits- und
Gefahrenbewusstsein verfügen.
➜➜ Benutzen Sie das Gerät nur entsprechend den Vorschriften in dieser Betriebsanleitung.
➜➜ Wenn Informationen missverständlich sind oder Sie Informationen vermissen, fragen
Sie Ihren Vorgesetzten oder wenden Sie sich an den Hersteller.
➜➜ Bedienen Sie nichts an dem Gerät ohne Befugnis.
➜➜ Verwenden Sie das Gerät nur bestimmungsgemäß.
Bestimmungsgemäße Verwendung
Das Gerät darf nur von autorisiertem Fachpersonal betrieben werden.
Das Gerät ist für folgende ▪▪ Schütteln
Verwendung geeignet: ▪▪ Mischen
▪▪ Emulgieren
▪▪ Suspendieren
▪▪ Trennen
▪▪ Lösen
▪▪ Anfärben
Das Gerät darf betrieben ▪▪ Chemie
werden in Forschungslabor, ▪▪ Pharmazie
Praktikum, und Produktion ▪▪ Biologie
von: ▪▪ Umwelt-Analytik
▪▪ Grundlagenforschung
▪▪ Ähnliche Forschungslabore
Nicht zugelassene Verwendung/Vorhersehbare Fehlanwendung
Eine andere als die bestimmungsgemäße Verwendung gilt als nicht bestimmungsgemäß.
Für hieraus resultierende Schäden haftet der Hersteller nicht. Das Risiko trägt allein der
Betreiber.
Beim Einsatz im Medizinal- und Lebensmittelbereich ist allein der Betreiber für die Einhal-
tung der entsprechend gültigen Vorschriften und Normen verantwortlich.
32Sicherheitshinweise
Installation
▪▪ / Elektrische Sicherheit
▪▪ Das Gerät darf nur angeschlossen werden, wenn die vorhandene Netzspannung mit
den Angaben auf dem Typenschild des Gerätes übereinstimmt.
▪▪ Der Netzanschluss muss jederzeit leicht zugänglich sein.
▪▪ In der Hausinstallation muss ein RCD-Schutzschalter (Fehlerstrom-Schutzschalter)
vorhanden sein, der das Gerät im Fehlerfall vom Stromnetz trennt.
▪▪ Reparaturen dürfen nur von einer durch Heidolph Instruments autorisierten Elektro-
fachkraft durchgeführt werden.
▪▪ Betreiben Sie das Gerät niemals mit einem defekten Netzkabel.
▪▪ Schalten Sie das Gerät immer AUS und lösen Sie das Netzkabel, bevor eine Wartung
oder eine Reparatur durchgeführt wird.
Qualifikation der Mitarbeiter
▪▪ Das Gerät darf nur von geschultem Personal bedient werden.
▪▪ Das Gerät darf nur von Personen bedient werden, die durch geschultes Fachpersonal
in die ordnungsgemäße Bedienung eingewiesen und betreut werden.
▪▪ Das Gerät darf nur von Fachpersonal im gesetzlichen Mindestalter bedient werden.
▪▪ Andere Personen dürfen nur unter permanenter Aufsicht von erfahrenem und
geschultem Fachpersonal an dem Gerät arbeiten.
▪▪ Diese Betriebsanleitung muss von allen Personen gelesen und verstanden werden, die
mit diesem Gerät arbeiten.
▪▪ Das Personal muss eine Sicherheitseinweisung erhalten haben, die zu verantwor-
tungsvollem und sicherem Arbeiten führt.
Pflichten des Betreibers
Aufstellort
▪▪ Das Gerät muss an einem geeigneten Platz aufgestellt werden.
▪▪ Das Gerät muss stabil und standsicher aufgestellt werden.
▪▪ Stellen Sie sicher, dass das Gerät und alle Gerätekomponenten jederzeit frei zugängig
sind.
▪▪ Insbesondere zu beweglichen und/oder heißen Gerätekomponenten muss ein ausrei-
chender Sicherheitsabstand eingehalten werden.
▪▪ Innerhalb der Abstandsfläche dürfen während des Betriebes keinerlei Gegenstände
wie Zubehör, Werkzeuge oder Chemikalien abgelegt oder gelagert werden.
▪▪ Alle Schraubverbindungen müssen sicher angezogen sein.
▪▪ Das Gerät darf nicht in der Nähe von leicht entzündlichen oder explosiven Stoffen
betrieben werden.
▪▪ Betreiben Sie das Gerät unter einem geschlossenen belüfteten Abzug, wenn Sie mit
potenziell gefährlichen Stoffen arbeiten (siehe DIN EN 14175 und DIN 12924).
33Sicherheitshinweise
▪▪ Das Gerät darf nur innerhalb von geschlossenen Gebäuden in trockenen Räumen und
unter folgenden Umgebungsbedingungen betrieben werden:
Umgebungstemperatur 5 - 31 °C bei 80 % relativer Luftfeuchtigkeit
32 - 40 °C linear abnehmend bis
maximal 50 % relativer Luftfeuchtigkeit
Aufstellhöhe 0 - 2.000 m über NN
Verschmutzungsgrad 2
Überspannungs-Kategorie II
Zulässige Versorgungs ± 10 %
netzschwankungen
▪▪ Wird das Gerät in korrosiven Atmosphären verwendet, sinkt die Lebensdauer des
Gerätes abhängig von Konzentration, Dauer und Häufigkeit der korrosiven Umgebung
z. B. konzentrierte Hydrochloridsäure (HCI).
Änderungen am Gerät
▪▪ Das Gerät darf nicht eigenmächtig umgebaut oder verändert werden.
▪▪ Bauen Sie keine Teile an oder ein, die nicht vom Hersteller zugelassen sind.
▪▪ Eigenmächtige Umbauten oder Veränderungen führen dazu, dass die EU-Konformi-
tätserklärung des Geräts erlischt und das Gerät nicht mehr weiter betrieben werden
darf.
▪▪ Der Hersteller haftet nicht für Schäden, Gefahren oder Verletzungen, die durch eigen-
mächtige Umbauten und Veränderungen oder durch Nichtbeachtung der Vorschriften
in dieser Anleitung entstehen.
Sicherheit des Personals
➜➜ Stellen Sie sicher, dass nur qualifiziertes Fachpersonal und eingewiesene Mitarbeiter
das Gerät bedienen.
➜➜ Beachten Sie zur Vermeidung von Personen- und Sachschäden folgende Vorschriften:
- Labor-Richtlinie
- Unfallverhütungs-Vorschriften
- Gefahrstoff-Verordnung
- Sonstige allgemein anerkannte Regeln der Sicherheitstechnik und Arbeitsmedizin
- Örtliche Bestimmungen
34Sicherheitshinweise
Sicherheit während der Benutzung
➜➜ Schützen Sie sich mit passender Kleidung, wenn Sie an dem Gerät arbeiten
(Schutzkleidung, Schutzbrille, Schutzhandschuhe).
➜➜ Verwenden Sie das Gerät nicht in explosionsgefährdeten Bereichen. Das Gerät ist
nicht explosionsgeschützt. Es verfügt über keinen Ex- oder ATEX-Schutz.
➜➜ Arbeiten Sie in der Umgebung des Gerätes nicht mit offener Flamme (Explosionsgefahr).
➜➜ Betreiben oder montieren Sie in der Nähe keine Geräte, welche Emissions- oder
Strahlungsquellen (elektromagnetische Wellen) für den Frequenzbereich (3*1011 Hz
bis 3*1015 Hz) sind.
➜➜ Betreiben oder montieren Sie in der Nähe keine Geräte, welche Emissions- oder
Strahlungsquellen für ionisierende Wellen oder im Ultraschallbereich sind.
➜➜ Betreiben Sie das Gerät nicht, wenn adiabatische Kompression oder Stoßwellen
auftreten können (Druckwellenzündung).
➜➜ Verwenden Sie keine Stoffe, bei welchen der Energieeintrag durch Mischen Gefahren
birgt.
➜➜ Verschütten Sie keine Flüssigkeiten über das Gerät oder Teile davon.
➜➜ Wischen Sie evtl. auf das Gerät gelangte Flüssigkeiten sofort ab.
➜➜ Beheben Sie Fehler sofort.
➜➜ Schalten Sie das Gerät immer AUS, wenn es nicht in Betrieb ist.
➜➜ Vermeiden Sie unbeabsichtigten Druck auf das Display.
➜➜ Verwenden Sie keine scheuernden Mittel zur Reinigung; nur mit angefeuchteten
Tüchern abwischen.
Entsorgung
➜➜ Prüfen Sie die Geräte-Komponenten auf Gefahrenstoffe und
Lösemittel.
➜➜ Reinigen Sie alle Komponenten, bevor sie entsorgt werden.
➜➜ Entsorgen Sie das Gerät entsprechend der nationalen gesetz-
lichen Richtlinien.
➜➜ Entsorgen Sie das Verpackungsmaterial entsprechend der
nationalen gesetzlichen Richtlinien.
35Gerätebeschreibung
Gerätebeschreibung
Geräteübersicht
Vibramax 100 Gesamtansicht
Spannwalzen
(optional)
Aufsatz
Schüttelplattform
(optional)
kreisförmig vibrierend
Schüttelorbit 3,0 mm
Bedienfeld
Vibramax 110 Gesamtansicht
Reagenzglasaufsatz
(optional)
Schüttelplattform
kreisförmig vibrierend
Schüttelorbit 1,5 mm
Bedienfeld
36Gerätebeschreibung
Titramax 100/101/1000 Gesamtansicht
Titramax 100: Orbit 1,5 mm
Titramax 1000: Orbit 1,5 mm
Titramax 101: Orbit 3,0 mm
Mikrotiterplatten
(optional)
Schüttelplattform
kreisförmig vibrierend
Bedienfeld
Rotamax 120 Gesamtansicht
Beispiel
Petrischalen
(nicht im Zubehör)
Schüttelplattform
rotierend
Schüttelorbit 20 mm
Bedienfeld
Bedienfeld
Analoger Drehknopf Umschalter
zum Einstellen der Dauer-/Timerbetrieb
Schüttelfrequenz „rpm”
Analoger Drehknopf
zum Einstellen EIN-/AUS-
der Zeit Schalter
37Inbetriebnahme
Inbetriebnahme
Gerät aufstellen
Achtung:
Rutschgefahr für das Gerät
Durch die Vibration im Betrieb kann das Gerät beginnen, über die
Aufstellfläche zu wandern und heruntergleiten.
Die Aufstellfläche muss glatt, eben und sauber sein und sollte
möglichst in Waage liegen.
➜➜ Stellen Sie das Gerät auf einer massiven glatten Fläche auf, die in Waage liegt.
➜➜ Reinigen Sie die Auflagefläche und die Füße des Gerätes in regelmäßigen Abständen.
Netzkabel anschließen / lösen
Netzkabel anschließen
Die Gerätekabelbuchse ist dreipolig und
hat eine Aussparung auf der Unterseite.
Gerätekabelbuchse Netzkabel
Die Gerätesteckdose befindet sich auf der
Rückseite des Gerätes.
✓✓ Das Gerät ist ausgeschaltet.
➜➜ Stecken Sie die Gerätekabelbuchse
mit der Aussparung nach unten in die
Gerätesteckdose.
✓✓ Die Buchse ist sicher eingesteckt,
wenn sie bis zum Anschlag aufge-
schoben wurde.
➜➜ Stecken Sie nun den Netzstecker in die
Stromsteckdose.
Gerätesteckdose
Netzkabel lösen
➜➜ Ziehen Sie zuerst den Stecker aus der Stromsteckdose.
➜➜ Ziehen Sie dann die Gerätekabelbuchse vom Gerät.
38Inbetriebnahme
Gerät ein- und ausschalten
Gerät einschalten
➜➜ Drücken Sie den EIN-/AUS-Schalter im
oberen Bereich.
✓✓ Im EIN-/AUS-Schalter geht die grüne
Netz-Kontrollleuchte an.
✓✓ Das Gerät ist eingeschaltet.
Gerät ausschalten
➜➜ Drücken Sie den EIN-/AUS-Schalter im
unteren Bereich.
✓✓ Im EIN-/AUS-Schalter geht die grüne
Kontrollleuchte aus.
✓✓ Das Gerät ist ausgeschaltet.
Ein-/Aus-Schalter: Ein-/Aus-Schalter:
Gerät eingeschaltet Gerät ausgeschaltet
39Bedienung
Bedienung
Gefäße fixieren
Fixierung der Gefäße auf dem Schütteltisch
▪▪ Benutzen Sie zur Fixierung der Gefäße die als Zubehör erhältlichen Aufsätze (siehe
Kapitel „Lieferumfang, Zubehör”).
▪▪ Bei niedriger Schüttelfrequenz können Gefäße wie z.B. Petrischalen auch direkt auf
die rutschfeste Gummiplatte gestellt werden.
Platzieren Sie einzelne Gefäße mittig.
Platzieren Sie mehrere Gefäße so, dass sie gleichmäßig auf dem Aufla-
geteller verteilt sind.
TITRAMAX 100 / TITRAMAX 101 / TITRAMAX 1000
➜➜ Legen Sie Mikrotiterplatten direkt in
die Aufnahmenester der mitgelieferten
Gummiplatte ein.
✓✓ Die Mikrotiterplatten werden durch die
Gummimatte sicher fixiert.
✓✓ Die Gummiplatte kann zur Reinigung
oder bei Beschädigung leicht ausge-
tauscht werden.
VIBRAMAX 100 / ROTAMAX 120 / Aufsatz mit Spannwalzen
Mit dem als Zubehör angebotenen Aufsatz
mit Spannwalzen können Sie Gefäße
verschiedener Größen einspannen. Gleich-
zeitig eingespannte Gefäße zwischen 2
Spannwalzen müssen den gleichen Durch-
messer haben.
➜➜ Befestigen Sie den Aufsatz auf dem
Aufnahmetisch seitlich mit Hilfe der
mitgelieferten Flügelschrauben.
➜➜ Platzieren Sie die Gefäße auf der
rutschfeste Gummiplatte.
➜➜ Fixieren Sie die Gefäße von beiden
Seiten mit den Spannwalzen.
40Bedienung
VIBRAMAX 110 / Reagenzglasaufsätze
➜➜ Platzieren Sie ein einzelnes Reagenzglas
von Hand und drücken Sie es sanft auf die
Gummimatte.
Vorsicht:
Mögliche Überlastung von
Hand und Arm!
Je nach Kraftaufwand und Nutzungs-
dauer kann das Halten der Probe
im Schüttelbetrieb zu Überlastung
im Hand- und Armbereich führen .
Benutzen Sie das Gerät nicht
länger, als in der EG-Richtlinie
2002-44 zur Vibrationsbelastung
aufgeführt.
Mit den als Zubehör angebotenen
Reagenzglasaufsätzen können mehrere
Reagenzgläser gleichzeitig geschüt-
telt werden. (siehe Kapitel „Ersatzteile,
Zubehör”)
➜➜ Befestigen Sie den Aufsatz auf dem
Aufnahmetisch seitlich mit Hilfe der
mitgelieferten Flügelschrauben.
➜➜ Schieben Sie die Reagenzgläser in die
vorgesehenen Spannhülsen.
✓✓ Die Reagenzgläser werden dadurch
fixiert.
41You can also read