EFiling On-Line Manual for Criminal and Juvenile Case Types
←
→
Page content transcription
If your browser does not render page correctly, please read the page content below
eFiling On-Line Manual for Criminal
            and Juvenile Case Types
            Maricopa County Clerk of Superior Court

                                   Criminal and Juvenile eFiling
                                          User’s Manual

                                             Lrd 09/01/2021

To electronically file a document with the Superior Court in Criminal and Juvenile cases, the Clerk’s Office
eFiling application may be utilized. The following sections detail how to register, and complete an
electronic filing utilizing the Clerk of the Court eFiling website.
Contents
1 Become a Registered User ..................................... 1
2 Logging In ............................................................ 4
3 My eFiling Page ..................................................... 5
4 Edit User Profile .................................................... 6
5 Submit an eFiling with a Case Number .................. 7
6 Submit Case Initiating Documents ...................... 12
7 eFiling Email Notifications ................................... 21
8 Monitoring “My eFiling Page” ............................... 24
eFiling – Things You Need to Know ..................... 25
1
1
Become a Registered User
In order to E-file, you must first register as a user in the system. To access the
website and register as a user, go to the following URL:
https://efilingonline.clerkofcourt.maricopa.gov/Web/#/
The eFiling home page contains some useful training information regarding how to
register to use the eFile website and how to complete an electronic filing. The home
page also contains the applicable court rules and administrative orders regarding
eFiling. Be sure to review this page prior to registering.
To register for eFiling, follow these steps:
1. Click on the Not Registered yet? link, and complete the registration page.
1
Helpful training
information.
Note: At any time, you may click on the ? icons that appear next to certain fields
on the website. By clicking on this icon, you will launch a small window containing
helpful hints on how to complete certain fields.2
2. Complete the registration form in its entirety. Be sure to choose a username and
password you will remember.
3. An Email Address is mandatory, however, the “Receipt Notification Email Address”
field is NOT a mandatory field. If you wish to receive filing Receipt notifications in a
different mailbox than the Accept and Reject notifications, enter a different email in
this field. If left blank, all filing notifications will go to the address in the Email
Address field (Receipt, Accept, and Reject).
4. Be sure to select a Role that is appropriate. If you are an attorney, select the
Attorney role; by doing so, you’ll be required to enter your Bar Number (six digits
for Arizona) and Bar Number State. For any other role selected, the Bar Number
and Bar Number State fields will not be required.
5. Once the form is completely filled out (all asterisk indicated fields), the Register Me
button will become highlighted; click on the Register Me button to continue with the
registration process.
2
3
4
53
You will now be directed to a screen indicating there is one step left in the registration
process; the message on this page instructs you to check your e-mail inbox to confirm
your identity.
To finish registration, you must check your Inbox on the email account you entered
on the registration form, and click the link contained in that email.
Click on the link
Once you click the link contained in your registration confirmation email, you’ll be
directed back to the eFiling application site and receive a confirmed user message
on the screen.4
2
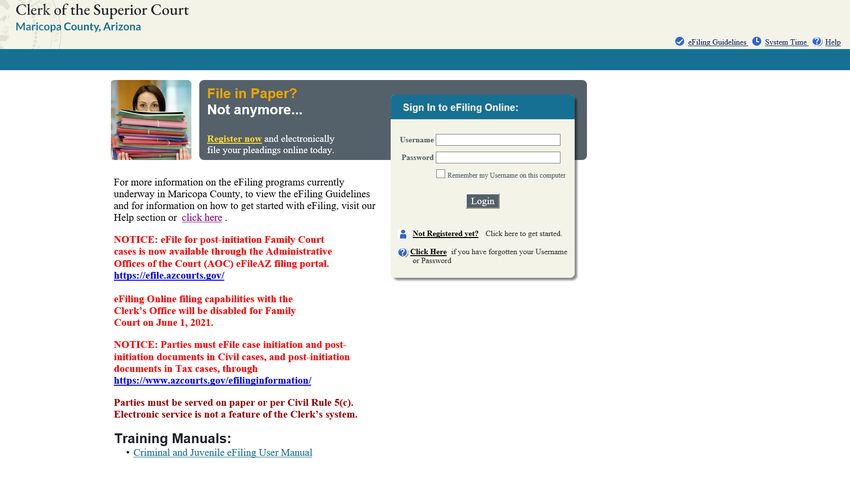
Logging In
To log in immediately after registering, follow these steps:
1. Type your username and password on the Sign In to eFiling Online Log In,
or
2. Click on the Log In Now button and then type in your username and password
from that screen – this is the same screen that appears on the Home Page of
the Clerk of Court eFiling website where you will log in to your eFiling account
from now on.
1
25
3
My eFiling Page
1. Once logged in, you’ll be directed to the My eFiling Page. The My eFiling Page
provides the user a list of filings submitted within the past seven days. The intent of
the screen is to provide the user with a ready list of recent eFilings for immediate
review. Filings on the page are grouped sequentially by the case number and then
chronologically by date/time within a case number.
2. By clicking on the Collapse All button, the page will collapse the list of filings to only
display case number.
3. By clicking on the Expand All button, the list of filings will display the filing details
(Receipt or Submission ID, date and time of filing, document(s) filed), for each filing
under each case number.
4. By clicking on a Document Title, a new window (Adobe Acrobat) will be launched to
display the document that was filed.
5. By clicking on a Case Number you will be launched into the filing process, described
in the section below, and the case number will default to the case number you
clicked on. This provides a quick way to file a new document on a case number that
already exists on the My eFiling Page.
6. You may also access the My eFiling page at any time by clicking on the My eFile
Page link.
6
2
3
4
5
16
4
Edit User Profile
1. To edit your user profile and change information your account information (i.e. email
address, password, etc.), go to the My eFiling Page and click on the Edit My Profile
link.
1
2. Make necessary changes and click on the Update Profile button to save your
modifications. You will not be able to modify your user name.
Note: To change your password re-enter it in the fields provided. If you do not wish
to change your password, leave the password fields blank.
27
5
Submit an eFiling with a Case
Number
To begin the process of eFiling a document, login and then follow these instructions:
1. Click on the File Now button on the upper right-hand corner of the screen
or
2. Click on a case number that already exists on your My eFiling Page to file a
document on that case.
1
2
There will be two screens used to complete the eFiling process; the first screen
(pictured below) requests all the information about the filing (see examples of
Criminal and Juvenile filing below). Notice the Filing Instructions on the right-hand
side of the screen. Following are detailed instructions on how to E-file documents:
1. Enter the Case Number and then click Confirm Case.
2. The case name will show in the Case Summary field. If this is the correct case,
continue with the next steps.
3. You may send designated county agencies a “notification” that your filing has
been accepted or rejected by placing a check (single mouse click) in the box next
to the county agency in the Email Copy To section. You may also send an email
“notification” that your filing has been accepted or rejected to another party or8
person; just add the recipients’ email addresses to the blank field entitled Email
Copies To. If you enter multiple email addresses simply separate them with a
comma (i.e. jattorney@legalstuff.com, glawyer@lawyering.com).
Important note: even when email notifications are sent to other parties or persons, it is still
the filing attorney’s responsibility to make sure opposing counsel receives copies of their
filing when necessary.
4. Next, you’ll need to enter information about the attorney who is authorizing this
filing. If you are registered as an attorney, this information will default to the
information submitted during the registration process. If you are registered as
any other role, you will be required to enter the attorney’s Bar Number, Bar
State, and Email Address that is authorizing the filing.
5. Click the Browse button to the right of the Select Document field. By doing so,
you may browse your local PC to find and select the electronic file (i.e. Word
Document, PDF document) that makes up your filing. Double click on that
document, once found, to add it to the filing.
6. Select the Filing Type of the document from the drop-down list.
7. Enter the Document Title. This would typically be the title that appears to the
right of the case caption on the actual document.
8. Finally, click on the Upload Document button. Upon doing so, you’ll notice that
the document that you uploaded now appears in the window on the right-hand
side of the screen (pictured on page 10).
Example of a Criminal Filing:
1 2
3
4
5
6
7
89
Example of a Juvenile Filing:
1 2
3
4
5
6
7
8
The documents that you upload for filing will appear on the right-hand side of the
screen where the instructions previously appeared. Some filings may require that
you upload more than one document, for example, a Motion that contains Exhibits. If
this is the case, simply repeat steps 5 through 8. You may repeat these steps as
many times as necessary to make sure all documents needed are submitted with the
filing.
9. You’ll notice a Remove link to the right of each document. If you accidentally
uploaded a document you shouldn’t have, you can click the Remove link to
delete that document. Note that if you remove the Main Document, all of the
attached documents will be deleted also.
10. Also available in the table that lists each of the documents attached to the filing
is a Make Main link. The first document uploaded is always defaulted to the
Main document, or the document containing the first page of the filing that will
receive a file stamp once accepted by the Clerk of the Court. If the first
document you uploaded is not the Main document, you may click the Make
Main link on the document that is in order to make it the Main document. The
original main document will simply switch to a supporting document.
11. After you have completed uploading the documents to be filed, click on the
Complete Filing button. 10 9
10
11
You will now be on the Confirm Your Filing screen.
1. Click on the Back button to return to the previous screen to make any necessary
corrections.
2. Click on the Cancel Filing button to start the filing process from the beginning.
3. If everything is correct, click on the Submit Filing button.
2
1
3 11
After you click the Submit Filing button you will see a page indicating Filing Complete.
You will receive a RECEIVED notification; this means the filing has been received. It
has not been reviewed by the clerk, and it has not been accepted / rejected. In other
words, it is pending clerk review.
Notice that the Receipt or Submission ID # appears on this page. You will use
(reference) the Receipt or Submission ID # in the event you need to discuss this filing
with the Clerk’s Office, Judicial Officer, or perhaps opposing counsel.
The Receipt or Submission ID # will also appear in the e-mails that the Clerk of Court
will send you upon receiving the filing, and accepting or rejecting the filing. The various
e-mails that you will receive from the Clerk’s Office will be discussed in Section 7.
Three options as to what you would like to do next appear on this page:
Print a Copy of the Filing
File Another Document Receipt or
Submission
Go to My eFiling Page ID # 12
6
Submit Case Initiating Documents
Effective September 1, 2021, filers may submit case initiating documents (petition, application,
motion) to initiate a new case in Juvenile for the following case types:
Adoption Certification (AC)
Adoption (JA)
Dependency (JD)
Severance (JS)
Multiple documents may be submitted/filed per case. Documents will be designated as:
Main – the primary document used to initiate a case, i.e., petition, motion, application.
There can only be ONE Main document per submission.
Lead – these are other documents in the case that will be filed in and generate an
individual docket entry.
Supporting – these are documents that are attachments or exhibits to a Main or Lead
document. For example, attachment/exhibits to a motion or petition. Supporting
documents will NOT be filed in or docketed separately; they are “part” of the document
they are associated with.
Proposed Orders are also considered a Supporting document. They are not filed in or
docketed when submitted.
It is recommended that a filer “organize” and submit filings per case in this order:
Main – Primary petition, motion, application to initiate the case
Supporting documents (attachments/exhibits), if any
Lead – Other documents that need to be filed in and docketed individually.
Examples: Dependency Coversheet, motions, consent, birth certificate
Supporting documents, if any. Example, attachment/exhibit to a motion, proposed order
Remember, the Main and Lead documents will receive a file stamp and be docketed
individually. Supporting documents will NOT receive a file stamp and be docketed
individually.
All documents submitted per case/submission are considered a packet; the packet will
either be accepted in its entirety, or rejected in its entirety, if there is a deficiency with
any of the documents. It is very important that the documents be uploaded and
submitted correctly: Main, Lead, and Supporting documents, and that supporting
documents be associated to the appropriate Lead or Main document.
How to eFile a case initiating petition/application/motion:
1. Log into eFiling Online. 13
2. Click on File Now.
3. On the Filing Information screen, click on the checkbox for “New Case Number (Juvenile
Only)”.
The Filing Information screen opens fully.
4. Proceed to the Upload Documents section.
5. The case initiating document (petition, motion, application) should always be the first
document that is uploaded. It is designated as the “Main” document. 14
For this scenario, the instructions will address the filing of a dependency petition (Main
document), 2 Lead documents (Dependency Coversheet, Motion to Pick Up), and a
Proposed Order (Supporting document) for the Motion to Pick Up.
6. Click on Browse and locate/select desired document.
7. The Filing Type option is defaulted to “Petition-No Case #”. It is the only choice
available to you when filing documents to initiate a new case.
The Clerk’s Office will apply the appropriate docket code for each document that
is submitted, including proposed orders.
8. Note the “Lead Doc” box is automatically checked and cannot be modified.
9. Type in the title of the document in the Document Title field. Example: Dependency
Petition and Petition for Paternity and/or Child Support.
10. Check the Dependency or Adoption Temporary Custody checkbox when the filing is to
initiate this type of case. This flags the case as a high priority filing in Clerk Review.
11. Click on Upload Document.
12. The document will display in the box on the right. Note that it is designated as the Main
Doc.
Click on Remove to remove the document if you uploaded the incorrect one.
Click on Cancel This Filing (on the Filing Information screen) to start over. 15
13. You may now upload additional documents for this case.
When the document should be filed individually (have its own file stamp and docket
entry), click on the Lead Doc checkbox.
If the document is a supporting document to the Main or Lead document, do not check
the Lead Doc box.
14. Upload a Lead Document: Dependency Coversheet
15. Click on Browse and locate/select desired document.
16. The Filing Type option is defaulted to “Petition-No Case #”. It is the only choice
available to you when filing documents to initiate a new case.
17. Click on the “Lead Doc” box.
18. Type in the title of the document in the Document Title field. 16
19. Click on Upload Document.
20. The document will display in the box on the right. Note the Dependency Coversheet is
designated as a Lead Document.
You may Remove it, or make it the Main document. Note: the petition should always be
the Main document.
21. Upload another Lead document: Motion to Pick Up
22. Click on Browse and locate/select desired document. 17
23. The Filing Type option is defaulted to “Petition-No Case #”. It is the only choice
available to you when filing documents to initiate a new case.
24. Click on the “Lead Doc” box.
25. Type in the title of the document in the Document Title field.
26. Click on Upload Document.
27. The document will display in the box on the right. Note that the Motion to Pick Up is
designated as a Lead Document.
28. To upload the proposed order associated to the Motion to Pick Up:
29. Click on Browse and locate/select desired document.
30. The Filing Type option is defaulted to “Petition-No Case #”. It is the only choice
available to you when filing documents to initiate a new case. 18
31. Do NOT check the “Lead Doc” box. Note that the proposed order is associated to the
last document you uploaded – the Motion to Pick Up.
You may select in the drop-down which document it should be associated with.
32. Type in the title of the document in the Document Title field.
33. Click on Upload Document.
34. The document will display in the box on the right. Note that the Order to Pick Up
(proposed order) is a different shade of blue and is listed under the “Lead” Motion to Pick
Up.
You may Remove it, or make it the Main or Lead document. Note: the petition should
always be the Main document.
You cannot change a Main or Lead document to a Supporting Document. You would
need to Remove the filing and re-upload it. 19
35. Review your filing. If correct, click on the Complete Filing button.
This will take you to the Confirm Your Filing screen.
36. Review the documents attached to the filing. You may view each document by clicking
on the document title blue link.
a. A new Back button has been added which will return you to the previous screen
to make any necessary modifications.
b. Click on Cancel Filing to cancel the entire filing.
37. Click on Submit Filing when ready to submit the filing. You must click on Submit Filing to
complete the eFiling submission.
38. After clicking on Submit Filing, the Filing Complete screen will display. Note the
Submission ID# with the date and time of filing.
Use the Submission ID# to match up the Receipt and Acceptance or Rejection
notifications.
The submission date and time will reflect in the Filed Stamp when the filing is accepted. 20 To file another document, click on “File Another Document”. This takes you to the Filing Information screen where you begin the eFiling process for the next document. To print the Filing Details screen, click on “Print a Copy of this Filing”, which looks like this: Note the Submission ID# with the date and time of filing. Note that the Case Number field is blank. The newly assigned case number and the Submission ID# will be provided in the Acceptance notification. Use the Submission ID# to match up the Receipt and Acceptance or Rejection notifications.
21
7 eFiling Email Notifications
6
Received eFilings
Once your eFiling has been submitted to the Maricopa County Clerk of Superior
Court, you will receive a “received e-mail.” It will look like the following sample:
Please remember that this e-mail indicates that your filing has been received; not
accepted. 22
Accepted eFilings
Once your eFiling has been accepted by the Maricopa County Clerk of Superior
Court through the clerk review process, you will receive an accepted email. It will
look like the following sample: 23
Rejected eFilings
If the filing has been rejected, the Subject line in the e-mail will indicate “Rejected.”
The first line in the e-mail will state, “The following eFiling has been Rejected by
the Maricopa County Clerk of Superior Court eFiling system.” It will also state in
the body of the e-mail the reason why the filing has been rejected. It will look like the
following sample: 24
8
Monitoring My eFiling Page
7
1. When you return to My eFiling Page, the filing that you submitted will be
displayed, with the Receipt ID # or Submission ID #, date, and time that the
document was filed.
2. You can click on the document link to open and view the document (filing). The
document will open in Adobe Acrobat.
1
2
The submissions for case initiating filings will display under Case Initiated Documents
because there is no case number. Note the Submission ID number if you need to reference. 25
eFiling – Things You Need to Know
Here is a list of things you NEED TO KNOW about eFiling with the Clerk of the Superior Court in Maricopa County.
Be sure that the Clerk of the Court has an accurate record of the “Primary Attorney” on your case. You can view
case information by looking the case up in the iCIS application, or online by going to the Case History web site
at: http://www.superiorcourt.maricopa.gov/Docket/ (Criminal only).
Please review the eFiling Guidelines established by Administrative Order 2007-140, available at this web
address: https://efilingonline.clerkofcourt.maricopa.gov/Web/efilingguidelines/eFilingGuidelines.pdf
Case-initiating documents may be eFiled for Juvenile Adoption Certification (AC), Adoption (JA), Dependency
(JD), and Severance (JS) case types. Initial complaints/petitions may not be eFiled for Criminal (CR), Juvenile
Delinquency (JV), Emancipation (JE), and Guardianship (JG) case types.
Post-initiation/subsequent documents may be eFiled for Criminal (CR), and the following Juvenile case types:
Adoption Certification (AC), Adoption (JA), Delinquency (JV), Dependency (JD), and Severance (JS).
Subsequent documents may be eFiled for Juvenile Emancipation (JE) and Guardianship (JG) cases when a
filing fee is not required.
eFile only one “Main” document per filing ID transaction for post-initiation filings. The first document in each
Filing ID is the “Main” document and will receive the “FILED” stamp (if accepted) and determines how the
document will be recorded on the Court’s docket.
Submit exhibits or other documents you want attached (or “stapled”) to the main document as a supporting
document within the same Filing ID. Supporting documents will not have a “FILED” stamp and do not generate a
separate record in the Court’s docket.
Submit Proposed Orders in the same submission as the respective motion. It is highly encouraged that Proposed
Orders be submitted in an editable format. Microsoft Word (.doc or .docx) is the most desirable.
If a Proposed Order is submitted as a main document, it will be lodged with the Court along with any supporting
exhibits, but only the Proposed Order will be filed in to the case file, and only after it is signed by the judicial
officer.
You do not need to provide the judicial division a copy of the filing. The eFiling system will automatically route a
copy of the filing to the assigned judicial division once your filing has be accepted (filed).
When viewing the docket, documents that have been eFiled will have a red “E” in the paper document icon.
The signature line on an electronically filed document shall contain the printed name of the filing participant
preceded by the symbol “/s/”; for example: /s/ James Smith. If an attorney is signing a document for another
attorney, for instance, the signature line should appear:
By: /s/ James Smith on behalf of George Jones
JAMES SMITH on behalf of GEORGE JONES
eFile Support Contact
Hours: Monday – Friday 8:00 am – 5:00
pm
Phone (602)37-Clerk, or (602)372-5375
coscr-efile-support@maricopa.gov [Adult case types]
Email efileJuvenileSupport@maricopa.gov [Juvenile case types]
Visit us on the web at http://www.clerkofcourt.maricopa.gov.
Visit https://efilingonline.clerkofcourt.maricopa.gov/Web/efilingguidelines/eFilingGuidelines.pdf for the
eFiling Guidelines.
Visit http://www.azleg.state.az.us/ to review Arizona Revised Statutes.
Visit https://govt.westlaw.com/azrules/ to review local rules of procedure.You can also read