INTELLO Application Guide - Intelligent moisture management for healthy, durable and energy efficient buildings - Pro Clima Australia
←
→
Page content transcription
If your browser does not render page correctly, please read the page content below
INTELLO®                                    NZ
                                         INTELLO®
                                                          NZ
                                                    INTELLO® PLUS
                                                                         AUS
                                                                    INTELLO® PLUS

Application Guide

Intelligent Air Barrier System

Intelligent moisture management for healthy,
durable and energy efficient buildings
Intelligent Air Barrier
Wall
IMPORTANT
INTELLO® and INTELLO®
PLUS are for internal
use only. Keep it away
from water, moisture
and direct UV.
Having a clean worksite
and surfaces is key to
achieving durable
adhesion.
Prepare site Tools required
Clean / sweep the area. Check interior surface for - Ruler; marker, pencil; sharp knife; caulking gun Plan ahead before
staples, nails and protrusions that might damage - PRESSFIX fixing membranes. This
the membrane. - Staple gun (pneumatic if preferred) will anticipate
- Staples 8-10 mm crown width, 8 mm leg length challenges and reduce
re-work.
Measure install height to 1470 mm Mark height at several locations
Set a mark at 1470 mm above the floor, which Measure and mark the 1470 mm height at the
will result in a 30 mm overlap onto the floor. The same level in several locations along the wall to
flap at the bottom is required. ensure a level application.
1
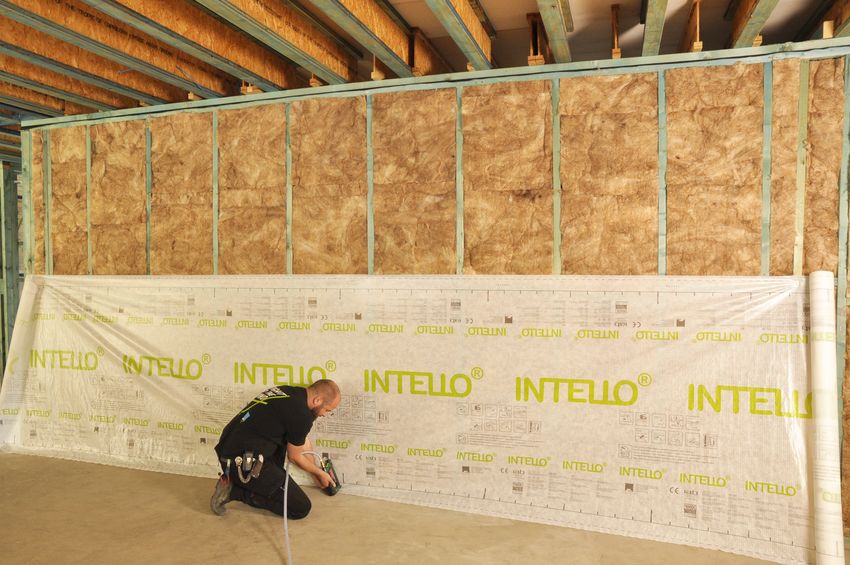
Unroll INTELLO® membrane Staple perpendicular to direction of tension
Align the top edge of INTELLO® membrane to Orient staples so crown is perpendicular to the
1470 mm marks. Keeping alignment with the direction of tension. Use 5-6 staples at the initial
marks, fix one end with a few staples (1). fixing point.
SYSTEM
Intelligent Air Barrier
Wall

  IMPORTANT

  Ensuring the membrane
  is properly taut to
  enable effective
  application and              1                                       2                                     4
  adhesion of TESCON®
  tapes.                                                                               6
                                                    3
  If you use too much                                                                                                          5
  tension, you risk having
  seals pull away over
  time.                        Position INTELLO® bottom layer                     Tension & fix INTELLO®
                               Staple at corner (1), pull the membrane taut and   Pull up and staple (4). Pull the corners down and
  If you allow too much        staple at (2). At the middle, stretch the bottom   staple (5, 6). Along the bottom plate, staple at
  slack, you may have a        down to create a tight “V” and staple (3).         every 100 mm & along the top edge, staple at
  hard time ensuring                                                              every stud.
  durable adhesion.

  You may also create
  small folds in the
  membrane that are
  troublesome to seal.

                               Note: For fixing INTELLO® on metal frames          Correctly overlap INTELLO®
                               Use pro clima DUPLEX double-sided tape to          Position upper courses of INTELLO® to make a
  DUPLEX                       adhere the membrane on metal framing with the      100 mm lap over the lower course. Staple in the
  All-purpose double sided     same “V” pattern as above.                         30 mm space between the dotted line and the
  tape, ideal for permanent                                                       edge.
  bonding of INTELLO® to
  steel framing. DUPLEX is
  reinforced with a scrim
  allowing it to remain
  thin, avoiding thick
  layered material build ups                                                                             3
  while still providing easy
  application.
                                                                                   1
                                                                                                                                    2

                               Apply successive courses of INTELLO®               Pull INTELLO® taut & staple fix
                               Staple lower edge of new course at one lower       After fixing the lower corners (1, 2), pull the
                               corner, pull membrane across keeping it taut,      membrane firmly up. When taut, staple once in
                               then staple at the lower edge of the other end.    the middle at the top edge (3).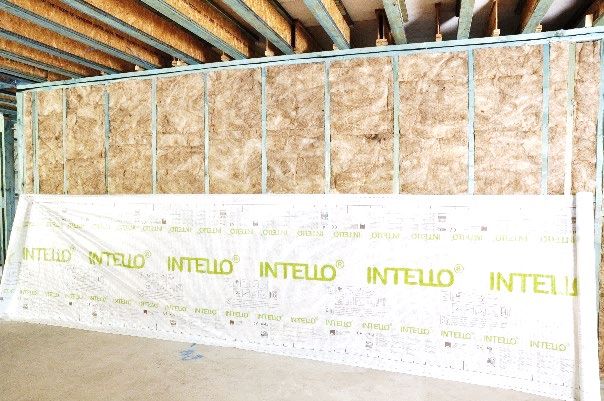
Intelligent Air Barrier
                                                                                                                                   Wall

                                                                                                                        IMPORTANT
                                                    6
5                                                                                                               Membrane should be
                                                                                                                pulled taut to ensure
                      4                                                                                         TESCON® VANA tape
                                                                                                               can be easily installed
                                                                                                               and adequate pressure
                                                                                                                    applied using the
                                                                                                                       PRESSFIX tool.

                                                                                                                       When applying
                                                                                                               TESCON® VANA ensure
Pull INTELLO® taut & staple                             Fix staples within 30 mm dashed line                   there are no creases or
Pull down in centre and staple (4). Pull taut and       Where one course overlaps another, a dashed line            excessive tension.
staple at each top corner (5, 6). Staple every          30 mm from the edge indicates where to staple.
100 mm along top plate & every stud along               When taped, the staples will be sealed.
bottom.

                                                                                                                     TESCON® VANA
                                                                                                                    Pressure sensitive
                                                                                                             adhesive tape for airtight
Seal overlaps & joints with TESCON® VANA                Activate the adhesive using PRESSFIX                             connections.
Apply TESCON® VANA along the 30 mm mark                 Firmly run the PRESSFIX tool along TESCON®
(dotted line). Remove the backing from short            VANA to activate the adhesive. Ensure that this is
sections while working from one end to the other.       done with firm pressure.

9
                                                                                                                            PRESSFIX
Create a continuous airtight INTELLO® layer             Floor connection preparation                          A malleable plastic tool
-    Connect to floor                                   Surface must be dry and dust free. Vacuum if          for applying pressure to
-    Connect to window                                  necessary. Surface must be grease and silicone       pro clima adhesive tapes
-    Connect to penetrations                            free and also free of contaminants.                       to ensure long term
                                                                                                                     durable bonding.
Intelligent Air Barrier
Wall

  IMPORTANT

  Adhesion test
  Use a small strip of
  TESCON® VANA tape
  to test adhesion on
  the substrate.

  If TESCON® VANA fails
  to stick properly
  because the surface is:
  • dirty -> clean the
                               Apply ORCON® CLASSIC bead along floor            Attach INTELLO® to ORCON® CLASSIC bead
     surface
                               Hold the INTELLO® overlap up & apply a bead of   Lay the INTELLO® overlap onto the ORCON®
  • uneven -> use              ORCON® CLASSIC adhesive that is at least 5 mm    CLASSIC bead in full contact. Do not press the
     TESCON® PRIMER RP         thick along the floor (concrete, fc sheet or     bead completely flat, allowing a lasting, flexible
     & ORCON® CLASSIC          timber).                                         connection.
     sealant

  If TESCON® VANA fails
  to stick to a clean
  surface then TESCON®
  PRIMER RP must be
  used.

                               Apply TESCON® PRIMER RP                          Evenly spread TESCON® PRIMER RP
                               Do an adhesion test. If additional adhesion is   Smooth the application of TESCON® PRIMER RP
                               necessary, prepare the surface by applying a     with a brush.
                               spread of TESCON® PRIMER RP.
  TESCON® PRIMER RP
  Applied to substrates to
  prepare for optimum
  adhesion to surfaces such
  as concrete, masonry,
  timber, fibre cement,
  plywood, oriented strand
  board (OSB), and other
  porous or friable surfaces
  prior to application of
  TESCON® tapes or
  ORCON® CLASSIC
  adhesive.

                               Apply ORCON® CLASSIC to TESCON® PRIMER RP        Attach INTELLO® to ORCON® CLASSIC bead
                               When TESCON® PRIMER RP has dried                 Lay the INTELLO® overlap onto the ORCON®
                               (approx. 15 - 20 min), a bead of ORCON®          CLASSIC bead in full contact. Do not press the
                               CLASSIC may be applied.                          bead completely flat, allowing a lasting, flexible
                                                                                connection.
Intelligent Air Barrier
                                                                                                                             Wall

                                                                                                                   IMPORTANT

                                                                                                           When creating a seal
                                                                                                         with ORCON® CLASSIC
                                                                                                         adhesive, take care not
                                                                                                            to press too hard or
                                                                                                             squish the bead of
                                                                                                                        sealant.

                                                                                                             The bead thickness
                                                                                                           provides elasticity of
                                                                                                           the connection once
Seal internal corner using ORCON® CLASSIC          Fill the corner fold with ORCON® CLASSIC                      dry to allow for
Hold the INTELLO® overlap up & apply a bead of     Pinch any extra INTELLO® material and lift it up.        building movement.
ORCON® CLASSIC adhesive that is at least 5 mm      Fill the fold with ORCON® CLASSIC. Lay the
thick along the floor (concrete, fc sheet or       folded and filled material down, completing a
timber).                                           continuous seal.

                                                                                                               ORCON® CLASSIC
                                                                                                       A durable airtight sealing
                                                                                                       glue suitable for bonding
                                                                                                        all pro clima products to
Cut INTELLO® at exterior corner                    Apply ORCON® CLASSIC bead around corner                 any building material,
Where INTELLO® meets an exterior corner, cut the   Apply a bead of ORCON® CLASSIC underneath                     smooth or rough,
material at a right angle to remove all tension.   INTELLO® where it is lifted.                          masonry or timber. It is
                                                                                                        fast drying and performs
                                                                                                       even in extreme humidity
                                                                                                              or damp conditions.

Attach INTELLO® to ORCON® CLASSIC bead             Tape exterior corner with TESCON® VANA
Lightly press both folds of INTELLO® onto the      At the corner, a short strip of TESCON® VANA
bead of ORCON® CLASSIC, taking care not to         tape may be used. Make a small slice halfway
press it flat but maintain a continuous            through the length, and apply it in the corner as
connection.                                        shown.
Intelligent Air Barrier
Wall

  IMPORTANT

  INTELLO® must not be
  exposed to UV for
  more than two weeks
  or exposed to water
  for any length of time.

  INTELLO® connection
  strips must run
  between the junction
  of the internal wall and
  external wall, and         Prepare interior to exterior wall junction            Install INTELLO® connection strips
  along the top plate of     Where an interior partition abuts an exterior wall,    Cut a short section of INTELLO® (approx. 400 mm).
  the internal wall.         continuity of the INTELLO® system is required.         Fix this to the stud junction.
                             Pre-planning is critical.
  Any overlaps or change
  of direction of the
  connection strip needs
  to be taped with
  TESCON® VANA or
  TESCON EXTORA®.

                             Apply TESCON® PRIMER RP                               Connect INTELLO® to floor with ORCON® CLASSIC
                             Do an adhesion test. If additional adhesion is        For uneven subsurfaces; when TESCON® PRIMER
                             necessary, prepare the surface by applying a          RP has dried, apply a bead of ORCON® CLASSIC
                             spread of TESCON® PRIMER RP.                          adhesive and lay the INTELLO® overlap onto it.

                             Secure lap using TESCON® VANA                         Ready for internal partition install
                             Apply a length of TESCON® VANA to secure the          Once the seal is complete, the interior wall frame
                             connection between INTELLO® and the floor.            may be placed. This ensures continuity of the
                                                                                   INTELLO® Intelligent Air Barrier system.
Intelligent Air Barrier
                                                                                                                                    Wall

                                                                                                                         IMPORTANT

                                                                                                              Pulling the membrane
                                                                                                             taut is important for a
                                                                                                                good connection of
                                                                                                                 TESCON® VANA by
                                                                                                                using the PRESSFIX
                                                                                                              tool, especially where
                                                                                                                an overlap between
                                                                                                             courses does not lie on
                                                                                                               a rigid substrate like
                                                                                                                            framing.
Connect wall/ceiling INTELLO® away from corner        Overlap INTELLO® by 100 mm
INTELLO® must be connected away from the              INTELLO® in the ceiling must finish flush with the
corner. This avoids difficult corner taping. Ensure   wall top-plate, behind the 100 mm overlap.
INTELLO® is taut along the top plate of the wall.     Ensure it is taut & staple INTELLO® onto ceiling
                                                      joists or rafters.

                                                                                                                     TESCON® PROFIL
                                                                                                             Specially designed for a
                                                                                                               secure and permanent
                                                                                                            airtight seal of junctions
Tape junction with TESCON® VANA                       Wall/ceiling intersection finishing check
                                                                                                                    between INTELLO®
Apply TESCON® VANA tape at the resulting joint,       TESCON® VANA should be free of creases and
                                                                                                           Intelligent Air Barrier and
relying on the tautness of the membrane & apply       folds. Check all imperfections for air pathways &
                                                                                                           window and door joinery.
moderate pressure using PRESSFIX.                     tape with TESCON® VANA patches if necessary.
                                                                                                            It is flexible, easy to cut,
                                                                                                                              and has a
                                                                                                             simple-to-remove triple
                                                                                                              release paper, ensuring
                                                                                                               maximum productivity
                                                                                                                   during installation.

                                                                                                                      CONTEGA® IQ
                                                                                                              Makes airtight seal of
Window connection using TESCON® PROFIL                Window connection using CONTEGA® IQ                         junctions between
After windows are fixed in place, use TESCON®         CONTEGA® IQ must be connected to the window           INTELLO® Intelligent Air
PROFIL to bridge the gap between INTELLO® and         before placement. Once fixed in pace, complete        Barrier and window and
the window frame.                                     the connection of CONTEGA® IQ to INTELLO®.              door joinery. Multiple
                                                                                                               adhesive strips allow
                                                                                                                 flexible installation
                                                                                                             options for masonry or
                                                                                                                       timber frame.
SYSTEM
Intelligent Air Barrier
Wall

  IMPORTANT

  Many of these
  applications rely on the
  membrane being taut
  so pressure can be
  applied effectively with
  the PRESSFIX tool.

  Many pipe penetrations
  and details can be fixed
  manually with
  TESCON® VANA tape            For small pipes use ROFLEX 20 grommet              Adhere the ROFLEX 20 flange
  but ROFLEX makes             Use ROFLEX to seal pipes & conduit. Use the        Remove ½ of the backing from ROFLEX and
  quick and effective          appropriate diameter ROFLEX for the penetration.   adhere it to INTELLO®. Remove the remaining ½
  work of many repeated        ROFLEX should fit snuggly around the               of the backing and adhere. Apply pressure with
  details.                     penetration.                                       the PRESSFIX tool.

  ROFLEX 20
  Sealing grommet made of
  strong and highly flexible
  EPDM with integrated
  adhesive flange for rapid    For cold and hot pipes up to 150°C                 Sealing large pipes using ROFLEX
  sealing of pipes up to       ROFLEX 20 can seal cold and hot pipes and          ROFLEX can seal large diameter pipes up to
  30 mm in diameter.           penetrations within the range of 15 - 30 mm in     320 mm. Choose the ROFLEX of the correct
                               diameter.                                          diameter range & fit the grommet over the pipe.

  ROFLEX
  Sealing grommet made of
  strong and highly flexible
  EPDM for rapid and
  permanent airtight
  feedthroughs for pipes.
                               Fix ROFLEX with TESCON® tape                       Complete perimeter with TESCON® tape
                               Cut four lengths of TESCON® VANA or TESCON         Continue fixing the sides, then the top. Ensure to
                               EXTORA® tape 60 mm longer than each side of        apply pressure using the PRESSFIX tool.
                               the grommet.
Intelligent Air Barrier
                                                                                                                            Wall

                                                                                                                  IMPORTANT

                                                                                                                  Many cable
                                                                                                            penetrations and
                                                                                                         details can be fixed
                                                                                                              manually with
                                                                                                       TESCON® VANA tape
                                                                                                          but KAFLEX makes
                                                                                                         quick and effective
                                                                                                      work of many repeated
                                                                                                                      details.

Seal “round” cables using KAFLEX                 Adhering KAFLEX                                        KAFLEX mono/duo for
Pull the cable penetration through the KAFLEX    Remove ½ of the backing from KAFLEX and                       round cables.
grommet. Where the cable penetrates INTELLO®,    adhere it to INTELLO®. Remove the remaining ½
align it with the grommet opening on the         of the backing and adhere. Try to avoid folds or     KAFLEX post for flat or
KAFLEX.                                          creases.                                            already installed cables.

                                                                                                           KAFLEX mono/duo
                                                                                                               Airtight sealing
PRESSFIX the flange                              Sealing flat cables (TPS Red/Black/Earth)          grommets made of strong
Make sure to use the PRESSFIX tool to press      KAFLEX post is used when cables are already           and flexible EPDM with
KAFLEX into place and ensure durable adhesion.   connected, if pulling through a grommet is not       adhesive flange for ease
                                                 practical, or when cables are not round.                       of installation.

                                                                                                                KAFLEX post
                                                                                                     Flexible and stretchable
                                                                                                        adhesive patch. Used
                                                                                                     when cables are already
                                                                                                        connected or for flat
                                                                                                                       cables.

Adhere KAFLEX post flange to INTELLO®            Seal KAFLEX around the flat cable
Remove ½ of the backing from KAFLEX post and     Pull backing in short sections evenly from both
adhere it to INTELLO®. Remove the remaining ½    sides of the standing section and stick them
of the backing and adhere. Ensure pressure is    together firmly. Continue around the cable.
applied with the PRESSFIX tool.
Intelligent Air Barrier
Wall
IMPORTANT
When using
KALFLEX multi, use the
included hole punch on
a piece of scrap timber
to ensure no damage to
finished surfaces.
Sealing multiple round cables Place KAFLEX multi and pull through cables
When many cables penetrate INTELLO®, use Work the cables through the holes in KAFLEX
KAFLEX multi. Use the included hole punch to multi and manoeuvre into place onto INTELLO®.
stamp holes to match the number of cable
penetrations.
KAFLEX multi
Sealing grommet made of
strong and highly flexible Tape bottom edge using TESCON® tape Tape perimeter using TESCON® tape
EPDM for rapid and Tape bottom edge of KAFLEX multi with TESCON® Continue with small sections of TESCON® VANA
permanent air seals for VANA or TESCON EXTORA®. or TESCON EXTORA® tape for all sides and apply
up to 16 round cables. pressure with the PRESSFIX tool.
Use KAFLEX multi to seal refrigerant lines Seal with TESCON® & replace lagging
Use KAFLEX multi & hole punch for refrigerant After placing the KAFLEX grommet, seal it to
lines. Cut and pull lagging insulation away from INTELLO® with TESCON® VANA or TESCON
the pipe so that KAFLEX seals around the pipe. EXTORA® tape. Re-apply pipe lagging if it was
removed.Intelligent Air Barrier
Wall
IMPORTANT
INSTAABOX makes
penetrations through
INTELLO® more
manageable where
room is needed.
If there is a service
cavity, the penetrations
are often not needed
when services are run
Use service cavity to avoid INTELLO® penetration Use INSTAABOX when directly fixing plasterboard to the interior of
Cavity battens used to create a service cavity for When cavity battens are not used, use of INTELLO®.
electrical and plumbing avoiding penetrations or INSTAABOX is required for continuity of INTELLO®
the need for an INSTAABOX. airtightness layer and to accommodate GPOs, Some projects will use
sockets & switches. a combination of
service cavities and
INSTAABOX to create
an effective air barrier
system.
Cut rectangle to fit INSTAABOX Seal bottom edge of INSTAABOX to INTELLO®
Mark the spot on INTELLO® to fit the INSTAABOX Use a length of TESCON® VANA tape to seal the
(260 mm x 130 mm) & cut. Poke small holes in bottom edge of INSTAABOX to INTELLO®. Apply INSTAABOX
INSTAABOX and feed the cables through. pressure using the PRESSFIX tool. Installation box for walls
without a service cavity
to provide a dedicated
airtight alcove for GPO’s,
sockets, switches, and
other outlets.
Fully seal INSTAABOX to INTELLO® & cables Ensure cables are fully sealed
Seal the perimeter. Using short lengths of Use further short lengths of TESCON® VANA tape
TESCON® VANA tape, seal the cable penetrations on the forward side of the cables to create a seal
into INSTAABOX. Start with the rear side of the of the cable into INSTAABOX.
cables.Intelligent Air Barrier
Wall
IMPORTANT
Steel structural
members such as
I-beams, C-channels,
Z-channels are difficult
to tape but with care
taken a good airtight
connection can be
achieved.
Seal structural penetrations Apply TESCON® PROFIL to bottom edge
Cut INTELLO® flush with the sides. Seal the Apply tape half on the penetration and half on
bottom side first. Cut a length of TESCON® INTELLO®. Cut at 45° and 3 mm away from the
PROFIL 60 mm longer than the narrow side. corner of the penetration and fold it up as shown.
TESCON® PROFIL
With a simple to remove Apply TESCON® PROFIL to vertical edges Apply TESCON® PROFIL to top edge
triple release paper it is Seal the sides of the penetration. TESCON® Finish with the top of the penetration. Make a
the ideal tape for easy PROFIL has split backing that allows adhesion of small slice at a 45° angle and 3 mm away from
installation around one half to INTELLO®, then the other to the the corners to allow a fold around.
penetrations. penetration.
Use PRESSFIX to adhere TESCON® PROFIL Penetration finishing check
Always use the PRESSFIX tool to apply pressure to TESCON® PROFIL should be free of creases and
the adhesive to ensure durable adhesion. folds. Check all imperfections for air pathways &
tape with TESCON® strips if necessary.Intelligent Air Barrier
Wall
IMPORTANT
The mid-floor
connection must be
planned and executed
28a 28b well before INTELLO®
installation takes place.
Connecting INTELLO® between floors: Option 1 Connecting INTELLO® between floors: Option 2 This means the
Where an air barrier is required between floors, a Use a block of timber and seal it with ORCON® connection strip needs
strip of INTELLO® may be used to create a CLASSIC all around and to the underside of the to be planned into the
continuous seal around floor framing. floor panel. construction timeline.
AUS: www.proclima.com.au/construction-details- AUS: www.proclima.com.au/construction-details-
library-wall/ (MIDFLOOR A2211) library-wall/ (MIDFLOOR A2214) If INTELLO® connection
NZ: www.proclima.co.nz/construction-details- NZ: www.proclima.co.nz/construction-details- strips will be exposed,
library-wall/ (MIDFLOOR A2211) library-wall/ (MIDFLOOR A2214) they should be
protected from rain and
UV exposure.
28c 28d
INTELLO® Product Matrix INTELLO® Installer QA Checklist
Ensure good adhesion to substrates by checking Use the INTELLO® Installer QA Checklist to
the INTELLO® Product Matrix. confirm that all the proper steps have been done.
AUS www.proclima.com.au/intello-plus/ AUS www.proclima.com.au/intello-plus/
NZ www.proclima.co.nz/intello/ NZ www.proclima.co.nz/intello/ Access all
NZ www.proclima.co.nz/intello-plus/ NZ www.proclima.co.nz/intello-plus/ documentation online
AUS
INTELLO® PLUS
NZ
INTELLO® PLUS
28e 28f
Protect your work! Check install quality with a Blower Door
NZ
Where INTELLO® is installed, use pro clima Before installing plasterboard, consider using a
INTELLO®
Signage on site to prevent damage to INTELLO®. Blower Door to find any air leaks in the
AUS www.proclima.com.au/intello-plus/ Intelligent Air Barrier system.
NZ www.proclima.co.nz/intello/ AUS www.proclima.com.au/blower-door/
NZ www.proclima.co.nz/intello-plus/ NZ www.proclima.co.nz/blower-door/Intelligent Air Barrier
Wall
Recommendations and requirements
ATTENTION:
• Keep all angle grinding of metals away from INTELLO®. Sparks projected from angle grinders during
cutting can burn tiny holes in the membrane and reduce its effectiveness.
• Blow torches and heat guns should be used with care when near INTELLO®. All damage must be repaired.
• INTELLO® and INTELLO® PLUS are for internal use only. Keep them away from moisture and UV exposure.
• Where possible, INTELLO® should be installed so that adhesion can be achieved using single-sided
adhesive tape on the printed, smooth side of the membrane.
• The maximum span between supporting members for INTELLO® shall be no more than 1 m.
• After ceiling installation, perpendicular cavity battens on the inside should have a maximum separation
distance of 500 mm & the battens must be fitted to carry the weight of the insulation material.
• If regular tensile loads on adhesive tape bonds are to be expected – for example, due to the weight of
the insulation material – when using roll, batt or board type insulation materials, an additional
supporting batten should be fitted over the overlap connection. Alternately, the adhesive tape can also
be secured on the overlap with strips of adhesive tape running across it at a distance of 300 mm.
• When attaching the membranes in the case of roll, batt or board insulation materials, a maximum
separation distance of 100 mm to 150 mm applies for the fastening staples, which must be at least
10 mm wide and 8 mm long. The membrane overlaps must be approx. 80 mm to 100 mm.
• For blown-in insulation: Only INTELLO® PLUS (not INTELLO®) is strong enough to hold the weight and
pressure during the process of installation. Orientation of the staples should be lengthwise i.e. the same
as the structural frame orientation.
NOTE
- Information in this Application Guide applies to INTELLO® and INTELLO® PLUS unless otherwise stated.
New Zealand: INTELLO® & INTELLO® PLUS are available | Australia: INTELLO® PLUS is available.
- Photography undertaken in Australia. Installation method applies for Australia and New Zealand,
timber colour may vary.
Certification
Your local support
NEW ZEALAND AUSTRALIA
0800 PRO CLIMA (776 254) 1800 PRO CLIMA (776 254)
Technical: support@proclima.co.nz support@proclima.com.au
General: welcome@proclima.co.nz welcome@proclima.com.au
www.proclima.co.nz www.proclima.com.au
11.12.2020You can also read