SALMON'S TALE - TECHNICAL DESCRIPTION OF THE PROGRAM - Updated January 2021 - Alexandra Déry
←
→
Page content transcription
If your browser does not render page correctly, please read the page content below

SALMON’S TALE - TECHNICAL DESCRIPTION OF THE PROGRAM

  Updated January 2021 – Alexandra Déry

Table of Contents

1.     INCUBATOR COMPONENTS ..................................................................................................... 3
2.     INSTALLING THE INCUBATOR ................................................................................................. 5
3.     STAGES OF THE PROJECT ....................................................................................................... 10
     3.1       DELIVERY OF THE EGGS ................................................................................................ 10
     3.2       CARING FOR THE EGGS .................................................................................................. 10
       3.2.1         Before hatching .............................................................................................. 10
       3.2.2         After hatching ................................................................................................ 11
     3.3       RELEASING THE FRY (STOCKING) ................................................................................... 11
     3.4       AFTER RELEASING THE FRY ........................................................................................... 13
     3.5       CLEANING AND STORING THE INCUBATOR .................................................................. 13
4.     FREQUENTLY ASKED QUESTIONS ......................................................................................... 15
     4.1       ABOUT SALMON’S TALE ............................................................................................... 15
     4.2       USING THE AQUARIUM - INSTALLATION AND START-UP ............................................. 17
     4.3       USING THE AQUARIUM - PHYSIOCHEMICAL ................................................................ 21
5.     Problem Solving .................................................................................................................... 23
     5.1       ISSUE WITH THE COIL COOLER ..................................................................................... 23
     5.2       ISSUE WITH THE AQUACLEAR 300 FILTER .................................................................... 23
     5.3       ISSUE WITH THE FLUVAL FILTER ................................................................................... 23
6.     SUMMARY TABLE OF THE PROGRAM ................................................................................... 24
7.     TEACHER’S REMINDER .......................................................................................................... 25

Operating Manual - Salmon’s Tale                                                                                               Page 2 de 27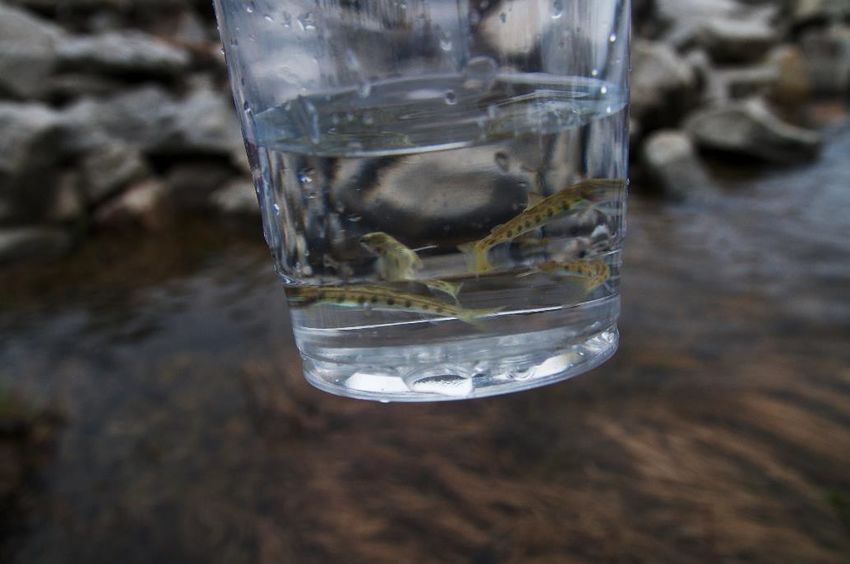
1. INCUBATOR COMPONENTS

Incubator: The incubator is the set of elements that allow the eggs to develop into small
fry. As such, the aquarium, the filter, and the cooling unit make up what we refer to as
the “incubator” in this document.
Aquarium: The aquarium must contain at least 30 gallons of water (114 liters) for the fry
to properly develop, and for their environment to be provided with sufficient oxygen.
Filter: Filters keep the water fresh and clean for the fry. There are two different models
to choose from in the program.
The original filter unit that was used, called Aquaclear, would be installed on the brim of
the aquarium, and relied solely on the old Freon coolers to operate. This type of cooling
system uses coils placed inside the aquarium, directly at the bottom of the tank.
The Fluval filter features its own reservoir and is designed for external filtration
(positioned below the aquarium). The filter unit is connected to the cooler with hoses
providing water inlet and outlet through the system.

                         Fluval                                Aquaclear

Operating Manual - Salmon’s Tale                                                 Page 3 de 27
Cooler: The cooler allows to maintain optimal water temperature for the survival of the
eggs and fry. In the past in the program, the incubator’s cooler came as a coil that was
placed directly at the bottom of the aquarium tank. The newer model features its own
reservoir, which is connected to the filter and the aquarium.

                                                                      → Water inlet and
                                                                      outlet nozzles

                                                                      → Rubber collar
                                                                      → Metal collar (can be
                                                                      used to seal joints
                                                                      between pipes and
                                                                      water inlets/outlets)

Carbon filter/bag: This is the only component in the incubator that needs to be changed
every year. Carbon filters improve water clarity by effectively eliminating odors,
discoloration, and impurities. Accordingly, these filters have a certain lifespan, which is
why they should be replaced every year. They usually cost around $16, so this is a small
annual investment to help increase the fry’s chances of survival.

Gravel: You could buy some gravel at the store or you could use rocks taken from the
river. The gravel helps reassure the fry because they can hide in it. It also mimics their
natural river environment; however, it is not essential to their survival in the incubator.

Operating Manual - Salmon’s Tale                                                 Page 4 de 27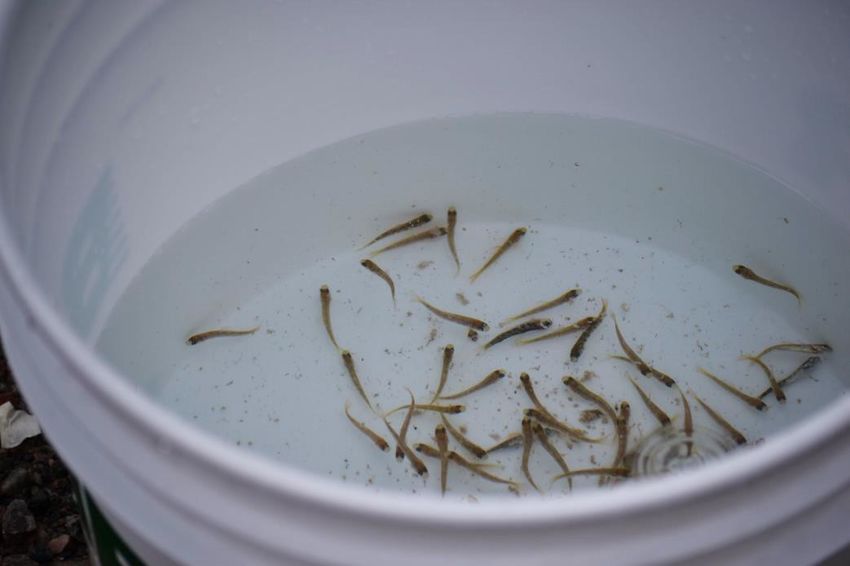
2. INSTALLING THE INCUBATOR

Follow these steps to install your aquarium. The procedures are described for the two
different types of filter (Aquaclear and Fluval) and cooler. You may refer to the
reference images that follow each step at any time.

     1. To maintain as much control and to be able to closely monitor the incubator, we
        suggest that you install it in the classroom rather than in another space such as a
        study room or another location with no regular supervision. Make sure you have
        a table or platform that is wide enough, stable, and leveled. The aquarium, once
        filled with water, is extremely heavy (180 kg) and will require proper support.

     2. The filter, cooler and gravel should be rinsed with water to remove any dirt or
        dust left during the time it was in storage. If you are unsure of how to clean the
        aquarium before storing your incubator equipment, it would be best to rewash it
        along with all the components using a bleach solution (1/10), and then finally
        rinse it thoroughly several times with water. Do not rinse any components of the
        filtration system with bleach only. The solution must be dissolved.

     3. Cover the bottom of the aquarium with the rocks and gravel that you have
        cleaned and disinfected beforehand. Only one layer of gravel is enough. Too
        much gravel will make it harder to see the fry after hatching.

     4. Let the water run for three minutes before starting to fill the aquarium.
        4.1 Aquaclear: Fill the aquarium with tap water at least 1 inch above the coil and
        let it sit for a minimum of 72 hours to allow the chlorine in the water to
        evaporate.
        4.2 Fluval: Fill the aquarium with tap water up to 2 inches from the rim of the
        aquarium and let it stand for a minimum of 72 hours to allow the chlorine in the
        water to evaporate.

     5. Assembling and installing the filter
        5.1 Aquaclear: insert the sponge at the bottom of the unit and place the carbon
            on top of it. Due to the age at which eggs and fry are kept, we do not have to
            add ammonia to the filter after the yolk sacs have been resorbed. Then,
            insert the carbon filter after it has been rinsed. Fill the reservoir with water
            and start the unit. Refer to manufacturer instructions.
        5.2 Fluval: DO NOT CONNECT THE FILTER UNIT UNTIL THE AQUARIUM IS
            FILLED WITH WATER AND THE INSTALLATION IS COMPLETE.

Operating Manual - Salmon’s Tale                                                  Page 5 de 27
This filter unit works using gravity, which means that the system must be
               positioned below the aquarium. The height distance between the floor/filter
               unit should be within 1.4 meters from the top edge of the aquarium tank.

     6. Fluval: Assembling the different hoses and components. If you have the white
        strainer hose, you must place it at the bottom of the aquarium and connect it to
        the filter’s water inlet. Otherwise, simply use the standard nozzle and install it on
        the rim of the aquarium, then connect the other end to the filter’s water inlet.

          Connect a hose from the filter’s water outlet to the cooler’s water inlet.

          Connect a third hose from the cooler’s water outlet to the aquarium. Use the outlet
          nozzle provided for this purpose and install it on the rim of the aquarium.

          Make sure that the hoses are not looped or twisted together, otherwise
          this could result in a system malfunction.

          DO NOT FILL THE RESERVOIR WITH WATER YET. DO NOT CONNECT THE FILTER AT
          THIS POINT.

Operating Manual - Salmon’s Tale                                                       Page 6 de 27
Pump the instant-prime handle by pulling it up and pushing it down several times (see
picture).

       Once you hear water being drawn into the unit, return the instant-prime handle to
       the down position. Air will be expelled through the output nozzle, causing the water
       in the aquarium to bubble. Once the bubbling in the tank stops, you will know the
       air is out of the system, and the reservoir is full. Plug the power cord into an
       electrical outlet and the pump should start immediately.

      7. Adjust the water temperature according to the thermometer in the aquarium.
         Temperature should be maintained between 4 and 6 °C to ensure the survival of
         eggs and fry. Gradually decrease the temperature to 5 °C (1 °C per day).

      8. Learn how to operate the system beforehand so that you are comfortable when
         the eggs arrive. Know where the ON/OFF controls are located. Experiment with
         the degree difference between your aquarium thermometer and the cooler
         unit’s thermostat. Always rely on your aquarium’s thermometer reading.

      9. From the outset of the program, you should have a bucket or a large jug to keep cool
         water inside. Tap water must sit for at least 72 hours for chlorine to evaporate.
         Make sure that the water in the container is kept at a temperature of 4-5°C
         (refrigerator temperature) so as not to create a thermal shock in the aquarium. Eggs
         and fry are very sensitive to physicochemical changes in their environment. The
         bucket of water or the jug can be stored in the fridge. Make sure that the staff and the
           students at your school know about the situation so that no one inadvertently adds tap
           water directly into the aquarium, and so that you can be notified in case of a power outage,
           for example.

      10. Make sure that the incubator is ready when the eggs arrive and that the
          temperature in the aquarium is stable - between 4 °C and 6 °C (thermometer
          reading). The representative who will deliver your eggs will be able to provide
           you with any information specific to your sample.

 Operating Manual - Salmon’s Tale                                                        Page 7 de 27
Final assembly image of the incubator with the Fluval filter unit

Operating Manual - Salmon’s Tale                                       Page 8 de 27

Operating Manual - Salmon’s Tale Page 9 de 27

Instructions for digitally controlled cooling units

Internal cooling unit (old model):
    • Start the unit
    • Place the coil at the bottom of the aquarium
    • Connect the compressor to a power source
    • Set the lever switch to the “ON” position
    • The temperature gage will begin flashing and the unit will start after 7 minutes

Changing the temperature
   • Press the menu button “SP” and it should begin flashing
   • Press the button again and the digits for the temperature will appear
   • Use the arrows to set the desired temperature
   • Press the “menu” button again to confirm the desired temperature level

To switch from Fahrenheit to Celsius: (and vice versa) press both arrows simultaneously.

Instructions for the ActiveAqua cooling unit

     •    Before turning on the cooler, make sure that the filter is working and that
          the water is circulating properly (see steps 5 and onwards describing the
          Fluval filter installation process)

→ Aquarium temperature display

     •    Press the “SET” button for more than 2 seconds or until the number “2” appears
     •    Press the “SET” button a second time and the number “2” will disappear, and this
          time the aquarium temperature will appear

→ Changing the temperature

     •    Press the “SET” button for more than 3 seconds until the number “2” reappears

Operating Manual - Salmon’s Tale                                                   Page 10 de 27
3. STAGES OF THE PROJECT
3.1 DELIVERY OF THE EGGS
The scheduled date and time for the egg delivery will be made known to each teacher in
the weeks prior to the beginning of the project. Under normal circumstances, you
should receive the salmon eggs in mid-February, or by the beginning of March. On that
day, a representative will come to your classroom to deposit the eggs in the incubator
and give you some additional instructions. You should contact us at the FQSA, or the
organization responsible for sponsoring your school, for details on how the delivery will
take place (animation, presentation to students on salmon, etc.).
Egg Acclimatization and Releasing the Eggs Into the Aquarium
Acclimatization is essential to the survival of the eggs and to ensure that they do not
suffer from stress due to the change in their environment (between the thermos flask
they are being transported in and the aquarium). When the eggs are brought in, transfer
them inside a glass jar (e.g., Masson jar) that has been preliminarily filled with aquarium
water (equivalent to the amount of water found in the thermos flask). Place the jar in
the aquarium for 15 to 30 minutes (it will float). If the difference in temperature
between the water in the thermos flask and the aquarium is too significant, allow more
time for the water to temper.
Once the acclimatization is complete, the teacher (or another volunteer) will have to
deposit the eggs inside the aquarium. Simply spread the eggs gently on the gravel and
be careful not to move or disrupt the bottom surface while doing so.
Age of the Eggs Explained
The eggs will hatch once they reach a total of 425 to 450 degree days. We mention 429
degree days in the teacher’s book, because we know that nature can be unpredictable.
429 degree days is a good indicator in predicting when the eggs will hatch, but you can
explain to the students that there may be a slight variation. Thus, every day, the eggs
are aging according to the temperature of the water in the aquarium.
3.2 CARING FOR THE EGGS
Here are the various tasks that need to be completed in order for the project to run
smoothly.
3.2.1 Before hatching
• Know that the eggs are already at the eyed-egg stage, which means that they may
be safely transported at this time (developing embryo).
• You will have to regularly remove the dead eggs using the baster, to avoid the
propagation of mold and bacteria. Dead eggs are distinguished by their dull, whitish
color.
Operating Manual - Salmon’s Tale Page 11 de 273.2.2 After hatching
• AquaClear: The ammonia filter must be rinsed with dechlorinated water and
installed by the time the fry are hatched. Then you will need to install the
small mesh on the filter’s water intake.
• Once every two weeks, replace part of the water in the incubator (about 1/3 of
the water) and rinse the foam filter. It is important to use chlorine-free water to
fill the aquarium. The filters are effective for the entire duration of the
experiment, without having to be changed regardless of the type of filter.
• Sac fry do not need to be fed as long as their yolk sac is still attached to them.
When the yolk sac is resorbed in most fry, they will begin to emerge from the
rocks to look for food. This is when we start feeding them, usually at the end of
April, beginning of May.
• To feed the fry, only sprinkle a little bit of food at a time and do not overfeed
them. Feed them once or twice a day and give them just a small pinch at a time.
• Do not forget to regularly remove the foam forming on the surface of the water
using the net provided (small strainer). Dead fry and other visible waste should
also be removed.
Note: If there is an unusual smell, rinse the carbon filter with non-chlorinated water.
3.3 RELEASING THE FRY (STOCKING)
The location of the fry release shall be confirmed to you upon delivery of the eggs and
will be indicated on the SEG permit issued by the Ministère des Forêts, de la Faune et
des Parcs. The stocking will take place in a river near your school. To choose the location
of the stocking process, please inquire with the FQSA. You can decide on the
appropriate date between May 25th and June 23rd (end of classes).
There are many ways you can plan for this event. You may do the stocking process with
your students yourself, or you can arrange with your river manager or the FQSA. The
river manager can come and collect the fry as well as guide you through the stocking
process.
Two weeks before the official release day, you will need to start gradually increasing the
temperature of the water in your incubator to match the temperature of the river (no
more than one degree per day). Talk to your river manager to know the current water
temperature.
On the day of the release, it will also be important that you carefully remove the pebbles one
by one and decrease the water level as much as possible (remove 1/3 of water) while making
sure that the filters in your incubator are still working. This will make it easier for you to
scoop out the fry using the net.
Operating Manual - Salmon’s Tale Page 12 de 27If you transport the fry yourself, follow this simple protocol:
Stocking protocol
It is important to keep the fry at a constant temperature to avoid thermal shock.
1. Get some ice: the ice should not be in direct contact with the fry or the water.
You can either put regular ice in Ziploc bags, rinse a small plastic bottle (e.g.,
water or juice bottle) and freeze water in it, or you can use icepacks.
Note: remember that the amount of ice you need depends on the distance you have to
travel. You do not need ice if you only have to travel 5 minutes on foot, but if you take a 45-
minute bus ride, we recommend bringing the equivalent of 3-4 ice cubes. Bring more ice so
you can replace it if it melts during the trip.
2. Transporting the fry: you have several options.
- Carrier bag and cooler: This is the safest way to transport the fry, and is the
method used by professionals. Carrier bags are provided by the FQSA upon
request. These bags are resistant, clean, and made of plastic that is safe for
the fry. We suggest you put your Ziploc bag or bottle of ice directly in the
cooler along with the carrier bag containing the fry inside.
- Bucket: Fry may also be transported in a large bucket. If you do so, be sure to
wash it beforehand and only use a diluted bleach solution to do so (1/10).
Rinse thoroughly with water multiple times and use dechlorinated water fort
the last rinse, then let the bucket air-dry before using it to transport fry.
When transporting the fry, put a lid on the container to protect them from
any harmful exposure.
Be sure to coordinate the transportation to the river in a timely manner. The
fish should not spend more than 30 minutes to 1 hour in the bucket. Oxygen
depletes quickly once the filter is no longer there to supply air to the water.
Use water from the incubator to fill your carrier bag or bucket, and then put the
fry inside using the hand net. You can ask for help to empty the aquarium by
tilting it to one side. Doing this can be quite delicate, but if you do it quickly
enough to keep the fry in the water, they will be much easier to scoop out once
there is less water left in the aquarium. Be careful not to agitate them too much
during transport.
Operating Manual - Salmon’s Tale Page 13 de 273. Releasing the fry: releasing the fry is likely to involve students from your school
only and should take approximately two hours to complete. You can contact the
FQSA to find out if other schools in your area could join you (sometimes sharing
travel fees), and you can ask your river manager or the organization responsible
to guide you along the process.
- You can invite parents to participate in the event, or you can invite other
classes from your school. Many have combined this activity with a school
field trip, such as a nature hike or canoe float.
- You are responsible for the cost of the bus or other necessary transportation.
- Students must wear boots for the event and dress accordingly to stay warm
and dry in case it rains on the day of the release.
- When the time has come to release the fry, the idea is for each student to be
able to participate in the stocking process. You can give each student a small
paper cup or another type of small container. Ideally, you should give out
about 15 cups and have students share them. Having smaller groups of
students go to the river to release the fry makes it easier to supervise and
ensure that everything runs smoothly. Collect a few fry at a time from the
containers and let the students take them into the river.
- You must ensure the safety of the students on site.
3.4 AFTER RELEASING THE FRY
You must complete the fry stocking report that will be sent to you by the Salmon’s Tale
program manager and return it by email before July 1st. This form is essential for the
completion of the final stocking report required by the Ministry for the issuance of the
SEG permit. The form takes approximately 5 minutes to fill out and should include
information such as the number of students, the number of fry released, and any
comments related to the activity.
3.5 CLEANING AND STORING THE INCUBATOR
1. Remove the gravel, wash it with a bleach solution, rinse and let it air dry. Store in a
clean bucket for reuse again the following year.
2. AquaClear: throw away the carbon filter and the ammonia filter.
3. Wash all components of the incubator with a bleach solution (1/10) and let them soak
for a few minutes. Rinse and let components dry out before storing them in a dry and
clean room where they cannot be exposed to freezing temperatures.
Operating Manual - Salmon’s Tale Page 14 de 27We hope that the project has met your expectations and those of the students and that
it has raised awareness on the importance of respecting our beautiful rivers and the
environment.
Thank you to all the students, teachers, and volunteers for participating in this great
collective project.
Bucket with fry inside during a stocking activity.
Fry inside a small plastic cup before being released.
Operating Manual - Salmon’s Tale Page 15 de 274. FREQUENTLY ASKED QUESTIONS
4.1 ABOUT SALMON’S TALE
• Who is the Salmon’s tale educational program intended for?
The program is aimed primarily at Grades 5 and 6 students, but many teachers have
adapted their teaching to classes ranging from Grade 3 to high school, all the way to the
college level! The program can very well be adapted to classes of students with learning
difficulties, as much as it can serve as the basis for an enriched science program. The
program can be taught in any school in Quebec, but since the stocking must be done on
a salmon river, schools need to consider if their location is appropriate for their
involvement. If you have any questions, do not hesitate to contact our Salmon’s Tale
program coordinator at the FQSA.
• How is the program structured?
The program is designed to take place over a 4-month period starting when the eggs
arrive in the classroom and ending when they are released into the river. The aquarium
should be installed at least 1 week prior to the arrival of the eggs. Teachers must
register their class for the program in the fall the year before.
• What are the main themes addressed in the program?
The Atlantic salmon serves as a common thread to address various issues. Wild Atlantic
salmon populations are the perfect indicator of a healthy environment. Also, salmon
rivers and sport fishing for this iconic species are an important contributor of the
economy in many regions in Quebec. Salmon are as much a part of our history and
heritage for both indigenous and non-native people alike.
Salmon are the ideal wildlife species to approach, popularize, and transmit fundamental
knowledge about that deal with science, technology, and the history of Quebec.
• What is the teaching approach?
The program makes students aware of the issues surrounding Atlantic salmon and its
rivers, but also the environment in general and the impact that we have on it at large.
They learn about the king of rivers through English, math, biology, and ecology activities,
as the teaching material aims to integrate various concepts from different school
subjects. The student’s workbook includes multiple-choice or short answer questions,
associative games, gap-filling texts, crossword puzzles and a role-playing game on an
environmental issue concerning the exploitation of a salmon river. Our program is built
on a competency-based approach and draws on research that emphasizes on how
important it is to help students make sense of their learnings by explicitly linking them
to varied and meaningful contexts. As proposed by the Ministère de l’Éducation, cross-
curricular competency approaches and project-based approaches help break down the
barriers between different school subjects, and help students create connections
Operating Manual - Salmon’s Tale Page 16 de 27between them. This program provides students with a broader understanding of the
various disciplines taught throughout their education.
• What kind of teaching material is used?
The student and teacher’s books are used for learning through research and discovery.
You may purchase hard copies of the books or print them directly from our website.
The books are designed to meet instructional objectives in English, mathematics,
geography, and the natural sciences. They include several different types of exercises
(multiple choice, crossword puzzles, role-playing, etc.).
The incubator installed in the classroom allows students to witness the early life stages
of salmon. They will take responsibility for their care (monitoring the temperature,
looking after the aquarium, feeding the fish) until it is time to release them into the river
in early summer.
The FQSA also suggests watching a short 20-minute film available on its website:
“Jusqu’à la mer”, by Normand Bergeron and Francis Bérubé, which does a great job of
explaining the life of Atlantic salmon in the river.
There is an online game that allows you to learn about the life cycle of salmon with the
help of Salmo, our mascot! Developed in collaboration with Créo, this interactive game
allows us to combine the course material with play and makes for a fun way to integrate
some of the information in the program. The game is available for free online on our
website.
• How can I participate in the program?
The registration form you need to fill out is available on our website. We receive the
forms directly from you via the electronic questionnaire. If you have any questions, you
can contact us by email at adery@fqsa.ca or by calling us at (418) 847-9191 ext. 109.
Next, you must fill out and send your order form to us, also by email.
If this is your first time participating in the program, we strongly recommend that you
first read the detailed description of the program and learn about its wider implications.
Operating Manual - Salmon’s Tale Page 17 de 27• What are the financial implications of the program?
The first year will require an outlay of approximately $1350 for the aquarium, the
cooling unit, and the filtration system, that is to say, all the equipment for your
incubator. Each year after that, the FQSA provides the salmon eggs free of charge and
offers technical support to help you properly use the incubator and its components.
The following years’ costs are minimal (changing the filters). You can purchase hard
copies of the student workbooks or have them printed using the document available on
our website.
A space must be provided to accommodate the incubator system as well as to allow
daily monitoring of the devices. We suggest installing the incubator system in the
classroom or outside in the hallway, rather than in a study room or other unattended
space. Make sure you have a table or platform that is leveled and wide enough. An
aquarium filled with water is very heavy (180 kg) and requires good support.
You must dedicate time in the classroom to teach the program and integrate its
contents into your curriculum. We suggest that you review the course materials before
beginning the project and incorporate the activities into your curriculum from the
outset, rather than seeing it as an extra activity. The wide range of subjects addressed,
and the various exercises proposed are designed to meet the learning objectives set for
your class.
4.2 USING THE AQUARIUM - INSTALLATION AND START-UP
• What kind of equipment do we need to set up an incubator in the classroom?
All the material and the equipment needed to set up the incubator is specified when you
register and fill out the order form. If you have participated in the program in the past
and already have the necessary equipment, be sure to replace the filters every year
(AquaClear: all filters, Fluval: carbon filter only).
The refrigeration unit is the key piece in maintaining a viable environment for the eggs
and fry. It consists of a compressor, a refrigerating tube, a motor, and a ventilation
system. Contrary to the models previously used, the thermal exchanger is kept out of
the water, preventing problems caused by ice build-up due to low water displacement.
You will also need some rounded rocks of various sizes ranging from 1″ to 4″ in
diameter. The gravel can be found along the banks of a river, and will have to be
brushed, cleaned, and washed. Use a bleach solution diluted in water (1/10) to wash the
gravel and rinse several times.
Operating Manual - Salmon’s Tale Page 18 de 27• Should the equipment be washed before use?
The incubator unit, gravel and filter unit should be rinsed thoroughly with water to
remove any dirt and dust remaining from the time it was stored. If you are unsure about
the cleaning method to use before storing your incubator, it would be best to re-wash
the aquarium using only a bleach solution (1/10) and rinse it several times.
Be sure to rinse each unit thoroughly and repeatedly to eliminate any residual chlorine
left from the bleach solution. Salmon eggs and fry are extremely fragile beings. Exposure
to such chemical substances could be fatal to them, so take no chances.
• What temperature should the incubator be initially set at?
First, check the water temperature in the aquarium before you start the cooling unit.
After turning on the unit, set the temperature 1 degree below the current water
temperature. You will need to gradually lower the temperature down to 5 °C. We
suggest that you decrease the temperature by one degree per day and check it as often
as possible to see if the temperature remains stable.
• Do filters have to be installed immediately upon start-up of the incubator?
The AquaClear system requires that you install the sponge, followed by the carbon
filter, after rinsing both units thoroughly with water. The ammonia filter should only be
installed after the eggs have hatched. It should also be rinsed with water, but this time
use the decanted water from your bucket. The water should have been allowed to settle
for 48 to 72 hours to let the chlorine evaporate. Eggs and fry are very sensitive to
physical and chemical changes in their environment.
The Fluval system already has all its components built into the filter unit, so there is no
need for further handling at this stage. However, they will have to be rinsed with water
once a year, at the end of the program, before storage. Change only the carbon filter to
use again the following year.
• What to do in case if ice builds up on the cooling tube (old coil model)?
Two reasons can explain the formation of ice on the coil: water displacement in the
incubator is insufficient, or the difference in water temperature compared to the
desired temperature is too significant.
Turn off the system for a few moments to allow the ice to come off the coil and check
your thermometer reading. Turn the system back on and adjust the thermostat to a
higher temperature, ideally only one degree above the actual water temperature. Check
to see if ice is still accumulating.
Operating Manual - Salmon’s Tale Page 19 de 27Another solution to get rid of the ice is to increase the water flow near the coil. Adjust
the flow rate of the filter unit to the highest setting and bring it closer to the coil to
allow for better water circulation around the unit.
•Is it normal to see a difference in temperature between the thermometer
reading in the aquarium and the incubator thermostat?
The aquarium thermometer may not display the same temperature reading as the unit’s
thermostat. Trust the thermometer reading. Experiment with the temperature
differences between the two and try to adjust the filter unit so that the aquarium’s
water temperature gets as close to 5 °C as possible.
• Is there anything special to prepare on the day of arrival of the eggs?
The day and time scheduled for the egg delivery will be made known to each teacher in
the weeks prior to the event. Under normal circumstances, you should receive the
salmon eggs in mid-February, early March.
Make sure that the water temperature has been stable between 4 and 6 °C for at least
two days prior to receiving the eggs. This is the single most important thing to prepare
before the eggs are delivered. On this day, a representative will come to your classroom
to deposit the salmon eggs in the incubator and to provide you with further instructions.
• Some of the eggs have changed color and are now white, is this normal?
The dull whitish color is a sign that the egg is dead. A certain mortality rate is normal at
each stage of salmon development. You must remove any white eggs that you see using
the pipette and then throw them away.
Use the aspirator bulb or place your thumb tightly on one end of the pipette/baster and
bring the other end of the pipette/baster close to the egg you wish to remove and
gently release your thumb to suck up the egg. Put your thumb/finger back on and
dispose of the egg in the toilet. Practice doing this to measure the suctioning and be
careful not to draw in the live eggs along with the dead eggs.
• What to do if foam appears on the surface of the water?
Scum/foam forming on the surface is quite normal. Use the net included in the starter kit to
remove this type of matter from the water’s surface.
• The water level in the aquarium seems to have dropped, what can I do?
It is normal for the water level to drop over time due to evaporation, among other things.
Operating Manual - Salmon’s Tale Page 20 de 27From the very beginning of the project, you should have a bucket, or a large jug filled
with tap water that should be left to rest and settle for at least 72 hours to allow the
chlorine to evaporate. Make sure that the water in this jug is kept at a temperature of 4-
5 degrees so as not to create thermal shock in the aquarium. Eggs and fry are very
sensitive to physicochemical changes in their environment. The bucket or the jug can be
stored in the fridge or in another cool environment. Make sure everyone in your school
is aware of the situation to avoid someone inadvertently feeding the aquarium directly
with tap water or room-temperature water.
• Is it normal for the aquarium to develop a particular odor after the eggs have
hatched?
The distinct smell that may develop, reminiscent of a river or lake, is normal, especially
after the eggs hatch and the fry start feeding. If the smell is too strong or abnormal,
rinse the carbon filter with dechlorinated water.
• Do we have to change the water temperature once the eggs have hatched?
The temperature should remain cool and stable for up to 2 weeks before the fry are
released into the river. This prevents the fry from developing too quickly. Keeping the
water temperature low also reduces mortality, decomposition speed and odors.
• When should we start feeding the fry?
Only when the yolk sac has resorbed in the fry. After hatching, the fry begin their life
relying on a food supply - the yolk sac. Therefore, they do not need to be fed at this
stage.
Once their yolk sac is resorbed, you will see the fry emerge from the gravel looking for
food. If you are unsure, throw a pinch of food on the surface and see if the fry approach
it. If so, it is time to start feeding them; if not, wait until they emerge and start looking
for food themselves.
• How much food should we give the fry every day?
Sprinkle a small amount with your fingertips in the morning and in the evening. If you
have a saltshaker type container, quickly turning it over once on the surface of the
aquarium is enough. If you see the fish rush to the surface and eat all their food quickly,
you may have to feed them a second pinch.
Remember not to overfeed them. Leftover food will accumulate at the bottom of the
aquarium adding to the amount of organic matter in the tank. This will decrease water
quality and could create odors.
Operating Manual - Salmon’s Tale Page 21 de 27• When should the fry be released in the river?
The fry should be released in the river when the water temperature reaches at least
10 °C, which is usually around mid-June. Plan with the nearest salmon river manager.
This activity can be combined with a field trip event or a year-end class trip.
Find out about the river’s current water temperature and begin to gradually increase
the water temperature in the aquarium (1 degree per day).
• How to prepare for the release/stocking of the fry?
Begin to gradually increase the water temperature 15 days prior to the release date.
Refer to the release/stocking protocol. If you have any questions, do not hesitate to
contact the FQSA program coordinator.
•How long can fry survive in the container while being transported to the
river?
Fry will need to be transported as quickly as possible to the river. They should not stay
more than 30 minutes to 1 hour in the carrier bag, in the cooler, or in the bucket. Water
temperature should remain relatively stable.
Oxygen depletes rapidly once there is no longer a filter to feed air into the water. Fry are
very sensitive to physicochemical changes in their environment. Some fry may exhibit a
blood-red color on their thorax, which means that they are under intense stress and
must be quickly released into the water.
Should you have any doubts or if you have any questions, do not hesitate to contact us at
the FQSA.
4.3 USING THE AQUARIUM - PHYSIOCHEMICAL
• What is the ideal pH for the aquarium water?
The pH of the aquarium water should be around 7—tap water is ideal for this pH value.
However, make sure to let the chlorine evaporate before adding the water to the incubator.
• What is water hardness?
Water hardness is the amount of dissolved minerals found in water. Water hardness can
vary across different regions depending on the nature of the earth’s subsurface. The
presence of shells for example, can cause water hardness to vary as well.
• What is the ideal water hardness for the aquarium water?
The water hardness in most of Quebec’s municipal water systems is suitable for salmon.
Operating Manual - Salmon’s Tale Page 22 de 27• What is the carbon filter used for?
The activated carbon found in the filter acts as a stabilizer. If impurities or chemicals get
into the water (soap, chlorine, heavy metals), the carbon filter will absorb these
contaminants and purify the water. The carbon filter can be installed in the aquarium
from the start to stabilize the water that is going to be poured into the incubator.
• What is the ammonia filter used for?
The ammonia filter is used to neutralize any presence of ammonia in the water (see
nitrogen cycle). There is no need to use it from the start since eggs do not produce
waste. The new Fluval filter uses Biomax beads to do the job of neutralizing ammonia in
the water.
• What is the foam filter used for?
The foam in the filter is used to prevent larger particles from reaching the other filters’
components. Its function is purely mechanical.
As described in the document, follow the instructions given for the different filters and for
changing the water. Changing the water will cause nitrogen levels to decrease. However, do
not change water too often, or replace an excessive amount of water. It is important to
retain some of the bacteria found in the water, which are important in the nitrogen cycle
process. These bacteria enter the water through the presence of fish, so you don’t have to
worry about them.
Operating Manual - Salmon’s Tale Page 23 de 275. Problem Solving
5.1 ISSUE WITH THE COIL COOLER
• Make sure the cooling unit is properly connected. These cooling/filtering
units require a lot of electricity. If you are using an extension cord, make
sure that it can support the power demands of both devices (3-prong
extension cord (outlet)
• Make sure the on/off switch is turned on
• You must press the Menu button twice to calibrate the cooling unit
temperature
• Do not forget that the temperature at the end of last year was likely set
around 14-15 °C. If you turn on the cooling unit without recalibrating it, it
will not run since the water should already be at a cooler temperature.
• If there is a thin layer of ice on the coil, unplug the cooling unit for a few
seconds. The ice should come off and float to the surface.
• Do not forget to restart the cooling unit
• If you are trying to prevent excessive ice from forming on the coil, you
should only calibrate the unit one degree less each day, rather than
several degrees at a time.
5.2 ISSUE WITH THE AQUACLEAR 300 FILTER
• Do not turn on the filter without water inside the unit. The filter unit’s casing
must be filled with water from the aquarium and the intake hose must be in the
water so as not to damage the motor.
• Make sure it is properly connected.
• If the water still does not seem to flow, you can add water to the filter box
(casing) to get it to run
• Check that the turbine is not obstructed
5.3 ISSUE WITH THE FLUVAL FILTER
• Visit the following website and watch this video made by the company
http://fluvalaquatics.com/ca/product/A217-406-canister-filter/#.V9bV3k3hBpg ’
• You can contact a specialist at Aquamérik, Mr. André Bérubé, directly at
andre@aquamerik.com or by phone at 418-831-1333 (toll free at 1-888-
278-4776).
Operating Manual - Salmon’s Tale Page 24 de 276. SUMMARY TABLE OF THE PROGRAM
September - Fill out the registration form and the order form
to - Verify that the FQSA has your thermos on hand for
December delivery
January to - Preparing your incubator. You will be told when to do so by
February one of our representatives at the FQSA or by the river manager.
February or
- Eggs delivery
March
June - Stocking of fry
Operating Manual - Salmon’s Tale Page 25 de 277. TEACHER’S REMINDER
Before December 1st:
- Registration for the program.
- Order the incubator equipment and educational materials upon registration by filling
out the order form. Submit your order form to the FQSA, which will take care of placing
a group order with Aquamérik, the supplier of the incubation equipment.
o Note: If the teacher already has the incubation equipment, some filter
components (charcoal) still need to be changed each year.
- Make sure that the FQSA has your thermos on hand for delivery.
- Get some river rocks or gravel for the aquarium. Without using soap, brush and rinse
the river rocks thoroughly for a good wash. By placing them in the incubator, the rocks
or gravel will provide shelter for the fry. Do not put shells or seashells in the incubator.
Checklist
□ Send the registration form and order form
□ Make sure the FQSA has your thermos
□ Find a few rocks measuring 1 to 4″ in size
Two weeks before delivery of the eggs (February):
- Wash all incubator components using a bleach solution (1/10) and rinse thoroughly with
water. Do not rinse the filter components using this solution, only use water.
- Install the incubator on a solid surface (table or desk). Do not forget to put the filtering
masses back inside the filtration unit.
- Before using the incubator cooler and filter, fill the aquarium with water and let it rest
for at least 72 hours to allow the chlorine to evaporate (chlorine evaporates slowly).
- Turn on the incubator system to ensure that the installation is working properly, and
gradually lower the temperature (1 °C per day until it reaches 4 to 6 °C). Due to the
inaccuracy of the temperature shown on the cooling unit, refer to the temperature
reading from the thermometer immersed in the aquarium.
Checklist
□ Rinse the incubator, rocks, and filtration components
□ Install the incubator components following the protocol
□ Fill the aquarium with water and let it rest for 72 hours to let the water
dechlorinate
□ Start the cooling unit by setting the temperature to 1 °C lower than the current
water temperature
□ Gradually lower the temperature (1 °C/day) to 4-6°C
Operating Manual - Salmon’s Tale Page 26 de 27The day of the delivery of the eggs (February-March):
- The water temperature must be between 4 and 6 °C and should have been stable for a few
days.
- Allow the eggs to acclimatize in a Masson-style jar placed inside the aquarium until the
temperature is the same (about 15 to 30 minutes if the temperatures of the delivery
thermos and the aquarium are similar, and up to 2 hours if there are a few degrees
difference).
- Deposit the eggs inside the incubator
Checklist
□ Allow the eggs to acclimatize in a Masson-style jar placed inside the incubator for
15 to 30 minutes
□ Deposit the eggs directly inside the incubator
Between the delivery of the eggs and the stocking of fry:
- Remove dead eggs every week (dull and whitish looking) using the aspirator bulb to prevent
the spread of fungus.
- After the eggs have hatched, once every two weeks, replace about 20% of the water in
the incubator with cool dechlorinated water. Save some of this water for rinsing the
foam filter.
o Note: To avoid thermal shock, you must allow water to dechlorinate in a
container (e.g., a bucket) for 72 hours and keep it refrigerated before pouring it
into the aquarium.
- When the fry begin to swim and their egg sacs (orange abdominal pouch) are resorbed,
start feeding them in small quantities (a small pinch a day is enough).
o Note: it is important not to overfeed them. If excess food accumulates inside the
aquarium, then the amount of food given is too much. If the task of feeding the
fry is assigned to students, be sure to supervise them, as they tend to give too
much food. This can lead to the spread of bacteria and fungi. An incubator
polluted with food residue can kill the fry.
- Two weeks before stocking, gradually increase the temperature of the incubator (1 °C
per day) to match the temperature of the river (10 to 15 °C). You can contact your river
manager or the FQSA to find out the ideal temperature for the day of the stocking.
- Prepare for the stocking of the fry a few weeks in advance: transportation of the
students, location. You can refer to the stocking protocol available on our website.
Checklist
□ Remove dead eggs regularly
Operating Manual - Salmon’s Tale Page 27 de 27□ Once the eggs have hatched, change 20% of the water every two weeks
□ After the yolk sacs are resorbed in the fry, remove surface debris, and
start feeding the fry with a pinch of food per day
□ Determine the fry release date
□ Two weeks before stocking, gradually increase the temperature by one degree per
day until the river temperature is attained (around 10-15 °C).
The day of the release (end of May-June):
- Collect the fry in the incubator using the hand net. Students can help you with this task, they
really enjoy it!
- Keep the fry in fresh water at all times, in a carrier bag or in a clean bucket.
- Release the fry at the authorized location as specified on the permit issued by the
Ministère des Forêts, de la Faune et des Parcs (MFFP), provided to you by the FQSA
representative upon delivery of the eggs.
- By the end of the school year, complete the fry stocking report form that will be
emailed to you by the program manager and return it to him/her.
Checklist
□ Put the fry in a carrier bag or bucket
□ Release the fry at the authorized stocking location (indicated on the permit)
□ Fill out the stocking report form and return it to the FQSA
Cleaning and storage of equipment (June):
- Wash all incubator components thoroughly using running water or a bleach solution
(1/10), rinse well and allow to dry. Do not clean the filtering masses (foam filter,
carbon, ammonia neutralizer or Biomax) with bleach.
- Store incubator components in a clean, dry, and frost-free environment.
- Ideally store food in the freezer or away from light and moisture
Checklist
□ Dispose of coal filtering masses
□ Clean and rinse the other filtering masses with water and allow to dry
□ Disinfect the aquarium, filter casing, strainer, tubing, hand net, and aspiration bulb
(bleach solution 1/10)
□ Rinse well with water and allow the material to dry
□ Store materials
Operating Manual - Salmon’s Tale Page 28 de 27You can also read