Fast Talker Getting started - Created by - Smartbox Assistive Technology
←
→
Page content transcription
If your browser does not render page correctly, please read the page content below
Fast Talker
 Getting started

        Created by

    thinksmartbox.com   1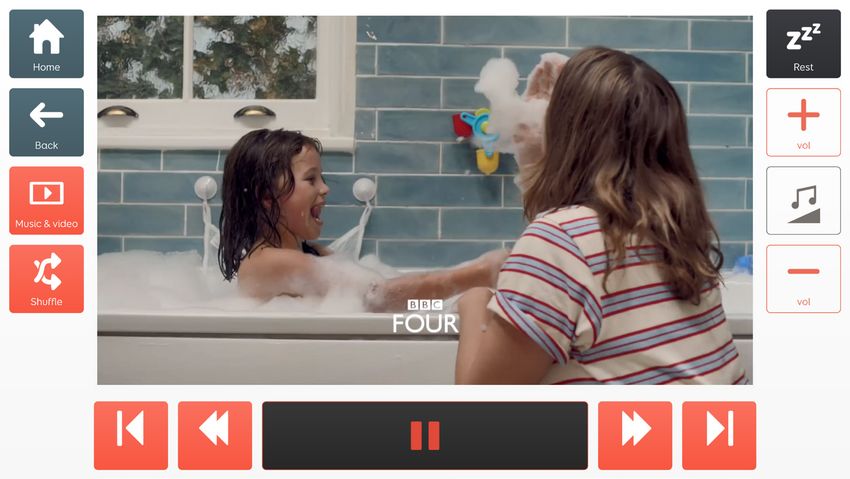
Contents
Introducing Fast Talker					3
Available in two sizes					4
Using Fast Talker						5
Chat keyboard						7
       Chat area and functions				7
       Fast Talker Large Cell keyboard			    8
       Chat tools						9
Chat history							11
       Removing a phrase from Chat history		 12
       Private mode						12
Messages							13
       Adding and removing phrases			        13
Message banking						14
Social Media							15
       YouTube						15
       Facebook						17
       Twitter						19
Phone								21
Answer							24
SMS								25
Email								26
Servus Environment Control				29
Web Browser							33
Computer Control						35
Notes								38
Music & Video						40
Camera							42
Calculator							43
Contacts							44
Settings							45

                            thinksmartbox.com     2
Introducing Fast Talker
Fast Talker is designed to help people communicate quickly, keep in touch with friends and
family, and stay connected to the world.

It is a complete solution for literate AAC users, with apps for fast text communication,
message banking, SMS, email, browsing the web, environment control and much more. It
also comes with Computer Control tools, giving you full access to Windows software.

       Fast text communication
       Easy to use accessible apps
       Message banking technology
       Tools for full control of Windows software
       Easy to edit and personalize
       Large cell version to support all access needs
       Designed for all access methods

Fast Talker is designed for literate people using the following types of access:

       Touch                  Eye gaze                  Switch                     Pointer

                                   thinksmartbox.com                                         3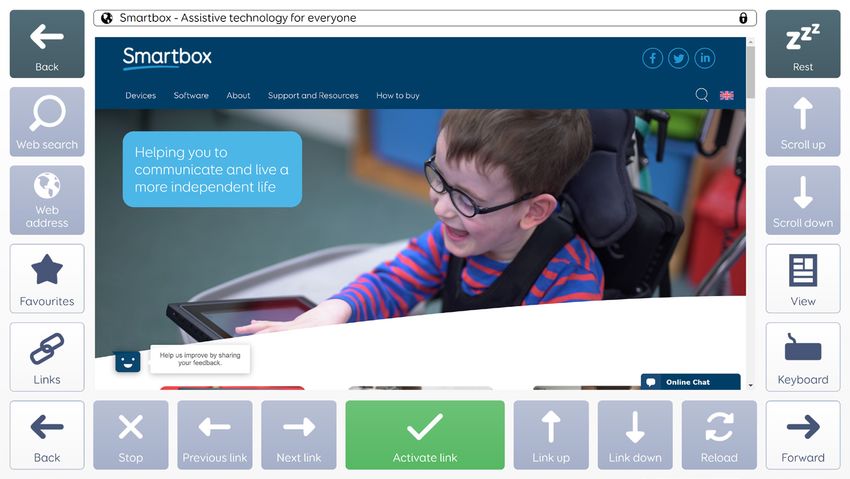
Available in two sizes
Fast Talker is available in two sizes, to suit the access needs of different AAC users.
Both versions have the same functionality, so you can access all the same features and
resources.

                                        Fast Talker

                                  Fast Talker - Large cell

Our standard Fast Talker grid set is suited to people who can manage smaller cells, with
more on each grid.

Fast Talker Large Cell enables people who need larger cells to access all the functions of
Fast Talker. It features a frequency-based keyboard that splits letters across two grids,
with the most commonly used letters appearing first.

                                  thinksmartbox.com                                          4
Using Fast Talker
You will be able to access all the apps in Fast Talker from your home grid. Each app in Fast
Talker has a Home cell that will bring you back to this screen.

                                 Fast Talker - Home grid 1

Chat 		              Your chat keyboard with powerful prediction tools to help you increase
			                  your rate of communication.

Messages             Ready made phrases and messages for common situations and
			                  interactions, that you can quickly speak without typing.

Message banking If you have recorded messages and phrases with speech, you can
			             store them in the message banking grid, to use in place of synthetic
			             speech. You can also record new words and phrases here.

Social Media		 Connect to social media accounts like Facebook, Twitter and browse
			YouTube.

Phone 		             Browse your contacts and make phone calls.

Answer		             Answer incoming phone calls from your device.

SMS			               Read and send text messages via a connected Android phone

Email inbox		        Send and receive emails from your account

                     Grid navigation                       Alarms
                Move between the two Fast         Sound an audible alarm, or
                    Talker home grids              send an emergency SMS

                                  thinksmartbox.com                                            5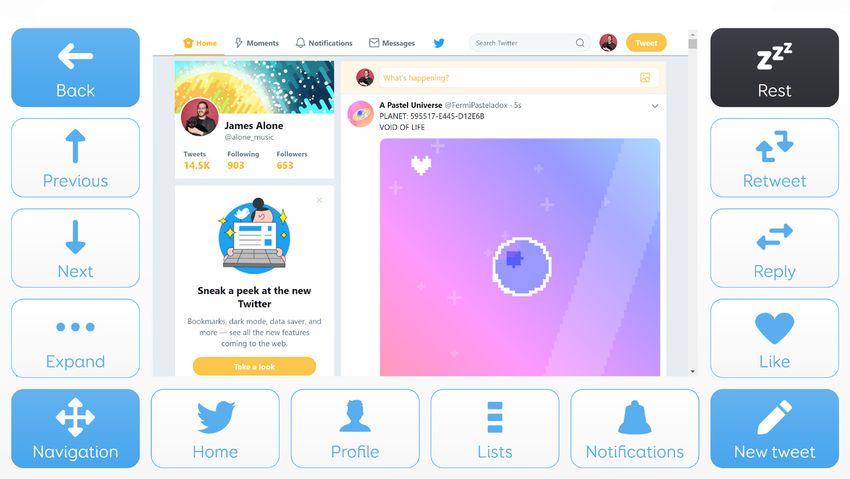
Fast Talker - Home grid 2

Servus             Use Servus environment control to control the devices around your
			                home such as TVs, Hifis, lamps, curtains and more.

Web			             Browse the web using the accessible browser in Grid.

Computer		 Access your Windows desktop and applications using Computer
			Control

Notes 		           Use the Notes app to jot down notes and create longer documents.

Music & video      Access the music and videos that are stored on your device.

Camera		           Take pictures with the built-in camera on your device.

Calculator		       Use the calculator for quick sums and basic calculations.

Contacts		         Browse, add and remove contacts from your device.

            Rest                         Clock                       Settings
  For those using eye gaze     Select the clock to check       Calibrate and control
    or a pointer access,                the time              how Fast Talker and Grid
  you can use the rest cell                                          behaves
   to pause your access
  method and look around
  the grid without making
       any selections.

                                thinksmartbox.com                                         6
Chat keyboard
The Fast Talker Chat grid is based around a QWERTY keyboard.

                                     Fast Talker - Chat grid

Chat area and functions
Chat area
At the top of the grid is your chat area, where messages are composed. Selecting the
Speak cell will read your message aloud.

Undo
This will undo the last selection or writing action you made, so for example if you selected
the wrong prediction cell, you can undo and select again. You can also use undo to restore
text to the writing area if you accidentally selected Clear.

Word prediction
The row of cells under the message bar are your prediction. Just start typing a word and
after a few letters you should see it appear. After selecting your word, suggestions for your
next word will appear.

Tip: You can switch from word prediction to chat history using the chat history cell at the
bottom of the keyboard. Chat history will suggest whole phrases based on things you have
already said.

Shift
Pressing shift once will capitalize the first letter of your next word, selecting it again will
capitalize every letter until you select shift again.

Clear, delete word and delete letter
The Clear cell resets the message bar, ready to compose a new message. You can also
delete your message word by word, or letter by letter.

                                     thinksmartbox.com                                            7
Tools
Open a grid of text editing and useful functions.

Speak
Select the speak cell to speak your message aloud.

123
Show the number and punctuation keyboard. A B C will take you back to the keyboard.

                             Fast Talker - Chat grid - Numbers

Fast Talker Large Cell keyboard
The Chat Keyboard in Fast Talker Large Cell is split across two screens, with letters
organized by frequency. The most commonly used letters appear on the first grid, and
those that are used less frequently are found in a second keyboard grid.

     Fast Talker Large cell - Chat grid              Fast Talker Large cell - Chat grid
                                                           Secondary keyboard

You can use the keyboard cell to switch between the two keyboards. You’ll also find the
Shift, Back and Pin command on the second grid.

                                  thinksmartbox.com                                       8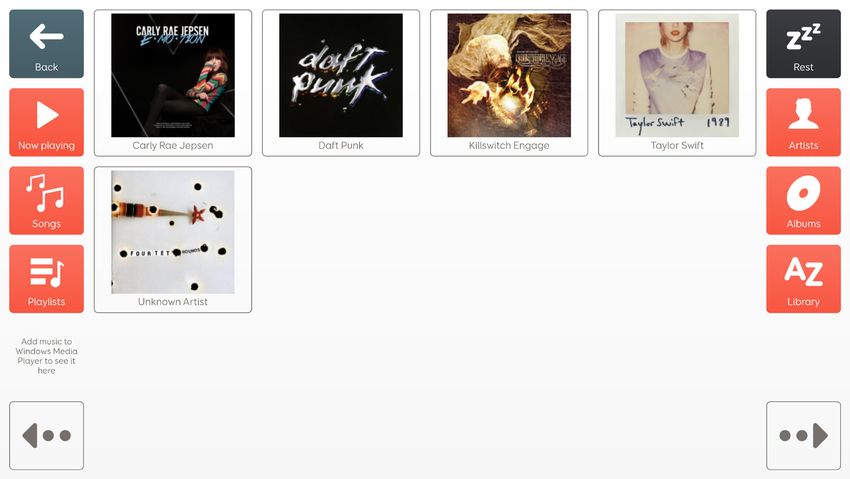
Pin
The second keyboard will automatically jump back to the home grid once you have
selected a letter. You can select the Pin cell to stay on the second grid and choose another
letter after making your selection.

Tools
In Fast Talker Large Cell the Prediction and Chat history display, Punctuation keyboard
and Delete word are located under Tools, along with a with a selection of useful features
for editing text and creating longer messages.

Tip: Fast Talker Large cell does not have a Speak cell. Instead you can select the chat area
to speak your message aloud.

Chat tools
You will find a selection of useful features in the Tools grid of Fast Talker and Fast Talker
Large Cell.

                                Fast Talker - Chat grid - Tools

Copy and Paste
Copy will take a copy of the entire chat area, and Paste will insert your copied.

Tip: When you paste text, it will appear wherever your cursor is positioned in the chat area.
You can move your cursor using the arrows or the previous and next word commands.

Undo Clear – Fast Talker only
Undo clear will restore the text in your chat area from the last time you selected clear.

Select text
If you want to select text and copy it into an email or another program, you can use the
Select text cell. This will enable you to select text from the chat area using the arrow keys.
Once you have selected your text, you can turn off the select text cell and Copy your
highlighted text.

                                    thinksmartbox.com                                            9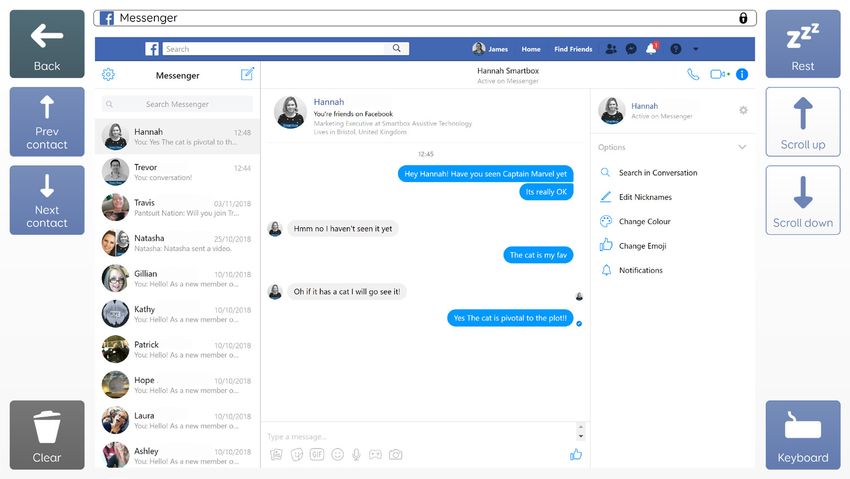
Select all – Fast Talker only
Select All will select everything in the chat area.

Add Phrase
Add phrase will take the text from your chat area and add it to the Message app.

Private mode
Switch Private mode on and off to control when Fast Talker remembers what you say.

Print
Selecting Print will generate a PDF of the text in your chat area and send it to a connected
printer.

Fast typing
Switch Fast Typing on for a faster dwell speed on the letters and numbers in your keyboard.
As they are in familiar locations, you can select them quickly and increase your speed of
communication.

Previous and Next word
Previous word and Next word will move your cursor between the words in your chat area.

Start and End of text
Start of text and End of text will move your cursor to the start or end of the text in your chat
area.

Previous and Next sentence – Fast Talker only
Previous sentence and Next Sentence will move your cursor to the previous or next
sentence. This is useful if you are editing paragraphs of text.

Start and End of line – Fast Talker only
Start of line and End of line will move the cursor to the start or the end of your current line
in the chat area.

                                    thinksmartbox.com                                              10
Chat history
Chat history gives you a quick and easy way to speak whole phrases. With your permission,
everything you say is remembered.
Fast Talker - Chat history bar
Fast Talker Large cell - Chat history bar
Your Chat history suggestions will appear in the same row as word prediction under the
chat area. You can switch between prediction and chat history using the Chat history cell
at the bottom of the keyboard. You will find this under Tools in Fast Talker Large Cell.
How does Chat history work?
Your Chat history phrases are suggested based on how often you speak them, and how
recently they were said. Chat history also takes into account where you were when you last
said something.
For example, the phrases that appear when you are at your favourite café may be different
from those that appear when you are at home. If your desired phrase doesn't come up
straight away, use the More cell to scroll through more choices.
Tip: Rather than starting at the beginning of your sentence, just begin typing the keyword
and your related messages will appear under the message bar. For example if you want to
order a coffee, just type “cof”.
A huge bank of commonly spoken phrases are included in Fast Talker to get you started.
Your own personal phrases are added to this as you speak!
You can enable Chat history in Settings – Writing – Chat history.
Settings - Writing - Chat history
thinksmartbox.com 11Removing a phrase from Chat history
If you want to remove a phrase from Chat history, start by typing the keyword so that the
message you want to delete is displayed underneath the chat area.
Then select the arrow for more suggestions, and you will see all of your related messages
that are stored in Chat history. Now you can select Remove and choose the phrase that
you want to delete.
Fast Talker Large Cell - Chat grid - Remove Chat history
Tip: In Fast Talker Large Cell you will need to go to tools to and select chat history for the
bar to appear.
Private mode
There may be times when you don’t want Grid to remember what you want to say. On
these occasions you can simply switch on Private mode by selecting the padlock in Tools.
The padlock will change colour when Private mode is turned on, and no phrases will be
stored in chat history until you turn it off again or exit Fast Talker.
Private mode on Private mode off
thinksmartbox.com 12Messages
Fast Talker comes with a range of pre-stored phrases, organized into categories. Each
phrase will speak as soon as you select it.
These messages are here to are here to help you respond quickly in particular situations
and common interactions, and are fully editable.
Fast Talker Large Cell - Messages grid
Adding and removing phrases
You can add and remove your own messages by using the Add phrase and Remove
phrase.
To add a new phrase you must first type it using your Chat keyboard. Then go to Tools
and select Add phrase. This will jump to the Messages grid, and you can choose which
category you would like to save your phrase in.
Now you can pick the cell you want your phrase to appear on. Available cells will be
highlighted in green. You can choose to overwrite a previous message, or select a blank
cell to add your message to the end of the list.
Similarly, you can delete a phrase by selecting Remove and then choosing the phrase you
no longer want.
Tip: If you wish to change the name of your categories, you can do this in Edit mode.
Simply choose the category you want to edit and select the Change Label button in the
toolbar.
thinksmartbox.com 13Message banking
The Message banking grid enables you to play back the phrases you have recorded with
your own speech, rather than using a synthesised voice.
Fast Talker - Message banking
Tip: Banked messages can also be triggered by typing your phrase using the keyboard, or
by selecting it from your Chat history.
Adding phrases
To add a phrase, select Record new message and use the keyboard to type the phrase
you want to record. Select Next when you are happy with your phrase, and use the Start/
Stop recording button to record your message.
You can now check whether you are happy with your recording, then Save and finish or
choose to Record again.
If you want to record multiple messages, simply choose Save and record new phrase to go
back to your keyboard and compose your next message.
Tip: You can also record, import, delete and organise your messages into categories by
going to Settings - Speech - Message banking.
thinksmartbox.com 14Social media
The social media grids provide more accessible versions of YouTube, Facebook and
Twitter.
Fast Talker - Social media grid
YouTube
The YouTube grid will open in YouTube’s TV mode. Use the navigation arrows to move
between videos and the menu. When a video is highlighted, select Play/Select to begin the
video. If you have a menu option selected, the Play/Select cell will activate that item.
Fast Talker - YouTube grid
When you want to head back to the browse screen, tap Esc.
thinksmartbox.com 15Search
Search will open a keyboard grid that you can use to search for videos. Type in your query
and select Go to search YouTube. Use the arrow keys to browse search results and Play/
Select when you have found the video you want to watch. Selecting Esc will take you back
to your search results.
Fast Talker - YouTube - Search grid
Signing in to YouTube
You may want to sign in to YouTube if you want to access your own subscriptions and
playlists. To sign in, you will need to create a Google Account. You will also need a separate
web browser open on either your device, or a mobile phone. On your device, navigate to
the Sign in option in YouTube.
Fast Talker - YouTube grid
thinksmartbox.com 16In your second browser window, or mobile device, go to Youtube.com/activate and type in
the Sign in code displayed in the grid set.
Follow the instructions on your mobile device or second browser to confirm your account.
Tip: From time to time Google and YouTube update their sign in methods, if in doubt, read
the screen and follow the instructions that Google provide. We always try to keep our grid
sets up to date with the latest changes.
Facebook
The Facebook grid gives you access to your timeline, messages and more.
Fast Talker - Facebook grid
Logging in to Facebook
Tap the Log in cell to sign into your Facebook account. You’ll be taken to a keyboard grid
where you will need to input your email address or phone number. Select Next link to move
to the password field.
Tip: You may see a ‘Remember this browser’ page. It is best to select Yes. Use the
Navigation options to select the link.
Getting around Facebook
To move up and down your timeline use the Next story and Previous story cells. For more
focused browsing, select Navigation. Here you can scroll by story, or by highlighting links.
You can zoom in and out with the Zoom cells.
Tip: Zooming in too far can interfere with further navigation, it is best to zoom out when
browsing!
thinksmartbox.com 17Status
To write a status to your own feed, select the Status cell. A keyboard gird will open where
you can write your message. When complete select Post.
Fast Talker - Facebook - Post status
If you start writing a message and want to get back to your feed without posting, select
Back. In Fast Talker Large Cell you can do this by selecting Tools followed by Facebook –
Home
Commenting and Liking
If you have a story highlighted, you can add a comment by selecting Comment. This will
open a keyboard where you can add your message, then select Post to add your message
to the conversation.
To ‘like’ a highlighted story select the Like cell. You can always take it back by pressing Like
again later!
Notifications
To check your notifications, select the Notifications cell, this will open your notifications in
a new window. You can browse these with the up and down cells and activate link cell.
thinksmartbox.com 18Messaging
Selecting Messenger opens Facebook Messenger, where you can privately message your
friends. Use the Previous and Next contacts to scroll your conversations. Scroll up and
down will navigate through the message window.
Selecting Keyboard will let you write your message.
Fast Talker - Facebook - Messaging grid
Twitter
Log into Twitter to compose tweets, send messages, retweet and use hashtags.
Fast Talker Large cell - Twitter grid
thinksmartbox.com 19Browsing your timeline
Use the Previous and Next cells to browse through your timeline. You can Reply to and
Retweet any post by selecting the relevant cells. You can get finer control of your browsing
by selecting Navigation. On the Navigation grid you can zoom in and out of your timeline
and navigate between links in tweets.
Tweeting
Select New tweet to open a keyboard to compose your message. When you have finished
typing, select Tweet to post your message.
Tip: While you compose your message note that it must stay within Twitter’s character limit
of 280 characters (including spaces)!
Fast Talker Large Cell - Twitter - New Tweet
Reply, Retweet and Like
When replying to a Tweet, the keyboard grid will open for you to compose your message.
You will not see the name of the user who you are replying to while you write your reply.
When you have finished, select Tweet and you will be asked to confirm your reply before it
is sent.
Retweet will repost the highlighted tweet to your timeline.
Like will give a tweet your seal of approval that everyone can see.
Viewing your profile
Profile will take you to your personal profile, where you can see your previous tweets.
thinksmartbox.com 20Phone
Access your contacts and make phone calls using an Android phone.
Connecting an Android phone to Grid 3
Before you can make any calls using Fast Talker, you will need to connect your phone. You
will need:
A compatible Android smartphone with access to the Google Play Store and
Bluetooth
The Remote Phone Call App
CallCenter PC software
Your communication device should support and have access to Bluetooth settings
Tip: It’s important to trial the Remote Phone Call App and CallCentre on your device before
you purchase.
Step 1: Pairing your phone with your device
Go to the Bluetooth settings on your phone and make sure that Bluetooth is turned on
and discoverable. On your device, open Control Panel then Devices. Click ‘Add Bluetooth
Device’ – you should see your phone appear. Select your phone and click Next to pair it
and follow the on screen instructions for both devices.
Step 2: Install the software
First head to the website on your phone, and select Remote Phone Call Trial and follow
the store link to install the app. You can also find the app in the Play Store by searching
'Remote Phone Call'.
To install the software on your communication aid, open a web browser (not in Grid 3)
and go to www.justremotephone.com. Scroll down to the Download section and select
CallCenter.msi. Once downloaded, install the software.
Step 3: Connect your phone and communication aid
With the app on your phone and the CallCenter software installed, both devices are ready
to be paired.
Open CallCenter on your communication aid by selecting the icon on your Desktop (it will
also be found in your Start menu). The software will open. You will see a drop down menu,
select and you should see your phones name with a green Android icon.
Open Grid 3 and head to Settings
Select Phone. You will get a pop up with Grid 3 requesting access to CallCenter.
thinksmartbox.com 21Select Grant. Check the ‘Remember this answer’ box to prevent the pop up showing every
time Grid 3 opens You can then minimize CallCenter and select OK on the settings screen.
Grid 3 is now linked to your phone. You may see several notifications pop up with your calls
and messages!
The Phone grid
Fast Talker Large cell - Phone - Home
The Phone grid shows a list of your most recent calls that you can navigate with the arrow
cells. Selecting Dial will call the highlighted contact.
Tip: If a contact does not exist on your phone you can select the Add Contact cell to start
adding the relevant details.
Why are my Grid 3 contacts not the same as my phone?
Your phone and Grid 3 have two separate contact lists. Grid 3 will display names that
your phone knows. To add them to Grid 3 you should highlight the contact and select Add
Contact. If you add a contact your phone knows, the name field will already be filled out.
Fast Talker Large cell - Phone - Add contact
thinksmartbox.com 22Contacts lists all the Grid 3 contacts you have added. You can select a contact and
choose to send an SMS, Dial or Email. You can also edit or delete contacts from this grid.
Fast Talker - Phone - Contact
thinksmartbox.com 23Answer
Opening the Answer grid will automatically answer an incoming call. If you open the
Answer grid set after a caller has hung up, you can jump to the dial or your phone grid.
Fast Talker Large Cell - Answer
thinksmartbox.com 24SMS
Opening the SMS grid will display a list of your text messages pulled across from your
phone. You can use the arrow keys to navigate the list and the Speak cell will read out the
contact name or number, followed by the date the message was received.
Fast Talker - SMS - Open message
The Open cell will open the full conversation. Selecting Speak on the conversation grid will
read out the last message received.
Fast Talker - SMS - Send message
You can reply, forward or delete a message. You can also start a New text message.
Tip: You will need to add contact before you start new message. You can do this using the
contacts grid.
thinksmartbox.com 25Email
Fast Talker allows you to connect to your email account and compose and send messages.
Before you can use the email grid, you will need to configure your account.
Configuring your email account in Grid 3
Configuring your email account can differ depending on your email provider. These
instructions will cover most of the settings, but you may need to refer to our online guide.
Open Settings - Accounts - Email
In the dropdown menu select your email provider. If your provider is not listed select IMAP
and SMTP.
You will be asked for your email address and password.
Gmail and Yahoo
If you use Gmail or Yahoo, you will need to configure your account to allow Grid 3 to
connect. Login to your account in a web browser and find the account settings.
In Gmail you are looking for the option to ‘Allow Less secure app access’ under your
Account settings.
If you have a Yahoo email address you will need to setup an account specific password. For
more information on how to do this visit:
thinksmartbox.com/answer/email-account-settings-in-grid-3
Once you have allowed Grid 3 access to your account, head back to Grid 3 and select Test
connection. If everything is working you will see ‘Connection successful’.
Tip: Depending on how many emails you currently have in your inbox, Grid 3 will take some
time to import your messages.
thinksmartbox.com 26Using Email
Use the arrow cells to navigate your inbox. Here you can send emails to your contacts, or
email addresses that you know.
Fast Talker - Email
Selecting Reply and Reply All will create a new email to the highlighted conversation.
Forward will let you send an email on to one of your contacts.
When you choose Open you will be able to read the whole email chain.
New Emails
Select New and pick a contact. Note that you need to add the email address as a contact
before you start writing an email.
Fast Talker - New Email
thinksmartbox.com 27With your contact selected, you can write your email by selecting Write email. Compose
your message, and then send by selecting the Send cell. If you are using Fast Talker Large
Cell the Send cell is found under Functions.
Tip: You can also send email to more than one person by selecting multiple contacts.
Attachments
If there is an image attached to an email, you can save it to your device by selecting the
Save attachment.
Attachments are saved into your Picture gallery (which you can also find in My Pictures in
Windows)
When you are composing an email, you can attach an image by selecting Tools and
selecting Attach photo. This opens your image library and allows you to browse and select
a photo. Note you can only select one photo per email.
Fast Talker - Attach photo
thinksmartbox.com 28Servus Environment control
Fast Talker can control a range of devices to give you more independence. With infrared
technology you can control your TV, set-top boxes, or other devices around your home.
You can also use a radio frequency transmitter that can be used to control lights, doors,
windows and more.
To use these grids, you will need a compatible device (for example a Grid Pad) with
support for infrared and radio transmission.
For more information on what your hardware supports refer to its manual and specification
Fast Talker - Servus
Setting up Servus environment control and Fast
Talker
To use the Fast Talker environment control grids you will need to configure your accessories
and remotes to work with Grid 3 and your device.
Infrared controls
The Servus Environment Control grid sets are ready for variety of devices and appliances.
You will need to teach your Grid Pad the correct infrared codes.
We keep a list of different IR remote codes for many home entertainment devices. Before
you start setting up your devices, check the list to see if we have the relevant codes pre-
programmed to save you time. These files are stored as .remote files. To find our current list
of remote files visit:
thinksmartbox.com/ir-remotes
thinksmartbox.com 29Installing a remote file
To install a .remote file, download the file you need from our website, close down Grid 3 and
open your File Explorer.
Navigate to: Users\Public\Documents\Smartbox\Grid 3\Environment Control
Accessories
Copy the .remote file into this folder and open Grid 3.
Go to Settings – Environment control in Grid 3 and you will now see the new device listed.
Setting up an infrared remote manually
To set up a remote manually, open Grid 3 and go to Settings – Environment control. Under
Accessories select Add.
Settings - Environment control - Add
You will see a list of accessories. Select the type you would like to configure, and you will be
taken to the learning screen.
Settings - Environment control - Add - Television
Here you can name your device (useful if you will be using more than one of the same type
of device), change the icon and most importantly, learn the IR signals.
thinksmartbox.com 30Select the Action button you wish to train, for example Power, then tap the Learn button
on the right side of the window.
The Learn infrared window will appear and you will be asked to follow the instructions on
the screen. Remember to point your remote directly at IR receiver.
Once complete, the Action button will turn green. You can test it by pressing Transmit now.
Follow these steps for each corresponding Action button that appears on your remote,
then click OK to save and go back to the Environment control window.
Setting up a radio frequency device
To use an EasyWave or Z-Wave radio frequency device, you must first pair it with your Grid
Pad, then configure how it behaves. In the following example we are using an EasyWave
socket, however similar instructions apply for Z-Wave devices.
Pairing an EasyWave socket
Go to Settings – Environment control and select Transmitters. Highlight EasyWave and
tap Configure.
Settings - Environment Control - Transmitter - EasyWave
You will need to assign a button to the socket. Select one of the buttons from the menu
and click Rename. This will be helpful if you are going to be using more than one socket.
Give the button a recognizable name and tap enter.
Plug your EasyWave socket into a power outlet and press the button once to enter training
mode. The LED will flash in a steady pattern.
In Grid 3 highlight your newly named button and select Transmit A. On your EasyWave
socket, press the button three times. This will return the device to operating mode. You can
now tap Transmit A to toggle the switch on and Transmit B to switch it off.
thinksmartbox.com 31Adding the paired socket to an accessory
Once your socket has been paired, you can assign it to an accessory and use it in the
Servus Environment Control grid sets. In Settings – Environment control, tap Add under
the Accessories heading.
Settings - Environment control - Add accessory
From the Add accessory window select Socket and select Next.
You can now give the accessory a name. This is useful if you are using more than one
accessory of the same type at the same time. In this example, the socket is controlling a
desk fan.
Settings - Environment control - Add accessory - Socket
Under actions, select On and choose the name of your button from the drop-down
menu (Desk fan A). Next select the Off action and assign this to the name of your button,
followed by the letter B. Select OK to save your settings and return to the Environment
control window.
Your socket will now be listed under accessories and will be ready to use in your Servus
Environment Control grid set.
thinksmartbox.com 32Web Browser
The Fast Talker web browser allows you to access the internet and browse content with
easy to access controls.
Fast Talker - Web
Web search
Selecting Web search opens your keyboard where you can input your search terms.
Selecting Go starts your search and displays the results.
Fast Talker - Web - Web search
Web address
Selecting Web address will open your keyboard (with www. Already added for your
convenience). Here you can type in the rest of the web address you want to visit and select
Go.
thinksmartbox.com 33Browsing a website
Fast Talker has several options to make reading websites easier. You can use the Scroll up
and Scroll down cells to move the page up and down, the Scroll left and right cells control
horizontal scrolling.
Selecting Navigation opens up more options. Here you can zoom in and out of the page
you are viewing and navigate the links on the page. You can also access the keyboard to
insert text.
There are several View options available. Selecting view expands the browser window to
fill more of the screen and offers finer control of scrolling. You can zoom in and out and
enter Reading mode.
Fast Talker - Web - View - Reading mode
Reading mode removes the formatting from the website you are viewing and displays the
site as text only. This can help focus in on smaller text, and make longer articles easier to
read.
You can also choose to load the Mobile site. This reloads the website in its mobile view,
which is often a simpler layout with more focus on the content. You can switch back by
selecting Mobile site again.
The Favourites cell opens a grid with the sites that you have added to your bookmarks.
You can select Add favourite to add the current site to your list of favourites.
Selecting Remove favourite allows you to select a bookmark and remove it from your list.
Tip: If you fill the grid with favourites, don’t worry! A more cell will automatically appear to
add the new grid.
thinksmartbox.com 34Computer control
Computer control in Fast Talker is designed for users accessing their device with pointer or
eye gaze. With Computer control you have access to Windows applications, with a control
overlay that allows you to click, drag, type and more.
Using Computer control
Computer control is to navigate either the Windows interface and use applications, like as
Word or Excel.
Using Computer control you can select the type of click you would like to perform, then
guide your pointer or gaze to the point where that click should be carried out, then allow
the dwell or click to take place.
Tip: If you are anticipating several clicks, for example if you are playing a game, you can
select the click cell twice. This means you will always have that click set to occur, until you
select the click cell again to switch the command off.
Fast Talker Large Cell - Computer control
Access settings
To set up computer control, you will need to configure your Access settings to suit your
needs. Under Settings – Access you can choose to configure either Pointer or Eye gaze.
If you are using Pointer control, select this, and the Computer control settings will be on the
screen.
Pointer options
Press switch to click
With Press switch to click you to move the pointer around the screen and press your
switch to make a selection. You will need to have connected a switch to your device and
thinksmartbox.com 35configured it in Settings – Access – Switch.
Dwell to click
Move the mouse pointer around the screen with your gaze and a dwell will begin when still.
Zoom to click
Zoom to click enables you to focus in on a part of the screen with a slow zoom, so you can
pinpoint exactly where you want to interact with the screen. You can adjust the speed and
level of magnification.
Eye gaze options
Move pointer, no click
Move mouse pointer simply enables you to guide the mouse cursor around the screen
without clicks.
Move pointer, switch to click
With Press switch to click you use the eye gaze camera to move the pointer around the
screen and press your switch to make a selection. You will need to have connected a
switch to your grid pad and configured it in Settings – Access – Switch.
Move pointer, blink to click
Blink to click uses the eye gaze camera to move the pointer around the screen and blinks
to make your selections. You can adjust the minimum and maximum blink times to prevent
accidental activations.
thinksmartbox.com 36Move pointer, dwell to click
Move the mouse pointer around the screen with your gaze and a dwell will begin when still.
Dwell to move and click
Dwell to click lets you move the mouse around the screen with your gaze. When still, the
dwell timer will appear. With this option you will not see the mouse pointer on the screen.
Zoom to move and click
Zoom to click enables you to focus in on a part of the screen with a slow zoom, so you can
pinpoint exactly where you want to interact with the screen. You can adjust the speed and
level of magnification.
Computer control with Fast Talker
When open the Computer control Grid 3 shrinks, and will shrink to the right hand side of the
screen with options for choosing the type of click you want, and to use an accessible on
screen keyboard.
Selecting More will give you further click options as well as Tools. The View cell gives you
options to reposition your Computer control grid.
Under the Tools grid you can adjust your access preferences and also make the Computer
control grid bigger or smaller. Selecting More gives you further options to switch between
desktop programs.
The Home cell will take you back into the Fast Talker home grid which will once again be full
screen.
Keyboards
The keyboard grid in Computer control allows you to see the program you are typing in,
however if you are using Fast Talker Large Cell you will also be able to make the keyboard
full screen for easier access.
thinksmartbox.com 37Notes
The Notes grid allows you to create longer documents within Fast Talker, that you can
print, or copy into emails, messages and more.
Fast Talker - Notes
On the Notes home grid you will find a list of your saved notes, options to Edit the selected
note, create a New note and Delete the selected note. You will also see a preview of the
currently selected note.
Fast Talker - Notes - Edit
Selecting Edit will open your keyboard and let you continue writing your longer message.
New will open your keyboard and a blank workspace. To save your document and go back
to the Notes grid select Tools and select Documents.
The Tools grid also allows you to navigate you notes, copy and paste text, you can also
read out full paragraphs, letting you deliver longer speeches.
thinksmartbox.com 38Send as email will copy the full text of the selected note and let you select which of your
contacts you would like to email it to. These messages are sent in the body of the email,
not as separate attachments.
thinksmartbox.com 39Music & Video
Listen to music and watch videos in Fast Talker with the Music & Video grid. The home grid
will show you what is currently playing and the options to jump to your music and video
libraries.
How to add music
To load your music into Fast Talker you will need to have your music library stored in
Windows Media Player. To add music to your library, open Windows Media Player, select
your music files and drag and drop them into the library. You will see the music populate
the library, and pull in relevant information like album and artist.
Fast Talker - Music
Playing music in Fast Talker
Selecting Music will open your music library, listed by artist. On this grid you can select the
artist you want to listen to. You will then be able to choose from any albums you have, and
then the song. Alternatively you can browse by Album or Song.
Fast Talker - Music - Player
thinksmartbox.com 40Once a song is playing you will see the artwork of the track, and a grid where you can play,
pause, fast forward, skip, go back, shuffle your play list and change the volume. Once a
song is playing, it will keep playing while you browse other grids.
How to add videos
Fast Talker and Grid can play back videos in MP4 format. Videos you want to watch
should be added you your Windows documents folders before they can be played back
in Fast Talker. Drag and drop your video files to the This PC – Videos folder. You can make
additional folders inside here if you need to organize your videos.
Watching a video in Fast Talker
Selecting video from the Music & video home grid will open your video library. You can
select a video or browse any folders of video content you may have on your device. When
you select a video you will be taken to the video player grid. You can play, pause, and skip.
You can also adjust the volume of the video playback, as well as head back to your video
library.
If you leave the grid while a video is still playing, it will keep playing in the background, until
you head back to the video grid and pause or stop the video.
Fast Talker - Video - Player
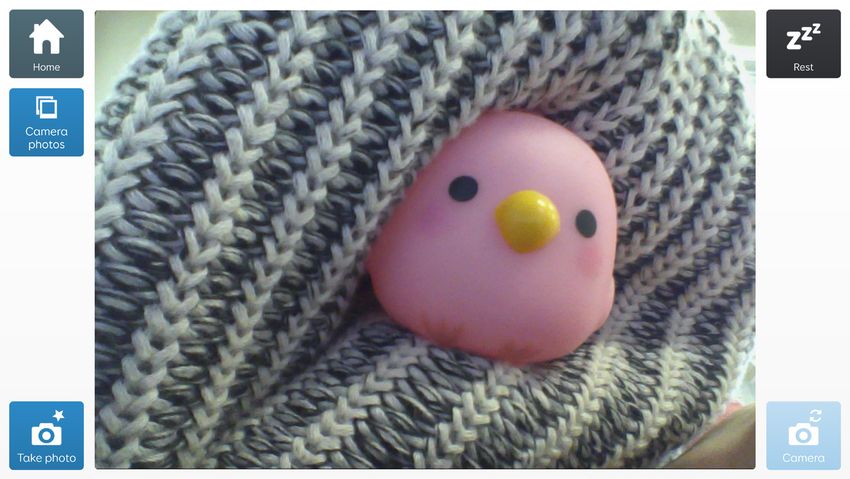
thinksmartbox.com 41Camera
The Camera grid lets you take pictures in Fast Talker with any camera attached to your
device.
Setting up your cameras
If your device has built in cameras, you may need to configure Grid 3 before they display.
Under Settings – Computer you can find the Devices heading. Here you can use the drop
down boxes to choose your front facing and back facing cameras.
Tip: You can connect many webcams via USB to your device and Grid 3 should support
them. If you plug a webcam in, allow Windows to detect the camera, restart Grid 3, and the
camera should be available when you are choosing cameras in your Grid 3 settings.
Taking pictures in Fast Talker
Opening the Camera grid will display a live feed of your selected camera. Selecting Take
photo will capture a picture and save it to your library.
Fast Talker - Camera
The Camera cell will switch between front and back cameras on your device (if these are
available).
If you want to browse and view photos you have taken select Camera photos. Here you will
see your photos arranged in a library. You can jump to your My Pictures folder when you
can view other pictures saved to your library (from email attachments for example).
thinksmartbox.com 42Calculator
The calculator grid lets you perform basic calculations. Use the keypad to input digits.
The Clear cell will clear your whole calculation, the Delete option will remove the last digit
input. You can add, subtract, multiply and divide.
Fast Talker Large Cell - Calculator
thinksmartbox.com 43Contacts
The Contacts grid lets you manage the contacts you have stored in Fast Talker and Grid
3. When you select a contact from the list, you can choose to send an SMS, dial a phone
number, send an email or edit the contact. You can also choose to delete a contact.
Fast Talker Large Cell - Contacts
Editing a contact
When you choose to edit a contact, you will switch to your keyboard and be able to edit the
contacts name. Selecting Number and Email address lets you edit these fields. Change
photo lets you chose an image from your image library (including pictures you have taken
with your camera). When you are finished select Save.
Fast Talker Large Cell - Contacts - Edit
thinksmartbox.com 44Settings
The Settings Grid gives you control over many Grid options and settings.
Fast Talker Large Cell - Settings
Eye gaze viewer See a representation of where your eyes are positioned in
relation to your device
Eye gaze live video Some eye gaze cameras allow you to have a live feed from the
camera which will be displayed inside the Eye gaze viewer.
This will change the eye gaze view to video if camera supports
it and let you see what the camera sees. For example you may
find a reflection that is causing a problem
Improve calibration Starts an eye gaze calibration that focuses on specific points.
(Specific eye gaze cameras only)
Volume + - Control your voices volume
Volume Displays current volume, selecting will mute your voice.
Battery Displays the current battery level
Brightness Tapping the brightness cell cycles the brightness of the devices
screen in increments of 25
Slower and Faster dwell These adjust the dwell time for both eye gaze and pointer
access
Calibrate Start a new eye gaze calibration
Hide/show menu Hides or reveals the Grid 3 menu at the top of your screen. To
reveal the menu outside of the Settings screen you need to tap
the top left and bottom right of the screen
thinksmartbox.com 45Standby Puts the device into Standby mode
Restart Restarts the device. Grid 3 will reopen if it is set to open on
Windows start up
Grid Explorer Leave Fast Talker and return to Grid Explorer
Change voice Opens the Change voice grid, this lets you choose from your
installed voices and can also adjust the volume of both
your speaking Voice and Audio Feedback
Fast Talker Large Cell - Settings - Change voice
Tip: if you want to change your audio feedback voice you can do that in Menu - settings
Sleep Screen Turn your screen off to save battery life and reduce distraction.
Switch the screen back on by activating a switch or holding
your gaze in the centre of your screen
Fast typing Switch on Fast Typing feature globally, see the Chat section for
more information
thinksmartbox.com 46Fast Talker Manual (Version 1.0)
English (UK)
Copyright 2019 Smartbox Assistive Technology
For support, video tutorials, webinars and further information visit us at
thinksmartbox.com
47You can also read