Installation Guide Kunpeng BoostKit for Virtualization - HUAWEI TECHNOLOGIES CO., LTD - Huawei Cloud
←
→
Page content transcription
If your browser does not render page correctly, please read the page content below
Kunpeng BoostKit for Virtualization

Installation Guide

Issue           11
Date            2021-10-15

HUAWEI TECHNOLOGIES CO., LTD.
Copyright © Huawei Technologies Co., Ltd. 2022. All rights reserved.
No part of this document may be reproduced or transmitted in any form or by any means without prior
written consent of Huawei Technologies Co., Ltd.

Trademarks and Permissions

      and other Huawei trademarks are trademarks of Huawei Technologies Co., Ltd.
All other trademarks and trade names mentioned in this document are the property of their respective
holders.

Notice
The purchased products, services and features are stipulated by the contract made between Huawei and
the customer. All or part of the products, services and features described in this document may not be
within the purchase scope or the usage scope. Unless otherwise specified in the contract, all statements,
information, and recommendations in this document are provided "AS IS" without warranties, guarantees
or representations of any kind, either express or implied.

The information in this document is subject to change without notice. Every effort has been made in the
preparation of this document to ensure accuracy of the contents, but all statements, information, and
recommendations in this document do not constitute a warranty of any kind, express or implied.

Issue 11 (2021-10-15)          Copyright © Huawei Technologies Co., Ltd.                                  i
Kunpeng BoostKit for Virtualization
Installation Guide                                                                                                                                                              Contents

                                                                                                                                                           Contents

1 Docker Installation Guide......................................................................................................1
1.1 Introduction............................................................................................................................................................................... 1
1.2 Environment Requirements................................................................................................................................................. 2
1.3 Obtaining the Source Code.................................................................................................................................................. 3
1.4 Installing Docker...................................................................................................................................................................... 4
1.5 Running and Verifying Docker............................................................................................................................................ 7
1.6 More Information.................................................................................................................................................................... 8
1.6.1 Common Commands.......................................................................................................................................................... 9
1.6.2 Uninstalling Docker.......................................................................................................................................................... 10
1.6.3 Searching for Docker Images for the Kunpeng Architecture..............................................................................10
1.6.4 Creating a Docker Image for the Kunpeng Architecture..................................................................................... 13

2 KVM Installation Guide........................................................................................................15
2.1 Introduction............................................................................................................................................................................ 15
2.2 Environment Requirements............................................................................................................................................... 16
2.3 Configuring the Installation Environment.................................................................................................................... 18
2.3.1 (Optional) Configuring the Local Source.................................................................................................................. 18
2.3.2 Installing Virtualization Components......................................................................................................................... 20
2.3.3 (Optional) Upgrading QEMU........................................................................................................................................ 21
2.3.4 (Optional) Upgrading libvirt.......................................................................................................................................... 25
2.3.5 Verifying the Installation Environment...................................................................................................................... 27
2.4 Installing VMs........................................................................................................................................................................ 28
2.4.1 Creating a VM..................................................................................................................................................................... 28
2.4.2 Configuring the VM.......................................................................................................................................................... 30
2.4.3 Cloning the VM.................................................................................................................................................................. 32
2.4.4 (Optional) Configuring a VM Network......................................................................................................................33
2.5 Running and Verifying VMs...............................................................................................................................................39
2.5.1 Starting a VM......................................................................................................................................................................39
2.5.2 Common Commands....................................................................................................................................................... 39

3 Calico Installation Guide..................................................................................................... 41
3.1 Introduction............................................................................................................................................................................ 41
3.2 Environment Requirements............................................................................................................................................... 42
3.3 Configuring the Installation Environment.................................................................................................................... 43

Issue 11 (2021-10-15)                                    Copyright © Huawei Technologies Co., Ltd.                                                                                            ii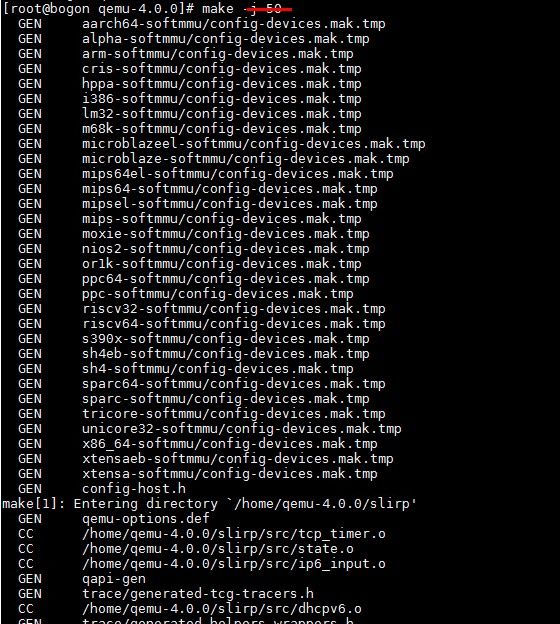
Kunpeng BoostKit for Virtualization
Installation Guide                                                                                                                                                              Contents

3.4 Installing Calico..................................................................................................................................................................... 44
3.4.1 Deploying the Calico Node............................................................................................................................................ 44
3.4.1.1 Downloading the YAML Configuration File.......................................................................................................... 44
3.4.1.2 Deployment and Installation..................................................................................................................................... 44
3.4.2 Installing the Calicoctl Tool............................................................................................................................................ 45
3.4.2.1 Container-based Installation...................................................................................................................................... 45
3.4.2.2 Binary Installation.......................................................................................................................................................... 46
3.5 Troubleshooting..................................................................................................................................................................... 46
3.6 Reference................................................................................................................................................................................. 48
3.6.1 Calico Deployment YAML File....................................................................................................................................... 48
3.6.2 Calicoctl Deployment YAML File.................................................................................................................................. 60

4 Open vSwitch Installation Guide.......................................................................................64
4.1 Introduction............................................................................................................................................................................ 64
4.2 Environment Requirements............................................................................................................................................... 66
4.3 Configuring the Installation Environment.................................................................................................................... 67
4.3.1 openEuler............................................................................................................................................................................. 67
4.3.1.1 Configuring the Yum Source...................................................................................................................................... 67
4.3.1.2 Installing Dependencies............................................................................................................................................... 67
4.3.2 CentOS.................................................................................................................................................................................. 68
4.3.2.1 Configuring the Yum Source...................................................................................................................................... 68
4.3.2.2 Installing Dependencies............................................................................................................................................... 68
4.4 Installing Open vSwitch...................................................................................................................................................... 69
4.4.1 openEuler............................................................................................................................................................................. 69
4.4.1.1 Obtaining the Source Code........................................................................................................................................ 69
4.4.1.2 Performing the Compilation and Installation...................................................................................................... 69
4.4.2 CentOS.................................................................................................................................................................................. 70
4.4.2.1 Installation from the Source Code Package..........................................................................................................70
4.4.2.2 Installation from the RPM Package......................................................................................................................... 73
4.5 Verifying Functions............................................................................................................................................................... 74
4.5.1 Component Startup.......................................................................................................................................................... 74
4.5.1.1 Start with the Default Configurations.................................................................................................................... 74
4.5.1.2 Start with Custom Configurations............................................................................................................................74
4.5.2 Verifying Functions........................................................................................................................................................... 75
4.6 Troubleshooting..................................................................................................................................................................... 75

5 K8s Topology Manager Patch Installation Guide.......................................................... 77
5.1 Introduction............................................................................................................................................................................ 77
5.2 Environment Requirements............................................................................................................................................... 78
5.3 Installation.............................................................................................................................................................................. 80
5.4 Configuration......................................................................................................................................................................... 80
5.5 Deploying the Cluster.......................................................................................................................................................... 81
5.6 Troubleshooting..................................................................................................................................................................... 81

Issue 11 (2021-10-15)                                    Copyright © Huawei Technologies Co., Ltd.                                                                                           iii
Kunpeng BoostKit for Virtualization
Installation Guide                                                                                                           Contents

A Change History...................................................................................................................... 83

Issue 11 (2021-10-15)                   Copyright © Huawei Technologies Co., Ltd.                                                     iv

Kunpeng BoostKit for Virtualization
Installation Guide                                                         1 Docker Installation Guide

                                      1      Docker Installation Guide

                  1.1 Introduction
                  1.2 Environment Requirements
                  1.3 Obtaining the Source Code
                  1.4 Installing Docker
                  1.5 Running and Verifying Docker
                  1.6 More Information

1.1 Introduction
Docker Overview
                  Docker is an open-source application container engine. If the delivery and running
                  environment is compared to sea transportation, the OS is like a freighter and each
                  OS-based software is like a container, where users can flexibly assemble the
                  running environment by using standard methods. The content of the container can
                  be customized by users or made by professionals. In this way, a piece of software
                  can be built by a series of standardized components, like Lego building blocks.
                  Users only need to select a proper building block combination and name it on the
                  top (the last standardized component is the user's app). This is the prototype of
                  the Docker-based PaaS products.
                  Developers can package their applications and dependencies into a portable
                  container and then publish them to any popular Linux machine. The containers
                  use the sandbox mechanism, which eliminates interface between containers.
                  Programming language: Shell
                  Brief description: open-source application container engine

Issue 11 (2021-10-15)          Copyright © Huawei Technologies Co., Ltd.                            1
Kunpeng BoostKit for Virtualization
Installation Guide                                                            1 Docker Installation Guide

Recommended Version

                  Table 1-1 Recommended version
                   Software                                  Version

                   Docker                                    docker-18.09.8 or later

1.2 Environment Requirements
Hardware Requirements

                  Table 1-2 Hardware requirements
                   Type               Item                       Requirements

                   Hardware           Server                     TaiShan 200 server (model 2280)

                                      CPU                        Huawei Kunpeng 920 processor

                                      NIC                        TM210 with electrical ports

OS and Installation Requirements

                  Table 1-3 OS and installation requirements
                   Category                             How to Obtain

                   OS                                   Version: CentOS Linux release 7.6.1810
                                                        (AltArch)
                                                        URL: http://isoredirect.centos.org/
                                                        altarch/7/isos/aarch64/
                                                        OS version: openEuler-20.03-LTS
                                                        URL: https://www.openeuler.org/en/
                                                        download/

                   Docker                               docker-18.09.8

                   Network                              ● The Docker Hub (https://
                                                          hub.docker.com/) is reachable.
                                                        ● The Docker URL (https://
                                                          download.docker.com/linux/static/
                                                          stable/aarch64/) is reachable.
                                                           NOTE
                                                            By default, the nf_conntrack service is enabled
                                                            for Docker. If it is disabled, Docker cannot be
                                                            installed.

Issue 11 (2021-10-15)          Copyright © Huawei Technologies Co., Ltd.                                      2
Kunpeng BoostKit for Virtualization
Installation Guide                                                                    1 Docker Installation Guide

1.3 Obtaining the Source Code
                         NOTE

                        The Docker version of the default YUM source is too old, which is prone to errors that are
                        difficult to locate. Therefore, do not use the yum install command to install Docker. Use
                        the static installation package instead.

         Step 1 Visit the official Docker website and view the Docker static installation package
                list.

                  URL: https://download.docker.com/linux/static/stable/aarch64/

         Step 2 Download the installation package of the required version to the local PC, as
                shown in Figure 1-1.
                         NOTE

                        If the server cannot access the Internet, download the installation package through the
                        network and then upload it to the server.
                  wget https://download.docker.com/linux/static/stable/aarch64/docker-18.09.8.tgz

                  Figure 1-1 Downloading a static package

                  If information shown in Figure 1-2 is displayed, the Docker installation package is
                  successfully downloaded.

Issue 11 (2021-10-15)            Copyright © Huawei Technologies Co., Ltd.                                           3
Kunpeng BoostKit for Virtualization
Installation Guide                                                            1 Docker Installation Guide

                  Figure 1-2 Docker installation package successfully downloaded

                  ----End

1.4 Installing Docker
Obtaining the Docker Static Package and Components
         Step 1 Check the operating system version of the physical machine.
                  cat /etc/redhat-release

         Step 2 Decompress the static installation package on the local host. A docker folder is
                generated in the local folder, as shown in Figure 1-3.
                  tar xvpf docker-18.09.8.tgz

                  Figure 1-3 Decompressing the installation package

         Step 3 Copy all Docker files to the /usr/bin directory.
                  cp -p docker/* /usr/bin

                  ----End

Configuring the Environment
         Step 1 Disable SELinux and firewall.
                  setenforce 0
                  systemctl stop firewalld
                  systemctl disable firewalld

                  The setenforce 0 command disables SELinux temporarily. To disable SELinux
                  permanently, you need to modify the /etc/selinux/config file.

                  In the configuration file, change "SELINUX=enforcing" to "SELINUX=permissive" or
                  "SELINUX=disabled".

Issue 11 (2021-10-15)             Copyright © Huawei Technologies Co., Ltd.                            4
Kunpeng BoostKit for Virtualization
Installation Guide                                                                           1 Docker Installation Guide

         Step 2 Restart the server for the configuration file to take effect.

                  ----End

Starting docker.service
         Step 1 Run the following commands to configure the docker.service file.
                  cat >/usr/lib/systemd/system/docker.service
Kunpeng BoostKit for Virtualization
Installation Guide 1 Docker Installation Guide
NOTE
Pay attention to the format of the code copied to the terminal. Figure 1-4 shows an
example.
Figure 1-4 Code copied to the terminal
Step 2 Start related services and check the Docker status.
systemctl daemon-reload
systemctl status docker
systemctl restart docker
systemctl status docker
systemctl enable docker
systemctl status docker
NOTE
When the systemctl status docker command is run for the first time, the Docker loading
status is inactive (dead) because the newly configured docker.service file has not started.
Step 3 Query the Docker version.
docker version
If the Docker version is displayed, as shown in Figure 1-5, Docker is successfully
installed.
Issue 11 (2021-10-15) Copyright © Huawei Technologies Co., Ltd. 6Kunpeng BoostKit for Virtualization
Installation Guide 1 Docker Installation Guide
Figure 1-5 Docker version
----End
1.5 Running and Verifying Docker
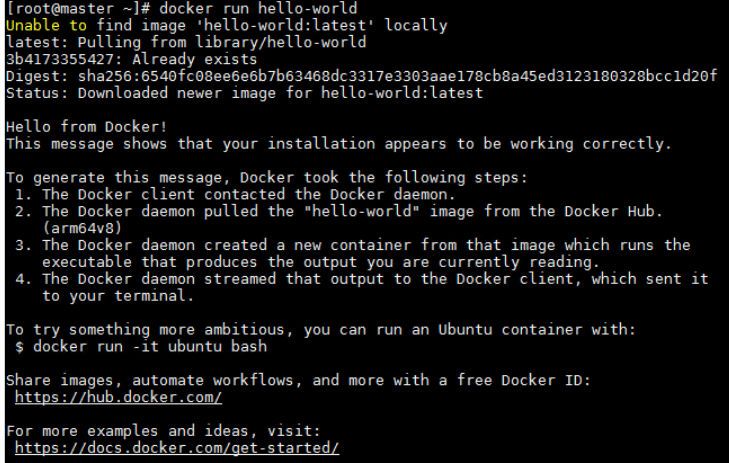
Step 1 Run Docker.
docker run hello-world
The command output is as shown in Figure 1-6.
Issue 11 (2021-10-15) Copyright © Huawei Technologies Co., Ltd. 7Kunpeng BoostKit for Virtualization
Installation Guide 1 Docker Installation Guide
Figure 1-6 docker hello world
As shown in Figure 1-6, Docker obtains the hello-world image from Docker Hub
and runs the image. Docker is successfully installed.
Step 2 Check the Docker services of all containers on the local host.
docker ps -a
The command output is as shown in Figure 1-7.
Figure 1-7 Container created
The container has been created, and the Docker service is available.
NOTE
After Docker is installed, the local image library is empty. You can run the docker run
hello-world command to verify that Docker can obtain images from Docker Hub and
create containers using the image.
----End
1.6 More Information
Issue 11 (2021-10-15) Copyright © Huawei Technologies Co., Ltd. 8Kunpeng BoostKit for Virtualization
Installation Guide 1 Docker Installation Guide
1.6.1 Common Commands
Table 1-4 Common Docker commands
Command Description
docker run --network host Enables the containers and hosts to
share the network.
docker pull ubuntu:17.10 Pulls the 17.10 image.
docker run -p Maps a range of ports (host:guest).
15555-15579:15555-15579
docker port container Displays configuration of the mapped
ports.
docker inspect container Displays the underlying information
about a container.
docker info Displays container configuration.
docker ps (-a) Displays the container list.
docker images Displays container images.
docker run -v /root/data/:/home/ Maps the /root/data directory on the
data/ host to the /home/data directory in the
container for data transmission.
docker commit Saves the modified image as a new
812a997f614a(container id) image.
ubuntu:update(image name:tag)
docker export Exports image data based on a
cbe3cb7799ed(container id) > container.
update.tar
docker import - update < update.tar Imports an image.
docker save ***** (image id) Saves an image as a local file.
>ubuntu_17.10.tar
docker load < ubuntu_17.10.tar Loads a locally packaged image file to
docker tag ***** (image id) Ubuntu: the container engine.
17.10
docker cp HOST_PATH :/PATH
docker run -it -d -p 5900:5900 -p Starts Docker (example).
15555-15577:15555-15577 --name
mesa0 --privileged -v /root/share:/
root/share ubuntu:17.10 /bin/bash
Issue 11 (2021-10-15) Copyright © Huawei Technologies Co., Ltd. 9Kunpeng BoostKit for Virtualization
Installation Guide 1 Docker Installation Guide
1.6.2 Uninstalling Docker
Perform the following steps to uninstall Docker:
Step 1 Delete all running containers.
docker rm -vf $(docker ps -a -q)
NOTE
To back up a running container, run the docker commit command to save the container as
an image.
docker commit -m "" -a "" :
The backup of image will be described in the following.
Step 2 Delete all local images.
docker rmi -f $(docker images -a -q)
NOTE
To back up a Docker image to a local file, run the docker save command to save the image
as a .rar file.
docker save -o .rar :
Step 3 Delete the Docker components from /usr/bin.
1. Query the Docker components in /usr/bin.
ll
2. Delete these components in sequence.
rm -f /usr/bin/
Step 4 Reset the docker.service configuration file.
1. Clear the docker.service file.
echo '' > /usr/lib/systemd/system/docker.service
2. Reload the daemon service.
systemctl daemon-reload
Docker is uninstalled.
----End
1.6.3 Searching for Docker Images for the Kunpeng
Architecture
Step 1 Open the Docker image library.
https://hub.docker.com/
Issue 11 (2021-10-15) Copyright © Huawei Technologies Co., Ltd. 10Kunpeng BoostKit for Virtualization
Installation Guide 1 Docker Installation Guide
Figure 1-8 Docker Hub
Step 2 In the search box, enter the image name and press Enter.
Figure 1-9 Searching for an image
Step 3 Select Architectures under Filters.
Issue 11 (2021-10-15) Copyright © Huawei Technologies Co., Ltd. 11Kunpeng BoostKit for Virtualization
Installation Guide 1 Docker Installation Guide
Figure 1-10 Selecting an image architecture
Step 4 Select ARM 64.
Figure 1-11 Selecting ARM 64 architecture
All the images with the ARM64 tag are displayed. These images apply to Kunpeng
servers.
Step 5 Click an image.
Issue 11 (2021-10-15) Copyright © Huawei Technologies Co., Ltd. 12Kunpeng BoostKit for Virtualization
Installation Guide 1 Docker Installation Guide
Figure 1-12 Image download page
The command for downloading the image on Docker is displayed in the right.
The supported tags and Dockerfile links are displayed below.
----End
1.6.4 Creating a Docker Image for the Kunpeng Architecture
NOTE
The following describe how to use the docker commit command to create a Docker image.
HTTPd is used as an example.
Prerequisites
The Docker service is running on the host based on the Kunpeng architecture.
Procedure
Step 1 Start a Docker container of CentOS.
docker run -itd -p 5000:80 --name xx --privileged centos:latest init
Step 2 Access the container.
docker exec -it xx /bin/bash
Step 3 Install the HTTPd service.
yum -y install httpd.aarch64
Step 4 Start the HTTPd service.
systemctl enable httpd
systemctl start httpd
Step 5 The container is a CentOS container that has HTTPd service installed. Run the
docker commit command to import it as an image.
docker commit -m "message" -a "author" :
Issue 11 (2021-10-15) Copyright © Huawei Technologies Co., Ltd. 13Kunpeng BoostKit for Virtualization
Installation Guide 1 Docker Installation Guide
A Docker image with the HTTPd service is created.
----End
Issue 11 (2021-10-15) Copyright © Huawei Technologies Co., Ltd. 14Kunpeng BoostKit for Virtualization
Installation Guide 2 KVM Installation Guide
2 KVM Installation Guide
2.1 Introduction
2.2 Environment Requirements
2.3 Configuring the Installation Environment
2.4 Installing VMs
2.5 Running and Verifying VMs
2.1 Introduction
KVM Overview
Kernel-based Virtual Machine (KVM) is a virtualization architecture in the Linux
kernel. It allows the kernel to function as a hypervisor.
KVM contains a kernel module kvm.ko for implementing kernel virtualization
functions and a processor-related module, such as kvm-amd.ko. KVM does not
provide processor emulation. It exposes the /dev/kvm interface, through which a
host machine can create vCPUs, allocate virtual memory address space, read and
write vCPU registers, and run vCPUs. With KVM, the CPU instructions of the guest
OS can run directly without being translated by the Quick EMUlator (QEMU),
which greatly improves the running speed.
The KVM implements CPU and memory virtualization, but it cannot provide
emulation of other devices. A tool running in the user space is required. KVM
developers use the mature open-source virtualization software QEMU as this tool.
QEMU simulates I/O devices (such as NICs and drives). QEMU-KVM is developed
based on QEMU.
In QEMU-KVM, KVM runs in the kernel space, and QEMU runs in the user space to
simulate the creation and management of various virtual hardware. QEMU
integrates the KVM, and invokes the /dev/kvm through the /ioctl to enable some
CPU instructions to be executed by kvm.ko. KVM implements CPU and memory
virtualization, and QEMU simulates I/O devices (such as drives, NICs, and video
cards). In this way, KVM and QEMU together implement server virtualization.
Issue 11 (2021-10-15) Copyright © Huawei Technologies Co., Ltd. 15Kunpeng BoostKit for Virtualization
Installation Guide 2 KVM Installation Guide
Recommended Versions
Table 2-1 Recommended versions
Software Recommended Version
QEMU (CentOS) qemu-2.12.0 or later
libvirt (CentOS) libvirt-4.5.0 or later
QEMU (openEuler-SP1) qemu-4.1.0 or later
libvirt (openEuler-SP1) libvirt-6.2.0 or later
2.2 Environment Requirements
Hardware Requirements
Table 2-2 Hardware requirements
Type Item Requirements
Hardware Server TaiShan 200 server (model 2280)
CPU Huawei Kunpeng 920 processor
RAID controller card Avago 3508
BIOS Advanced→MISC Enabled
settings Config→Support Smmu
Advanced→PCIe Enabled
Config→SRIOV
NOTE
The Avago SAS3408iMR RAID controller card does not support virtualization.
OS Requirements
Table 2-3 OS requirements
Item Version
CentOS CentOS 7.6
openEuler 20.03 LTS-SP1 for ARM
Issue 11 (2021-10-15) Copyright © Huawei Technologies Co., Ltd. 16Kunpeng BoostKit for Virtualization
Installation Guide 2 KVM Installation Guide
You are advised to install Infrastructure Server or Server with GUI for the OS, as
shown in Figure 2-1.
Figure 2-1 Installing Server with GUI
NOTE
When installing an OS, choose Minimal Install and select Development Tools to minimize
manual operations.
Software Packages
Table 2-4 Software packages
Software How to Obtain
Package
qemu-4.0.0.tar. ● Online
xz Run the wget https://download.qemu.org/
qemu-4.0.0.tar.xz command to download the source code
package.
● Offline
1. On a PC that can access the Internet, download https://
download.qemu.org/qemu-4.0.0.tar.xz.
2. Copy the downloaded source code package to the
target host.
Issue 11 (2021-10-15) Copyright © Huawei Technologies Co., Ltd. 17Kunpeng BoostKit for Virtualization
Installation Guide 2 KVM Installation Guide
Software How to Obtain
Package
libvirt-5.6.0-1.f libvirt-5.6.0 is used as an example.
c30.src.rpm ● Online
Run the wget https://libvirt.org/sources/
libvirt-5.6.0-1.fc30.src.rpm command to download the
source code RPM package.
● Offline
1. On a PC connected to the Internet, download https://
libvirt.org/sources/libvirt-5.6.0-1.fc30.src.rpm.
2. Copy the downloaded source code package to the
target host.
2.3 Configuring the Installation Environment
2.3.1 (Optional) Configuring the Local Source
If the server is not connected to the Internet and dependencies cannot be
obtained using the yum command, configure the local source on CentOS or
openEuler.
CentOS
Step 1 Copy the OS image file CentOS-7-aarch64-Everything-1810.iso to the /root
directory on each server.
Step 2 Mount the image file.
1. Mount the CentOS .iso file in the /root directory to the /mnt/repo directory
on the server.
mount /root/CentOS-7-aarch64-Everything-1810.iso /mnt/repo -o loop
NOTE
This operation takes effect only once and becomes invalid after the OS is restarted.
2. (Optional) Enable the OS image to be automatically mounted upon system
startup.
a. Run the following command to open the fstab file:
vi /etc/fstab
b. Add the following content to the end of the fstab file:
/root/CentOS-7-aarch64-Everything-1810.iso /mnt/repo iso9660 loop 0 0
c. Save and close the fstab file.
Step 3 Add the local source file.
1. Go to the /etc/yum.repos.d directory.
cd /etc/yum.repos.d
NOTE
You are advised to move the *.repo file in this directory to any other backup directory.
Issue 11 (2021-10-15) Copyright © Huawei Technologies Co., Ltd. 18Kunpeng BoostKit for Virtualization
Installation Guide 2 KVM Installation Guide
2. Create a local.repo file.
a. Run the following command to open the local.repo file:
vi local.repo
b. Add the following information to the local.repo file:
[local]
name=local repo
baseurl=file:///mnt/repo
enabled=1
gpgcheck=0
c. Save and exit the local.repo file.
Step 4 Make the local source take effect.
yum clean all
yum makecache
yum list
----End
openEuler
Step 1 Copy the OS image file openEuler-20.03-LTS-SP1-everything-aarch64-dvd.iso to
the /root directory on each server.
Step 2 Mount the image file.
1. Mount the CentOS .iso file in the /root directory to the /mnt/repo directory
on the server.
mount /root/openEuler-20.03-LTS-SP1-everything-aarch64-dvd.iso /mnt/repo -o loop
NOTE
This operation takes effect only once and becomes invalid after the OS is restarted.
2. (Optional) Enable the OS image to be automatically mounted upon system
startup.
a. Run the following command to open the fstab file:
vi /etc/fstab
b. Add the following content to the end of the fstab file:
/root/openEuler-20.03-LTS-SP1-everything-aarch64-dvd.iso /mnt/repo iso9660 loop 0 0
c. Save and exit the fstab file.
Step 3 Add the local source file.
1. Go to the /etc/yum.repos.d directory.
cd /etc/yum.repos.d
NOTE
You are advised to move the *.repo file in this directory to any other backup directory.
2. Create a local.repo file.
Issue 11 (2021-10-15) Copyright © Huawei Technologies Co., Ltd. 19Kunpeng BoostKit for Virtualization
Installation Guide 2 KVM Installation Guide
a. Run the following command to open the local.repo file:
vi local.repo
b. Add the following content to the local.repo file:
[Base]
name=Base
baseurl=file:///mnt/repo
enabled=1
gpgcheck=0
priority=1
[arch_fedora_online]
name=arch_fedora
baseurl=https://mirrors.huaweicloud.com/fedora/releases/30/Everything/aarch64/os/
enabled=1
gpgcheck=0
priority=2
c. Add the following content to the end of the /etc/profile file:
export http_proxy=http://ptaishanpublic2:Huawei123@90.90.64.10:8080
export https_proxy=http://ptaishanpublic2:Huawei123@90.90.64.10:8080
d. Save and exit the local.repo file.
Step 4 Make the local source take effect.
yum clean all
yum makecache
yum list
----End
2.3.2 Installing Virtualization Components
Before the operation, ensure that the server is connected to the Internet or the
local source has been configured. CentOS and openEuler require different
virtualization components. Install the components based on your OS requirements.
CentOS
Install virtualization components on CentOS 7.6.
yum -y install qemu* libvirt* AAVMF virt-install
openEuler
Step 1 Obtain the virt-manager source code.
git clone https://gitee.com/src-openeuler/virt-manager.git -b openEuler-20.03-LTS-SP1
Step 2 Compile and install virt-manager.
1. Go to the source code directory.
cd virt-manager
2. Install required software packages.
yum install rpm-build
yum-builddep virt-manager.spec
3. Create a compilation directory.
mkdir -p ~/rpmbuild/SOURCES
4. Copy the source file to the compilation directory.
cp * ~/rpmbuild/SOURCES
Issue 11 (2021-10-15) Copyright © Huawei Technologies Co., Ltd. 20Kunpeng BoostKit for Virtualization
Installation Guide 2 KVM Installation Guide
5. Perform the compilation.
rpmbuild -bb virt-manager.spec
6. Install the generated RPM package.
yum install ~/rpmbuild/RPMS/noarch/*.rpm
Step 3 Install virtualization components.
yum -y install qemu libvirt openssl-devel numactl numactl-devel libcap-ng-devel traceroute iperf3
python2-paramiko edk2-aarch64.noarch edk2-devel qemu-guest-agent
----End
2.3.3 (Optional) Upgrading QEMU
You do not need to upgrade QEMU by default. The recommended QEMU version
is 2.12.0. If you want to use QEMU of another version, perform the following steps
to upgrade QEMU. However, an upgrade may cause permission or function issues.
The QEMU version on openEuler is generally later than the minimum requirement
and does not need to be upgraded. The following uses CentOS 7.6 as an example.
Installing Dependency Packages
NOTE
Before the operation, ensure that the server is connected to the Internet or the local source
has been configured.
Install the dependency packages.
yum -y install glib2-devel zlib-devel pixman-devel libaio-devel
Upgrading QEMU
NOTE
The default installation path of QEMU is /usr/local. For details about how to download the
source code package, see Software Packages.
qemu-4.0.0 is used. The ARM version does not support live VM migration (but supports cold
migration). If you need a live VM migration, install the patch in the openEuler package. You
can obtain the openEuler package at:
https://gitee.com/src-openeuler/qemu/tree/openEuler-20.03-LTS/
Step 1 Decompress the QEMU package, and go to the directory where QEMU is stored.
tar -xvf qemu-4.0.0.tar.xz
cd qemu-4.0.0
Step 2 Install the QEMU package.
./configure --target-list=aarch64-softmmu --enable-linux-aio
NOTE
You can also run the ./configure command and add parameters to accelerate the
compilation, as shown in the following figure.
Issue 11 (2021-10-15) Copyright © Huawei Technologies Co., Ltd. 21Kunpeng BoostKit for Virtualization Installation Guide 2 KVM Installation Guide Issue 11 (2021-10-15) Copyright © Huawei Technologies Co., Ltd. 22
Kunpeng BoostKit for Virtualization
Installation Guide 2 KVM Installation Guide
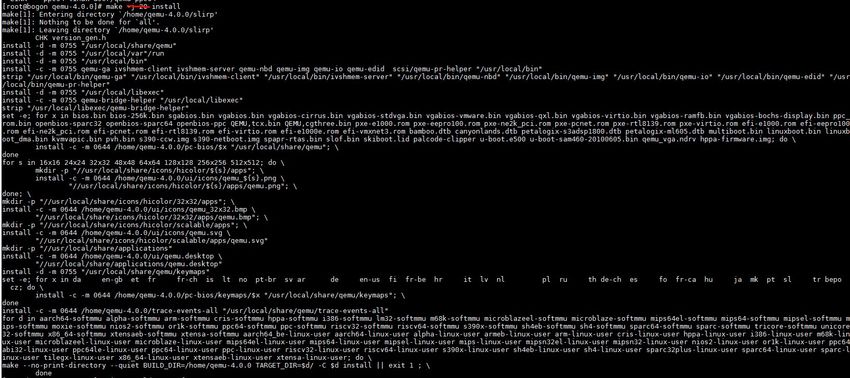
make[-j ]
Issue 11 (2021-10-15) Copyright © Huawei Technologies Co., Ltd. 23Kunpeng BoostKit for Virtualization
Installation Guide 2 KVM Installation Guide
make install
Step 3 Add the lib.
1. Add the library path.
vim /etc/ld.so.conf
include /usr/local/lib
Issue 11 (2021-10-15) Copyright © Huawei Technologies Co., Ltd. 24Kunpeng BoostKit for Virtualization
Installation Guide 2 KVM Installation Guide
2. Make the configuration take effect.
ldconfig
Step 4 Check the QEMU version.
qemu-img --version
----End
2.3.4 (Optional) Upgrading libvirt
The QEMU version on openEuler is generally later than the minimum requirement
and does not need to be upgraded. The following uses CentOS 7.6 as an example.
NOTICE
If you do not demand a GUI and can use the CLI to perform virtualization
operations, the built-in libvirt-4.5.0 of the system is recommended.
However, the libvirt-4.5.0 code has bugs. When virt-manager is used, errors are
triggered, for example, internal error: Socket 6378 can't be handled(max socket is
4095). If virt-manager must be used, install libvirt-4.7.0 or later.
Installing edk2
● Online installation
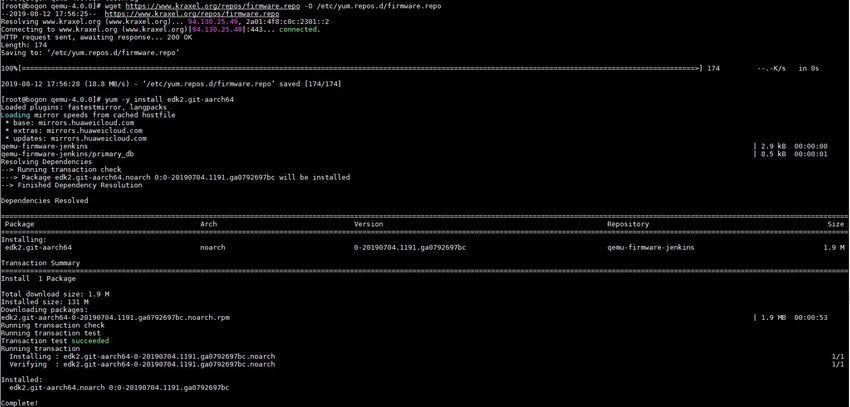
Run the following commands to install edk2 online, as shown in Figure 2-2.
wget https://www.kraxel.org/repos/firmware.repo -O /etc/yum.repos.d/firmware.repo
yum -y install edk2.git-aarch64
Figure 2-2 Installing edk2 online
● Offline installation
Visit https://mirrors.huaweicloud.com/centos/8-stream/AppStream/
aarch64/os/Packages/edk2-
aarch64-20200602gitca407c7246bf-4.el8.noarch.rpm to download the RPM
Issue 11 (2021-10-15) Copyright © Huawei Technologies Co., Ltd. 25Kunpeng BoostKit for Virtualization
Installation Guide 2 KVM Installation Guide
package, and then copy it to the target server. Run the following command to
install edk2 offline, as shown in Figure 2-3.
rpm -ivh edk2.git-aarch64*.rpm
Figure 2-3 Installing edk2 offline
Installing Dependency Packages
NOTE
Before the operation, ensure that the server can access the Internet or that the local source
has been configured.
Step 1 Install the dependency packages.
yum -y install libxml2-devel readline-devel ncurses-devel libtasn1-devel gnutls-devel libattr-devel
libblkid-devel augeas systemd-devel libpciaccess-devel yajl-devel sanlock-devel libpcap-devel libnl3-
devel libselinux-devel dnsmasq radvd cyrus-sasl-devel libacl-devel parted-devel device-mapper-devel
xfsprogs-devel librados2-devel librbd1-devel glusterfs-api-devel glusterfs-devel numactl-devel libcap-
ng-devel fuse-devel netcf-devel libcurl-devel audit-libs-devel systemtap-sdt-devel nfs-utils dbus-
devel scrub numad
----End
Installing libvirt
NOTE
The following uses libvirt-5.6.0 as an example. For details about how to download the
source code package, see Software Packages. The ARM version does not support live VM
migration (but supports cold migration). If you need a live migration, install the patch in
the openEuler package. You can obtain the openEuler package at https://gitee.com/src-
openeuler/libvirt/tree/openEuler-20.03-LTS/.
Step 1 Install the src.rpm source code package.
rpm -i libvirt-5.6.0-1.fc30.src.rpm
Step 2 Generate an RPM package.
cd /root/rpmbuild/SPECS/
rpmbuild -ba libvirt.spec
NOTE
There is a possibility that the src.rpm package provided by the official website fails to be
compiled. You may need to try for multiple times.
Step 3 Install the RPM package.
cd /root/rpmbuild/RPMS/aarch64/
yum -y install *.rpm
Step 4 Modify the configuration file.
1. Run the following command to open the qemu.conf file:
vim /etc/libvirt/qemu.conf
Issue 11 (2021-10-15) Copyright © Huawei Technologies Co., Ltd. 26Kunpeng BoostKit for Virtualization
Installation Guide 2 KVM Installation Guide
2. Locate the content to be modified, as shown in the following figure.
3. Add the following information.
nvram = ["/usr/share/edk2.git/aarch64/QEMU_EFI-pflash.raw:/usr/share/edk2.git/aarch64/vars-
template-pflash.raw"]
4. Save the configuration and exit.
:wq
Step 5 Restart the libvirtd service.
service libvirtd restart
Step 6 Disable SELinux.
setenforce 0
----End
2.3.5 Verifying the Installation Environment
CentOS
Step 1 Restart the libvirt service.
service libvirtd restart
Issue 11 (2021-10-15) Copyright © Huawei Technologies Co., Ltd. 27Kunpeng BoostKit for Virtualization
Installation Guide 2 KVM Installation Guide
Step 2 View the version.
virsh version
The following figure shows version information after an upgrade.
----End
openEuler
Step 1 Restart the libvirt service.
systemctl restart libvirtd
Step 2 View the version.
virsh version
----End
2.4 Installing VMs
2.4.1 Creating a VM
Step 1 Start the libvertd service and enable the libvertd service to automatically start
upon system startup.
Issue 11 (2021-10-15) Copyright © Huawei Technologies Co., Ltd. 28Kunpeng BoostKit for Virtualization
Installation Guide 2 KVM Installation Guide
systemctl start libvirtd
systemctl enable libvirtd
Step 2 Create a storage pool.
1. Create a storage pool directory and configure operation permissions for the
directory.
mkdir -p /home/kvm/images
chown root:root /home/kvm/images
chmod 755 /home/kvm/images
2. Define a storage pool and bind it to the directory created. Create a folder-
based storage pool, activate it, and enable it to start upon system startup.
virsh pool-define-as StoragePool --type dir --target /home/kvm/images
virsh pool-build StoragePool
virsh pool-start StoragePool
virsh pool-autostart StoragePool
3. Query the storage pool information.
virsh pool-info StoragePool
virsh pool-list
Step 3 Create the drive space for the virtual machine (VM).
1. Create a volume.
For example, the volume named is 1.img, the storage pool is StoragePool,
the volume capacity is 50 GB, the initially allocated capacity is 1 GB, the file
format is qcow2, and the drive file format is qcow2.
virsh vol-create-as --pool StoragePool --name 1.img --capacity 50G --allocation 1G --format
qcow2
2. Check volume information.
virsh vol-info /home/kvm/images/1.img
Issue 11 (2021-10-15) Copyright © Huawei Technologies Co., Ltd. 29Kunpeng BoostKit for Virtualization
Installation Guide 2 KVM Installation Guide
Step 4 Create a VM.
1. Create VM vm1, and allocate four CPUs, 8 GB memory, and 1.img drive space
to it. Copy the .iso file to a non-root directory, and install CentOS 7.6.
brctl addbr br1
virt-install --name=vm1 --vcpus=4 --ram=8192 --disk path=/home/kvm/images/
1.img,format=qcow2,size=50,bus=virtio --cdrom /xxx/CentOS-7-aarch64-Everything-1810.iso --
network bridge=br1,model=virtio --force --autostart
2. Installing the OS on the VM.
3. Configure all items that contain !. Input the serial numbers corresponding to
the items and configure them as prompted. Then, press b to start the
installation.
4. After the installation is complete, the login prompt is displayed.
----End
2.4.2 Configuring the VM
Use the virsh edit vmx command to edit the VM configuration file. In the
command, vmx indicates the VM name.
Issue 11 (2021-10-15) Copyright © Huawei Technologies Co., Ltd. 30Kunpeng BoostKit for Virtualization
Installation Guide 2 KVM Installation Guide
Binding VM CPUs
Bind the vCPUs of the VM to the physical CPUs of an NUMA node.
The following describes how to bind the four vCPUs of a VM to physical cores 0, 1,
2, and 3 respectively.
Step 1 Open the configuration file in edit mode.
virsh edit vmx
Step 2 Add the following CPU information to the file:
After the configuration, the vCPU threads of the VM run on the physical CPU of
the specified host.
Step 3 Save and close the configuration file.
Step 4 Check the CPU basic information.
virsh vcpuinfo vmx
----End
Binding Memory
Bind the memory to the same NUMA node as the vCPUs.
Step 1 Open the configuration file in edit mode.
virsh edit vmx
Step 2 Add the following memory information to the file:
Issue 11 (2021-10-15) Copyright © Huawei Technologies Co., Ltd. 31Kunpeng BoostKit for Virtualization
Installation Guide 2 KVM Installation Guide
Step 3 Save and close the configuration file.
----End
2.4.3 Cloning the VM
Step 1 Stop VM vm1 and run the virt-clone command in the virt-install software
package to clone vm10.
virt-clone -o vm1 -n vm10 -f /home/kvm/images/10.img
In the command, -o indicates the original VM, -n indicates the new VM, and -f
indicates that the newly created VM uses the file on the host machine as the
image file.
NOTE
● After the command is executed, vm10 is created. The CPU, memory, drive, and network
resources allocated to vm10 are the same as those allocated to vm1. The CPU and
network resources allocated to vm10 need to be configured separately.
● There is a possibility that the virt-clone command fails to clone VMs. See the root cause
at https://bugs.launchpad.net/qemu/+bug/1824053, which has been rectified in QEMU
5.0.0.
Step 2 Check the status of the created VM.
virsh list --all
Step 3 Change the host name of the VM.
The cloned VM has the same host name and IP address as vm1. You need to log
in to vm10 and run the following command to change the host name:
hostnamectl --static set-hostname vm10
Step 4 Modify the VM IP address.
Issue 11 (2021-10-15) Copyright © Huawei Technologies Co., Ltd. 32Kunpeng BoostKit for Virtualization
Installation Guide 2 KVM Installation Guide
vim /etc/sysconfig/network-scripts/ifcfg-ens3
----End
2.4.4 (Optional) Configuring a VM Network
To access the services on a KVM VM from another PC on the same LAN, you can
connect the KVM VM (guest) to the host machine in bridge mode so that the VM
is allocated an independent IP address on the LAN.
If you do not need to access the KVM VM from other PCs on the LAN, you do not
need to configure the network.
Configuring a Network Bridge
Step 1 View the network information.
ip a
This example illustrates how to bridge the KVM VM to the network segment
(192.168.224.XXX, subnet mask: 255.255.255.0) where enp3s0 is located.
Step 2 Check for network bridges and ensure that the br0 network bridge does not exist.
brctl show
Step 3 Stop the NetworkManager service to prevent configuration modifications from
taking effect unexpectedly.
systemctl stop NetworkManager
Step 4 Create a br0 network bridge.
1. Open the ifcfg-br0 file.
vi /etc/sysconfig/network-scripts/ifcfg-br0
Issue 11 (2021-10-15) Copyright © Huawei Technologies Co., Ltd. 33Kunpeng BoostKit for Virtualization
Installation Guide 2 KVM Installation Guide
2. Add the following content. Save the file and exit.
DEVICE=br0
ONBOOT=yes
TYPE=Bridge
NM_CONTROLLED=yes
BOOTPROTO=static
IPADDR=192.168.224.2
NETMASK=255.255.255.0
GATEWAY=192.168.224.1
STP=on
DELAY=0.0
NOTE
● In this example, replace the values of IPADDR and GATEWAY with actual ones.
● If you perform the following operations to create a network bridge, the network bridge
becomes invalid after the host machine is restarted. Replace the IP address in the
example with the actual one.
brctl addbr br0
brctl addif br0 enp5s0
ifconfig br0 192.168.224.2/24
service network restart
brctl show
ip a
Step 5 Modify the ifcfg-enp3s0 file to connect the enp3s0 network port to the br0
bridge.
1. Back up the ifcfg-enp3s0 file.
mv /etc/sysconfig/network-scripts/ifcfg-enp3s0 /home/
2. Open the ifcfg-enp3s0 file.
vi /etc/sysconfig/network-scripts/ifcfg-enp3s0
3. Add the following information, save the file, and exit:
HWADDR=a8:49:4d:f6:84:dc
DEVICE=enp3s0
TYPE=Ethernet
ONBOOT=yes
NM_CONTROLLED=yes
BRIDGE=br0
NOTE
Check the HWADDR value of enp3s0. In the command output, the MAC address
following ether is the HWADDR value.
ip a
Step 6 Make the ifcfg-br0 and ifcfg-enp3s0 files take effect.
● CentOS
systemctl restart network
● openEuler
systemctl restart NetworkManager
NOTE
If the configuration does not take effect after the network service is restarted, check
whether the previous configurations are correct. Alternatively, restart the host machine
and then restart the network service.
Step 7 View the network information.
ip a
Issue 11 (2021-10-15) Copyright © Huawei Technologies Co., Ltd. 34Kunpeng BoostKit for Virtualization
Installation Guide 2 KVM Installation Guide
Step 8 View the network bridge.
brctl show
If enp3s0 is displayed under interfaces of br0, the network bridge is configured
successfully.
----End
Configuring the VM
Step 1 Modify the VM configuration.
1. Open the VM configuration file.
vi /etc/libvirt/qemu/vm1.xml
Or
virsh edit vm1
2. Find the tag under and change br1 to br0. Save the
file and exit.
Issue 11 (2021-10-15) Copyright © Huawei Technologies Co., Ltd. 35Kunpeng BoostKit for Virtualization
Installation Guide 2 KVM Installation Guide
NOTE
If the tag does not exist, add the following content under the
tag:
– indicates that the VM uses the bridge mode.
– The MAC address in is automatically
generated after the VM is installed and is used as the MAC address of the VM NIC
eth0. Generally, you do not need to change the MAC address. If you need to
change the MAC address, ensure that it is different from the MAC address of the
br0 network bridge.
– indicates the connection to br0 network bridge on the host
machine.
Step 2 Make the VM configuration take effect.
systemctl restart libvirtd
Step 3 Stop the VM.
1. View the VM status.
virsh list --all
2. Stop the VM.
virsh shutdown vm1
3. Check whether the VM has been stopped.
virsh list --all
Step 4 Start the VM.
virsh start vm1
virsh list --all
Step 5 View the network bridge.
brctl show
Issue 11 (2021-10-15) Copyright © Huawei Technologies Co., Ltd. 36Kunpeng BoostKit for Virtualization
Installation Guide 2 KVM Installation Guide
If vnet0 is displayed under interfaces of br0, vm1 is successfully connected to the
network bridge. (vnet0 exists only after the vm1.xml configuration takes effect
and vm1 is successfully started.)
Step 6 Log in to the VM.
virsh list --all
virsh console vm1 --force
Step 7 Configure the NIC.
1. View the network information.
ip a
2. Modify the NIC configuration.
– CentOS
i. Edit the ifcfg-eth0 file.
vi /etc/sysconfig/network-scripts/ifcfg-eth0
ii. Edit the file as follows. Save the file and exit.
NOTE
Set IPADDR to an unused IP address that is on the same network segment
as the host machine. Set this parameter based on site requirements.
TYPE=Ethernet
PROXY_METHOD=none
BROWSER_ONLY=no
BOOTPROTO=static
DEFROUTE=yes
IPV4_FAILURE_FATAL=no
IPV6INIT=yes
IPV6_AUTOCONF=yes
IPV6_DEFROUTE=yes
IPV6_FAILURE_FATAL=no
IPV6_ADDR_GEN_MODE=stable-privacy
NAME=eth0
UUID=aca69508-f4c7-4ff2-9cc5-668ac45e429e
DEVICE=eth0
ONBOOT=yes
IPADDR=192.168.224.3
NETMASK=255.255.255.0
GATEWAY=192.168.224.1
– openEuler
i. Edit the ifcfg-enp1s0 file.
vi /etc/sysconfig/network-scripts/ifcfg-enp1s0
ii. Edit the file as follows. Save the file and exit.
TYPE=Ethernet
PROXY_METHOD=none
BROWSER_ONLY=no
BOOTPROTO=static
DEFROUTE=yes
IPV4_FAILURE_FATAL=no
IPV6INIT=yes
IPV6_AUTOCONF=yes
IPV6_DEFROUTE=yes
IPV6_FAILURE_FATAL=no
IPV6_ADDR_GEN_MODE=stable-privacy
Issue 11 (2021-10-15) Copyright © Huawei Technologies Co., Ltd. 37Kunpeng BoostKit for Virtualization
Installation Guide 2 KVM Installation Guide
NAME=enp1s0
UUID=dedf1652-5eff-3fb4-be23-c658b834774f
DEVICE=enp1s0
ONBOOT=yes
AUTOCONNECT_PRIORITY=-999
IPADDR=192.168.224.13
NETMASK=255.255.255.0
GATEWAY=192.168.224.1
NOTE
Set IPADDR to an unused IP address that is on the same network segment
as the host machine. Set this parameter based on site requirements.
Step 8 Make the NIC take effect.
● CentOS
systemctl restart network
ip a
● openEuler
systemctl restart NetworkManager
ifdown enp1s0
ifup enp1s0
ip a
----End
Verifying the Network
Step 1 Ping the VM and the host machine from each other.
Step 2 Ping the VM and other hosts on the LAN from each other.
Step 3 Ping the host machine and other hosts on the LAN from each other.
Issue 11 (2021-10-15) Copyright © Huawei Technologies Co., Ltd. 38Kunpeng BoostKit for Virtualization
Installation Guide 2 KVM Installation Guide
NOTE
● If the ping fails, on the host machine, capture packets of br0 and analyze the problem.
yum -y install tcpdump
tcpdump -i br0
● If all of the host machines, VMs, and other hosts are successfully pinged, the bridge
configuration is complete.
● If the VM can communicate with only the host machine but not with other hosts on the
LAN, you may need to disable the network filter on the host machine.
1. Disable the network filter.
1. Edit the sysctl.conf file.
vim /etc/sysctl.conf
2. Add the following content to the file. Save the file and exit.
net.bridge.bridge-nf-call-ip6tables = 0
net.bridge.bridge-nf-call-iptables = 0
net.bridge.bridge-nf-call-arptables = 0
2. Reload the kernel parameters for the configuration to take effect.
sysctl -p
----End
2.5 Running and Verifying VMs
2.5.1 Starting a VM
● Start VM vm1.
virsh start vm1
● Modify the configuration file of vm1.
virsh edit vm1
● Shut down vm1.
virsh shutdown vm1
2.5.2 Common Commands
Command Description
virsh list --all Queries information about all VMs.
virsh undefine vm2 Deletes a VM.
virsh vol-delete --pool Deletes an image.
StoragePool --vol 2.img
virsh pool-destroy vmfspool Deletes a storage pool.
virsh pool-undefine vmfspool
virsh pool-delete vmfspool
brctl addbr br1 Creates a network bridge. br1 indicates the
name of the network bridge.
brctl addif br1 eth0 Binds bridge br1 to network port eth0.
Determine the network port to be bound
based on actual requirements.
Issue 11 (2021-10-15) Copyright © Huawei Technologies Co., Ltd. 39You can also read