LIBERO SOC V2021.1 - AMAZON ...
←
→
Page content transcription
If your browser does not render page correctly, please read the page content below
Libero® SoC v2021.1
                        Linux Environment Setup User Guide

Introduction
                                            ®
This document explains how to install Libero SoC and the Linux packages required to run Libero SoC. It also
explains how to set up licensing. The document is intended for users who will be running Libero SoC in a Linux
environment.
The document also includes the following sections to enable you to run the Libero SoC software in the Linux
environment:
  •   Install Libero SoC
  •   Set up licensing
Libero SoC is supported on the following Linux operating systems.
  •   RHEL6.6 or later 64-bit, RHEL7 64-bit, and RHEL 8.2
  •   CentOS 6.6 or later 64-bit, CentOS 7 64-bit, and CentOS 8.2 64-bit
  •   Ubuntu 18.04
  •   OpenSUSE Leap 42.3 (SLES 12.3 equivalent)
Note: RHEL 5.x and CentOS 5.x do not support programming using FlashPro5.

© 2021 Microchip Technology Inc.                        User Guide                               DS00003755B-page 1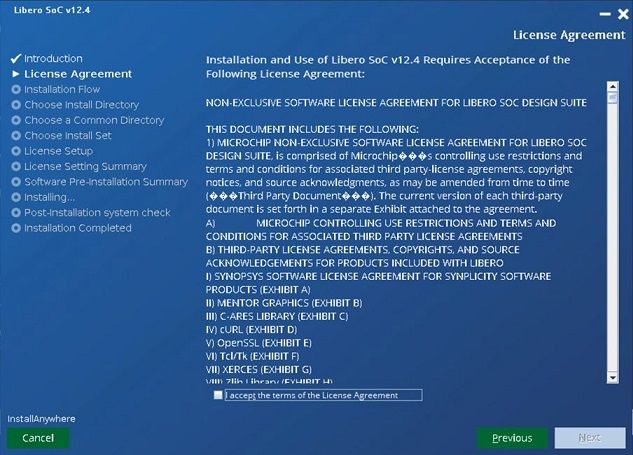
Libero® SoC v2021.1

Table of Contents
Introduction.....................................................................................................................................................1

1.    Libero SoC Installation............................................................................................................................ 4

2.    Installation............................................................................................................................................... 5
      2.1.  Step 1—Download License Daemons, License File, and Set Up Licensing on License Server
            ..................................................................................................................................................... 5
      2.2. Step 2—Add Packages to the Linux OS...................................................................................... 5
      2.3. Step 3—Set Up Licensing (Floating License)...............................................................................6
      2.4. Step 4—Download and Install a PDF Reader.............................................................................. 6
      2.5. Step 5—Set Up Locale User Environment Variable..................................................................... 7
      2.6. Step 6—Set up the User Environment Variables to Start Libero SoC..........................................7
      2.7. Step 7—Setting the Vault to Store IP Cores.................................................................................8
      2.8. Step 8—Downloading Libero SoC IP Cores.................................................................................8
      2.9. Step 9—Setting the PDF Reader and Web Browser....................................................................9
      2.10. Step 10—Configure Linux to Detect and Use Programmer Hardware.......................................10
      2.11. Step 10—Create flexlm Initialization Script (Optional)............................................................... 12

3.    Libero SoC Installation Instructions in Ubuntu...................................................................................... 14

4.    Libero SoC Installation Instructions in OpenSUSE............................................................................... 25

5.    Libero SoC Installation Instructions in CentOS..................................................................................... 26

6.    Appendix: Warning /Error Messages and Solutions..............................................................................27
      6.1.       Wind/U Error: Failed to connect to the registry on server.......................................................... 27
      6.2.       Warning: Unknown locale...........................................................................................................27
      6.3.       Warning: Failed to contact web Repositories............................................................................. 28
      6.4.       Error: Could not Locate the Motif Library in LD_LIBRARY_PATH..............................................28
      6.5.       Wind/U X-toolkit Error: wuDisplay: Can't open display...............................................................28
      6.6.       Wind/U Error: A fatal registry I/O failure has occurred............................................................... 29
      6.7.       Segmentation fault "$exedir/$exename" "$@" message........................................................... 29
      6.8.       Designer GUI Appears Stretched When Running On Linux.......................................................30
      6.9.       Libero GUI is Distorted on Older Versions of Red Hat 5 Through VNC..................................... 30
      6.10.      Libero GUI Fails to Start When Pre-loading a Project................................................................30
      6.11.      Viewing PDF Files and Online Help Files...................................................................................30
      6.12.      JRE libraries are missing or not compatible............................................................................... 31
      6.13.      Libero Installer stalled on Red Hat/CentOS 6.x..........................................................................31
      6.14.      Error when Installing Linux Packages........................................................................................ 31
      6.15.      During Installation Warning Message appears: /tmp does not have enough disk space........... 32
      6.16.      X libraries not in LD_LIBRARY_PATH (Libero).......................................................................... 32
      6.17.      Missing libgthread-2.0.so.0 libraries (Libero)............................................................................. 32
      6.18.      Missing MOTIF libraries (Libero)................................................................................................ 32
      6.19.      Missing libncurses.so.5 libraries (ModelSim)............................................................................. 32
      6.20.      Missing libXrender libraries........................................................................................................ 32
      6.21.      Missing libfontconfig.sol.1 libraries.............................................................................................33
      6.22.      Missing libfreetype.so.6 libraries................................................................................................ 33
      6.23.      Missing libpng.so.6 libraries....................................................................................................... 33

© 2021 Microchip Technology Inc.                                                      User Guide                                                      DS00003755B-page 2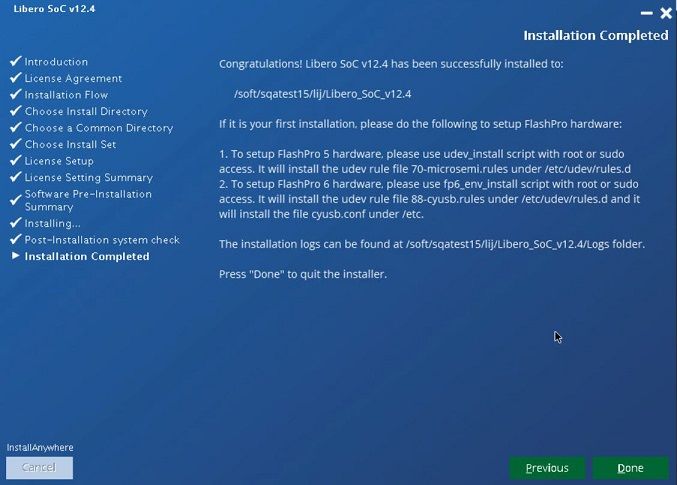
Libero® SoC v2021.1

      6.24. Double Quotes around Vault Location Path on Linux Installation.............................................. 33
      6.25. Script "udev_install" to set up FlashPro fails on Linux............................................................... 33
      6.26. Starting the License Manager gives Error on Linux................................................................... 34
      6.27. Missing libXtst library during Libero installation..........................................................................34
      6.28. Libero installation registry file still shows installed directories even though they had been
            uninstalled.................................................................................................................................. 34
      6.29. Possible errors related to Linux SSSD....................................................................................... 35

7.    References............................................................................................................................................36

8.    Revision History.................................................................................................................................... 37

9.    Microchip FPGA Technical Support...................................................................................................... 38
      9.1.      Customer Service.......................................................................................................................38
      9.2.      Customer Technical Support...................................................................................................... 38
      9.3.      Website...................................................................................................................................... 38
      9.4.      Outside the U.S.......................................................................................................................... 38

The Microchip Website.................................................................................................................................39

Product Change Notification Service............................................................................................................39

Customer Support........................................................................................................................................ 39

Microchip Devices Code Protection Feature................................................................................................ 39

Legal Notice................................................................................................................................................. 40

Trademarks.................................................................................................................................................. 40

Quality Management System....................................................................................................................... 41

Worldwide Sales and Service.......................................................................................................................42

© 2021 Microchip Technology Inc.                                                    User Guide                                                     DS00003755B-page 3
Libero® SoC v2021.1
                                                                                            Libero SoC Installation

1.   Libero SoC Installation
     Download the current release of Libero SoC for Linux from:
     http://www.microsemi.com/products/fpga-soc/design-resources/design-software/libero-soc#downloads
     Follow the installer UI prompts and install Libero. Ensure that the user accounts that will be used to execute Libero
     have read access to the Libero installation area.

     © 2021 Microchip Technology Inc.                         User Guide                                 DS00003755B-page 4
Libero® SoC v2021.1
                                                                                                                Installation

2.      Installation

2.1     Step 1—Download License Daemons, License File, and Set Up Licensing on
        License Server
        For some sites, the site's system administration policy requires a special user account to be set up for administering
        site-wide licenses for all applications. The account "" is just a hypothetical user account name for this
        purpose. Use your regular user account (for example, user_john) for these steps if it is allowed at your site.

2.1.1   Download License Daemons
          1.   Open a terminal window by selecting Applications > System Tools > Terminal.
          2.   (Optional) At the Linux prompt, type su -  to switch to user "" (assuming that your
               licenses are set up by a special user account called "").
               Note: Skip this step if your site's system administration policy allows a regular user to set up licensing.
          3.   Get the hardware MAC-ID of the Linux Host you want to use as the License Server.
               3.1.     Type the following command:
                        % ifconfig | grep Eth
               3.1.     The output from the command should be similar to: eth0 Link encap:Ethernet HWaddr
                        00:0C:29:66:78:72
               3.2.     Record the 12-digit hex number. Leave out the colon ":". You will need this HostID to get the license
                        file.
          4.   Download the License Server Daemons for Linux from the following location: http://www.microsemi.com/
               products/fpga-soc/design-resources/licensing#downloads.

2.1.2   Request a Libero SoC License
          1.   Login to your Microsemi SoC customer portaland request a new "Libero Silver Floating License for Windows or
               Linux Server". Use the recorded MAC- ID from the previously entered ifconfig command (2.3 Step 3—Set Up
               Licensing (Floating License)).
          2.   Download the license file to the HOME directory of the user who will be installing and administering licensing
               for Libero.

2.2     Step 2—Add Packages to the Linux OS
        Libero SoC requires the Linux system to have some special packages that may not be part of a standard CentOS/
        RHEL distribution. To help you find out what additional packages are required, a shell script is available in the
        /bin/check_linux_req directory. The script checks the packages on
        the Linux system, identifies the required packages that are already installed, and lets you know which packages need
        to be added.
        To run the script, at the prompt type:
        % cd /bin/check_linux_req
        % ./check_linux_req.sh
        Note: This script is available begining with the Libero SoC PolarFire v1.1 SP1 release (for PolarFire devices) and
        Libero SoC v11.8 SP1 release (for all other devices).
        Red Hat uses the Red Hat Package Manager (RPM). However, the Yellowdog Updater Modified (YUM ) tool adds
        support for package management and dependency management. For this reason, YUM is the preferred tool.
        Installation of these packages requires superuser privileges or an account on the sudo list. Use superuser account
        (root) or sudo access to run these commands:
          1.   Use the previously opened terminal or open a new terminal window by selecting Applications > System
               Tools > Terminal.

        © 2021 Microchip Technology Inc.                         User Guide                                 DS00003755B-page 5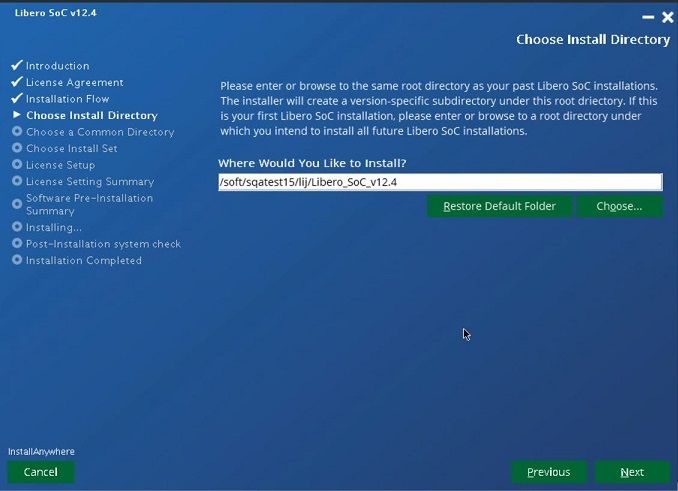
Libero® SoC v2021.1
                                                                                                                 Installation

        2.   Do one of the following:
              – At the prompt, type:
                 % su -
               – Or, using sudo, type:
                 % sudo yum install -y
        3.   Ensure that all optional repositories are enabled, using the command "yum-config-manager --enable
             \*optional\*"
        4.   If a multilib error is seen for any package, run yum update first for that package, then retry the yum install step
             for that package. Repeat for all packages for which yum install errors out with a multilib error.

2.3   Step 3—Set Up Licensing (Floating License)
        1.   Unzip the previously downloaded licensing daemons file Linux_Licensing_Daemon.zip (from 2.4 Step 4—
             Download and Install a PDF Reader):
             % unzip Linux_Licensing_Daemon.zip; & chmod 755 Linux_Licensing_Daemon/*
        2.   Create a new directory called flexlm under :
             % mkdir flexlm
        3.   Move the previously downloaded license file (from 2.7 Step 7—Setting the Vault to Store IP Cores) into the
             flexlm directory.
        4.   Change directory into flexlm directory and unzip the License.dat file:
             % cd flexlm;
             % unzip License.dat
        5.   Start editing the License.dat file. Linux filenames are case-sensitive.
             % gedit License.dat (if you are familiar with vi use vi License.dat)
        6.   Edit the first four lines in the License.dat file to match your current environment:
             SERVER   1702
             DAEMON actlmgrd /home//Linux_Licensing_Daemon/actlmgrd DAEMON mgcld /
             home//Linux_Licensing_Daemon/mgcld VENDOR snpslmd /home//
             Linux_Licensing_Daemon/snpslmd
        7.   Replace the  in the first line with the MAC-ID you have obtained from the
             ifconfig command.
        8.   Save the License.dat file and return to the  HOME directory (). Start the licensing
             server manager (lmgrd) by entering the following command (no line break):
             % /home//Linux_Licensing_Daemon/lmgrd -c /home//flexlm/
             License.dat -log /tmp/lmgrd.log
        9.   Check the log file for errors:
             % more /tmp/lmgrd.log
        10. If there are no errors, enter the following command:
            % tail -f -s10 /tmp/lmgrd.log
        11. Leave the terminal window with the  account open. Whenever a license is checked in or out from
            the License Server, the tail command prints the information to the  terminal window.
        12. (Optional) Create the flexlm initialization script (2.11 Step 10—Create flexlm Initialization Script (Optional))
            to start the license server whenever the system boots up. An rc script is provided (2.10 Step 10—Configure
            Linux to Detect and Use Programmer Hardware).

2.4   Step 4—Download and Install a PDF Reader
      Note: If a PDF Reader is already installed, you can skip this step.
      Libero requires a PDF reader to open the Libero Reference Manuals (Help > Reference Manuals).

      © 2021 Microchip Technology Inc.                           User Guide                                  DS00003755B-page 6
Libero® SoC v2021.1
                                                                                                            Installation

2.5   Step 5—Set Up Locale User Environment Variable
      Libero SOC only supports en_US.UTF-8 locale. To set a global locale for single user, open ~/.bash_profile file and
      add the following lines:

        LANG="en_US.UTF-8"
        export LANG

2.6   Step 6—Set up the User Environment Variables to Start Libero SoC
      This step sets up all user environment variables to run Libero SoC.
        1.   Open a terminal window by selecting Applications > System Tools > Terminal.
        2.   Use an editor and open the ~John/.bashrc file (for user John).
        3.   Use an editor to open and append the following four lines to the user startup file.
             3.1.    For ~John/.bashrc (Bash-shell user John)
                         # For Floating License from a License Server
                         export LM_LICENSE_FILE=1702@localhost:$LM_LICENSE_FILE
                         export SNPSLMD_LICENSE_FILE=1702@localhost:$SNPSLMD_LICENSE_FILE
                         export LANG=en_US.UTF-8
                                                               #  is the port number
                                                               #  is the license
                         server host name
                         #For Node-Locked License
                         export LM_LICENSE_FILE=/
                         license.dat:$LM_LICENSE_FILE
                         exportSNPSLMD_LICENSE_FILE=/
                         license.dat:$SNPSLMD_LICENSE_FILE

                         export    LD_LIBRARY_PATH=/usr/lib:$LD_LIBRARY_PATH
                         export    LANG=en_US.UTF-8
                         export    DISPLAY=:1
                         export    PATH=/usr/local/microsemi//Libero/bin:${PATH}

             3.2.      For ~John/.cshrc (C-shell user John), append the following four lines:
                         #For Floating License from a License Server
                         setenv LM_LICENSE_FILE=1702@localhost:$LM_LICENSE_FILE
                         setenv SNPSLMD_LICENSE_FILE=1702@localhost:$SNPSLMD_LICENSE_FILE
                         setenv LANG en_US.UTF-8
                                                                     #  is the port number
                                                                     #  is the license
                         server host name
                         #For Node-Locked License
                         setenv LM_LICENSE_FILE=/
                         license.dat:$LM_LICENSE_FILE
                         setenv SNPSLMD_LICENSE_FILE=/
                         license.dat:$SNPSLMD_LICENSE_FILE

                         setenv LD_LIBRARY_PATH=/usr/lib:$LD_LIBRARY_PATH setenv export
                         DISPLAY=:1
                         setenv LANG en_US.UTF-8

                         setenv PATH=/usr/local/microsemi//Libero/bin:${PATH}

                       Note: Check the value for LC_CTYPE and ensure that it is same as en_US.UTF.8.
             For details, see the instructions in the email you receive from Microchip with the License.dat file. For more
             information about licensing, see the Libero Software Installation and Licensing Guide.
        4.   Save the .bashrc or .cshrc file and update your terminal window by typing source ~/.bashrc or source
             ~/.cshrc. (Alternatively, close the current window and open a new terminal window.)

      © 2021 Microchip Technology Inc.                          User Guide                              DS00003755B-page 7
Libero® SoC v2021.1
Installation
5. Start Libero with the command "libero &".
2.7 Step 7—Setting the Vault to Store IP Cores
Before IP cores from the IP catalog are available for use, the IP cores must be downloaded and stored in a physical
disk location called the Vault. To set the vault location, from the Project menu, select Vault/Repositories and then the
Vault Location tab (Project > Vault/Repositories Settings > Vault Location), and enter the disk location. You must
have the write permission to the disk location before it can be set as the vault location. A warning message displays if
you do not have the write permission.
Vault locations can be set to a disk location on a per-user basis or set to a central location for all users.
• One vault location per user
The individual user downloads and stores IP cores into this location. An internet connection is required for
download. The individual user is responsible for maintaining the IP core versions and their availability in this
vault.
• One single central vault location for multiple users
The System Administrator downloads and stores IP cores into this location. An internet connection is required
for download. The System Administrator is responsible for maintaining the IP core versions and their availability.
Multiple Individual users, who may not have an internet connection (and therefore cannot download IP cores),
can set the vault to this central location and use the cores in the vault.
Note: The individual user must have write permission to the disk location of this central vault. If the user
does not have write permission, he/she must copy the central vault to a disk location where he/she has write
permission and set the vault to this copied location.
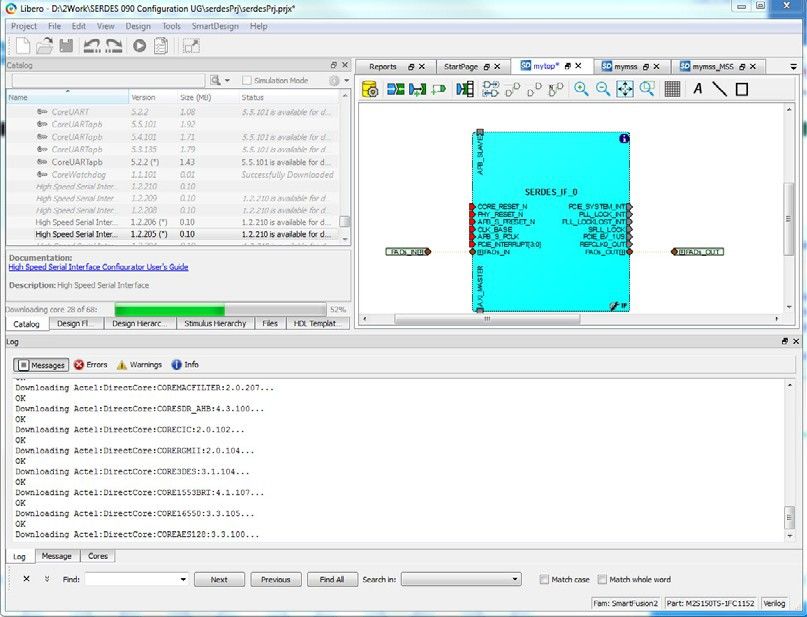
2.8 Step 8—Downloading Libero SoC IP Cores
In the Libero GUI, click View > Windows > Catalog. The catalog tab indicates the availability of new cores. Click
"Download them now!".
© 2021 Microchip Technology Inc. User Guide DS00003755B-page 8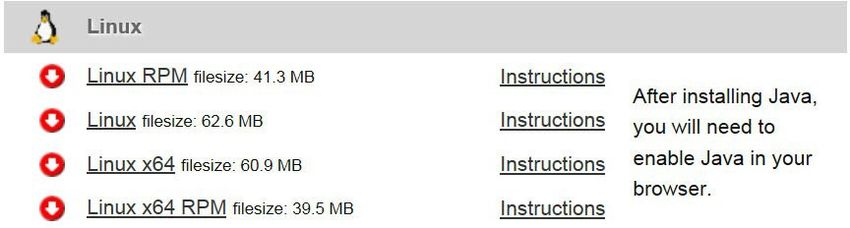
Libero® SoC v2021.1
                                                                                                      Installation

      Figure 2-1. Downloading Libero SoC IP Cores

2.9   Step 9—Setting the PDF Reader and Web Browser
        1.   Set the PDF Reader (Project > Preferences > PDF Reader) to a PDF Reader, for example,
             /usr/bin/acroread.
        2.   Set the Web Browser to a browser of your choice (Project > Preferences > Web Browser), for example,
             /usr/bin/firefox.

      © 2021 Microchip Technology Inc.                     User Guide                              DS00003755B-page 9
Libero® SoC v2021.1
                                                                                   Installation

       Figure 2-2. Project Preferences for PDF Reader

       Figure 2-3. Project Preferences for Web Browser

2.10   Step 10—Configure Linux to Detect and Use Programmer Hardware

       © 2021 Microchip Technology Inc.                  User Guide            DS00003755B-page 10
Libero® SoC v2021.1
Installation
2.10.1 Configure Linux to Detect and Use FlashPro5 Programmer Hardware
If you want a regular user (without root permission) to program the Flash based FPGA devices with FlashPro5
hardware, you must run the udev_install script on the Linux machine as root. The udev_install script helps you set up
a udev rule file for the FLashPro5 hardware.
This udev rule authorizes the Linux user group (that you specify during execution of udev_install script) to access the
FlashPro5 hardware without sudo or root permission.
Follow the steps below to configure Linux to detect and use FlashPro5 programmer hardware.
1. At the prompt, type su -.
2. Change directory to the HOME directory: cd /home/.
3. Execute the udev_install script with the following option: ./udev_install -t /tmp.
4. The previous command generates a template file called "70-microsemi.rules" in the /tmpdirectory
5. Modify the template file to match your group ID of the user "john" connecting the FlashPro5 hardware
(assuming the user "john" will attach the FlashPro5 hardware):
5.1. Open a terminal and run the command id as user john. The output should be similar to the following
text: uid=500(john) gid=500(john)….
5.2. Return to your terminal with root access. Open the "70-microsemi.rules" in an ASCIIeditor.
5.3. Replace the "" with your current group ID # in the following two lines:
BUS=="usb",SYSFS{idProduct}=="2008",SYSFS{idVen-
dor}=="1514",MODE="0660",GROUP="",SYMLINK+="FlashPro5"
BUS=="usb",SYSFS{idProduct}=="6001",SYSFS{idVen-
dor}=="0403",MODE="0660",GROUP="",SYMLINK+="FTDI232"
Assuming the user john has "uid=500" and "gid=500", the line after editing should look like this:
BUS=="usb",SYSFS{idProduct}=="2008",SYSFS{idVendor}=="1514",MODE="0660"\
,GROUP="500",SYMLINK+="FlashPro5"
BUS=="usb",SYSFS{idProduct}=="6001",SYSFS{idVendor}=="0403",MODE="0660"\
,GROUP="500",SYMLINK+="FTDI232"
6. Move the "70-microsemi.rules" file to the proper location:
% mv /tmp/70-microsemi.rules /etc/udev/rules.d/
2.10.2 Configure Linux to Detect and Use FlashPro6 Programmer Hardware
Follow the steps below to configure Linux to detect and use FlashPro6 programmer hardware.
Notes: The fp6_env_install script creates two files:
• cysub.conf (located under /etc) – This file contains the list of devices you wish to communicate with CYUSB
suite for Linux. If the file does not exist, the only device will be FlashPro6. Otherwise, the device is appended to
the existing file.
• 88-cyusb.rules (located under /etc/udev/rules.d/) – This file contains the udev rules for programming tools
users to access the device without sudo or root access.
Procedure for sudo users (this is the preferred usage)
1. At the prompt, type sudo -
2. Change directory to /bin (cd /bin)
3. Execute fp6_env_install
– The cyusb.conf file will be created under /etc
– The 88-cyusb.rules file will be created or modified under /etc/udev/rules.d
4. When the script finishes, unplug the FlashPro6 hardware from the Linux server and then plug the hardware
back in. This will enable updates for the correct modules in the system.
Procedure for non-sudo users (when installing FlashPro6 for the first time)
1. Change directory to /bin (cd /bin)
2. Execute fp6_env_install -t /tmp
– The cyusb.conf file is created or modified under /tmp
© 2021 Microchip Technology Inc. User Guide DS00003755B-page 11Libero® SoC v2021.1
Installation
– The 88-cyusb.rules file is created or modified under /tmp
3. Once the files are created, ask a user with sudo access to copy the files.
2.11 Step 10—Create flexlm Initialization Script (Optional)
The Linux boot process allows services to be started with the help of startup scripts. The flexm script automatically
launches the licensing server during the boot process and also properly shuts down the license daemon when the
license server machine shuts down. This script eliminates the need to manually restart the licensing server after the
license server Linux machine reboots.
1. Open a new terminal window by selecting Applications > System Tools > Terminal.
2. At the prompt, type:
% su -
% cd /etc/init.d
3. Start an editor with a new file flexlm.
4. Paste the following content into the editor:
#!/bin/bash #
# flexlm This starts and stops flexlm #
# description: Start or stop the flexlm license manager + vendor daemons #
# Return values according to LSB for all commands:
# 0 - success
# 1 - generic or unspecified error # 2 - invalid or excess argument(s)
# 3 - unimplemented feature (e.g. "reload") # 4 - insufficient privilege
# 5 - program is not installed # 6 - program is not configured # 7 - program
is not running
# #
PATH=/sbin:/bin:/usr/bin:/usr/sbin LICENSE_FILE=/home//flexlm/
License.dat LMGRD_HOME=/home//Linux_Licensing_Daemon
LMGRD_LOGFILE=/tmp/lmgrd.log
prog="flexlm"
# Source function library.
. /etc/init.d/functions # Check license file
test -f $LICENSE_FILE || exit 6 RETVAL=0
start () {
test -x $LMGRD_HOME/lmgrd || exit 5 echo -n $"Starting Microsemi $prog: "
su -c "$LMGRD_HOME/lmgrd -c $LICENSE_FILE -log $LMGRD_LOGFILE" - caeadmin
RETVAL=$?
return $RETVAL
}
stop(){
}
echo -n $"Stopping Microsemi $prog: "
su -c "$LMGRD_HOME/lmutil lmdown -c $LICENSE_FILE -q" - caeadmin RETVAL=$?
return $RETVAL
status(){
su -c "$LMGRD_HOME/lmutil lmstat -c $LICENSE_FILE" - caeadmin RETVAL=$?
return $RETVAL
}
reload(){
stop start
}
restart(){
stop start
}
case "$1" in start)
stop)
start
;;
stop
;;
status)
status
;;
© 2021 Microchip Technology Inc. User Guide DS00003755B-page 12Libero® SoC v2021.1
Installation
restart)
restart
;;
reload|force-reload) reload
;;
*)
esac
echo $"Usage $0 {start|stop|status|restart|reload|force-reload}" RETVAL=3
exit $RETVAL
5. Save the file and exit the editor.
6. Change the permission of the flexlm file to rxwr-xr-x as follows:
# chmod 755 flexlm
7. Create links for the Linux boot/shutdown process under the following runlevels:
# sh
# for i in 1 2 3 5
do
cd /etc/rc.d/rc${i}.d
ln -s ../init.d/flexlm S98flexlm
ln -s ../init.d/flexlm K98flexlm
>done
# for i in 0 6
do
cd /etc/rc.d/rc${i}.d
ln -s ../init.d/flexlm K98flexlm
done
#
8. Check the content of the License Log File /tmp/lmgrd.log file if you encounter any issues.
© 2021 Microchip Technology Inc. User Guide DS00003755B-page 13Libero® SoC v2021.1
Libero SoC Installation Instructions in Ubuntu
3. Libero SoC Installation Instructions in Ubuntu
1. Pre-installation instructions
Install X-windows packages necessary to start up Libero installer:
% sudo dpkg --add-architecture i386; sudo apt update
% sudo apt-get install apt-file; sudo apt update
% sudo apt-get install -y libxext6 libx11-6 libxrender1 libxtst6 libxi6
Set your DISPLAY environment variable:
• Bourne, Bash, or Korn shell:
$ export DISPLAY=localhost:0.0
• C shell
% setenv DISPLAY localhost:0
2. After installing the above packages, go to the directory where Libero SOC installer file is present and bring up
the installer.
% ./Libero_SoC_v12.4.bin
3. Follow installation instructions as installation dialog box will appear on screen.
© 2021 Microchip Technology Inc. User Guide DS00003755B-page 14Libero® SoC v2021.1
Libero SoC Installation Instructions in Ubuntu
© 2021 Microchip Technology Inc. User Guide DS00003755B-page 15Libero® SoC v2021.1
Libero SoC Installation Instructions in Ubuntu
© 2021 Microchip Technology Inc. User Guide DS00003755B-page 16Libero® SoC v2021.1
Libero SoC Installation Instructions in Ubuntu
© 2021 Microchip Technology Inc. User Guide DS00003755B-page 17Libero® SoC v2021.1
Libero SoC Installation Instructions in Ubuntu
© 2021 Microchip Technology Inc. User Guide DS00003755B-page 18Libero® SoC v2021.1
Libero SoC Installation Instructions in Ubuntu
© 2021 Microchip Technology Inc. User Guide DS00003755B-page 19Libero® SoC v2021.1
Libero SoC Installation Instructions in Ubuntu
© 2021 Microchip Technology Inc. User Guide DS00003755B-page 20Libero® SoC v2021.1
Libero SoC Installation Instructions in Ubuntu
© 2021 Microchip Technology Inc. User Guide DS00003755B-page 21Libero® SoC v2021.1
Libero SoC Installation Instructions in Ubuntu
© 2021 Microchip Technology Inc. User Guide DS00003755B-page 22Libero® SoC v2021.1
Libero SoC Installation Instructions in Ubuntu
© 2021 Microchip Technology Inc. User Guide DS00003755B-page 23Libero® SoC v2021.1
Libero SoC Installation Instructions in Ubuntu
4. Install required system packages for Libero SoC v12.4
At the end of Libero installation, the installer will automatically check whether required system packages
are installed. If required packages are missing, the installer will print the commands to install the missing
packages. For example:
apt-get install -y libc6:i386 libdrm2:i386 libexpat1:i386 libfontconfig1:i386
libfreetype6:i386 libglapi-mesa:i386 libglib2.0-0:i386 libgl1:i386
libice6:i386 libsm6:i386 libuuid1:i386 libx11-6:i386 libx11-xcb1:i386
libxau6:i386 libxcb-dri2-0:i386 libxcb-glx0:i386 libxcb1:i386 libxdamage1:i386
libxext6:i386 libxfixes3:i386 libxrender1:i386 libxxf86vm1:i386
apt-get install -y libasound2 libasyncns0 libdbus-1-3 libdrm2 libegl1
libexpat1 libflac8 libfontconfig1 libfreetype6 libgbm1 libglapi-mesa
libglib2.0-0 libgl1 libice6 libnspr4 libnss3 libogg0 libpulse0 libsm6
libsndfile1 libsqlite3-0 libvorbisenc2 libvorbis0a libwrap0 libx11-xcb1 libxcb-
dri2-0 libxcb-glx0 libxcb-render0 libxcb-shape0 libxcb-xfixes0 libxcomposite1
libxcursor1 libxdamage1 libxfixes3 libxslt1.1 libxxf86vm1
apt-get install -y xfonts-100dpi xfonts-75dpi xfonts-base xfonts-intl-asian
xfonts-intl-chinese xfonts-intl-chinese-big xfonts-intl-japanese
xfonts-intl-japanese-big xkb-data ksh libxft2:i386
Run the above commands as root (or with sudo privilege) to install required packages.
5. After installation, go to the directory location where Libero SoC v12.4 is installed,and execute Libero SoC
v12.4.
# cd /Desktop/Libero_SoC_v12.4/bin
# ./libero
© 2021 Microchip Technology Inc. User Guide DS00003755B-page 24Libero® SoC v2021.1
Libero SoC Installation Instructions in Op...
4. Libero SoC Installation Instructions in OpenSUSE
1. Pre-installation instructions
Install X-windows packages necessary to start up Libero installer:
% sudo zypper install libXext6 libX11-6 libXrender1 libXtst6 libXi6 libgtk-2_0-0
tar
Set your DISPLAY environment variable:
• Bourne, Bash, or Korn shell:
$ export DISPLAY=localhost:0.0
• C shell
% setenv DISPLAY localhost:0
2. After installing the above packages, go to the directory where Libero SoC installer file is present and bring up
the installer.
% ./Libero_SoC_v12.5.bin
3. Follow installation instructions as installation dialog box will appear on screen.
© 2021 Microchip Technology Inc. User Guide DS00003755B-page 25Libero® SoC v2021.1
Libero SoC Installation Instructions in Ce...
5. Libero SoC Installation Instructions in CentOS
1. Pre-installation instructions
Set your DISPLAY environment variable:
• Bourne, Bash, or Korn shell:
$ export DISPLAY=localhost:0.0
• C shell
% setenv DISPLAY localhost:0
2. After installing the above packages, go to the directory where Libero SoC installer file is present and bring up
the installer.
% ./Libero_SoC_v12.4.bin
3. Follow installation instructions as installation dialog box will appear on screen.
© 2021 Microchip Technology Inc. User Guide DS00003755B-page 26Libero® SoC v2021.1
Appendix: Warning /Error Messages and Solutions
6. Appendix: Warning /Error Messages and Solutions
Linux users may encounter some or all of the following error messages. The solution for each is described in this
appendix.
• Error: Could not locate the Motif library in LD_LIBRARY_PATH
• Warning: Unknown locale
• Wind/U X-toolkit Error: wuDisplay: Can't open display
• Wind/U Error: Failed to connect to the registry on server
• Wind/U Error: A fatal registry I/O failure has occurred. A registry daemon may not be running.
• Designer GUI Appears Stretched When Running On Linux
• Libero GUI is Distorted on Older Versions of Red Hat 5 Through VNC
• Libero GUI Fails to Start When Pre-loading a Project
• Viewing PDF Files and Online Help Files
• Segmentation fault "$exedir/$exename" "$@" message
• Warning: Failed to contact webRepositories
• JRE libraries are missing or not compatible
• Libero Installer stalled on Red Hat/CentOS 6.x
• Error when Installing Linux Packages
• During Installation Warning Message appears: /tmp does not have enough disk space
• X libraries not in LD_LIBRARY_PATH (Libero)
• Missing libgthread-2.0.so.0 libraries (Libero)
• Missing MOTIF libraries (Libero)
• Missing libncurses.so.5 libraries (ModelSim)
• Missing libXrender libraries
• Missing libfontconfig.sol.1 libraries
• Missing libfreetype.so.6 libraries
• Double Quotes around Vault Location Path on Linux installation
• Script "udev_install" to set up FlashPro fails on Linux
• Starting the License Manager gives Error on Linux
• Libero installation registry file still shows installed directories even though they had been uninstalled
• Missing libXtst library during Libero installation
• Possible errors related to Linux SSSD
6.1 Wind/U Error: Failed to connect to the registry on server
Symptoms: Wind/U Error: Failed to connect to the registry on server [server_name]
Cause: This Error may indicate that there is a Linux security setting that prevents Libero from connecting to the
Wind/U Registry. This connection is typically made using a TCP port.
Solution: Resolve this error by modifying the Linux Security settings. For example, on RHEL5, navigate to the
desktop menu System > Administration > Login Screen > Security Tab and Uncheck the Security Setting Deny
TCP connections to Xserver. After making this change you must restart your computer for the changes to take effect.
Run the actel_wuclean command to clean up any left-over processes. At the command prompt:
% ./actel_wuclean -R -D
6.2 Warning: Unknown locale
Symptoms: Warning (241): Unknown locale specified locale:en_US.iso885915 LANGUAGE: UNDEFINED
SUBLANGUAGE: Wind/U Warning (241): Unknown locale specified locale: en_US.iso885915
LANGUAGE:UNDEFINED SUBLANGUAGE:
© 2021 Microchip Technology Inc. User Guide DS00003755B-page 27Libero® SoC v2021.1
Appendix: Warning /Error Messages and Solutions
The four tabs on the lower left of the GUI are also displayed incorrectly.
Cause: This is caused by incorrect language setting on the Operating System.
Solution: Set the locale [elcap] with the following command:
% setenv LANG en_US
Note: If you experience this problem often, add the above command to your shell setup (such as .cshrc or .bashc)
file.
6.3 Warning: Failed to contact web Repositories
The warning message "Failed to contact Web Repositories" appears in the Libero catalog window if any one of the
following conditions is true:
• You do not have a connection to the Internet.
• You do not have write permission to the disk location you have set your vault to.
• Your vault location runs out of disk space. (For the Linux environment, Libero's vault location is set by default to
your user directory in ~/.actel/vault. If your work site imposes quota restrictions on the size of user directories,
you user directory may run out of disk space).
• A firewall prevents access to the Web Repositories.
To correct the problem:
4.1. Check that you have an Internet connection.
4.2. Check that you have write permission to the vault location or change your vault location setting to a
location that you have write permission (Project > Vault/Repositories Settings > Vault location).
4.3. Increase the disk space for the vault location to a minimum of 850 MB.
4.4. Contact your IT department about the firewall issue.
6.4 Error: Could not Locate the Motif Library in LD_LIBRARY_PATH
Cause: Libero uses Motif Graphical Toolkit Library for its Graphical Interface on Linux. RHEL OS installation may not
include a Motif Library.
Solution: If you have the Motif Library Installed, there should be an Environment Variable called LD_LIBRARY_PATH
that points to the location of the Motif Library. Ensure that the path of the Motif Library is contained in the
LD_LIBRARY_PATH Environment Variable. You can add the path with the command:
set LD_LIBRARY_PATH = ( $LD_LIBRARY_PATH)
If you are not sure whether you have the Motif Library Installed, try the following commands: The command "rpm -qa |
grep -i motif" lists which Motif Library is installed.
The command "rpm -qal | grep -i motif" lists the files and paths associated with the motif library listed
above (notice the extra "l" in the second command).
If you do not have a Motif Library Installed, consider downloading and installing OPEN Motif for free from http://
www.openmotif.org/.
Libero Linux tools expect to see the libXm.so.3 package of the Motif Library. Different versions of OPEN Motif could
potentially install libXm.so.4 or others that are not compatible with Libero. Ensure that the version of OPEN Motif
used installs libXm.so.3. One example version that provides libXm.so.3 is openmotif v2.2.3. As Libero is a 32-bit
application, the 32-bit Motif Library must be used even if the computer is running a 64-bit Operating System.
6.5 Wind/U X-toolkit Error: wuDisplay: Can't open display
Set the $DISPLAY environment variable to:0 using the command:
setenv DISPLAY :0
Then run the command:
© 2021 Microchip Technology Inc. User Guide DS00003755B-page 28Libero® SoC v2021.1
Appendix: Warning /Error Messages and Solutions
/Libero/bin/actel_wuclean -R to clean up any processes
left over from the first invocation of Libero
6.6 Wind/U Error: A fatal registry I/O failure has occurred
Symptoms: Wind/U Error (251): Function RegPingDaemon - A fatal registry I/O failure has occurred. A registry
daemon may not be running. Restart your application and verify that a registry daemon is running:
Wind/U Error (251): Function RegOpenKeyExA - A fatal registry I/O failure has
occurred. A registry daemon may not be running. Restart your application and verify
that a registry daemon is running.
Solution/Workaround: Run the 'actel_wuclean' utility found in the bin folder. Use the '-R' option as follows:
.../bin/actel_wuclean -R
The following messages may appear:
Shutting down Actel applications.
All actgen_bin processes are shut down.
All smartgen_bin processes are shut down.
All expert_bin processes are shut down.
All mvn_bin processes are shut down.
All libero_bin processes are shut down.
Shutting down Wind/U daemons...
All windu_scmd processes are shut down.
All windu_serviced processes are shut down.
All windu_registryd processes are shut down.
Removing Wind/U temporary files from the temporary directories...
Removing cached Wind/U files from the home directory...
Done
The actel_wuclean utility shuts down any Microsemi tools running on the same host by the same user. Save any work
you may have before invoking actel_wuclean.
6.7 Segmentation fault "$exedir/$exename" "$@" message
Scenario 1: When trying to invoke Libero SoC 10.1 on Linux Red Hat 5.4 (32bit or 64-bit), Libero may crash with
segmentation fault message
Description: When you invoke Libero SoC v10.1 on Linux Red Hat 5.4 machine, Libero does not come up and a
crash with segmentation fault message is issued. For example:
Solution/Workaround: The templates file at /data/catalogs/ templates.xml may get
corrupted and cause the crash. To resolve this issue, rename the file at
/data/catalogs/templates.xml to templates.xml.ori. Make
sure that there is enough disk space in the user's home directory, ~.
Run the "check_linux_req" script to make sure that all required packages have been installed on the system.
Scenario 2: Multiview Navigator errors are reported upon opening the Constraints Editor.
Description: The following messages are displayed on the Linux terminal when the Floorplan Constraints Editor is
opened:
Start Server 1
Start Server 2
Failed to open Def Table: 9 Failed to open Def Table: 8 Failed to open Def Table: 12
Running in orphan mode!
© 2021 Microchip Technology Inc. User Guide DS00003755B-page 29Libero® SoC v2021.1
Appendix: Warning /Error Messages and Solutions
The following message appears on exiting MVN and a core file is created: …/bin/mvn: line 69: 1675
Segmentation fault (core dumped) "$exedir/../lib/$exename" "$@"
Solution/Workaround: These errors can be ignored.
6.8 Designer GUI Appears Stretched When Running On Linux
® ® ®
Note: Designer is for IGLOO , SmartFusion , Fusion, and ProASIC3 devices only.
Scenario: Log onto a Linux machine, then run Designer software.
Symptoms: Some of the GUIs appear stretched.
Description: Some Designer GUIs appear stretched on Linux when directly logged into the machine. This is due to
issues with mismatched color depths on the GUI and desktop.
Solution/Workaround: Change the desktop color depth to resolve the issue. For Linux access via VNC, change the
color depth of the vncserver to 8, 16 or 24. See the vncserver manual pages for details.
6.9 Libero GUI is Distorted on Older Versions of Red Hat 5 Through VNC
Scenario: The Libero GUI may appear distorted when VNC is used with Linux Red Hat versions older than 5.3.
Description: When using VNC and Linux RH 5.2 or older, Libero GUI, fonts and background colors may appear
slightly faded or fuzzy. This issue is not unique to Libero but affects all Qt based software including Synplify Pro. The
problem is caused by the VNC server (Xvnc) not loading Xrender by default in these older versions of RHEL 5.
Note: There should be no issue when using Linux RHEL 5 (Tikanga) 5.3 to 5.75 (32-bit and 64-bit).
Workaround/ Solution:
When using RHEL 5.2 (and older) with VNC:
• Microchip has tested and recommends using Exceed 11, if possible. This version of Exceed is still on the
support list at OpenText.
Or
• Upgrade to a newer version of VNC server (Xvnc) that enables Xrender by default. One version that has
been tested is Tiger (an open source vncserver that is available from http://sourceforge.net/projects/tigervnc/
files/tigervnc/) VNC v1.2.0 instead of the default VNC server on RHEL 5.2.
6.10 Libero GUI Fails to Start When Pre-loading a Project
Scenario: Your most recent project file may have been corrupted and causes Libero to crash trying to open the
corrupted project file.
Solution: To change your user settings to prevent Libero from automatically opening your last project when it
invokes:
1. Open ~/.actel/libero.def.
2. Add the following line to the file: data IDE_OPEN_MRU_PROJECT 0.
3. Start Libero using /bin/Libero.
6.11 Viewing PDF Files and Online Help Files
To view online Help files and PDF files, you may need to set environment variables LINUX_HTMLREADER to the full
path of your web browser in your terminal before invoking Libero. For example:
csh (C-shell):
setenv LINUX_HTMLREADER /usr/bin/firefox
sh (Borne Shell)/ ksh (Korn Shell):
© 2021 Microchip Technology Inc. User Guide DS00003755B-page 30Libero® SoC v2021.1
Appendix: Warning /Error Messages and Solutions
LINUX_HTMLREADER=/usr/bin/firefox; export LINUX_HTMLREADER
If you do not set the environment variable, some HTML files (such as the online help) will not be viewable from within
Libero.
6.12 JRE libraries are missing or not compatible
This is a Libero Installer Error message.
Description: The Installer script requires some Java Libraries to run and the libraries are missing.
Solution:
1. Go to the following Java Download website and install the missing Java libraries:
http://www.java.com/en/download/manual.jsp#lin
2. To download the 32-bit version, select "Linux RPM". The Instructions on how to install the RPM are under
"Instructions" link located to the right of the "Linux RPM" link.
3. To download the 64-bit version, select "Linux x64 RPM". The Instructions on how to install the RPM are under
"Instructions" link located to the right of the "Linux x64 RPM" link.
Figure 6-1. Java Download Website
Note: Alternatively, you may install the latest OpenJDK JRE as follows:
% su
% yum install java
4. If the installer still fails and you are using CentOS 6, run the installer as follows:
LiberoSoc_vLinux_bin LAX_VM /java.exe This forces the Libero Linux
Installer to use the Java executable in the specified path.
6.13 Libero Installer stalled on Red Hat/CentOS 6.x
Description: Installation starts but then stalls half-way through installation when installing Libero on Red Hat/CentOS
6.x machines. In the System Monitor, the Waiting Channel of the process is futex_wait_queue_me.
Solution: Update the system kernel to version 2.6.32-504.16.2.el6.x86_64
6.14 Error when Installing Linux Packages
Description: Error Message while installing Linux packages: Protected multilib versions ……
Cause: There is package incompatibility between i686 (32-bit) and x86_64 (64-bit) packages when 32-bit Linux
packages are installed.
Solution: First upgrade the packages to 64-bit and then install the 32-bit package, e.g., for the gtk2 package, the
commands are:
% sudo yum upgrade gtk2
% sudo yum install gtk2.i686
© 2021 Microchip Technology Inc. User Guide DS00003755B-page 31Libero® SoC v2021.1
Appendix: Warning /Error Messages and Solutions
6.15 During Installation Warning Message appears: /tmp does not have enough disk
space
Cause: The Installer runs out of disk space in /tmp and tries to use /home/user instead, which also has less disk
space than required.
Solution: At the Linux prompt, set the environment variable IATEMPDIR to a disk location with enough disk space as
follows:
• For Borne Shell (sh), Korn Shell (ksh), bash and zsh users:
% IATEMPDIR=/your/free/space/directory
% export IATEMPDIR
• For C-shell (csh) and tcsh users:
setenv IATEMPDIR= /your/free/space directory
6.16 X libraries not in LD_LIBRARY_PATH (Libero)
Description: Libero has a dependency on the X Libraries but cannot find it.
Solution: Install libXft package:
% sudo yum install libXft.i686
6.17 Missing libgthread-2.0.so.0 libraries (Libero)
Description: Libero has a dependency on the glib2 Libraries but cannot find it.
Solution: Install glib2 package:
% sudo yum install glib2.i686
Note: If the yum install command errors out because of a version conflict with x86_64 version already installed, use
the yum update command instead:
% sudo yum update glib2
6.18 Missing MOTIF libraries (Libero)
Description: Libero has a dependency on the MOTIF libraries but cannot find them.
Solution: Install the MOTIF libraries:
% sudo yum install openmotif (for CentOS 5/RedHat)
% sudo yum install openmotif22 (for CentOS 6/RedHat)
% sudo yum install motif (for CentOS7/RedHat 7)
6.19 Missing libncurses.so.5 libraries (ModelSim)
Description: ModelSim Simulator has a dependency on the libncurses.so.5 libraries but cannot find them.
Solution: Install the current package version of ncurses libraries:
% sudo yum install ncurses-libs.i686
6.20 Missing libXrender libraries
Description: Libero has a dependency for libXrender libraries but cannot find them.
Solution: Install the current libXrender libraries:
© 2021 Microchip Technology Inc. User Guide DS00003755B-page 32Libero® SoC v2021.1
Appendix: Warning /Error Messages and Solutions
% sudo yum install libXrender.i686
6.21 Missing libfontconfig.sol.1 libraries
Description: Libero has a dependency for libfontconfig libraries but cannot find them.
Solution: Install the libfontconfig libraries:
% sudo yum install fontconfig-2.8.0-3.el6.i686 (for Red Hat)
% sudo yum install fontconfig-2.8.0-5.el6.i686 (for CentOS)
6.22 Missing libfreetype.so.6 libraries
Description: Libero has a dependency for libfreetype libraries but cannot find them.
Solution: Install the current freetype libraries:
% sudo yum install freetype-2.3.11-14.el6_3.1.i686
6.23 Missing libpng.so.6 libraries
Description: Libero v12.2 and earlier requires the installation of libpng12.x86_64 system package.
Solution: Install libpng12.x86_64 library:
% sudo yum install libpng12.x86_64
6.24 Double Quotes around Vault Location Path on Linux Installation
Symptom: After console mode installation on Linux, the vault location displayed under Project > vault/ repositories
setting shows /bin "/vault." The double quotes around the vault path
location should be removed.
Problem: The install.def file has double quotes around the variable for the vault location.
Workaround: Exit Libero, update the install.def file, and restart Libero.
1. Exit Libero.
2. At the Linux shell prompt, go to /data directory:
% cd /data
3. At the Linux shell prompt, apply the sed command to remove the double quotes in the install.def file:
% sed 's/"//g' install.def > tmp.def
% cp tmp.def install.def
% rm tmp.def
4. Restart Libero to check that the double quotes around the vault location path are removed.
6.25 Script "udev_install" to set up FlashPro fails on Linux
Symptom: When running the "udev_install" script to set up FlashPro on Linux, the script fails with error message:
% ./udev_install
/bin/sh^M: bad interpreter: No such file or directory
Problem: The script uses Windows CR/LF line termination instead of Unix/Linux LF only line termination and, as
such, is not a valid shell script for Linux.
Workaround: Users must run dos2unix command on the script "udev_install" to convert Windows CR/ LF line
termination to Linux LF only line termination and run the script again. At the Linux shell prompt:
© 2021 Microchip Technology Inc. User Guide DS00003755B-page 33Libero® SoC v2021.1
Appendix: Warning /Error Messages and Solutions
% dos2unix udev_install
% ./udev_install
Note: If dos2unix is not available, run the following command to install dos2unix, then run dos2unix:
% sudo yum install dos2unix
6.26 Starting the License Manager gives Error on Linux
Symptom: When running lmgrd to start the License Manager on Linux, the system gives this error message:
12:39:28 (actlmgrd) Vendor daemon can't talk to lmgrd (License server machine is down
or not responding. (-96,7:2 "No such file or directory"))
12:39:28 (actlmgrd) EXITING DUE TO SIGNAL 37 Exit reason 5
Problem: The host is not recognized due to a problem in the /etc/hosts file on the Linux system.
Solution:
1. At the Linux prompt, edit the /etc/hosts file and add the following lines:
# IP address Hostname Alias
127.0.0.1 localhost
Note: is the name of the Linux system.
2. Restart lmgrd.
6.27 Missing libXtst library during Libero installation
Symptom: Libero installer crashes with the following message:
Invocation of this Java Application has caused an InvocationTargetException. This
application will now exit. (LAX)
Stack Trace: java.lang.UnsatisfiedLinkError:
/tmp/install.dir.8046/Linux/resource/jre/lib/i386/xawt/libmawt.so: libXtst.so.6:
cannot open shared object file: No such file or directory
Problem: libXtst system library is missing.
Solution: Install libXtst.i686 library:
% sudo yum install libXtst.i686
Note: This issue exists only for Libero SoC v12.0, v12.1, and v12.2.
6.28 Libero installation registry file still shows installed directories even though they
had been uninstalled
Symptom: Libero installer dialog still shows existing installation instances even though such instances had been
uninstalled.
Problem: Libero installer keeps installation instances in its registry file kept at the user home location by the name
‘.com.zerog.registry.xml’. After the uninstallation of each instance, the instance properties lines in the registry file do
not get deleted as expected. Upon subsequent installation, the installer shows the previous installations as existed.
Workaround: Users must manually remove the installation properties lines in the registry file.
Example of the registry file:
© 2021 Microchip Technology Inc. User Guide DS00003755B-page 34Libero® SoC v2021.1
Appendix: Warning /Error Messages and Solutions
…..
Carefully remove the above lines from the registry file. Save and exit. Restart Libero installer. The previous
installation will not show up again.
6.29 Possible errors related to Linux SSSD
Description: Customers on RHEL/CentOS 6.8 or higher and who use System Security Services Daemon (SSSD) for
authentication should install system package sssd-client.i686. Further information is available here:
https://access.redhat.com/documentation/en-us/red_hat_enterprise_linux/6/html/deployment_guide/SSSD-
Troubleshooting#idm139666065990896
Problem: If you configure SSSD for central authentication, several applications, such as Firefox or Adobe, might not
start.
Workaround: Even on 64-bit systems, 32-bit applications require a 32-bit version of SSSD to use to access the
password and identity cache. If a 32-bit version of SSSD is not available, but the system is configured to use the
SSSD cache, then 32-bit applications can fail to start.
Recommended Action:
% sudo yum install sssd-client.i686
For example, customers may see the following errors when running Designer:
Wind/U Error (251): Function RegPingDaemon - A fatal registry I/O failure has
occurred. A registry daemon may not be running. Restart your application and verify
that a registry daemon is running.
Wind/U Error (251): Function RegOpenKeyExA - A fatal registry I/O failure has
occurred. A registry daemon may not be running. Restart your application and verify
that a registry daemon is running.
© 2021 Microchip Technology Inc. User Guide DS00003755B-page 35You can also read