Solar Datatechnology SUNNY BEAM
←
→
Page content transcription
If your browser does not render page correctly, please read the page content below
Solar Datatechnology
SUNNY BEAM
User Manual

SBeam-12-NE1606 | TBE-SBEAM | Version 2.2   EN
SMA Solar Technology AG                                                                                       Table of Contents

Table of Contents
1             Notes on Using these Instructions. . . . . . . . . . . . . . . . . . . .                                        7
1.1           Target Group . . . . . . . . . . . . . . . . . . . . . . . . . . . . . . . . . . . . . . .                      7
1.2           Validity . . . . . . . . . . . . . . . . . . . . . . . . . . . . . . . . . . . . . . . . . . . .                7
1.3           Symbols used . . . . . . . . . . . . . . . . . . . . . . . . . . . . . . . . . . . . . . .                      7
2             Sunny Beam . . . . . . . . . . . . . . . . . . . . . . . . . . . . . . . . . . . . . 8
2.1           Applications . . . . . . . . . . . . . . . . . . . . . . . . . . . . . . . . . . . . . . . . 8
2.2           Functions. . . . . . . . . . . . . . . . . . . . . . . . . . . . . . . . . . . . . . . . . . . 9
2.3           Scope of Delivery. . . . . . . . . . . . . . . . . . . . . . . . . . . . . . . . . . . 10
2.4           Accessories. . . . . . . . . . . . . . . . . . . . . . . . . . . . . . . . . . . . . . . . 11
2.5           Identifying the Sunny Beam . . . . . . . . . . . . . . . . . . . . . . . . . . . 12
2.5.1         Type Plate . . . . . . . . . . . . . . . . . . . . . . . . . . . . . . . . . . . . . . . . . . . . . . . . . . . 12
2.5.2         Firmware Version . . . . . . . . . . . . . . . . . . . . . . . . . . . . . . . . . . . . . . . . . . . . . 12

3             Safety Instructions . . . . . . . . . . . . . . . . . . . . . . . . . . . . . . . 13
4             Mounting the Sunny Beam . . . . . . . . . . . . . . . . . . . . . . . . 14
4.1           Tabletop Device . . . . . . . . . . . . . . . . . . . . . . . . . . . . . . . . . . . . 14
4.2           Wall Mounting . . . . . . . . . . . . . . . . . . . . . . . . . . . . . . . . . . . . . 14
5             Installing a Radio Piggy-Back in an Inverter . . . . . . . . . . 16
5.1           Ways of Installation . . . . . . . . . . . . . . . . . . . . . . . . . . . . . . . . . 16
5.1.1         Installation(A): Radio Piggy-Back and Antenna . . . . . . . . . . . . . . . . . . . . . . 17
5.1.2         Installation(B): Radio Piggy-Back and Antenna . . . . . . . . . . . . . . . . . . . . . . 19
5.1.3         Installation(C): Antenna, Piggy-Back ex Factory . . . . . . . . . . . . . . . . . . . . . 21
5.2           DIP Switch Setting on the Radio Piggy-Back . . . . . . . . . . . . . . 22
5.3           Installation of the external Antenna Kit . . . . . . . . . . . . . . . . . . 23
5.3.1         Retrofitting for initial Situation (A). . . . . . . . . . . . . . . . . . . . . . . . . . . . . . . . . 25
5.3.2         Retrofitting for initial Situation (B) . . . . . . . . . . . . . . . . . . . . . . . . . . . . . . . . . 29
5.3.3         Installation for initial Situation (C) . . . . . . . . . . . . . . . . . . . . . . . . . . . . . . . . 31

User Manual                                                                                SBeam-12-NE1606                     3
Table of Contents                                                                                      SMA Solar Technology AG

5.4            Basic Information on Radio Transfer . . . . . . . . . . . . . . . . . . . . 33
5.4.1          Antenna on Inverter . . . . . . . . . . . . . . . . . . . . . . . . . . . . . . . . . . . . . . . . . . . 34
5.4.2          External Antenna Kit . . . . . . . . . . . . . . . . . . . . . . . . . . . . . . . . . . . . . . . . . . . 35

6              Operating the Sunny Beam. . . . . . . . . . . . . . . . . . . . . . . . 37
6.1            Inserting the Batteries . . . . . . . . . . . . . . . . . . . . . . . . . . . . . . . . 37
6.2            Initial Startup . . . . . . . . . . . . . . . . . . . . . . . . . . . . . . . . . . . . . . 38
6.2.1          The Rotating Push Button . . . . . . . . . . . . . . . . . . . . . . . . . . . . . . . . . . . . . . . 38
6.2.2          Initial Settings . . . . . . . . . . . . . . . . . . . . . . . . . . . . . . . . . . . . . . . . . . . . . . . . 38
6.3            The display Elements . . . . . . . . . . . . . . . . . . . . . . . . . . . . . . . . 40
6.3.1          Menu View . . . . . . . . . . . . . . . . . . . . . . . . . . . . . . . . . . . . . . . . . . . . . . . . . .        40
6.3.2          Normal View . . . . . . . . . . . . . . . . . . . . . . . . . . . . . . . . . . . . . . . . . . . . . . . .          41
6.3.3          Graph Area . . . . . . . . . . . . . . . . . . . . . . . . . . . . . . . . . . . . . . . . . . . . . . . . .         42
6.3.4          Status Bar . . . . . . . . . . . . . . . . . . . . . . . . . . . . . . . . . . . . . . . . . . . . . . . . . . .     43
6.3.5          Output Indicator . . . . . . . . . . . . . . . . . . . . . . . . . . . . . . . . . . . . . . . . . . . . . .         43
6.3.6          Battery Symbol/Charging the Batteries . . . . . . . . . . . . . . . . . . . . . . . . . . . .                        44
6.3.7          USB Symbol . . . . . . . . . . . . . . . . . . . . . . . . . . . . . . . . . . . . . . . . . . . . . . . . .         45
6.4            Sunny Beam Basic Settings . . . . . . . . . . . . . . . . . . . . . . . . . . . 45
6.4.1          Setting the Contrast . . . . . . . . . . . . . . . . . . . . . . . . . . . . . . . . . . . . . . . . . . .           45
6.4.2          Setting the Language . . . . . . . . . . . . . . . . . . . . . . . . . . . . . . . . . . . . . . . . . .             45
6.4.3          Setting the Date and Time . . . . . . . . . . . . . . . . . . . . . . . . . . . . . . . . . . . . . .                46
6.4.4          Energy Saving Options . . . . . . . . . . . . . . . . . . . . . . . . . . . . . . . . . . . . . . . .                47
6.4.5          Adjusting the Energy Meter in the Sunny Beam. . . . . . . . . . . . . . . . . . . . . .                              48
6.5            Setting the Status Bar . . . . . . . . . . . . . . . . . . . . . . . . . . . . . . . . 49
6.5.1          Adding Information to the Status Bar . . . . . . . . . . . . . . . . . . . . . . . . . . . . . .                     49
6.5.2          Changing the Data Change Frequency . . . . . . . . . . . . . . . . . . . . . . . . . . . .                           49
6.5.3          History. . . . . . . . . . . . . . . . . . . . . . . . . . . . . . . . . . . . . . . . . . . . . . . . . . . . . .   50
6.5.4          Setting Factors . . . . . . . . . . . . . . . . . . . . . . . . . . . . . . . . . . . . . . . . . . . . . . .        50
6.6            Service Settings . . . . . . . . . . . . . . . . . . . . . . . . . . . . . . . . . . . . 51
6.6.1          Setting a Group for the Sunny Beam . . . . . . . . . . . . . . . . . . . . . . . . . . . . . .                       51
6.6.2          Detecting and Selecting Inverters. . . . . . . . . . . . . . . . . . . . . . . . . . . . . . . . .                   52
6.6.3          Setting the Data Request Frequency . . . . . . . . . . . . . . . . . . . . . . . . . . . . . .                       53
6.6.4          Signal Strength of the Registered Inverters . . . . . . . . . . . . . . . . . . . . . . . . .                        53
6.6.5          Calling up the Communication Quality . . . . . . . . . . . . . . . . . . . . . . . . . . . .                         54

4              SBeam-12-NE1606                                                                                          User Manual
SMA Solar Technology AG                                                                                     Table of Contents

6.6.6         Calling up the exact Battery Level . . . . . . . . . . . . . . . . . . . . . . . . . . . . . . . .           54
6.6.7         Transmitting Power . . . . . . . . . . . . . . . . . . . . . . . . . . . . . . . . . . . . . . . . . . . .   55
6.6.8         Calling up the Firmware Versions . . . . . . . . . . . . . . . . . . . . . . . . . . . . . . . .             55
6.6.9         Resetting the Sunny Beam . . . . . . . . . . . . . . . . . . . . . . . . . . . . . . . . . . . . . .         56

7             Connecting the Device to the PC . . . . . . . . . . . . . . . . . . . . 57
7.1           Detecting Sunny Beam with Sunny Data Control . . . . . . . . . . 57
7.1.1         Installing the USB Driver. . . . . . . . . . . . . . . . . . . . . . . . . . . . . . . . . . . . . . . . 58
7.1.2         installing Sunny Data Control. . . . . . . . . . . . . . . . . . . . . . . . . . . . . . . . . . . . 59
7.1.3         Setting up Sunny Data Control. . . . . . . . . . . . . . . . . . . . . . . . . . . . . . . . . . . 59
7.2           Parameterizing the Inverters. . . . . . . . . . . . . . . . . . . . . . . . . . . 60
7.3           Updating the Firmware . . . . . . . . . . . . . . . . . . . . . . . . . . . . . . 61
8             Troubleshooting/Problem Solving . . . . . . . . . . . . . . . . . . 63
8.1           Radio Connection. . . . . . . . . . . . . . . . . . . . . . . . . . . . . . . . . . . 63
8.1.1         Compare the Group Setting. . . . . . . . . . . . . . . . . . . . . . . . . . . . . . . . . . . . .           64
8.1.2         Checking Radio Contact . . . . . . . . . . . . . . . . . . . . . . . . . . . . . . . . . . . . . . .         64
8.1.3         Checking Antenna Alignment and Position . . . . . . . . . . . . . . . . . . . . . . . . .                    65
8.1.4         Checking Antenna Attachment. . . . . . . . . . . . . . . . . . . . . . . . . . . . . . . . . . .             65
8.1.5         Checking Installation of Radio Piggy-Back . . . . . . . . . . . . . . . . . . . . . . . . .                  65
8.1.6         Checking the Grounding of the Inverter. . . . . . . . . . . . . . . . . . . . . . . . . . . .                66
8.2           Hatched Surfaces . . . . . . . . . . . . . . . . . . . . . . . . . . . . . . . . . . . 66
8.3           The Display switches off completely . . . . . . . . . . . . . . . . . . . . 66
8.4           The "P" in the "Power" Indicator flashes . . . . . . . . . . . . . . . . . . 67
8.5           Interruption during Firmware Update . . . . . . . . . . . . . . . . . . . 67
8.6           Error Messages in the Status Bar . . . . . . . . . . . . . . . . . . . . . . . 67
9             Maintenance and Cleaning . . . . . . . . . . . . . . . . . . . . . . . . 68
9.1           Replacing the Batteries. . . . . . . . . . . . . . . . . . . . . . . . . . . . . . . 68
9.2           Cleaning . . . . . . . . . . . . . . . . . . . . . . . . . . . . . . . . . . . . . . . . . . 68

User Manual                                                                              SBeam-12-NE1606                    5
Table of Contents                                                                                   SMA Solar Technology AG

10             Disposal . . . . . . . . . . . . . . . . . . . . . . . . . . . . . . . . . . . . . . . 69
10.1           Decomissioning . . . . . . . . . . . . . . . . . . . . . . . . . . . . . . . . . . . . 69
10.2           Notes on Disposal . . . . . . . . . . . . . . . . . . . . . . . . . . . . . . . . . . 69
10.2.1         Batteries . . . . . . . . . . . . . . . . . . . . . . . . . . . . . . . . . . . . . . . . . . . . . . . . . . . . 69
10.2.2         Sunny Beam . . . . . . . . . . . . . . . . . . . . . . . . . . . . . . . . . . . . . . . . . . . . . . . . . 69
10.3           Packaging for Shipment . . . . . . . . . . . . . . . . . . . . . . . . . . . . . . 69
11             Technical Data . . . . . . . . . . . . . . . . . . . . . . . . . . . . . . . . . . 70
11.1           Sunny Beam . . . . . . . . . . . . . . . . . . . . . . . . . . . . . . . . . . . . . . . 70
11.2           Radio Piggy-Back . . . . . . . . . . . . . . . . . . . . . . . . . . . . . . . . . . . 70
12             Contact . . . . . . . . . . . . . . . . . . . . . . . . . . . . . . . . . . . . . . . . 71
12.1           Suggested Improvements . . . . . . . . . . . . . . . . . . . . . . . . . . . . . 71

6              SBeam-12-NE1606                                                                                       User Manual
SMA Solar Technology AG                                                    Notes on Using these Instructions

1 Notes on Using these Instructions
1.1 Target Group
This documentation is intended for installers and users. It includes a description of the system and
instructions for the commissioning and operation of the device. Some of the activities described in
this document may only be performed by qualified electricians. They are marked with a danger
notice.

1.2 Validity
This operating manual for the Sunny Beam applies from Sunny Beam firmware version 2.17EU. You
can call up thefirmware version as described in chapter “Calling up the Firmware Versions" on
page 55.

1.3 Symbols used
In order to ensure optimal use of these instructions, please note the following explanation of symbols
used.

          DANGER!

          „DANGER“ indicates a hazardous situation which, if not avoided, will result in death or
          serious injury.

          NOTICE!

          „NOTICE“ indicates a situation that can result in property damage if not avoided.

          Information

          Information provides tips that are valuable for the optimal installation and operation of
          your product.

User Manual                                                              SBeam-12-NE1606                   7
Sunny Beam SMA Solar Technology AG
2 Sunny Beam
2.1 Applications
The Sunny Beam allows you to monitor up to four inverters in your photovoltaic system. All the
inverters must be equipped with a Radio Piggy-Back. The Sunny Beam collects the data wirelessly
from the inverters and shows it on the Sunny Beam display.
The Sunny Beam also allows you to store the recorded data long-term using a PC and the SMA
Sunny Data Control software and to send it to the Sunny Portal in the internet.
Internet
USB
PC with Sunny Data Control
The Sunny Beam can be used wirelessly almost everywhere as a tabletop or wall-mounted unit.
Power is supplied via the enclosed AccuCell AC 1800 batteries, which are recharged via the
integrated solar cell.
8 SBeam-12-NE1606 User ManualSMA Solar Technology AG Sunny Beam
2.2 Functions
The device can be connected to the inverters via:
• Wireless (radio) (up to approx. 100 m in the open air, up to approx. 30 m in buildings, max.
4 inverters)
Supported inverters:
• All Sunny Boys type SB
• All Sunny Boys type SWR
- except SWR 1100 (no "E"), SWR 1700 (no "E"), SWR 1600
- SWR 1500 and SWR 2000 require the SBEAMPB-ISO-NR intermediate adapter
• All Sunny Mini Central
The device can be connected to the PC via:
• USB (max. 2 m)
System data displayed via:
• Integrated display in Sunny Beam
• Sunny Portal (via Sunny Data Control and connected PC)
Sunny Beam installation site requirements:
• Protect the Sunny Beam from dust, wet conditions and aggressive substances.
• The ambient temperature must be between 0 °C and +40 °C.
• The Sunny Beam is not suitable for outdoor installation.
• Select a sunlit location in the house, so that the batteries can be charged via the integrated
solar cell of the Sunny Beam.
User Manual SBeam-12-NE1606 9Sunny Beam SMA Solar Technology AG
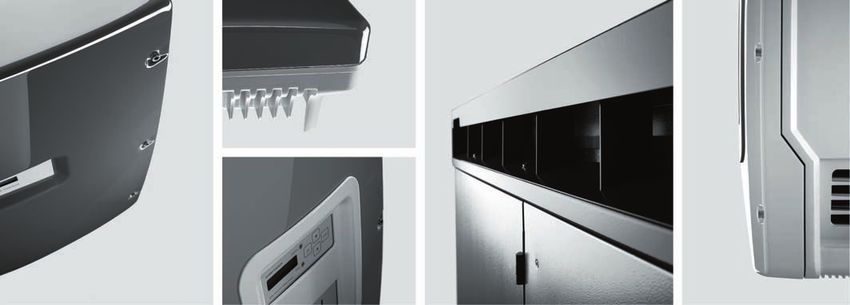
2.3 Scope of Delivery
B
A
E
C
D
F G
I K
L
H H H
J J
A Sunny Beam
B 2 AccuCell AC 1800 type rechargeable batteries (rechargeable only in the Sunny Beam!)
C USB connecting cable
D Software CD
E Wall bracket for Sunny Beam
F Service sheet (fax answer)
G Technical documentation
Scope of delivery in dotted box:
The number of parts in the dotted box depends on your order. The parts in either dotted box A, B
or C will be delivered.
The scope of delivery in dotted box C will be delivered if the Radio Piggy-Back comes from the
factory built in and is contained in your inverter.
H Radio antenna
I Grooved antenna screw fittings (PG13.5 and PG16 with an adapter)
J Radio Piggy-Back
K PG 16 grooved antenna screw fittings
L Sealing
10 SBeam-12-NE1606 User ManualSMA Solar Technology AG Sunny Beam
2.4 Accessories
• USB power supply unit
SMA order number: SBEAM-NT
• External antenna kit
SMA order number: BEAM-AW15 (with 1.5 m antenna extension cable)
SMA order number BEAM-AW100 (with 10 m antenna extension cable)
• Intermediate adapter for Radio Piggy-Back on SWR 1500 and SWR 2000
SMA order number: SBEAMPB-ISO-NR
• Radio Piggy-BackRadio Piggy-Back retrofit it
SMA order number: BEAMPB-NR
• Spare batteries (AccuCell AC 1800)
SMA order number: SBEAM-BAT
User Manual SBeam-12-NE1606 11Sunny Beam SMA Solar Technology AG
2.5 Identifying the Sunny Beam
2.5.1 Type Plate
You can identify the Sunny Beam using the type plate
(see figure at right). The type plate is located on the
underside of the Sunny Beam.
2.5.2 Firmware Version
You can call up the firmware version of your Sunny Beam and the Radio Piggy-Back via the menu
in the registered inverters.
1. Select "SETUP" in the main menu.
2. Select "SERVICE".
3. Select "DIAGNOSTICS". This allows you to view the firmware version of your Sunny Beam
in the first line below the menu heading. Firmware version SBeam V2.17EU is shown in the
figure below. The firmware versions of the Radio Piggy-Backs (PB=Piggy-Back) in the
registered inverters are listed below this.
DIAGNOSTICS
Sunny Beam firmware SBeam V2.17EU firmware
1.PB V:2.10 2.PB V:2.04
Radio Piggy-Backs firmware 3.PB V:0.00 4.PB V:0.00
DEVICE S LS LR
.67890: 204 0 0 100%
.67891: 204 0 0 100%
3.07V
Before you can call up the firmware version in the menu, you must make initial settings as
described in chapter “Initial Settings" on page 38.
12 SBeam-12-NE1606 User ManualSMA Solar Technology AG Safety Instructions
3 Safety Instructions
Please follow all operating and safety instructions in this manual. Failure to do so could result in
damage to the device and cause personal injury.
DANGER!
• All work on the inverters may only be performed by qualified electricians! Please
follow all safety instructions contained in the inverter documentation!
DANGER!
• You can change the safety-related inverter parameters of your PV system using the
Sunny Beam. Such parameters may only be changed after consulting with your
electricity supply company.
The Sunny Beam may only be opened by qualified SMA staff. This does not apply to
battery changes.
Operating instructions
Our Sunny Boy Service Hotline is available for questions on details not covered in this
manual. See chapter “Contact" on page 71.
Data collected by the Sunny Beam regarding the power generated by your solar system
can deviate from the electricity meter. The Sunny Beam data cannot be used for billing
purposes.
User Manual SBeam-12-NE1606 13Mounting the Sunny Beam SMA Solar Technology AG
4 Mounting the Sunny Beam
The Sunny Beam can be used as a tabletop device or mounted on the wall bracket.
Suitable installation and assembly site
• Protect the Sunny Beam from dust, wet conditions and aggressive substances.
• Select a sunlit location in the house, so that the batteries can be charged via the integrated
solar cell of the Sunny Beam.
• The ambient temperature must be between 0 °C and +40 °C.
• If you use the wall bracket, make sure that there is sufficient mounting space around the wall
bracket.
4.1 Tabletop Device
The Sunny Beam can be installed anywhere in the building if the above points on selecting a suitable
installation site are observed.
4.2 Wall Mounting
You can mount the Sunny Beam to a wall in the building using the enclosed wall bracket (see figure).
The Sunny Beam can be removed from the wall bracket at any time and used as a tabletop device.
Before installing the wall bracket, check whether the reception of the Sunny Beam from
the inverters is good (see chapter “Calling up the Communication Quality" on page 54).
1. Mark the drill holes on the wall, taking themounting
clearance into account.
2. Drill the holes.
3. Secure the wall bracket with screws.
14 SBeam-12-NE1606 User ManualSMA Solar Technology AG Mounting the Sunny Beam
Mount the Sunny Beam on the wall bracket.
1. Align the upper edge of the
Sunny Beam with the recess on
the catch of the wall bracket.
2. Press downwards against the Sunny Beam. The two recesses in the
Sunny Beam lock audibly into place on the catches of the wall
bracket.
Make sure that the Sunny Beam does not fall down and fits securely on the wall bracket.
Remove the Sunny Beam from the wall bracket
1. Pull the Sunny Beam slightly downwards and outwards at the same
time.
User Manual SBeam-12-NE1606 15Installing a Radio Piggy-Back in an Inverter SMA Solar Technology AG
5 Installing a Radio Piggy-Back in an Inverter
DANGER!
• This chapter is intended solely for qualified electricians!
All work on the inverter may only be performed by qualified electricians! Please
follow all safety instructions contained in the inverter documentation!
5.1 Ways of Installation
The installation of the Radio Piggy-Back and the antenna is determined by the scope of delivery.
Scope of delivery (A) Scope of delivery (B) Scope of delivery (C)
with unscrewable equipped with Radio
Antenna tip Piggy-Back by default
(enclosed with the
inverter)
For scope of delivery (A) please refer to section “Installation(A): Radio Piggy-Back and Antenna"
on page 17 .
For scope of delivery (B) please refer to section “Installation(B): Radio Piggy-Back and Antenna" on
page 19 .
For scope of delivery (C), with the Radio Piggy-Back installed at the factory, please refer to section
“Installation(C): Antenna, Piggy-Back ex Factory" on page 21.
16 SBeam-12-NE1606 User ManualSMA Solar Technology AG Installing a Radio Piggy-Back in an Inverter
5.1.1 Installation(A): Radio Piggy-Back and Antenna
This section refers solely to scope of delivery (A). For the different scopes of delivery, please refer
to section “Installing a Radio Piggy-Back in an Inverter" on page 16.
DANGER!
• This chapter is intended solely for qualified electricians!
All work on the inverter may only be performed by qualified electricians! Please
follow all safety instructions contained in the inverter documentation!
DANGER!
• The Radio Piggy-Back may only be connected to the radio antenna via the enclosed
coax antenna cable! Only the enclosed coax antenna cable ensures sufficient
safety of the persons involved.
1. Open the inverter as described in the inverter documentation.
2. The DIP switches on the Radio Piggy-Back are
set to group 1 by default. Even if you intend to
leave group 1 set, check the DIP switch
setting on the Radio Piggy-Back using the
figure below. DIP switch 4 should be the only
one pressed down.
See chapter “DIP Switch Setting on the Radio
Piggy-Back" on page 22 for further DIP switch
information on setting the group.
3. Attach the Radio Piggy-Back to the slot provided for it in the inverter
without exerting excessive force on the pins as shown in the inverter
documentation. Make sure thatyou do not attach the Piggy-Back the
wrong way around. The extreme right-hand pin on the lower, short row DIP switches set
of pins is left free. to group 1
4. Rotate the PG cover away from the inverter housing. The PG screw
fitting which fits your inverter is specified on the PG cover.
User Manual SBeam-12-NE1606 17Installing a Radio Piggy-Back in an Inverter SMA Solar Technology AG
5. For a PG 16 screw fitting, screw the enclosed
PG 16 adapter to the PG screw fitting of the
antennaas shown in the figure.
grooved
6. Insert the end of the antenna cable through
ring
the PG opening on the inverter housing.
7. Tighten the PG screw fitting from the interior
of the housing with the grooved ring of the
corresponding PG screw fitting. Make sure
that you tighten the grooved ring so tightly
that the paint on the enclosure is damaged PG 16 adapter
and thus contact is made with the bare metal for PG 16 screw fitting only
of the inverter enclosure.
8. Screwthe antenna cable to the antenna
connection of the Radio Piggy-Back (see figure at right).
9. Lay the antenna cable as described in the inverter
documentation.
10. Do not mount any jumpers on the inverter.
11. Close the inverter as described in the inverter Antenna connection
documentation.
18 SBeam-12-NE1606 User ManualSMA Solar Technology AG Installing a Radio Piggy-Back in an Inverter
5.1.2 Installation(B): Radio Piggy-Back and Antenna
This section refers solely to scope of delivery (B). For the different scopes of delivery, please refer
to section “Installing a Radio Piggy-Back in an Inverter" on page 16.
DANGER!
• This chapter is intended solely for qualified electricians!
All work on the inverter may only be performed by qualified electricians! Please
follow all safety instructions contained in the inverter documentation!
DANGER!
• The Radio Piggy-Back may only be connected to the radio antenna via the enclosed
coax antenna cable! Only the enclosed coax antenna cable ensures sufficient
safety of the persons involved.
1. Open the inverter as described in the inverter documentation.
2. The DIP switches on the Radio Piggy-Back
are set to group 1 by default. Even if you
intend to leave group 1 set, check the setting
of the DIP switches on the Radio Piggy-Back
using the figure below. DIP switch 4 should
be the only one pressed down.
See chapter “DIP Switch Setting on the Radio
Piggy-Back" on page 22 for further DIP switches
information on setting the group.
3. Attach the Radio Piggy-Back to the slot provided for it in the inverter
without exerting excessive force on the pins as shown in the inverter
documentation. Make sure thatyou do not attach the Piggy-Back the
wrong way around. The extreme right-hand pin on the lower, short row DIP switches
of pins is left free. set to group 1
User Manual SBeam-12-NE1606 19Installing a Radio Piggy-Back in an Inverter SMA Solar Technology AG
4. Insert the end of the antenna cable through the grooved ring
PG opening on the inverter housing.
5. Tighten the PG screw fitting from the interior of the
housing with the grooved ring. Make sure that
you tighten the grooved ring so tightly that the
paint on the enclosure is damaged and thus
contact is made with the bare metal of the inverter
enclosure.
6. Screwthe antenna cable to the antenna
connection of the Radio Piggy-Back (see figure at right).
7. Lay the antenna cable as described in the inverter
documentation.
8. Do not mount any jumpers on the inverter.
9. Close the inverter as described in the inverter
documentation.
Antenna connection
20 SBeam-12-NE1606 User ManualSMA Solar Technology AG Installing a Radio Piggy-Back in an Inverter
5.1.3 Installation(C): Antenna, Piggy-Back ex Factory
DANGER!
• This chapter is intended solely for qualified electricians!
All work on the inverter may only be performed by qualified electricians! Please
follow all safety instructions contained in the inverter documentation!
If the Radio Pigy-Back has already been installed at the factory, the antenna can be fastened to the
inverter as follows.
1. Remove the protective cap from the thread of the antenna on the
inverter housing.
2. Plug the sealing on the thread of the antenna
on the inverter housing.
3. Screw the antenna tip to the thread of the
antenna on the inverter housing.
User Manual SBeam-12-NE1606 21Installing a Radio Piggy-Back in an Inverter SMA Solar Technology AG
5.2 DIP Switch Setting on the Radio Piggy-Back
DANGER!
• This chapter is intended solely for qualified electricians!
All work on the inverter may only be performed by qualified electricians! Please
follow all safety instructions contained in the inverter documentation!
The Radio Piggy-Backs can be set to groups via the DIP switches (0 to 15, see figures below). This
allows you to exclude other inverters when recording data with the Sunny Beam, if to many other
inverters in the vicinity are set to the same group. The Sunny Beam and the Radio Piggy-Backs must
always be set to a common group. The Piggy-Backs are set to group 1 by default.
You can change the group for the Radio Piggy-Back
by pushing the white DIP switches on the Radio Piggy-
Back (see figure at right) up or down. Please refer to
the overview to find out which position of the switches
corresponds to which group. See chapter “Setting a
Group for the Sunny Beam" on page 51 on how to
change the group setting for the Sunny Beam.
DIP switches
Overview of Radio Piggy-Back group settings
0 6 12
1
7 13
(factory setting)
2 8 14
3 9 15
4 10
5 11
22 SBeam-12-NE1606 User ManualSMA Solar Technology AG Installing a Radio Piggy-Back in an Inverter
5.3 Installation of the external Antenna Kit
DANGER!
• This chapter is intended solely for qualified electricians!
All work on the inverter may only be performed by qualified electricians! Please
follow all safety instructions contained in the inverter documentation!
The external antenna is not suitable for mounting outdoors!
The external antenna kit (see chapter 2.4 Accessories) allows you to improve the antenna
alignment, if you are unable to install the inverter and Sunny Beam in an optimal position. If
necessary, walls or a ceiling can be bridged. If this is the case, lay the antenna cable through the
wall or ceiling and mount the antenna bracket on the other side.
Scope of delivery for external antenna kit
Antenna extension cable
Rubber ring
Antenna bracket
Washer
User Manual SBeam-12-NE1606 23Installing a Radio Piggy-Back in an Inverter SMA Solar Technology AG
Differences in the initial situation
The installation of an external antenna kit is determined by the initial situation at the inverter.
Initial situation (A) Initial situation (B) Initial situation (C)
with unscrewable equipped with Radio
antenna Piggy-Back by default
For initial situation (A) please refer to section “Retrofitting for initial Situation (A)" on page 25 .
For initial situation (B) please refer to section “Retrofitting for initial Situation (B)" on page 29.
For initial situation (C), with the Radio Piggy-Back installed at the factory, please refer to section
“Installation for initial Situation (C)" on page 31
24 SBeam-12-NE1606 User ManualSMA Solar Technology AG Installing a Radio Piggy-Back in an Inverter
5.3.1 Retrofitting for initial Situation (A)
DANGER!
• This chapter is intended solely for qualified electricians!
All work on the inverter may only be performed by qualified electricians! Please
follow all safety instructions contained in the inverter documentation!
This section refers solely to initial situation (A). For the different initial situations, please refer to
section “Installation of the external Antenna Kit" on page 23.
Remove existing antenna.
1. Open thethe inverter as described in
the inverter documentation. Radio Piggy-Back
2. Unscrew the antenna cable from the
antenna connection on the Radio
Piggy-Back in the inverter housing.
3. Unscrewthe threaded sleeve of the PG PG screw fitting
screw fitting.
4. Remove the entire antenna cable from
the inverter housing by pulling the
antenna tip.
In the process, the antenna spring is
also removed from the PG screw
fitting. The PG screw fitting itself
remains permanently attached to the
inverter housing (see figure on the Antenna tip Threaded sleeve
following page).
User Manual SBeam-12-NE1606 25Installing a Radio Piggy-Back in an Inverter SMA Solar Technology AG
Threaded sleeve
Sealing ring
Antenna tip Antenna spring
PG screw fitting
5. Unscrew the antenna tip and remove the threaded sleeve and the sealing ring from the
antenna cable. The antenna cable and the antenna spring are no longer required.
Install antenna extension cable
You need the parts shown in the figure to install the external antenna.
Antenna extension cable
Rubber ring Antenna tip
Threaded sleeve
Sealing ring
Washer Antenna bracket
The parts of the old antenna in the dotted box (see figure above) are now mounted to the cable of
the external antenna.
6. Remove the rubberfrom the sealing ring.
Sealing ring
Rubber
26 SBeam-12-NE1606 User ManualSMA Solar Technology AG Installing a Radio Piggy-Back in an Inverter
7. Take the antenna extension cable and attach
the sealing ring to the rubber ring as shown
in the figure on the right. Ensure that the End of antenna
rubber ring is in the centre of the thick part of with internal thread
the cable. Sealing ring
Rubber ring
8. Attach the threaded sleeve to the sealing ring
as shown in the figure.
Threaded sleeve
Sealing ring
9. Insert the end of the cable with the Threaded sleeve
internal thread through the opening of with sealing ring
the PG screw fitting on the inverter
housing.
10. Insert the threaded sleeve with the
sealing ring into the PG screw fitting,
rotating it slightly until the catch of the
sealing ring locks into place in the
recesses.
11. Attach the threaded sleeve to the PG PG screw fitting
screw fitting on the inverter housing.
12. Connect the end of the antenna cable in the inverter to the antenna connection on the Radio
Piggy-Back.
User Manual SBeam-12-NE1606 27Installing a Radio Piggy-Back in an Inverter SMA Solar Technology AG
Fasten antenna bracket
1. Remove the protective foil from the antenna bracket.
2. Secure the antenna bracket with screws in a suitable position relative to the inverter. See
chapter 5.4.2 External Antenna Kit on the advantages of horizontal or vertical mounting.
3. Place the washer on the external thread of the antenna cable and insert the external thread
through the slit in the antenna bracket.
4. Screw the antenna tip to the external thread of the antenna cable from the other side of the
antenna bracket.
Avoid major kinking in the antenna cable.
Antenna bracket
Antenna tip
Washer
28 SBeam-12-NE1606 User ManualSMA Solar Technology AG Installing a Radio Piggy-Back in an Inverter
5.3.2 Retrofitting for initial Situation (B)
DANGER!
• This chapter is intended solely for qualified electricians!
All work on the inverter may only be performed by qualified electricians! Please
follow all safety instructions contained in the inverter documentation!
This section refers solely to initial situation (B). For the different initial situations, please refer to
section “Installation of the external Antenna Kit" on page 23.
Fasten antenna extension cable
1. Unscrew the antenna tip from the inverter housing. It will
still be required later.
2. Remove the sealing from the thread of the antenna.
3. Screw the antennaextension cable to the
thread of the antenna on the inverter
housing.
User Manual SBeam-12-NE1606 29Installing a Radio Piggy-Back in an Inverter SMA Solar Technology AG
Fasten antenna bracket
1. Remove the protective foil from the antenna bracket.
2. Secure the antenna bracket with screws in a suitable position relative to the inverter. See
chapter “External Antenna Kit" on page 35 on the advantages of horizontal or vertical
mounting.
3. Place the washer on the external thread of the antenna cable and insert the external thread
through the slit in the antenna bracket.
4. Screw the antenna tip to the external thread of the antenna cable from the other side of the
antenna bracket.
Avoid major kinking in the antenna cable.
Antenna bracket
Antenna tip
Washer
30 SBeam-12-NE1606 User ManualSMA Solar Technology AG Installing a Radio Piggy-Back in an Inverter
5.3.3 Installation for initial Situation (C)
This section refers solely to initial situation (C). If the Radio Pigy-Back has already been installed at
the factory, the external antenna kit can be fastened to the inverter as follows. For the different initial
situations, please refer to section “Installation of the external Antenna Kit" on page 23.
Fasten antenna extension cable
1. Remove the protective cap from the thread of the antenna on the
inverter housing.
2. Screw the antenna extension cable to the
thread of the antenna on the inverter
housing.
User Manual SBeam-12-NE1606 31Installing a Radio Piggy-Back in an Inverter SMA Solar Technology AG
Install antenna bracket
3. Remove the protective foil from the antenna bracket.
4. Secure the antenna bracket with screws in a suitable position relative to the inverter. See
chapter 5.4.2 External Antenna Kit on the advantages of horizontal or vertical mounting.
5. Place the washer on the external thread of the antenna cable and insert the external thread
through the slit in the antenna bracket.
6. Screw the antenna tip to the external thread of the antenna cable from the other side of the
antenna bracket.
Avoid major kinking in the antenna cable.
Antenna bracket
Antenna tip
Washer
32 SBeam-12-NE1606 User ManualSMA Solar Technology AG Installing a Radio Piggy-Back in an Inverter
5.4 Basic Information on Radio Transfer
The radio range of the antenna for the Sunny Beam in buildings is 30 m and up to 100 m in the
open air. The ambient conditions and the distance from the Sunny Beam to the antenna are the
critical factors for the radio range. The greater the absorbing qualities of walls, doors etc., the lower
the range.
If the ideal location of the inverter relative to the Sunny Beam as described in chapter “Antenna on
Inverter" on page 34 cannot be selected, you can bridge walls or ceilings etc. using the external
antenna kit (see chapter “Accessories" on page 11 for the SMA order number).
The external antenna is not suitable for mounting outdoors!
User Manual SBeam-12-NE1606 33Installing a Radio Piggy-Back in an Inverter SMA Solar Technology AG
5.4.1 Antenna on Inverter
Standard case from storey to storey
If you installed your inverter e.g. in the attic of your building, ensure that the Sunny Beam is not in
the dead spot directly below the inverter in the building. If you still have poor reception in the
building, you can use the external antenna kit to bridge ceilings or walls, as described in chapter
“External Antenna Kit" on page 35.
Dead spot
From building to building
For example, if you have installed your inverter in an adjacent building on your site, vertical
mounting of the antenna is appropriate.
Dead spot
34 SBeam-12-NE1606 User ManualSMA Solar Technology AG Installing a Radio Piggy-Back in an Inverter
5.4.2 External Antenna Kit
The external antenna kit (see chapter “Accessories" on page 11 for SMA order number) can be
installed horizontally and vertically, which allows the antenna position to be adjusted for local
conditions.
The external antenna is not suitable for mounting outdoors!
From storey to storey with an external antenna
If you have very absorbent walls or ceilings in your building which impair the radio connection
between the inverter and the Sunny Beam, you can circumvent this problem using the external
antenna and antenna bracket. Simply lay the antenna cable through a wall or ceiling and mount
the antenna bracket on the other side. The antenna bracket must then be mounted horizontally as
shown in the figure.
outside the reception range or in the
dead spot
External antenna kit (with antenna
bracket and Antenna extension cable)
User Manual SBeam-12-NE1606 35Installing a Radio Piggy-Back in an Inverter SMA Solar Technology AG
From building to building with an external antenna
If the radio connection from building to building is not sufficient, you can bridge walls using the
antenna bracket by laying the antenna cable through the wall and mounting the antenna bracket
on the other side. The antenna bracket must then be mounted vertically as shown in the figure.
outside the reception range Dead spot
External antenna kit (with antenna bracket and
extension cable)
36 SBeam-12-NE1606 User ManualSMA Solar Technology AG Operating the Sunny Beam
6 Operating the Sunny Beam
6.1 Inserting the Batteries
Use only the enclosed AccuCell AC 1800 type batteries! Other accumulators or batteries
are not suitable and may leak! Please observe all the indications on the accumulators and
under the battery compartment cover.
Charge the batteries only in the Sunny Beam! Other chargers destroy the batteries! Do
not use the Sunny Beam as a charger for other batteries or for different types of
accumulator as the Sunny Beam and/or the other batteries or accumulators will be
damaged.
The batteries must be at the same charge level. You should therefore always use the
batteries in pairs and always replace both batteries at the same time.
The batteries may not be used for other devices, as the higher discharge rate damages
the batteries.
Before you can start the Sunny Beam, you must insert the enclosed batteries, even if
the display is already on because there is sufficient sunlight.
1. Open the battery compartment on the underside of the Sunny
Beam.
2. Insert the enclosed AccuCell AC 1800 type batteries the right
way around as shown in the figure at right.
User Manual SBeam-12-NE1606 37Operating the Sunny Beam SMA Solar Technology AG
6.2 Initial Startup
6.2.1 The Rotating Push Button
The "rotating push button" can be pressed and turned back and
forth (see figure at right). Rotating the "rotating push button" on
the Sunny Beam allows you to select the individual menu items.
The selection frame with an arrow always shows the selected
menu item (see example figures below).
Pressing the "rotating push button" on the Sunny Beam allows
you to open or activate the selected menu item. Menu items are
activated when settings can be made. You can then change a setting by rotating the "rotating push
button". In the remainder of the manual, the "rotating push button" will only be referred to as
"button".
6.2.2 Initial Settings
On initial startup, after the batteries are inserted, the
"LANGUAGE" menu is automatically displayed (see figure at
LANGUAGE
right). SELECTION : GERMAN
CONTINUE
1. If you want to change the language, press the button once
to activate the menu item. The background of the
"GERMAN" setting becomes dark and it can now be
changed.
2. Rotatethe button and set the required language. Then
press the button to save the selection.
SET DATE + TIME
3. Select the "CONTINUE" menu point and press the button DAY : 1
to activate the menu item. The menu for setting the date MONTH : 1
YEAR : 2005
and time opens automatically. HOUR : 12
MINUTE : 0
4. Set date and time. CONTINUE
If you have finished the settings, select the
"CONTINUE" menu point. The settings are saved.
38 SBeam-12-NE1606 User ManualSMA Solar Technology AG Operating the Sunny Beam
You now need to register your inverter with the Sunny Beam.
The inverters you want to detect with the Sunny Beam must be ready for feeding.
5. Turn the button and set the radiofrecuency which you
have set for the Radio Piggy-Back in the inverter.
6. Press the button to begin registering the inverter. Radio Piggy-Back
The Sunny Beam will now look for inverters set to the group that
you have selected (see figure at right). The number of inverters
detected will be indicated as shown in the figure. Wait for the Sunny Boy DETECTION
search to end. GROUP 1
The group setting for the Radio Piggy-Back and the Sunny Beam DETECTED Sunny Boys 2
must always match. Press the button to cancel the search
process. Set the Sunny Beam group as described in chapter
“Setting a Group for the Sunny Beam" on page 51 and detect the inverters again as described in
chapter “Detecting and Selecting Inverters" on page 52.
When the searchis completed, the "Exclude Sunny Boys"
menu opens automatically and the inverters found are listed
with their serial numbers and device type (see figure at right). EXCLUDE Sunny Boys
1:11234567890 WR11HX08
If you want to register all inverters displayed (max. four), 2:11234567891 WR50MS08
PROCEED TO REGISTRATION
continue reading at point 9 "Register inverters". FIND MORE DEVICES
CANCEL
If other inverters are shown, or your inverters which you do not
want to monitor, they must be excluded before you can register
the remaining inverters. If this is the case, continue reading at point 7 "Excluding inverters".
Excluding inverters
7. Select an inverter you want to exclude from monitoring
and press the button. The serial numberand the device
type are crossed out on the display (see figure at right). EXCLUDE Sunny Boys
1:11234567890 WR11HX08
Repeat this procedure to exclude other inverters. 2:11234567891 WR50MS08
PROCEED TO REGISTRATION
8. Activate the "FIND MORE DEVICES" menu item to FIND MORE DEVICES
search for other inverters. Continue with point 9 when all CANCEL
inverters you want to monitor are displayed.
User Manual SBeam-12-NE1606 39Operating the Sunny Beam SMA Solar Technology AG
Registering inverters
9. Activatethe
"PROCEED TO REGISTRATION"menu item.
Sunny Beam then saves the inverters and switches
automatically to the normal view at the end of the
registration process (see the figure at right).
That completes the registration process.
P1 : 54
It may take a few minutes before the first system values are displayed.
If the Sunny Beam does not find any inverters, you can cancel the search by pressing the button.
The "EXCLUDE Sunny Boys" menu opens automatically. Activate the "CANCEL" menu item.
The main menu opens. Chapter 8 Troubleshooting/Problem Solving contains troubleshooting
instructions.
6.3 The display Elements
6.3.1 Menu View
The individual menu items are listed in the menu viewList of menu
items (see examples in figure at right). Select "EXIT" in the main
MAIN MENU
menu to return from the menu view to the normal view. LANGUAGE
TIME
CONTRAST
DATA VIEW
VIEW OPTIONS
SETUP
EXIT
40 SBeam-12-NE1606 User ManualSMA Solar Technology AG Operating the Sunny Beam
6.3.2 Normal View
The normal view is divided into three sections:
• Graph area
• Status bar
• Output indicator
The time, the date and the battery status are shown in the normal view. The output indicator is always
displayed except between 9:00 pm and 4:00 am in night mode.
The night mode on a Sunny Beam firmware version larger than V2.17 will automatically adapt to
the inverter's behaviour.
Date Time
Graph area
Status bar
Output indicator
Press the button to return from the normal view to the menu view.
User Manual SBeam-12-NE1606 41Operating the Sunny Beam SMA Solar Technology AG 6.3.3 Graph Area Total output In the graph area of the normal view, the total output data of your inverters is shown graphically (see figure at right). Individual output Rotate the button to show the individual output data of the inverters graphically (P1, P2, P3, P4). You can call up the inverters to which P1 to P4 are assigned in the menu (see chapter “Adjusting the Energy Meter in the Sunny Beam" on page 48). After all data of the individual inverters has been forwarded, all daily energy yields will be indicated when you rotate the button. Daily energy yield The total daily energy yield will be displayed as a bar chart. You can choose to set whether the daily energy yield is shown for the current month or for the previous 31 days (see chapter “History" on page 50). Hatched surfaces Hatched surfaces indicate that the radio contact between the inverter and the Sunny Beam was faulty or interrupted. (for troubleshooting see section “Hatched Surfaces" on page 66). 42 SBeam-12-NE1606 User Manual
SMA Solar Technology AG                                                            Operating the Sunny Beam

6.3.4 Status Bar
The following information is shown in the status bar by default:
•     Output of the individual inverters (P1, P2, P3, P4)

              Status bar

Additional information which can be set:
•     Percentage output of the inverters
•     Inverter device types
•     Inverter serial numbers
•     Yield in Euro
•     CO2 savings

The information is displayed alternately in the status bar. See chapter “Setting the Status Bar" on
page 49 on how to change the view options for the status bar.
If there is a system error, the current status and error messages are displayed in the status bar. If an
inverter indicates a fault, first the current output, then the error (e.g. Uac-Bfr) and finally the status
message (or Error) are displayed.
Error messages are specific to each inverter and are described in the "error messages" section of
your inverter documentation. You can find the current inverter documentation at any time in the
download section at www.SMA.de.

6.3.5 Output Indicator
The current output, the daily energy yield and the overall energy yield of the system are displayed
in the output indicator. The yields and the output of the individual inverters are displayed when you
rotate the button.
The output indicator is also displayed when the Sunny Beam switches to energy saving mode after
a certain period (default setting: 5 minutes). The output indicator only switches itself off between
9:00 pm and 4:00 am in night mode. The night mode on a Sunny Beam firmware version larger
than V2.17 will automatically adapt to the inverter's behaviour.

        Current power

     Daily energy yield                                                        Total energy yield

User Manual                                                                 SBeam-12-NE1606             43
Operating the Sunny Beam SMA Solar Technology AG
6.3.6 Battery Symbol/Charging the Batteries
Battery symbol
The battery symbol is displayed above the status bar in the
normal view. The battery symbol fill level decreases in line
with the decreasing charge level.
Charging the batteries
When the "P" in the "Power" indicator flashes or the battery
symbol is empty, proceed as follows to charge the batteries:
• Place the Sunny Beam in a sunny location, so that
sufficient sunlight strikes the solar cell. The batteries are
charged via the integrated solar cell.
• If the sunlight is insufficient, the Sunny Beam can be
charged via the USB interface of a PC using the enclosed
USB connecting cable. If no PC is available, you can use
the SMA USB power supply unit (not included). You can order it from SMA under the SMA
order number: SBEAM-NT.
Use only the enclosed AccuCell AC 1800 type batteries! Other accumulators or batteries
are not suitable and may leak! Follow all instructions on the batteries and on the inside
of the battery compartment cover.
Charge the batteries only in the Sunny Beam! Other chargers destroy the batteries! Do
not use the Sunny Beam as a charger for other batteries or other types of accumulator as
the Sunny Beam and/or the batteries or accumulators will be damaged.
The batteries must be at the same charge level. You should therefore always use the
batteries in pairs and always replace both batteries at the same time.
The batteries may not be used for other devices, as the higher discharge rate damages
the batteries.
44 SBeam-12-NE1606 User ManualSMA Solar Technology AG Operating the Sunny Beam
6.3.7 USB Symbol
The USB symbol is displayed in the status bar in the normal
view when the Sunny Beam is connected to the PC using the
USB connecting cable.
6.4 Sunny Beam Basic Settings
6.4.1 Setting the Contrast
You can set the contrast of the display to adjust the legibility to the sight conditions. The contrast of
the upper (graph area, status bar) and the lower display sections (output indicator) can be set
separately from one another.
1. Select "CONTRAST" in the main menu.
2. Select "UPPER AREA CONTRAST" or "LOWER AREA CONTRAST
CONTRAST". UPPER AREA CONTRAST: 30
LOWER AREA CONTRAST: 18
3. Rotate the button and set the required contrast. The EXIT
changes can be seen immediately and are saved.
6.4.2 Setting the Language
The Sunny Beam menu can be set to various languages.
1. In the main menu,"LANGUAGE" in the main menu.
2. Select "SELECTION" and set the required language. The LANGUAGE
language changes immediately to that set, and the setting SELECTION : GERMAN
EXIT
is saved.
User Manual SBeam-12-NE1606 45Operating the Sunny Beam SMA Solar Technology AG
6.4.3 Setting the Date and Time
The time is displayed in the top right corner of the display in the normal view.
1. Select"TIME" in the main menu.
2. Select "SET DATE + TIME".
SET DATE + TIME
3. Set the date and time. DAY : 1
MONTH : 1
4. Select "EXIT" repeatedly until the prompt window opens YEAR : 2005
HOUR : 12
to save the setting. MINUTE : 0
EXIT
5. Select "Yes" in the prompt window. The settings are
saved.
It is important that the correct time is set for the Sunny Beam to function properly, as there
are time-dependent reactions (night mode).
The 12-hour format will display the time between midday and 23:59 as "pm" (post
meridiem, latin for "after midday") and the time between midnight and 11:59 as "am"
(ante meridiem, latin for "before midday").
Formatting the date
1. In the main menu,"TIME" in the main menu.
2. Select "DATE FORMAT". TIME
SET DATE + TIME
3. Set the required date format. TIME FORMAT : 24h
DATE FORMAT : DMY
DATE SEPARATOR : .
EXIT
4. Select "DATE SEPARATOR".
5. Set the required date separator. TIME
SET DATE + TIME
6. Select "EXIT" repeatedly until the prompt window opens TIME FORMAT : 24h
to save the setting. DATE FORMAT : DMY
DATE SEPARATOR : .
7. Select "Yes" in the prompt window. The settings are EXIT
saved.
46 SBeam-12-NE1606 User ManualSMA Solar Technology AG Operating the Sunny Beam
Setting the time format
The time can be set to 24 hour or 12 hour format.
1. Select "TIME" in the main menu.
2. Select "TIME FORMAT". TIME
SET DATE + TIME
3. Set the required time format (24h or 12h). TIME FORMAT : 24h
DATE FORMAT : DMY
4. Select "EXIT" repeatedly until the prompt window opens DATE SEPARATOR : .
to save the setting. EXIT
5. Select "Yes" in the prompt window. The settings are
saved.
The 12-hour format will display the time between midday and 23:59 as "pm" (post
meridiem, latin. for "after midday") and the time between midnight and 11:59 as "am"
(ante meridiem, latin for "before midday").
6.4.4 Energy Saving Options
If the button on the Sunny Beam is not used for a certain amount of time, the device switches to
energy saving mode (default setting: 5 minutes). In this mode, the graph area and the status bar are
switched off. The output indicator is always displayed (except between 9:00 pm and 4:00 am in
night mode).
The night mode on a Sunny Beam firmware version larger than V2.17 wil automatically adapt to
the inverter's behaviour.
The period which expires before the Sunny Beam switches to energy saving mode can be set. The
energy saving mode is switched off if no value is set (- - - -).
1. In the main menu,
"VIEW OPTIONS".
VIEW OPTIONS
2. Select "DISPLAY OFF DELAY". DATA CHANGE FREQ. : 5s
DATA REQUEST FREQ. : 30s
3. Set the required time. DISPLAY OFF DELAY : 5m
HISTORY : 31D
4. Select "EXIT" repeatedly until the prompt window opens EXIT
to save the setting.
5. Select "Yes" in the prompt window. The settings are
saved.
You can set the data request frequency at which the Sunny Beam requests data from the inverters
between 15 s and 120 s. The higher the value set for the data request frequency, the lower the
Sunny Beam's energy consumption.
Lower values (under 15 seconds) should only be set for commissioning purposes (testing
the radio connection) and not long-term.
User Manual SBeam-12-NE1606 47Operating the Sunny Beam SMA Solar Technology AG
1. In the main menu,
"VIEW OPTIONS" in the main menu.
VIEW OPTIONS
2. Select "DATA REQUEST FREQ.". DATA CHANGE FREQ. : 5s
DATA REQUEST FREQ. : 30s
3. Set the required data request frequency. DISPLAY OFF DELAY : 5m
HISTORY : 31D
4. Select "EXIT" repeatedly until the prompt window opens EXIT
to save the setting.
5. Select "Yes" in the prompt window. The settings are
saved.
6.4.5 Adjusting the Energy Meter in the Sunny Beam
The individual yield values (kWh) of the registered inverters can be adjusted in the Sunny Beam.
This may be necessary if an inverter is replaced and the yield of the old inverter is to be used.
1. Select "SETUP" in the main menu.
2. Select "ENERGY METER ADJUSTMENT". In addition to the numbers 1, 2, 3 and 4
(depending on the number of inverters registered), the device type and the serial number of
the inverters are also listed. This allows you to see which number is assigned to each inverter
in the Sunny Beam. In the table below, in addition to the inverter number, there is:
"OUTPUT" = the inverter's previous total output
"OFFSET" = the value to be added to the OUTPUT
"DISPLAY" = the newly calculated output based on the values taken from OUTPUT and
OFFSET
3. Select the inverter whose values you want to change.
Inverter device type/serial numbers ENERGY METER ADJUSTMENT
1:WR11HX08 SN:1234567890
2:WR50MS08 SN:1234567891
Yield, offset, view YIELD OFFSET VIEW
1: 2.0 1.5 3.5
2: 3.0 0.0 3.0
5.0 1.5 6.5
ACCEPT
CANCEL
4. Rotate the button and change the yield value of the inverter as required. Positive and negative
values can be set.
5. Select "EXIT" repeatedly until the prompt window opens to save the setting.
6. Select "Yes" in the prompt window. The settings are saved.
48 SBeam-12-NE1606 User ManualSMA Solar Technology AG Operating the Sunny Beam
6.5 Setting the Status Bar
The status bar is described in chapter “Status Bar" on page 43.
6.5.1 Adding Information to the Status Bar
The total and individual output of the inverters are displayed alternately in the status bar. Other
information can be selected, which is then also displayed in the status bar:
• Percentage output of the inverters
• Device types of the inverters (in the individual output display, if more than one inverter is
registered)
• Serial numbers of the inverters (in the individual output display, if more than one inverter is
registered)
• Yield in Euro
• CO2 savings
1. Select "DATA VIEW" in the main menu. A dash after the
colon indicates that this information is not shown in the
DATA VIEW
status bar. A tick indicates that the information is shown. PERCENTAGE TO P-LIMIT :
DEVICE TYPE : -
2. Select the required information and set whether the SERIAL NO : -
information in the status bar is to be displayed or not. EARNED : -
CO2 SAVED :
EXIT
3. Select "EXIT" repeatedly until the prompt window opens
to save the setting.
4. Select "Yes" in the prompt window. The settings are saved.
6.5.2 Changing the Data Change Frequency
Information alternates in the status bar; the time interval between display changes can be set.
1. In the main menu,select
"VIEW OPTIONS".
VIEW OPTIONS
2. Select "DATA CHANGE FREQ.". DATA CHANGE FREQ. : 5s
DATA REQUEST FREQ. : 30s
3. Set the required data change frequency. DISPLAY OFF DELAY : 5m
HISTORY : 31D
4. Select "EXIT" repeatedly until the prompt window opens EXIT
to save the setting.
5. Select "Yes" in the prompt window. The settings are
saved.
User Manual SBeam-12-NE1606 49Operating the Sunny Beam SMA Solar Technology AG
6.5.3 History
The graph area will display the total daily energy yield (see chapter 6.3.3 Graph Area). You can
choose to set whether the daily energy yield is shown for the previous 31 days or the current month.
1. Select
"VUEW OPTIONS" in the main menu.
VIEW OPTIONS
2. Select "HISTORY". DATA CHANGE FREQ. : 5s
DATA REQUEST FREQ. : 30s
3. Rotate the button and set the required period. DISPLAY OFF DELAY : 5m
HISTORY : 31D
4. Select "EXIT" repeatedly until the prompt window opens EXIT
to save the setting.
5. Select "Yes" in the prompt window. The settings are
saved.
6.5.4 Setting Factors
6.5.4.1 Setting Yield per kWh
The yield per kWh depends on the location and system type.
1. Select"SETUP" in the main menu.
2. Select "COEFFICIENTS OF BALANCE".
COEFFICIENTS OF BALANCE
3. Select "EARNING/kWh". EARNING/kWh : 0.5740
CURRENCY : $
4. Rotate the button and set the required value. kg CO2/kWh : 0.70
EXIT
5. Select "EXIT" repeatedly until the prompt window opens
to save the setting.
6. Select "Yes" in the prompt window. The settings are saved.
6.5.4.2 Setting the Currency
You can select different currencies.
1. In the main menu,"SETUP" in the main menu.
2. Select "COEFFICIENTS OF BALANCE".
COEFFICIENTS OF BALANCE
3. Select "CURRENCY". EARNING/kWh : 0.5740
CURRENCY : $
4. Rotate the button and set the required currency. kg CO2/kWh : 0.70
EXIT
5. Select "EXIT" repeatedly until the prompt window opens
to save the setting.
6. Select "Yes" in the prompt window. The settings are saved.
50 SBeam-12-NE1606 User ManualSMA Solar Technology AG Operating the Sunny Beam
6.5.4.3 Setting the CO2-savings Factor
Your photovoltaic system contributes to reducing CO2 emissions. The CO2savings, e.g. compared
with the current German electricity mix, is calculated with a factor of 0.7. This factor is set by default.
The calculation factors are country-specific.
1. Select"SETUP" in the main menu.
2. Select "COEFFICIENTS OF BALANCE".
COEFFICIENTS OF BALANCE
3. Select "kg CO2/kWh". EARNING/kWh : 0.5740
CURRENCY : $
4. Rotate the button and set the corresponding value. kg CO2/kWh : 0.70
EXIT
5. Select "EXIT" repeatedly until the prompt window opens
to save the setting.
6. Select "Yes" in the prompt window. The settings are saved.
6.6 Service Settings
6.6.1 Setting a Group for the Sunny Beam
The Radio Piggy-Backs in the inverters and the Sunny Beam must be set to a common
group.
The Piggy-Backs are set to group 1 by default. You only have to change the group if you want to
detect several other inverters in group 1. Check the group setting for the Sunny Beam as follows:
1. Select"SETUP" in the main menu.
2. Select "PLANT".
3. Select "RADIO FREQUENCY". Radio Piggy-Back
4. Rotate the button and set the required group (0 to 15).
5. Select "EXIT" repeatedly until the prompt window opens
to save the setting.
6. Select "Yes" in the prompt window. The settings are saved.
User Manual SBeam-12-NE1606 51You can also read