User Guide - Internet Television - Burlington Telecom
←
→
Page content transcription
If your browser does not render page correctly, please read the page content below

User Guide

How-To:
  Set Up Voice Mail
  Configure BT Email
  Set Up a Wireless Router
  Enable TV Parental Controls
  Schedule Recordings with a DVR
  Troubleshoot Your Service
                                and more...

       Internet        Television         Telephone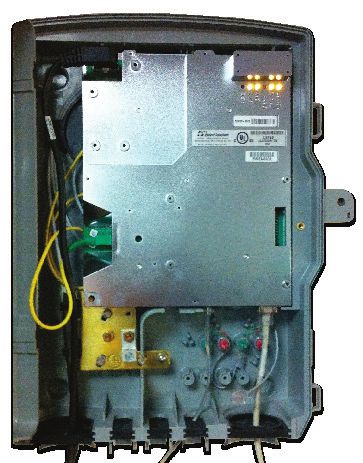
Burlington
Telecom
User Guide
Customer Service: (802) 540-0007
Mon - Fri 8AM to 6PM
Saturday 8AM to 4:30PM

Help Desk: (802) 540-0007
Mon - Sat 8AM to 10PM
Sunday 10AM to 6PM

www.burlingtontelecom.com

Burlington Telecom
200 Church Street
Burlington, VT 05401
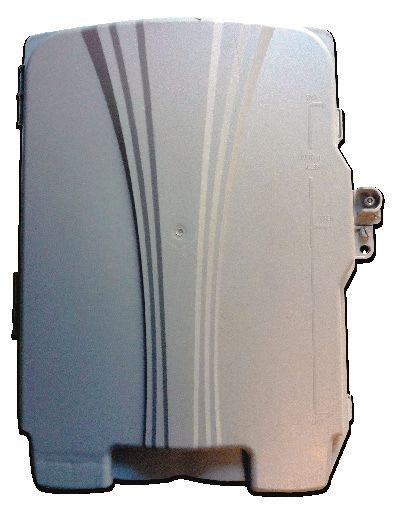
Table of Contents
Chapter 1: Telephone

Single Mail Box Setup                             2
Accessing Your Voice Mail                         2
Changing Your PIN                                 2
Record Your Greeting                              3
Retrieve Messages                                 3
A Guide to the Buttons in the Voice Mail System   3

Multiple Mail Box Setup                           4
Administrator Instructions                        4

General Information                               5
How to Place an International Call                5
101 on Voice Mail Capacity                        5

Telephone Troubleshooting                         6

Chapter 2: Internet
Email Access                                       8
Creating an Email Account                          8
Accessing Web Mail                                 8
Changing Your Email Password                      9
Setting up BT Email on Your iPhone and iPad       9
Mail Client Settings                              10

Wireless Router Setup                             11
Changing the settings on a TP Link Router         12
Changing SSID (Network Name)                      12
Changing Wireless Password                        13

Internet Troubleshooting                          14
Wireless Connection                               14
Macintosh Computers                               14
Windows Computers                                 14
Wired Connection                                  17
Slow Wireless Connection                          18
Slow Wired Connection                             19
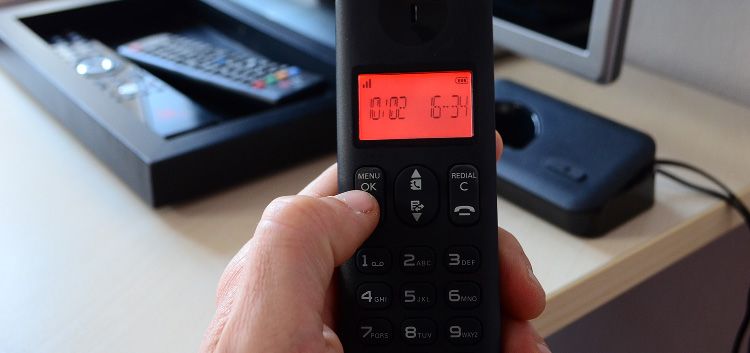
Table of Contents
Chapter 3: TV
Watching TV                                 21
Guide                                       21
Search                                      21
Favorites                                   22

Parental Controls                           22
Turning Parental Controls On and Off        22

Television Features                         23
Remote Programming                          23

DVR Usage                                   24
Pause Live TV                               24
Record the Program Currently Being Viewed   24
Schedule a Recording                        24
Cancel a Recording                          25
VOD (Video On Demand) Usage                 25
Changing PIN                                26
Pay Per View                                26
Premium VOD                                 26
Cable Troubleshooting                       27
Frozen Screen                               27
Distorted Image/Tiling                      28
No image (Black/Blue screen)                28
Remote Not Responding                       29
Set-Top Boxes                               30
Chapter 1

Telephone
Single Mailbox Setup
Multiple Voice Mail Setup
General Telephone Information
Telephone Troubleshooting

                                1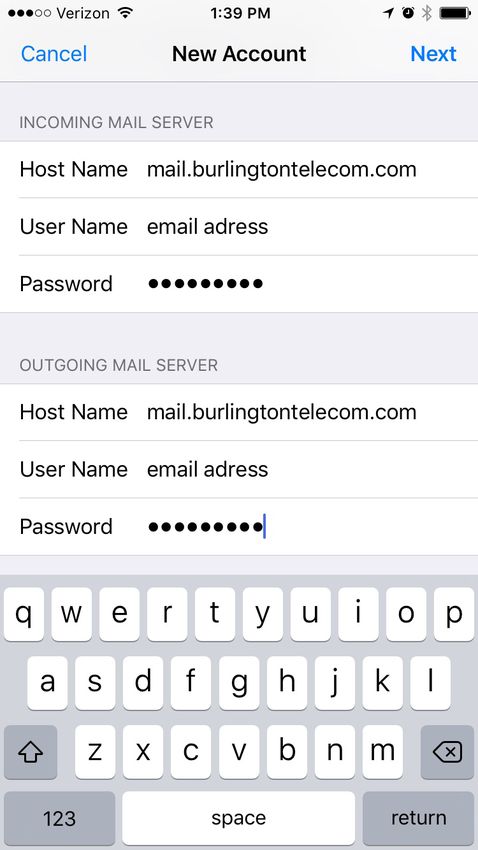
Single Mail Box Setup

Accessing Your Voice Mail

From your home (Burlington Telecom) phone:

1. Dial *09.
2. If prompted, enter your PIN (default is 0000) and then #.

From a different phone:

1. Dial (802) 540-0975.
2. Enter your 10-digit mailbox # (802-XXX-XXXX), which is
   your Burlington Telecom phone number.
3. Enter your PIN (default is 0000) and then #.

Changing Your PIN (Password)

1. Access your voice mail as described above in the section
   on Accessing Your Voice Mail.
2. Press 9 to access the mailbox setup menu.
3. Press 2 to change your password.
4. Enter your new password and then press #.
5. When prompted to verify the password enter it again and
   then press #.

A prompt will inform you if you have successfully changed
your password.

                                                               2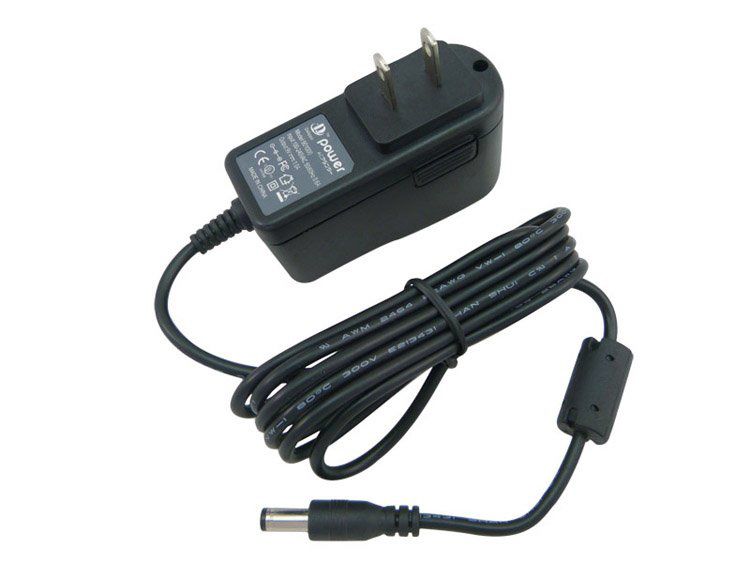
Record Your Greeting

1. Access your voicemail as described in the section on
   Accessing Your Voice Mail. (page 2)
2. Press 9 to access the mailbox setup menu.
3. Press 1 for greeting options.
4. Press 4 to record your greeting.
5. Record your greeting and then press #.
6. Press 2 to keep your greeting.

Retrieve Messages

1. Access your voice mail as described in the section on
   Accessing Your Voice Mail. (page 2)
2. Press 1 to listen to new messages.
3. Press 2 to listen to saved messages.

A Guide to the Buttons in the Voice Mail System
The numbers below correspond to the keypad on the
telephone.

1.   Repeat the voice mail message.
2.   Save the message and play the next message.
3.   Delete the message and play the next message.
4.   Save the message as new.
5.   Reply to the message *
6.   Forward the message to another mailbox *
7.   Skips backward in the message.
8.   Pauses the message.
9.   Skips forward in the message.
* The individual receiving the message must be subscribed to BT voicemail

                                                                            3
Multiple Voice Mail Set-up

Administrator Instructions

To originally record your group greeting from the phone
subscribed to Burlington Telecom service:

1. Dial 540-0975.
2. Listen to the recording.
3. Wait until the end of the recording, then press * to
   administer the group greeting.
4. Enter your PIN (default = 0000) and then #.
5. Press 4 to record your group greeting.
6. Record your greeting. When finished recording, press #.
   For example, “You have reached the Doe residence. To
   leave a message for John, press 1. To leave a message for
   Jane, press 2”.
7. Press 2 to keep your greeting.

To change an existing group greeting from the phone
subscribed to the service.

1.   Dial *09.
2.   Press * to administer the group greeting.
3.   Enter your PIN (default = 0000) and then #.
4.   Press 4 to record your group greeting.
5.   Record your greeting. When finished recording, press #.
6.   Press 2 to keep your greeting.

* To change the group greeting from a phone that is not subscribed, please contact
BT’s help desk at (802) 540-0007
                                                                                     4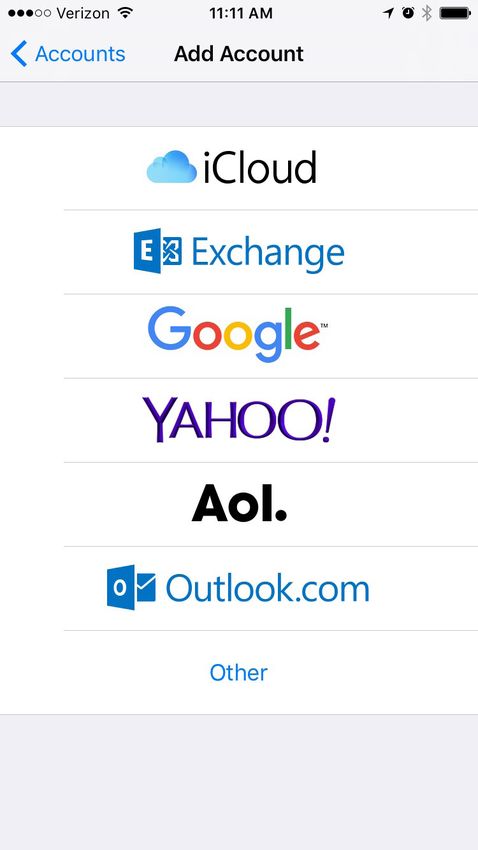
General Telephone Information

How to Place an International Call

To place an International call, you must dial (011), the country
code and the phone number of the person to whom you are
calling.

101 on Voice Mail Capacity

•   Maximum number of messages the voice mail system may
    receive is 100.
•   Maximum length of one voice mail message is 2 minutes.
•   Maximum box capacity is 20 minutes. This includes saved
    and new messages.
•   Message retention time for messages saved on the voice
    mail system is 31 days.

Telephone Troubleshooting

No Dial Tone - If you do not have a dial tone, please follow
these steps:

1. If all of the services are out in your house, locate
   the battery supply (“Cyber Power”) in your
   basement.
2. The Cyber Power should have two solid green
   lights, if not, it is not receiving power. Make sure
   it is plugged into a working power outlet. Your Cyber Power Battery Supply Box
   services should be restored upon plugging the
   Cyber Power into an outlet.
                                                                                    5
3. If the Cyber Power is plugged into a working power outlet
    but you still have no services, please call the Help Desk at
    (802) 540-0007 for assistance.
4. If there are two green lights on the Cyber Power, try the
    following steps:
     1. Are you using a cordless phone? If so, is its battery
     charged?
     2. Is the base station plugged in? If there is no power to
     the handset of your cordless phone it will not function.
     3. If you have a spare phone, try plugging it in and
     seeing if it works.
     4. If you have more than one phone, try unplugging
     them all and plug one in at a time. Sometimes one phone
     can short out several.
5. The next step is to obtain a dial tone at the
Network Interface Device (“NID”). This only works if
you have a phone which does not require a power
supply or have a way to plug your phone’s power
supply in outside.
     1. Open the NID and disconnect the telephone
     jack inside by squeezing the clip with your thumb
     and forefinger and gently pulling it out.
                                                         Closed Network Interface Device

     2. Now plug your phone into this jack inside
     the NID. If the phone works, the problem is in
     your inside jacks and or wiring. To learn more
     about what maintenance is included with your BT
     service, contact Customer Service or Help Desk at
     (802) 540-0007.
                                                                     Open Network Interface Device

                                                                                                     6
Chapter 2
Internet
Email Access
Wireless Router Setup
Internet Troubleshooting
7Email Access
Creating an Email Account
To create an email account you will need to speak with a
Customer Service Representative or a Help Desk Technician by
either contacting us at (802) 540-0007 or by visiting our office
at 200 Church Street.
Accessing Web Mail
There are two ways to access your email in a browser.
1. The easiest way is to simply go to the Burlington Telecom
home page at www.burlingtontelecom.com and click the
Web Mail icon at the top of the page.
2. Another easy way to get into Web Mail is to go directly
to webmail.burlingtontelecom.net and enter your login
credentials.
Home Page Web Mail Icon Web Mail Login Screen
8Changing Your Email Password
To change your password enter http://users.burlingtontelecom.
net into your browser.
1. Once loaded, enter your email address and password then
click Log In.
2. Now click “Change Password” at the top of the page.
3. You will be prompted for your current password and for a
new password. Enter this information and click the “Change
Password” button to confirm.
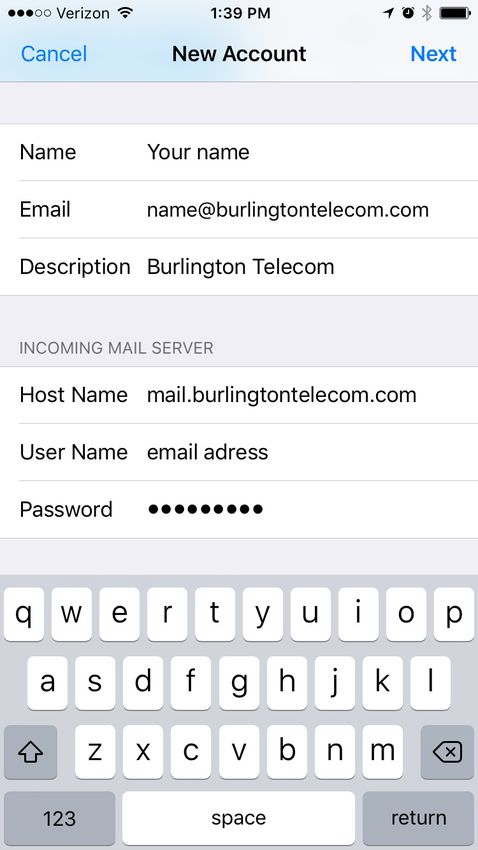
Setting up BT Email on Your iPhone and iPad (iOS 10)
1. Open Settings.
2. Swipe down and tap on “Mail”, then “Accounts”
93. Tap “Add Account”, then “Other”.
4. On next screen tap “Add Mail Account”.
5. Complete the New Account section
6. Complete the Mail Server section (see below for example)
mail@burlingtontelecom.net
mail@burlingtontelecom.net
mail@burlingtontelecom.net
mail@burlingtontelecom.net
*Android & Blackberry Users: Due to differing mobile operating systems and phone models, we recommend referencing your
phone’s user manual or contacting your wireless carrier for assistance with configuring email settings. The settings covered in
this section may or may not be applicable to your device. 10Mail Client Settings
Burlington Telecom supports both POP3 and IMAP protocols
for retrieving and reading email messages within an email
client. To enable a Burlington Telecom email account in your
email client of choice you will need the following settings:
1. Incoming Mail Server: mail.burlingtontelecom.net.
2. User Name: [your email address@burlingtontelecom.net].
3. Password: [your email password].
4. POP3 uses port 995 and IMAP uses 993.
1. Outgoing Mail Server: mail.burlingtontelecom.net.
2. Outgoing Mail Server Port: 465.
3. Use SSL?: Yes.
4. Authentication type: Password (the user name for the
SMTP server must be your full email address).
If you would like help configuring an email client, please
contact the Help Desk at (802) 540-0007 or visit our office at
200 Church Street.
Wireless Router Setup
Most wireless routers work out of the
box with a Burlington Telecom Internet
connection. If you are using your own
wireless router you should refer to the
documentation that accompanied it.
TP Link Dual Band Router
11Changing the settings on a TP Link Router 1. You must be connected to the router either wirelessly or directly with an Ethernet cable. 2. If the back of your router looks like this, with the blue port to the left of the yellow ports, please enter 192.168.0.1 into the address bar of your browser. 3. You will be prompted for your name and password. By default, both the name and password are “admin”. Enter “admin” into both fields and click “log In”. You will now have access to all of the settings in the router. Unless you have experience with networking, it is best not to change settings besides those covered in this guide. Changing SSID (Network Name) 1. Click on “Wireless” in the list on the left. 2. Look for a field labeled “SSID”. Enter the name you would like to call your wireless network and click “Save”. 3. An alert will show up at the bottom of the page reminding you to reboot the router. Click where it says “click here” at the bottom of the page. It will bring you to a page with a button labeled “Reboot”. Click “Reboot” and then click “OK” on the alert that comes up. Your router will now reboot. 4. Once rebooted, any computers that connect to the wireless router will no longer be connected. 5. You will now need to select the wireless network from the list of available networks (varies by system). 12
Changing Wireless Password

1. Log into your router as described in the Changing the
   Settings on a TP Link section.
2. Click on “Wireless” in the list on the left, then “Wireless
   Security”
3. Most routers are configured with a WPA password. This will
   be listed at the bottom of the Wireless Security settings
   page in the field PSK Password.
4. If you previously had no password, you will need to click
   the button to the left of “WPA-PSK/WPA2-PSK”.
5. Enter your password in the field labeled PSK Password and
   click “Save” at the bottom of the page.
6. You will be prompted to reboot. Click on the “click here”
   link at the bottom of the page, click “Reboot” and then
   “OK”. The router will reboot.

Any computers that connect to this wireless router will no
longer be able to connect without the password you just set.
Your operating system may prompt you for your password or
you may need to manually rejoin the wireless network.

                                                                 13
Internet Troubleshooting Wireless Connection If your Internet connection appears to be failing, follow these steps to resolve most issues. 1. Verify if your computer is connected to a wireless network: Macintosh Computers On a Macintosh, the Wi-Fi status menu is in the top right of your screen: The above icons indicate you are connected to a network. Click on this icon and make sure there is a check mark next to your network. This icon means your machine’s Wi-Fi is turned off. Click on this icon and select “Turn Wi-Fi On.” (On older Macs this will read “Turn Airport On”). If you see other variations of this icon, there may be a problem with your Macintosh. Windows Computers On a Windows computer, your Wi-Fi status indicator varies by brand, model and driver. Refer to the documentation that came with your computer. 14
2. If you do not see your wireless network listed or you are
   connected to the network but still can’t get online, there is
   likely an issue with your router.

If you have a router from Burlington Telecom it will look like
one of these:

                        TP Link Router - Acher C7

                        TP Link Router - Acher C2
                                                                   15
If there are no lights visible on your router, it is not on. If your
router’s lights are on and blinking, it is operating normally.
There should be at least two cables plugged into the back of
the router. One is an Ethernet cable which will either come
out of the wall or will be connected to another small box. This
cable should be connected to the WAN port on the router. The
other cable is a power cable. It will have a round end on it.
If all of these cables are connected correctly, the next step is to
reboot the router. This is done by removing the power cord
POWER WAN PORT LAN PORTS
Power Cable Ethernet Cable
from the back of the router, waiting 30 seconds and then
plugging it back in. Once plugged back in, the lights should
turn on again and begin blinking.
Return to your computer and see if you can get online. In
some cases you may need to restart your computer.
16If none of the above steps restore your Internet connection,
there may be an additional problem with your connection.
Please contact the Burlington Telecom Help Desk at (802) 540-
0007 for assistance.
Wired Connection
If your computer is not wireless, it will be connected via
an Ethernet cable (see Figure B). Look on the back of your
computer to make sure you have one of these cables
connected. The Ethernet cable will either go from your
computer into the wall or into a small box. This small box will
be either a router or an Ethernet switch.
SMC Ethernet Switch TP Link Ethernet Switch
If your computer is wired into a small box via an Ethernet
cable, verify that this box has its lights on. If it does not, make
sure it is plugged into a power outlet.
You may need to restart your computer.
17If none of the above steps restore your Internet connection, there may be an additional problem with your connection. Please contact the Burlington Telecom Help Desk at (802) 540-0007 for assistance. Slow Wireless Connection 1. If your wireless Internet connection seems slow, first make sure it is password protected. If your network is unsecured, there is a chance neighbors or other people living in close proximity to you are using your wireless connection without your knowledge and slowing overall speeds. 2. Once you’ve verified that your wireless network is password protected, run a speed test to test your connection speed. The most accurate test to use is BT’s speed test. 3. To produce an accurate speed test result, make sure that you aren’t loading any other websites, downloading something or using any other program which connects to the internet. Also verify that no one else is currently using the Internet either. 4. Once loaded, click “Begin Test.” 5. If the speed that is shown is greater than 2/3rd of your advertised BT service then your connection is functioning normally. The slowness you have perceived may be due to a slow computer, other people on the network slowing you down or just the expected performance of the network. If you have questions about your Internet speed, feel free to call the Help Desk. If the speed that is shown to you is less that 2/3rds of your advertised BT service there may be a problem. 18
http://speedtest.burlingtontelecom.net
6. Unplug the power cord from your router
7. Unplug the Ethernet cable from the WAN port on your
    router (see Figure B) and plug it directly into your
    computer.
8. Run the speed test again and see if there is any difference.
9. If your network speed is much faster when directly
    connected via ethernet, there could be a problem with
    the router. You may want to reset factory default settings
    for your router and/or change the password. If you have a
    router from Burlington Telecom (see Figure A), please call
    the Help Desk at (802) 540-0007 for help resetting your
    Burlington Telecom router.
10. If you are receiving a slow connection, even when
    bypassing your router, please call the Help Desk at (802)
    540-0007 for further assistance.

Slow Wired Connection

1. If your wired Internet connection seems slow, try running
      a speed test. The most accurate speed test to use is
      Burlington Telecom’s speed test.
2. See steps 6 through 8 in the Slow Wireless Connection
      section.
                                                                  19
Chapter 3
TV
Watching TV
Parental Controls
Television Features
DVR Usage
Television Troubleshooting
20Watching TV Each time you press the guide button on your remote, the STB (Set Top Box) will toggle through different guide settings. The current setting is displayed in the video preview in the top left. The different guides are as follow: Subscribed: The channels to which you have subscribed. PPV: Pay Per View. Favorites: These are custom guides you have created. All: These are all of the channels BT offers. Depending on your subscription you may or may not receive all of these channels. HD: HD channels only. Guide 1. To search for a program you wish to watch, start by pressing the “Guide” button on your remote. 2. Scrolling up or down changes the channel one at a time. 3. Scrolling left or right changes the time block one at a time. 4. Use the “PG” button to move a page at a time. 5. Use the “Day -” or “Day+” to jump forward or back a full day. 6. To exit the guide press “Exit” on your remote. Search 1. Press the left arrow button on your remote, hightlight new search, and press “OK”. 2. Using the on screen search window, use the browse buttons to type the title of the show or movie you want. 3. Press the yellow button to search. 21
Favorites

Favorites allows you to save you favorite channels in one place.

1. Using the program guide, select the program you wish to
   save as a favorite and press the blue button.
2. You can save as my channels as you would like.
3. To view your saved favorites press the “FAV” button.

Parental Controls

Turning Parental Controls On and Off

1. Press the “Menu” button and select “Settings” at the
   bottom.
2. Arrow to the right, select “Parental” and press “OK”
3. Here you can set and change PIN code, restrict channels
   based on rating, set time restrictions, and more.
4. To make these changes follow the on screen prompts.
5. Make sure you press “OK” to lock in your changes.

                                                                   22
Television Features
Remote Programming
To use the volume and power controls on your Burlington
Telecom remote control, it will need to be programmed.
Potenza backlit remote Amino Willow remote Big Button UR2-211
*Remote programming guides can be found on the BT’s
website and helpful videos on BT’s YouTube channel.
23DVR Usage
DVRs provide two advantages over a standard set top box. The
first is the ability to pause live TV and the second is the ability
to record programs for watching later.
Pause Live TV
1. Press the “Pause” button on your remote.
2. To resume playback, press the “Pause” button again or the
“Play” button.
3. To move past the recorded portion press the “Live” button.
Record the Program Currently Being Viewed
1. Press the “Record” button.
2. Choose “One-Time” or “Series”, and press “OK”.
Schedule a Recording
1. Using the guide, use the
arrow buttons to select the
program you wish to record
and press the “Record”
button.
2. Choose “Series”, and press “OK”.
3. If you wish to change, you can adjust the recording
options.
4. You can also turn on AutoTune, which will automatically
change the channel to that recording if selected.
5. Highlight “Create Series Recording” and press “OK”.
24Cancel A Recording
If you wish to cancel or delete recording or to skip a particular
episode.
1. Press “List” on your remote control.
2. Press the red button to delete a single recording.
3. Press “Menu”, highlight Recordings, and then select Series.
4. Highlight the series and press the red button to remove.
VOD (Video On Demand) Usage
1. Press “On-Demand” on your remote.
2. Use the arrow buttons to select the program you wish to
watch.
25In order to rent a movie, or a Pay Per View event you will need
to enter a PIN number. The PIN number is set by default to
1234, we strongly encourage you to change this.
Changing PIN
1. Press the “Menu” button and select “Settings” at the
bottom.
2. Arrow to the right, select “Parental” and press “OK”
3. Here select “Change Pin” (Default PIN - 1234)
Pay Per View
To view Pay Per View events, tune to channel 800. You will be
given a 5 minute free preview. To order the event, press the
“OK” button on your remote. You will be prompted for your pin.
Premium VOD
If you subscribe to premium channels such as HBO or
Showtime, there are additional VOD rentals available.
1. Press “On-Demand” on your remote.
2. Use the arrow buttons to select the program you wish to
watch.
Any premium package VOD content to which you have
subscribed, will appear here.
*More user guides can be found on the BT’s website and
helpful videos on BT’s YouTube channel.
26Cable Troubleshooting
Frozen Screen
If your video signal appears frozen, you may
need to reboot your set-top box.
Amino Set-top Box
1. In the back of your set-top box there is a thin
black power cable with a round connector.
2. Unplug this cable and the lights on the front of the box
should go out.
3. Wait 30 seconds and plug the power cable back in.
4. You should see the boot screen on your TV.
Boot Screen
271. If your set-top box does not boot up after being plugged
back in, you will need to locate your Ethernet switch.
SMC Ethernet Switch TP Link Ethernet Switch
2. This box is most likely located in the basement, but
sometimes can be found in the living area.
3. Once you have located the Ethernet switch, unplug the
thin, black power cable from it.
4. Wait 30 seconds, then plug it back in.
5. If lights do not appear on the front of the box, make sure
there is power coming to the power outlet the set-top box
is plugged into.
6. Once the lights on the Ethernet switch come back on,
check the TV.
7. You may need to reboot the set-top box again.
Distorted Image/Tiling
See above steps on troubleshooting for Frozen Screen.
No image (Black/Blue screen)
1. Make sure there is a light on the front of your set-top box.
2. If the red light is blinking, make sure the Ethernet cable in
the back of it is secure.
3. If you connect to your TV with a coaxial connection, make
sure your TV is set to channel 3 or 4. 284. Reboot your set-top box.
5. In the back of your set-top box there is a thin black power
cable with a round connector.
6. Unplug this cable and the lights on the front of the box
should go out.
7. Wait 30 seconds and plug the power cable back in.
8. You should see the boot screen on your TV.
9. If this doesn’t solve it, locate your Ethernet switch.
10. This box is most likely located in the basement, but
sometimes can be in the living area.
11. Unplug the power cable from the Ethernet switch.
12. Wait 30 seconds and plug it back in.
Remote Not Responding
Try these steps if your remote control is not responding:
1. When you press a button on the remote the red light on
the remote should illuminate. If it does not, the batteries
may need to be replaced or have been installed incorrectly.
2. If the red light comes on but still nothing is happening, try
pressing the “CBL” (“STB” on silver remotes) button in the
top right of the remote. This puts the remote in Cable TV
mode.
3. Try to re-program the remote. Start by pressing the “CBL”
(“STB” on silver remotes) button in the top right of the
remote.
4. Press and hold the “setup” button in the top left of the
remote until the light on the remote blinks twice.
5. Once the light is blinking, let go of the setup button and
enter the code from your remote support guide. (Can be
found on BT’s TV Support page.)
6. After entering the code, the light should blink twice. 29Set-Top Boxes
Amino A140
Amino A540
ADB 3800W
30(802) 540-0007 www.burlingtontelecom.com 200 Church Street, Burlington VT, 05401
You can also read