User Guide Linux Mint - Jan 13, 2021
←
→
Page content transcription
If your browser does not render page correctly, please read the page content below

User Guide

   Linux Mint

    Jan 13, 2021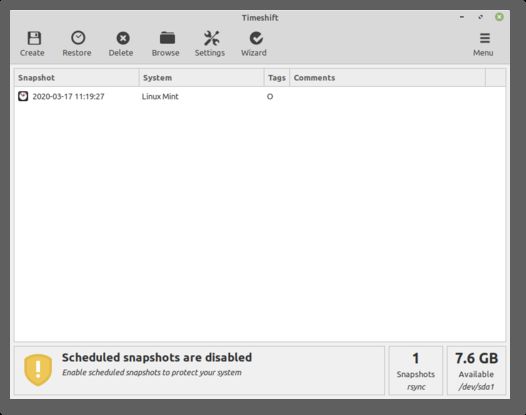
Software

1   Snap Store                               3

2   Chromium                                 5

3   Grub Boot Menu                           7

4   Printers and Scanners                   11

5   Edge ISO Images                         15

6   How to upgrade to Linux Mint 20         17

                                             i
ii
User Guide

This is the Linux Mint User Guide.
This Guide is not final. Content is being added slowly but surely :)

Software                                                                        1
User Guide

2            Software
CHAPTER            1

                                                                                                        Snap Store

The Snap Store, also known as the Ubuntu Store, is a commercial centralized software store operated by Canonical.
Similar to AppImage or Flatpak the Snap Store is able to provide up to date software no matter what version of Linux
you are running and how old your libraries are.

1.1 Criticism

1.1.1 Centralized control

Anyone can create APT repositories and distribute software freely. Users can point to multiple repositories and define
priorities. Thanks to the way APT works, if a bug isn’t fixed upstream, Debian can fix it with a patch. If Debian
doesn’t, Ubuntu can. If Ubuntu doesn’t Linux Mint can. If Linux Mint doesn’t, anyone can, and not only can they fix
it, they can distribute it with a PPA.
Flatpak isn’t as flexible. Still, anyone can distribute their own Flatpaks. If Flathub decides they don’t want to do this or
that, anyone else can create another Flatpak repository. Flatpak itself can point to multiple sources and doesn’t depend
on Flathub.
Although it is open-source, Snap on the other hand, only works with the Ubuntu Store. Nobody knows how to make
a Snap Store and nobody can. The Snap client is designed to work with only one source, following a protocol which
isn’t open, and using only one authentication system. Snapd is nothing on its own, it can only work with the Ubuntu
Store.
This is a store we can’t audit, which contains software nobody can patch. If we can’t fix or modify software, open-
source or not, it provides the same limitations as proprietary software.

1.1.2 Backdoor via APT

When Snap was introduced Canonical promised it would never replace APT. This promise was broken. Some APT
packages in the Ubuntu repositories not only install snap as a dependency but also run snap commands as root without
your knowledge or consent and connect your computer to the remote proprietary store operated by Canonical.

                                                                                                                          3
User Guide 1.2 Disabled Snap Store in Linux Mint 20 Following the decision made by Canonical to replace parts of APT with Snap and have the Ubuntu Store install itself without users knowledge or consent, the Snap Store is forbidden to be installed by APT in Linux Mint 20. Note: For more information read the announcements made in May 2020 and June 2019. 1.3 How to install the Snap Store in Linux Mint 20 Recommended or not, if you want to use the Snap Store, re-enabling and installing it is very easy. sudo rm /etc/apt/preferences.d/nosnap.pref apt update apt install snapd 4 Chapter 1. Snap Store
CHAPTER          2

                                                                                               Chromium

Chromium is an open-source web browser developed by Google.
Google also develops a proprietary browser based on Chromium called Chrome. This is the browser Google promotes
and provides repositories for. There are no Google repositories for Chromium.
Chromium can be installed from the official repositories.

2.1 Linux Mint 18.x and 19.x

In Linux Mint 18.x and Linux Mint 19.x the packages is called chromium-browser:

apt install chromium-browser

2.2 Linux Mint 20.x and LMDE 4

In Linux Mint 20.x and LMDE 4, it is called chromium:

apt install chromium

                                                                                                             5
User Guide 6 Chapter 2. Chromium
CHAPTER        3

                                                                                           Grub Boot Menu

Grub is the boot menu.
If you have more than one operating system installed, it allows you to select which one to boot.
Grub is also useful for troubleshooting. You can use it to modify the boot arguments or to boot from an older kernel.

3.1 How to make the Grub menu always visible

If you only run Linux Mint and there are no other operating systems on the computer, the menu is hidden by default.
To make it visible, as root, add these lines to /etc/default/grub.d/90_custom.cfg:

GRUB_TIMEOUT="5"
GRUB_TIMEOUT_STYLE="menu"

Then type the following commands in a terminal:

sudo update-grub

3.2 How to theme the Grub menu

For compatibility reasons, some releases sometimes ship without a Grub theme:

                                                                                                                    7
User Guide You can make it look like this: 8 Chapter 3. Grub Boot Menu
User Guide

To do so, open a terminal and type:

apt install --reinstall -o Dpkg::Options::="--force-confmiss" grub2-theme-mint

Or if you have a HiDPI screen, type this instead:

apt install --reinstall -o Dpkg::Options::="--force-confmiss" grub2-theme-mint-2k

3.2. How to theme the Grub menu                                                      9
User Guide

10           Chapter 3. Grub Boot Menu
CHAPTER           4

                                                                                 Printers and Scanners

To add a printer open Printers from the application menu and click on the Add button.
To scan a document open Document Scanner from the application menu.

 Warning: Linux Mint 20 shipped with a package called ippusbxd. This package prevents many printers from
 working correctly. If this package is installed on your computer, remove it and reboot.

Note: Network printers can be automatically added and reappear even if you remove them. If you do not like this
behaviour, remove the cups-browsed package.

4.1 Manufacturers

4.1.1 Hewlett-Packard (HP)

The HP drivers are called HPLIP. They are open-source and they are installed by default in Linux Mint. As a result,
most HP printers and scanners work out of the box and don’t require you to install any additional drivers.

Installing hplip-gui

In addition to the already installed hplip driver, there is a package available in the Linux Mint repositories called
hplip-gui.
This package provides the following utilities:
    • An HP status tray icon
    • HP Device Manager
    • HPLIP Toolbox

                                                                                                                  11
User Guide
• HPLIP Fax Utility
• Fax Address book
Although you do not need hplip-gui to use your HP device, it can provide extra information (such as ink levels) and
help troubleshooting.
Installing the proprietary plug-in
Some HP printers require proprietary software technologies to allow full access to printer features and performance.
Unfortunately, these technologies cannot be open sourced, but to resolve this HP uses a binary plug-in for these
printers.
To see if your printer requires the HP plugin-in, check the list of devices at the HP Developer Website.
To install the plugin-in, open a terminal and type:
apt install python3-pyqt5
sudo hp-setup
Then follow the instructions written on that website.
4.1.2 Brands which provide .deb packages
The following brands provide Linux drivers for their printers and scanners in the form of .deb packages:
• Epson
• Lexmark
• Samsung
• Xerox
Look for Linux drivers on your manufacturer’s website, download the packages and double-click them to install them
with Gdebi.
Hint: When you have a choice between different package options, choose .deb. If you have a choice for the package
architecture choose amd64 (note that this is sometimes called x86_64 or even just 64-bit).
4.1.3 Canon
Canon provides Linux drivers for its printers and scanners. They have different websites for Europe, the USA and
various countries.
When downloading drivers from Canon, choose the debian Package archive option.
If they come as .tar.gz archives, decompress them.
Canon driver archives usually contain an install.sh script which already has execution permissions. Run it and follow
the instructions provided by Canon.
12 Chapter 4. Printers and ScannersUser Guide 4.1.4 Brother Brother provides a utility to download and install the right driver for you. Download the utility, choose deb when asked. Decompress it, give it permission to execute and run it in a terminal: chmod a+rx ./linux-brprinter-installer* sudo ./linux-brprinter-installer* Then follow the instructions provided by Brother. 4.2 Driverless Printing and Scanning A standard protocol called IPP was designed to communicate with printers and scanners over the network. Nowadays this protocol is supported by many devices. Driverless printing and scanning consists in using IPP locally, i.e. to be able to print and scan without the need for any drivers at all. 4.2.1 ippusbxd ippusbxd was an early implementation of IPP over USB. It didn’t work well and caused many issues. It was installed by default in Linux Mint 20. If this package is installed on your computer, make sure to remove it. apt remove ippusbxd Then reboot your computer. 4.2.2 ipp-usb ipp-usb is a new implementation of IPP over USB. It works much better and recognizes many printers and scanners. If you are unable to make your device work using printing/scanning drivers, give ipp-usb a try. First, remove your printer using the Printers configuration tool. Then install ipp-usb from the repositories: apt install ipp-usb Finally reboot the computer. Note: When ipp-usb is installed local printers are automatically added. They will reappear if you remove them. Warning: When ipp-usb is installed it takes over communication with all printing/scanning devices, i.e. print- ing/scanning drivers cannot work, they’re inhibited. 4.2. Driverless Printing and Scanning 13
User Guide

4.2.3 sane-airscan

sane-airscan provides support for eSCL (Apple AirScan, AirPrint) and Microsoft WSD (WS-Scan, Web Services for
Devices).
If you can’t get your scanner to work give sane-airscan a try.
Install it from the repositories:

apt install sane-airscan

And reboot the computer.

14                                                                     Chapter 4. Printers and Scanners
CHAPTER           5

                                                                                        Edge ISO Images

If you cannot boot or install Linux Mint because your hardware is too recent and is not properly detected look for an
“Edge” ISO image.
In addition to its regular ISO images, Linux Mint sometimes provides an “edge” ISO image for its latest release. This
image ships with newer components to be able to support the most modern hardware chipsets and devices.

 Warning: The Edge ISO image is not as stable as the other ISOs and may not support as many proprietary drivers.
 Only use it if you cannot boot or install with the other ISOs.

5.1 Latest Edge ISO image

The latest Edge ISO image is Linux Mint 20.1 Cinnamon Edge.
It features the following upgraded components:

                                                        20.1    20.1 Edge
                                        Linux kernel    5.4     5.8

                                                                                                                  15
User Guide 16 Chapter 5. Edge ISO Images
CHAPTER           6

                                                                 How to upgrade to Linux Mint 20

This page explains how to upgrade from Linux Mint 19.3 to Linux Mint 20.

6.1 Requirements

6.1.1 64-bit architecture

Although both 32-bit and 64-bit versions of Linux Mint 19.3 are supported until April 2023, new releases of Linux
Mint, including 20, are only available in 64-bit.
To upgrade to Linux Mint 20 you need to be running the 64-bit version of Linux Mint 19.3.
To check which version you’re running type:

dpkg --print-architecture

If it says amd64 you can upgrade to Linux Mint 20.
If it says i386, it means you’re using the 32-bit version. In this case you cannot upgrade and you need to stick with
Linux Mint 19.3.

6.1.2 Experience with APT

To upgrade to Linux Mint 20 you need experience with APT and the command line.
Upgrading to a newer package base is not trivial and it should not be performed by novice users.
You need to know how to type commands and read their output.
You also need to be experienced with APT. During the upgrade you’ll need to understand the output of APT commands.
You’ll need to understand if a package needs to be removed, if it blocks the upgrade or if it conflicts with another
package.

                                                                                                                  17
User Guide
6.2 Preparation
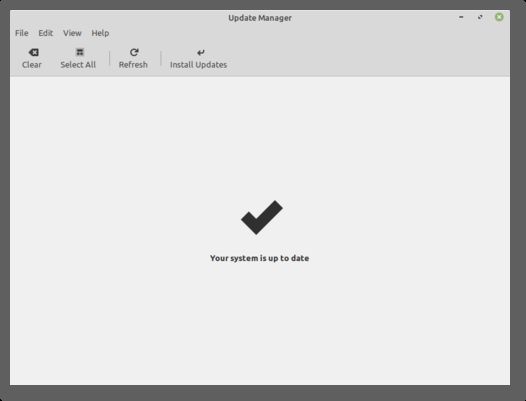
6.2.1 Apply all package updates
To apply all updates:
• Launch the Update Manager with Menu → Administration → Update Manager.
• Press the Refresh button to update the cache.
• Press the Select All button to select all updates.
• Press the Install Updates button.
• Follow the instructions from the Update Manager and install all updates until the manager tells you the system
is up to date.
• Reboot the computer.
6.2.2 Create a system snapshot
If anything breaks or if anything goes wrong during the upgrade, you can go back in time and revert all changes by
restoring your latest system snapshot. Whatever happens, you’re covered. You’ll be able to restore your operating
18 Chapter 6. How to upgrade to Linux Mint 20User Guide
system to this current state, either from within Linux Mint, or by launching Timeshift from a live Mint session (live
DVD or live USB).
To create a system snapshot:
• Launch Timeshift with Menu → Administration → Timeshift.
• Follow the wizard to select a destination for your snapshots.
• In the toolbar, click on the Create button to make a manual snapshot of your operating system.
6.2.3 Purge PPAs and 3rd party repositories
PPAs or 3rd party repositories can introduce issues during the upgrade if the versions of the packages they provide are
higher than in Linux Mint 20. This can result in unmet dependencies, held packages or resolver issues.
To purge 3rd party packages follow these steps:
• Launch the Software Sources tool from Menu → Administration → Software Sources.
• Open the Additional repositories tab and disable all additional repositories.
• Open the PPA tab and disable all PPAs.
• Click on the button to refresh your APT cache.
6.2. Preparation 19User Guide
• Open the Maintenance tab and click on Downgrade Foreign Packages.
• Select all foreign packages and click Downgrade.
• Click on Remove Foreign Packages.
• Select all foreign packages and click Remove.
• Reboot the computer.
• Create another Timeshift snapshot.
Note: This step is optional but it is strongly recommended. Some PPAs are perfectly fine, some aren’t. Some only
add packages and don’t impact the upgrade process, others introduce dependencies which cannot be resolved.
You can leave some foreign packages installed or in their 3rd party version and try to upgrade if you want. If it works,
then great. If it doesn’t, you can always restore the previous snapshot and follow the steps above to purge them before
trying again.
6.3 Upgrade
6.3.1 Install the upgrade tool
To install the upgrade tool, open a terminal and type:
apt install mintupgrade
6.3.2 Check the upgrade
To simulate an upgrade, open a terminal and type:
mintupgrade check
Then follow the instructions on the screen.
This command temporarily points your system to the Linux Mint 20 repositories and calculates the impact of an
upgrade.
Note that this command doesn’t affect your system. After the simulation is finished, your original repositories are
restored.
The output shows you if the upgrade is possible, and if it is, which packages would be upgraded, installed, removed
and kept back.
Note: It is extremely important that you pay close attention to the output of this command.
Keep using mintupgrade check and do not proceed to the next step, until you’re happy with the output.
Hint: If this steps fails half-way through type mintupgrade restore-sources to go back to your original
APT configuration.
20 Chapter 6. How to upgrade to Linux Mint 20User Guide
6.3.3 Download the package updates
To download the packages necessary to upgrade, type the following command:
mintupgrade download
Note that this command doesn’t actually perform the upgrade itself, but just downloads the packages.
6.3.4 Apply the upgrades
Warning: This step is non-reversible. Once you perform it, the only way to go back is by restoring a system
snapshot.
To apply the upgrades, type the following command:
mintupgrade upgrade
6.3.5 Downgrade foreign packages
Some of your packages might have a lower version in Linux Mint 20 than in Linux Mint 19.3. To guarantee they
function properly, they need to be downgraded.
• Launch the Software Sources tool from Menu → Administration → Software Sources.
• Open the Maintenance tab and click on Downgrade Foreign Packages.
• Select all foreign packages and click Downgrade.
6.3.6 Delete foreign packages
Some packages no longer exist in Linux Mint 20 and can safely be removed.
• Launch the Software Sources tool from Menu → Administration → Software Sources.
• Open the Maintenance tab and click on Remove Foreign Packages.
• With the exception of packages you want to keep, select all foreign packages and click Remove.
6.4 Troubleshooting
6.4.1 Installing mintupgrade
If you can’t find mintupgrade in the repositories, switch to the default Linux Mint mirror and refresh the APT cache.
6.4.2 Restoring a snapshot
A known issue affects Timeshift. When restoring a snapshot, if the Disclaimer window is empty, wait for about 2
minutes for the text to appear. Once the disclaimer text is there you can press Next and restore your snapshot. Pressing
Next before the text appears results in a failure to restore. If you did, reboot and try to restore again.
6.4. Troubleshooting 21User Guide
6.4.3 Skipping the timeshift requirement
If you’re using another snapshot tool and would rather not use Timeshift, you can skip the Timeshift requirement with
the following command:
echo "{}" | sudo tee /etc/timeshift.json
Don’t forget to remove that file after the upgrade if you want Timeshift to work properly.
6.4.4 Computer freeze
On some computers the upgrade can be quite intensive and it can temporarily freeze the desktop. This can last for up
to 10 minutes at times or even take hours on slow computers. This is OK, be patient and give it time.
If this becomes a problem, logout completely, drop to console with CTRL+ALT+F2 and run mintupgrade
upgrade from there instead.
6.4.5 Broken boot
If the computer no longer boots, boot from the live Linux Mint 19.3 ISO.
From the live session, launch Boot Repair and use it to fix the boot sequence.
If this doesn’t work, boot from the live Linux Mint iso again, and launch Timeshift.
Timeshift is able to scan your drives from the live session and restore your snapshot from there.
6.4.6 Boot warnings
You can ignore boot warnings related to ACPI or initramfs unpacking. They’re cosmetic and do not affect the boot
sequence.
6.5 Notes
The upgrade overwrites files in /etc/ with default configuration files. You can restore files indivually by the Timeshift
snapshot you made prior to upgrading.
To restore your lightDM settings, run the Login Window configuration tool (sudo lightdm-settings).
6.6 Alternatives
If you cannot upgrade perform a fresh installation.
Generic instructions on fresh upgrades are also available.
22 Chapter 6. How to upgrade to Linux Mint 20You can also read