Using HP Vertica on Amazon Web Services - HP Vertica Analytics Platform 6.1.x
←
→
Page content transcription
If your browser does not render page correctly, please read the page content below
HP Vertica Analytics Platform 6.1.x

 Using HP Vertica on
Amazon Web Services
                                        Doc Revision 3
                  Copyright© 2006-2013 Hewlett-Packard

         Date of Publication: Monday, September 23, 2013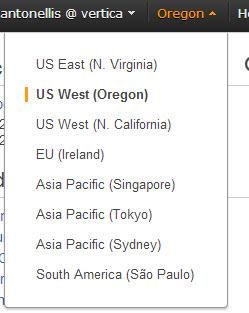
Contents
Syntax Conventions                                                                                                                                                              4

About Using HP Vertica on Amazon Web Services (AWS)                                                                                                                             1
     Important Notes on this Release of HP Vert ica on AWS .......................................................................................1
     Understanding the AWS Procedure Co mponents ....................................................................................................2
     About the HP Vertica 6.1.x Instance Sizing .............................................................................................................5

Installing and Running HP Vertica on AWS: The Detailed Procedure                                                                                                                6
     Creat ing a Placement Group ........................................................................................................................................6
     Creat ing a Key Pair .......................................................................................................................................................7
     Creat ing a Virtual Private Cloud (VPC)....................................................................................................................7
     Creat ing and Assigning an Internet Gateway ...........................................................................................................8
     Creat ing a Security Group............................................................................................................................................8
     Adding Rules to a Security Group..............................................................................................................................9
     Configuring and Launching an Instance..................................................................................................................11
     Assigning an Elastic IP...............................................................................................................................................13
     Connecting to an Instance ..........................................................................................................................................14
     Forming a Cluster ........................................................................................................................................................14
     After Your Cluster is Up and Running ....................................................................................................................15
     Using Management Console (MC) on AWS ..........................................................................................................16

Adding Nodes to a Running AWS Cluster                                                                                                                                        18
     Launching New Instances to Add to an Existing Cluster .....................................................................................18
     Including the New Instances as Nodes in Your Existing Cluster........................................................................19
     Re-Balancing Data ......................................................................................................................................................19

Removing Nodes from a Running AWS Cluster                                                                                                                                    21
     Preparing to Remove a Node.....................................................................................................................................21
     Removing Hosts fro m the Database .........................................................................................................................21
     Removing Nodes from the Cluster ...........................................................................................................................22
     Stopping the AWS Instances (Optional) .................................................................................................................22

Migrating to HP Vertica 6.1.x on AWS                                                                                                                                         23

Upgrading from a 6.1 AMI on AWS                                                                                                                                              24
     Preparing to Upgrade Your AMI ..............................................................................................................................24
     Upgrading Your AMI .................................................................................................................................................24

Troubleshooting: Checking Open Ports Manually                                                                                                                                27

                                                                                      -ii-
Contents

     Using the netcat (nc) Utility ......................................................................................................................................27

Appendix: Installing and Running HP Vertica on AWS: QuickStart                                                                                                        30

Copyright Notice                                                                                                                                                      32

                                                                                  -iii-
4
Syntax Conventions
The following are the syntax conventions used in the HP Vertica documentation.
Syntax Convention Description
Text without brackets/braces Indicates content you type, as shown.
< Text inside angle brackets > Represents a placeholder for which you must supply a value. The
variable is usually shown in italics. See Placeholders below.
[ Text inside brackets ] Indicates optional items; for example, CREA TE TABLE
[schema_name.]table_name
The brackets indicate that the schema_name is optional. Do not type
the square brackets.
{ Text inside braces } Indicates a set of options from which you choose one; for example:
QUOTES { ON | OFF } indicates that exactly one of ON or OFF must
be provided. You do not type the braces: QUOTES ON
Backslash \ Represents a continuation character us ed to indicate text that is too
long to fit on a single line.
Ellipses ... Indicate a repetition of the previous parameter. For example,
option[,...] means that you can enter multiple,
comma-separated options.
Showing ellipses in code examples might also mean that part of the
text has been omitted for readability, such as in multi-row result sets.
Indentation Is an attempt to maximize readability; SQL is a free-form language.
Placeholders Represent items that must be replaced wit h appropriate identifiers or
expressions and are usually shown in italics.
Vertical bar | Is a separator for mutually exclusive items. For example: [ ASC |
DESC ]
Choose one or neither. You do not type the square brackets.
-4-About Using HP Vertica on Amazon Web Services
(AWS)
In the context of AWS, an HP Vertica node is an AWS instance that has been configured using the
HP Vertica AMI. When you create your instances, you specify the HP Vertica AMI you want to
install. You then configure individual nodes to act as a cluster by using the install_vertica
script.
This document covers the steps you should follow to create an HP Vertica cluster on AWS, from
preparing your AWS environment and launching instances through combining those instances to
create an HP Vertica cluster. You can choose to follow either the QuickStart procedure, or a
more detailed procedure:
The QuickStart procedure includes everything you need to know to set-up HP Vertica, but
assumes you are familiar with the AWS Amazon Management Console. You can find the
QuickStart procedure near the end of this document (page 30).
The detailed procedure adds steps to help walk you through setting up and combining
instances to create a simple cluster.
Note that you run the install_vertica script at the end; the procedures in this document
create your environment so that you can create a cluster using the install_vertica script.
Important Notes on this Release of HP Vertica on AWS
The instructions in this document apply to HP Vertica Version 6.1.x.
If you are running or upgrade to HP Vertica Release 6.1.2 or later:
You can install the Management Console (MC) on your AWS cluster. This release of MC on
AWS includes restrictions. For more information, see Using Management Console (MC) on
AWS (page 16).
You can use the expanded HP Vertica Community Edition, which is the free version of the HP
Vertica Analytics Platform. The free version remains limited to three nodes and up to 1 TB of
data. Refer to HP Vertica Community Edition in the New Features Guide for more information
on the enhanced Community Edition. Note that, if you are using Community Edition, the
license is included within the AMI and is located here:
/opt/vertica/config/licensing/vertica_community_edition.license.key
The HP Vertica 6.1.x AMI includes a pre-formatted 8-disk software RAID array mounted at
/vertica/data (The location is the data and catalog path, which you use when you create a
database.)
-1-Using HP Vertica on Amazon Web Services
Understanding the AWS Procedure Components
The following illustration and table display and describe the AWS components that you must
configure. These are preliminary steps in creating an HP Vertica cluster on Amazon AWS. You
can skip this section and go right to the Installing and Running HP Vertica on AWS: The
Detailed Procedure (page 6).
-2-About Using HP Vertica on Amazon Web Services (AWS)
Illustration Reference
and Step #
Component Sample Description
1 Placement Group GroupVerticaP You supply the name of a Placement Group
(page 6) when you create instances. You use a
Placement Group to group instances
together. A Placement Group for a cluster
resides in one availability zone; your
Placement Group cannot span zones. A
Placement Group includes instances of the
same type; you cannot mix types of instances
in a Placement Group. You can choose one
of two regions for a Plac ement Group; see
Creating a Placement Group (page 6) for
information.
2 Key Pair (page 7) MyKey (MyKey.pem You need a K ey Pair t o access your instances
would be the resultant using SSH. You create the Key Pair through
file.) the AWS interfac e, and you store a copy of
your key (*.pem) file on your local machine.
When you access an instance, you need to
know the local pat h of your key, and you copy
the key to your instance before you can run
the install_vertica script.
3 VPC (page 7) Vpc-d6c18dbd You creat e a Virtual Private Cloud (VP C) on
Amazon assigns this Amazon so that you can create a network of
name automatically. your EC2 instances. All instances within the
VPC share the same network and security
settings. A VPC uses the CIDR format for
specifying a range of IP addresses.
4 Internet Gateway Igw-d7c18dbc An internet gateway allows instances to
(page 8) Amazon assigns and access the internet. Note that, typically, a
attaches an internet gateway is automatically assigned when you
gateway automatically. create a VPC. You can also create your own
named internet gateway, and then attach that
gateway to your VPC.
5 Security Group "default" The security group includes firewall settings;
(page 8) Amazon assigns a its rules specify how traffic can get in and out
security group named of your instances. When you launch your
"default" automatically, instances, you choose a security group.
but you can create and If y ou us e the default security group, you must
name your own add HP Vertica recommended rules to the
security group. group as you would if you created the group
yourself.
-3-Using HP Vertica on Amazon Web Services
6 Instances (page 11) 10.0.3.158 (all An instance is a running version of the AMI.
samples) You first choose an AMI and specify the
10.0.3.159 number of instances. You then launch those
instances. Once the instances are running,
10.0.3.157
you can access one or more of them through
10.0.3.160 SSH.
(Amazon assigns IP
addresses. You need
Notes:
to list the addresses
when you run the Once IPs are assigned to your
install_vertica instances, they must not change in
script to form a cluster order for HP Vertica to continue
of the instances.) working. The IP addresses are
crucial once you have run the
install_vertica script; if you
change them or they become
reassigned, your cluster breaks.
When you stop one or more
instances, your My Instances page
may show blanks for the IP fields.
However, by default Amazon retains
the IPs and they should show up
again in short order.
7 Elastic IP (page 13) 107.23.104.78 You associate an elastic IP to one of your
(sample) instances so you can communicat e with your
cluster. An elastic IP is a static IP address
that stays connected to your account until you
explicitly release it.
8 Connecting (page --- Once you have complet ed all of the
14) procedures for setting up your cluster, you
can connect to the instance attached to your
elastic IP. You can use SSH. If connecting
from a Windows machine, you can, for
example, use Putty.
9 install_vertica --- Your instanc es are already grouped through
script (page 14) Amazon and include the HP Vertica software,
but you must then run the
install_vertica script to combine
instances through their IP addresses so that
HP Vertica knows the instances are all part of
the same cluster.
-4-About Using HP Vertica on Amazon Web Services (AWS)
About the HP Vertica 6.1.x Instance Sizing
Sizing an instance involves estimating the hardware requirements for optimal HP Vertica
performance in a typical scenario. HP Vertica’s recommended pre-configured AMI is meant to
apply to many typical customer environments; HP Vertica uses an AWS cluster-compute type
instance in its AMI. HP Vertica provides its pre-configured 6.1.x AMI to ensure that CPU, RAM,
storage I/O and networking is allocated in a balanced manner, so that no particular resource
bottleneck leaves other resources underutilized.
A cluster-compute instance includes a large amount of CPU and increased networking
performance. Faster processors and substantially improved networking capabilities are
important properties in scenarios such as operating clusters with a large node count loading very
large volumes of data, or executing queries requiring on-the-fly data re-segmentation.
Note: You can read about Amazon cluster instances and their limitations in the Amazon
documentation
http://docs.amazonwebservices.com/AWSEC2/latest/UserGuide/using_cluster_computi
ng.html.
Instance Type Accommodates Large Clusters and High Query Concurrency
The HP Vertica pre-configured AMI includes the AWS cc2.8xlarge instance type, allowing for very
large clusters, higher query concurrency, continuous (trickle) loads, and high-volume periodic
concurrent bulk loads.
Elastic Clock Storage Provides Optimal Cluster Performance
EBS (Elastic Block Storage) is block-level storage used within Amazon EC2 instances. HP Vertica
includes eight EBS volumes for each instance you create with the recommended HP Vertica AMI;
you do not configure EBS volumes when you launch an instance. Every CPU within the instance
receives I/O throughput independently. Prior to release 6.1, before HP Vertica provided a
pre-configured AMI, under-configured EC2 storage was often the root cause of unsatisfactory
AWS cluster performance.
The eight volumes of EBS storage are presented to the host instance as a software RAID0 device.
HP Vertica has found that RAID0 device performance continues to increase up to the optimal
number of eight volumes. Note that HA is provided through K-safety in HP Vertica. Refer to
High Availability and Recovery in the Concepts Guide for information on K-safety.
HP Vertica uses a recommended size for each EBS volume of 146 GB. With eight volumes at
146 GB per volume, total volume size compares to a typical HP Vertica hardware
recommendation of 1.2TB.
Ample Disk Space Allotted for the Operating System
The HP Vertica AMI includes 15 GB disk space for the OS, which HP Vertica has determined to be
an adequate allotment.
-5-Installing and Running HP Vertica on AWS: The
Detailed Procedure
Use these procedures to install and run HP Vertica on AWS. Note that this document mentions
basic requirements only, by way of a simple example. Refer to the AWS documentation for more
information on each individual parameter.
Creating a Placement Group
Perform the following steps to create a Placement Group. A Placement Group ensures that your
nodes are properly co-located.
1 Log in to your Amazon EC2 Console Dashboard.
2 Select Placement Groups. The Placement Group screen appears.
3 Using the region dropdown on the top right of the Placement Group screen, choose one of two
regions for your nodes. Two AWS regions support the HP Vertica AMI: US West (Oregon),
and US East (N. Virginia).
4 Click Create Placement Group.
5 Name your placement group.
6 Click Yes, Create. Your group is created.
-6-Installing and Running HP Ver tica on AWS: The Detailed Procedure
Creating a Key Pair
Perform the following steps to create a Key Pair.
1 Select Key Pairs from the Navigation panel.
Note: Depending upon which browser you are using, you may have to turn off the pop-up
blocker in order to download the Key Pair.
2 Click Create Key Pair.
3 Name your Key Pair.
4 Click Create.
The system displays a message letting you know that the Key Pair has been created.
5 Click Save when you are prompted. Ensure that you keep the *.pem file; you need it to logon
to your instances.
Note that your Key Pair name now appears on the Key Pair list.
Creating a Virtual Private Cloud (VPC)
Perform the following steps to create a VPC.
1 From the AWS Management Console Home, navigate to the VPC console by selecting VPC.
Note: If the VPC Console Dashboard shows that VPCs already exist, you can select Your
VPCs to note the names of the existing VPCs. As the VPC IDs are very similar, noting the
names of the existing VPCs helps you later in identifying the new one you are about to create.
2 Click Start VPC Wizard.
3 From the wizard that displays, select VPC with a Single Public Subnet Only.
4 From the next screen, Create an Amazon Virtual Private Cloud, select Edit Public Subnet.
5 Change the Public Subnet as desired. HP Vertica recommends that you secure your
network with an Access Control List (ACL) that is appropriate to your situation. The default
ACL does not provide a high level of security.
-7-Using HP Vertica on Amazon Web Services
6 Choose an Availability Zone.
Note: An HP Vertica cluster is operated within a single availability zone.
7 Click Create VPC. Amazon displays a message noting success.
8 Choose Your VPCs from the navigation pane, select your new VPC, and be sure that both
Enable DNS resolution and Enable DNS hostname support for instances launched in
this VPC are both checked.
9 Click Close.
Creating and Assigning an Internet Gateway
When you create a VPC, an internet gateway is automatically assigned to the VPC. You can use
that gateway, or you can assign your own. To create and assign your own, perform the following
steps. If using the default, continue with the next procedure, Creating a Security Group (page
8).
1 From the navigation pane, choose Internet Gateways.
2 Click Create Internet gateway.
3 Choose Yes, Create.
The Internet Gateway screen appears. Note that the new gateway is not assigned to a VPC.
4 Click Attach to VPC.
5 Choose your VPC.
6 Click Yes, Attach.
Note that your gateway is now attached to your VPC.
Creating a Security Group
When you create a VPC, a default security group is created and automatically assigned. You can
use that security group, or you can name and assign your own. To create and assign your own,
perform the following steps. If using the default, continue with the next procedure, Adding Rules
to a Security Group. Note that you must add the HP Vertica rules as described in the next
section.
To create and name your own security group, perform the following steps.
1 From the Navigation pane, select Security Groups.
2 Click Create Security Group.
-8-Installing and Running HP Ver tica on AWS: The Detailed Procedure
3 Enter a name for the group. (Fill in a description if desired.)
4 Choose your VPC.
5 Select Yes, Create.
Adding Rules to a Security Group
Perform the following steps to add rules to the security group you plan to use (whether you plan to
use the default group or have created your own). This section includes procedures for adding
rules from the Inbound tab and adding rule from the Outbound tab. You perform both
procedures to establish your security group.
Perform the following to add rules from the Inbound tab:
1 Ensure that you have checked the box for the security group you just created, and that the
Inbound tab is selected.
2 Add the HTTP rule.
1. Ensure that the Inbound tab is selected.
2. From the Create a new rule dropdown, choose HTTP.
3. Click Add Rule. The HTTP rule is added to your security group.
3 Add the Echo Reply rule.
1. From the Create a new rule dropdown, select Custom ICPM rule.
2. From the Type dropdown, select Echo Reply.
3. Click Add Rule. The Echo Reply rule is added to your security group.
4 Add the Traceroute rule.
1. Choose Custom ICMP rule once again.
2. Select Traceroute.
3. Click Add Rule. The Traceroute rule is added to your security group.
5 Add the SSH rule.
1. From the Create a new rule dropdown, choose SSH.
2. Click Add Rule. The SSH rule is added to your security group
6 Add the HTTPS rule.
1. From the Create a new rule dropdown, choose HTTPS.
2. Click Add Rule. The HTTPS rule is added to your security group.
7 Add a port range to your security group.
1. From the Create a new rule dropdown, select Custom TCP Rule.
2. Under Port range, enter 4803-4805.
3. Click Add Rule. The port range is added to your security group.
4. From the Create a new rule dropdown, select Custom UDP Rule.
5. Under Port range, enter 4803-4805.
6. Click Add Rule. The port range is added to your security group.
8 Add individual ports.
-9-Using HP Vertica on Amazon Web Services
1. Also under Custom TCP rule, enter the following ports under Port Range, one by one:
5433, 5434, 5444, and 5450. You enter the ports one by one to ensure the port
assignments are sequential. HP Vertica uses these ports for internode communication.
2. Click Add Rule as you enter each number. Each port is added to your security group.
9 Click Apply Rule Changes.
Note: You must click Apply Rule Changes or your rules will not be applied to your security
group. With the Inbound tab selected, your security group screen should look similar to the
following.
Perform the following to add rules from the Outbound tab.
Note: You want to ensure that all outbound traffic is allowed.
1 Select the Outbound tab.
1. Choose All TCP rule from the Create a new rule dropdown.
2. Click Add Rule. The All TCP rule is added to your security group.
2 Add the All ICMP rule.
1. Choose All ICMP rule from the Create a new rule dropdown.
2. Click Add Rule. The All ICMP rule is added to your security group.
3 Add the ALL UDP rule.
1. Choose ALL UDP rule from the Create a new rule dropdown.
2. Click Add Rule. The ALL UDP rule is added to your security group.
4 Click Apply Rule Changes.
-10-Installing and Running HP Ver tica on AWS: The Detailed Procedure
Note: You must click Apply Rule Changes or your rules will not be applied to your security
group. With the Outbound tab selected, your screen should look similar to the following.
Configuring and Launching an Instance
Perform the following steps to configure and launch the instances that will become your cluster in
a later procedure. A basic EC2 instance (sans HP Vertica AMI) is similar to a traditional host.
When you create an EC2 instance using an HP Vertica AMI, the instance includes the HP Vertica
software and a standard recommended configuration to ease creation of your cluster. HP Vertica
recommends that you use the HP Vertica AMI as is – without modification. The HP Vertica AMI
acts as a template, allowing you to save configuration steps.
1 Navigate to the AWS Console, and select EC2.
2 From the EC2 Console Dashboard, click Launch Instance.
3 Select the Classic Wizard.
4 Choose the HP Vertica AMI.
1. Select the Community AMIs tab.
2. Choose the AMI, HP/Vertica Analytics Platform 6.1.x. Click the Select button next to
AMI.
Note: The HP Vertica AMI has a preformatted 8 disk software RAID array mounted at
/vertica/data The location is the data and catalog path, which you use when creating a
database.
5 Configure Instance Details.
1. Enter a number in the Number of Instances field. For our example, we are entering 4,
which represents the number of nodes in our cluster.
-11-Using HP Vertica on Amazon Web Services
Note: An HP Vertica cluster uses identically configured instances of the same type. You
cannot mix instance types.
2. From Instance Type, choose Cluster Compute (cc2.8xlarge).
3. Choose the VPC button, and select the Subnet created previously.
Note: Not all data centers support VPC. If you receive an error message that states "VPC is
not currently supported…", choose a different subnet location (e.g., choose us-east-le rather
than us-east-1c).
4. Click Continue.
5. Select the Placement Group you previously created.
6. Click Continue.
Note: On the next screen, Storage Device Configuration shows eight EBS volumes. Do not
change the settings on this screen (e.g., do not add or delete disks or the RAID array already
set-up for you will be destroyed).
7. Click Continue twice to get to the Key Pair screen.
6 Choose your Key Pair.
1. Choose the Key Pair you previously created.
2. Click Continue.
7 Configure the firewall.
1. Choose the security group you previously created.
2. Click Continue.
The review screen appears.
8 Press Launch to launch the instances. A screen similar to the following appears; note the
instance numbers.
9 Click Close.
-12-Installing and Running HP Ver tica on AWS: The Detailed Procedure
You can view the instances you created on your My Instances page. Check that your instances
are started (show green as their state).
Note: You can stop an instance by right-clicking and choosing Stop. Use Stop rather than
Terminate; the latter may cause the instance to be lost.
Assigning an Elastic IP
Perform the following procedure to assign an Elastic IP address.
The elastic IP is an IP address that you attach to an instance; you communicate with your cluster
through the instance that is attached to this IP address. An elastic IP is a static IP address that
stays connected to your account until you explicitly release it.
1 From the Navigation menu, select Elastic IPs.
2 Click Allocate New Address. (Alternatively, you can select the checkbox for the address to
associate with an Elastic IP.)
3 On the Allocate New Address screen, choose VPC from the dropdown.
4 Click Yes, Allocate.
5 Click Associate Address.
6 Choose one of the instances you created.
7 Click Yes, Associate.
Your instance is associated with your elastic IP.
Note the following on IP addresses:
You can stop your instances, but you must ensure that the IP addresses assigned are not
released.
By default, Amazon keeps your IP addresses assigned unless you have selected "Allow
Reassignment." To ensure your IP addresses will not be reassigned:
Right click on an instance and choose Manage Private IP Addresses.
-13-Using HP Vertica on Amazon Web Services
Ensure that Allow Reassignment is not checked. If it is checked, uncheck it.
Connecting to an Instance
Perform the following procedure to connect to an instance within your VPC.
Note: Connect to the instance that is assigned to the Elastic IP.
1 Select Instances from the Navigation panel.
2 From My Instances, right click on the instance and choose Connect.
3 On Connect to an Instance, you can choose from Connect from your browser using the
Java SSH Client or Connect with a standalone SSH Client.
If you have chosen Connect from your browser using the Java SSH Client:
Add the path to your private key in the field Private key path.
Click Launch SSH Client.
If you have chosen Connect with a standalone SSH Client, follow the steps given to
connect.
Note that, if you connect to the instance from the Windows operating system, and plan to use
Putty:
1 Convert your key file using PuTTYgen.
2 Connect with Putty or WinSCP (connect via the elastic IP), using your converted key (i.e., the
*ppk file).
3 Move your key file (the *pem file) to the root dir using Putty or WinSCP.
Forming a Cluster
Use the install_vertica script to combine two or more individual instances and create a
cluster.
The My Instances page lists the instances and their associated IP addresses. You need the IP
addresses when you run the install_vertica script.
-14-Installing and Running HP Ver tica on AWS: The Detailed Procedure
Note: When you issue install_vertica or update_vertica on an AMI, the parameters –d
and –T are assumed if you do not include them in your command. The parameter –T configures
spread to use point-to-point communication between all Vertica nodes, a requirement for clusters
on AWS. The –d parameter, if left out of your command, defaults to /vertica/data. Refer to
the Installation Guide for more information on the install_vertica script.
The following sample steps combine instances using the install_vertica script. Before you
run install_vertica, be sure to stop any running databases on your nodes; the
install_vertica script cannot complete successfully if any databases are running.
1 Locate your HP Vertica license.
Note: You need both the *pem file and your HP Vertica license to complete this procedure.
2 Copy files over to the instance.
1. Copy your *pem file (from where you saved it locally) onto the instance and place it in
/root
Note: You must copy the file to the instance while logged on as root. Depending upon the
procedure you use to copy the file, the permissions on the file may change. If permissions
change, the install_vertica script will fail with a message similar to the following:
FATAL (19): Failed Login Validation 10.0.3.158, cannot resolve or
connect to host as root.
If this happens, enter the following command to correct permissions on your *pem file:
chmod 600 /root/.pem
2. Copy your HP Vertica license over to the instance and also place it in /root.
3 While connected to the instance, enter the following command to combine your instances into
a cluster. The following is an example. Substitute the IP addresses for your instances and
include your root *pem file name.
/opt/vertica/sbin/install_vertica -s
10.0.3.100,10.0.3.101,10.0.3.98,10.0.3.99 -i ~/tst-key-pair.pem -L
~/license.key
Note: If you are using Community Edition, which limits you to three instances, you can simply
specify -L CE with no license file.
For complete information on the install_vertica script and its parameters, see the Installation
Guide, specifically the section, About the install_vertica Script.
After Your Cluster is Up and Running
Stop or reboot instances using the Amazon AWS console, but you must stop the database before
doing so. Once your cluster is up and running, if you need to stop or reboot:
1 Stop the database.
2 Stop or reboot one or more instances.
-15-Using HP Vertica on Amazon Web Services
Caution: If you stop or reboot an instance (or the cluster) without shutting the database down first,
disk or database corruption could result. Shutting the database down first ensures that HP
Vertica is not in the process of writing to disk when you shutdown. Refer to the HP Vertica 6.1
Administrator’s Guide for information on stopping a database.
Once your cluster is configured and running:
1 Create a database. When HP Vertica was installed for you, an HP Vertica database
administrator was created, dbadmin. You can use this pre-created dbadmin user to create
and start a database. Refer to the HP Vertica 6.1 Installation Guide for information on the
dbadmin administrator.
2 Configure a database. Refer to the HP Vertica 6.1 Administrator’s Guide for information on
configuring a database.
3 Refer to the full documentation set for HP Vertica 6.1 for other tasks.
Using Management Console (MC) on AWS
MC is a database management tool that provides a way for you to view and manage aspects of
your HP Vertica cluster. If you are running HP Vertica Release 6.1.2 or later, you can install and
run MC.
This release of MC on AWS includes restrictions.
You cannot create a cluster on AWS using the MC. You cannot import a cluster into AWS
using the MC.
You cannot monitor an AWS cluster using MC on a node that is outside of your AWS cluster.
You must install MC on an instance within the AWS cluster itself.
Note: Each version of HP Vertica Management Console (MC) is compatible only with the
matching version of the HP Vertica server. Version numbers must match to three digits; for
example, HP Vertica 6.1.2 server is supported with HP Vertica 6.1.2 MC only. This is a
general MC requirement and is not specific to MC on AWS.
What follows is a reading path for learning more about MC:
For an overview of MC, where you can get it, and what you can do with it, refer to the Concepts
Guide, specifically, Management Console.
For information on installing and configuring MC, refer to the Installation Guide, specifically,
Installing and Configuring Management Console (MC).
For information on the differences between what you can do with MC versus what you can do
with the Administration Tools, refer to the Administration Guide, specifically the section,
Administration Tools and Management Console.
For information on creating a database using MC, refer to the Getting Started Guide,
specifically the section, Create the Example Database Using Management Console.
Keep the following in mind concerning user accounts and the MC.
-16-Installing and Running HP Ver tica on AWS: The Detailed Procedure
When you first configure MC, during the configuration process you create an MC super user (a
Linux account). Issuing a Factory Reset on the MC does not create a new MC super user, nor
does it delete the existing MC super user. When initializing after a Factory Reset, you must
logon using the original MC super user account.
For information on setting MC to its original state (Factory Reset), and why you might
implement Factory Reset, refer to the Administration Guide, specifically the section, Resetting
MC to Pre-configured State.
Note that, once MC is configured, you can add users that are specific to MC. Users created
through the MC interface are MC specific. When you subsequently change a password
through the MC, you only change the password for the specific MC user. Passwords external
to MC (i.e., system Linux users and HP Vertica database passwords) remain unchanged.
For information on MC users, refer to the Administration Guide, specifically the sections,
Creating an MC User and MC configuration privileges.
-17-Adding Nodes to a Running AWS Cluster
Use these procedures to add instances/nodes to an AWS cluster. The procedures assume you
have an AWS cluster up and running and have most-likely accomplished each of the following.
Created a database.
Defined a database schema.
Loaded data.
Run the database designer.
Connected to your database.
Launching New Instances to Add to an Existing Cluster
Perform the following to launch instances that you later add to your existing cluster.
1 Navigate to the AWS Console, and select EC2.
2 From the EC2 Console Dashboard, click Launch Instance.
3 Select the Classic Wizard.
4 Choose the HP Vertica AMI.
1. Select the Community AMIs tab.
2. Choose the AMI, HP/Vertica Analytics Platform 6.1.x. Click the Select button next to
AMI.
Note: The HP Vertica AMI has a preformatted 8 disk software RAID array mounted at
/vertica/data The location is the data and catalog path, which you use when creating a
database.
5 Configure Instance Details.
1. Enter the number of instances to add to your existing cluster in the Number of Instances
field.
Note: An HP Vertica cluster utilizes identically configured instances of the same type. You
cannot mix instance types. The new instances you create to add to your existing cluster must
be of the same type as the instances currently within the cluster.
2. From Instance Type, choose Cluster Compute (cc2.8xlarge).
3. Choose the VPC button, and select the Subnet created previously.
4. Click Continue.
-18-Adding Nodes to a Running AWS Cluster
5. Select the Placement Group you previously created.
6. Click Continue.
Note: On the next screen, Storage Device Configuration shows eight EBS volumes. Do not
change the settings on this screen (e.g., do not add or delete disks or the RAID array already
set-up for you will be destroyed).
7. Click Continue twice to get to the Key Pair screen.
6 Choose your Key Pair.
1. Choose the Key Pair you previously created.
2. Click Continue.
7 Configure the firewall.
1. Choose the security group you previously created.
2. Click Continue.
The review screen appears.
8 Press Launch to launch the instances. Note the instance numbers.
9 Click Close.
You can view the instances you created on your My Instances page. Check that your instances
are started (show green as their state).
Including the New Instances as Nodes in Your Existing
Cluster
Note that the My Instances page lists the instances and their associated IP addresses. You
need the IP addresses when you run the install_vertica script.
Perform the following to add the new instances as nodes to your existing cluster.
1 Connect to the instance that is assigned to the Elastic IP. See Connecting to an Instance
(page 14) if you need more information.
2 Enter the following command to add the new instances as nodes to your cluster. The
following is an example. Substitute the IP addresses for your instances and include your root
*pem file name. Your instances are added to your existing cluster.
/opt/vertica/sbin/install_vertica -A 10.0.3.110,10.0.3.111,10.0.3.112
-i ~/tst-key-pair.pem
Re-Balancing Data
Perform the following to re-balance data among the nodes of your newly expanded cluster.
1 Run the Administration Tools.
$ /opt/vertica/bin/admintools
2 From the Administration Tools Menu, select Advanced Tools Menu and click OK.
-19-Using HP Vertica on Amazon Web Services
3 From the Advanced Menu, select Cluster Management and click OK.
4 From the Cluster Management Menu, select Re-balance Data and click OK. The Select
database menu asks you to choose a database.
5 Choose your database and click OK. (Leave the password screen blank if you had not
previously entered a password for the database.)
6 On the next screen, enter a directory for the Database Designer output. Click OK.
7 From the Database Designer screen, enter a proposed K-safety value. Click OK.
8 From the Re-balance Data screen, choose the option that allows re-balancing automatically
across all nodes. Notes are displayed allowing you to review the options you selected.
9 Click Proceed. The Database Designer begins re-balancing.
-20-Removing Nodes from a Running AWS Cluster
Use these procedures to remove instances/nodes from an AWS cluster.
Preparing to Remove a Node
Removing one or more nodes consists of the following general steps. The first two steps, backing
up a database and lowering the k-safety before node removal, are prerequisites for the
subsequent steps.
1 Back up the Database. See the section, Creating Full and Incremental Snapshots (vbr.py) in
the Administrator's Guide.
HP recommends that you back up the database before performing this significant operation
because it entails creating new projections, deleting old projections, and reloading data.
2 Lower the K-safety of your database if the cluster will not be large enough to support its current
level of K-safety after you remove nodes. See the section, Lowering the K-safety Level to Allow
for Node Removal in the Administrator's Guide.
Note: You cannot remove nodes if your cluster would not have the minimum number of nodes
required to maintain your database's current K-safety level (3 nodes for a database with a
K-safety level of 1, and 5 nodes for a K-safety level of 2). To remove the node or nodes from
the database, you first must reduce the K-safety level of your database.
3 Remove the hosts (page 21) from the database.
4 Remove the nodes from the cluster if they are not used by any other databases.
5 Optionally, stop the instances within AWS that are no longer included in the cluster.
Removing Hosts from the Database
Before performing the procedure in this section, you must have completed the tasks referenced in
Preparing to Remove a Node. The following procedure assumes that you have both backed up
your database and lowered the k-safety.
Note: Do not stop the database.
Perform the following to remove a host from the database.
1 While logged on as dbadmin, launch Administration Tools.
$ /opt/vertica/bin/admintools
Note: Do not remove the host that is attached to your EIP.
2 From the Main Menu, select Advanced Tools Menu.
3 From Advanced Menu, select Cluster Management. Select OK.
4 From Cluster Management, select Remove Host(s). Select OK.
-21-Using HP Vertica on Amazon Web Services
5 From Select Database, choose the database from which you plan to remove hosts. Select
OK.
6 Select the host(s) to remove. Select OK.
7 Click Yes to confirm removal of the hosts.
Note: Enter a password if necessary. Leave blank if there is no password.
8 Select OK. The system displays a message letting you know that the hosts have been
removed. Automatic re-balancing also occurs.
9 Select OK to confirm. Administration Tools brings you back to the Cluster Management
menu.
Removing Nodes from the Cluster
To remove nodes from a cluster, run the install_vertica script, specifying the IP addresses
of the nodes you are removing and the location and name of your root *pem file. (The following
example removes only one node from the cluster.)
/opt/vertica/sbin/install_vertica -R 10.0.3.43 -i ~/tst-key-pair.pem
Stopping the AWS Instances (Optional)
Once you have removed one or more nodes from your cluster, to save costs associated with
running instances, you can choose to stop or terminate the AWS instances that were previously
part of your cluster. This step is optional because, once you have removed the node from your
HP Vertica cluster, HP Vertica no longer sees the instance/node as part of the cluster even though
it is still running within AWS.
To stop an instance in AWS:
1 On AWS, navigate to your My Instances page.
2 Right-click on the instance, and choose Stop.
-22-Migrating to HP Vertica 6.1.x on AWS
If you had an HP Vertica installation running on AWS prior to Release 6.1.x, you can migrate to HP
Vertica 6.1.x using the new preconfigured 6.1.x AMI.
For more information, see the Solutions tab of the myVertica portal http://my.vertica.com/.
-23-Upgrading from a 6.1 AMI on AWS
Use these procedures for upgrading from an HP Vertica 6.1 AMI to a later HP Vertica 6.1.x AMI.
The procedures assume that you have a 6.1 cluster successfully configured and running on AWS.
If you are setting up an HP Vertica cluster on AWS for the first time, follow the detailed procedure
for installing and running HP Vertica on AWS (page 6).
Note: Both install_vertica and update_vertica use the same parameters.
Preparing to Upgrade Your AMI
Perform this procedure to prepare for the upgrade from an HP Vertica 6.1 AMI to a later HP Vertica
6.1.x AMI.
1 Back up your existing database. See Backing Up and Restoring the Database in the
Administrator's Guide.
2 Download the HP Vertica install package. See Download and Install the HP Vertica Install
Package in the Installation Guide.
Upgrading Your AMI
Perform this procedure to upgrade from an HP Vertica 6.1 AMI to a later HP Vertica 6.1.x AMI.
Note: All output is for illustrative purposes only and may change slightly from release to
release.
1 Stop any running databases. You can use the Admin Tools dialog or a command line. A
command line example follows.
[root@ip-10-0-10-117 ~]# sudo -u dbadmin /opt/vertica/bin/admintools -t stop_db
-d testdb
Info: no password specified, using none
Issuing shutdown command to database
Database testdb stopped successfully
2 Upgrade the rpm. A sample rpm command and output follows.
[root@ip-10-0-10-117 ~]# rpm --upgrade vertica-6.1.x.x86_64.RHEL5.rpm
Shutting down vertica services for upgrade
Shutting down spread daemon
Stopping spread daemon: [ OK ]
Shutting down vertica agent daemon
Stopping vertica agent:
Vertica Analytic Database V6.1.1-20130107 successfully installed on host
ip-10-0-10-84
--------------------------------------------------------
-24-Upgrading from a 6.1 AMI on AWS
Important Information
--------------------------------------------------------
If you are upgrading from a previous version, you must backup your
database before continuing with this install. After restarting your
database, you will be unable to revert to a previous version of the
software.
--------------------------------------------------------
To download the latest Vertica documentation in zip or tar format please
visit http://www.vertica.com/documentation
(http://www.vertica.com/documentation)
To complete installation and configuration of the cluster,
run: /opt/vertica/sbin/install_vertica
3 Run the update_vertica script. You must use the –i option to specify location of your
private-key file. Note that you cannot run the install_vertica script with the sudo
command when you specify the –i parameter. An example follows.
Note: Refer to About the install_vertica script in the Installation Guide for more information on
the update_vertica parameters. The install_vertica and update_vertica scripts use the same
parameters.
[root@ip-10-0-10-117 ~]# /opt/vertica/sbin/update_vertica -u dbadmin -r
~/vertica-6.1.x.x86_64.RHEL5.rpm -L ~/license.key.unlimited -i ~/tst-key-pair.pem
Vertica Analytic Database 6.1.x Installation Tool
Starting installation tasks...
Getting system information for cluster (this may take a while)....
backing up admintools.conf on 10.0.10.118
backing up admintools.conf on 10.0.10.117
Installing rpm on 1 hosts....
installing node.... 10.0.10.118
NTP service is not running on the hosts: ['10.0.10.118', '10.0.10.117']
Vertica recommends that you keep the system clock synchronized using
NTP or some other time synchronization mechanism to keep all hosts
synchronized. Time variances can cause (inconsistent) query results
when using Date/Time Functions. For instructions, see:
* http://kbase.redhat.com/faq/FAQ_43_755.shtm
* http://kbase.redhat.com/faq/FAQ_43_2790.shtm
Info: the package 'pstack' is useful during troubleshooting. Vertica
recommends this package is installed.
Checking/fixing OS parameters.....
Setting vm.min_free_kbytes to 31631 ...
Detected cpufreq module loaded on 10.0.10.118
Detected cpufreq module loaded on 10.0.10.117
CPU frequency scaling is enabled. This may adversely affect the
performance of your database.
Vertica recommends that cpu frequency scaling be turned off or set to
'performance'
Creating/Checking Vertica DBA group
Creating/Checking Vertica DBA user
Installing/Repairing SSH keys for dbadmin
Modifying existing Vertica DBA user
-25-Using HP Vertica on Amazon Web Services
Creating Vertica Data Directory...
Skipping N-way network test (not recommended)
Updating spread configuration...
Verifying spread configuration on whole cluster.
Error Monitor 0 errors 4 warnings
Installation completed with warnings.
Installation complete.
To create a database:
1. Logout and login as dbadmin.**
2. Run /opt/vertica/bin/adminTools as dbadmin
3. Select Create Database from the Configuration Menu
** The installation modified the group privileges for dbadmin.
If you used sudo to install vertica as dbadmin, you will
need to logout and login again before the privileges are applied.
4 Start the database.
5 Check your HP Vertica version to ensure that upgrade was successful.
-26-Troubleshooting: Checking Open Ports Manually
You originally configured your security group through the AWS interface. Once your cluster is up
and running, you can check ports manually through the command line using the netcat (nc) utility.
What follows is an example using the utility to check ports.
Before performing the procedure, choose the private IP addresses of two nodes in your cluster.
The examples given below use nodes with the private IPs:
10.0.11.60
10.0.11.61
Using the netcat (nc) Utility
After installing the nc utility on both nodes, you can issue commands to check the ports on one
node from another node.
1 Logon to the node that is attached to your elastic IP.
Note: The node must have internet access to perform the next step. If the node does not have
internet access, you can copy the rpm to the node rather than download it directly from the
internet
2 Issue the following command to download the netcat (nc) utility.
yum install nc
3 Type y and press Enter when asked to confirm the download. A full example follows.
[root@ip-10-0-11-60 ~]# yum install nc
Loaded plugins: fastestmirror, security
Determining fastest mirrors
* base: mirrors.lga7.us.voxel.net
* extras: mirror.dattobackup.com
* updates: centos.mirror.netriplex.com
base | 3.7 kB
00:00
base/primary_db | 4.4 MB
00:00
extras | 3.5 kB
00:00
extras/primary_db | 19 kB
00:00
updates | 3.4 kB
00:00
updates/primary_db | 3.1 MB
00:00
Setting up Install Process
Resolving Dependencies
--> Running transaction check
---> Package nc.x86_64 0:1.84-22.el6 will be installed
-27-Using HP Vertica on Amazon Web Services
--> Finished Dependency Resolution
Dependencies Resolved
====================================================================
============
Package Arch Version Repository
Size
====================================================================
============
Installing:
nc x86_64 1.84-22.el6 base
57 k
Transaction Summary
====================================================================
============
Install 1 Package(s)
Total download size: 57 k
Installed size: 109 k
Is this ok [y/N]: y
Downloading Packages:
nc-1.84-22.el6.x86_64.rpm | 57 kB
00:00
Running rpm_check_debug
Running Transaction Test
Transaction Test Succeeded
Running Transaction
Warning: RPMDB altered outside of yum.
Installing : nc-1.84-22.el6.x86_64
1/1
Verifying : nc-1.84-22.el6.x86_64
1/1
Installed:
nc.x86_64 0:1.84-22.el6
Complete!
[root@ip-10-0-11-60 ~]#
4 Logon to the other node and install nc.
5 Stop spread on both nodes.
[root@ip-10-0-11-60 ~]# sudo /etc/init.d/spreadd stop
[root@ip-10-0-11-61 ~]# sudo /etc/init.d/spreadd stop
6 To check a TCP port:
a) Put one node in listen mode and specify the port. In the following sample, we’re putting IP
10.0.11.60 into listen mode for port 4804.
[root@ip-10-0-11-60 ~]# nc -l 4804
-28-Troubleshooting: Checking Open Por ts Manually
b) From the other node, run nc specifying the IP address of the node you just put in listen
mode, and the same port number.
[root@ip-10-0-11-61 ~]# nc 10.0.11.60 4804
c) Enter sample text from either node and it should show up on the other. To cancel once
you have checked a port, enter Ctrl+C.
Note: To check a UDP port, use the same nc commands with the –u option.
[root@ip-10-0-11-60 ~]# nc -u -l 4804
[root@ip-10-0-11-61 ~]# nc -u 10.0.11.60 4804
-29-Appendix: Installing and Running HP Vertica on
AWS: QuickStart
These steps cover specifics you need to know while working with the Amazon AWS interface.
This procedure assumes you have a working knowledge of the AWS Management Console.
Note: This section covers all of the steps given in the full procedure, but is abbreviated for
those familiar with the AWS Management Console. If you are not familiar with the AWS
Management Console, please follow the full procedure (page 6).
Steps from the AWS Management Console.
1 Choose a region, and create and name a Placement Group.
2 Create and name a Key Pair.
3 Create a VPC.
1. Edit the public subnet; change according to your planned system set-up.
2. Choose an availability zone.
4 Create an Internet Gateway and assign it to your VPC (or use the default gateway).
5 Create a Security Group for your VPC (or use the default security group, but add rules).
Inbound rules to add:
HTTP
Custom ICMP Rule: Echo Reply
Custom ICMP Rule: Traceroute
SSH
HTTPS
Custom TCP Rule: 4803-4805
Custom UDP Rule: 4803-4805
Custom TCP Rule: (Port Range) 5433
Custom TCP Rule: (Port Range) 5434
Custom TCP Rule: (Port Range) 5434
Custom TCP Rule: (Port Range) 5450
Outbound rules to add:
All TCP: (Destination) 0.0.0.0/0
All ICMP: (Destination) 0.0.0.0/0
6 Create an instance.
1. Choose HP/Vertica Analytics Platform 6.1.x from Community AMIs.
2. Enter number of instances/nodes you want in your system.
3. Choose cc2.8xlarge as the instance type.
4. Select your subnet.
5. Select your Placement Group.
6. Select your Key Pair.
-30-Appendix: Installing and Running HP Vertica on AWS: QuickStart
7. Choose the security group to use.
8. Launch.
7 Assign an elastic IP to an instance.
8 Connect to the instance that is attached to the elastic IP.
9 Run the install_vertica script after placing the *pem file and the HP Vertica license in
/root.
-31-Copyright Notice
Copyright© 2006-2013 Hewlett-Packard, and its licensors. All rights reserved.
Hewlett-Packard
150 CambridgeP ark Drive
Cambridge, MA 02140
Phone: +1 617 386 4400
E-Mail: info@vertica.com
Web site: http://www. vertica.com
(http://www.vertica.com)
The software described in this copyright notice is furnished under a license and may be used or
copied only in accordance with the terms of such license. Hewlett-Packard software contains
proprietary information, as well as trade secrets of Hewlett-Packard, and is protected under
international copyright law. Reproduction, adaptation, or translation, in whole or in part, by any
means — graphic, electronic or mechanical, including photocopying, recording, taping, or
storage in an information retrieval system — of any part of this work covered by copyright is
prohibited without prior written permission of the copyright owner, except as allowed under the
copyright laws.
This product or products depicted herein may be protected by one or more U.S. or international
patents or pending patents.
Trademarks
HP Vertica™, the HP Vertica Analytics Platform™, and FlexStore™ are trademarks of Hewlett -Packard.
Adobe®, Acrobat®, and Acrobat® Reader® are registered trademarks of Adobe Systems Incorporated.
AMD™ is a trademark of Advanced Micro Devices, Inc., in the United States and ot her countries.
DataDirect® and DataDirect Connect® are registered trademarks of Progress Software Corporation in the
U.S. and other countries.
Fedora™ is a trademark of Red Hat, Inc.
Intel® is a registered trademark of Intel.
Linux® is a registered trademark of Linus Torvalds.
Microsoft® is a registered trademark of Microsoft Corporation.
Novell® is a registered trademark and SUSE™ is a trademark of Novell, Inc., in the United States and other
countries.
Oracle® is a registered trademark of Oracle Corporation.
Red Hat® is a registered trademark of Red Hat, Inc.
VMware® is a registered trademark or trademark of VMware, Inc., in the United States and/ or other
jurisdictions.
Other products mentioned may be trademarks or registered trademarks of their respective
companies.
-32-Copyright Notice
Information on third-party software used in HP Vertica, including details on open-source software,
is available in the guide Third-Party Software Acknowledgements.
-33-You can also read