What's Beneath Your Feet?
←
→
Page content transcription
If your browser does not render page correctly, please read the page content below
What’s Beneath Your Feet?
Learning about sedimentary rocks
Sedimentary rocks are formed from pieces of other existing rock or organic material. There are three
different types of sedimentary rocks: clastic, biological, and chemical. Clastic sedimentary rocks, like
sandstone, form from clasts, or pieces of other rock. Biological sedimentary rocks, like coal or
limestone, form from hard, biological materials like plants, shells, and bones that are compressed into
rock. Chemical sedimentary rocks, like halite (rock salt) and gypsum, form from chemical precipitation.
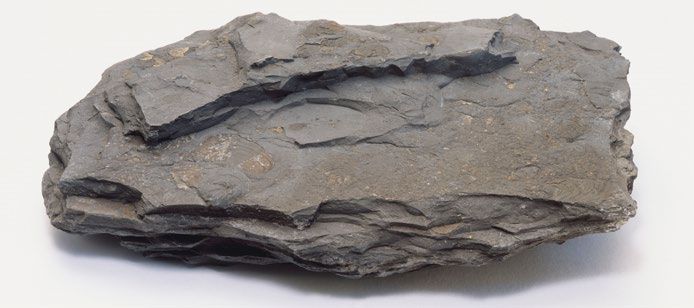
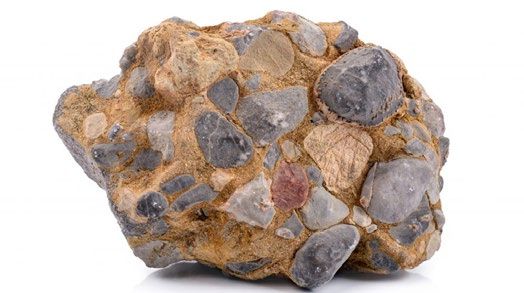
The formation of clastic rocks, like conglomerate, sandstone, and shale, begins when exposed rock
breaks down into small fragments. Through the process of erosion, these fragments are removed from
their source and transported by wind, water, or ice to a new location. Once the sediment settles
somewhere, and enough of it collects, the layers become lithified to form solid rock.
Conglomerate Sandstone Shale
Limestone
Biological rocks, like limestone, form when the shells and skeletons of
fossil organisms are cemented together. These rocks form where lots of
organisms live together to form structures like coral reefs.
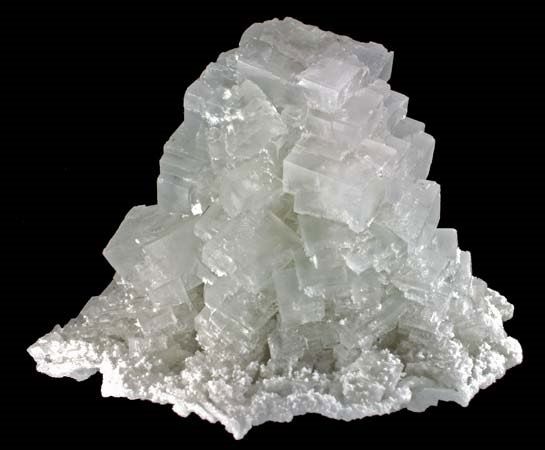
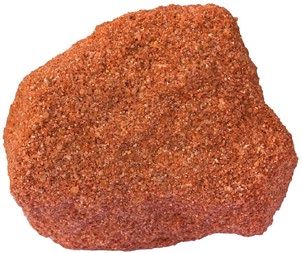
Chemical sedimentary rocks, like halite (rock salt) and gypsum, form from chemical precipitation. A
chemical precipitate is a chemical compound that forms when the solution it is dissolved in, usually
water, evaporates and leaves the compound behind.
Gypsum Rock salt
This activity was designed for Dinosaurs and
Disasters 2021 by Dr. Tracy Frank and Dr.
Chris Fielding, who are professors in the UNL
Department of Earth and Atmospheric
Sciences.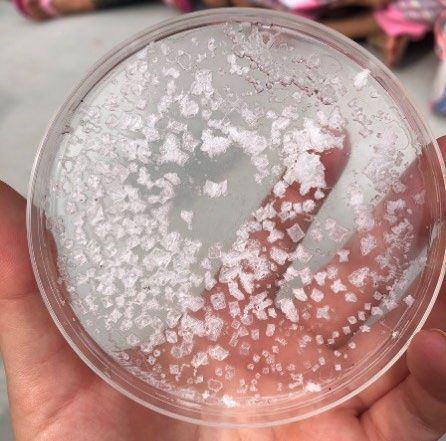
Make your own clastic rock
This activity is designed to illustrate how sediments are deposited by natural processes such as particles
settling out of water in a river or in the sea. Adult supervision is recommended. Can be done inside or
outside.
Clastic sediment is produced by the weathering and erosion of rocks. Natural agents such as flowing
water or the wind can then pick up and transport sediment particles long distances. When the flow
slows down, sediments are dropped to the ground, or river bed, and deposited. The manner in which
they are deposited is controlled by gravity and the density of the particles, the heaviest particles falling
first and smaller particles later. Some material may be less dense than water and therefore will float on
water, at least temporarily. If deposited sediments are not eroded again but remain in place, they may
become cemented over time by minerals precipitating between the sediment particles, creating a clastic
sedimentary rock.
What you’ll need:
•    A tall jar such as a mason jar,
•    Mixed soil, sand, small gravel, and plant debris such as potting mix,
•    Water,
•    Bowl for mixing the sediment,
•    ¼ cup of Epsom Salts if you want to         Some further resources for learning:
     make a cemented sedimentary rock.           https://www.youtube.com/watch?v=SuNfbEDMOQs
                                                 https://www.youtube.com/watch?v=Em3w_7KMmBQ

Experiment:
1.   Mix all the solid materials in a bowl,
2.   Fill the jar ¾ full with water,
3.   Pour the mixed materials into the jar, leaving one inch of space at the top,
4.   Put a lid on the jar and give it a good shake,
5.   Place the jar in a sunny spot, and let it sit.
6.   Watch and record what happens over time (immediately, after 1 hour, 2 hours, etc.)
What do you notice? Things to talk about …
How did the different materials settle, and when? How long did it take for the water to become clear
again? Did the floating leaves, etc. eventually sink? Why? Did the Epsom Salts cause the sediment to
become cemented?
Did your experiment create a layered sedimentary rock? If you want to see your sedimentary rock, wait
until the water is clear again, then pour out the excess water and let the jar dry out completely (this may
take several days). Your sedimentary rock is hard because minerals precipitated from the Epsom Salts
that were dissolved in the water to fill the spaces between the sediment particles and make a natural
glue. In nature, this process (called cementation) and the process of burial (compaction) cause loose
sediment to be turned into sedimentary rock over millions of years.
Make your own chemical rock (evaporite)
Evaporites are “chemical” rocks. They are the minerals left
behind when salty water, for example sea water, evaporates (dries
up).
We use evaporite minerals every day. The salt you put on your
food is an evaporite mineral called halite (sodium chloride). The
wallboard that forms the walls in your home is probably made of
gypsum (sodium chloride). Halite and gypsum are the two main
minerals that form when seawater undergoes evaporation.
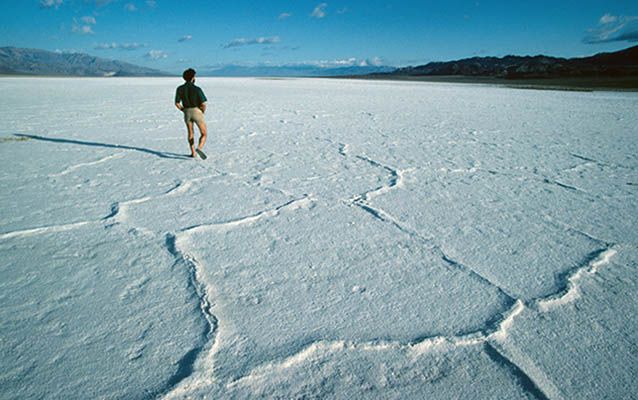
This activity is designed to show how minerals precipitate from This photo shows an example of an evaporite
basin called Badwater Basin (Death Valley, CA).
water as it dries up to form evaporite sedimentary rocks. Adult The white deposits are salts that were left
supervision is recommended. Can be done inside or outside. behind when the water in the lake evaporated.
The evaporite sediments here are composed
mostly of sodium chloride, along with calcite,
gypsum, and borax.
What you’ll need
• Warm water
• Salt
o Table salt, kosher salt, pickling salt, or ice cream salt (Experiments 1 and 2)
o One or more of Epsom salt, sidewalk de-icing salt, water softener salt, borax (laundry
additive), or baking soda (Experiment 3)
• Large jug or container and a spoon for mixing salt solution
• Plastic plate or shallow dish
• Food coloring (optional)
• Several different shaped and sized small containers (Experiment 2 only)
Experiment 1
Put about two cups of warm water into the container you’re using
to mix your solution.
Add a large spoonful of salt and stir until you can no longer see
all the grains of salt, which means they have dissolved. Keep on
stirring in salt, a spoon at a time, until you reach the point where
no more salt will dissolve. Once you reach this point, you have
what is called a saturated solution. Add a small amount of food
coloring if you wish.
Pour a small amount of your salty water onto a flat, colored plate
or tray and leave the plate somewhere warm.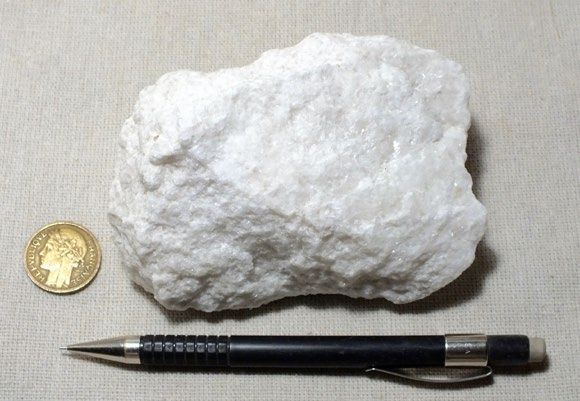
What do you notice? Things to talk about …
Over the next few days have a close look at what is happening on the plate. What do you notice? Where
do you think the water is going? Can you see the salt again? Does it look the same as the salt that you
started with? What is the same about it? What is different about it?

Experiment 2
Take the rest of your salty water from Experiment 1 and put a small amount into each of your different
shaped and sized containers. Try to put the same amount of salty water into each container. Find a sunny
place outside to put the containers close together, or you can find a warm place indoors. Over the next
few days, watch to see what happens.
What do you notice? Things to talk about …
What do you notice is happening to the levels of the salty water? Can you see any salt crystals
appearing? Which containers do you see salt in first, the tall and thin or the shallow and wide ones?

Experiment 3
Try experiment 1 but use a different salt that you may have at home. Some ideas include Epsom salt,
sidewalk de-icer, salt from your water softener, borax (laundry additive), or baking soda. You could also
mix several of these salts together.
What do you notice? Things to talk about …
Over the next few days have a close look at what is happening on the plate. What do you notice? Can
you see crystals forming? Does it look the same as the salt from experiment 1? What is the same about
it? What is different about it?

What is the science?
When you stir salt into warm water, it dissolves. It looks like it has disappeared, but it has actually
mixed with the water to form a transparent (see-through) solution. Seawater is an example of a natural
salty solution.
When a salty solution is left in a warm place, the water evaporates, leaving behind salt crystals.
Evaporation of water happens when the water gets enough energy to change state from liquid water to
water vapor (a gas). The type of salts that remain depends on the type of salt that was dissolved in the
water.
The water vapor mixes with the air above the water. If it is warm or windy, evaporation happens faster:
think about a puddle on a sunny day. Evaporation also happens faster when there is a bigger surface area
next to the air, so the water in a shallow, wide container will evaporate faster than the same amount of
water in a tall, thin container.
You can also read