DUAL DASHCAM DDC-200 USER'S MANUAL - FR GB NL - Guardo
←
→
Page content transcription
If your browser does not render page correctly, please read the page content below
DUAL DASHCAM
   DDC-200
 USER’S MANUAL
  GB   NL         FR   D

            -1-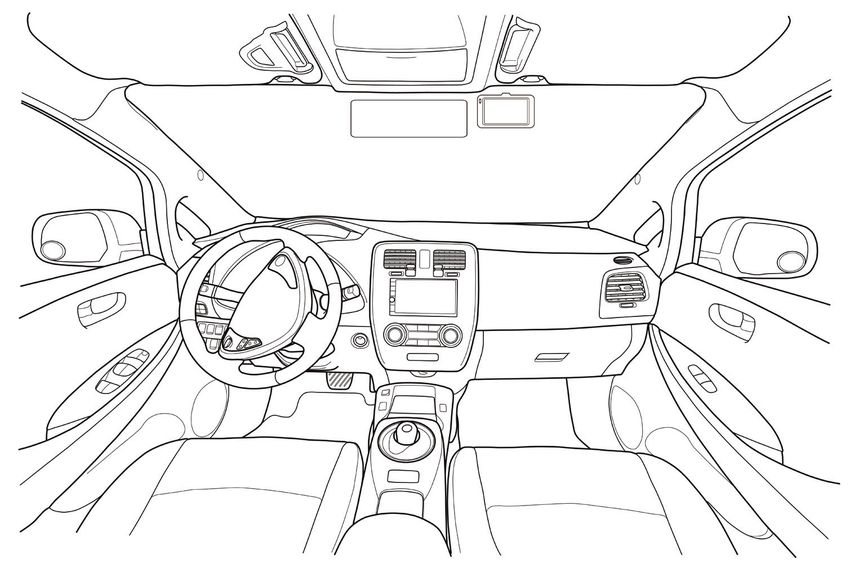
DECLARATION OF CONFORMITY
Hereby,
Par la présente,
Company:
Entreprise:                     TE-Group NV

Address:
                                Kapelsestraat 61, 2950 Kapellen, Belgium
Adresse:

declare that the following equipment:
déclare que le dispositif suivant :

Product name:
Nom du produit:                 Guardo DDC-200

Product type:                   Full HD 1080P Dual Dashcam
Type de produit:

conforms with the following safety requirements of the directives 2014/30/EU, 2011/65/EU,
EC/1907/2006. Conformity is guaranteed by the CE-symbol. This product has been tested against fol-
lowing standards and specifications, applying versions valid in July 2018. The full text of the EU declara-
tion of conformity is available at the following internet address: https://www.guardo.be/doc_ddc-200/

est conforme aux exigences de sécurité suivantes des directives 2014/30/EU, 2011/65/EU, EC/1907/2006.
La conformité est garantie par le symbole CE. Ce produit a été testé par rapport aux normes et spécifica-
tions suivantes, appliquant les versions valides en Juillet 2018. Le texte complet de la déclaration UE de
conformité est disponible à l’adresse internet suivante: https://www.guardo.be/doc_ddc-200/

EN 55032:2015
EN 55035:2017
EN 61000-3-2:2014
EN 61000-3-3:2013
EN 50498:2010
IEC 62321:2013

S. Izaks, Product & Research Manager
Authorized Signature, Kapellen – July 2018
Authorized Signature

 -------------------- Manual/Guardo Dual Dashcam DDC-200/07-18/V1 --------------------
                                  Copyright © GUARDO

                                                    -2-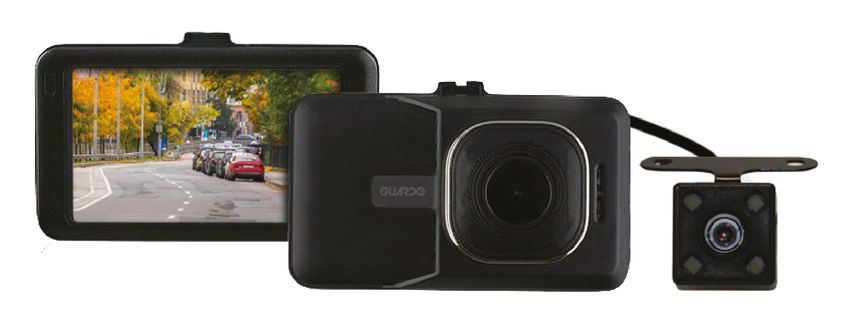
GB
INTRODUCTION
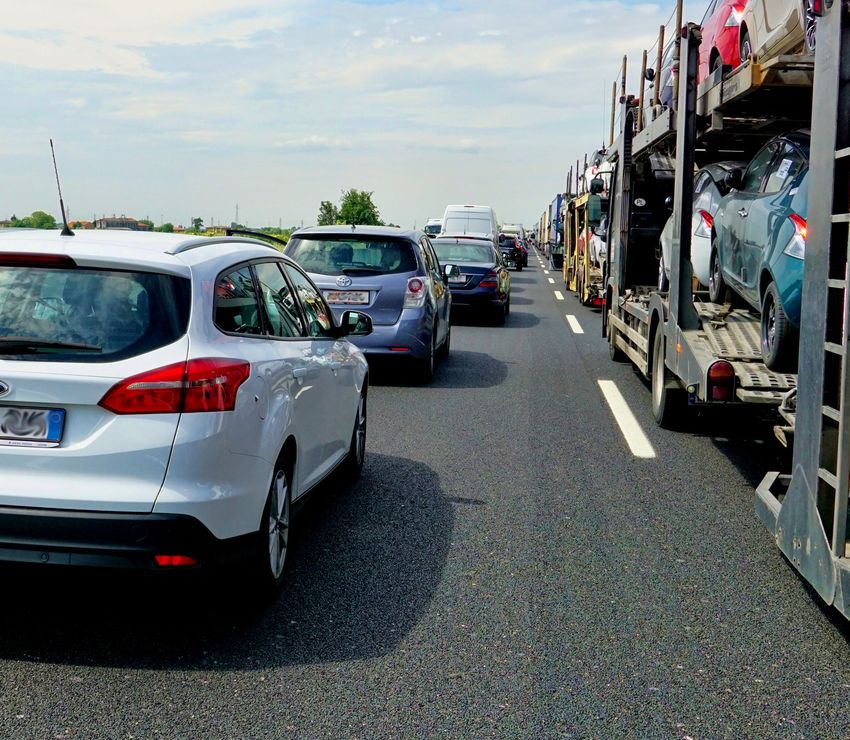
Congratulations on your purchase. Please read all instructions carefully before using your device. You
can use the GUARDO DUAL DASHCAM inside your car to record in full HD quality your driving and
dangerous situations or accidents on the road.
PACKAGE CONTENTS
1. K I
P J
O
L
N B
F
E
M G
C
D A
H
2. 3. 4. 5. 6.
1. CAMERA DVR UNIT M. 3.0” TFT screen
N. Indicator light
A. Turn device on/off (Press & hold to O. Speaker
turn the device on. Press and hold to shut P. HDMI connection for rear camera
it off when not connected to power source)
+ press shortly to turn on/off the LCD display 2. REAR VIEW CAMERA WITH 5.5
B. Confirm the selected option METER HARDWIRED
C. Enter/exit the menu INSTALLATION CABLE
D. Go down in the menu or have no sound recording
E. Go up in the menu or change the rear camera 3. MOUNTING BRACKET WITH
view or parking mode DASHCAM HOLDER + TAPE
F. Mode switching between VIDEO / PHOTO /
PLAYBACK/ Browse images 4. 12/24V DC 5V/2.1A CAR CHARGER
G. SOS function WITH 3,5M XL USB CONNECTION
H. Lens CABLE AND EXTRA USB PORT
I. Reset, if your device stops working (crashes), (1.5A MAX.)
you can reset your device and turn it on again.
J. USB connection 5. LIGHT COVER FOR REAR CAM
K. Microphone
L. Micro SD TF card slot 6. MOUNTS & SCREWS + TAPE
-3-
G-SENSOR ACCIDENT FUNCTION
When gravity acceleration reaches up to 8G (1G = 9.8m/s), the camera will automatically store the
video and protect it against being auto-deleted. You can change this setting manually if desired.

PARKING MODE & SOS FUNCTION
In idle mode (when not recording), press and hold the        button, a camera symbol will be shown
on the right side of the display. When the car is parked and it is hit or shaken (in case of a parking
accident), the camera will start recording for 30 sec. Afterwards, the camera will turn off and return
to parking standby mode. Press       shortly to immediately save and lock the video while it’s being
recorded. On the micro-SD card, this file will be tagged as a locked file.

CHARGING
• The device has a small built-in Li-ion rechargeable battery for emergency use that has to be fully
  charged and discharged 4 times on battery function to activate the maximum capacity of the
  battery. Charging time is about 2 hours maximum.
• The status of the battery is indicated by following symbols:
      0%       25%       70%        100%
• The red indication light turns on while charging and turns off once the battery has been fully charged.
• The camera records for max. 15 minutes when not connected to any power source (depends on
  settings/mode).

Charging options:
• Connect the device to a computer/laptop using the USB connection cable. OR
• Plug the device into the included cable + car charger for use in car or truck. As soon as the car
   engine turns on, the device will start recording. The GUARDO DUAL DASHCAM will now also be
   charged while recording. When the car charger is disconnected from the unit, the GUARDO DUAL
   DASHCAM will shut down automatically and save the files.

Caution:
• With low battery, the GUARDO DUAL DASHCAM will enter a protection mode. Please charge the
   battery to ensure you can turn on the device and continue to use it.
• GUARDO DUAL DASHCAM can only be used with the supplied 5V (12/24V) car power supply. Any
   other power supply may cause errors and/or permanent damage to the device.

USING MICRO SD CARD (TF) (not included, optionally available)

                                                  -4-
• Insert your micro SD card into the SD slot until it clicks into place.
• To remove the micro SD Card, press the card lightly. It is partially ejected allowing you to pull the
card out.
• With no card in the SD slot, the display will inform you with an ‘Please insert SD card’ message.
Note:
• We recommend using a 16GB SDHC micro card (or higher, max. 64 GB SDHC) with class 10, 15
MB/s writing (or higher).
• Without SD card, the device will NOT work!
• If the micro SD card is inserted in a wrong way (difficult to insert), it may damage the device and
the memory card.
• The device will automatically set up the micro SD-card after it’s been inserted.
VIDEO* IMAGE (examples) *
MICRO SD CARD 1920xFHD1080P 1280x720P 4032x3024 2MP 2592x1944 5MP 2048x1536 3MP
32 GB 225 min 252 min 12624 31600 48316
16 GB 112 min 126 min 6312 15080 24158
MOUNTING
FRONT CAMERA
• Slide the GUARDO DUAL DASHCAM into the
mounting bracket.
• Clean the window with alcohol / window
cleaner and dry it. Take off the protection
strip from the holder and place it firmly
on the inside of your windshield (push &
hold) and close the holder using the lever.
We recommend placing the dashcam on the
right side of the rear view mirror.
• Adjust the bracket by using the adjustment
knob.
• Make sure the camera is mounted horizontal
for the best view.
• Connect the car charger to the car lighter for
power.
REAR CAMERA
• Turn the power of the car OFF when connecting the camera.
• Clean and dry the desired location before installation.
• Ensure that the cable is placed so that it will not be damaged (e.g. not laid under car/truck seats
or over sharp edges beneath the dashboard).
The rear camera HDMI cable is used for plug & play installation. It provides power supply & video
via the cigarette lighter from the front camera. The HDMI cable comes out of the front camera
screen unit and is used for connecting the front camera screen unit to the rear camera via the
socket.
-5-REAR CAMERA CABLE
CAR PLUG POWER CABLE
CAM
CAM
CAM
• We recommend mounting the rear camera near the license plate / inner rear window / back
windshield / back shelf and/or on the dead corner / blind spot area with the ready-for-use
mounting bracket.
• Before mounting the rear camera, make sure you get a maximum view coverage with the location
of your camera!
• Mount the camera on the desired location of your car/truck using the installation screws and/or
tape included.
• Connect the front camera and the rear camera using the rear camera HDMI cable.
-6-There are 2 ways of connecting the rear camera to the car/truck’s electronic system
6m 3.5m
Power line Cigarette plug cable
Reverse signal red + wire
1. Plug & play connection: via the adapter for the cigarette lighter, 12/24 V systems.
2. (optional) Reverse signal detection: immediately to the car/truck’s rear signal light system (12~24
V) via the red + power cable. The red wire should be connected to the + voltage of the car/truck
reverse signal/light power supply. If the reverse signal is connected to the reverse signal light
power, the front and rear camera will switch ON/OFF automatically when you select the reverse
gear from your car’s gear box or automatic transmission box. Once the gear is in rear-position, the
camera will switch to rear camera automatically and the LED lights will turn on*.
Note: Connect the red wire with the contact clip. Put the car/truck wire in the groove of the clips and
the cable wire in the groove with the confining rib, and push it hard to connect.
* Use a tool to lift the edges of the rubber window sealing and molding and push the rear and front
camera connection cables inside.
* When using the rear camera inside the car, we advise to
add the light cover on top of the LED lights to have no
reflections or disturbances.
Attention!
If there is no “Reverse signal/light” wire or if it is unavailable, you should not connect the red cable
but consult your garage/car manufacturer for more info.
Note: To avoid distortions make sure that the cables are laid far away from the electronic systems
of the car/truck.
OPERATION
A. MODES
Attention: This menu will not work if Mass Storage mode is activated.
VIDEO RECORDING MODE
A camera icon is shown in the upper left corner of the display.
• When the GUARDO DUAL DASHCAM is connected to your car’s power supply, it will start Video
recording as soon as the car engine is started. It will stop recording after the car is stopped.
• When the GUARDO DUAL DASHCAM is not connected to the car’s power supply, press and hold
the button, and press the button to start recording. The unit will automatically be in
Video recording mode. Press again to stop recording and save the files automatically.
• Loop recording: During recording, the device will save each video file every 1, 5 or 10 minutes
automatically. When the micro SD card is full, the device will delete the oldest video files
automatically one by one.
-7-PHOTO MODE
A photo icon is shown in the upper left corner of the display.
• Press the button 1x if you want to make pictures instead of recordings.
• Press the button every time you want to take a picture.
PLAYBACK MODE
A playback icon is shown in the upper left corner of the display.
• For Playback mode, press the button 2x.
• Use the & buttons to scroll through the recordings.
• Press to start playback.
• Press the button to pause or begin playback again.
MASS STORAGE MODE
• You can connect the GUARDO DUAL DASHCAM to your PC by using the supplied USB cable. You
can also use it to backup or playback files/videos on your PC.
• Press the & buttons to choose the mode and then press : Mass storage (USB mode) is a
computer interface between a computer and a digital camera which shows the digital camera as
a removable disk drive attached to the computer.
You don’t need to install drivers to use the HD DASHCAM with your PC because these are already
installed by Windows/Macintosh in the Windows/Macintosh pack.
You should connect the HD DASHCAM as following :
1. Make sure the battery is charged.
2. Only use the SUPPLIED USB cable.
3. Turn the DASHCAM ON.
4. Connect the USB cable with the DASHCAM before connecting it to the PC.
5. Select “MASS STORAGE” on the DASHCAM and press the button.
6. The driver will now install itself and in the folder “My computer” on your desktop you will see a
new (hard)disk (it is possible that a window will appear in which you can indicate how you would
like to view the files).
7. You can now see all files in the folder and double-click them to watch the videos using the
standard Windows Media Player or Apple Quicktime (you can select yourself).
Note:
You can also remove the micro SD card from the DASHCAM and place it in a (built-in or optional)
micro SD card reader from your PC or a separate micro SD card reader if you have one. This is a
quicker and easy-to-use solution.
B. MENU SETTINGS
Attention: This menu will not work if Mass Storage mode is activated.
1. Power on the unit with the supplied car charger or by using a fully charged battery.
2. Stop the recording if needed.
3. Press until you have selected the desired mode #.
4. Press to enter the menu#.
5. Press & buttons to scroll through the submenu’s.
6. After selection, click to confirm and save the setting.
7. Press to exit the menu.
-8-For example: to set date and time, please follow these steps:
1. Make sure the battery is charged.
2. Turn the DASHCAM ON or use it with the car charger in the car).
3. Stop the recording if needed.
4. Press .
5. Press again.
6. Use the button to go to DATE & TIME.
7. Press the button.
8. You can now use the & buttons to change the date and time and confirm each setting
by pressing the button. You can exit this menu by pressing the button.
#
Only works when no recording has been started.
VIDEO MENU
Resolution FHD 1080P 1920x1080
Video resolution 720P 848x480 / VGA
Dual camera Off / On
Loop Recording Off / 1 Min.* / 5 Min. / 10 Min.
Cycle recording: Saving time of each section on SD card
HDR Off / On*
Exposure +3.0 / +2.0 / +1.0 / +0.0 / -1.0
Luminance adjustment / -2.0 / -3.0
Motion Detection Off* / On
Automatic recording when movement is detected (only for front cam)
Record audio Off / On
Sound recording
Date Stamp Off / On
Date indication while recording
G-sensor Off / Low* / Medium / High
Adjust gravity acceleration for activation of the G-sensor
Park mode Off / On
Headlight warning Off/ On
* Recommended setting
PHOTO MENU
Capture mode Single Shot, 2s, 5s, 10s delay
Resolution 12MP 4032x3024 / 10MP 3648 x2736 / 8MP 3264 x 2448 / 5MP
2592x1944 / 3MP 2048x1536/ 2MP HD 1920x1080 / VGA 640x
480 / 1.3MP 1280x960
Quality Fine / Normal / Economy
Sharpness Strong / Normal / Soft
HDR Off / On*
White Balance Auto* / Daylight / Cloudy / Tungsten / Fluorescent
Colour Normal / Black & white / Sepia
ISO Auto* / 100 / 200 / 400
-9-Exposure +2.0 / +5/3 / +4/3 / +1.0 / +2/3 / +1/3 / +0.0 / -1/3 / -2/3 / -1.0 /
-4/3 / -5/3 / -2.0
Anti-Shaking Off / On*
Quick Review Off / 2 Seconds / 5 Seconds
Date Stamp Off/ On
* Recommended setting
PLAYBACK MENU
Delete / File removal Delete Current / Delete All
Protect / File locking Lock Current / Unlock Current / Lock All/ Unlock All
Slide Show 2, 5 or 8 seconds
C. SYSTEM SETTINGS
Attention: This menu will not work if Mass Storage mode is activated.
1. Power on the unit.
2. Stop the recording if needed.
3. Press to enter the menu when the device is in recording mode #.
4. Press again to select the set up menu.
5. Use the & buttons to scroll through the submenu’s.
6. After selection, click to confirm and save the setting.
7. Press to exit.
8. The new settings will be applied after restart of the device.
#
Only works when no recording has been started.
LCD Screen OFF Off */ 30 sec. / 1 Minute / 2 Minutes
Screensaver when use on battery
Auto Power Off Off */ 3 Minutes / 5 Minutes / 10 Minutes
Automatic power off when use on battery
Frequency 50 Hz / 60 Hz
Beep sound Off / On
Language English, Dutch, French, Spanish, German,
Polish, Czech, Italian
Set Date/Time DD/MM/YY and Date /Time
Format Internal memory / Micro SD card
In case of problems with your micro SD-card (f.ex.
“Memory full”) we recommend formatting your card
from this menu.
Default Setting Cancel / OK
Reset to factory settings
Version
* Recommended setting
-10-TROUBLE SHOOTING
FRONT CAMERA
I cannot take pictures or record a video.
Check if the TF-card has enough free storage left and make sure it is unlocked.
The device does not stop recording automatically.
Use the compatible high-speed Micro SD TF card with SDHC because of big HD video data. The SDHC
TF card needs to be class 10 or higher.
I get the message “error” while watching pictures or playing a recorded video.
The files have not been saved correctly due to a micro SD card storage error. Please use the format
option in the menu of your device to reformat your TF-card.
My recordings are blurry.
Make sure the lens is clean. Remove dust or finger prints if necessary.
I only see a black screen while trying to record air or water scenery.
Scenes with big contrasts will influence your automatic image control function. You can adjust the
settings manually in the “Exposure” menu.
The colour is not perfect on cloudy day or in natural daylight.
Reset the “White Balance” option to automatic.
Cross-stripe interference in image.
This is caused by an incorrect light frequency. Please adjust the setting to 50 or 60 Hz depending on
the local power supply values.
My device keeps crashing.
Reset the device by pressing the reset button with a sharp object (f.ex. a paperclip).
Reset the Dashcam back to original factory settings through the menu in the device.
REAR CAMERA
I get shrunk and unstable pictures.
Check voltage source.
I get a black picture.
Check fuse and/or power of the car adapter. If OK, please check power assembly of the screen
unit for loose or broken wires or connections.
I get static lines
Check ground and +12V or24V DC source for solid connection.
GUARANTEE
Copyright © Guardo. Guardo is a registered trademark of TE-Group NV. The Guardo brand stands for
superior product quality and outstanding customer service. That is why Guardo warrants this product
against all defects in material and workmanship for a period of two (2) years from the date of original
purchase of the product. The conditions of this guarantee and the extent of responsibility of Guardo
under this guarantee can be downloaded from our website: www.guardo.be.
-11-CUSTOMER SUPPORT
For more information, technical questions and return requests, please contact
support@guardo.be.
SOFTWARE UPDATES
Guardo keeps improving its products and therefore releases product software updates on a regular
basis when needed. Check www.guardo.be and click on ‘support’ to see if there is a software update
available for your Guardo device!
LEGAL DISCLAIMER
The software is provided “as is”, without warranty of any kind, express or implied, including but not
limited to the warranties of merchantability, fitness for a particular purpose and noninfringement.
In no event shall the authors or copyright holders be liable for any claim, damages or other liability,
whether in an action of contract, tort or otherwise, arising from, out of or in connection with the
software or the use or other dealings in the software.
The device and the recorded footage are intended for personal use only and should only be used as
reference material. Video surveillance and privacy issues are regulated by laws that vary from country
to country. Check the laws in your local region before using this product. The use of the product is
under your responsibility. In case of abuse, Guardo cannot be held liable for any abuse whatsoever.
-12-NL
INLEIDING
Gefeliciteerd met je aankoop. Lees alle instructies aandachtig voordat u uw apparaat gebruikt. U kunt
de GUARDO DUAL DASHCAM in uw auto gebruiken om uw rit en gevaarlijke situaties of ongevallen
onderweg op te nemen in volledige Full HD-kwaliteit.
VERPAKKINGSINHOUD
1. K I
P J
O
L
N B
F
E
M G
C
D A
H
2. 3. 4. 5. 6.
1. CAMERA DVR TOESTEL
L. Micro SD TF card gleuf
A. Zet apparaat aan / uit (Houd ingedrukt om M. 3.0” TFT scherm
het apparaat in te schakelen. Houd ingedrukt N. Indicatie licht
om het uit te schakelen als het niet op de O. Luidspreker
stroombron is aangesloten) + druk kort op om P. HDMI aansluiting voor
het LCD-scherm in / uit te schakelen achteruitrijcamera
B. Bevestig de geselecteerde optie
C. Ga naar / verlaat het menu 2. ACHTERUITRIJCAMERA MET 5,5 M
D. Ga naar beneden in het menu of schakel BEDRADE INSTALLATIEKABEL
geluidsopname uit
E. Ga omhoog in het menu of verander de 3. MONTAGEBEUGEL MET DASHCAM -
achteruitrijcamera of parkeermodus HOUDER + TAPE
F. Modus schakelen tussen VIDEO / FOTO /
WEERGAVE / Door afbeeldingen bladeren 4. 12 / 24V DC 5V / 2.1A AUTOLADER
G. SOS functie MET 3,5M XL USB-VERBINDINGSKABEL
H. Lens EN EXTRA USB - POORT ( MAX. 1,5A)
I. Resetten, als uw apparaat niet meer werkt
(vastloopt), kunt u uw apparaat opnieuw 5. LICHTKAP VOOR ACHTERKANT CAM
instellen en weer inschakelen.
J. USB-verbinding 6. BEVESTIGINGEN, SCHROEVEN
K. Microfoon EN TAPE
-13-G-SENSOR ONGEVAL FUNCTIE
Wanneer de zwaartekrachtversnelling oploopt tot 8G (1G = 9,8 m / s), zal de camera de video
automatisch opslaan en beschermen tegen automatische verwijdering. U kunt deze instelling
desgewenst handmatig wijzigen.
PARKEERFUNCTIE EN SOS-FUNCTIE
In de niet-actieve modus (wanneer u niet opneemt), houdt u de knop ingedrukt en verschijnt er
een camerasymbool aan de rechterkant van het display. Wanneer de auto geparkeerd staat en deze
wordt geraakt of wordt geschud (in geval van een parkeerongeval), zal de camera 30 seconden lang
opnemen. Daarna schakelt de camera uit en keert terug naar de parkeerstand. Druk kort op om de
video onmiddellijk op te slaan en te vergrendelen terwijl deze wordt opgenomen. Op de micro-SD-
kaart wordt dit bestand gecodeerd als een vergrendeld bestand.
OPLADEN
• Het apparaat heeft een kleine ingebouwde oplaadbare li-ionbatterij voor noodgebruik die
vier keer volledig moet worden opgeladen en ontladen bij de batterijfunctie om de maximale
capaciteit van de batterij te activeren. De laadtijd is ongeveer 2 uur maximaal.
• De status van de batterij wordt aangegeven met de volgende symbolen:
0% 25% 70% 100%
• Het rode indicatielampje gaat branden tijdens het opladen en gaat uit zodra de batterij volledig
is opgeladen.
• De camera neemt op voor max. 15 minuten zonder aansluiting op een stroombron (afhankelijk
van instellingen / modus).
Laadopties:
• Verbind het apparaat met een computer / laptop via de USB-verbindingskabel. OF
• Sluit het apparaat aan op de meegeleverde kabel + autolader voor gebruik in auto of vrachtwagen.
Zodra de motor van de auto wordt ingeschakeld, start het apparaat met opnemen. De GUARDO
DUAL DASHCAM wordt nu ook tijdens het opnemen opgeladen. Wanneer de autolader wordt
losgekoppeld van het apparaat, wordt de GUARDO DUAL DASHCAM automatisch uitgeschakeld
en worden de bestanden opgeslagen.
Opgelet:
• Als de batterij bijna leeg is, schakelt de GUARDO DUAL DASHCAM over naar een beveiligingsmodus.
Laad de batterij op om ervoor te zorgen dat u het apparaat kunt inschakelen en blijven gebruiken.
• GUARDO DUAL DASHCAM kan alleen worden gebruikt met de meegeleverde 5V (12 / 24V)
autostroomvoorziening. Elke andere voeding kan fouten en / of permanente schade aan het
apparaat veroorzaken.
GEBRUIK VAN MICRO SD-KAART (TF) (niet inbegrepen, optioneel verkrijgbaar)
-14-• Plaats uw micro SD-kaart in het SD-slot totdat deze op zijn plaats klikt.
• Druk zachtjes op de kaart om de micro SD-kaart te verwijderen. Het wordt gedeeltelijk uitgeworpen
waardoor u de kaart eruit kunt trekken.
• Als er geen kaart in de SD-sleuf zit, wordt op het display het bericht ‘Plaats een SD-kaart’ weergegeven.
Opmerking:
• We raden aan een 16 GB SDHC-microkaart (of hoger, max. 64 GB SDHC) te gebruiken met klasse
10, 15 MB / sec schrijven (of hoger).
• Zonder SD-kaart zal het apparaat NIET werken!
• Als de micro-SD-kaart verkeerd is geplaatst (moeilijk in te brengen), kan het apparaat en de
geheugenkaart worden beschadigd.
• Het apparaat stelt automatisch de micro SD-kaart in nadat deze is geplaatst.
VIDEO* IMAGE (examples) *
MICRO SD CARD 1920xFHD1080P 1280x720P 4032x3024 2MP 2592x1944 5MP 2048x1536 3MP
32 GB 225 min 252 min 12624 31600 48316
16 GB 112 min 126 min 6312 15080 24158
MONTAGE
VOORKANT-CAMERA
• Schuif de GUARDO DUAL DASHCAM in de
montagebeugel.
• Maak het venster schoon met alcohol /
glasreiniger en droog het af. Neem de
beschermstrook van de houder en plaats deze
stevig aan de binnenkant van uw voorruit
(drukken en vasthouden) en sluit de houder
met behulp van de hendel. We raden aan
om de dashcam aan de rechterkant van de
achteruitkijkspiegel te plaatsen.
• Stel de beugel af met behulp van de instelknop.
• Zorg ervoor dat de camera horizontaal staat
voor het beste zicht.
• Sluit de autolader aan op de auto-aansteker
voor stroomvoorziening.
ACHTERKANT CAMERA
Opmerking:
• Schakel de stroom van de auto UIT wanneer u de camera aansluit.
• Reinig en droog de gewenste locatie voor de installatie.
• Zorg ervoor dat de kabel zo wordt geplaatst dat deze niet wordt beschadigd (bijvoorbeeld niet
onder auto- / vrachtwagenstoelen of over scherpe randen onder het dashboard).
De HDMI-kabel aan de achterzijde van de camera wordt gebruikt voor plug & play-installatie.
Het levert voeding en video via de sigarettenaansteker van de camera aan de voorkant. De HDMI-
kabel komt uit de camera aan de bovenkant van de camera en wordt gebruikt voor het aansluiten
van de camera aan de voorkant op de camera aan de achterzijde via deze aansluiting.
-15-REAR CAMERA CABLE
CAR PLUG POWER CABLE
CAM
CAM
CAM
• We raden aan de achteruitrijcamera te monteren in de buurt van het nummerbord / de binnenste
achterruit / achterruit / achterplank en / of op het dode hoek- / dode hoekbereik met de
gebruiksklare montagebeugel.
• Zorg voordat u de camera achteraan monteert dat u een maximale beelddekking krijgt met de
locatie van uw camera!
• Monteer de camera op de gewenste locatie van uw auto / vrachtwagen met behulp van de
bijgeleverde installatie schroeven en / of tape.
• Sluit de camera aan de voorkant en de camera aan de achterzijde met behulp van de HDMI-kabel
aan de achterzijde van de camera aan.
-16-Er zijn 2 manieren om de achteruitrijcamera aan te sluiten op het elektronische systeem van de auto / truck
6m 3.5m
Power line Cigarette plug cable
Reverse signal red + wire
1. Plug & play-verbinding: via de adapter voor de sigarettenaansteker, 12/24 V-systemen.
2. (optioneel) Signaalherkenning: onmiddellijk naar het achterlichtsignaal van de auto / vrachtwagen
(12 ~ 24 V) via de rode + voedingskabel. De rode draad moet worden aangesloten op de + spanning
van het achteruitrijsignaal / lichtnet van de auto / truck. Als het achteruitrijsignaal is aangesloten
op de voeding van het achteruitrijlicht, schakelen de camera aan de voorzijde en de achterzijde
automatisch in of uit wanneer u de achteruitversnelling selecteert in de versnellingsbak of de
automatische versnellingsbak van uw auto. Zodra het tandwiel zich in de achterste positie bevindt,
schakelt de camera automatisch over naar de achteruitrijcamera en gaan de LED-lampjes branden *.
Opmerking: Verbind de rode draad met de contactclip. Steek de auto / vrachtwagendraad in de groef
van de clips en de kabeldraad in de groef met de opsluitende rib, en duw hem hard om aan te sluiten.
• Gebruik een gereedschap om de randen van de rubberen vensterafdichtingen en -lijst op te tillen
en de aansluitingskabels van de achterste en voorste camera naar binnen te duwen.
* Wanneer u de achteruitrijcamera in de auto gebruikt,
adviseren wij om de lichtkap bovenop de LED-verlichting
toe te voegen om geen reflecties of storingen te hebben.
OPGELET!
Als er geen “Reverse signal / light” -draad is of als deze niet beschikbaar is, moet u de rode kabel niet
aansluiten maar raadpleegt u uw garage / autofabrikant voor meer informatie.
Opmerking: Om vervormingen te voorkomen, moet u ervoor zorgen dat de kabels ver van de
elektronische systemen van de auto / vrachtwagen worden geplaatst.
BEDIENING
A. MODI
Let op: dit menu zal niet werken als de Mass Storage-modus is geactiveerd.
VIDEO OPNAME MODUS
Een camerapictogram wordt weergegeven in de linkerbovenhoek van het scherm.
• Wanneer de GUARDO DUAL DASHCAM op de voeding van uw auto is aangesloten, start deze video-
opname zodra de motor van de auto wordt gestart. Het stopt met opnemen nadat de auto is gestopt.
• Wanneer de GUARDO DUAL DASHCAM niet op de voeding van de auto is aangesloten, houdt u
de knop ingedrukt en drukt u op de knop om de opname te starten. Het apparaat bevindt
zich automatisch in de video-opnamestand. Druk opnieuw op om de opname te stoppen en de
bestanden automatisch op te slaan.
• Loop-opname: tijdens het opnemen, zal het apparaat elk videobestand elke 1, 5 of 10 minuten
automatisch opslaan. Wanneer de micro-SD-kaart vol is, verwijdert het apparaat de oudste
videobestanden automatisch één voor één.
-17-FOTO MODUS
Er verschijnt een fotopictogram in de linkerbovenhoek van het scherm.
• Druk 1x op de knop als u opnamen wilt maken in plaats van opnames.
• Druk telkens op de knop wanneer u een foto wilt maken.
AFSPEEL MODUS
Een afspeelpictogram wordt weergegeven in de linkerbovenhoek van het scherm.
• Druk voor de weergavemodus 2x op de knop.
• Gebruik de knoppen & om door de opnamen te bladeren.
• Druk op om het afspelen te starten.
• Druk op de knop om te pauzeren of het afspelen opnieuw te starten.
MASSA OPSLAG MODUS
• U kunt de GUARDO DUAL DASHCAM op uw pc aansluiten met behulp van de meegeleverde USB-
kabel. U kunt het ook gebruiken om een back-up te maken van bestanden of video’s op uw pc.
• Druk op de knoppen & om de modus te selecteren en druk vervolgens op : massaopslag
(USB-modus) is een computerinterface tussen een computer en een digitale camera die de
digitale camera als een verwisselbaar schijfstation op de computer laat zien.
U hoeft geen stuurprogramma’s te installeren om de HD DASHCAM met uw pc te gebruiken, omdat
deze al zijn geïnstalleerd door Windows / Macintosh in het Windows / Macintosh-pakket.
Je moet de HD DASHCAM als volgt verbinden:
1. Zorg dat de batterij is opgeladen.
2. Gebruik alleen de MEEGELEVERDE USB-kabel.
3. Schakel de DASHCAM IN.
4. Sluit de USB-kabel aan op de DASHCAM voordat u deze aansluit op de pc.
5. Selecteer “MASS STORAGE” op de DASHCAM en druk op de knop.
6. Het stuurprogramma zal zichzelf nu installeren en in de map “Mijn computer” op uw bureaublad
ziet u een nieuwe (harde) schijf (het is mogelijk dat er een venster verschijnt waarin u kunt
aangeven hoe u de bestanden wilt bekijken ).
7. U kunt nu alle bestanden in de map zien en erop dubbelklikken om de video’s te bekijken met de
standaard Windows Media Player of Apple QuickTime (u kan zelf selecteren).
Opmerking:
U kunt ook de micro SD-kaart uit de DASHCAM verwijderen en deze in een (ingebouwde of optionele)
micro SD-kaartlezer vanaf uw pc of een afzonderlijke micro SD-kaartlezer plaatsen als u die hebt. Dit
is een snellere en gemakkelijk te gebruiken oplossing.
B. MENU INSTELLINGEN
Let op: dit menu zal niet werken als de Mass Storage-modus is geactiveerd.
1. Schakel het apparaat in met de meegeleverde auto-oplader of met behulp van een volledig
opgeladen batterij.
2. Stop de opname indien nodig.
3. Druk op totdat u de gewenste modus hebt geselecteerd. #
4. Druk op om het menu # te openen.
5. Druk op & om door de submenu’s te bladeren.
6. Klik na selectie op om te bevestigen en de instelling op te slaan.
7. Druk op om het menu te verlaten.
-18-Bijvoorbeeld: om de datum en tijd in te stellen, volgt u deze stappen:
1. Zorg dat de batterij is opgeladen.
2. Schakel de DASHCAM in of gebruik hem met de autolader in de auto).
3. Stop de opname indien nodig.
4. Druk op .
5. Druk opnieuw op .
6. Gebruik de knop om naar DATE & TIME te gaan.
7. Druk op de knop.
8. U kunt nu de knoppen & gebruiken om de datum en tijd te wijzigen en elke instelling
te bevestigen door op de knop te drukken. U kunt dit menu verlaten door op de knop te
drukken.
# Werkt alleen als er geen opname is gestart.
VIDEO MENU
Resolutie FHD 1080P 1920x1080
Video resolutie /720P 848x480 / VGA
Dual camera Uit / aan
Loop opname Uit / 1 Min.* / 5 Min. / 10 Min.
Cyclusopname: tijd besparen van elk gedeelte op de SD-kaart
HDR Uit / Aan*
Blootstelling +3.0 / +2.0 / +1.0 / +0.0 / -1.0
Luminantie aanpassing / -2.0 / -3.0
Bewegingsdetectie Uit* / Aan
Automatische opname wanneer beweging wordt gedetecteerd (alleen
voor voorcamera)
Geluid opnemen Uit / aan
Geluidsopname
Datumstempel Uit / aan
Datumaanduiding tijdens opname
G sensor Uit / Laag* / Medium / Hoog
Pas zwaartekrachtversnelling aan en voor activering van de G-sensor
Parkeermodus Uit / aan
Koplampwaarschuwing Uit / aan
* Recommended setting
FOTO MENU
Opnamemodus Enkele opname, 2s, 5s, 10s vertraging
Resolutie 12MP 4032x3024 / 10MP 3648 x2736 / 8MP 3264 x 2448 / 5MP
2592x1944 / 3MP 2048x1536/ 2MP HD 1920x1080 / VGA 640x
480 / 1.3MP 1280x960
Kwaliteit Fijn / Normaal / Economisch
Scherpte Sterk / Normaal / Zacht
HDR Uit / Aan*
Witbalans Auto* / Daglicht / Bewolkt / Kunstlicht / Fluorescerend
Kleur Normaal / Zwart & wit / Sepia
ISO Auto* / 100 / 200 / 400
-19-Blootstelling +2.0 / +5/3 / +4/3 / +1.0 / +2/3 / +1/3 / +0.0 / -1/3 / -2/3 / -1.0 /
-4/3 / -5/3 / -2.0
Anti-Schokken Uit / Aan*
Snel overzicht Uit / 2 Sec / 5 Secs
Datumstempel Uit / Aan
* Aanbevolen instellingen
AFSPEEL MENU
Verwijder / Bestand verwijderen Wis huidige / Wis alle
Beschermen / Bestand vergrendelen Huidige vergrendelen / Huidige ontgrendelen / Alle
vergrendelen / Alle ontgrendelen
Diavoorstelling 2, 5 of 8 sec
C. SYSTEEMINSTELLINGEN
Let op: dit menu zal niet werken als de Mass Storage-modus is geactiveerd.
1. Schakel het apparaat in.
2. Stop de opname indien nodig.
3. Druk op om het menu te openen wanneer het apparaat in de opnamemodus # is.
4. Druk nogmaals op om het instellingenmenu te selecteren.
5. Gebruik de knoppen & om door de submenu’s te bladeren.
6. Klik na selectie op om te bevestigen en de instelling op te slaan.
7. Druk op om af te sluiten.
8. De nieuwe instellingen worden toegepast na het opnieuw opstarten van het apparaat.
# Werkt alleen als er geen opname is gestart.
LCD-scherm UIT Uit */ 30 sec. / 1 Min / 2 Min
Schermbeveiliging bij gebruik op batterij
Auto Power Off Uit */ 3 Min / 5 Min / 10 Min
Automatische uitschakeling bij gebruik op batterij
Frequentie 50 Hz / 60 Hz
Piep geluid Uit / Aan
Taal Engels, Nederlands, Frans, Spaans,
Duits, Pools, Tsjechisch, Italiaans
Datum/Tijd instellen DD/MM/YY en Datum /Tijd
Formatteren Intern geheugen / Micro SD-kaart
In het geval van problemen met uw micro SD-kaart (bijv.
“Geheugen vol”), raden we aan om uw kaart in dit menu te
formatteren.
Standaardinstelling Annuleren / OK
Resetten naar fabrieksinstellingen
Versie
* Aanbevolen instellingen
-20-PROBLEEMOPLOSSEN
VOORKANT CAMERA
Ik kan geen foto’s maken of een video opnemen.
Controleer of de TF-kaart voldoende vrije opslagruimte over heeft en zorg dat deze ontgrendeld is.
Het apparaat stopt niet automatisch met opnemen.
Gebruik de compatibele high-speed Micro SD TF-kaart met SDHC vanwege de grote HD-videogegevens.
De SDHC TF-kaart moet klasse 10 of hoger zijn.
Ik krijg het bericht “error” tijdens het bekijken van foto’s of het afspelen van een opgenomen video.
De bestanden zijn niet correct opgeslagen vanwege een opslagfout op de micro SD-kaart. Gebruik de
optie Formaat in het menu van uw apparaat om uw TF-kaart te formatteren.
Mijn opnames zijn wazig.
Zorg dat de lens schoon is. Verwijder indien nodig stof of vingerafdrukken.
Ik zie alleen een zwart scherm tijdens het opnemen van lucht- of waterlandschappen.
Scènes met grote contrasten zullen uw automatische beeldbesturingsfunctie beïnvloeden. U kunt de
instellingen handmatig aanpassen in het menu “Belichting”.
De kleur is niet perfect op bewolkte dagen of in natuurlijk daglicht.
Stel de optie “Witbalans” in op automatisch.
Cross-stripinterferentie in beeld.
Dit wordt veroorzaakt door een onjuiste lichtfrequentie. Stel de instelling in op 50 of 60 Hz,
afhankelijk van de lokale voedingswaarden.
Mijn apparaat blijft crashen.
Reset het apparaat door op de resetknop te drukken met een scherp voorwerp (bijvoorbeeld een
paperclip).
Reset de Dashcam terug naar de originele fabrieksinstellingen via het menu op het apparaat.
ACHTERKANT CAMERA
Ik krijg gekrompen en instabiele foto’s.
Controleer de spanningsbron.
Ik krijg een zwarte foto.
Controleer de zekering en / of de stroom van de autoadapter. Als dit goed is, controleer dan of
de voedingseenheid op het scherm is aangesloten en de eenheid op losse of gebroken draden of
verbindingen.
Ik krijg statische lijnen
Controleer de aarde en + 12V of 24V DC-bron voor een solide verbinding.
GARANTIE
Copyright © Guardo. Guardo is een gedeponeerd handelsmerk van TE-Group NV. Het merk Guardo
staat voor producten van superieure kwaliteit en een uitstekende klantenservice. Daarom garandeert
Guardo dat dit product vrij is van materiaal- en fabricagefouten gedurende een periode van twee (2)
jaar na de oorspronkelijke aankoopdatum van het product. De voorwaarden van deze garantie en
de omvang van de verantwoordelijkheid van Guardo onder deze garantie kan je bekijken op www.
guardo.be.
-21-KLANTENONDERSTEUNING
Voor meer informatie, technische vragen of retouraanvragen met betrekking tot dit product dient u
rechtstreeks contact op te nemen met support@guardo.be.
SOFTWARE UPDATES
Guardo blijft zijn productaanbod verbeteren en zal dus regelmatig product software updates
vrijgeven. Kijk regelmatig op www.guardo.be en klik ‘support’ om na te gaan of er
een software-update beschikbaar is voor je Guardo toestel!
LEGAL DISCLAIMER
Deze software wordt aangeboden in de huidige staat (‘as is’) en enige expliciete of impliciete
garanties, met inbegrip van, maar niet beperkt tot, de geïmpliceerde garanties van verhandelbaarheid
en geschiktheid voor een bepaald doel worden verworpen. In geen geval zullen de auteurs of
copyrighthouders aansprakelijk zijn voor enige claim of schade hetzij in overeenkomst, burgerlijke
aansprakelijkheid, of onrechtmatige daad in verband met deze software of voortvloeiende uit het
gebruik van deze software. Het toestel en de opgenomen beelden zijn enkel bedoeld voor persoonlijk
gebruik en mogen enkel worden gebruikt als referentiemateriaal. Videobewaking en privacy kwesties
worden geregeld door wetten die verschillen van land tot land. Controleer de wetten in je eigen regio
voor je dit product gebruikt. Het gebruik van het product valt onder je verantwoordelijkheid. In geval
van misbruik, kan Guardo niet aansprakelijk worden gesteld.
-22-INTRODUCTION
FR
Félicitations pour votre achat. Veuillez lire attentivement toutes les instructions avant d’utiliser votre
appareil. Vous pouvez utiliser le GUARDO DUAL DASHCAM à l’intérieur de votre voiture pour enregistrer
en toute qualité HD votre conduite et les situations dangereuses ou les accidents sur la route.
CONTENU DE L’EMBALLAGE
1. K I
P J
O
L
N B
F
E
M G
C
D A
H
2. 3. 4. 5. 6.
1. CAMERA DVR APPAREIL
A. Allumer / éteindre l’appareil (appuyer et M. 3.0” TFT écran
maintenir enfoncé pour allumer l’appareil Appuyer N. Voyant
et maintenir enfoncé pour l’éteindre lorsqu’il n’est O. Haut-parleur
pas connecté à la source d’alimentation) + appuyer P. HDMI connexion pour caméra arrière
brièvement pour allumer / éteindre l’écran LCD
B. Confirmer l’option sélectionnée 2. CAMÉRA DE RECUL AVEC CÂBLE
C. Entrer / quitter le menu D ’INSTALLATION CÂBLÉ DE 5,5 M
D. Descendez dans le menu ou n’avez pas
d’enregistrement sonore 3. SUPPORT DE FIXATION AVEC
E. Monter dans le menu ou changer la vue SUPPORT DASHCAM + RUBAN
arrière de la caméra ou le mode parking
F. Mode de commutation entre VIDEO / 4. 12/24V DC 5V/2.1A CHARGEUR
PHOTO / PLAYBACK / Parcourir les images DE VOITURE AVEC CÂBLE DE
G. Fonction SOS CONNEXION USB XL 3,5 M ET PORT
H. Objectif USB SUPPLÉMENTAIRE (1,5 A MAX.)
I. Réinitialiser, si votre appareil cesse de fonctionner
(se bloque), vous pouvez réinitialiser votre appareil 5. COUVERCLE POUR LA CAME ARRIÈRE
et le rallumer.
J. USB connexion 6. MONTURES ET VIS + RUBAN
K. Microphone
L. Micro SD TF fente
-23-G-SENSOR ACCIDENT FONCTION
Lorsque l’accélération gravitationnelle atteint 8G (1G = 9,8m / s), l’appareil photo enregistre
automatiquement la vidéo et la protège contre une suppression automatique. Vous pouvez modifier
ce paramètre manuellement si vous le souhaitez.
PARKING MODE & SOS FONCTION
En mode veille (lorsque vous n’enregistrez pas), maintenez le bouton enfoncé, le symbole de la
caméra s’affiche sur le côté droit de l’écran. Lorsque la voiture est garée et qu’elle est heurtée ou
secouée (en cas d’accident de stationnement), l’appareil photo commence à enregistrer pendant 30
secondes. Ensuite, l’appareil photo s’éteint et retourne en mode d’attente de stationnement. Appuyez
brièvement pour enregistrer et verrouiller immédiatement la vidéo pendant son enregistrement.
Sur la carte micro-SD, ce fichier sera marqué comme un fichier verrouillé.
CHARGEMENT
• L’appareil est équipé d’une petite batterie Li-ion rechargeable intégrée pour une utilisation
d’urgence qui doit être complètement chargée et déchargée 4 fois sur la batterie pour activer la
capacité maximale de la batterie. Le temps de charge est d’environ 2 heures maximum.
• L’état de la batterie est indiqué par les symboles suivants:
0% 25% 70% 100%
• Le voyant rouge s’allume pendant le chargement et s’éteint une fois la batterie complètement chargée.
• La caméra enregistre pour max. 15 minutes lorsqu’il n’est pas connecté à une source d’alimentation
(dépend des réglages / mode).
Options de recharge:
• Connectez l’appareil à un ordinateur / ordinateur portable à l’aide du câble de connexion USB. OU
• Branchez l’appareil dans le câble + chargeur de voiture inclus pour une utilisation dans une voiture
ou un camion. Dès que le moteur de la voiture s’allume, l’appareil commence à enregistrer. Le
GUARDO DUAL DASHCAM sera également chargé pendant l’enregistrement. Lorsque le chargeur
de voiture est déconnecté de l’appareil, le GUARDO DUAL DASHCAM s’éteint automatiquement et
enregistre les fichiers.
Attention:
• Avec une batterie faible, le GUARDO DUAL DASHCAM passe en mode de protection. Veuillez
charger la batterie pour vous assurer que vous pouvez allumer l’appareil et continuer à l’utiliser.
• GUARDO DUAL DASHCAM ne peut être utilisé qu’avec l’alimentation de voiture 5V (12 / 24V)
fournie. Toute autre source d’alimentation peut provoquer des erreurs et / ou des dommages
permanents à l’appareil.
UTILISATION DE LA CARTE MICRO SD (TF) (non incluse, disponible en option)
-24-• Insérez votre carte micro SD dans la fente SD jusqu’à ce qu’elle s’enclenche.
• Pour retirer la carte micro SD, appuyez légèrement sur la carte. Il est partiellement éjecté vous
permettant de sortir la carte.
• Si aucune carte n’est insérée dans la fente SD, l’écran affiche le message ‘Veuillez insérer une carte SD’.
Remarque:
• Nous recommandons d’utiliser une carte micro SDHC de 16 Go (ou une carte SDHC de 64 Go
maximum) avec une écriture de classe 10, 15 Mo / s (ou plus).
• Sans carte SD, l’appareil ne fonctionnera PAS!
• Si la carte micro SD est mal insérée (difficile à insérer), cela peut endommager l’appareil et la
carte mémoire.
• L’appareil configure automatiquement la carte micro SD après son insertion.
VIDEO* IMAGE (examples) *
MICRO SD CARD 1920xFHD1080P 1280x720P 4032x3024 2MP 2592x1944 5MP 2048x1536 3MP
32 GB 225 min 252 min 12624 31600 48316
16 GB 112 min 126 min 6312 15080 24158
MONTAGE
CAMERA FRONTALE
• Faites glisser le GUARDO DUAL DASHCAM
dans le support de montage.
• Nettoyez la vitre avec de l’alcool / nettoyant
pour vitres et séchez-la. Retirez la bande de
protection du support et placez-la fermement
à l’intérieur de votre pare-brise (appuyez et
maintenez) et fermez le support à l’aide du
levier. Nous vous recommandons de placer la
dashcam sur le côté droit du rétroviseur.
• Ajustez le support en utilisant le bouton de
réglage.
• Assurez-vous que la caméra est montée
horizontalement pour une meilleure vue.
• Connectez le chargeur de voiture à l’allume-
cigare pour l’alimentation.
CAMERA ARRIERE
Remarque:
• Éteignez la voiture lorsque vous connectez l’appareil photo.
• Nettoyez et séchez l’endroit désiré avant l’installation.
• Assurez-vous que le câble est placé de sorte qu’il ne soit pas endommagé (par exemple, il ne doit
pas être placé sous des sièges de voiture / camion ou au-dessus d’arêtes vives sous le tableau de
bord).
Le câble HDMI de la caméra arrière est utilisé pour l’installation plug & play. Il fournit l’alimentation
et la vidéo via l’allume-cigare de la caméra frontale. Le câble HDMI sort de l’unité de l’écran de la
caméra avant et sert à connecter l’unité de l’écran de la caméra avant à la caméra arrière via la
prise.
-25-REAR CAMERA CABLE
CAR PLUG POWER CABLE
CAM
CAM
CAM
• Nous recommandons de monter la caméra arrière près de la plaque d’immatriculation / de la vitre
arrière arrière / du pare-brise arrière / de l’étagère arrière et / ou sur la zone coin mort / angle
mort avec le support de montage prêt à l’emploi.
• Avant de monter la caméra arrière, veillez à obtenir une couverture maximale de la vue avec
l’emplacement de votre caméra!
• Montez la caméra sur l’emplacement souhaité de votre voiture / camion à l’aide des vis
d’installation et / ou du ruban adhésif inclus.
• Connectez la caméra avant et la caméra arrière à l’aide du câble HDMI de la caméra arrière.
-26-Il y a 2 façons de connecter la caméra arrière au système électronique de la voiture / camion:
6m 3.5m
Power line Cigarette plug cable
Reverse signal red + wire
1. Connexion Plug & Play: via l’adaptateur pour l’allume-cigare, systèmes 12/24 V.
2. (optionnel) Détection du signal de marche arrière: immédiatement au système de feux de
signalisation arrière de la voiture / camion (12 ~ 24 V) via le câble d’alimentation rouge +. Le
fil rouge doit être connecté à la tension + du signal de marche arrière du véhicule / camion /
alimentation électrique. Si le signal de marche arrière est connecté à la puissance du signal de
marche arrière, les caméras avant et arrière se mettront automatiquement en marche / arrêt
lorsque vous sélectionnez la marche arrière de la boîte de vitesses ou du boîtier de transmission
automatique de votre voiture. Une fois la vitesse en position arrière, l’appareil photo passera
automatiquement à la caméra arrière et les lumières DEL s’allumeront *.
Remarque: Connectez le fil rouge avec le clip de contact. Mettez le fil de la voiture / camion dans la
rainure des clips et le fil du câble dans la rainure avec la nervure de confinement, et poussez-le fort
pour se connecter.
• À l’aide d’un outil, soulevez les bords de l’étanchéité et du moulage de la fenêtre en caoutchouc et
poussez les câbles de connexion de caméra arrière et avant à l’intérieur.
* Lors de l’utilisation de la caméra arrière à l’intérieur de la voiture, nous
conseillons d’ajouter le couvercle de la lumière sur les lumières LED
pour ne pas avoir de réflexions ou de perturbations.
Attention!
S’il n’y a pas de fil “Inverser le signal / lumière” ou s’il n’est pas disponible, vous ne devez pas connecter
le câble rouge mais consulter le fabricant de votre garage / voiture pour plus d’informations.
Remarque: Pour éviter les distorsions, assurez-vous que les câbles sont éloignés des systèmes
électroniques de la voiture / camion.
OPERATION
A. MODES
Attention: Ce menu ne fonctionnera pas si le mode Mass Storage est activé.
MODE VIDEO ENREGISTREMENT
Une icône de caméra s’affiche dans le coin supérieur gauche de l’écran.
• Lorsque le GUARDO DUAL DASHCAM est connecté à l’alimentation de votre voiture, il démarre
l’enregistrement vidéo dès que le moteur de la voiture est démarré. Cela arrêtera l’enregistrement
après l’arrêt de la voiture.
• Lorsque le GUARDO DUAL DASHCAM n’est pas connecté à l’alimentation de la voiture, appuyez
sur le bouton et maintenez-le enfoncé, puis appuyez sur le bouton pour démarrer
l’enregistrement. L’appareil sera automatiquement en mode d’enregistrement vidéo. Appuyez à
nouveau pour arrêter l’enregistrement et enregistrer les fichiers automatiquement.
• Enregistrement en boucle: Pendant l’enregistrement, l’appareil enregistre chaque fichier vidéo
toutes les 1, 5 ou 10 minutes automatiquement. Lorsque la carte micro SD est pleine, l’appareil
supprime automatiquement les fichiers vidéo les plus anciens un par un.
-27-MODE PHOTO
Une icône de photo s’affiche dans le coin supérieur gauche de l’écran.
• Appuyez sur le bouton 1x si vous voulez faire des images à la place des enregistrements.
• Appuyez sur le bouton chaque fois que vous voulez prendre une photo.
MODE DE LECTURE
Une icône de lecture s’affiche dans le coin supérieur gauche de l’écran.
• Pour le mode Lecture, appuyez sur le bouton 2x.
• Utilisez les boutons & pour faire défiler les enregistrements.
• Appuyez sur pour démarrer la lecture.
• Appuyez sur le bouton pour faire une pause ou recommencer la lecture.
MODE DE STOCKAGE EN MASSE
• Vous pouvez connecter le GUARDO DUAL DASHCAM à votre PC à l’aide du câble USB fourni. Vous
pouvez également l’utiliser pour sauvegarder ou lire des fichiers / vidéos sur votre PC.
• Appuyez sur les boutons & pour choisir le mode, puis appuyez sur : Le stockage de masse
(mode USB) est une interface d’ordinateur entre un ordinateur et un appareil photo numérique qui
montre l’appareil photo numérique comme un lecteur de disque amovible connecté à l’ordinateur.
Vous n’avez pas besoin d’installer des pilotes pour utiliser le HD DASHCAM avec votre PC, car ils sont
déjà installés par Windows / Macintosh dans le pack Windows / Macintosh.
Vous devez connecter le HD DASHCAM comme suit:
1. Assurez-vous que la batterie est chargée.
2. Utilisez uniquement le câble USB FOURNI.
3. Mettez le DASHCAM sous tension.
4. Connectez le câble USB au DASHCAM avant de le connecter au PC.
5. Sélectionnez “MASS STORAGE” sur le DASHCAM et appuyez sur le bouton.
6. Le pilote va maintenant s’installer et dans le dossier “Mon ordinateur” sur votre bureau vous
verrez un nouveau disque (dur) (il est possible qu’une fenêtre apparaisse dans laquelle vous
pouvez indiquer comment vous voulez voir les fichiers ).
7. Vous pouvez maintenant voir tous les fichiers dans le dossier et double-cliquer dessus pour
regarder les vidéos en utilisant le Windows Media Player standard ou Apple Quicktime (vous
pouvez choisir vous-même).
Remarque:
You can also remove the micro SD card from the DASHCAM and place it in a (built-in or optional)
micro SD card reader from your PC or a separate micro SD card reader if you have one. This is a
quicker and easy-to-use solution.
B. PARAMÈTRES DE MENU
Attention: Ce menu ne fonctionnera pas si le mode Mass Storage est activé.
1. Mettez l’appareil sous tension avec le chargeur de voiture fourni ou en utilisant une batterie
complètement chargée.
2. Arrêtez l’enregistrement si nécessaire.
3. Appuyez sur jusqu’à ce que vous ayez sélectionné le mode désiré #.
4. Appuyez sur pour entrer dans le menu #.
5. Appuyez sur les touches & pour faire défiler les sous-menus.
6. Après la sélection, cliquez sur pour confirmer et enregistrer le réglage.
7. Appuyez sur pour quitter le menu.
-28-Par exemple: pour définir la date et l’heure, procédez comme suit:
1. Assurez-vous que la batterie est chargée.
2. Allumez le DASHCAM ou utilisez-le avec le chargeur de voiture dans la voiture).
3. Arrêtez l’enregistrement si nécessaire.
4. Appuyez sur .
5. Appuyez à nouveau sur .
6. Utilisez le bouton pour aller à DATE ET HEURE.
7. Appuyez sur le bouton .
8. Vous pouvez maintenant utiliser les boutons & pour changer la date et l’heure et confirmer chaque
réglage en appuyant sur le bouton. Vous pouvez quitter ce menu en appuyant sur le bouton.
# Fonctionne uniquement quand aucun enregistrement n’a été démarré.
VIDEO MENU
Résolution FHD 1080P 1920x1080 /720P
Résolution vidéo 848x480 / VGA
Dual camera Éteint / allumé
Enregistrement en boucle Off / 1 Min.* / 5 Min. / 10 Min.
Enregistrement de cycle: économie de temps de chaque section sur
la carte SD
HDR Éteint / allumé*
Exposition +3.0 / +2.0 / +1.0 / +0.0 / -1.0 /
Réglage de la luminance -2.0 / -3.0
Détection de mouvement Éteint* / allumé
Enregistrement automatique lorsqu’un mouvement est détecté
(uniquement pour la caméra avant)
Enregistrement audio Éteint / allumé
Enregistrement sonore
Timbre de date Éteint / allumé
Indication de la date pendant l’enregistrement
G-sensor Éteint / Faible * / Moyen /
Ajuster l’accélération de gravité pour l’activation du G-sensor Élevé
Mode parc Éteint / allumé
Avertissement de phare Éteint / allumé
* Paramètre recommandé
PHOTO MENU
Mode de capture Coup unique, 2s, 5s, 10s delay
Résolution 12MP 4032x3024 / 10MP 3648 x2736 / 8MP 3264 x 2448 / 5MP
2592x1944 / 3MP 2048x1536 / 2MP HD 1920x1080 / VGA 640x
480 / 1.3MP 1280x960
Qualité Fine / Normal / Économie
Acuité Fort / Normal / Doux
HDR Éteint / allumé*
Balance des blancs Auto * / Lumière du jour / Nuageux / Tungstène / Fluorescent
Couleur Normal / Noir et blanc / Sépia
-29-ISO Auto * / 100/200/400
Exposition +2.0 / +5/3 / +4/3 / +1.0 / +2/3 / +1/3 / +0.0 / -1/3 / -2/3 / -1.0 /
-4/3 / -5 / 3 / -2.0
Anti-tremblement Éteint / allumé*
Examen rapide Arrêt / 2 secondes / 5 secondes
Timbre de date Éteint / allumé
* Recommended setting
LECTURE MENU
Effacer Supprimer actuel / Supprimer tout
Suppression de fichier
Protéger Verrouiller le courant / Débloquer le courant / Verrouiller tout /
Verrouillage de fichier Déverrouiller tout
Diaporama 2, 5 ou 8 secondes
C. PARAMÈTRES DU SYSTÈME
Attention: Ce menu ne fonctionnera pas si le mode Mass Storage est activé.
1. Mettez l’appareil sous tension.
2. Arrêtez l’enregistrement si nécessaire.
3. Appuyez sur pour accéder au menu lorsque l’appareil est en mode d’enregistrement #.
4. Appuyez à nouveau sur pour sélectionner le menu de configuration.
5. Utilisez les boutons & pour faire défiler les sous-menus.
6. Après la sélection, cliquez sur pour confirmer et enregistrer le réglage.
7. Appuyez sur pour quitter.
8. Les nouveaux paramètres seront appliqués après le redémarrage de l’appareil.
Écran LCD éteint Arrêt * / 30 sec. / 1 minute / 2 minutes
Économiseur d’écran en cas d’utilisation sur batterie
Arrêt automatique Arrêt * / 3 minutes / 5 minutes / 10 min-
Mise hors tension automatique lors d’une utilisation sur utes
batterie
fréquence 50 Hz / 60 Hz
Bip sonore Éteint allumé
Langue Anglais, Néerlandais, Français, Espagnol,
Allemand, Polonais, Tchèque, Italien
Définir la date et l’heure JJ / MM / AA et date / heure
Format Mémoire interne / Carte Micro SD
En cas de problème avec votre carte micro SD (par
exemple, “Mémoire pleine”), nous vous recommandons
de formater votre carte à partir de ce menu.
Paramètres par défaut Annuler / OK
Réinitialiser les paramètres d’usine
Version
* Paramètre recommandé
-30-You can also read