User Guide for Kata S58 - GSM/GPRS Digital Mobile Phone
←
→
Page content transcription
If your browser does not render page correctly, please read the page content below
User Guide for Kata S58.
               GSM/GPRS Digital Mobile Phone

© 2011 SAA Asia Limited. All rights reserved. Kata is a trademark of SAA Asia Limited, registered in the H.K. and other countries.Other
product and company names mentioned herein may be trademarks of their respective companies.

                                                          -- 1 of 24 --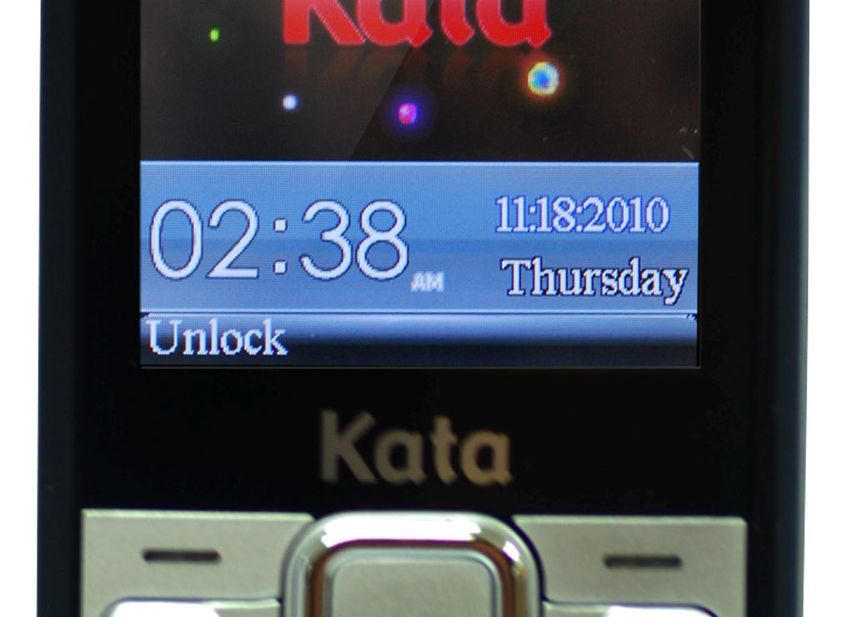
Table of contents
1. Preface.............................................................................................................5
2. Safety ...............................................................................................................5
3. About your device...........................................................................................6
   3.1 Appearance................................................................................................6
      3.2 Keys instruction ...................................................................................6
   3.2 Keys instruction ........................................................................................7
   3.3 Icons ...........................................................................................................8
4. Getting started ................................................................................................9
   4.1 Battery ........................................................................................................9
     4.1.1 Install &remove battery ......................................................................9
     4.1.2 Charging ............................................................................................10
   4.2 SIM card installation ...............................................................................10
   4.3 Memory card installation ........................................................................11
   4.4 Headset ....................................................................................................12
   4.5 File manager ............................................................................................12
   4.6 PC camera................................................................................................12
   4.7 Power on and off .....................................................................................12
5. Call functions ................................................................................................13
   5.1 Make a call ...............................................................................................13
     5.1.1 Make a domestic call ........................................................................13
     5.1.2 Make an extension call .....................................................................13
     5.1.3 Make an international call ................................................................13
     5.1.4 Make a call from Phonebook............................................................13
     5.1.5 Redial a call by Call history..............................................................13
     5.1.6 Smart dial ..........................................................................................13
     5.2 Answer a call ........................................................................................13
     5.3 Call options ..........................................................................................13
6. Text entry......................................................................................................14
   6.1 Switch input methods .............................................................................14
   6.2 Smart English input method...................................................................14
   6.3 English input method..............................................................................14
   6.4 Smart input method ................................................................................14
   6.5 Multitap input method .............................................................................14
   6.6 Input punctuations and symbols ...........................................................14
   6.7 Input space ..............................................................................................14
   6.8 Input numbers .........................................................................................14
7. Menu operation ............................................................................................15
   7.1 Access menus .........................................................................................15
8. Menu functions ............................................................................................15
   8.1 Audio Player ............................................................................................15

                                                     -- 2 of 24 --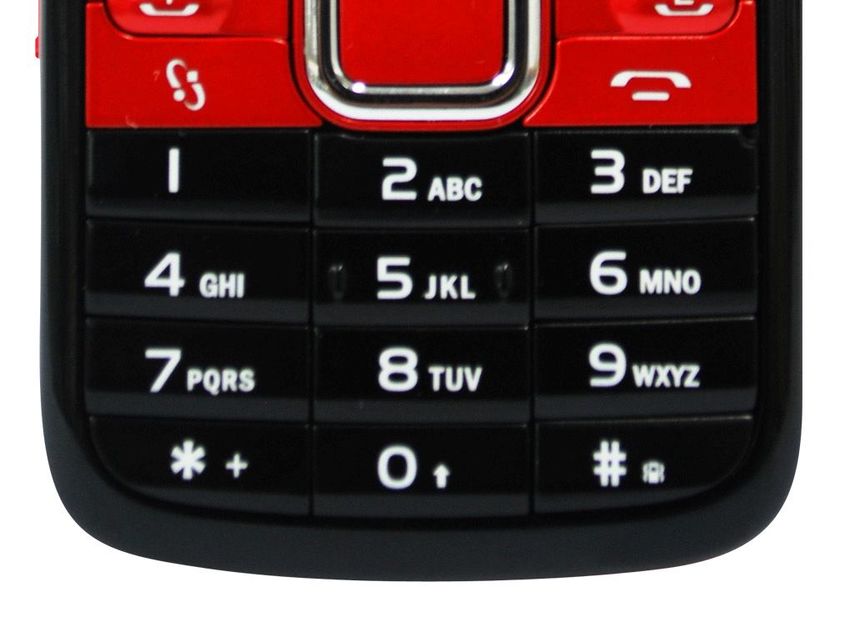
8.2 Phonebook...............................................................................................15
8.3 Call history...............................................................................................15
  8.3.1 Call history ........................................................................................15
8.4 Settings ....................................................................................................15
  8.4.1 Phone settings ..................................................................................15
  8.4.2 General call settings.........................................................................15
  8.4.3 Dual SIM settings ..............................................................................16
  8.4.4 Network settings ...............................................................................16
  8.4.5 Security settings ...............................................................................16
  8.4.6 Restore factory settings...................................................................17
8.5 Messages .................................................................................................18
  8.5.1 SMS ....................................................................................................18
     8.5.1.1 Write message............................................................................18
     8.5.1.2 Inbox............................................................................................18
     8.5.1.3 Outbox.........................................................................................18
     8.5.1.4 Drafts...........................................................................................18
     8.5.1.5 Templates ...................................................................................18
     8.5.1.6 SMS settings...............................................................................18
  8.5.2 MMS ...................................................................................................18
     8.5.2.1 Write message............................................................................18
     8.5.2.2 Inbox............................................................................................18
     8.5.2.3 Outbox.........................................................................................19
     8.5.2.4 Drafts...........................................................................................19
     8.5.2.5 Message settings .......................................................................19
  8.5.3 Voicemail server ...............................................................................19
  8.5.4 Broadcast message ..........................................................................19
  8.5.5 Blacklist .............................................................................................19
8.6 JAVA.........................................................................................................19
8.7 Network Services ....................................................................................20
  8.7.1 STK.....................................................................................................20
  8.7.2 WAP ...................................................................................................20
  8.7.3 Data account .....................................................................................20
8.8 Multimedia................................................................................................20
  8.8.1 FM radio.............................................................................................20
  8.8.2 Camera...............................................................................................20
  8.8.3 Album.................................................................................................20
  8.8.4 Video recorder...................................................................................21
  8.8.5 Video player.......................................................................................21
  8.8.6 Sound recorder .................................................................................21
  8.8.7 Schedule FM record..........................................................................21
8.9 File manager ............................................................................................21
8.10 Organizer................................................................................................21
  8.10.1 Alarm................................................................................................21

                                                -- 3 of 24 --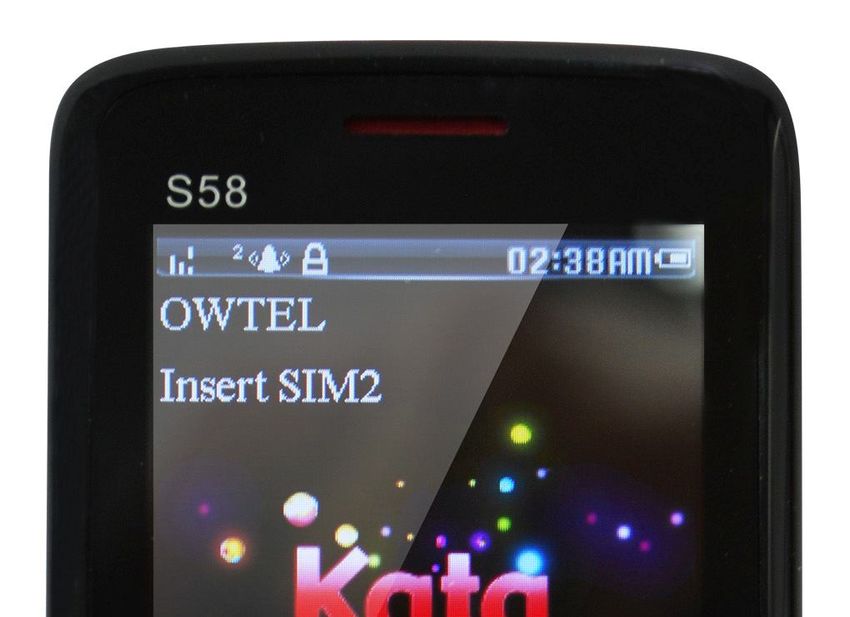
8.10.2 Calendar ..........................................................................................21
    8.10.3 Memo ...............................................................................................21
    8.10.4 World clock......................................................................................21
  8.11 Profiles ...................................................................................................21
  8.12 Extra .......................................................................................................22
    8.12.1 Calculator ........................................................................................22
    8.12.2 Games..............................................................................................22
    8.12.3 Bluetooth .........................................................................................22
    8.12.4 Auto answer machine .....................................................................22
9. Battery information......................................................................................22
  9.1 Operation information.............................................................................22
  9.2 Notice information...................................................................................23
10. Safety information .....................................................................................23
  10.1 Operating environment .........................................................................23
  10.2 Electronic devices.................................................................................23
    10.2.1 Pacemaker.......................................................................................23
    10.2.2 Hearing aids ....................................................................................23
    10.2.3 Other medical devices....................................................................23
    10.2.4 Vehicles ...........................................................................................24
    10.3 Potentially dangerous situations......................................................24
11. Care and maintenance................................................................................24

                                                   -- 4 of 24 --
1. Preface
Thank you very much for your choice of Kata S58! The mobile device described in this guide is
approved for use on the GSM network GSM network is a global cellular communication system of
international standards. Allow you to receive an international telephone call used as in your homeland.
However, before using these advanced network functions, you must firstly apply for these required
services. In order to better use your device, we suggest that you carefully read this guide to know all the
functions well.
Note: Due to the cellular network settings and the services provided, some functions may be
unavailable. For more information, please contact your service provider.
2. Safety
Read these concise guidelines. Not following them may be dangerous or illegal.
ROAD SAFETY
Always keep your hands free to operate the vehicle while driving. Park your vehicle safely
before using your device.
SWITCH OFF OR USE FLIGHT MODE IN AIRCRAFT
Wireless devices can cause interference in aircraft. Using them in aircraft is both dangerous
and illegal. Switch off your device or switch to fight mode before on board.
SWITCH OFF IN HOSPITALS
Follow relevant regulations or rules. Switch your device off near medical equipment.
SWITCH OFF WHEN REFUELING
Switch off your device at a refueling point or near fuels or chemicals.
SWITCH OFF NEAR BLASTING
Don’t use your device where blasting is in progress.
Observe restrictions, and follow any regulations or rules.
INTERFERENCE
All wireless phones may be susceptible to interference, which could affect the performance.
USE PROPERLY
Use in the normal position explained in the product documentation. Don't touch the
antenna unnecessarily.
ACCESSORIES AND BATTERIES
Use only the approved accessories and batteries. Do not connect to incompatible products.
EMERGENCY CALLS
Ensure the phone is switched on and in service. Enter the emergency number, and then press
the talk key. Give your location. Do not end the call without permission.
-- 5 of 24 --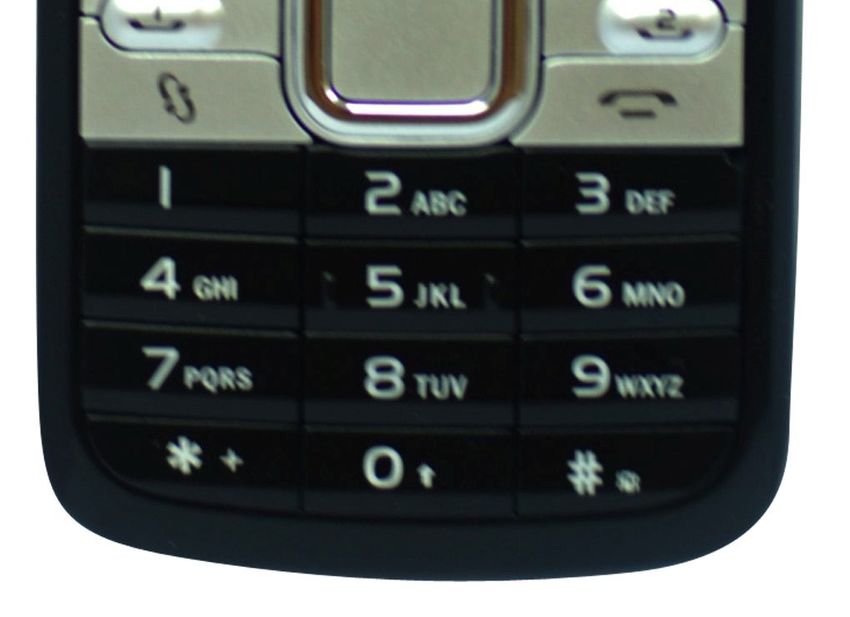
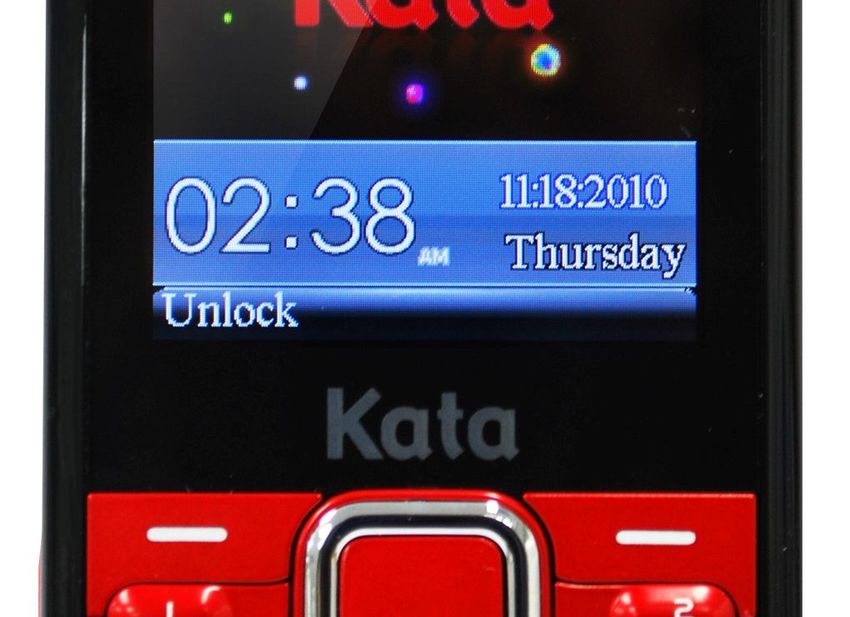
3. About your device

  3.1 Appearance

                       -- 6 of 24 --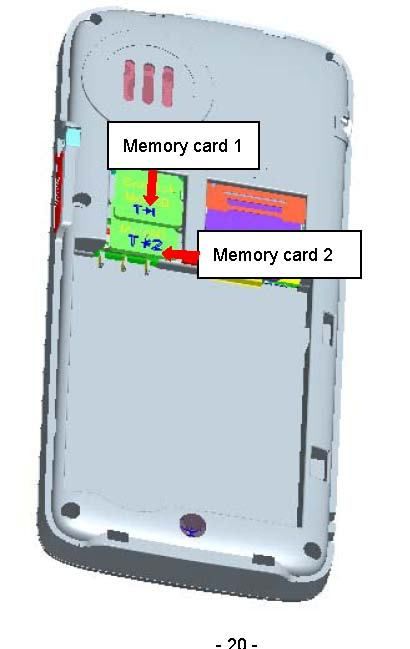
3.2 Keys instruction

   Keys                          Descriptions
                                OK key is used to confirm. At the standby mode
                                Up key: Audio player
                                Down key: Inbox
                                Left key: Camera
    OK key & Direction keys     Right key: Write message

                                It depends on the display text above it.
           Left soft key

                                It depends on the display text above it.
          Right soft key
                                Press it to make or answer a call;
                                At the standby mode, press it to

            Talk key 1          access SIM1 call history;
                                Press it to make or answer a call;
                                At the standby mode, press it to

            Talk key2           access SIM2 call history;
                                Press it to end the current call; Return from any menu to
                                standby mode;

                                While Audio player or FM is working in background, short
                                press it and select to turn off background play.
             End key
                                Long press it to power on/off the device
                                At the standby mode, press it to enter shortcuts.

          Shortcut key

              ~                 To input numbers, letters and special characters.
           Number keys

              * key             It has different functions in different menus.

              # key             It has different functions in different menus.

  Notice: In this user guide, when we say "Press”, the “Press” means “click the key then release”. "Press
  and hold" or “long press” means the key is kept pressed for two or more seconds.

                                         -- 7 of 24 --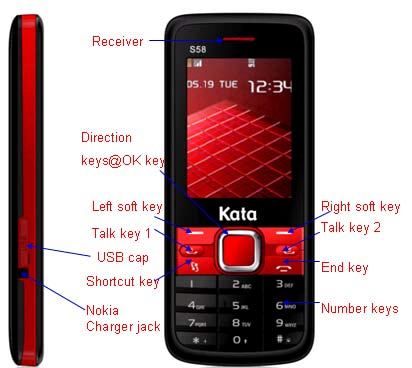
3.3 Icons

  Icons     Descriptions

            Show the SIM1’s current network signal level.

            Show the SIM2’s current network signal level.

            Show the power level of Battery.

            You have unread SMS in SIM1.

            You have unread SMS in SIM2.

            You have unread MMS in SIM1.

            You have unread MMS in SIM2.

            You have missed calls in SIM1.

            You have missed calls in SIM2.

            Alarm is set on.

            The headset is plugged in.

            In Profiles, Alert type is set as Ring only.

            In Profiles, Alert type is set as Vibrate only.

            In Profiles, Alert type is set as Vibrate and Ring.

            In Profiles, Alert type is set as Vibrate then Ring.

            Bluetooth is powered on.

            The keypad is locked.

                                    -- 8 of 24 --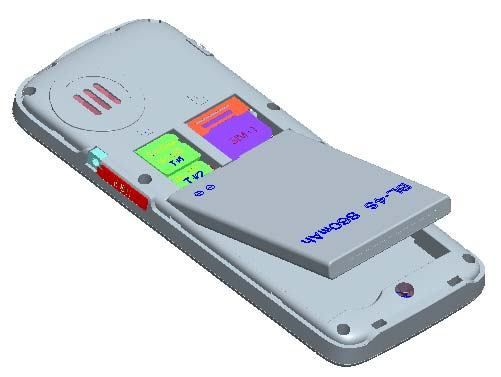
4. Getting started

4.1 Battery

Please use the approved batteries, and only use the battery charger approved by the device producer to charge
your battery.
      4.1.1 Install &remove battery

      Remove:
       1) Remove the back cover of the device by pushing forwards;
        2) Uplift the battery from its slot and take it out.

      Install:
                 1) Match the metal contacts of battery separately with the battery compartment metal
                     contacts, and put the battery base into the slot;
                  2) Slide the back cover toward the top of the phone to lock the cover into its place.

                                               -- 9 of 24 --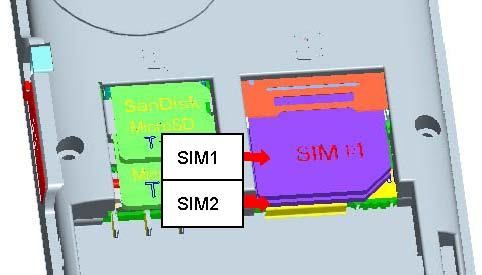
4.1.2 Charging

   Connect the charger to a power supply, and then plug in the charger pin to the charger jack on the right
   side. Charger animation will be displayed if the device is powered off. When it is powered on, the power
   status icon at the top right corner of the screen will blink circularly. Disconnect the charger from handset
   and power supply when battery is full. Notice:
             1. During charging, don’t remove or move the battery to prevent the battery circuit from burning
                out.
             2. During charging, it is normal that the phone and charger will become heated.
             3. If the battery is completely empty, it may take a period of time before the charging icon
                appears on the screen.

4.2 SIM card installation

     - Keep the metallic face of a SIM card downward, and slide it gently to the position of SIM 1.
     - Keep the metallic face of the other SIM card downward, and slide it gently to the position of SIM 2.
     - To remove a SIM card, please power off your device first, remove the battery and slide the card out
    gently.

                                           -- 10 of 24 --
4.3 Memory card installation
- Keep the metallic face of a memory card downward, and slide it gently to the position of Memory card 1.
- Keep the metallic face of the other memory card downward, and slide it gently to the position of Memory
card 2.
- To remove Memory card 1, please remove the back cover first and slide the memory card out gently.
- To remove Memory card 2, please power off your device first, then plug out the battery and slide the
memory card out gently.
- When the device is powered on, Memory card 1 supports hot-plug.
-- 11 of 24 --4.4 Headset
Insert the headset into the headset jack on the right side of the device if required.
4.5 File manager
File manager is used to manage the phone and the memory cards respectively.
1. Connect to a computer
The USB function of the device is available, no matter the device is powered on or off. While the device is
powered off, it will start charging and open File manager after the USB cable is plugged in. When the
device is powered on, it will enter the “USB Config” interface automatically after the USB cable is plugged
in. In the interface, select “Mass storage” to start File manager. If your memory cards are inserted, the
computer will pop up removal disks, respectively representing your device and memory cards. After you
enter, you will find some preset files or folders. For the sake of normal use, please put related files into
relevant directories, that is, MP3 files shall be put into My music, videos into Videos, photos into Photos,
into, records into Audio and Bluetooth received into Received. After the operation is completed, if you want
to exit, click the USB icon on the lower right side of the PC desktop, select to stop the USB devices, and
remove them after the pop-up warning “USB devices can be removed now” appears.
2. Format
If you format Phone or Memory card, all files in it will be deleted. You can format Phone or Memory card in
two ways:
i) Use the phone to format directly.
Steps: Select File manager > Memory card/Phone > Format.
ii) Use PC to format
To better complete the formatting, please follow the following steps:
(1) Right click My computer to select Manage > Storage >Disk management;
(2) Right click the disk of a memory card, and select Format.
(3) In Allocation Unit Size, select Default and then confirm.
4.6 PC camera
You can use the device as a PC camera.
For the first use, you may be required to install a driver. If you are using Windows XP, there is no need to
install the driver. Follow these steps below:
1. Plug in the USB cable when the device is powered on. The device will turn to USB Config automatically;
2. Select “Webcam”. The screen will display the picture captured by camera;
To exit PC camera, close web camera on your PC first, andthen unplug the USB cable. Don’t plug the cable
directly.
4.7 Power on and off
Press and hold the End key to switch your device on/off. If SIM lock or Phone lock is activated, please enter
the password as required.
-- 12 of 24 --5. Call functions
5.1 Make a call
When the sign of a network operator appears on the idle screen, you can make or answer calls.
5.1.1 Make a domestic call
Enter a phone number, including the area code if you are calling a fixed phone number (excluding local
numbers). Press Talk key 1 or Talk key 2 to make a call via your desired SIM card.
5.1.2 Make an extension call
When making an extension call, you can press * key to switch until the extension prefix “P” appears. After
a switchboard number is dialed, the device will pause automatically for a few seconds then dial your
desired extension number. Input the following one by one: Area code –Switchboard number – P –
Extension number. Then press Talk key 1 or Talk key 2 to make a call via your desired SIM card.
5.1.3 Make an international call
Enter the country code, the area code and the phone number. Press Talk key 1 or Talk key 2 to make a call
via your select SIM card. “+” is required when you enter the country code. You can press * key to switch
until + appears. When you are making a call to Hong Kong, Macao or Taiwan, it’s the same method.
5.1.4 Make a call from Phonebook
Access Phonebook to select a desired phone number, and press Talk key 1 or Talk key 2 to make a call via
your desired SIM card.
5.1.5 Redial a call by Call history
Access Call history, scroll to a desired number or name, and press Talk key 1 or Talk key 2 to make a call
via your desired SIM card.
5.1.6 Smart dial
When you enter the first few digits of your desired contact's phone number at the standby mode, the device
will list all matched contacts' numbers at the bottom of the screen.
Press direction keys to select your desired contact and press Talk key 1 or Talk key 2 to make a call via
your desired SIM card.
5.2 Answer a call
When there is an incoming call, there will be reminding information of the corresponding SIM card. The
caller’s name or number will appear in the screen if you have activated the Caller ID Display service. At this
time, you can press Talk key 1 or Talk key 2 to answer it. If an incoming call arrives during your operation in
sub window, a new window will pop up to inform you and your operation will be interrupted. If you miss it,
when you return to the standby screen, you will be reminded that there is a missed call of SIM 1 or SIM 2.
5.3 Call options
During a call, you can press the left soft key to enter Call options. The options differ according to your call
status. Here below are a few of them: Hold single call, End single call, New call, Phonebook, Messages,
Sound recorder, Multiparty call etc. Hold single call, New call and Multiparty call need supports of
network.
-- 13 of 24 --6. Text entry
During use, you will be required to input texts time and time again. You can input texts, letters, numbers or
symbols (including punctuations).
6.1 Switch input methods
In any Text Editor, or press # key to switch input methods.
6.2 Smart English input method
Switch to Smart ABC or Smart abc.
Press number keys to input letters continuously and select a desired word to smartly input.
6.3 English input method
Switch to Multitap ABC or Multitap abc.
Following the sequence of letters on a key, you can press thekey once to insert the first letter on the key,
twice for the second letter, etc., until the highlight is on your desired letter.Then release the key to input it.
6.4 Smart input method
Switch to Smart uppercase or Smart lowercase.
Press number keys to input letters continuously and select a desired word to smartly input.
6.5 Multitap input method
Switch to Multitap uppercase or Multitap lowercase. Following the sequence of letters on a key, you can
press the key once to insert the first letter on the key, twice for the second letter, etc., until the highlight is on
your desired letter. Then release the key to input it.
6.6 Input punctuations and symbols
No matter what input method you are using, press * key to display a list of punctuations and symbols for
you to select.
6.7 Input space
No matter what input method you are using, press 0 key to input a space.
6.8 Input numbers
Switch to Numeric input method. Directly press the number keys to input numbers
-- 14 of 24 --7. Menu operation
7.1 Access menus
You can press the left soft key or short press OK key to view menus of all levels.
8. Menu functions
8.1 Audio Player
Access this function to play your favorite mp3 songs. In the player interface, press OK key to play/pause.
Press the left/right key to switch to another song. Press the up/down key to volume up/down. Press the left
soft key to access Options. You can select Stop, Play/Pause, Next, Previous, Playlist or Settings. Settings
include Bluetooth settings and Player settings (Preferred playlist, List update, Repeat, Random,
Background play, Spectrum display etc)
Note: When Updated list is set on, the device will automatically update the playlist according to the songs
in My Music of Phone or Memory card. When it is set off, you can select Add, Remove or Remove all in
Options.
8.2 Phonebook
After you enter Phonebook, you can select a number to Dial, View, Edit, Delete, Copy, Move, Send text
message or Send multimedia message.
Notice:
1. Sending vCard can only be supported when the received device also supports it.
2. Files in File manager can be set as ringtone only after they are sent to Ringtone list.
3. When you are copying entries from Phone to SIM1/SIM2, only the names and numbers of entries will be
copied.
4. Adding or deleting caller group member and Incoming caller ringtone are limited to entries in Phone only.
8.3 Call history
8.3.1 Call history
Select Call history to view recent calls in SIM1 and in SIM2, including Missed calls, Dialed calls,
Received calls, Delete call log, Call time, Call cost, SMS counter and GPRS counter.
8.4 Settings
8.4.1 Phone settings
In Phone settings, you can configure the settings below: Time and date, Schedule power on/off,
Language, Input method, Display characteristic, Java, Shortcuts, Dedicated key, Auto update time etc.
8.4.2 General call settings
In this function, you can configure SIM 1 call settings, SIM 2 call settings and Advanced settings.
SIM 1/SIM 2 call settings
—Caller ID Three options are available: Set by network, Hide ID and Send ID.
—Call waiting If the network supports, during calling, the network will remind you of a
-- 15 of 24 --new incoming. You can hold the current incoming and answer the other
one. To make this function available, please contact local network
operator.
—Call divert Call divert is a network function. With this function, an incoming can be
diverted to another phone number or voice mailbox, avoiding missing it.
There are several diverts available: Divert all voice calls, Divert if
unreachable, Divert if no answer, Divert if busy, Divert all data calls, and
Cancel all (diverts).
—Call barring If the network supports, this function will enable you to restrict the
incoming or outgoing calls.
—Line switching In Line switching, you can switch between Line 1 and Line 2.
Notice: If Line 2 is selected, whether you can make a successful call
depends on your network operator. For SIM 2 call settings, please refer
to SIM 1 call settings.
—Closed user group You can close user group settings in this menu.
Advanced settings
—Blacklist In Blacklist, you can set the status of Blacklist. When Blacklist is set on,
incomings from numbers in the blacklist will be automatically rejected.
—Auto redial You can set it on/off to activate or deactivate this function.
—IP dial Set the prefix of IP numbers.
—Call time display You can select whether to display call time or not.
—Call time reminder In this menu you can set a fixed time or a time period to remind you
during your call.
—Auto quick end This enables you to set auto quick end time during calling.
—Reject by SMS When it is set on and there is an incoming, press Options to select this
function. The device will automatically reject the call and send a SMS to
the caller.
8.4.3 Dual SIM settings
You can select to use Dual SIM, SIM 1 only, SIM 2 only, or select Flight mode not to use any SIM.
8.4.4 Network settings
In this function, you can configure network settings for SIM 1 and SIM 2, including Network selection and
preferred networks.
8.4.5 Security settings
You can configure the security settings for Phone, SIM 1 and SIM 2 to protect your device or SIM cards
from unauthorized use. The preset password of Phone is 0000. Please revise it to be yours immediately.
-SIM1 security setup
SIM1 lock
This option makes you select whether to use PIN code or not. The preset PIN code is
1234. After three consecutive incorrect PIN code entries, the code will be locked, and
you need the PUK code
To unlock it
If you have activated SIM lock, you are required to input the PIN code each time you
power the device on to use the locked SIM card.
-- 16 of 24 --Fixed dial
If your SIM supports fixed dial, it can restrict you so that you can only call the fixed
numbers in fixed dial list.
Note: To activate or deactivate fixed dial, you are required to input PIN2 code. Please contact
your network provider to obtain PIN2 code.
Barred dial
If your SIM supports barred dial, it can forbid you to dial the selected numbers. When
the function is activated, you cannot use the device to dial any number in the list of
barred dial.
Note: To activate or deactivate barred dial, you are required to input PIN2 code. Please contact
your network provider for PIN2 code. If you activate barred dial, the numbers in the list of barred
dial will not be displayed in Phonebook.
-Change password
You can change PIN code and PIN2 code here.
For SIM2 security setup, please refer to SIM1 security setup.
-Phone lock
Phone lock can be activated to avoid unauthorized use. If you have activated Phone lock,
you will be required to input the password each time you power the device on.
-Auto keypad lock
Auto keypad lock can prevent from unintended operations on keypad.
At the standby mode, press Left soft key + * key to lock the keypad. When the keypad is locked,
press Left soft key + *key to unlock the keypad.
-Change password
You can change phone lock password here.
-Guard theft
When the SIM card is replaced, the device will automatically send a message to your preset
number.
-Peer control
You can set Peer control item and Peer control setting. When you send the preset setting to the
device, it will complete your preset Peer control items.
-Person encrypt
You can set Private encryption to encrypt Messages, Phonebook, Call history, File manager. So
when you want to view them, you are required to input the password.
8.4.6 Restore factory settings
In this menu, when you input phone lock password and confirm, related parameters will be restored to
factory settings.
-- 17 of 24 --8.5 Messages
8.5.1 SMS
8.5.1.1 Write message
Access this menu to edit and send message. When you are writing a message, you can Insert
template, Insert number or Insert name. After a message is completed, you can select to use SIM
1 or SIM 2 to send or save it.
8.5.1.2 Inbox
View all the received messages.
When there is a new message in SIM1 or SIM2, the device will play the preset message tone and
the corresponding unread message icon will also appear on top of the screen.
You can select to tap and view the new message, or access Inbox to read.
After the message is read, press Options to Reply, Call sender, Forward, Delete etc.
8.5.1.3 Outbox
In Outbox, you can view the saved messages. You can select one to Resend, Edit or
Delete.
8.5.1.4 Drafts
In Drafts, you can view the uncompleted and saved messages. You can select one to Send,
Edit or Delete.
8.5.1.5 Templates
There are 10 predefined templates in the device. You can edit or use them.
8.5.1.6 SMS settings
Access this menu to configure the following settings of SIM 1 or SIM 2: Profile settings, Common
settings, Memory Status and Preferred Storage
8.5.2 MMS
This function needs the support of network operators. Before use, please confirm that your SIM
supports this function or consult related network operators for more details.
8.5.2.1 Write message
Enter MMS Editing Interface. You can edit To, Cc, Bcc, Subject and Content. When you are
editing content, you can add image, add audio, add attachment, add slide, add bookmark,
Replace or Delete.
After the editing is completed, you can select Send only, Save and send, Save to Drafts, Send
options or Exit.
8.5.2.2 Inbox
View all your received MMS here.
When there is a new MMS, the phone will play the preset message tone and the corresponding
SIM card’s unread MMS icon will also appear on top of the screen.
Select one successfully-downloaded MMS. You can View, Delete, Reply or Save.
-- 18 of 24 --8.5.2.3 Outbox
The failed sent MMS will be saved in Outbox. You can select one to Resend, Edit or Delete.
8.5.2.4 Drafts
MMS, which are uncompleted and saved as Drafts, will be saved in Drafts. You can select one to
Send, Edit or Delete.
8.5.2.5 Message settings
Access this menu to configure the following settings: Compose, Send, Retrieve, Filter and Sever
profile. You can also view Memory status here. The default server profile is China Mobile MMS. If
you use a SIM card from another network operator, please consult the local operator and set
related parameters.
Notice: The storage space left for MMS in the phone is limited. So if the space is insufficient,
please delete some unnecessary MMS.
8.5.3 Voicemail server
Enter Voicemail server to set the voicemail numbers of SIM 1 & SIM 2 operators. Dial either number to
listen to voice messages in the voice mailbox. This function needs supports of network operators.
8.5.4 Broadcast message
Broadcast message is the public information sent by network operators. Using broadcast message
services, you can receive messages of various topics from you network operator, for example,
weather, taxi, hospital etc. For topics available, please contact your local network provider.
8.5.5 Blacklist
You can set its Status and Blacklist number here. If the status is set on, messages from numbers in the
list will be blocked. If the status is set off, all the messages will be received normally.
8.6 JAVA
In Java, you can view installed software packages in your device. You can view details of installed
applications, delete applications or customize installation settings. The extension names of Java-based
J2ME applications are .jad or .jar. In the device, you can only install compatible applications.
Install an application:
Select a .jar or .jad file in File manager. Select Install, and then select an installation path to install
the application successfully. During installation, you can see an installation progress bar.
Run the installed application:
After the installation, the device will ask you whether to launch the application immediately or run it
from Java of Main menu.
Remove an installed application:
Select Java from Main menu. Select a desired application. Press Options to select Delete and then
Yes to confirm.
-- 19 of 24 -- Java Application Network Settings:
After a Java application is installed, you can set GPRS to
establish connections.
Note: You can press the end key to select Background running or close the java application.
8.7 Network Services
8.7.1 STK
This function is provided by network providers. If your SIM card and network provider don’t support it,
this function will be unavailable. For more information, please contact your network provider.
8.7.2 WAP
Your device supports WAP. After necessary settings, you can surf the Internet in your device.
Note: To use WAP, your SIM 1 or SIM 2 shall support GPRS. In WAP, you can browse web pages, add
bookmark, view history, receive service information and configure settings related to WAP.
8.7.3 Data account
It contains GSM data and GPRS account of SIM 1 and SIM 2. To use Internet normally, please make the
following settings correct: Account name, Access point name, User name and Password.
8.8 Multimedia
8.8.1 FM radio
In FM interface, you can use icons to execute Settings, enter channel list, Turn on/off, switch channels
and Search.
-Channel list: Display the names and numbers of channels that are saved.
-Manual input:You can enter FM frequencies manually.
-Preset auto search:Search all channels available and save them in the channel list automatically.
-Settings: You can configure the following settings: Loud speaker, Record format, Record storage etc.
Note: Pull out the antenna or plug in the headset while playing or searching channels.
8.8.2 Camera
After you enter photo-taking mode, you can view the captured picture through the screen; at the same
time, in the preview status, you can press Left soft key to conduct the following settings and set detailed
parameters: Album, Camera settings, Image settings, White balance, Scene mode, Effect settings,
Frame, Storage, Restore default. After all settings are done, press Center key to capture.
8.8.3 Album
In Album, you can select a photo to View, Send to Wallpaper, Rename, Delete etc. Whether your
operation can be done successfully is subject to such factors as the screen size etc.
-- 20 of 24 --8.8.4 Video recorder
Enter Video recorder to see video preview interface. Press Options to see a recorder Options menu,
including Camcorder settings, Video settings, White balance, Effect settings, Storage and
Restore default.
After configuration, tap the record icon to start or pause. When the recording is completed, tap the
stop icon to stop recording. You will be reminded to save the video clip.
8.8.5 Video player
Enter Video player to select your favorite video clip to play or delete.
8.8.6 Sound recorder
Storage and File format of sound clips can be set here. You can either record or listen to your own
sound clips. And you can even add sound slips to Ringtone list
8.8.7 Schedule FM record
You can configure the record Time & date, Channel settings and Record settings.
8.9 File manager
This enables you to view multimedia files in the device and memory cards. You can also select one to View,
Rename, Copy, Delete etc.
Note: Audio files in File manager can be set as Ringtone only after they are sent to Ringtone list.
8.10 Organizer
8.10.1 Alarm
You can set 5 alarms at most. And alarm is still active when you power the device off. In the list of Alarm,
select one alarm. You can configure these settings: Status, Time, Alert type, Snoozer etc.
8.10.2 Calendar
In this function, you can view calendar at any time. You can click to view other dates.
8.10.3 Memo
Display the schedules of today and future. In Options, you can View, Add, Edit, Delete, Delete all or
Send.
8.10.4 World clock
In a map, you can view the current time of different cities around the world.
8.11 Profiles
The device provides you with several profiles so that you can customize the following settings to meet your
different needs: ringtone, volume, alert type, ring type, prompt tone and answer mode. The profiles available
are General, Meeting, Outdoor, Silent, Headset and Bluetooth.
-- 21 of 24 --8.12 Extra
8.12.1 Calculator
The device can be used as a calculator to do some simple arithmetic work.
8.12.2 Games
For Game help, please refer to Help files in the device
8.12.3 Bluetooth
The device supports Bluetooth. You can establish connections between the device and other devices
(Bluetooth headset, PC or handheld Bluetooth device etc) to realize voice calls, data exchange, data
synchronization etc. Settings are as follows:
-Power: Activate or deactivate Bluetooth.
-Visibility: Set whether Bluetooth of the device can be found or not.
-My device: Display the current or once connected device,and inquiry new ones.
-Inquiry BT headset: Search for a Bluetooth headset and pair them.
-Change device name: Display online bluetooth devices
-Advanced: Advanced settings of Bluetooth, as follows:
i) Audio path: Change sound output device.
ii) Storage: Set the default storage path of received files.
iii) Sharing permission: Set the shared directory and limits of authority.
iv) My address: Display Bluetooth address of the device.
8.12.4 Auto answer machine
When it is inconvenient for you to answer, the device will answer the incoming automatically and save
the caller’s voice information by means of recording. You can set Auto answer mode accordingly. And
you can configure the settings of Sound, Time and Message time.
9. Battery information
9.1 Operation information
Your device is powered by a rechargeable battery. The battery can be charged and discharged hundreds
of times but it will eventually wear out. When the talk and standby times are noticeably shorter than
normal, please buy a new battery. Use only the approved batteries, and recharge your battery only with
approved chargers designated for this device.
Unplug the charger from the electrical plug and the device when not in use. Do not leave the battery
connected to a charger. Overcharging may shorten its lifetime. If left unused, a fully charged battery will
lose its charge over time.
-- 22 of 24 --9.2 Notice information
- Do not drop, knock, or shake the device. Rough handling can shorten the life of the battery.
- Do not make short-circuit occur to the battery. The battery put in hot or cold places, such as in a closed
car in summer or winter, will reduce the capacity and lifetime of the battery.
- Do not put the battery near flammable or explosive goods.
- Do not dispose of batteries in a fire!
- Never use any charger or battery that is damaged. Use the battery only for its intended purpose.
- Dispose of batteries according to local regulations. Please recycle when possible. Do not dispose as
household waste.
10. Safety information
10.1 Operating environment
Remember to follow any special regulations in force in any area and always switch off your device when
its use is prohibited or when it may cause interference or danger. Use the device only in its normal
operating positions. Do not keep the device near credit cards and other magnetism medium, some
accessories can bring magnetism that may be delete the data.
10.2 Electronic devices
Some electronic devices are not adequately shielded from external RF energy.
10.2.1 Pacemaker
Pacemaker manufacturers recommend that a minimum separation of 6in (20cm) should be maintained
between a wireless phone and a pacemaker to avoid potential interference with the pacemaker. These
recommendations are consistent with the independent research by and recommendations of Wireless
Technology Research. To minimize the potential interference, persons with pacemakers should do as
below:
Always keep the device more than 6 in (20 cm) from their pacemaker when the device is switched on.
Not carry the device in a breast pocket. Hold the device to the ear opposite the pacemaker. If you have
any reason to suspect that interference is taking place, switch off your device immediately.
10.2.2 Hearing aids
Some digital wireless devices may interfere with some hearing aids. If interference occurs, consult
your service provider.
10.2.3 Other medical devices
Operation of any radio transmitting equipment, including wireless phones, may interfere with the
functionality of inadequately protected medical devices. Switch off your phone in health care
facilities when any regulations are posted in these areas instructing you to do so.
-- 23 of 24 --10.2.4 Vehicles
RF signals may affect improperly installed or inadequately shielded electronic systems in motor
vehicles.
10.3 Potentially dangerous situations
Switch off your device when in any area with a potentially explosive atmosphere and obey all signs and
instructions. Sparks in such areas could cause an explosion or fire resulting in body injury even death.
Switch off the device at refueling points such as near gas pumps at service stations. Observe restrictions
on the use of radio equipment in fuel depots, storage, and distribution areas, chemical plants or where
blasting operations are in progress.
Areas with a potentially explosive atmosphere are often but not always clearly marked. They include
below deck on boats, chemical transfer or storage facilities, vehicles using liquefied petroleum gas (such
as propane or butane), and areas where the air contains chemicals or particles such as grain, dust or
metal powders.
11. Care and maintenance
Your device is a product of superior design and craftsmanship and should be treated with care. The
suggestions below will help you protect your warranty coverage and enjoy your device for many years.
Do not use or store the device in dusty, dirty areas.
Do not store the device in hot/cold areas.
Do not contact the device by wet hands while charging. The electric current may strike and damage it.
Do not attempt to open the device other than as instructed in this guide.
Do not drop, knock, or shake the device. Rough handling can break internal circuit boards and fine
mechanics.
Do not use harsh chemicals, cleaning solvents, or strong detergents to clean the device.
Do not paint the device.
If any device is not working properly, take it to the nearest authorized service facility for service.
-- 24 of 24 --You can also read