PRIUS REAR VIEW CAMERA - Installation Instructions
←
→
Page content transcription
If your browser does not render page correctly, please read the page content below
PRIUS
                              REAR VIEW CAMERA
                              Installation Instructions
         Thank you for your purchase of the Coastal Electronic Technologies, Inc. Rear View
Camera system. It is shipped with necessary wiring and connectors for trouble free installations
and when paired with the Camera Lockpick or Ultimate Camera Lockpick, will automatically
display the view from the rear view camera when the car is placed in reverse. It is suggested that
you install the camera and Lockpick at the same time. Lockpick installation instructions are
included in their kit literature.
         Installation of the camera includes:
    • Removal of panels around the underside of the lid of your rear hatch
    • Mounting of camera and routing of cables to reverse tail light
    • Connection of camera power to reverse tail light
    • Routing of video cable to front of vehicle
    It is recommended that you have this installation performed by a certified installer with
experience in vehicle electronics. Coastal Electronic Technologies Inc. accepts no liability for
use or installation of this product.
         Begin your installation by becoming familiar with the components and planning
appropriately for the time involved for completion. Typically, you will need about an hour
although this may vary with your experience level. You may wish to change the order and
configurations of these instructions to accommodate your ability and schedule.
    Toyota utilizes plastic or metal friction locks for most of its assembly of interior body panels.
These are dislodged by pulling the panels free using moderate pressure and techniques. A simple
help to start the removal of the panels is to use a plastic bondo spreader, screwdriver or other flat
tool to start the process of pulling the panels free from their locks. Once it is started, you can use
your fingertips to continue carefully pulling the individual panel free.
    To install the Camera Assembly, a couple of panels from the underside of the Prius hatch
must be removed. They are removed by manually pulling them free using standard techniques
described earlier. Start by lifting the hatch and pulling free the panel covering the area behind the
license plate.

         Above you can view the underside of the hatch with the panel removed and on the right,
the friction lock pins on the underside of the panel which hold it in place. Next, remove the
license and license plate holder from your hatch and discard the original screws. They will be
replaced by the high security screws included in your kit. Configure your camera so that the
camera body itself is located on the bottom of the frame (instructions are included in the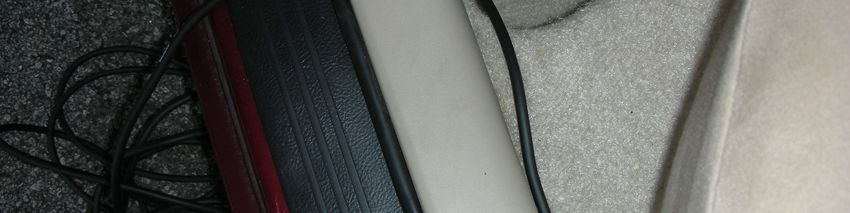
Hitchcam literature). This allows free access to your handle for opening. Mount the license plate
Camera using the included screws and special Allen wrench. Press the wire under the edge of the
left front of the license and out the top corner of the frame.
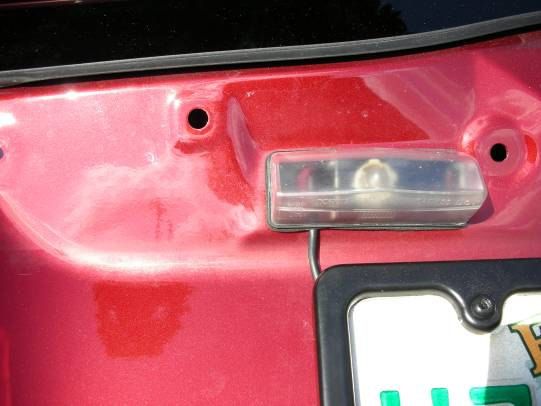
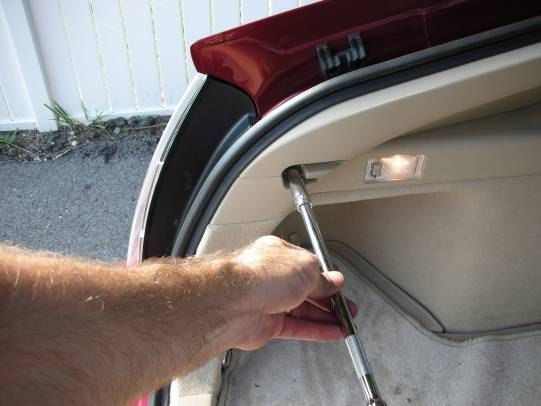
From the backside of the hatch, remove the four (4) screws holding the cover for the license
plate lights. Then pull the trim piece free on the outside of the hatch to expose the license plate
light assemblies.
From the backside of the hatch, press the drivers’ side license plate light assembly out of the
hatch to allow the Camera cable to be passed underneath and into the inside of the car.
Press the light back into position and begin routing the wire to the hinge area. Press the wire
underneath the edge of the plastic panels. Remove the panel from the underside of the hatch
which is covering the latches to allow greater access. Again, the panel is not held in place by any
screws and is simply pulled free from the friction locks underneath.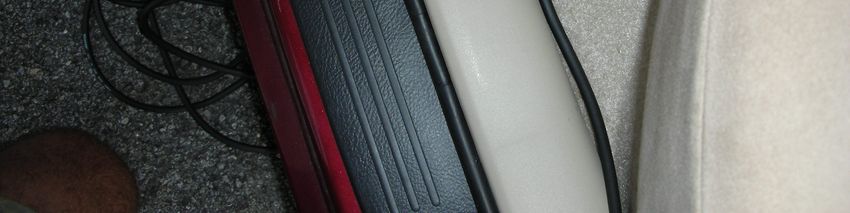
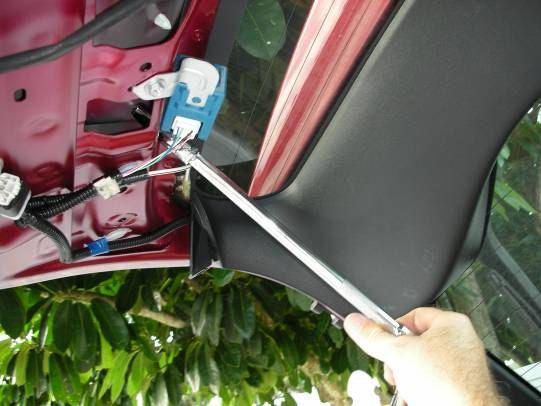
Bring the camera wire from your harness around to the larger rubber boot connecting the
hatch wiring to the interior of the car. Manipulate the camera connector down through this rubber
boot.
Lift up the rubber gasket around the hatch opening and pull down the edge of the headliner
enough to retrieve the camera wire as you pass it into the car opening.
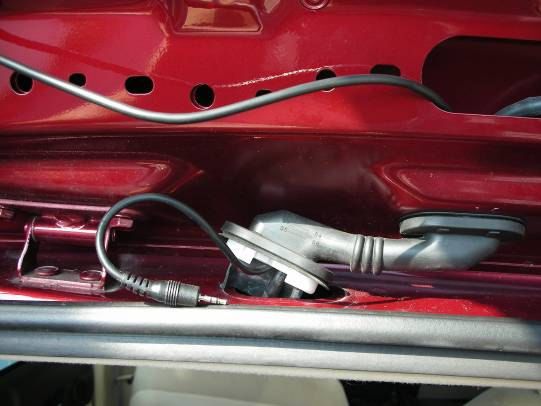
Plug in the matching Hitchcam harness to the camera cable and prepare to bring the other end
down to the taillight assembly. Begin by removing the 10mm bolt on the rear panel and pulling
the top edge out enough to tuck the wire in around the top edge. Remove the small panel over the
taillight connections and pass the wire down through the opening.
The wiring harness for your camera contains connectors and wire taps so that no wires
will need to be cut during installation. The wire taps are designed to simply fold around a wire,
and when squeezed together with a pair of pliers, create a convenient connection for your harness
wires to plug into. Locate the wires behind the clear reverse tail light. Place wire taps on both
wires of its connector ( RED W/BLUE stripe and WHITE W/BLACK STRIPE )
Plug the wires from the camera harness into the appropriate wire tap. The GROUND
wire from your camera harness pugs into the WHITE W/BLACK STRIPE wire and the
12V/REVERSE wires are both plugged into taps on the RED W/BLUE stripe wire. You may
find it more convenient to place a tap on one of the power wires of the camera harness to connect
them both together and then place a single tap on the RED W/BLUE stripe wire to make your
connection to.

    This will configure your camera for power and operation when the car is placed in reverse
only. The rest of the installation is simply to bring the Hitchcam Video cable up to the front of
the car for connection to the screen. Begin by lifting out the rear deck cover, lifting out the
plastic liner over the spare tire. Then remove the 10mm plastic nut in the bottom of the storage
compartment and lift it out as well. This gives you plenty of room to begin routing the cable out
of sight and up to the front.
With the rear seat folded down, bring the video cable up to the battery cover panel. Remove
the bolt on the tie down plate to allow the cable to be brought underneath. Pull the Velcro free
from the back of the seat and pull the friction lock free from the corner to allow the cable to be
fully hidden.
Bring the cable into the rear seat area. Pull up the front left corner of the rear seat bottom to
allow the cushion to be lifted slightly. This allows you to tuck the cable underneath.
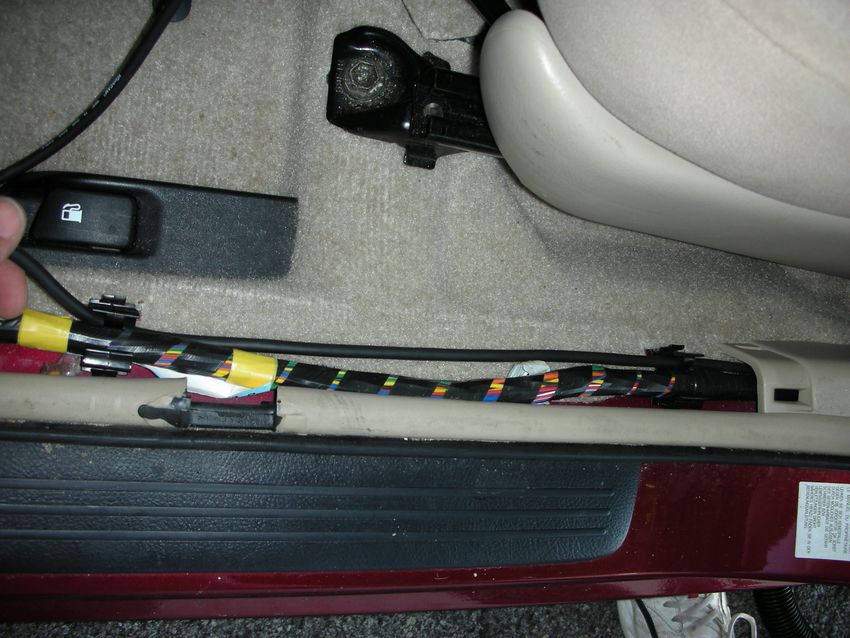
Tuck the wire under the edge of the trim panels along the doors as you bring the video cable
up to the front of the car. The trim panel should be pulled up at the driver area to allow the
kickpanel up front to be pulled free. Again, no screws are holding these panels in place and are
simply pulled free with your fingertips.
Finish your installation by bringing the video cable up to the back of the screen and plugging
it into the connector provided by the Camera Lockpick. Tie up any extra cable and place behind
the kickpanel before reinstalling.
Enjoy and Thank You for your trust in Coastal Electronics, Inc.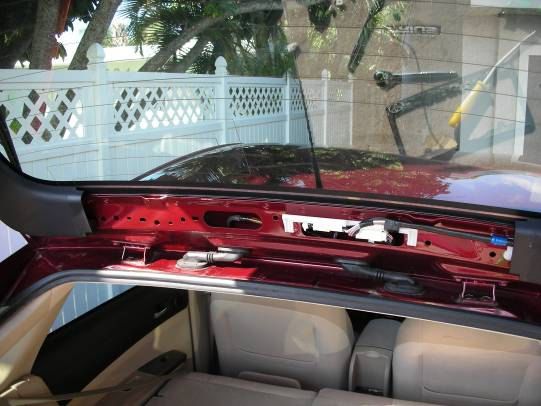
You can also read