Sophos Anti-Virus for Linux configuration guide - Product version: Document date: 9 September 2014
←
→
Page content transcription
If your browser does not render page correctly, please read the page content below
Sophos Anti-Virus for Linux
configuration guide

Product version: 9
Document date: September 2014
Contents

    1 About this guide..........................................................................................................8

    2 About Sophos Anti-Virus for Linux..............................................................................9

            2.1 What Sophos Anti-Virus does........................................................................9

            2.2 How Sophos Anti-Virus protects your computer............................................9

            2.3 How you use Sophos Anti-Virus....................................................................9

                     2.3.1 Command-line interface (CLI)...........................................................9

                     2.3.2 Web user interface (web UI)............................................................10

            2.4 How you configure Sophos Anti-Virus.........................................................11

    3 On-access scanning.................................................................................................12

            3.1 Check that on-access scanning is active.....................................................12

                     3.1.1 CLI..................................................................................................12

                     3.1.2 Web UI............................................................................................12

            3.2 Check on-access scanning will be started automatically on system
               boot................................................................................................................12

                     3.2.1 CLI..................................................................................................12

                     3.2.2 Web UI............................................................................................13

            3.3 Start on-access scanning............................................................................13

                     3.3.1 CLI..................................................................................................13

                     3.3.2 Web UI............................................................................................13

            3.4 Stop on-access scanning.............................................................................13

                     3.4.1 CLI..................................................................................................13

                     3.4.2 Web UI............................................................................................14

    4 On-demand scanning...............................................................................................15

            4.1 Running on-demand scans..........................................................................15

2
4.1.1 Scan the computer..........................................................................15
4.1.2 Scan a particular directory or file....................................................15
4.1.3 Scan a filesystem............................................................................15
4.1.4 Scan a boot sector..........................................................................15
4.2 Configuring on-demand scans.....................................................................16
4.2.1 Scan all file types............................................................................16
4.2.2 Scan a particular file type................................................................16
4.2.3 Scan inside all archive types...........................................................16
4.2.4 Scan inside a particular archive type..............................................17
4.2.5 Scan remote computers..................................................................17
4.2.6 Turn off scanning of symbolically linked items................................17
4.2.7 Scan the starting filesystem only....................................................17
4.2.8 Excluding items from scanning.......................................................17
4.2.9 Scan file types that UNIX defines as executables...........................18
5 What happens if viruses are detected......................................................................19
6 Cleaning up viruses..................................................................................................21
6.1 Get cleanup information...............................................................................21
6.2 Quarantining infected files...........................................................................21
6.2.1 Specify quarantining.......................................................................21
6.2.2 Specifying the ownership and permissions that are applied...........21
6.3 Cleaning up infected files.............................................................................22
6.3.1 Disinfect a specific infected file.......................................................22
6.3.2 Disinfect all infected files on the computer......................................22
6.3.3 Delete a specific infected file...........................................................22
6.3.4 Delete all infected files on the computer.........................................23
6.3.5 Disinfect an infected boot sector.....................................................23
6.4 Recovering from virus side-effects...............................................................23
37 View the Sophos Anti-Virus log................................................................................24
7.1 CLI...............................................................................................................24
7.2 Web UI.........................................................................................................24
8 Update Sophos Anti-Virus immediately....................................................................25
9 About kernel support................................................................................................26
9.1 About support for new kernel releases........................................................26
9.2 About support for customized kernels.........................................................26
10 Configure the web UI..............................................................................................27
11 Appendix: On-demand scan return codes..............................................................28
11.1 Extended return codes...............................................................................28
12 Appendix: Extra Files configuration........................................................................30
12.1 About Extra Files configuration..................................................................30
12.1.1 What is Extra Files configuration?.................................................30
12.1.2 How do you use Extra Files configuration?...................................30
12.2 Using Extra Files configuration..................................................................30
12.2.1 Create security certificates on the server.....................................31
12.2.2 Create an Extra Files configuration...............................................32
12.2.3 Install the root certificate on endpoint computers.........................33
12.2.4 Enable endpoint computers to use the Extra Files
configuration.........................................................................................33
12.3 Updating Extra Files configuration.............................................................33
12.4 About configuration layers.........................................................................34
12.5 savconfig configuration command.............................................................35
12.5.1 option............................................................................................35
12.5.2 operation.......................................................................................35
12.5.3 parameter......................................................................................36
12.5.4 value..............................................................................................36
13 Appendix: Configuring scheduled scans.................................................................37
413.1 Add a scheduled scan from a file...............................................................37
13.2 Add a scheduled scan from standard input...............................................37
13.3 Export a scheduled scan to a file...............................................................38
13.4 Export names of all scheduled scans to a file............................................38
13.5 Export a scheduled scan to standard output.............................................38
13.6 Export names of all scheduled scans to standard output..........................38
13.7 Update a scheduled scan from a file.........................................................39
13.8 Update a scheduled scan from standard input..........................................39
13.9 View log of a scheduled scan.....................................................................39
13.10 Remove a scheduled scan.......................................................................40
13.11 Remove all scheduled scans...................................................................40
14 Appendix: Configuring alerts..................................................................................41
14.1 Configuring desktop pop-up alerts.............................................................41
14.1.1 Turn off desktop pop-up alerts......................................................41
14.1.2 Specify custom message..............................................................41
14.2 Configuring command-line alerts...............................................................42
14.2.1 Turn off command-line alerts.........................................................42
14.2.2 Specify custom message..............................................................42
14.3 Configuring email alerts.............................................................................43
14.3.1 Turn off email alerts.......................................................................43
14.3.2 Specify the SMTP server hostname or IP address.......................43
14.3.3 Specify the language....................................................................43
14.3.4 Specify the email recipients..........................................................44
14.3.5 Specify the email Sender address................................................44
14.3.6 Specify the email ReplyTo address...............................................44
14.3.7 Specify what happens if viruses are detected on-access.............45
14.3.8 Specify what happens if there is an on-access scanning
error......................................................................................................45
514.3.9 Turn on-demand email alerts off...................................................46
14.3.10 Specify what happens if an event is logged................................46
15 Appendix: Configure logging...................................................................................47
16 Appendix: Configuring updating..............................................................................48
16.1 Basic concepts...........................................................................................48
16.2 savsetup configuration command..............................................................48
16.3 Check the auto-updating configuration for a computer..............................49
16.4 Configure an update server.......................................................................49
16.5 Configure multiple update clients to update ..............................................49
16.6 Configure a single update client to update................................................51
17 Appendix: Configuring Sophos Live Protection.......................................................52
17.1 Check Sophos Live Protection setting.......................................................52
17.2 Turn Sophos Live Protection on or off........................................................52
18 Appendix: Configuring on-access scanning............................................................53
18.1 Change the on-access scanning file interception method.........................53
18.2 Excluding files and directories from scanning............................................53
18.2.1 Use file or directory name.............................................................53
18.2.2 Use wildcards................................................................................54
18.2.3 Specifying character encoding of directory names and
filenames..............................................................................................55
18.3 Exclude a filesystem type from scanning...................................................55
18.3.1 CLI................................................................................................55
18.3.2 Web UI..........................................................................................55
18.4 Scan inside archives..................................................................................56
18.4.1 CLI................................................................................................56
18.4.2 Web UI..........................................................................................56
18.5 Cleaning up infected files...........................................................................56
18.5.1 Disinfect infected files and boot sectors........................................56
618.5.2 Delete infected files.......................................................................57
19 Appendix: Configuring the phone-home feature.....................................................58
20 Appendix: Configuring restarts for RMS.................................................................59
21 Troubleshooting.......................................................................................................60
21.1 Unable to run a command.........................................................................60
21.2 Exclusion configuration has not been applied............................................60
21.3 Computer reports “No manual entry for …”...............................................61
21.4 Sophos Anti-Virus runs out of disk space..................................................61
21.5 On-demand scanning runs slowly..............................................................62
21.6 Archiver backs up all files that have been scanned on demand................63
21.7 Virus not cleaned up..................................................................................63
21.8 Virus fragment reported.............................................................................64
21.9 Connection to web UI refused....................................................................64
21.10 Unable to access disk..............................................................................65
22 Glossary.................................................................................................................66
23 Technical support....................................................................................................68
24 Legal notices..........................................................................................................69
7Sophos Anti-Virus for Linux
1 About this guide
This guide tells you how to use and configure Sophos Anti-Virus for Linux.
To install or uninstall Sophos Anti-Virus on networked and single Linux computers, see the Sophos
Anti-Virus for Linux startup guide.
To install Sophos Anti-Virus on a mixed Linux and Windows network, or to centrally manage
Sophos Anti-Virus using Sophos Enterprise Console, see the Sophos Enterprise Console startup
guide for Linux, NetWare, and UNIX.
Sophos documentation is published at http://www.sophos.com/en-us/support/documentation.aspx.
8configuration guide
2 About Sophos Anti-Virus for Linux
2.1 What Sophos Anti-Virus does
Sophos Anti-Virus detects and deals with viruses (including worms and Trojans) on your Linux
computer. As well as being able to detect all Linux viruses, it can also detect all non-Linux viruses
that might be stored on your Linux computer and transferred to non-Linux computers. It does this
by scanning your computer.
2.2 How Sophos Anti-Virus protects your computer
On-access scanning is your main method of protection against viruses. Whenever you access
(copy, save, or open) a file, Sophos Anti-Virus scans the file and grants access to it only if it does
not pose a threat to your computer.
In addition to on-access scanning, Sophos Anti-Virus enables you to run an on-demand scan to
provide additional protection. An on-demand scan is a scan that you initiate.You can scan anything
from a single file to everything on your computer that you have permission to read.You can either
manually run an on-demand scan or schedule it to run unattended.
2.3 How you use Sophos Anti-Virus
Sophos Anti-Virus has two types of user interface:
■ Command-line interface (CLI)
■ Web user interface (web UI)
Use the interface that you prefer but note that you can use the web UI to perform only certain
tasks, listed below.
For tasks that you can perform using either interface, this document explains both methods, in
subsections headed either CLI or Web UI, respectively.
2.3.1 Command-line interface (CLI)
The command-line interface enables you to perform all tasks. It is the only way to run on-demand
scans and configure updating.
Note: You must be logged on to the computer as root to use all commands except savscan,
which is used to run on-demand scans.
This document assumes that you have installed Sophos Anti-Virus in the default location,
/opt/sophos-av. The paths of the commands described are based on this location.
9Sophos Anti-Virus for Linux
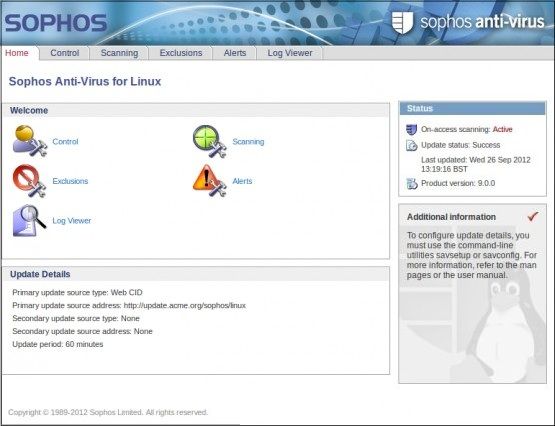
2.3.2 Web user interface (web UI)
The web user interface enables you to:
■ Check that on-access scanning is active.
■ Start and stop on-access scanning.
■ Configure on-access scanning inside archives.
■ Configure what is excluded from on-access scanning.
■ Configure alerts.
■ View the Sophos Anti-Virus log.
■ Configure on-access cleanup.
To run on-demand scans and configure updating, you must use the CLI.
Note: Although the web UI can be run by the root user (as well as other users), it does not run
with root privileges. It cannot therefore access all files on the computer.
To use the web UI
1. Point a web browser to http://localhost:8081.
The browser displays the Home tab of the web UI.
10configuration guide
2. When you click another tab, the browser asks you for credentials so that you can use the web
UI to configure Sophos Anti-Virus.
To find out your username, either ask your system administrator or, at a command prompt,
type:
/opt/sophos-av/bin/savconfig query HttpUsername
Note: To find out your username in this way, you must be logged on to the computer as root.
To find out your password, ask your system administrator.
2.4 How you configure Sophos Anti-Virus
If your Linux computers are managed by Sophos Enterprise Console, configure Sophos Anti-Virus
as follows:
■ Configure on-access scanning, scheduled scans, alerting, logging, and updating centrally
from Enterprise Console. For information, see the Enterprise Console Help.
Note: These features also include some parameters that cannot be set using Enterprise
Console.You can set these parameters from the Sophos Anti-Virus CLI on each Linux computer
locally. Enterprise Console ignores them.
■ Configure on-demand scans and the web user interface from the Sophos Anti-Virus CLI
on each Linux computer locally.
If you have a network of Linux computers that is not managed by Enterprise Console, configure
Sophos Anti-Virus as follows:
■ Configure on-access scanning, scheduled scans, alerting, logging, updating, and the
web user interface centrally by editing a configuration file from which the computers update.
See Appendix: Extra Files configuration (page 30).
■ Configure on-demand scans from the Sophos Anti-Virus CLI on each computer locally.
Note: Do not use Extra Files configuration unless technical support advises you to do so, or you
cannot use Enterprise Console.You cannot use Enterprise Console configuration and Extra Files
configuration together.
If you have a standalone Linux computer that is not managed by Enterprise Console, configure
Sophos Anti-Virus as follows:
■ Configure on-access scanning, scheduled scans, alerting, logging, updating, and the
web user interface from the Sophos Anti-Virus CLI or web UI.
■ Configure on-demand scans from the Sophos Anti-Virus CLI.
11Sophos Anti-Virus for Linux
3 On-access scanning
On-access scanning is your main method of protection against viruses. Whenever you access
(copy, save, or open) a file, Sophos Anti-Virus scans the file and grants access to it only if it does
not pose a threat to your computer.
3.1 Check that on-access scanning is active
3.1.1 CLI
■ To check that on-access scanning is active, type:
/opt/sophos-av/bin/savdstatus
3.1.2 Web UI
■ To check that on-access scanning is active, look at the Status panel.
3.2 Check on-access scanning will be started automatically
on system boot
3.2.1 CLI
To perform this procedure, you must be logged on to the computer as root.
1. Check that savd will be started automatically on system boot:
chkconfig --list
Note: If this command does not work on your Linux distribution, use the appropriate utility to
display services that are configured to start on system boot.
If the list contains an entry for sav-protect with 2:on, 3:on, 4:on and 5:on, on-access scanning
will be started automatically on system boot.
Otherwise, type:
/opt/sophos-av/bin/savdctl enableOnBoot savd
12configuration guide
2. Check that on-access scanning will be started automatically with savd:
/opt/sophos-av/bin/savconfig query EnableOnStart
If the command returns true, on-access scanning will be started automatically with savd on
system boot.
Otherwise, type:
/opt/sophos-av/bin/savconfig set EnableOnStart true
3.2.2 Web UI
■ To check on-access scanning will be started automatically on system boot, on the Control
tab, check the Startup panel.
If the Start on-access scanning on system boot check box is selected, on-access scanning
will be started automatically on system boot.
3.3 Start on-access scanning
3.3.1 CLI
To start on-access scanning, do one of the following:
■ Type:
/opt/sophos-av/bin/savdctl enable
■ Use the appropriate tool to start the installed service sav-protect. For example, type:
/etc/init.d/sav-protect start
or
service sav-protect start
3.3.2 Web UI
■ To start on-access scanning, on the Control tab, in the Control panel, click Enable On-access
Scanning.
3.4 Stop on-access scanning
Important: If you stop on-access scanning, Sophos Anti-Virus does not scan files that you access
for viruses. This puts your computer, and others to which it is connected, at risk.
3.4.1 CLI
■ To stop on-access scanning, type:
13Sophos Anti-Virus for Linux
/opt/sophos-av/bin/savdctl disable
3.4.2 Web UI
■ To stop on-access scanning, on the Control tab, in the Control panel, click Disable On-access
Scanning.
14configuration guide
4 On-demand scanning
An on-demand scan is a scan that you initiate. You can scan anything from a single file to
everything on your computer that you have permission to read. You can either manually run an
on-demand scan or schedule it to run unattended.
To schedule an on-demand scan, see Appendix: Configuring scheduled scans (page 37).
4.1 Running on-demand scans
The command that you type to run an on-demand scan is savscan.
4.1.1 Scan the computer
■ To scan the computer, type:
savscan /
Note: You can also use Sophos Enterprise Console to run a full scan on one or more computers.
For details, see the Enterprise Console Help.
4.1.2 Scan a particular directory or file
■ To scan a particular directory or file, specify the path of the item. For example, type:
savscan /usr/mydirectory/myfile
You can type more than one directory or file in the same command.
4.1.3 Scan a filesystem
■ To scan a filesystem, specify its name. For example, type:
savscan /home
You can type more than one filesystem in the same command.
4.1.4 Scan a boot sector
To scan a boot sector, log in as superuser. This grants you sufficient permission to access the
disk devices.
You can scan the boot sector of a logical or physical drive.
■ To scan the boot sector of specific logical drives, type:
savscan -bs=drive, drive, ...
where drive is the name of a drive, for example /dev/fd0 or /dev/hda1.
15Sophos Anti-Virus for Linux
■ To scan the boot sector of all logical drives that Sophos Anti-Virus recognises, type:
savscan -bs
■ To scan the master boot record of all fixed physical drives on the computer, type:
savscan -mbr
4.2 Configuring on-demand scans
In this section, where path appears in a command, it refers to the path to be scanned.
To see a full list of the options that you can use with an on-demand scan, type:
man savscan
4.2.1 Scan all file types
By default, Sophos Anti-Virus scans only executables.To see a full list of the file types that Sophos
Anti-Virus scans by default, type savscan -vv.
■ To scan all file types, not just those that are scanned by default, use the option -all. Type:
savscan path -all
Note: This makes scanning take longer, can compromise performance on servers, and can
cause false virus reports.
4.2.2 Scan a particular file type
By default, Sophos Anti-Virus scans only executables.To see a full list of the file types that Sophos
Anti-Virus scans by default, type savscan -vv.
■ To scan a particular file type, use the option -ext with the appropriate filename extension. For
example, to scan files that have the filename extension .txt, type:
savscan path -ext=txt
■ To disable scanning of a particular file type, use the option -next with the appropriate filename
extension.
Note: To specify more than one file type, separate each filename extension with a comma.
4.2.3 Scan inside all archive types
You can configure Sophos Anti-Virus to scan inside all archive types. To see a list of these archive
types, type savscan -vv.
■ To scan inside all archive types, use the option -archive. Type:
savscan path -archive
Archives that are “nested” within other archives (for example, a TAR archive within a ZIP
archive) are scanned recursively.
16configuration guide
If you have numerous complex archives, the scan may take longer to run. Bear this in mind
when scheduling unattended scans.
4.2.4 Scan inside a particular archive type
You can configure Sophos Anti-Virus to scan inside a particular archive type. To see a list of these
archive types, type savscan -vv.
■ To scan inside a particular archive type, use the option that is shown in the list. For example,
to scan inside TAR and ZIP archives, type:
savscan path -tar -zip
Archives that are “nested” within other archives (for example, a TAR archive within a ZIP
archive) are scanned recursively.
If you have numerous complex archives, the scan may take longer to run. Bear this in mind
when scheduling unattended scans.
4.2.5 Scan remote computers
By default, Sophos Anti-Virus does not scan items on remote computers (that is, does not traverse
remote mount points).
■ To scan remote computers, use the option --no-stay-on-machine. Type:
savscan path --no-stay-on-machine
4.2.6 Turn off scanning of symbolically linked items
By default, Sophos Anti-Virus scans symbolically linked items.
■ To turn off scanning of symbolically linked items, use the option --no-follow-symlinks. Type:
savscan path --no-follow-symlinks
To avoid scanning items more than once, use the option --backtrack-protection.
4.2.7 Scan the starting filesystem only
Sophos Anti-Virus can be configured not to scan items that are beyond the starting filesystem
(that is, not to traverse mount points).
■ To scan the starting filesystem only, use the option --stay-on-filesystem. Type:
savscan path --stay-on-filesystem
4.2.8 Excluding items from scanning
You can configure Sophos Anti-Virus to exclude particular items (files, directories, or filesystems)
from scanning by using the option -exclude. Sophos Anti-Virus excludes any items that follow
the option in the command string. For example, to scan items fred and harry, but not tom or
peter, type:
17Sophos Anti-Virus for Linux
savscan fred harry -exclude tom peter
You can exclude directories or files that are under a particular directory. For example, to scan all
of Fred’s home directory, but exclude the directory games (and all directories and files under it),
type:
savscan /home/fred -exclude /home/fred/games
You can also configure Sophos Anti-Virus to include particular items that follow the option -include.
For example, to scan items fred, harry, and bill, but not tom or peter, type:
savscan fred harry -exclude tom peter -include bill
4.2.9 Scan file types that UNIX defines as executables
By default, Sophos Anti-Virus does not scan file types that UNIX defines as executables.
■ To scan file types that UNIX defines as executables, use the option --examine-x-bit. Type:
savscan path --examine-x-bit
Sophos Anti-Virus still scans files that have filename extensions that are in its own list as well.
To see a list of these filename extensions, type savscan -vv.
18configuration guide
5 What happens if viruses are detected
Regardless of whether viruses are detected by on-access scanning or an on-demand scan, by
default Sophos Anti-Virus:
■ Logs the event in syslog and the Sophos Anti-Virus log (see View the Sophos Anti-Virus log
(page 24)).
■ Sends an alert to Enterprise Console if it is being managed by Enterprise Console.
■ Sends an email alert to root@localhost.
By default, Sophos Anti-Virus also displays alerts according to whether the viruses were detected
by on-access scanning or an on-demand scan, as explained below.
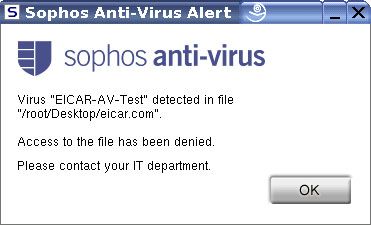
On-access scanning
If on-access scanning detects a virus, Sophos Anti-Virus denies access to the file and by default
displays a desktop pop-up alert like the one shown below.
If the desktop pop-up alert cannot be displayed, a command-line alert is displayed instead.
For information about cleaning up viruses, see Cleaning up viruses (page 21).
On-demand scans
If an on-demand scan detects a virus, by default Sophos Anti-Virus displays a command-line
alert. It reports the virus on the line which starts with >>> followed by either Virus or Virus
Fragment:
SAVScan virus detection utility
Version 4.69.0 [Linux/Intel]
Virus data version 4.69
19Sophos Anti-Virus for Linux
Includes detection for 2871136 viruses, Trojans and worms
Copyright (c) 1989-2012 Sophos Limited. All rights reserved.
System time 13:43:32, System date 22 September 2012
IDE directory is: /opt/sophos-av/lib/sav
Using IDE file nyrate-d.ide
. . . . . . . . . . . . . .
Using IDE file injec-lz.ide
Quick Scanning
>>> Virus 'EICAR-AV-Test' found in file /usr/mydirectory/eicar.src
33 files scanned in 2 seconds.
1 virus was discovered.
1 file out of 33 was infected.
Please send infected samples to Sophos for analysis.
For advice consult www.sophos.com or email support@sophos.com
End of Scan.
For information about cleaning up viruses, see Cleaning up viruses (page 21).
20configuration guide
6 Cleaning up viruses
6.1 Get cleanup information
If viruses are reported, you can get information and cleanup advice from the Sophos website.
To get cleanup information:
1. Go to the security analyses page
(http://www.sophos.com/en-us/threat-center/threat-analyses/viruses-and-spyware.aspx).
2. Search for the analysis of the virus, by using the name that was reported by Sophos Anti-Virus.
6.2 Quarantining infected files
You can configure an on-demand scan to put infected files into quarantine to prevent them from
being accessed. It does this by changing the ownership and permissions for the files.
Note: If you specify disinfection (see Cleaning up infected files (page 22)) as well as quarantining,
Sophos Anti-Virus attempts to disinfect infected items and quarantines them only if disinfection
fails.
In this section, where path appears in a command, it refers to the path to be scanned.
6.2.1 Specify quarantining
■ To specify quarantining, use the option --quarantine. Type:
savscan path --quarantine
6.2.2 Specifying the ownership and permissions that are applied
By default, Sophos Anti-Virus changes:
■ The user ownership of an infected file to the user running Sophos Anti-Virus.
■ The group ownership of the file to the group to which that user belongs.
■ The file permissions to -r-------- (0400).
If you prefer, you can change the user or group ownership and file permissions that Sophos
Anti-Virus applies to infected files. You do so by using these parameters:
uid=nnn
user=username
gid=nnn
group=group-name
mode=ppp
21Sophos Anti-Virus for Linux
You cannot specify more than one parameter for user ownership or for group ownership. For
example, you cannot specify a uid and a user.
For each parameter that you do not specify, the default setting (as given earlier) is used.
For example:
savscan fred --quarantine:user=virus,group=virus,mode=0400
changes an infected file’s user ownership to “virus”, the group ownership to “virus”, and the file
permissions to -r--------. This means that the file is owned by the user “virus” and group
“virus”, but only the user “virus” can access the file (and only for reading). No-one else (apart from
root) can do anything to the file.
You may need to be running as a special user or as superuser to set the ownership and
permissions.
6.3 Cleaning up infected files
You can configure an on-demand scan to clean up (disinfect or delete) infected files. Any actions
that Sophos Anti-Virus takes against infected files are listed in the scan summary and logged in
the Sophos Anti-Virus log. By default, cleanup is disabled.
In this section, where path appears in a command, it refers to the path to be scanned.
6.3.1 Disinfect a specific infected file
■ To disinfect a specific infected file, use the option -di. Type:
savscan path -di
Sophos Anti-Virus asks for confirmation before it disinfects.
Note: Disinfecting an infected document does not repair any changes the virus has made to
the document. (See Get cleanup information (page 21) to find out how to view details on the
Sophos website of the virus’s side-effects.)
6.3.2 Disinfect all infected files on the computer
■ To disinfect all infected files on the computer, type:
savscan / -di
Sophos Anti-Virus asks for confirmation before it disinfects.
Note: Disinfecting an infected document does not repair any changes the virus has made to
the document. (See Get cleanup information (page 21) to find out how to view details on the
Sophos website of the virus’s side-effects.)
6.3.3 Delete a specific infected file
■ To delete a specific infected file, use the option -remove. Type:
savscan path -remove
22configuration guide
Sophos Anti-Virus asks for confirmation before it deletes.
6.3.4 Delete all infected files on the computer
■ To delete all infected files on the computer, type:
savscan / -remove
Sophos Anti-Virus asks for confirmation before it deletes.
6.3.5 Disinfect an infected boot sector
■ To disinfect an infected boot sector, use the disinfection option -di and the boot sector option
-bs. For example, type:
savscan -bs=/dev/fd0 -di
where /dev/fd0 is the name of the drive that contains the infected boot sector.
Sophos Anti-Virus asks for confirmation before it disinfects.
6.4 Recovering from virus side-effects
Recovery from virus infection depends on how the virus infected the computer. Some viruses
leave you with no side-effects to deal with; others may have such extreme side-effects that you
have to restore a hard disk in order to recover.
Some viruses gradually make minor changes to data. This type of corruption can be hard to detect.
It is therefore very important that you read the virus analysis on the Sophos website, and check
documents carefully after disinfection.
Sound backups are crucial. If you did not have them before you were infected, start keeping them
in case of future infections.
Sometimes you can recover data from disks damaged by a virus. Sophos can supply utilities for
repairing the damage caused by some viruses. Contact Sophos technical support for advice.
23Sophos Anti-Virus for Linux
7 View the Sophos Anti-Virus log
Sophos Anti-Virus logs details of scanning activity in the Sophos Anti-Virus log and syslog. In
addition, virus and error events are logged in the Sophos Anti-Virus log.
7.1 CLI
■ To view the Sophos Anti-Virus log, use the command savlog. This can be used with various
options to restrict the output to certain messages and to control the display.
For example, to display all messages logged to the Sophos Anti-Virus log in the last 24 hours,
and to display the date and time in UTC/ISO 8601 format, type:
/opt/sophos-av/bin/savlog --today --utc
■ To see a complete list of the options that can be used with savlog, type:
man savlog
7.2 Web UI
■ To view the Sophos Anti-Virus log, on the Log Viewer tab, in the Log selection panel, use
the text boxes and option buttons to specify the messages that you want to display. Then click
View Log.
The messages are displayed in the Log Contents panel.
24configuration guide
8 Update Sophos Anti-Virus immediately
Provided that you have enabled auto-updating, Sophos Anti-Virus is kept updated automatically.
However, you can also update Sophos Anti-Virus immediately, without waiting for the next
automatic update.
■ To update Sophos Anti-Virus immediately, at the computer that you want to update, type:
/opt/sophos-av/bin/savupdate
Note: You can also update computers immediately from Sophos Enterprise Console.
25Sophos Anti-Virus for Linux
9 About kernel support
Note: This section is only applicable if you are using Talpa as your on-access scanning interception
method. For more information, see Change the on-access scanning file interception method (page
53).
9.1 About support for new kernel releases
When one of the Linux vendors supported by Sophos Anti-Virus releases an update to its Linux
kernel, Sophos releases an update to the Sophos kernel interface module (Talpa) to support this.
If you apply a Linux kernel update before you apply the matching Talpa update, Sophos Anti-Virus
initiates a local compilation of Talpa. If this fails, Sophos Anti-Virus tries to use Fanotify as the
interception method instead. If Fanotify is also unavailable, on-access scanning is stopped and
an error is reported.
To avoid this problem, you must confirm that the matching Talpa update has been released before
applying the Linux kernel update. A list of supported Linux distributions and updates is available
in Sophos support knowledgebase article 14377
(http://www.sophos.com/en-us/support/knowledgebase/14377.aspx). When the required Talpa
update is listed, it is available for download. Provided that you have enabled auto-updating, Sophos
Anti-Virus downloads the update automatically. Alternatively, to update Sophos Anti-Virus
immediately, without waiting for the next automatic update, type:
/opt/sophos-av/bin/savupdate
You can then apply the Linux kernel update.
9.2 About support for customized kernels
If you customize your Linux kernels, this manual does not explain how to configure updating to
support this. See Sophos support knowledgebase article 13503
(http://www.sophos.com/en-us/support/knowledgebase/13503.aspx).
26configuration guide
10 Configure the web UI
Note: If you are configuring a single computer that is on a network, the configuration might be
overwritten if the computer downloads a new Extra Files configuration.
To configure the web UI:
1. At the computer that is running the web UI, type:
/opt/sophos-av/bin/savsetup
savsetup asks you to select what you want to do.
2. Select Sophos Anti-Virus GUI configuration.
savsetup asks you a series of questions about the web UI. Type your responses to configure
the web UI.
27Sophos Anti-Virus for Linux
11 Appendix: On-demand scan return codes
savscan returns a code to the shell that indicates the result of the scan. You can view the code
by entering a further command after the scan has finished, for example:
echo $?
Return code Description
0 No errors occur and no viruses are detected
1 The user interrupts the scan by pressing CTRL+C
2 An error occurs that prevents further execution of a
scan
3 A virus is detected
11.1 Extended return codes
savscan returns a more detailed code to the shell if you run it with the -eec option. You can view
the code by entering a further command after the scan has finished, for example:
echo $?
Extended return code Description
0 No errors occur and no viruses are detected
8 A survivable error occurs
16 A password-protected file is found (it is not scanned)
20 An item containing a virus is detected and disinfected
28configuration guide
Extended return code Description
24 An item containing a virus is found and not disinfected
28 A virus is detected in memory
32 An integrity check failure occurs
36 An unsurvivable error occurs
40 The scan is interrupted
29Sophos Anti-Virus for Linux
12 Appendix: Extra Files configuration
This section describes how to configure Sophos Anti-Virus with Extra Files configuration.
12.1 About Extra Files configuration
This section gives you an overview of Extra Files configuration.
12.1.1 What is Extra Files configuration?
Extra Files configuration is a method of configuring Sophos Anti-Virus for Linux. It is an alternative
to configuration from Sophos Enterprise Console and it does not require a Windows computer.
You should use this method only if you cannot use Enterprise Console.
Note: You cannot use Enterprise Console configuration and Extra Files configuration
together.
You can use this method to configure all features of Sophos Anti-Virus except on-demand scans,
for which you should see Configuring on-demand scans (page 16)
12.1.2 How do you use Extra Files configuration?
You create a file that contains the Extra Files configuration settings. This file is offline, so that
other computers cannot access it.
When you are ready to configure your computers, you copy the offline file to a live configuration
file, which is in a location that endpoint computers can access. You configure each endpoint
computer to fetch its configuration from the live file when that computer updates.
To reconfigure endpoint computers, you update the offline configuration file, and copy it to the
live configuration file again.
Notes:
■ To ensure that the configuration file is secure, you must create and use security certificates,
as described in the following sections.
■ You can lock part or all of the configuration so that individual end-users cannot modify it on
their computer.
The following sections tell you how to create and use Extra Files configuration files.
12.2 Using Extra Files configuration
To use Extra Files, you:
■ Create security certificates on the server.
30configuration guide
■ Create an Extra Files configuration.
■ Install the root certificate on endpoint computers.
■ Enable endpoint computers to use the Extra Files configuration.
12.2.1 Create security certificates on the server
You create the security certificates as follows.
Note: If you use OpenSSL to generate certificates, you must be running OpenSSL 0.9.8 or later.
1. Fetch the script that you will use to create the certificates. The script is available from Sophos
support knowledgebase article 119602.
2. Run the script to create a set of certificates. For example, type:
./create_certificates.sh /root/certificates
You can specify a different directory in which to place the certificates. However, you must
ensure that the certificates are in a secure location.
3. When prompted, enter and confirm a root key password.
4. When prompted, enter and confirm a signing key password.
5. Check that the certificates are in the directory. Type:
ls /root/certificates/
You should see these files:
extrafiles-root-ca.crt extrafiles-root-ca.key extrafiles-signing.cnf
extrafiles-signing.crt extrafiles-signing.key
31Sophos Anti-Virus for Linux
12.2.2 Create an Extra Files configuration
1. On the computer where you want to store the Extra Files configuration, use the command
savconfig to create the offline configuration file and set the values of parameters in that file.
Use the following syntax:
/opt/sophos-av/bin/savconfig -f offline-config-file-path -c operation
parameter value
where:
■ -f offline-config-file-path specifies the path of the offline configuration file, including the
filename. savconfig creates the file for you.
■ -c indicates that you want to access the Corporate layer of the offline file (for more
information about layers, see About configuration layers (page 34)).
■ operation is either set, update, add, remove, or delete.
■ parameter is the parameter that you want to set.
■ value is the value to which you want to set the parameter.
For example, to create a file called OfflineConfig.cfg in the directory /rootconfig/
and to disable email alerts, type:
/opt/sophos-av/bin/savconfig -f /root/config/OfflineConfig.cfg -c set
EmailNotifier Disabled
For information about using savconfig, see savconfig configuration command (page 35).
2. To view the parameter values, use the query operation.You can view the value of an individual
parameter or all parameters. For example, to view the values of all the parameters that you
have set, type:
/opt/sophos-av/bin/savconfig -f /root/config/OfflineConfig.cfg -c
query
3. When you have finished setting parameters in the offline configuration file, create either a web
share or a shared directory for storing the live configuration file.
4. Create the live configuration file by using the command addextra. Use the following syntax:
/opt/sophos-av/update/addextra offline-config-file-path
live-config-file-path --signing-key=signing-key-file-path
--signing-certificate=signing-certificate-file-path
For example:
/opt/sophos-av/update/addextra /opt/sophos-av/OfflineConfig.cfg
/var/www/extrafiles/ --signing-key=
/root/certificates/extrafiles-signing.key
--signing-certificate=/root/certificates/extrafiles-signing.crt
32configuration guide
12.2.3 Install the root certificate on endpoint computers
You must install the root certificate on each endpoint computer.
1. At the computer where you created the certificates (or the computer to which you copied them),
create a new directory for the root certificate. Type:
mkdir rootcert
cd rootcert/
2. Copy the root certificate to the new directory. Type:
cp /root/certificates/extrafiles-root-ca.crt .
3. Copy the new directory to a shared directory.
4. Go to each endpoint computer and mount the shared directory.
5. Install the certificate. Use the following syntax:
/opt/sophos-av/update/addextra_certs --install=
shared-rootcert-directory
For example:
/opt/sophos-av/update/addextra_certs --install= /mnt/rootcert/
12.2.4 Enable endpoint computers to use the Extra Files configuration
You enable the endpoint computers to download and use the configuration as follows.
1. If your live configuration file is in a shared directory, mount that directory on each client
computer.
2. On each endpoint computer, specify the path of the live configuration file.
For example:
/opt/sophos-av/bin/savconfig set ExtraFilesSourcePath
http://www.example.com/extrafiles
The new configuration is now available for the client computers to download the next time that
they update.
3. To run an update now, type:
/opt/sophos-av/bin/savupdate
12.3 Updating Extra Files configuration
1. On the computer where the Extra Files configuration is stored, use the command savconfig
to update the offline configuration file and set the values of parameters in that file.
You can use the same syntax as you did when creating the offline configuration file.
For example, to update a file called OfflineConfig.cfg in the directory /opt/sophos-av
and to enable email alerts, type:
/opt/sophos-av/bin/savconfig -f /opt/sophos-av/OfflineConfig.cfg -c
set EmailNotifier Enabled
33Sophos Anti-Virus for Linux
2. To view the parameter values, use the query operation.You can view the value of an individual
parameter or all parameters. For example, to view the values of all the parameters that you
have set, type:
/opt/sophos-av/bin/savconfig -f /opt/sophos-av/OfflineConfig.cfg -c
query
3. When you have finished setting parameters in the offline configuration file, update the live
configuration file by using the command addextra. Use the following syntax:
/opt/sophos-av/update/addextra offline-config-file-path
live-config-file-path --signing-key=signing-key-file-path
--signing-certificate=signing-certificate-file-path
For example:
/opt/sophos-av/update/addextra /opt/sophos-av/OfflineConfig.cfg
/var/www/extrafiles/ --signing-key=
/root/certificates/extrafiles-signing.key
--signing-certificate=/root/certificates/extrafiles-signing.crt
The updated configuration is now available for the client computers to download the next time
that they update.
4. To run an update now, type:
/opt/sophos-av/bin/savupdate
12.4 About configuration layers
Each installation of Sophos Anti-Virus includes a local configuration file, which includes settings
for all features of Sophos Anti-Virus apart from on-demand scans.
Each local configuration file contains a number of layers:
■ Sophos: This is always present in the file. It includes the factory settings, which are changed
only by Sophos.
■ Corporate: This is present if the installation is configured using Extra Files configuration.
■ User: This is present if any local configuration is performed. It includes settings that apply only
to the installation on this computer.
Each layer uses the same parameters, so that the same parameter can be set in more than one
layer. However, when Sophos Anti-Virus checks the value of a parameter, it does so according
to the layer hierarchy:
■ By default, Corporate layer overrides User layer.
■ Corporate and User layers override Sophos layer.
For example, if a parameter is set in the User layer and the Corporate layer, the value in the
Corporate layer is used. Nevertheless, you can unlock the values of individual parameters in the
Corporate layer, so that they can be overridden.
When the local configuration file is updated from the Extra Files configuration file, the Corporate
layer in the local file is replaced by that of the Extra Files configuration file.
34configuration guide
12.5 savconfig configuration command
savconfig is the command that you use to configure all features of Sophos Anti-Virus apart
from on-demand scanning. The path of the command is /opt/sophos-av/bin. Using the
command to configure specific functions of Sophos Anti-Virus is explained in the remainder of
this manual. The rest of this subsection explains the syntax.
The syntax of savconfig is:
savconfig [option] ... [operation] [parameter] [value] ...
To view a complete list of the options, operations, and parameters, type:
man savconfig
12.5.1 option
You can specify one or more options. The options are mainly associated with the layers in the
local configuration files in each installation. By default, the command accesses the User layer. If
you want to access the Corporate layer for example, use the option -c or --corporate.
By default, the values of parameters in the Corporate layer are locked, so that they override values
in the User layer. If you want to allow a corporate setting to be overridden by users, use the option
--nolock. For example, to set the value of LogMaxSizeMB and allow it to be overridden, type:
/opt/sophos-av/bin/savconfig --nolock -f corpconfig.cfg -c LogMaxSizeMB
50
If you are using Enterprise Console, you can display just the values of the anti-virus policy
parameters by using the option --consoleav. Type:
/opt/sophos-av/bin/savconfig --consoleav query
You can display just the values of the Enterprise Console update policy by using the option
--consoleupdate. Type:
/opt/sophos-av/bin/savconfig --consoleupdate query
12.5.2 operation
You can specify one operation. The operations are mainly associated with how you want to access
a parameter. Some parameters can have only one value but others can have a list of values. The
operations enable you to add values to a list or remove values from a list. For example, the Email
parameter is a list of email recipients.
To display the values of parameters, use the operation query. For example, to display the value
of the EmailNotifier parameter, type:
/opt/sophos-av/bin/savconfig query EmailNotifier
If you are using Enterprise Console, when savconfig returns values of parameters, those that
conflict with the relevant Enterprise Console policy are clearly marked with the word “Conflict”.
35Sophos Anti-Virus for Linux
12.5.3 parameter
You can specify one parameter. To list all the basic parameters that can be set, type:
/opt/sophos-av/bin/savconfig -v
Some parameters require secondary parameters to be specified as well.
12.5.4 value
You can specify one or more values that will be assigned to a parameter. If a value contains
spaces, you must enclose it in single quotation marks.
36configuration guide
13 Appendix: Configuring scheduled scans
Sophos Anti-Virus can store definitions of one or more scheduled scans.
Note: You can also use Enterprise Console or the command crontab to scan computers at set
times. For details, see the Enterprise Console Help or Sophos support knowledgebase article
12176 (http://www.sophos.com/en-us/support/knowledgebase/12176.aspx), respectively. Scheduled
scans that have been added using Enterprise Console have names that are prefixed with “SEC:”
and cannot be updated or removed except by using Enterprise Console.
13.1 Add a scheduled scan from a file
1. To use a template scan definition as a starting point, open
/opt/sophos-av/doc/namedscan.example.en.
To create a scan definition from scratch, open a new text file.
2. Define what to scan, when to scan it, and any other options, using only the parameters listed
in the template.
To schedule the scan, you must include at least one day and one time.
3. Save the file in a location of your choosing, being careful not to overwrite the template.
4. Add the scheduled scan to Sophos Anti-Virus using the command savconfig with the
operation add and the parameter NamedScans. Specify the name of the scan and the path
of the scan definition file.
For example, to add the scan Daily, which is stored in /home/fred/DailyScan, type:
/opt/sophos-av/bin/savconfig add NamedScans Daily /home/fred/DailyScan
13.2 Add a scheduled scan from standard input
1. Add the scheduled scan to Sophos Anti-Virus using the command savconfig with the
operation add and the parameter NamedScans. Specify the name of the scan and use a
hyphen to specify that the definition is to be read from standard input.
For example, to add the scan Daily, type:
/opt/sophos-av/bin/savconfig add NamedScans Daily -
When you press ENTER, Sophos Anti-Virus waits for you to type the definition of the scheduled
scan.
2. Define what to scan, when to scan it, and any other options, using only the parameters listed
in the template scan definition: /opt/sophos-av/doc/namedscan.example.en. After
typing each parameter and its value, press ENTER.
To schedule the scan, you must include at least one day and one time.
3. To complete the definition, press CTRL+D.
37You can also read