Manual - Smartbox Assistive Technology
←
→
Page content transcription
If your browser does not render page correctly, please read the page content below

Manual

         Created by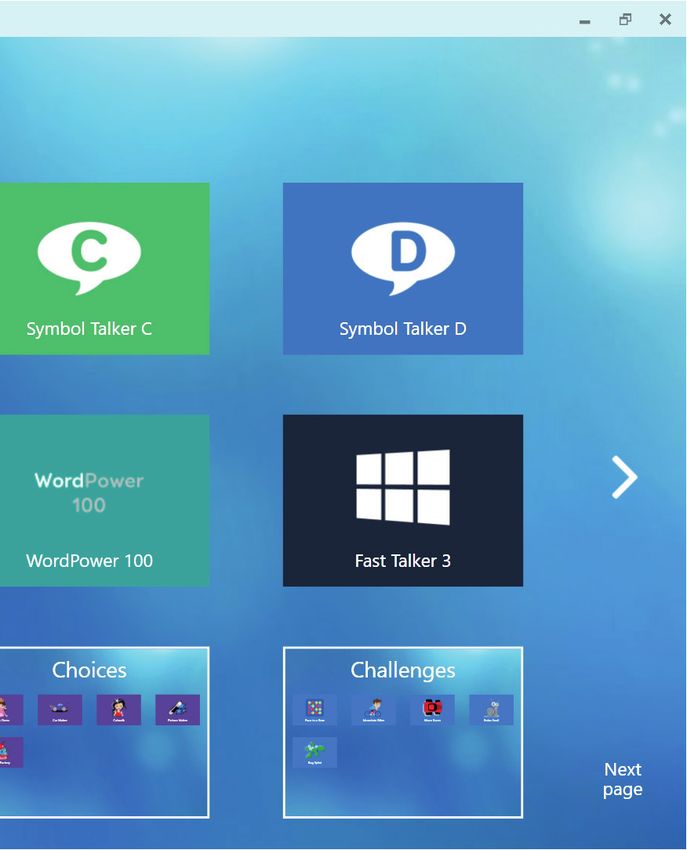
Power Pad Manual (Version 1.0)
English (UK)

Copyright 2017 Smartbox Assistive Technology
thinksmartbox.com

Welcome to Power Pad, your complete
         communication and access solution

   Use any method of alternative access to communicate
using symbols or text, with powerful speakers to project your
                            voice.

  Access your social media profiles and email, SMS text
 messaging and control Windows applications. Jump into
YouTube and your online communities, complete homework
and documents. The Power Pad is designed to connect you
                      to the world.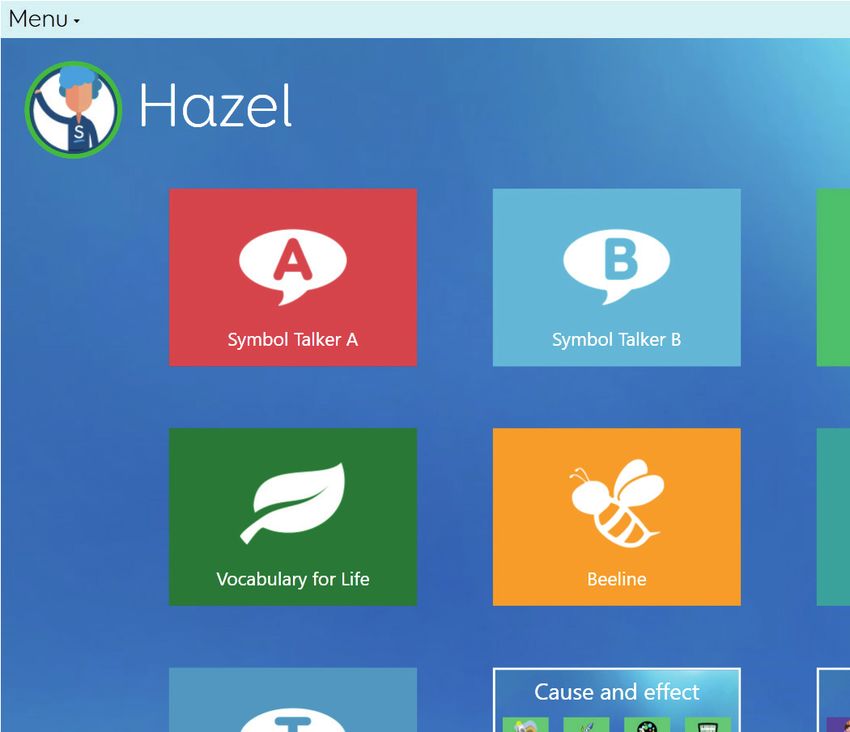
Contents

1. Getting started                                               5
     1.1    What is included with your Power Pad                 7
     1.2    Getting started with Power Pad, Grid 3 and Windows   8
     1.3    Features                                             9
     1.4    Power                                                11
     1.5    External battery                                     13
     1.6    The Power Pad desktop                                15

2. Using your Power Pad                                          17
     2.1    Mounting your Power Pad                              19
     2.2    Setting up your speech and audio                     21
     2.3    Using headphones and audio feedback                  23
     2.4    Screen brightness                                    24
     2.5    Internet and network settings                        25
     2.6    Bluetooth                                            26

3. Access                                                        27
     3.1    Eye gaze                                             29
     3.2    EyeTech QuickACCESS                                  33
     3.3    Switch access                                        34
     3.4    Using a SmartNav or other pointer access             36
     3.5    Touch access                                         38
     3.6    Keyboard and mouse                                   40
     3.7    Voice activation and access                          41

 3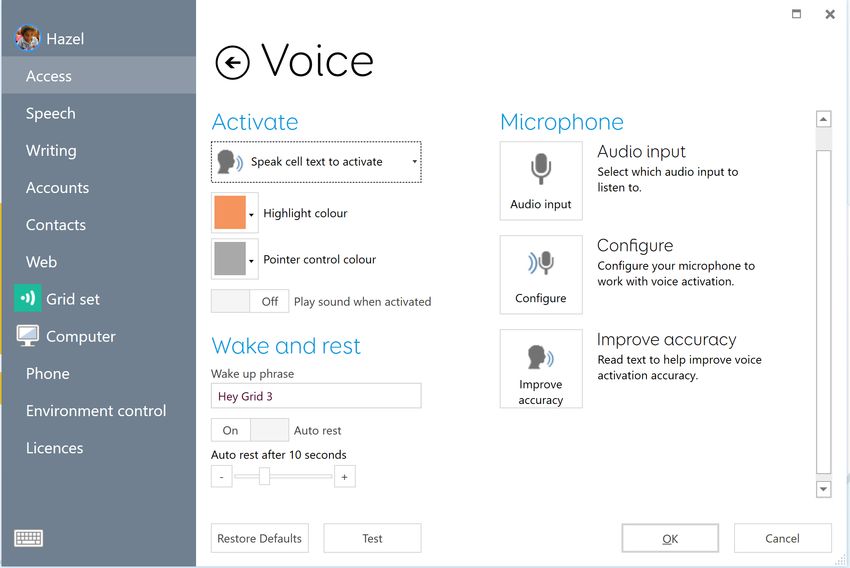
4. Environment Control                                  43
      4.1   Introduction to Environment Control         45
      4.2   Infrared controls                           47
      4.3   Setting up a radio device                   51
      4.4   Connecting a smartphone to your Power Pad   54

5. Grid 3                                               57
  5.1       Using Grid 3                                59
  5.2       Useful commands to control your Power Pad   60
		          from Grid 3

6. Looking after your Power Pad                         61
      6.1   Software updates                            63
      6.2   Getting the most from your battery          65
      6.3   Cleaning and storing your Power Pad         68

7. Appendices                                           69
      7.1   Smartbox Support                            71
      7.2   Specification                               73
      7.3   Safety notices                              75
      7.4   Statement of compliance                     80
      7.5   Battery warnings                            81
      7.6   Notes                                       82

                                                        4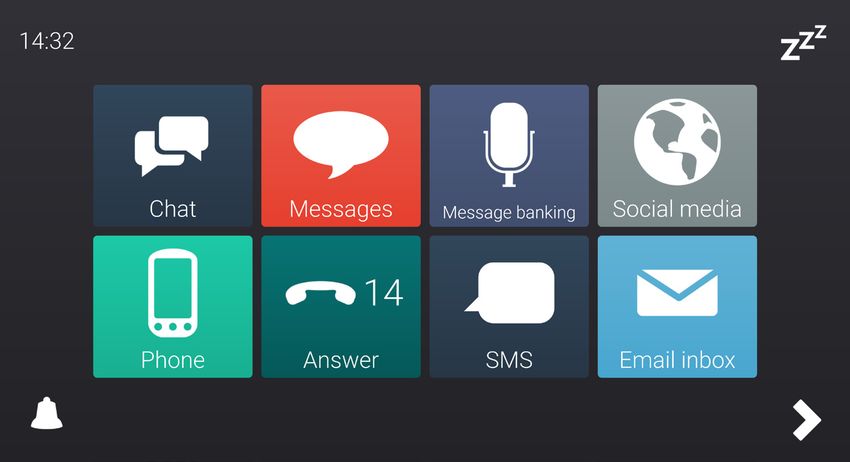
5

1

Getting started

                  6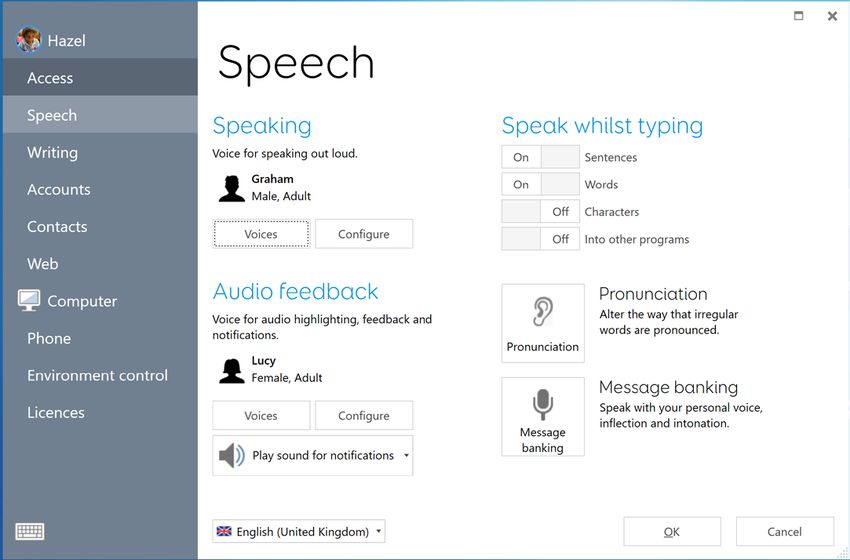
What is included with your Power
      1.1
            Pad
Power Pad communication aid
One external battery
Power lead
Daessy and Rehadapt mounting plates
       (including screws and screwdriver)
Port label stickers
Manual
Grid 3 training pack
Support magnet
Cleaning cloth

Included Software

Grid 3
EyeTech QuickACCESS software

  7
Getting started with Power Pad,
                                                                  1.2
Grid 3 and Windows
Power Pad is built around Grid 3, Smartbox’s powerful software for
complete access and communication. Grid 3 gives users many ways
to build and speak sentences using text, symbols, powerful prediction
and grammar. Included with Grid 3 are many resources, from
accessible keyboards to symbol based core vocabularies, as well as
tools to access the internet, social media and more.

Grid 3 is fully customisable, from controlling your synthetic voices pitch
and speed, to creating your own resources so you can speak how you
want.

Throughout this manual we use the included Grid 3 software to
configure Power Pad and its settings.

Where appropriate we will also include where settings are found in
Windows 10.

                                                                       8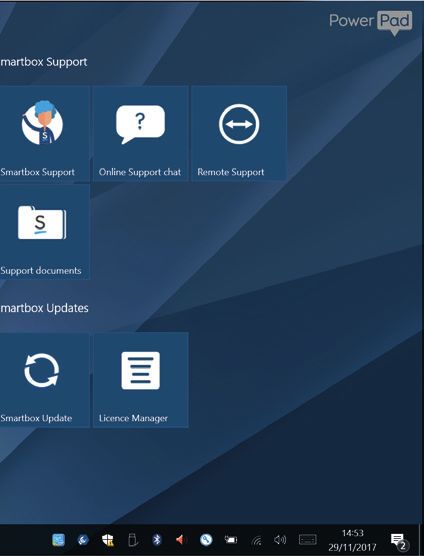
1.3     Features

                          SmartNav mount

                           Front camera

                           Touch screen

                           Infrared learning window
                           Eye gaze camera

      2 x USB 2.0 ports

        Charging port

      Adjustable stand

9
2 x 3.5mm switch ports
On / off button
Headphone and
microphone port
Infrared transmitter
Rear camera
Mounting plate
Speakers
External battery
101.4 Power Turning on your Power Pad Before you switch on your Power Pad for the first time, it is best to plug in the power supply and charge the device. To turn on the Power Pad, press the On / Off button on the right hand side of the screen. Shutting down the Power Pad When not in use, it is good practice to shut down the Power Pad completely. It is also recommended to shut the device down before it is stored for transit. Grid 3 Many grid sets allow the user to switch off the Power Pad with the Turn off computer command. For more about these commands see Section 5.2. Windows Open the Start Menu and tap the Power icon. From here you can select Sleep, Shut down and Restart. Selecting Shut down will power down the device completely. You can also press and hold the power button on the side to power the device down. 11
Charging your Power Pad

To charge your Power Pad, plug the power lead into the charging port
on the right hand side of the Power Pad. A full charge will take up to 8
hours.

The Power Pad will charge its internal battery before the external
battery. There is an indicator LED above the charging port. This will
blink while the device is charging.

For more information on looking after your battery see section 6.2.

                                                                      12
1.5 External battery Swapping the external battery The Power Pad’s external battery can be swapped without powering the device down. To remove the external battery lift the catch in the centre of the battery. Pull the battery down and away from the Power Pad. To insert a charged external battery, place the battery bottom first into the Power Pad, then push the top into place until the catch clicks. 13
Charging the external battery

The external battery can be charged away from the Power Pad using
the Power Pad external battery charging dock (sold separately).

                                                              14
1.6 The Power Pad desktop
Grid 3 - Grid Explorer
Close Grid 3
Open Grid 3 menu
Maximise
Current user
Minimise
Grid sets
Folder Next page
The Power Pad can either be set to start Grid 3 automatically, which
by default will take you to Grid Explorer, or will show the Windows
desktop.
15Windows
Search Date and time
Start menu Action centre and notifications
Smartbox apps
User settings
Settings
Power options
1617
2

Using your Power Pad

                       18
2.1 Mounting your Power Pad
Adjustable stand
The Power Pad has an adjustable stand that can be folded out to
position the device comfortably.
To fold the stand out, pull the stand from the bottom and adjust the
angle to suit you.
When finished, you can push the stand back in, the stand will lock into
place.
Using a desk, floor or wheelchair mount
The Power Pad is supplied with both Daessy and Rehadapt mounting
plates so you can securely position your device.
Daessy mounting plate Rehadapt mounting plate
19Changing the mounting plate
To change the mounting plate, lay your Power Pad screen down on
a flat surface. To prevent damage to the screen, place the device
on something soft like a towel, cloth or newspaper. Use the supplied
screwdriver to remove the four screws that secure the mounting plate
to the Power Pad.
Once unscrewed, remove the mounting plate and replace with the
plate that you require. Use the screws supplied with the plate to
attach the new plate and tighten with the provided screwdriver. The
screws should be firmly tightened so they do not come loose.
202.2 Setting up your speech and audio Power Pad has two main speakers that are designed to make your synthetic voice heard in any situation. In addition, the Power Pad has a headphone port which can be used to output personal audio. This is called audio feedback and can help you navigate Grid 3 by reading out labels, words and actions. Grid 3 settings The audio settings in Grid 3 are found in Settings – Speech. Speaking You can select your speaking voice and configure its pitch and speed. This is the voice that is projected from the Power Pad’s main speakers. You can choose from voices that are included with Grid 3, or download and purchase more from the list. 21
Windows

In Windows the audio settings are found in the taskbar. By right
clicking or long pressing on the Speaker symbol.

From here you can access the Volume mixer, Playback devices,
Recording devices and Sounds. If you are having issues with hearing
certain audio, it is good to check you haven’t muted one of the sound
channels.

                                                                   22
Using headphones and audio
2.3
feedback
To use headphones with your Power Pad, connect your headphones to
the headphone and microphone port.
To send audio feedback to your headphones, go to Settings - Speech,
then tap Configure under the Audio feedback section. Select Power
Pad Headphones under Speakers.
Sending media audio through headphones
If you want to listen to media, such as music and videos privately whilst
still speaking aloud, you can use the headphone socket.
In Windows, tap the speaker icon on the taskbar and select Power
Pad headphones.
Tip: You can also use USB or Bluetooth headphones or headsets with
your Power Pad. Connected audio devices will be displayed in the
audio device list in Grid 3 and within your Windows audio settings.
23Screen brightness 2.4
The Power Pad has an HD screen that supports a range of brightness
levels so it is easy to find a setting that suits you. The brightness of the
screen can be adjusted both within Grid 3 and in Windows settings.
Grid 3
When using Grid 3, you can adjust the brightness of the screen with
the Brightness command. These can be added to your grid sets in edit
mode and are found under Grid 3 Commands when you create a cell.
These cells can be set to cycle the brightness, increase or decrease
the brightness of the screen, or set the screen to a specific value.
Tip: Using these commands, you could create a cell that sets your
Power Pad to ‘night mode’ or a low brightness when you are watching
TV or a movie.
Windows
Windows display settings are found in Settings - System– Display.
As well as brightness you can select Scale and layout options. These
adjust the size of Windows icons and menus.
242.5 Internet and network settings Wi-Fi To connect to the internet, the Power Pad uses Wi-fi. This is accessed from the taskbar. Tapping on the Wi-fi icon in the Windows taskbar will bring up a list of nearby wireless networks. Select your preferred network, and enter the network password if applicable. You can also choose to remember the connection. Network settings More detailed network settings in Windows are located in Settings – Network & Internet. From here you can view the status of your internet connection, configure how the wi-fi connects to public and open networks, set up a VPN and more. 25
Bluetooth                                                       2.6

You can connect many different types of Bluetooth device to your
Power Pad, from headphones and headsets to your mobile phone and
printers.

By default Bluetooth is switched off. To switch Bluetooth features
on in Windows, go to Settings – Network and Devices then select
Bluetooth. Toggle the tab to On and your Power Pad will start
scanning for nearby devices.

Depending on the device you are connecting to your Power Pad, you
may need to type in a pairing code. Refer to the instructions for your
bluetooth devices for more information.

Tip: Be aware that leaving Bluetooth switched on while not in use can
impact battery life.

                                                                     26
3
Access methods
283.1 Eye gaze
The Power Pad has a built in EyeTech TM5 eye tracking camera. This is
fully integrated with Grid 3 so you can access the Power Pad with only
your eyes.
Setting up the Power Pad for eye gaze access
It is important to have the Power Pad set up securely for eye gaze
access. Using either the built in stand or mounting the Power Pad
to a floor, desk or wheelchair mount (see Mounting the Power Pad),
position the Power Pad between 40cm and 75cm from your eyes.
Desk stand
Floor stand
(Reclined position)
You can also tilt the Power Pad
to match head position.
29You can use the eye gaze monitor to help position the Power Pad
comfortably (Settings - Access - Eye Gaze - Calibration).
Calibration
The next step is to calibrate the camera. This process helps the eye
tracker focus on how your eyes move around the screen. During a
calibration, you will be asked to follow targets around the screen and
the camera will score how accurate you are in holding your gaze in
each location.
In Grid 3 open Settings – Access and select Eye gaze.
Selecting Calibration will bring up the Calibration options. You will
see the Monitor which gives you a real time image of how the camera
is currently tracking your eyes. Under the Calibration options you can
select what the target looks like, the colour of the background, the size
30of the targets, the number of targets, if you would like a continuous or stepped calibration (allowing you to tap the screen to progress between points) and adjust the speed of the calibration. Tap the Calibrate option to begin. To cancel a calibration there is a cross in the top right corner. Once complete you will be given your calibration results. You do not need to calibrate every time you use the device. Calibration is recommended if there has been a change in environment, a change in positioning or you are noticing accuracy issues. Improving your calibration Once you have completed your calibration, you can use the Improve calibration option to focus on any problem areas. This is a good opportunity to check your surroundings for any potential interference, such as reflections, strong daylight and the position of the device. 31
Calibrating from a grid set

In Grid 3 you can start a calibration directly with the Calibration
command. You can also use the Improve calibration command to
focus on any difficult areas.

Configuring eye gaze options

Grid 3 gives you a range of options to customise how eye gaze access
works for you. These can be configured by navigating to Settings –
Access – Eye gaze.

                                                                      32
3.2 EyeTech QuickACCESS
By default the QuickACCESS software will be running in the
background when your Power Pad is switched on. The QuickACCESS
software allows you to access and calibrate the eye gaze camera
without opening Grid 3.
QuickACCESS
The QuickACCESS Start menu tile
Note that if the QuickACCESS software is shut down whilst are using
Grid 3, you will no longer be able to use eye gaze access. To restart
eye gaze access, close Grid 3 and open the QuickACCESS software
from the Start menu.
QuickACCESS settings screen
33Switch access 3.3
Power Pad has two 3.5mm sockets that allow you to connect a variety
of switches to your device. There are a number of options available to
customise how you navigate Grid 3 with one or two switches.
Connection
To connect a switch to your Power Pad, plug your switches 3.5mm jack
into one of the switch sockets (labelled S1 and S2 respectively)
Once connected, go to Settings – Access – Switches in Grid 3.
Selecting Connection will display a list of potential switches. If you tap
your switch it will highlight in green.
Radio switches
You can use a Radio Switch Transmitter with the Power Pad to give
you wireless switch access. Simply connect one or two switches to the
Radio Switch Transmitter (sold seperately), and test the connection on
the switch Connection page found under Settings – Access – Switches
34under Configuration. If your switches do not activate, you may need to change the channel the Radio Switch Transmitter is broadcasting on. See the Radio Switch Adapter manual for more information. Bluetooth switches If you want to connect a Bluetooth switch to your Power Pad, follow the pairing instructions provided with your switch. Make sure you have Bluetooth enabled on your Power Pad. You can then configure the switch as normal. 35
Using a SmartNav or other pointer
                                                             3.4
access
Grid 3 supports many types of alternative pointer access. These
access methods use many different technologies to let you guide
the mouse cursor and interact with your Power Pad. Popular pointer
access devices include the SmartNav and Quha Zono.

Mounting a SmartNav

Your Power Pad has a built in mount for a SmartNav head pointer. If
your SmartNav has a magnetic mount, the SmartNav will attach firmly
to the top of the Power Pad screen. For more information about the
magnetic mount see thinksmartbox.com/smartnav-pro.

Installing the SmartNav software

SmartNav software can be downloaded from: naturalpoint.com/
smartnav/support/downloads.html

Download and install the SmartNav software. Once installation is
complete you can run the SmartNav software from the Start menu.

                                                                   36
Selecting Control Panel will give you further options to configure the SmartNav, including starting the software on device start up. Pointer options To configure how the pointer is used in Grid 3, open Settings – Access – Pointer. From here you can select how you want clicks to activate, how cells are highlighted and how the pointer works when in Computer control. 37
Touch access                                                   3.5

Power Pad’s screen is fully touch accessible in Grid 3 and in Windows.

Touch screen settings are located in Settings – Access – Touch. From
here you can select Activate options and how you would like highlights
to appear as well as audio feedback.

Using the touch screen as a switch

You can set the entire touch screen as a switch using Grid 3. These
options are found in Settings – Access – Switches. Select the
Connection button under Configuration and use the drop down menu
to select Touch screen.

                                                                   38
Once selected you can configure touch screen presses in exactly the same manner as Switch access. Using a keyguard The Power Pad supports keyguards that can help you make accurate selections on the touch screen. To mount a keyguard to your Power Pad, see the instructions provided with your keyguard. 39
Keyboard and mouse                                            3.6

You can connect a keyboard and mouse to the Power Pad using either
the USB ports or via Bluetooth. To use a wired device, simply plug it
into one of the USB ports found on the side of the Power Pad. USB
keyboards and mice will automatically be detected in Windows.

To connect a Bluetooth keyboard or mouse, make sure that Bluetooth
is switched on and follow the pairing instructions provided with your
keyboard or mouse.

                                                                  40
3.7 Voice activation and access You can use your voice to access your grids in Grid 3. This requires a microphone or headset to be connected to the Power Pad. Once configured, voice commands are activated by speaking the wake up phrase “Hey Grid 3…” followed by the cell text. To turn the lights on speak “Hey Grid 3… On!” Configuring Voice access The settings to configure voice access are found in Settings – Access – Voice. From this screen you can select and test the microphone you wish to use. Once you have selected your microphone under the Audio input option, it is recommended to use the Configure tool, and to use 41
Improve accuracy to read out several test sentences.

You can set the Wake up phrase (by default this is “Hey Grid 3”) and
adjust the amount of time you have between saying the phrase and
the cell text.

                                                                   42
4
Environment Control
44Introduction to Environment
4.1
Control
Power Pad can control many other devices to give you independence.
Infrared communication can learn to control your TV, set top box
or other devices around the home. Power Pad also supports radio
switches to control lights, doors, windows and more.
The Environment Control settings are found in Grid 3 under Settings –
Environment control.
Transmitters
The Power Pad has two built in transmitters. A GEWA infrared
transmitter is found on the rear of the device and either an EasyWave
or Z-Wave transmitter is built into the device for radio control.
The infrared transmitter and its broadcast angle
45Servus Environment Control grid sets
Grid 3 is Environment control ready with two built in grid sets, Servus
Environment Control and Simple Servus Environment Control. Both of
these grid sets have been built to work with as many devices you may
have and can act as a template for your accessible home.
464.2 Infrared controls Setting up an infrared remote Grid 3 comes with ready made Servus Environment Control grid sets. To use these with your appliances you need to teach your Power Pad the infrared codes. Create an accessory In Grid 3, go to Settings - Environment control. Under the Accessories heading tap Add. You will see a list of various accessories. Select the type you would like to configure (for example Television) and you will be taken to the learning screen. 47
On the learning screen you can name your device (useful if you will
be using more than one of the same type), change the icon and most
importantly, learn the actions.

Select the action you wish to learn, for example Power, then tap the
Learn button on the right hand side of the window.

The Learn infrared window will appear and you will be asked to follow
the on screen instructions.

Remember to point your remote directly at the front of the Power Pad.

Once complete, the action will turn green and you can test the
recording by tapping Transmit now. Follow these steps for each
corresponding action that appears on your remote then click OK to
save and go back to the Environment control window.

                                                                   48
You can now use the Servus Environment Control grid sets to control your device. If you are controlling more than one of the same type of accessory, for example you have a TV in the bedroom and in the living room, you can use auto content cells in your grid sets. These toggle between accessories of a similar type. Unique infrared commands If you have an accessory or toy with only a few functions, you can use the Infrared command to create a cell that transmits a specific action. 49
When you add the Infrared command you will be taken to the Learn
infrared window. Follow the instructions and click OK to add the
command to a cell.

Infrared remote files

At Smartbox we keep a database of different IR remotes codes for
many home entertainment devices. Before setting up your home
device, check out the list to see if we already have pre-programmed
codes to save you time. These files are stored as .remote files. To find
our list of remotes visit:

thinksmartbox.com/ir-remotes

From here you can access and download our latest .remote files.

To install a .remote file, download the the file your need, close down
Grid 3 and open your File Explorer.

Navigate to : C:\Users\Public\Documents\Smartbox\Grid 3\
Environment Control Accessories

Copy the .remote file into this folder and open Grid 3.

Go to Settings and open the Environment control tab. You will see the
new devices listed.

                                                                     50
4.3 Setting up a radio device Setting up a radio device To use an EasyWave or Z-Wave radio device, you must first pair it with the Power Pad and then configure it. In this example we are using an EasyWave socket. Pairing an Easywave socket Go to Settings – Environment control and tap on Transmitters. You will see Easywave is listed and ready to configure. Highlight EasyWave and tap Configure. You then need to assign a button to the socket. Select one of the buttons from the menu and click Rename. This will be helpful if you are going to be using more than one socket. Give the button a recognisable name and press enter. 51
Plug your EasyWave socket into a mains socket and press the button
once to enter training mode. The LED will flash in a steady pattern.
In Grid 3 highlight your newly named button and tap on Transmit A.
On your EasyWave socket, press the button three times. This will return
the device to operating mode. Now you can tap Transmit A to toggle
the socket to on, and Transmit B to toggle it off.

Adding the paired socket to an accessory

Once your socket has been paired, you can assign it to an accessory
to use it in the Servus Environment Control grid sets. In Settings –
Environment control, under the Accessories heading, tap Add. From
the Add accessory window select Socket and tap Next.

You can now give the accessory a name. This is useful if you are using
more than one at the same time. In this example, the socket is being
used to control a desk fan.

                                                                   52
Under the Actions box, select On. In the drop down box to the right select the name of your button followed by A (in our example Fan A). Next select the Off action and assign this to the name of your button followed by B. Tap OK to save your settings and return to the Environment control window. You will now see your Socket listed under Accessories and will be able to use it in your Servus Environment control grid set. To test, you can use the Fan grid to toggle the socket on and off. 53
Connecting a smartphone to your
                                                                 4.4
Power Pad
Your Power Pad and Grid 3 can connect to an Android smartphone
enabling you to send and receive text messages and phone calls.
Note that while this works on many Android smartphones there are
several models that do not support the Remote Phone app. Check
with your local Smartbox dealer for advice on compatible models.

Installing the Remote Phone application
On desktop

The Remote Phone desktop application is found on your Power Pad in
the Support Documents folder (Start - Support Documents). Run the
CallCentre.exe installer. Once complete the software will open and will
be ready to pair.

On your smartphone

You will need to install the Remote Phone app to your phone. To find
the app, open your phones web browser and navigate to:

www.justremotephone.com

The Just Remote Phone app is paid for, you will need a Google
Account on your phone to complete the purchase from the Google
Play Store. If you would like to try out the Remote Phone features, there
is a 15 day trial available.

Bluetooth will need to be active on your phone to use the app.

                                                                     54
Setting up Grid 3 Make sure CallCenter is running on your Power Pad then, in Grid 3, open Settings - Phone. At this point Grid 3 will request access to CallCenter. Tick the ‘remember answer’ box in the pop up then tap Grant. Now you can open an SMS or phone grid set such as Fast Talker 3 and use the mobile functions. 55
56
5

Grid 3
5.1      Using Grid 3

Grid 3 is installed and ready to use on your Power Pad. Grid 3 is a
complete AAC software package, designed to help you communicate
and connect with the world around you. Everything in Grid 3 can be
tailored to suit you and how you want to access your Power Pad.

Launching Grid 3 on Startup

You can set Grid 3 to open automatically when you start your Power
Pad. Open Settings – Computer and toggle the Launch Grid 3 with
Windows option.

This will open Grid 3 and you can select which user you would like to
use. If you have a Primary User set, you can select a grid set to open
automatically by opening Settings and selecting your user name and
choose the grid set under the Startup heading.

Editing grid sets

Grid 3 has a complete suite of tools designed to make editing and
creating grids simple. Opening edit mode will enable you to make
changes to the grid you are currently using. You can add and remove
cells, rows, columns, commands and more. You can access edit mode
through the Grid 3 menu or by pressing F11 on a connected keyboard.

For more information on editing grids in Grid 3 see the Grid 3 training
cards supplied with your Power Pad.

 59
Useful commands to control your
                                                               5.2
Power Pad from Grid 3
These commands can be added to cells in you grid sets for control
various of functions of the Power Pad directly from Grid 3.

Turn off computer    This command will shut down the Power Pad
                     including all open programs.

Sleep screen         The Power Pad’s screen will switch off. Unlike the
                     Standby computer command, you can use your
                     access method to switch the screen back on.

Battery              This command displays a cell with the remaining
                     battery life as an icon.

Battery percentage This command displays a cell with the remaining
                   battery life as a percentage.

Grid Explorer        This command will take the user back to Grid
                     Explorer to choose another grid set.

Brightness           This command can be set to cycle through
                     several brightness levels.

Rest cell            The rest cell will deactivate every cell on a
                     grid, apart from the Rest cell. This can be used
                     to give you a break when using eye gaze or
                     head pointer access and prevents unwanted
                     activations.

Calibrate            This command starts a new eye gaze
                     calibration.

                                                                    60
6
Looking after your Power
Pad6.1 Software updates Grid 3 updates Grid 3 is set to check for updates automatically. To turn off automatic updates, navigate to Settings – Computer and toggle off Check for updates. If an internet connection is available, Grid 3 will automatically scan for any updates. If an update is available a notification will appear in the top right hand corner of Grid 3. Tap the icon to open Smartbox update and install the latest version of Grid 3. Tip: You can opt in to Early access updates from the Settings – Computer window in Grid 3. An early access release may have new features but be aware that these may be untested with your device and are subject to change. Smartbox update You will find Smartbox update software in your Start menu by default. Opening the program and clicking Next will begin an Automated internet update for all Smartbox software installed on your device. Your Power Pad will need to be connected to the internet to find any available software updates. 63
If updates are available, these will be downloaded and installed.

Windows updates

Windows update settings are found under Settings – Update &
security. From this screen you will see the status of any pending
updates. You can choose to switch off automatic updates. Note that
this does not stop Microsoft delivering security updates.

Microsoft rolls out larger Windows updates roughly once a year. At
Smartbox we will test these internally before we advise whether the
update is ready for Power Pad.

                                                                    64
6.2 Getting the most from your battery
As well as its internal battery, Power Pad has an external battery
which can be swapped without the device powering down.
Estimated battery life
The internal battery will last for approximately 3 hours (with eye gaze)
and the external battery will last approximately 6 hours (with eye
gaze). Total time: 9 hours
Charging time
The Power Pad’s internal battery will take approximately 2 hours to
fully charge. The external battery, when connected to the Power
Pad, will take up to 8 hours to fully charge. The batteries charge
simultaneously.
How the Power Pad batteries discharge
The Power Pad will always use the external battery before its internal
battery.
Viewing your remaining battery life
Battery cell Battery cell
(Charging)
65In Grid 3 you can place a cell to display remaining battery life.
In Windows you can display how much battery life you have remaining
by tapping the battery icon on the taskbar.
Making the most of your battery
The Power Pad batteries are designed to keep you talking and
accessing your device all day. With Grid 3, there are features to help
you keep talking for even longer.
Sleep screen
You many wish to take some time away from your device, or turn off
the screen to watch TV. Sleep screen enables you to turn the Power
Pad screen off when you choose, and wake it up again using your
chosen access method.
Once activated, the Sleep screen command will power down the
screen. To reactivate the screen, activate your access method again.
If you are using eye gaze access, gazing at the centre of the screen
will reawaken your device.
You can customise the Sleep screen settings by going to Menu –
Computer. You can turn on automatic dimming, screen off and the
dwell time to wake with eye gaze.
66Note: Sleep screen does not work when using a SmartNav or other head pointer to access the device. Brightness commands You can use the Brightness commands in Grid 3 to increase or decrease the brightness of the screen. If you are looking to conserve battery, having the brightness set to low can help. Smartbox recommends the brightness of the screen be set to 70%. 67
Cleaning and storing your Power
  6.3
            Pad
Cleaning your device

The front glass of your Power Pad can be cleaned using a microfibre
cloth. Your Power Pad should be regularly cleaned with an
antibacterial wipe. You can also use alcohol based wipes to clean
both the screen and case of the Power Pad.

Do not spray cleaning fluid, gel or polish directly onto your Power Pad
and do not immerse the device in water.

Storing your Power Pad

When not in use, your Power Pad should be stored safely. Do not rest
or press hard objects against the screen. You should also remove the
external battery and disconnect any USB devices that are connected.
Note the vents on the side of the Power Pad should not be covered.

                                                                    68
7 Appendices
7.1      Smartbox Support

Online support

Our team is here to help you make the most of your Power Pad and
Grid 3. You can raise a support ticket over email, use our online chat
box or search the knowledge base.
thinksmartbox.com/smart-support

Online chat

Online chat support is available from our website. The chat window
appears in the bottom right of thinksmartbox.com. Opening hours are
listed on the website. You can use Online chat to talk to a member of
our support team.

Remote support in Grid 3

Our support team can use a remote connection to deliver hands on
support over an internet connection. If you are asked to create a
remote support session you can do this directly in Grid 3. Go to Menu –
Help then select Remote Support.

 71
Knowledge Base

The Smartbox Knowledge base is full of tips, guides and
troubleshooting tools to help you get the most from your Power Pad
and Grid 3. Find the Knowledge base at:

thinksmartbox.com/knowledge-base

Use the search box to find exact answers or browse by product.

Other support

You can reach our UK support team 9am – 5:30pm (5pm Fridays) by
phone:

+44 (0) 1684 578868

If your Power Pad was supplied outside of the UK, please contact you
local Smartbox Partner. You can find our international partners here:

thinksmartbox.com/where-to-buy

Facebook Community

The Smartbox Facebook Community is a great way to meet, chat and
network with other Smartbox users. Not only is it a great place to ask
questions and share stories, our team all like to get involved.
Join the conversation at:

thinksmartbox.com/facebook

                                                                   72
7.2 Specification Device Processor: Intel Core i5-6200U Skylake processor, 3MB, 2.1GHz up to 2.7GHz RAM: 8GB LPDDR3 (1600 MHz) Hard disk drive: SSD SATA III, 128GB Operating system: Windows 10 Pro Display: Intel HD 1920 x 1080p EyeTech TM5 Eye Gaze camera Operating distance: 40 - 75cm Head motion box (Width x Height x Depth): 31.5 x 22.5 x 35cm Single or binocular tracking Access 2 x USB 2.0 ports 2 x 3.5mm switch ports 3.5mm audio port Touch screen Radio switch receiver Environment control GEWA infrared transmitter EasyWave or Z-Wave radio control 73
Mounting

Built in stand
Mounting plate (Daessy and Rehadapt)

Connectivity

Dual band Wireless (11ac/abgn)
Bluetooth 4.0 LE

Other information

Front camera: 2 megapixel
Rear camera: 5 megapixel
Battery life (with eye gaze on) : 9 hours
Battery life (with eye gaze off) : 15 hours
Charge time: Up to 8 hours
Dimensions: 355 x 266 x 70 mm
Weight: 3.4Kg

                                              74
7.3 Safety notices The Power Pad is not to be used as a life supporting device, and it should not be relied on in case of loss of function due to power loss or other causes. Water and other liquids The front glass of the Power Pad is design for IP54 and can be The Power Pad should not be exposed to or used in the rain. Do not immerse the Power Pad in liquids. Avoiding hearing damage Using the headphones and speakers at a high volume can cause permanent hearing loss. Always keep the volume of the device at a safe level. Power supply and batteries The Power Pad contains two rechargeable batteries. All rechargeable batteries degrade over time and usage. The possible usage time for the Power Pad after a full charge can become shorter over time. The Power Pad uses lithium ion batteries. For optimal performance, these should not be charged at extreme temperatures, below 0°C and above 45°C. At these temperatures the batteries will charge slowly or not at all. Do not expose the Power Pad and its external battery to fire or temperatures above 90°C as these conditions can cause the Li-ion batteries to malfunction, ignite or explode. Please take care when storing the Power Pad. 75
Only use the power lead provided to charge the Power Pad and only
use the Power Pad external battery dock to charge the external
battery. Using unofficial power supply devices may cause severe
damage to the Power Pad or cause fire.

If the Power Pad’s power lead is lost or damaged, contact your
supplier.

The Power Pad is not a user serviceable device. Do not open the
casing of the Power Pad, the power lead or the external battery as
this can cause damage to the device and yourself.

When the Power Pad’s batteries are depleted and the device is not
connected to a power source, the device will shut down to avoid
damaging the battery. The operating system will attempt to do this
as safely as possible, however it is recommended to attach the power
lead or a charged external battery.

Shipping devices with lithium ion batteries is subject to regulations,
check with your postal service or courier before shipping to ensure
safe delivery of your device.

Traveling with your Power Pad

When traveling, ensure the Power Pad is sufficiently protected from
knocks and bumps.

There are strict regulations for lithium ion batteries on airplanes.
Different airlines have different rules. Please contact your airline
before you travel. More information can be found here:
www.caa.co.uk/passengers/before-you-fly/baggage/items-that-are-allowed-in-baggage

                                                                               76
Temperature If used in hot temperatures or direct sunlight, the Power Pad may reach temperatures which can trigger automatic shutdown. This is a safety feature in many laptop and tablet devices to prevent damage to the device. If this occurs, please wait until the device has cooled before restarting. Do not block the vents. Ensure the device is shut down before storing or placing into a bag. Mounting Follow both the Power Pad and mounting stands instructions when attaching the Power Pad to a stand. While we have taken every precaution to ensure this is an easy and safe process, it is up to you to ensure the device is mounted safely. Emergencies The Power Pad should not be your only way of making an emergency call or raising an alarm. Safety If damaged, parts may detach from the Power Pad device. These can present a choking hazard. Young children should be supervised when using the device. 77
Magnetic field warning

The Power Pad contains magnets. The magnetic fields may
interfere with the function of cardiac pacemakers and implantable
cardioverter-defibrillators. It is recommended to keep the Power Pad
a minimum of 1 foot (12 inches) away from any devices.

Epilepsy warning

Some people with photosensitive epilepsy are susceptible to seizures
when exposed to certain lights or light patterns. The Power Pad
contains an infrared eye gaze camera. This does not affect many
people who suffer photosensitive epilepsy, however if you feel odd or
nauseous when in front of the Power Pad, move away from the device
and consult a medical professional.

Eye gaze safety

Prolonged use of an eye tracker as a pointing device may strain eye
muscles. The user should take frequent breaks and rest if eye fatigue
is noticed.

The eye gaze camera emits infrared light which can potentially
interfere with infrared devices. Be aware of this when using the Power
Pad in a room with multiple infrared devices and position the device
accordingly.

                                                                   78
Disposing of the Power Pad and external battery The Power Pad should be disposed of in accordance to local regulations for the disposal of electrical and electronic equipment. The external battery should be disposed of in accordance to your local regulations for the disposal of batteries. Warranty The Power Pad is covered under the standard 2 year warranty from time of purchase. Repairs The Power Pad is not a user serviceable device. In the event that your device requires repair please contact your local reseller. For more information visit thinksmartbox.com. 79
Statement of compliance                                             7.4

The Power Pad complies with the requirements of directive 93/42/
EEC concerning medical devices. The Power Pad is subject to
Directive 2001/96/EC of the European Parliament and the Council of
the European Union on waste electrical and electronic equipment
(WEEE) and should not be disposed of as unsorted municipal waste.
Please utilise your local WEEE collection facilities in the disposal of this
product.

2004/108/EC (EMC) – Electromagnetic Compatibility Directive

2006/95/EC (LVD) – Low Voltage Directive

The Power Pad complies to 2011/65/EU (RoHS 2) – Restriction of
hazardous substances Directives

WEEE

FCC Statement

The Power Pad complies with Part 15 of the FCC’s Rules for
transmission regulations.

                                                                        80
7.5 Battery warnings
• Do not dismantle, open or shred the battery.
• Do not expose the batteries to heat or fire, and avoid storage in
direct sunlight.
• Do not short-circuit the battery.
• Do not store the battery haphazardly in a box or drawer where it
may be short-circuited by other metal objects.
• Do not subject the battery to mechanical shock.
• In the event of a battery leaking, do not allow the liquid to come in
to contact with the skin or eyes. If contact has been made, wash
the affected area with copious amounts of water and seek medical
advice.
• Do not use any charger other than that specifically provided
for use with the equipment, and refer to the manufacturer’s
instructions or equipment manual for proper charging instructions.
• Do not use any other battery with the equipment unless approved
by Smartbox.
• Battery usage by children should be supervised.
• Keep the battery clean and dry.
• Wipe the battery with a clean dry cloth if it becomes dirty.
• Do not leave a battery on prolonged charge when not in use.
• After extended periods of storage, it may be necessary to charge
and discharge the battery several times to obtain maximum
performance.
• Retain the original product literature for future reference.
• Only use the battery in the application for which it was intended.
• When possible, remove the battery from the equipment when not in
use.
• Dispose of according to local regulations.
81Notes 7.6
82thinksmartbox.com
PP-MAN-AYou can also read