Operating Instructions Safety Cabinets Safe 2020 Maxisafe 2020 - Thermo Fisher Scientific
←
→
Page content transcription
If your browser does not render page correctly, please read the page content below
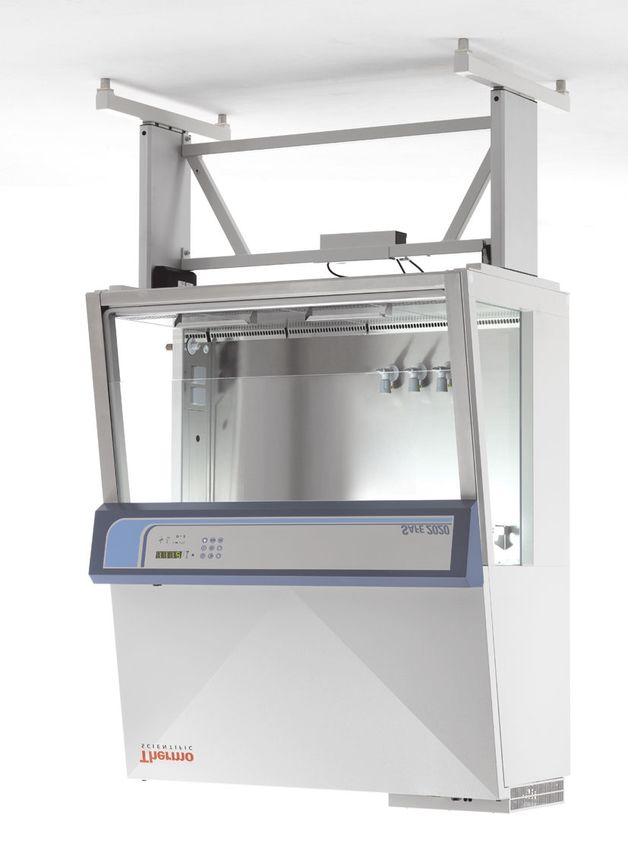
Operating Instructions
                            Safety Cabinets

                            Safe 2020
                            Maxisafe 2020

Valid: 01.2009 / 50118069
Operating Instructions Safety Cabinet Safe 2020 / Maxisafe 2020
© 2009 Thermo Fisher Scientific Inc. All rights reserved.
These operating instructions are protected by copyright. Rights resulting the-
reof, particularly reprint, photomechanical or digital postprocessing or reproduction,
even in part, are only allowed with the written consent of Thermo Electron LED GmbH.
This regulation does not apply to reproductions for in-plant use.
Trademarks
All trademarks mentioned in the operating instructions are the exclusive property
of the respective manufacturers.
Thermo Electron LED GmbH
Robert-Bosch-Straße 1
D - 63505 Langenselbold
Germany
2Operating Instructions Safety Cabinet Safe 2020 / Maxisafe 2020
Contents
1. General notes ......................................................................................... 6
1.1 General safety instructions ............................................................. 6
1.2 Warranty ......................................................................................... 7
1.3 Explanation of symbols ................................................................... 7
1.3.1 Symbols used in the operating instructions ............................. 7
1.3.2 Symbols on the device ............................................................. 8
1.4 Use of the device ............................................................................ 8
1.4.1 Correct use ............................................................................... 8
1.4.2 Incorrect use: ............................................................................ 9
1.5 Standards and safety regulations ................................................... 9
2. Delivery ................................................................................................. 10
2.1 Standard components ................................................................... 10
2.2 Acceptance inspection .................................................................. 10
2.3 Transport lock and device packaging ........................................... 10
3. Installation ............................................................................................ 11
3.1 Ambient conditions ....................................................................... 11
3.2 Room ventilation ........................................................................... 11
3.3 Correct location ............................................................................. 12
3.4 Installation in line .......................................................................... 12
3.5 Transport ....................................................................................... 13
4. Unit description .................................................................................... 14
4.1 Overall view .................................................................................. 14
4.2 Safety system ............................................................................... 17
4.3 Filter system ................................................................................. 18
4.4 Controls and display ..................................................................... 20
4.5 Sample chamber access .............................................................. 21
4.6 Device interfaces .......................................................................... 22
4.7 Sample chamber illumination ....................................................... 23
4.8 UV lamp unit ................................................................................. 24
4.9 Working area ................................................................................. 24
5. Start-up .................................................................................................. 25
5.1 Initial operation ............................................................................. 25
5.2 Installing unit and accessories ..................................................... 25
5.3 Levelling the cabinet ..................................................................... 27
5.4 Power supply connection ............................................................. 28
5.5 RS 232 interface connection ........................................................ 30
5.6 UV connection .............................................................................. 30
5.7 Installation test .............................................................................. 31
6. Handling and control ........................................................................... 32
6.1 Display .......................................................................................... 32
6.1.1 Functions of the display components ..................................... 32
6.1.2 Display during the calibration routine ..................................... 33
6.1.3 Display in OFF mode .............................................................. 33
6.1.4 Display in work mode ............................................................. 33
6.1.5 Power interruption .................................................................. 33
6.1.6 Display and functions after a power failure ............................ 34
6.1.7 Failure messages ................................................................... 34
6.2 Description of the operating modes ............................................. 35
6.3 Operation system ......................................................................... 37
6.3.1 Basic functions ....................................................................... 37
6.3.2 Moving the front window to the working position ................... 39
6.3.3 Silencing the audible alarm signal ......................................... 39
6.3.4 Switching the illumination on and off ...................................... 40
3Operating Instructions Safety Cabinet Safe 2020 / Maxisafe 2020
Contents
6.3.5 Activating and deactivating the internal power supply ........... 40
6.3.6 Displaying the UV disinfection time ........................................ 40
6.3.7 Activating and deactivating the potential-free contact
(optional) ................................................................................. 40
6.3.8 Switching the cabinet to OFF mode ....................................... 41
6.3.9 Setting the time ....................................................................... 41
6.3.10 Displaying the downflow velocity ........................................... 42
6.3.11 Displaying the operating hours of the HEPA filters ................ 43
6.3.12 Displaying the Performance Factor ........................................ 43
6.3.13 Setting and activating the timer .............................................. 44
6.3.14 Deactivating the timer ............................................................. 45
6.3.15 Setting the UV disinfection time ............................................. 46
6.3.16 Starting the UV disinfection .................................................... 46
6.3.17 Cancelling the UV disinfection ............................................... 47
6.3.18 Activating the stop watch ....................................................... 47
6.4 Pilot switch .................................................................................... 48
6.4.1 Moving the front window ......................................................... 48
6.4.2 Switching the device to OFF mode ........................................ 49
7. Operation .............................................................................................. 50
7.1 Hygiene preparations for the sample chamber ............................ 50
7.2 Preparing the sample chamber .................................................... 50
7.3 Response to failure messages ..................................................... 50
7.4 Work rules ..................................................................................... 51
8. Shut-down ............................................................................................. 52
8.1 Interrupting an operation .............................................................. 52
8.2 Shutting the unit down .................................................................. 52
9. Cleaning and decontamination .......................................................... 53
9.1 Decontamination procedure ......................................................... 53
9.2 Wipe/spray disinfection ................................................................. 53
9.3 UV disinfection after a wipe/spray disinfection ............................ 54
9.3.1 UV disinfection using the integral UV lamps .......................... 54
9.3.2 UV disinfection using a mobile UV device ............................. 55
9.3.3 Changing the UV disinfection time ............................................ 55
9.4 Sterilization with formaldehyde ..................................................... 56
9.5 Cleaning the exterior surfaces ...................................................... 56
9.6 Cleaning the floorpan ................................................................... 56
10. Maintenance ......................................................................................... 57
10.1 Inspection ...................................................................................... 57
10.2 Service .......................................................................................... 57
10.2.1 UV lamps ................................................................................ 57
10.2.2 Sample chamber illumination ................................................. 58
10.2.3 Replacing the front window seal ............................................ 58
10.3 Retrofitting and repairs ................................................................ 59
11. Disposal ................................................................................................ 60
11.1 Disposal procedure ...................................................................... 60
12. Technical data ...................................................................................... 62
13. Device log ............................................................................................. 69
14. Certificate of decontamination ........................................................... 70
4Operating Instructions Safety Cabinet Safe 2020 / Maxisafe 2020
Figures
Fig. 1 Device locations in a room ........................................................... 12
Fig. 2 Lift points ...................................................................................... 13
Fig. 3-a Overall view / model Safe 2020 ................................................... 15
Fig. 3-b Overall view / model Maxisafe 2020 ............................................ 16
Fig. 4-a Filter system with downflow filter and exhaust
air filter / model Safe 2020 ........................................................... 18
Fig. 4-b Filter system with primary filter, downflow filter and exhaust
air filter / model Maxisafe 2020 .................................................... 19
Fig. 5 Controls and indicators ................................................................ 20
Fig. 6-a Access through front cover .......................................................... 21
Fig. 6-b Access through front window ....................................................... 21
Fig. 7-a Supply interfaces .......................................................................... 22
Fig. 7-b Sample chamber illumination ....................................................... 23
Fig. 8 UV lamp unit .................................................................................24
Fig. 9 Working area on the workplate, armrests .................................... 24
Fig. 10-a Stand installation / model Safe 2020 ........................................... 25
Fig. 10-b Stand installation / model Maxisafe 2020 .................................... 26
Fig. 10-c Drain valve installation ................................................................. 27
Fig. 11 RS 232 interface connection ........................................................ 30
Fig. 12 UV connection .............................................................................. 30
Fig. 13 Indicator and operating panel ...................................................... 33
Fig. 14 Indicator and operating panel ...................................................... 37
Fig. 15 Basic functions of the pilot switch ................................................ 48
Fig. 16 Sitting posture .............................................................................. 52
Fig. 17 Front window seal replacement ................................................... 58
5Operating Instructions Safety Cabinet Safe 2020 / Maxisafe 2020
1. General notes
The following are the addresses of the international Thermo
Sales Organisations.
Postal address Germany
Thermo Electron LED GmbH
Robert-Bosch-Straße 1
D - 63505 Langenselbold
Enquiries from Germany:
Phone
Sales 0800 1 536376
Service 0800 1 112110
Fax
Sales/Service 0800 1 112114
E-Mail
info.labequipment.de@thermofisher.com
International enquiries
Tel. + 49 (0) 6184 / 90-6940
Fax + 49 (0) 6184 / 90-6772
E-Mail
info.labequipment@thermofisher.com
1.1 General safety instructions
These safety instructions describe the safety features of the Safe 2020 and
Maxisafe 2020 series.
The safety cabinet has been manufactured in keeping with the latest
technological developments and has been tested before delivery for its correct
function. It may, however, present potential hazards if it is not used according
to the intended purpose or outside of operating parameters. Therefore, the
following procedures must always be observed:
• The safety cabinet must be operated only by trained and authorized personnel.
• For any operation of this unit, the operator must prepare clear and concise
written instructions in the language of the operating and cleaning personnel
based on these operating instructions, applicable safety data sheets, plant
hygiene guidelines, and technical regulations, in particular:
• which decontamination measures are to be applied for the cabinet and
accessories,
• which protective measures apply while specific agents are used,
• which measures are to be taken in the case of an accident.
• Repairs to the device must be carried out only by trained and authorized expert
personnel.
• The contents of the operating instructions are subject to change without
further notice.
• Concerning translations into foreign languages, the German version of these
operating instructions is binding lease.
• Keep these operating instructions close to the unit so that safety instructions
and important information are always accessible.
• Should you encounter problems that are not detailed adequately in these
operating instructions, please contact Thermo Electron LED GmbH
immediately for your own safety.
6Operating Instructions Safety Cabinet Safe 2020 / Maxisafe 2020
1. General notes
1.2 Warranty
Thermo Electron LED GmbH warrant the operational safety and functions of the
safety cabinet only under the condition that:
• the device is operated and serviced exclusively in accordance with its intended
purpose and as described in these operating instructions,
• the device is not modified,
• only original spare parts and accessories that have been approved by Thermo
Electron LED GmbH are used,
• inspections and maintenance are performed at the specified intervals,
• an installation test is performed prior to the initial operation of the device and
that a repeat test is performed on the occasion of all inspections and repairs.
The warranty is valid from the date of delivery of the device to the operator.
1.3 Explanation of symbols
1.3.1 Symbols used in the operating instructions
WARNING!
is used if non-observance may cause serious
or even lethal injuries.
CAUTION!
is used if non-observance may cause medium
to minor injuries or damage.
NOTE
is used for hints and useful information.
RECYCLING!
Valuable raw materials can be reused.
7Operating Instructions Safety Cabinet Safe 2020 / Maxisafe 2020
1. General notes
1.3.2 Symbols on the device
Observe operating instructions (switchbox ceiling)
Biohazard (left device front)
Cytostatic agents (left device front)
Checked safety (right side of device)
T5A note (sample chamber fusing)
RS 232 interface (connection label)
Armrest installation
(right side of light dome)
1.4 Use of the device
1.4.1 Correct use
Model Safe 2020:
The safety cabinet is a laboratory device for installation and operation in
microbiological and biotechnical laboratories of safety levels 1, 2, and 3. It has
been designed as a Class II microbiological safety cabinet, in accordance with
EN 12469 / 2000.
Depending on the hazard level of the agents involved, the operator must
prepare in writing appropriate decontamination procedures for the device and
the accessories used in the sample chamber.
8Operating Instructions Safety Cabinet Safe 2020 / Maxisafe 2020
1. General notes
Model Maxisafe 2020:
The safety cabinet also meets the requirements from DIN 12980 / 2005-06 and
can be used for the production of cytostatic agents.
For cytostatic agent applications, use the lowered one-piece working plate only.
Prior to the initial operation of the cabinet, the operator must perform an
installation test. The test result must be documented by a test report. The
cabinet must only be released for operation if it is in compliance with the
operating parameters specified by Thermo Electron LED GmbH.
After any changes to the installation conditions or after any modification to the
technical system, a repeat test must be performed and the test result must be
documented by a test report that shows that all operating parameters are in
compliance with those specified by Thermo Electron LED GmbH.
1.4.2 Incorrect use:
The safety cabinet must not be used in laboratories that do not comply with the
requirements of safety levels 1, 2, or 3.
The unit must not be operated as a Class II safety cabinet, if:
• no repeat test is performed after changes to the installation conditions or after
modifications to the technical system,
• the alarm system of the device has issued a failure message and the
cause for the failure has not been repaired.
The alarm system must not be tampered with or disabled. If alarm system
components heve been removed or disabled for service or repairs, the unit must
only be released for operation if all alarm system components are functioning
again properly.
The filters installed in the device are not capable of separating gaseous
substances. Therefore, do not work with or store substances in the device:
• which in quantity or concentration are toxic,
• if a reaction with other substances may result in hazardous toxic concentrations
or formation of toxic gases,
• that may form combustible or explosive mixtures in combination with air.
1.5 Standards and safety regulations
The device complies with the safety requirements of the following standards and
guidelines:
• IEC 61010-1 / EN 61010-1
• EN 12469 / 2000
• DIN 12980 / 2005-06 (model Maxisafe 2020 only)
• Low Voltage Directive
• EMC Directive
9Operating Instructions Safety Cabinet Safe 2020 / Maxisafe 2020
2. Delivery
2.1 Standard components
Delivery for the safety cabinet includes the following:
Model Safe 2020:
• safety cabinet,
• drain valve.
Model Maxisafe 2020:
• safety cabinet
• armrests
• stand
All models:
• Device documentation:
— operating instructions,
— factory test report.
Optional components and accessories are listed as separate items in the
delivery document.
2.2 Acceptance inspection
After the device has been delivered, immediately check the device:
• for completeness,
• for possible damage.
If the delivery is incomplete or if you detect any transport damage to the
device, contact the forwarding agency and Thermo Electron LED GmbH
immediately.
2.3 Transport lock and device packaging
Do not transport the device over large distances without transport lock and original
device packaging.
10Operating Instructions Safety Cabinet Safe 2020 / Maxisafe 2020
3. Installation
3.1 Ambient conditions
The operational safety and correct function of the unit depend on the location
where it is to be operated. The safety cabinet must be operated only at
locations that meet the ambient conditions listed below.
Location requirements:
• The electrical system of the device has been designed for an operating height
of up to 2000 m above sea level.
• The mains power supply outlets should be out of normal reach to prevent
accidental shut-off. Ideally, the outlets should be installed above the safety
cabinet.
• The flooring of the location must be adequately strong and not flammable.
• The room in which the device is installed must be of adequately height. For
units not connected to an exhaust system, the distance between the exhaust
air opening and the room ceiling must be at least 200 mm (8 in).
• The location must be equipped with an appropriate ventilation system
(see Section 3.2.).
• The temperature within the room must be between 15 °C and 40 °C
(49 °F and 104 °F).
• The relative humidity in the vicinity of the device must not exceed 90 %.
NOTE - Ambient conditions
If ambient conditions vary from those descri-
bed above, please contact Thermo Electron
LED GmbH for assistance in installing the de-
vice.
NOTE - Temporary storage
If the device is stored only temporarily (up to
four weeks), the ambient temperature may be
between -20 °C and +60 °C (-4 °F and +140 °F)
at a relative air humidity of up to 90 %. For lon-
ger storage periods, the location requirements
apply.
3.2 Room ventilation
The room ventilation should preferably be a ventilation system that complies with
the national requirements for the application.
• The inlet air and exhaust air openings of the room ventilation must be located
so that drafts are prevented from impairing the function of the safety
cabinet air system.
11Operating Instructions Safety Cabinet Safe 2020 / Maxisafe 2020
3. Installation
3.3 Correct location
Choose a draft-free location where the safety cabinet does not
interfere with the room traffic.
Fig. 1: This figure shows preferred locations for safety
cabinets and unsuiable locations, not in accordance with the
safety requirements.
Unsuitable locations: The locations [1], [2], and [3] are not
suitable because they are exposed to drafts from windows and
doors.
Location [5] is undesirable because it is in range of plant traffic
and within the exhaust air range of a ventilation system [4].
Preferred locations [6], [7], and [8] are correct because they
are in a draft-free section of the room and not exposed to plant
traffic.
3.4 Installation in line
When several devices are to be installed in line, please observe
the following:
• Make sure that vibrations cannot be transferred between
adjacent units.
• Exterior surfaces of the cabinets must always be accessible
for cleaning and disinfection. Fig. 1
Locations in a room
12Operating Instructions Safety Cabinet Safe 2020 / Maxisafe 2020
3. Installation
3.5 Transport
Model Safe 2020:
Fig. 2: To prevent tilting, always transport the device using
a suitable carrier, even for a transport within a building, and
separate it from the stand.
CAUTION – Danger of tipping over!
For transport, lift the device only using the lift
points shown in the illustration. Do not load the
floorpan with the weight of the device frame!
CAUTION – Contusion hazard!
When lifting the safety cabinet, never place
fingers or hands under the base of the device!
Model Maxisafe 2020:
If required, the device stand must be removed from the stand
to be reinstalled onto the stand for the initial start-up after the
transport (see Section 5.2).
Fig. 2
Lift points
13Operating Instructions Safety Cabinet Safe 2020 / Maxisafe 2020
4. Unit description
4.1 Overall view
Model Safe 2020:
• Fig. 3a: Plenum assembly [5] with plenum for downflow blower [24] and
plenum for exhaust air blower [2]. The downflow filter and the exhaust air filter
are installed directly to the relevant blower. The exhaust air is released into
the environment around the device through the opening [1].
• At the side of the plenum, the optional media supply lines [25] are routed into
the sample chamber [20].
• Electrical box [4] with power supply cable [3]. An RS 232 connection to a PC
and two fuse holders are installed at the front of the electrical box.
• Front cover [6] with integral, electrically movable front window [7], operated by:
• the pilot switch [26].
The gas struts [22] secure the front cover in the open state.
• The light dome [23] with two tubes is part of the front cover assy.
• Side panels [9] with two sealed access openings [19]. These can be
equipped with media valves [13].
• Internal outlets [10] for power supply of accessories and adapter [11] for mobile
UV device.
• Optional UV lamp unit [8] consisting of two UV lamps per side.
• Optional stands [12], adjustable in height and with fixed height
• Workplate segments [15] with optional arm rests [16]. A one-piece workplate
and special workplates are available options.
• Lockable drain valve [17] for installation into floorpan.
• Display [21] with alarm system indicators.
• Test hoses for the supply unit [18] at the left side of the sample chamber and
for the exhaust unit [14] at the right side of the sample chamber.
NOTE – Test hoses
Do not remove the two test hoses for checking
downflow and exhaust air.
14Operating Instructions Safety Cabinet Safe 2020 / Maxisafe 2020
4. Unit description
Fig. 3a
Overall view / Model Safe 2020
15Operating Instructions Safety Cabinet Safe 2020 / Maxisafe 2020
4. Unit description
Model Maxisafe 2020:
• Fig. 3b: Stand [5] with integral prefilter housing [6].
• Filter inserts [2] for the prefilter housing. The number of supplied filter
inserts depends on the width of the device. To protect from liquid residues,
the filter inserts are oriented slightly sloping from the device backpanel to
form a drain duct to the floorpan [3].
The filter plates [4] have tongues and grooves and are inserted in an
overlapping pattern from right to left.
• Membrane sleeve or opening for filling with aerosol for testing the filter of the
downflow unit [1] at the left side of the sample chamber and of the exhaust
air unit [7] at the right side of the sample chamber.
Fig. 3b
Overall view / Model Maxisafe 2020
16Operating Instructions Safety Cabinet Safe 2020 / Maxisafe 2020
4. Unit description
4.2 Safety system
The safety system comprises a combination of protective and alarm systems
that ensure maximum personal and material protection.
Safety systems:
• Vacuum-sealed air system
A vacuum-sealed air system in combination with HEPA filters for downflow
and exhaust air forms the basis of the safety system for personal and
material protection.
• Personal protection
Air aspired from the exterior along the entire working opening at a constant
high velocity prevents that:
• agents may leak through the working opening of the chamber.
As the exterior air pressure around the unit exceeds the pressure of the
internal air system (vacuum sealing), it is ensured that:
• agents cannot be released to the exterior in the case of a leak in the
cabinet housing.
• Material protection
A steady airflow within the air system ensures that:
• a constant downflow allows the HEPA filters to remove contaminants
so that the samples are always surrounded by ultrapure air,
• harmful particles are not carried over through the sample chamber
(protection from cross-contamination).
• HEPA filters
The downflow (i.e. the air circulating within the device) and the exhaust air
(air that is released to the exterior) are cleaned by HEPA filters (HEPA = High
Efficiency Particulate Air Filter).
For version Maxisafe 2020, a prefiltering system is used to increase the fil-
ter efficiency and to protect the exhaust air and downflow systems.
• Safety lockout
To protect from UV radiation, the optional UV disinfection routine can be run
only if the front opening is closed. During UV disinfection, the front opening
safety lockout is activated and prevents harmful UV radiation from being
emitted from the sample chamber.
Warning system:
• Airflow monitoring
Airflow monitoring determines the velocity of the airflow in the sample chamber
as well as the inflow velocity of the air aspired from the exterior through the
working opening. As soon as airflow velocities move above or below a
specified safety value, a signal is transmitted to the alarm system.
• Visual and audible alarm system
The warning system constantly monitors the safety-relevant device functions:
• Inflow velocity of the air aspired from the exterior,
• downflow velocity,
• working position of the front window.
If the warning system detects changes to one of these device functions, it
issues:
• an audible and a visual alarm signal.
17Operating Instructions Safety Cabinet Safe 2020 / Maxisafe 2020
4. Unit description
• Position monitoring
The position sensors monitor the position of the front
cover as well as the movement of the front window; it will
indicate when the front window is in the working position.
• Performance Factor
The Performance Factor (PER) is a value that indicates the
safety state of the safety cabinet. This value is calculated
from data determined by the safety system and from
values captured empirically by service personnel during
safety checks. This data is entered into a parameter list of
the control software and interconnected. The result can be
indicated by the display.
4.3 Filter system
Model Safe 2020:
Fig. 4a: The filter system consists of two HEPA filters [2] and
[5] for the circulating air and for the exhaust air and of a coarse
filter for the aspired air.
HEPA filters: Room air [10] is drawn into the sample
chamber through the working opening. In the air duct, room
air and the downflow within the chamber [7] are then blended
to make up the blend air [9]. The blend air is then:
• filtered proportionally by the downflow filter [5] and
supplied as ultrapure air [6] evenly into the sample chamber
of the device,
• filtered by the exhaust air filter [2] and released as
ultrapure air [1] to the exterior of the device.
Inlet air protection: The air duct between the sample chamber
and the device plenum has an inlet air protection [8] below the
working surface to prevent coarse particles from entering the
plenum where they may impair blower [3] und [4] and filter
functions.
Fig. 4a
Filter system with downflow
filter and exhaust air filter /
model Safe 2020
18Operating Instructions Safety Cabinet Safe 2020 / Maxisafe 2020
4. Unit description
Model Maxisafe 2020:
Fig. 4b: The filter system consists of a set of HEPA primary
filter [10] (the number of filters depends on the sample chamber
width) and two HEPA filters [2] and [5] for downflow air and
exhaust air.
HEPA primary filter:
The compact size of the filter inserts allows filter replacement
with minimal contamination hazard. The use of the primary filter
protects the downflow and exhaust air filters considerably.
The filter inserts used are HEPA filters of Class H14
(according to DIN EN 1822). Alternatively, activated carbon
filters can be inserted into the housing to protect from smells.
Room air [11] is drawn into the sample chamber through the
working opening. In the air duct above the prefilter, room air
and the downflow within the chamber [7] are then blended to
make up the blend air [8]. The blend air is then:
• aspirated into the prefilter [10], filtered and fed into the air
duct [9].
HEPA filters: From the air duct, the primary filtered air is:
• filtered proportionally by the downflow filter [5] and
supplied as ultrapure air [6] evenly into the sample chamber
of the device,
• filtered by the exhaust air filter [2] and released as ultrapure
air [1] to the exterior of the device.
Fig. 4b
Filter system with primary
filter, downflow filter and
exhaust air filter / model
Maxisafe 2020
19Operating Instructions Safety Cabinet Safe 2020 / Maxisafe 2020
4. Unit description
4.4 Controls and display
Fig. 5: The safety cabinet is equipped with two separate control
elements that operate independently of each other:
• pilot switch [1].
• operating panel [2],
The status indicators of the display [2] indicate control
operations initiated with the control elements.
Pilot switch: Use to control all basic functions required for the
operation.
Operating panel: The operating panel [2] has a display
panel for text or number value output as well as 12 LEDs for
visual indication of the current operating state of the device.
All device functions can be controlled via the keys on the
operator panel.
Fig. 5
Controls and indicators
20Operating Instructions Safety Cabinet Safe 2020 / Maxisafe 2020
4. Unit description
4.5 Sample chamber access
The sample chamber of the device is accessible via two
modes:
Front cover:
Fig. 6a: Manual opening of the front cover [2] allows access
to the complete sample chamber width with an opening height
C. It is generally needed for decontamination and introduction
of larger accessories.
NOTE – Front cover lockout
The front cover is equipped with a safety
lockout and can only be opened when the front
window is completely closed.
Front window:
Fig. 6b: The electrically operated front window [1] is made of
multi-layer safety glass and integral to the front cover frame.
It can be raised to a maximum opening height B (480 mm). To
access the sample chamber during the work process, the front
window must stay in the work position with opening height A Fig. 6a
(200 mm). Access through front cover
CAUTION – Front window movement!
Do not attempt to move the front window
manually as otherwise the motor drive may be
damaged.
Lowering the front window when the device is deenergized:
The safety feature (optional) is backed up by a battery. Should
a power failure occur, the pilot switch (see Section 6.4) can be
used to lower the front window completely.
Fig. 6b
Access through front window
21Operating Instructions Safety Cabinet Safe 2020 / Maxisafe 2020
4. Unit description
4.6 Device interfaces
Fig. 7a: The standard equipment includes the outlets [10] for internal power supply
as well as the openings [8] on both sides for routing of cables and hoses. All other
supply connections are available as options.
Power supply connection: The connection to the power supply system is
achieved through a cable with grounding plug [2] at the rear of the electrical box.
Contact connection: The front of the box has an RS 232 interface [3] for the
connection to a PC as well as two fuse holders for 5A miniature fuses:
[4] for (L),
[5] for (N).
Internal power supply: There are two electrical outlets (5A) [10] and one UV
disinfection adapter (optional) [9] located in the side walls.
Media valves: There are two sealed feed throughs [8] on each side. These may
be used for installation of media valves [7].
Media supply lines: Additionally, media can be supplied into the sample chamber
through three pipes. The inlets [1] are located on top of the housing, the
outlets [6] are placed at the sample chamber backpanel.
Fig. 7a
Supply interfaces
22Operating Instructions Safety Cabinet Safe 2020 / Maxisafe 2020
4. Unit description
Disinfection adapter (optional), Fig. 7a: The disinfection
adapter [9] is used to connect a mobile UV radiation device.
The adapter is connected to the device control, the UV
disinfection routine with a mobile UV device may be controlled
with the remote control.
Media connections (optional): The media supply unit
consists of three pipes that are routed into the sample chamber
through the top of the unit. The inlet connections [1] and
outlet connections [6] with thread (R 3/8"), e.g. for media valves
[7], are preinstalled and equipped with a sealing plug.
The media connections are universal-type connections. Two
equipotential bonding connections are installed at the top of
the unit and at the stand.
Caution – Combustible gas!
If a gas burner is to be operated in the sample
chamber, an appropriate shut-off device for the
gas supply system (shut-off valve, solenoid
valve) must be installed.
Use only laboratory safety burners in the
sample chamber.
External systems: A failure detection systems or gas supply
solenoid valves may be connected to the safety cabinet control.
The unit may also be connected to an external ventilation
system.
4.7 Sample chamber illumination
Fig. 7b: The work space illumination [4] is equipped with two
fluorescent tubes [3] that are installed behind the light dome
[2].
Fig. 7b
Sample chamber illumination
23Operating Instructions Safety Cabinet Safe 2020 / Maxisafe 2020
4. Unit description
4.8 UV lamp unit
Fig. 8: The UV lamp unit consists of two lamp housings [2]
with two UV lamps each [1] that are integral to the side walls.
Both lamp housings are protected by a stainless steel cover
[3].
By cross-radiation of the UV units, all surfaces will be
disinfected as the shadow zone is reduced.
The operating time of the UV lamps is preset.
NOTE – Protection from UV radiation
As a protection from harmful UV radiation, the
UV lamps can only be activated if the front
window is completely closed.
4.9 Working area
The standard equipment comprises the segmented workplate for
the models Safe 2020 and Maxisafe 2020. Special workpla-
tes are available as optional accessories.
The workplates or workplate segments are placed onto the
frame above the sample chamber floorpan using two Fig. 8
submerging wire straps as handles. UV lamp unit
Fig. 9: The working area A for perfect material protection
extends over the entire width B and depth C of the workplate.
The two arm rests [3] are positioned at a distance
D (20 cm) to each other centrically on the workplate [1] or on
the workplate segments. The armrests are installed to the
second perforation line [2] of the workplate.
NOTE – Spilling liquid
(model Maxisafe 2020 only)
If larger quantities of liquid are spilled acciden- Fig. 9
tally while working with the model Maxisafe Working area on the workplate, armrests
2020, the segmented filters installed below the
working surface must be checked, and, if re-
quired, the safe functioning of the device has
to be inspected by qualified service personnel.
24Operating Instructions Safety Cabinet Safe 2020 / Maxisafe 2020
5. Start-up
5.1 Initial operation
Prior to initial operation, the safety cabinet must be subjected
to an installation test. Correct assembly and installation
performed by the operator are essential for good start-up.
Model Maxisafe 2020:
Upon the initial connection to the power supply system, the
device control of version Maxisafe 2020 starts an automatic ca-
libration routine to determine the parameters for the safety sys-
tem of the device.
NOTE – Calibration routine
The calibration routine is no substitite for the
installation check performed by the service
personnel.
5.2 Installing unit and accessories
Model Safe 2020:
Device without stand:
• Place the device without stand onto a sufficiently stable
substructure so that the weight of the device frame does
not rest upon the floorpan.
Device with stand:
To assemble the (optional) stand and to install the device frame
to the stand:
1. Fig. 10a: Slide the two crossmembers [2] onto the retaining
angles [3] of the sidemembers [1]. Secure the crossmembers
to the two sidemembers using the screws [4].
2. To attach the device frame [5] to the stand [7], install four
Allen screws [6] loosely into the corresponding threaded
holes at the underside of the device.
3. Place the safety cabinet [1] onto the stand so that the
Allen screws [6] pass through the corresponding holes [8]
of the retaining tabs [10].
4. Push the device frame [5] in the grooves [9] of the retaining
tabs [10] all the way to the stop.
5. Tighten the four Allen screws [6].
Fig. 10a
Stand installation model
Safe 2020
25Operating Instructions Safety Cabinet Safe 2020 / Maxisafe 2020
5. Start-up
Model Maxisafe 2020:
Fig. 10b: The stand [3] and the prefilter housing form an
assembly. To facilitate the installation of the device frame [1],
the stand is equipped with a lifting mechanism.
The four columns [7] of the stand have threaded rods [6] onto
which the device frame can be placed and lowered.
1. Fig. 10b: Unscrew the threaded rods from their hex disks
[5] by approx. 10 cm and make sure their height is identi-
cal on all four columns.
2. Place the safety cabinet onto the threaded rods. Check to
see whether each guide pin [4] is seated perfectly in its
receptacle at the lower device frame.
3. Screw in each threaded rod at its column in short, even
intervals all the way to the stop of the hex disk.
NOTE – Leveling the device
To level the device, do not use the lifting
mechanism but only the adjustable stands of
the device.
4. Align the working area of the safety cabinet:
Place a bubble level onto the workplate and rotate the stands
[2] of the stand using a 24-mm wrench until the workplate is
exactly horizontal in all directions. For the vertical alignment
of the device stands, proceed from left to right and from rear
to front.
Fig. 10b
Stand installation model
Maxisafe 2020
26Operating Instructions Safety Cabinet Safe 2020 / Maxisafe 2020
5. Start-up
Drain valve (optional)
Fig. 10c: The drain valve [2] is installed into the floorpan
opening [1] at the floor at the left front area of the sample
chamber.
NOTE – Installation
The optional drain valve must be installed only
by authorized service personnel.
WARNING – Drain valve lock!
To prevent contaminated liquid from being
accidentally drained from the floorpan, the
drain valve must be secured using a
conventional padlock.
5.3 Levelling the cabinet
The cabinet should be levelled only after it has been
positioned.
1. Remove transport protection (foil) from the workplate or from
the workplate segments.
2. Lift the workplate or the workplate segments by the wire
hooks and place it/them onto the front and rear rails in the
sample chamber with the wide line of holes facing forward.
3. Device without stand: Place a bubble level onto the
workplate and align the substructure until the bubble level
indicates an exactly horizontal position in all directions.
4. Device with stand: Place a bubble level onto the
workplate and use the four levellers of the stand to effect
a level state in all planes.
When adjusting the device stand height, proceed from right
to left and from rear to front.
Fig. 10c
Drain valve installation
27Operating Instructions Safety Cabinet Safe 2020 / Maxisafe 2020
5. Start-up
5.4 Power supply connection
WARNING – High voltage!
Contact with current-carrying components may
cause a lethal electric shock.
Before connecting the device to the power
supply system, check plug and power supply
cable for possible damage.
Do not use damaged components to connect
the device to the power supply system!
Establishing the power supply connection:
1. Before connecting the device to the power supply system, check to see if the
voltage of the outlet corresponds with the specifications on the nameplate
of the device. If the ratings given for voltage (V) and maximum current (A)
are not correct, the device must not be connected to the power supply
system.
2. Connect the grounding plug of the device to a properly grounded and fused
outlet.
• The outlet must be fused separately using a fusible link T 16 A or using
a circuit breaker B 16.
3. Make sure that the power supply line is not subjected to tensile or compressive
force.
Installation of the power supply connection:
To protect against accidental switch-off, the outlets for the connection to the power
supply must be located outside the normal hand reaching range and must be
accessible only to auhorized personnel. Ideally, the outlets should be installed
above the safety cabinet.
Connecting the equipotential bonding:
If the sample chamber is supplied with media (gas, water, etc.), the on-site
equipotential bonding must be connected to one of the premounted threaded
bushings either at the top of the housing or at the stand.
Initialization routine:
After the unit has been connected to the power supply system, the device control
runs through a start-up initialization routine and switches the functions to the OFF
mode. The safety cabinet is now operational and can be operated using the
operating panel or the pilot switch
Presetting the alarm limits upon initial operation, Maxisafe 2020:
NOTE – Presetting the alarm linits
The alarm limits must be set only upon the
initial operation of the device.
28Operating Instructions Safety Cabinet Safe 2020 / Maxisafe 2020
5. Start-up
After the initialization routine has been completed, the calibration routine is run
(only Maxisafe 2020):
• The display shows "CAL".
• The routine starts automatically when the device control is in the work mode
(sees Section 6.2) and runs for approx 30 minutes. If the airflow is disturbed
during the run time, the routine is cancelled and restarted automatically.
• At the end of the routine, the determined parameters for the alarm limits are
saved.
NOTE – Initial operation
According to applicable national standards
and regulations, the calibration routine is no
substitute for a start-up performed by an
authorized service technician.
Setting the clock:
After the initialization routine has been run, the clock should be set to the
appropriate time zone (see Section 6, Operation).
NOTE – Power supply connection
The safety cabinet should remain connected
to the power supply system at all times to
ensure that settings for the individual unit
configuration remain active in the memory. If
the power supply is interrupted for more than
5 minutes, the time must be reset correctly.
After the power supply connection has been
reestablished, the system switches to the
operating mode that had been active last.
29Operating Instructions Safety Cabinet Safe 2020 / Maxisafe 2020
5. Start-up
5.5 RS 232 interface connection
The RS 232 interface has been designed for a cable connection
with 9-pin connectors and a contact assignment of 1:1.
Connection of the device:
1. Turn PC off.
2. Fig. 11: Connect the connector of the serial interface
cable (not comprised in the scope of delivery) to the
socket [1] at the supply interface at the front of the
electrical box.
3. Connect the serial interface cable to an unassigned
slot COM 1/COM 2 etc. at the PC.
4. Turn PC on.
Transfer protocol:
The interface must be configured as follows:
Baud: 9600 Fig. 11
Data bits: 8 RS 232 interface connection
Parity: none
Stop bit: 1
Protocol: none
FIFO–puffer(extended modulation): enabled
Occupancy of conductors:
Type of connector [X] : 9-Pin SUB-D
Pin 2: TxD
Pin 3: RxD
Pin 5: GND
5.6 UV connection
Fig. 12: UV disinfection adapter (optional) for an external UV
disinfection unit.
Voltage: 230 V
Current: max. 1,1 A
Connectors: [1], [2], [3] and PE-sign
Fig. 12
UV connection
30Operating Instructions Safety Cabinet Safe 2020 / Maxisafe 2020
5. Start-up
5.7 Installation test
Do not operate the device before the installation test has been completed.
• The installation inspection of the device must be conducted in accordance
with EN 12469 and additionally according to DIN 12980 for Maxisafe 2020.
The cabinet may be operated as a Class II microbiological safety cabinet,
in accordance with EN 12469 / 2000, if the device functions or function patterns
listed below were checked and if the test results are within the safety value
tolerances specified in Annex F:
• Electrical safety test
• Inflow velocity test
• Downflow velocity test
• Leakage test of HEPA filters
• Airflow control test
• A repeat test must also be performed after repairs to the device or after
major changes (more than 5 cm) to the location of the device.
• The operator must prepare a test report or request a written test report from
the authorized test service.
NOTE – Safety warranty
The operational safety of the device,
particularly the personal and material
protection, are guaranteed only if all safety
functions of the device have been tested and
approved.
Thermo Electron LED GmbH will not warrant
the operational safety if the device is operated
without performance of the required
installation test or if the installation test and
repeat test are not performed by adequately
trained and authorized personnel!
NOTE – Device hygiene
The initial start-up with subsequent installation
test does not include any decontamination
measures. For operation in the work process,
the sample chamber of the device and the
accessories required for the work process
must be disinfected and cleaned in accordance
with the hygiene guidelines set forth for the
application.
31Operating Instructions Safety Cabinet Safe 2020 / Maxisafe 2020
6. Handling and control
6.1 Display
Fig. 13: The display in the light dome is used as indicator and output instrument
for:
• status messages,
• parameter input and output.
6.1.1 Functions of the display components
[1] Display segment for numbers and text
Value displays
The LEDs 2-5 illuminate when the corresponding value is called up:
[2] Display time (yellow LED), usually the active standard display
[3] Display downflow velocity (yellow LED)
[4] Operating hours after last filter replacement (yellow LED)
[5] Display Performance Factor (yellow LED)
Keys
[6] Potential-free contact for solenoid
[7] Set time
[8] Move window up
[9] Switch internal outlet on/off (the LED [17] indicates that voltage is applied)
[10] Move window down
[11] Switch UV disinfection on/off (the yellow LED indicates that the UV
disinfection routine has been activated; if the optional UV lamp is not installed,
the function of this key is disabled).
[12] Switch device on/off (switch-off only in stand-by mode, see Chapter 6.3)
[13] Toggle display: Time, downflow velocity, operating hours, performance factor
[14] Switch work space illumination on/off
Function displays
The LEDs 15 - 18 illuminate only when the corresponding value is called up:
[15] Ventilation reduced (yellow LED)
[16] Potential-free contact activated (yellow LED)
[17] Internal power supply activated (yellow LED)
[18] UV disinfection routine activated (yellow LED)
Status displays
The LEDs 19/20 and 21/22 show the operating condition of the device as
either/or conditions:
[19] Front window is not in working position (red LED)
[20] Front window is in working position (green LED)
[21] Airflow is not steady (red LED)
[22] Airflow is steady (green LED)
32Operating Instructions Safety Cabinet Safe 2020 / Maxisafe 2020
6. Handling and control
Fig. 13
Indicator and operating panel
6.1.2 Display during the calibration routine
The routine runs for approx 30 minutes. During this time, the display shows
alternatingly cal and the descending time value. If the calibration routine
cannot be started due to faults, the display shows cal permanently.
6.1.3 Display in OFF mode
In the OFF mode, the display shows the current time.
For the initial start-up of the device, the clock must be set to the correct time zone
and to the corresponding time output (CET mode or AM/PM mode)
(see Section 6.3.9).
6.1.4 Display in work mode
In the work mode, the display shows the values of the device data that had been
shown last (see Section 6.3.9.ff):
• Time (hours and minutes)
• Downflow velocity
• Operating hours after last filter replacement
• Performance Factor
6.1.5 Power interruption
If the master PCB of the device detects a power failure or a failure of the
power supply, a warning is issued.
Note – Power failure warning
In case of a power failure, the display goes off
after 10 seconds, then an audible alarm signal
sounds for about 30 seconds.
After this warning, the device is no longer
operative.
33Operating Instructions Safety Cabinet Safe 2020 / Maxisafe 2020
6. Handling and control
The battery operation safety feature (optional) allows the complete lowering of
the front window after a power failure by pressing the pilot switch.
6.1.6 Display and functions after a power failure
After the power supply has been reestablished after a power failure, the display
shows the values and functions that were last shown prior to the failure.
The functions that had been selected last will be continued where they had been
interrupted.
6.1.7 Failure messages
Failure messages are shown on the display as text/number combinations with
the codes ER 1 to ER 5. If one of these codes appears on the display, contact
Technical Service immediately.
Error code Fault cause
ER 1 Pressure sensor 1 / supply
ER 2 Pressure sensor 2 / exhaust
ER 4 BUS error
ER 5 RAM error
34Operating Instructions Safety Cabinet Safe 2020 / Maxisafe 2020
6. Handling and control
6.2 Description of the operating modes
The following operating modes exist for the device:
• Calibration mode (after initial start-up,
version Maxisafe 2020)
• OFF mode
• Work mode
• Window open mode
• Standby mode
• UV mode
OFF mode: The device is at "idle". Utilized for charging the sample chamber
or for cleaning and disinfection, the front cover can be opened when the front
window is completely closed.
• The air system blowers are switched off.
• The sample chamber illumination is available.
• The internal power supply within the sample chamber is available:
• If the internal power supply is activated, the yellow status indicator
INTERNAL POWER SUPPLY ACTIVATED is illuminated.
• The display shows the time. If the timer has been activated, the display
alternately shows the current time and the preset switching time for the
timer.
• The contact for the external device connection is not available.
Work mode: Ensures personal and material protection. In this operating mode,
the work process is run within the sample chamber. The device is in the work
mode when the front window has been moved into the working position and the
airflow is steady.
• The front window is in the working position:
• The green status indicator FRONT WINDOW IS IN WORKING POSITION is
illuminated.
• No audible alarm signal.
• The air system blowers are switched on to ensure steady airflow:
• The green status indicator AIRFLOW STEADY is illuminated.
• The sample chamber illumination is available.
• The power supply for the sample chamber outlets is available:
• If the internal power supply is ON, the yellow status indicator INTERNAL
POWER SUPPLY ACTIVATED is illuminated.
• The monitor-contact for the external device connection is available:
• If the contact is activated, the yellow status indicator POTENTIAL-FREE
CONTACT ACTIVATED is illuminated.
• The display can show values for: Operating hours, downflow velocity, and
exhaust airflow velocity.
Window open mode: Designates the condition when the window is open and
located outside the working position. To install and remove accessories, the front
window can be opened or moved upwards.
• The airflow system blowers are switched on:
• The red status indicator AIRFLOW NOT STEADY Is illuminated.
• The front window is not in the working position:
• The red status indicator FRONT WINDOW NOT IN WORKING POSITION is
illuminated.
• The work space illumination is operational.
35You can also read


