Visium Spatial Gene Expression Reagent Kits
←
→
Page content transcription
If your browser does not render page correctly, please read the page content below
CG000239 Rev F

USER GUIDE

Visium
Spatial Gene Expression
Reagent Kits

FOR USE WITH

Visium Spatial Gene Expression Slide & Reagent Kit, 16 rxns PN-1000184
Visium Spatial Gene Expression Slide & Reagent Kit, 4 rxns PN-1000187
Visium Gateway Package, 2 rxns PN-1000316
Visium Gateway Slide, 2 rxns PN-1000317
Visium Accessory Kit, PN-1000194
Dual Index Kit TT Set A, 96 rxns PN-1000215

10xGenomics.com
Notices

Notices        Document Number
               CG000239 • Rev F

               Legal Notices
               © 2021 10x Genomics, Inc (10x Genomics). All rights reserved. Duplication and/or reproduction of all or
               any portion of this document without the express written consent of 10x Genomics, is strictly forbidden.
               Nothing contained herein shall constitute any warranty, express or implied, as to the performance of any
               products described herein. Any and all warranties applicable to any products are set forth in the applicable
               terms and conditions of sale accompanying the purchase of such product. 10x Genomics provides no
               warranty and hereby disclaims any and all warranties as to the use of any third-party products or protocols
               described herein. The use of products described herein is subject to certain restrictions as set forth in the
               applicable terms and conditions of sale accompanying the purchase of such product. A non-exhaustive
               list of 10x Genomics’ marks, many of which are registered in the United States and other countries can
               be viewed at: www.10xgenomics.com/trademarks. 10x Genomics may refer to the products or services
               offered by other companies by their brand name or company name solely for clarity, and does not claim any
               rights in those third party marks or names. 10x Genomics products may be covered by one or more of the
               patents as indicated at: www.10xgenomics.com/patents. The use of products described herein is subject
               to 10x Genomics Terms and Conditions of Sale, available at www.10xgenomics.com/legal-notices, or such
               other terms that have been agreed to in writing between 10x Genomics and user. All products and services
               described herein are intended FOR RESEARCH USE ONLY and NOT FOR USE IN DIAGNOSTIC PROCEDURES.

               Licensed Software Updates Warranties

               Updates to existing Licensed Software may be required to enable customers to use new or existing products.

               Support
               Email: support@10xgenomics.com
               10x Genomics
               6230 Stoneridge Mall Road
               Pleasanton, CA 94588 USA

Click to TOC   Visium Spatial Gene Expression Reagent Kits User Guide • Rev F                                      2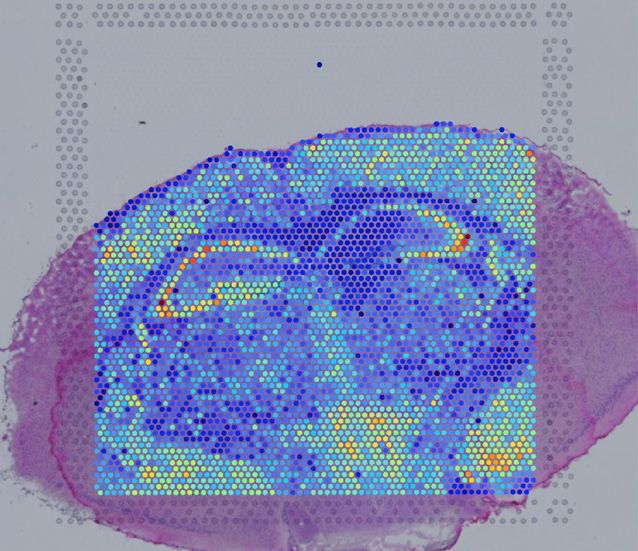
Document        Document Number              CG000239
Revision
Summary         Title
                                             Visium Spatial Gene Expression Reagent Kits -
                                             User Guide

                Revision                     Rev F

                Revision Date                January 2022

                Specific Changes:
                • Added additional recommended pipette tips on page 14.
                General Changes:
                • Updated for general minor consistency of language and terms throughout.

 Click to TOC   Visium Spatial Gene Expression Reagent Kits User Guide • Rev F               3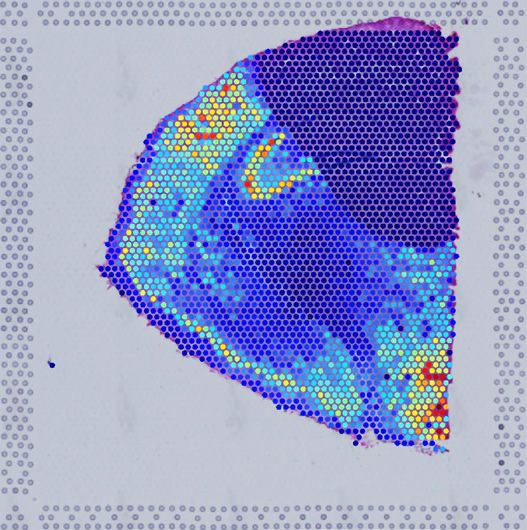
TOC

Table of Contents
Introduction										 6
Visium Spatial Gene Expression Reagent Kits                                   7
Visium Gateway Gene Expression Reagent Kits                                   9
10x Genomics Accessories								                                             10
Recommended Thermal Cyclers                                                  10
Recommended Real Time qPCR Systems							                                    10
Additional Kits, Reagents & Equipment                                        12
Protocol Steps & Timing                                                      15
Stepwise Objectives                                                          16

Tips & Best Practices									 19
Sample Preparation, Fixation & Staining Guidelines				 30
Tissue Optimization Guidelines							 33
Step 1					                                            34
Permeabilization & Reverse Transcription 					 36
1.1 Tissue Permeabilization									 37
1.2 Reverse Transcription 									 38

Step 2											 39
Second Strand Synthesis & Denaturation					 40
2.1 Second Strand Synthesis									 41
2.2 Denaturation 										 42

Step 3											 43
cDNA Amplification & QC 							 44
3.1 Cycle Number Determination – qPCR								                                45
3.2 cDNA Amplification 										                                            46
3.3 cDNA Cleanup – SPRIselect									                                       47
3.4 cDNA QC & Quantification									                                        48

            Visium Spatial Gene Expression Reagent Kits User Guide • Rev F        4
TOC

Step 4											49
Visium Spatial Gene Expression Library Construction			 50
4.1 Fragmentation, End Repair & A-tailing							                                         52
4.2 Post Fragmentation End Repair & A-tailing Double Sided Size Selection – SPRIselect		 53
4.3 Adaptor Ligation										 54
4.4 Post Ligation Cleanup – SPRIselect								                                           55
4.5 Sample Index PCR										 56
4.6 Post Sample Index PCR Double Sided Size Selection – SPRIselect				                   57
4.7 Post Library Construction QC									 58

Sequencing										59
Troubleshooting										 62
Appendix											 66
Post Library Construction Quantification                                                67
Agilent TapeStation Traces                                                              68
LabChip Traces                                                                          69
Oligonucleotide Sequences                                                               70

                     Visium Spatial Gene Expression Reagent Kits User Guide • Rev F           5
Introduction
Visium Spatial Gene Expression Reagent Kits
Visium Gateway Gene Expression Reagent Kits
10x Genomics Accessories
Recommended Thermal Cyclers
Recommended Real Time qPCR Systems
Imaging System Recommendations
Additional Kits, Reagents & Equipment
Protocol Steps & Timing
Stepwise Objectives

 Click to TOC         Visium Spatial Gene Expression Reagent Kits User Guide • Rev F   6
Introduction

Visium Spatial Gene Expression Reagent Kits

Visium Spatial Gene Expression Slide & Reagent Kit, 16 rxns PN-1000184

          Visium Spatial Gene Expression Reagent Kit,                                   Library Construction Kit,
              16 rxns PN-1000186 (store at −20°C)                                 16 rxns PN-1000190 (store at −20°C)
           Visium
           Spatial Gene Expression                                              Library Construction Kit
           Reagent Kit                            #      PN
                                                                                                               #   PN
                    Permeabilization Enzyme 1 2000214                                   Fragmentation Buffer   1 2000091
                    RT Reagent                        1 2000086                         Fragmentation Enzyme   1 2000090
                    RT Enzyme D                       1 2000216
                                                                                        Ligation Buffer        1 2000092
                    Template Switch Oligo             2 3000228
                                                                                        DNA Ligase             1 220110
                    Reducing Agent B                  1 2000087
                                                                                        Adaptor Oligos         1 2000094
                    Second Strand Primer              1 2000217
                                                                                        Amp Mix                1 2000047
                    Second Strand Enzyme              1 2000218
                    Second Strand Reagent             1 2000219
                    cDNA Primers                      1 2000089
                    Amp Mix                           1 2000047

                10xGenomics.com                                                 10xGenomics.com

          Visium Spatial Gene Expression Slide Kit, 16 rxns PN-1000185
          (store at ambient temperature)
                        Visium
                        Spatial Gene Expression Slide Kit                           #                   PN
                             Visium Spatial Gene Expression Slide                   4                2000233
                             *Visium Slide Seals, 40-pack                           1                2000284
                             or 20-pack                                                              3000279
                             Visium Slide Cassette & Gasket, 4-pack                 1                2000282

                   10xGenomics.com

                            *Visium Slide Seals may come in varying configurations in different lots.

 Click to TOC                        Visium Spatial Gene Expression Reagent Kits User Guide • Rev F                            7
Introduction

Visium Spatial Gene Expression Reagent Kits

Visium Spatial Gene Expression Slide & Reagent Kit, 4 rxns PN-1000187

          Visium Spatial Gene Expression Reagent Kit,                                   Library Construction Kit,
               4 rxns PN-1000189 (store at −20°C)                                  4 rxns PN-1000196 (store at −20°C)
           Visium
           Spatial Gene Expression                                              Library Construction Kit
           Reagent Kit                            #      PN
                                                                                                               #   PN
                    Permeabilization Enzyme 1 2000214                                   Fragmentation Buffer   1 2000091
                    RT Reagent                        1 2000086                         Fragmentation Enzyme   1 2000104
                    RT Enzyme D                       1 2000227
                                                                                        Ligation Buffer        1 2000092
                    Template Switch Oligo             1 3000228
                                                                                        DNA Ligase             1 220131
                    Reducing Agent B                  1 2000087
                                                                                        Adaptor Oligos         1 2000094
                    Second Strand Primer              1 2000217
                    Second Strand Enzyme              1 2000183
                    Second Strand Reagent             1 2000219
                    cDNA Primers                      1 2000089
                    Amp Mix                           1 2000103

                10xGenomics.com                                                 10xGenomics.com

          Visium Spatial Gene Expression Slide Kit, 4 rxns PN-1000188
          (store at ambient temperature)
                        Visium
                        Spatial Gene Expression Slide Kit                           #                   PN
                             Visium Spatial Gene Expression Slide                   1                2000233
                             *Visim Slide Seals, 12-pack                            1                2000283
                             or 5-pack                                                               3000279
                             Visium Slide Cassette & Gasket, 1-pack                 1                2000281

                   10xGenomics.com

                            *Visium Slide Seals may come in varying configurations in different lots.

 Click to TOC                        Visium Spatial Gene Expression Reagent Kits User Guide • Rev F                            8
Introduction

Visium Gateway Reagent Kits

Visium Gateway Package*, 2 rxns PN-1000316
Visium Gateway Slide, 2 rxns PN-1000317
*Contains Tissue Optimization reagents (PN-1000313 and PN-1000314) not used in this protocol.

            Visium Gateway Gene Expression Reagent Kit,                                  Library Construction Kit,
                    PN-1000315 (store at −20°C)                                     4 rxns PN-1000196 (store at −20°C)
              Visium
              Gateway Gene Expression                                             Library Construction Kit
              Reagent Kit                            #     PN
                                                                                                                #   PN
                      Permeabilization Enzyme 1 2000214                                  Fragmentation Buffer   1 2000091
                      RT Reagent                         1 2000086                       Fragmentation Enzyme   1 2000104
                      RT Enzyme D                        1 2000227
                                                                                         Ligation Buffer        1 2000092
                      Template Switch Oligo              1 3000228
                                                                                         DNA Ligase             1 220131
                      Reducing Agent B                   1 2000087
                                                                                         Adaptor Oligos         1 2000094
                      Second Strand Primer               1 2000217
                      Second Strand Enzyme               1 2000183
                      Second Strand Reagent              1 2000219
                      cDNA Primers                       1 2000089
                      Amp Mix                            1 2000103

                  10xGenomics.com                                                10xGenomics.com

             Visium Gateway Gene Expression Slide Kit, PN-1000312
             (store at ambient temperature)
                          Visium
                          Gateway Gene Expression Slide Kit                          #                PN
                               Visium Gateway Gene Expression Slide                  1                2000363
                               Visium Slide Seals, 5-pack                            1                3000279
                               Visium Slide Cassette & Gasket, 1-pack                1                2000281

                     10xGenomics.com

 Click to TOC                          Visium Spatial Gene Expression Reagent Kits User Guide • Rev F                           9
Introduction

Dual Index Kit TT Set A, 96 rxns PN-1000215 (store at −20°C)
                                    Dual Index Kit TT Set A

                                                                              #   PN
                                        Dual Index Plate TT Set A             1 3000431

10x Genomics           Product                                          Part Number (Kit)        Part Number (Item)
Accessories
                       Thermocycler Adaptor                                                            3000380

                       Visium Spatial Imaging Test Slide                                               2000235
                                                                              1000194
                       10x Magnetic Separator                                                           230003

                       Slide Alignment Tool                                                            3000433

Recommended             Supplier              Description                         Part Number
Thermal Cyclers
                        Bio-Rad               C1000 Touch Thermal Cycler          1851197
                                              with 96-Deep Well Reaction
                                              Module

                        Eppendorf             MasterCycler Pro                    North America 950030010
                                              (discontinued)                      International 6321 000.019

                        Thermo Fisher         Veriti 96-Well Thermal Cycler       4375786
                        Scientific            (discontinued)

Recommended             Supplier              Description                         Part Number
Real Time qPCR
Systems                 Applied               QuantStudio 12K Flex system         4471087
                        Biosystems

                        Bio-Rad               CFX96 Real-time System              1855096

 Click to TOC          Visium Spatial Gene Expression Reagent Kits User Guide • Rev F                              10
Introduction
Imaging System The imaging systems listed below were used by 10x Genomics. Any equivalent system
Recommendations with the listed features may be used for imaging. Hardware compatibility may be tested
by using the Visium Spatial Imaging Test Slide. Consult the Visium Spatial Gene
Expression Imaging Guidelines Technical Note (CG000241) for more information.
Imaging Systems & Specifications
Microscopes (Any equivalent system with the listed features may be used for imaging)
Nikon Nikon Eclipse Ti2 with brightfield and fluorescence capacity (TRITC)
Molecular Devices ImageXpress Nano Automated Slide Imaging System
Hamamatsu NanoZoomer S60
Keyence Keyence BZX800
BioTek Cytation 7
Thermo Fisher Scientific EVOS M7000
Leica DMi8
Leica
Versa 8
Microscope Features
• 4X (Plan APO λ; NA 0.20)
Objectives • 10X (Plan APO λ; NA 0.45)
• 20X (Plan APO λ; NA 0.75)
Automated Scanning Microscope tile scanning functionality is required for imaging tissue
Stage sections placed on a Capture Area of a Visium Spatial slide.
• Color camera (3 x 8 bit, 2,424 x 2,424 pixel resolution)
Brightfield
• White balancing functionality
Features
• Minimum Capture Resolution 2.18 �m/pixel
(for H&E staining only)
• Exposure times 2-10 milli sec
• Light source (or equivalent) with a wavelength range of 380-680 nm
• Monochrome camera (14 bit, 2,424 x 2,424 pixel resolution)
• DAPI filter cube (Excitation 392/23, Emission 447/60)
• Cy5 filter cube (Excitation 618/50, Emission 698/70)
Fluorescence Features* • TRITC filter cube (Excitation 542/20, Emission 620/52)
(required for Immunofluorescence Staining & Tissue Optimization protocols
only)
• Minimum Capture Resolution 2.18 �m/pixel
• Exposure times 100 milli sec-2 sec
* Only required for Visium Spatial Tissue Optimization protocol & Visium Imaging Test Slide verification and if
performing Immunofluorescence Staining prior to Tissue Optimization and Gene Expression protocols.
Additional Specificati
ifications
Image Format Save image as a tiff (preferred) or jpeg
Computer Computer with sufficient power to handle large images (0.5-5 GB)
Image stitching software
Software
(microscope’s software or equivalent, like Image J)
Image Capture Guidelines: The 8 mm x 8 mm area that includes the fiducial frame and the
Capture Area with the tissue section should be represented by ≥2,000 x 2,000 pixel portion of
the image. When setting the microscope for imaging individual Capture Area, the imaging area
should be ~1-2 mm beyond the fiducial frame for optimal imaging alignment. Minimize imaging
of any adjacent CaptureArea/s when taking images of a specific Capture Area with a tissue
section. For lossy compression, such as jpeg, the quality level should be kept high enough to
represent the fiducial frame crisply and without artifact.
Click to TOC Visium Spatial Gene Expression Reagent Kits User Guide • Rev F 11Introduction
Additional Kits, The items in the table below have been validated by 10x Genomics and are highly
Reagents & recommended for the Visium Spatial Reagent Kits protocols. Substituting materials may
Equipment adversely affect system performance. This list does not include standard laboratory
equipment such as water baths, centrifuges, vortex mixers, pH meters, freezers etc.
Supplier Description Part Number (US)
Plastics
Eppendorf PCR Tubes 0.2 ml 8-tube strips 951010022
DNA LoBind Tubes, 1.5 ml 022431021
DNA LoBind Tubes, 2.0 ml (when processing more than 2 slides) 022431048
Choose either Eppendorf,
USA Scientific TempAssure PCR 8-tube strip 1402-4700
USA Scientific or Thermo
Thermo Fisher Scientific MicroAmp 8-Tube Strip, 0.2 ml Fisher Scientific PCR 8-tube N8010580
MicroAmp 8 -Cap Strip, clear strips. N8010535
Simport Scientific LockMailer Tamper Evidence Slide Mailer 22-038-399
(alternatively, use a 50-ml centrifuge tube)
Corning Self-Standing Polypropylene Centrifuge Tubes (50 ml), sterile 430921
Bio-Rad Hard-shell PCR Plates 96-well, thin wall (pkg of 50) HSP9665
(alternatively, use any compatible PCR Plate)
Microseal ‘B’ PCR Plate Sealing Film, adhesive MSB1001
(alternatively, use any PCR Plate sealing adhesive)
VWR Divided Polystyrene Reservoirs 41428-958
Kits & Reagents
Thermo Fisher Scientific Nuclease-free Water AM9937
Low TE Buffer (10 mM Tris-HCl pH 8.0, 0.1 mM EDTA) 12090-015
Tris 1M, pH 7.0, RNase-free AM9850G
Shandon ColorFrost Plus Slides 25 x 75 x1 mm 6776214
(Optional)
Fisher Chemical Hydrochloric Acid Solution, 0.1N SA54-1
Roche
(US, some Canadian Provinces)
KAPA SYBR FAST qPCR Master Mix (2X) KK4600
Millipore Sigma
(Europe, Asia, & some Canadian
Provinces)
B23318
Beckman Coulter SPRIselect Reagent Kit
Click to TOC Visium Spatial Gene Expression Reagent Kits User Guide • Rev F 12Introduction
Additional Kits, The items in the table below have been validated by 10x Genomics and are highly
Reagents & recommended for the Visium Spatial Reagent Kits protocols. Substituting materials may
Equipment adversely affect system performance. This list does not include standard laboratory
equipment such as water baths, centrifuges, vortex mixers, pH meters, freezers etc.
Supplier Description Part Number (US)
Kits & Reagents
Millipore Sigma Ethanol, Pure (200 Proof, anhydrous) E7023-500ML
Potassium Hydroxide Solution, 8M P4494-50ML
SSC Buffer 20X Concentrate S66391L
Qiagen Qiagen Buffer EB 19086
- Ultrapure/Milli-Q water (from Milli-Q Integral Ultrapure Water System or equivalent)
Equipment
VWR VWR Mini Centrifuge 76269-064
(alternatively, use any equivalent mini centrifuge)
Quantification & Quality Control
Agilent 2100 Bioanalyzer Laptop Bundle (discontinued) G2943CA
(Replacement 2100 Bioanalyzer Instrument/2100 Expert Laptop Bundle) G2939BA/2953CA
High Sensitivity DNA Kit 5067-4626
4200 TapeStation Choose Bioanalyzer, G2991AA
High Sensitivity D1000 ScreenTape/Reagents TapeStation or 5067-5584/ 5067-5585
High Sensitivity D5000 ScreenTape/Reagents Lab Chip based 5067-5592/ 5067-5593
on availability &
PerkinElmer LabChip GX Touch HT Nucleic Acid Analyzer CLS137031
preference.
DNA High Sensitivity Reagent Kit CLS760672
KAPA Biosystems KAPA Library Quantification Kit for Illumina Platforms KK4824
Click to TOC Visium Spatial Gene Expression Reagent Kits User Guide • Rev F 13Introduction
Recommended 10x Genomics recommends using only validated emulsion-safe pipette tips for all Single
Pipette Tips Cell protocols. Rainin pipette tips have been extensively validated by 10x Genomics and
are highly recommended for all single cell assays. If Rainin tips are unavailable, any of the
listed alternate pipette tips validated by 10x Genomics may be used.
Supplier Description Part Number (US)
Recommended Pipettes & Pipette tips
Rainin Pipettes
Pipet-Lite Multi Pipette L8-50XLS+ 17013804
Pipet-Lite Multi Pipette L8-200XLS+ 17013805
Pipet-Lite Multi Pipette L8-10XLS+ 17013802
Pipet-Lite Multi Pipette L8-20XLS+ 17013803
Pipet-Lite LTS Pipette L-2XLS+ 17014393
Pipet-Lite LTS Pipette L-10XLS+ 17014388
Pipet-Lite LTS Pipette L-20XLS+ 17014392
Pipet-Lite LTS Pipette L-100XLS+ 17014384
Pipet-Lite LTS Pipette L-200XLS+ 17014391
Pipet-Lite LTS Pipette L-1000XLS+ 17014382
Pipette Tips
Tips LTS 200UL Filter RT-L200FLR 30389240
Tips LTS 1ML Filter RT-L1000FLR 30389213
Tips LTS 20UL Filter RT-L10FLR 30389226
Alternate Recommendations (If Rainin pipette tips are unavailable, any of the listed pipette tips may be used)
Eppendorf Pipettes
Eppendorf Research plus, 8-channel, epT.I.P.S. Box, 0.5 – 10 µL 3125000010
Eppendorf Research plus, 8-channel, epT.I.P.S. Box, 10 – 100 µL 3125000036
Eppendorf Research plus, 8-channel, epT.I.P.S. Box, 30 – 300 µL 3125000052
Eppendorf Research plus, 1-channel, epT.I.P.S.® Box, 0.1 – 2.5 µL 3123000012
Eppendorf Research plus, 1-channel, epT.I.P.S.® Box, 0.5 – 10 µL 3123000020
Eppendorf Research plus, 1-channel, epT.I.P.S.® Box, 2 – 20 µL 3123000039
Eppendorf Research plus, 1-channel, epT.I.P.S.® Box, 2 – 200 µL 3123000055
Eppendorf Research plus, 1-channel, epT.I.P.S.® Box, 100 – 1000 µL 3123000063
Pipette Tips (compatible with Eppendorf pipettes only)
ep Dualfilter T.I.P.S., 2-20 µL 0030078535
ep Dualfilter T.I.P.S., 2-200 µL 0030078551
ep Dualfilter T.I.P.S., 2-1,000 µL 0030078578
Labcon* ZAP SLIK 20 µL Low Retention Aerosol Filter Pipet Tips for Rainin LTS 4-1143-965-008
ZAP SLIK 200 µL Low Retention Aerosol Filter Pipet Tips for Rainin LTS 4-1144-965-008
ZAP SLIK 1200 µL Low Retention Aerosol Filter Pipet Tips for Rainin LTS 4-1145-965-008
Biotix* xTIP4 Racked Pipette Tips, Rainin LTS Pipette Compatible, 0.1-20uL 63300931
xTIP4 Racked Pipette Tips, Rainin LTS Pipette Compatible, 200uL 63300001
xTIP4 Racked Pipette Tips, Rainin LTS Pipette Compatible, 1200uL 63300004
*Compatible with Rainin pipettes
Click to TOC Visium Spatial Gene Expression Reagent Kits User Guide • Rev F 14Introduction
Protocol Steps & Timing
1-1.5 days
Steps Timing Stop & Store
Step 1 – cDNA Synthesis
1.1 Tissue Permeabilization Variable
1.2 Reverse Transcription 65 min
Step 2 – Second Strand Synthesis & Denaturation
2.1 Second Strand Synthesis 25 min
2.2 cDNA Denaturation 15 min
Step 3 – cDNA Amplification & QC
3.1 Cycle Number Determination – qPCR 45 min
3.2 cDNA Amplification 45-60 min STOP
4°C ≤72 h or −20°C ≤1 week
3.3 cDNA Cleanup – SPRIselect 20 min STOP 4°C ≤72 h −20°C ≤4 weeks
3.4 cDNA QC & Quantification 50 min
Step 4 – Visium Spatial Gene Expression Library Construction
4.1 Fragmentation, End Repair & A-tailing 50 min
4.2 Post Fragmentation, End Repair & A-tailing Double 30 min
Sided Size Selection – SPRIselect
4.3 Adaptor Ligation 25 min
4.4 Post Ligation Cleanup- SPRIselect 20 min
4.5 Sample Index PCR 40 min STOP 4°C ≤72 h
4.6 Post Sample Index PCR Double Sided Size Selection- 30 min STOP
4°C ≤72 h or -20°C long term
SPRIselect
4.7 Post Library Construction QC 50 min
Click to TOC Visium Spatial Gene Expression Reagent Kits User Guide • Rev F 15Introduction
Stepwise Objectives The Visium Spatial Gene Expression Solution measures total mRNA in intact tissue sections
and maps the location(s) where gene activity is occurring. Each Visium Spatial or Gateway
Gene Expression Slide contains Capture Areas with gene expression spots that include
primers required for capture and priming of poly-adenylated mRNA. Tissue sections placed
on these Capture Areas are fixed and stained, as described in Tissue Fixation & Staining
Demonstrated Protocols – CG000160 or CG000312, permeabilized, and cellular mRNA is
captured by the primers on the gene expression spots. All the cDNA generated from mRNA
captured by primers on a specific spot share a common Spatial Barcode. Libraries are
generated from the cDNA and sequenced and the Spatial Barcodes are used to associate
the reads back to the tissue section images for spatial gene expression mapping.
This document outlines the protocol for generating Visium Spatial Single Cell 3ʹ Gene
Expression libraries from tissue sections placed on the Capture Areas of a Visium Spatial
Gene Expression Slide.
Visium Spatial and The Visium Spatial Gene Expression Slide includes 4 Capture Areas (6.5 x 6.5 mm), each
Gateway Gene Expression defined by a fiducial frame (fiducial frame + Capture Area is 8 x 8 mm). The Visium
Slides Gateway Gene Expression Slide includes 2 Capture Areas that are identical in size.
The Capture Area has ~5,000 gene expression spots, each spot with primers that
include:
• Illumina TruSeq Read 1 (partial read 1 sequencing primer)
• 16 nt Spatial Barcode (all primers in a specific spot share the same Spatial Barcode)
• 12 nt unique molecular identifier (UMI)
• 30 nt poly(dT) sequence (captures poly-adenylated mRNA for cDNA synthesis).
Fiducial
Frame
Primers
TruSeq Read 1 Poly(dT)VN
UMI
Capture Spatial Barcode
Areas
Spots
Capture
Area
Visium Visium
Gateway Spatial
Gene Gene
Expression Expression
Slide Slide
Click to TOC Visium Spatial Gene Expression Reagent Kits User Guide • Rev F 16Introduction
Step 1 A Permeabilization Enzyme is Permeabilization
Permeabilization & used to permeabilize the fixed
Reverse Transcription and stained tissue sections on the
slide. The poly-adenylated mRNA
released from the overlying cells is
captured by the primers on the spots.
RT Master Mix containing reverse
transcription reagents is added to Reactions on slide Capture Areas
the permeabilized tissue sections.
Incubation with the reagents Slide
produces spatially barcoded, full- Read 1Spatial UMI Poly(dT)VN
Barcode
Tissue Permeabilization
length cDNA from poly-adenylated
mRNA on the slide.
Slide
Reverse Transcription
Slide
Template Switch Oligo Priming
TSO
Slide
Step 2 Second Strand Mix is added to Transcript Extension
Second Strand Synthesis the tissue sections on the slide to
& Denaturation initiate second strand synthesis. Slide
This is followed by denaturation Second Strand Synthesis Priming
and transfer of the cDNA from each Slide
Capture Area to a corresponding Second Strand Primer
tube for amplification and library Second Strand Synthesis
construction. Slide
Denaturation
Slide
Read 1Spatial UMI Poly(dT)VN TSO
Barcode
Step 3 After transfer of cDNA from the cDNA amplification
cDNA Amplification & QC slide, spatially barcoded, full-
Spatial TSO
length cDNA is amplified via PCR Read 1 Barcode UMI Poly(dT)VN
to generate sufficient mass for
cDNA
library construction. Amplification
Click to TOC Visium Spatial Gene Expression Reagent Kits User Guide • Rev F 17Introduction
Enzymatic fragmentation and Amplified cDNA processing (dual index)
Step 4
size selection are used to Spatial
Visium Spatial Read 1Barcode UMI Poly(dT)VN TSO
optimize the cDNA amplicon
Gene Expression
size. P5, P7, i7 and i5 sample Enzymatic Fragmentation
Library Construction
indexes, and TruSeq Read 2
(read 2 primer sequence) are
End Repair, A-tailing, Ligation
added via End Repair, A-tailing, Read 2
Adaptor Ligation, and PCR.
The final libraries contain the Cleanup & Priming
P5 and P7 primers used in Sample P7
Illumina amplification. Index (i7)
P5 Sample Sample Index PCR
Index (i5)
P5 Read 1Spatial UMI Poly(dT)VN
Barcode
Step 5 A Visium Spatial Gene Expression library comprises standard Illumina paired-end
Sequencing constructs which begin and end with P5 and P7. The 16 bp Spatial Barcode and 12 bp
UMI are encoded in Read 1, while Read 2 is used to sequence the cDNA fragment. i7 and
i5 sample index sequences are incorporated. TruSeq Read 1 and TruSeq Read 2 are
standard Illumina sequencing primer sites used in paired-end sequencing.
Illumina sequencer compatibility, sample indices, library loading and pooling for
sequencing are summarized in step 5.
Visium Spatial Gene Expression Library
Sample Read 1:28 Sample
Spatial BC+UMI
Index (i5:10) Index (i7:10)
P5 TruSeq SpatialUMI Poly(dT)VN TruSeq P7
Read 1 Barcode Read 2:90
Insert Read 2
See Appendix for Oligonucleotide Sequences
Click to TOC Visium Spatial Gene Expression Reagent Kits User Guide • Rev F 18Tips & Best Practices Click to TOC Visium Spatial Gene Expression Reagent Kits User Guide • Rev F 19
Tips & Best Practices

Icons                                                                      !
                          Tips & Best Practices                  Signifies critical step                 Troubleshooting section
                             section includes                     requiring accurate                       includes additional
                           additional guidance                         execution                                guidance

                                          Indicates version specific updates in a particular protocol step to inform users who have
Version Specific               VERSION    used a previous version of the product. The updates may be in volume, temperature,
Update                         SPECIFIC
                                          calculation instructions etc.

General            • Fully thaw and thoroughly mix reagents before use.
Reagent
                   • Keep all enzymes and Master Mixes on ice during setup and use. Promptly move
Handling             reagents back to the recommended storage.
                   • Use a pH meter to adjust pH as necessary during buffer preparation.

Pipette            • Follow manufacturer’s calibration and maintenance schedules.
Calibration
                   • Pipette accuracy is particularly important when using SPRIselect reagents.

Visium Spatial     • Includes 2 or 4 Capture Areas (6.5 x 6.5 mm),                    Visium Spatial Gene Expression Slide
and Gateway          each with ~5,000 unique gene expression                                        Label on
Gene Expression      spots.                                                                   Active Surface
Slides                                                                                     (with serial number)
                   • Each gene expression spot includes primers
                     with a unique Spatial Barcode (see Stepwise
                     Objectives for additional information).
                                                                                                      Capture
                   • The active surface of the slide is defined                                        Areas*
                     by a readable label that includes the serial                                  (place tissue
                                                                                                       sections)
                     number.
                   • The tissue sections are always placed on
                     the active surface of the Capture Areas.
                     For more information, consult the Visium
                     Spatial Protocols – Tissue Preparation Guide                      Note the serial number on the slide label;
                                                                                       required in downstream analysis.
                     (Demonstrated Protocol CG000240).
                                                                                       *Visium Gateway Gene Expression Slide contains
                                                                                       2 Capture Areas

 Click to TOC         Visium Spatial Gene Expression Reagent Kits User Guide • Rev F                                          20
Tips & Best Practices
Slide Storage • Always store unused slides in a dry Store Unsealed Slide Mailers in a
Secondary Sealed Container
environment at room temperature in their
original packaging and keep sealed. DO NOT
remove desiccant.
• After tissue placement, store slides in a
sealed container. If using an unsealed slide
mailer, store in a secondary sealed container,
such as a resealable bag.
• Store the sealed container containing slides
with tissue at −80°C for up to four weeks.
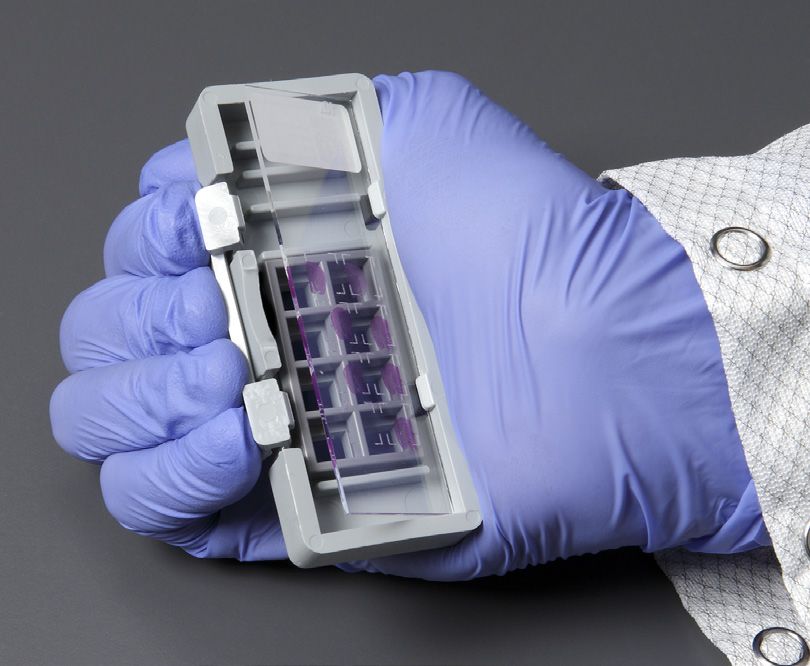
Slide Handling • Always wear gloves when handling Active Surface with Tissue Sections
slides.
• Exercise caution when handling slide
edges to prevent injury.
• Ensure that the active surface of a
slide faces up and is never touched.
The orientation of the label on the
slide defines the active surface. Immersing Slide
Correct Incorrect
• The tissue sections should always be
on the active surface of the slide. DO
NOT touch the tissue sections on the Not
immersed
slide.
• Minimize exposure of the slides to
sources of particles and fibers.
• When immersing slides in water,
ensure that the tissue sections are
completely submerged.
Reagent on Slide
• Keep the slide flat on the bench when Correct Incorrect
adding reagents to the active surface.
• Ensure that no absorbent surface is
in contact with the reagents on the
slide during incubation.
Slides in image are representative.
Click to TOC Visium Spatial Gene Expression Reagent Kits User Guide • Rev F 21Tips & Best Practices
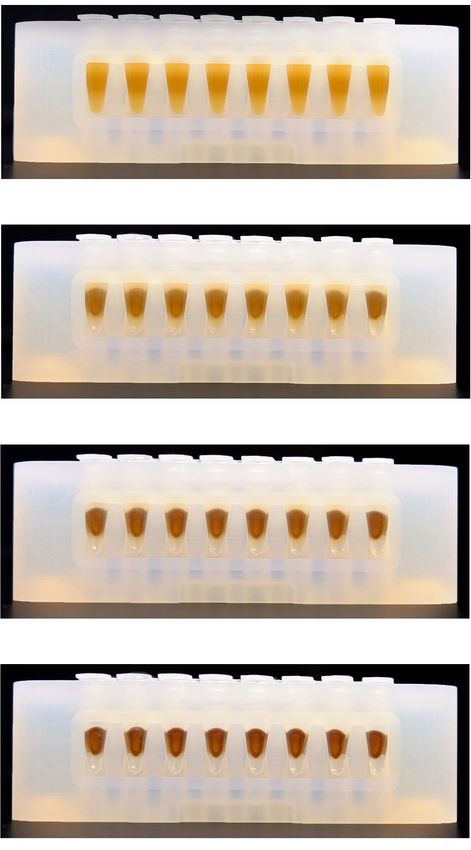
Visium Slide • The Visium Slide Cassette encases the Visium Slide Cassette
Cassette slide and creates leakproof wells for Front Back
adding reagents.
• Place the slides in the Visium Slide Tab 3 Tab 1
Cassette only when specified.
• The Visium Slide Cassette includes a Insert Visium
Clip Gasket
removable Visium Gasket.
Tab 4 Tab 2
• An Insert Clip and four tabs at the back
of the Visium Slide Cassette are used
for holding the slide in the cassette, as
shown.
• The removable Visium Gasket Slide Alignment Tool
corresponds to the Capture Areas on the
slides.
• The Visium Slide Cassette may be
assembled using the Slide Alignment
Tool or manually. Instructions for both
are provided in the following section. Ridges
• See Visium Slide Cassette Assembly &
Removal instructions for details.
• Ensure that the back of the Visium Slide
Cassette is facing the user prior to
assembly. The active surface of the slide
with tissue sections will face down such
that the slide label is no longer readable.
• Practice assembly with a plain glass
slide (75 x 25 x 1 mm).
• Applying excessive force to the slide may
cause the slide to break.
Click to TOC Visium Spatial Gene Expression Reagent Kits User Guide • Rev F 22Tips & Best Practices
Position Visium Slide Cassette Push Insert Clip along the ridge &
Visium Slide
along alignment tool ridges press Visium Slide Cassette down
Cassette
Assembly 1 2 Press
down
! Exercise caution
when handling slide edges
to prevent injury.
Insert Ridge Insert
Clip Clip
Visium Slide Cassette secured on Position Visium Slide Gasket to align
alignment tool with Visium Slide Cassette Cutouts
3 4 Visium
Gasket
Press slide down until it is flush
Insert long edge of slide under with the Visium Gasket and under
tabs 1 & 2; ensure slide is flush tabs 3 & 4
5 Slide 6
! Slide insertion label Tab 1
may push Visium Gasket Tab 2 Press down
out of alignment with
slide cutouts. Adjust if
necessary.
Tab 3
Active surface Tab 4
faces Visium
Gasket
Remove Visium Slide Cassette
while pressing slide against the
Visium Gasket
7 Pull up
Click to TOC Visium Spatial Gene Expression Reagent Kits User Guide • Rev F 23Tips & Best Practices
Position Visium Slide Cassette Push Insert Clip along the ridge
Visium Slide
along alignment tool ridges & press down
Cassette
Removal* 1 2 Press
down
Insert
Clip Ridge
Visium Slide Cassette sits securely Lift slide at Visium Slide Cassette
on alignment tool groove
3 4
Groove
*Slide removal not needed for the Visium Spatial Gene Expression protocol.
Click to TOC Visium Spatial Gene Expression Reagent Kits User Guide • Rev F 24Tips & Best Practices
Manual Assembly
Visium Slide Visium Slide Cassette
i. Remove the Visium Gasket from the
Cassette Visium Slide Cassette and re-insert Front Back
Assembly & the Visium Gasket, ensuring that
Removal the Visium Gasket and Visium Slide Tab 3 Tab 1
Cassette cutouts are aligned.
ii. Align the label on top of the slide to Insert Visium
the top of the Visium Slide Cassette, Clip
Gasket
as shown. Tab 4 Tab 2
iii. Insert the slide under tabs 1 and 2.
Ensure that the long edge of the slide
is flush with the side of the Visium
Slide Cassette.
Visium Slide Cassette Assembly
iv. Press the insert clip very firmly by
applying even force on the lower part Squeeze Label
Insert facing down
of the insert clip. Clip
v. Place a finger in between tab 3 and
the top of the Visium Slide Cassette,
and one finger between tab 4 and the
bottom of the Visium Slide Cassette.
Press down on the slide evenly
until the slide is under each tab and
release the insert clip. Slide
under tabs
Removal*
vi. Press the insert clip very firmly to
release the slide from the Visium
Slide Cassette.
Insert Clip - Press Firmly
vii. Lift slide at Visium Slide Cassette
groove between tabs 3 and 4 Lift
here
until the slide can be removed.
*Slide removal not needed for the Visium
Spatial Gene Expression protocol. Press
firmly
Click to TOC Visium Spatial Gene Expression Reagent Kits User Guide • Rev F 25Tips & Best Practices
Reagent • Place the assembled slide in the Visium Slide Reagent Addition/Removal
Addition & Cassette flat on a clean work surface.
Removal from Add/remove
• Dispense and remove reagents along the side along the side
Wells of the wells without touching the tissue sections of wells
and without introducing bubbles.
• Always cover the tissue section completely
! when adding reagents to the well. A gentle tap
may help spread the reagent more evenly.
• Ensure that no bubbles are introduced in the
process.
DO NOT
introduce
air bubbles
Visium Slide Application Visium Slide Seal Application
Seal Application
• Place the Visium Slide Cassette flat on a clean
& Removal
work surface.
• Remove the back of the adhesive Visium Slide
Seal.
• Align the Visium Slide Seal with the surface
of the Visium Slide Cassette and apply while
firmly holding the Visium Slide Cassette with
one hand.
• Press on the Visium Slide Seal to ensure Seals in image are representative.
uniform adhesion.
Removal
• Place the Visium Slide Cassette flat on a clean
work surface.
• Pull on the Visium Slide Seal from the edge
while firmly holding the Visium Slide Cassette.
Ensure that no liquid splashes out of the
wells.
Click to TOC Visium Spatial Gene Expression Reagent Kits User Guide • Rev F 26Tips & Best Practices
Slide Incubation Incubation at a specified temperature Place Thermocycler Adaptor
Guidance • Position a Thermocycler Adaptor on a
thermal cycler that is set at the incubation
temperature.
• Ensure that the Thermocycler Adaptor is
in contact with the thermal cycler surface
uniformly.
• When incubating a slide, position the slide
on the Thermocycler Adaptor with the active
surface facing up. Incubate Slide
• Ensure that the entire bottom surface of
! the slide is in contact with Thermocycler
Adaptor.
• When incubating a slide encased in a Visium
Slide Cassette, place the assembled unit
on the Thermocycler Adaptor with the wells
facing up. The Visium Slide Cassette should
always be sealed when on the Thermocycler
Incubate Assembled Visium Slide
Adaptor.
Cassette
Slide Incubation
Incubation at room temperature Correct Incorrect
• Place the slide/Visium Slide Cassette on a flat,
clean, non-absorbent work surface.
• Ensure that no absorbent surface is in
contact with the reagents on the slide during
incubation.
Click to TOC Visium Spatial Gene Expression Reagent Kits User Guide • Rev F 27Tips & Best Practices
10x Magnetic • Offers two positions of the magnets
Separator (high and low) relative to a tube,
depending on its orientation. Flip the
magnetic separator over to switch
between high (magnet•High) or low
(magnet•Low) positions.
• If using MicroAmp 8-Tube Strips, use
the high position (magnet•High) only
throughout the protocol.
Magnetic Bead • During magnetic bead based cleanup
Cleanup Steps steps that specify waiting “until the Magnetic beads mixed with reagent
solution clears”, visually confirm
clearing of solution before proceeding
to the next step. See adjacent panel
for an example.
• The time needed for the solution to
clear may vary based on specific
step, reagents, volume of reagents
Separation in progress
etc.
Separation continuing
Separation complete; solution is clear
Click to TOC Visium Spatial Gene Expression Reagent Kits User Guide • Rev F 28Tips & Best Practices
SPRIselect • After aspirating the desired volume of SPRIselect reagent, examine the pipette tips
Cleanup & before dispensing to ensure the correct volume is transferred.
Size Selection
• Pipette mix thoroughly as insufficient mixing of sample and SPRIselect reagent will
lead to inconsistent results.
• Use fresh preparations of 80% Ethanol.
Tutorial — SPRIselect Reagent:DNA Sample Ratios
SPRI beads selectively bind DNA according to the ratio of SPRIselect reagent (beads).
Example: Ratio = Volume of SPRIselect reagent added to the sample = 50 µl = 0.5X
Volume of DNA sample 100 µl
Schematic of Double Sided Size Selection
1st SPRI 2nd SPRI
Decrease Increase Decrease Increase Decrease Increase
After the first SPRI, supernatant is transferred for a second SPRI while larger fragments are
discarded (green). After the second SPRI, fragments on beads are eluted and kept while smaller
fragments are discarded (blue). Final sample has a tight fragment size distribution with reduced
overall amount (black).
Tutorial — Double Sided Size Selection
Step a – First SPRIselect: Add 50 µl SPRIselect reagent to 100 µl sample (0.5X).
Ratio = Volume of SPRIselect reagent added to the sample = 50 µl = 0.5X
Volume of DNA sample 100 µl
Step b – Second SPRIselect: Add 30 µl SPRIselect reagent to supernatant from step a (0.8X).
Ratio = Total Volume of SPRIselect reagent added to the sample (step a + b) = 50 µl + 30 µl = 0.8X
Original Volume of DNA sample 100 µl
Enzymatic • Ensure enzymatic fragmentation reactions are prepared on ice and then loaded into a
Fragmentation thermal cycler pre-cooled to 4°C prior to initiating the Fragmentation, End Repair, and
A-tailing incubation steps.
Sample Indices (i5/i7) in
• Choose the appropriate sample index sets to ensure that no sample indices overlap in
Sample Index PCR
a multiplexed sequencing run.
• Each well in the Dual Index Plate TT Set A contains a unique i7 and a unique i5
oligonucleotide.
Click to TOC Visium Spatial Gene Expression Reagent Kits User Guide • Rev F 29Sample Preparation, Fixation & Staining Guidelines Click to TOC Visium Spatial Gene Expression Reagent Kits User Guide • Rev F 30
Sample Preparation

Sample Preparation       Proper tissue handling and preparation techniques are critical in preserving the
Guidelines               morphological quality of the tissue sections and subsequent transcript profiling using
                         Visium Spatial protocols.
                         Listed below are some key considerations for preparing samples that are compatible with
                         the Visium Spatial protocols.
                         Consult the Visium Spatial Protocols – Tissue Preparation Guide for complete information
                     !   (Demonstrated Protocol CG000240).

                          Key Considerations

                           Slide Handling (before sectioning)

                            Equilibrate Visium slides to cryostat temperature before cryosectioning.

                            Store unused slides in original packaging and keep sealed. DO NOT remove desiccant. If necessary,
                            store original packaging in a secondary container such as a resealable bag.

                           Freezing and Embedding

                            Snap freeze samples in a bath of isopentane and liquid nitrogen.

                            Store frozen samples at -80°C in a sealed container for long-term storage prior to embedding.

                           Cryosectioning

                            Equilibrate OCT tissue block to the cryostat chamber temperature for 30 min.

                            Place tissue sections on the Capture Area* within the fiducial frame on the slide.

                         *Visium Gateway Gene Expression Slide contains 2 Capture Areas

                           Slide Handling (after sectioning)

                            Maintain slides containing sections in a low moisture environment.

                            Keep slides cold and transport slides on dry ice.

                            DO NOT leave slides at room temperature.

                           Sample Storage

                            Store slides individually in a sealed container at -80°C for up to 4 weeks to avoid multiple freeze
                            thaw cycles. If using an unsealed slide mailer, store in a secondary sealed container, such as a
                            resealable bag.

 Click to TOC            Visium Spatial Gene Expression Reagent Kits User Guide • Rev F                                      31
Fixation & Staining
Fixation & Staining Proper tissue fixation and staining should be performed before executing the
Guidelines Permeabilization & cDNA Synthesis steps.
Consult Demonstrated Protocols (available on the 10x Genomics Support website) for
! fixing and staining tissue sections:
Methanol Fixation, H&E Staining & Imaging for Visium Spatial Protocols
(Demonstrated Protocol CG000160)
OR
Methanol Fixation, Immunofluorescence Staining & Imaging for Visium Spatial
Protocols (Demonstrated Protocol CG000312)
DO NOT proceed with Permeabilization & Reverse Transcription without performing
appropriate fixation, staining, and imaging for the tissue sections on the appropriate
Visium slide.
Click to TOC Visium Spatial Gene Expression Reagent Kits User Guide • Rev F 32Tissue Optimization Guidelines Click to TOC Visium Spatial Gene Expression Reagent Kits User Guide • Rev F 33
Tissue Optimization

Tissue Optimization                   Prior to using a new tissue type for generating         Tissue Optimization Workflow
Guidelines                        !   Visium Spatial Gene Expression libraries, the                       Tissue Prep
                                      permeabilization time should be optimized.
                                      Failure to optimize the permeabilization
                                      time can diminish the efficiency of the assay
                                      significantly.
                                      Refer to the Visium Spatial Gene Expression
                                      Reagent Kits – Tissue Optimization User Guide
                                      (CG000238) for the complete protocol for
                                      optimizing permeabilization time for any tissue                  Staining & Imaging
                                      of interest.
                                      Briefly, previously fixed and stained tissue
                                      sections on 7 Capture Areas on a Visium Tissue
                                      Optimization slide are permeabilized for different
                                      times. mRNA released during permeabilization
                                      binds to oligonucleotides on the Capture Areas.
                                      Fluorescent cDNA is synthesized on the slide
                                      and imaged. The permeabilization time that
                                                                                                       Permeabilization
                                      results in maximum fluorescence signal with
                                      the lowest signal diffusion is optimal. If the
                                      signal is the same at two time points, the longer
                                      permeabilization time is considered optimal.

                                                                                            Fluorescent cDNA Synthesis & Imaging

                                      Example: Tissue Permeabilization Time Course                            Permeabilization
                                                                                                              Time Course (min)
                                      Mouse brain sections were imaged after                                   Pos        12

                                      permeabilization and fluorescent cDNA synthesis,
                                      using a Nikon Eclipse Ti2 microscope.
   !      Choose the                                                                                           30         6
permeabilization time                 • Positive control: Strong fluorescent signal.
that results in maximum
fluorescence signal with the
                                      • Negative Control: No fluorescent signal.                               24         3
lowest signal diffusion. If the
signal is the same at two time
points, choose the longer             • Optimal signal: 18 min.
permeabilization time.                  Use for Visium Spatial Gene Expression protocol.                       18         Neg

  Click to TOC                        Visium Spatial Gene Expression Reagent Kits User Guide • Rev F                            34
Step 1 Permeabilization & Reverse Transcription 1.1 Tissue Permeabilization 1.2 Reverse Transcription 1Click to TOC Visium Spatial Gene Expression Reagent Kits User Guide • Rev F 35
Step 1                                                                              Permeabilization & Reverse Transcription

1.0                      CHECKLIST – GET STARTED!
Permeabilization &
                         Items                                 10x PN      Preparation & Handling                 Storage
Reverse Transcription
                         Prepare & equilibrate to 37°C

                                                                           Centrifuge briefly and resuspend
                                                                           in 1.2 ml HCl (0.1N), pipette
                                                                     !     mix, centrifuge briefly, verify no
                                                                           precipitate. Equilibrate to 37°C
                                                                           for 15 min prior to step 1.1c. DO
                                                                           NOT exceed 20 min of preheating.
                                                                           Permeabilization enzyme will be
                                 Permeabilization Enzyme      2000214                                              −20°C
                                                                           kept at 37°C throughout step 1.1c.

                                                                           Store unused resuspended enzyme
                                                                           at −20°C immediately after Tissue
                                                                     !     Permeabilization. DO NOT freeze-
                                                                           thaw more than 3x. DO NOT keep at
                                                                           37°C for extended periods.

                         Equilibrate to room temperature
                                                                           Thaw, vortex, verify no precipitate,
                                 RT Reagent                   2000086                                              −20°C
                                                                           centrifuge briefly.

                                                                           Centrifuge briefly, resuspend in 80
                                                                           µl Low TE Buffer. Vortex 15 sec at
                                                                           maximum speed, centrifuge briefly,
                                 Template Switch Oligo        3000228                                              −20°C
                                                                           leave at room temperature for ≥
                                                                           30 min. After resuspension, store
                                                                           at −80°C.

                                                                           Thaw, vortex, verify no precipitate,
                                 Reducing Agent B             2000087                                              −20°C
                                                                           centrifuge briefly.
                         Place on ice

                                                              2000216/
                                 RT Enzyme D                               Pipette mix, centrifuge briefly.        −20°C
                                                              2000227

                         Obtain
                                 Nuclease-free Water             -         -                                      Ambient
                                 20X SSC                         -         -                                      Ambient
                                 Visium Slide Cassette &      2000281/
                                                                           See Tips & Best Practices.             Ambient
                                 Gasket                       2000282
                                                              2000283/
                                 Visium Slide Seals           2000284/     See Tip & Best Practices               Ambient
                                                              3000279
                                 Low TE Buffer                   -         -                                          -
                                 Hydrochloric Acid Solution
                                                                 -         -                                          -
                                 (HCl), 0.1N
                         Prepare

                                                                0.1X SSC                                           50 ml
                                                                                             Stock        Final
                                                                Store at room temperature                         (50 slides)

                                                                 SSC                          20X         0.1X     250 �l

                                                                 Water (Ultrapure/              -             -   49.75 ml
                                                                 Milli-Q)
 Click to TOC           Visium Spatial Gene Expression Reagent Kits User Guide • Rev F                                 36
Step 1 Permeabilization & Reverse Transcription
1.1 Retrieve the Visium Gene Expression Slide with fixed & stained tissue sections. If a
Tissue Permeabilization coverslip was mounted on the slide for imaging, remove the coverslip. Consult the
Demonstrated Protocol used for tissue staining for coverslip removal instructions.
Ensure Permeabilization Enzyme is resuspended and is equilibrated to 37°C for 15 min
prior to step 1.1c.
If Methanol Fixation, Immunofluorescence Staining & Imaging was performed (CG000312),
! the slide will be in the Visium Slide Cassette with wash buffer in the wells. Using a pipette,
remove wash buffer from well corners and proceed immediately to step 1.1c.
a. Place a Thermocycler Adaptor in the thermal cycler. Prepare the thermal cycler with the
! DO NOT proceed following incubation protocol and start the program.
with Permeabilization &
cDNA Synthesis without Lid Temperature Reaction Volume Run Time
performing appropriate 37°C (may be 50°C if instrument does not enable 37°C) *
fixation, staining, and imaging Step Temperature Time
(if applicable) for the tissue
Pre-equilibrate 37°C Hold
sections on the Visium slide.
Permeabilization 37°C *Determined by Tissue
Optimization protocol.
TIPS b. Place the slide in the Visium Slide Cassette. See Add Reagent
Tips & Best Practices for assembly instructions.
Add along the
Practice assembly with a blank slide. side of wells
c. Add 70 µl Permeabilization Enzyme along the
side of the wells to uniformly cover the tissue
sections, without introducing bubbles.
Tap Visium Slide Cassette gently to ensure
! uniform coverage.
d. Apply Visium Slide Seal on the Visium Slide
Cassette and place the Visium Slide Cassette on
the Thermocycler Adaptor at 37°C. Apply Visium Slide Seal
e. Close the thermal cycler lid and incubate for the
pre-determined permeabilization time (tissue
type specific).
Consult the Visium Spatial Gene Expression
Reagent Kits – Tissue Optimization User Guide
(CG000238) for the complete protocol for
optimizing permeabilization time for any tissue
of interest.
f. Remove the Visium Slide Cassette from the
Thermocycler Adaptor and place on a flat, clean
work surface.
g. Using a pipette, remove Permeabilization
Enzyme from the well corners.
h. Add 100 µl 0.1X SSC to the wells.
Click to TOC Visium Spatial Gene Expression Reagent Kits User Guide • Rev F 37Step 1 Permeabilization & Reverse Transcription
1.2 a. Place a Thermocycler Adaptor in the thermal cycler. Prepare a thermal cycler with the
Reverse Transcription following incubation protocol and start the program.
Lid Temperature Reaction Volume Run Time
53°C - 45 min
Step Temperature Time
Pre-equilibrate 53°C Hold
Reverse Transcription 53°C 00:45:00
Hold 4°C Hold
b. Prepare RT Master Mix on ice. Pipette mix 10x and centrifuge briefly.
RT Master Mix 1X 2X +10% 4X +10% 8X +10%
PN
Add reagents in the order listed. (μl) (μl) (μl) (μl)
Nuclease-free Water - 37.84 83.25 166.50 333.00
RT Reagent 2000086 18.75 41.25 82.50 165.00
Template Switch Oligo 3000228 5.22 11.48 23.00 45.94
Reducing Agent B 2000087 1.50 3.30 6.60 13.20
2000216/
RT Enzyme D 11.69 25.72 51.40 102.87
2000227
Total - 75.00 165.00 330.00 660.00
c. Remove 0.1X SSC from the wells.
d. Add 75 μl RT Master Mix to each well.
e. Apply Visium Slide Seal on the Visium Slide Cassette and place on the Thermocycler
Adaptor on the pre-heated thermal cycler. Close the thermal cycler lid.
f. Skip Pre-equilibrate step to initiate Reverse Transcription.
Click to TOC Visium Spatial Gene Expression Reagent Kits User Guide • Rev F 38Step 2 Second Strand Synthesis & Denaturation 2.1 Second Strand Synthesis 2.2 Denaturation 2Click to TOC Visium Spatial Gene Expression Reagent Kits User Guide • Rev F 39
Step 2                                                                                                Second Strand Synthesis

2.0
Second Strand Synthesis      CHECKLIST – GET STARTED!

                             Items                              10x PN       Preparation & Handling               Storage

                             Equilibrate to room temperature

                                     Second Strand Reagent     2000219       Thaw, vortex, centrifuge briefly.     −20°C

                                     Second Strand Primer      2000217       Thaw, vortex, centrifuge briefly.     −20°C

                             Place on ice

                                                               2000218/
                                     Second Strand Enzyme                    Pipette mix, centrifuge briefly.      −20°C
                                                               2000183

                             Obtain

                                     Nuclease-free Water           -                                              Ambient

                                     Qiagen Buffer EB              -         Manufacturer’s recommendations.      Ambient

                                     Tris 1 M, pH 7.0
                                                                   -         Manufacturer’s recommendations.      Ambient
                                     (Tris-HCl)

                                                               2000283/
                                     Visium Slide Seals        2000284/      See Tip & Best Practices.            Ambient
                                                               3000279

                             Prepare

                                                               0.08 M KOH
                                                                                              Stock       Final    500 �l
                                                               Store at room temperature
                                     0.08 M KOH
                                     (prepare 500 µl/slide)     KOH                            8M        0.08 M     5 �l

                                                                Nuclease-free Water             -            -     495 �l

 Click to TOC             Visium Spatial Gene Expression Reagent Kits User Guide • Rev F                              40
Step 2 Second Strand Synthesis
2.1 a. Remove the Visium Slide Cassette from the thermal cycler and place on a flat, clean
Second Strand Synthesis work surface.
b. Leave the Thermocycler Adaptor on the thermal cycler. Prepare the thermal cycler with
the following incubation protocol and start the program.
Lid Temperature Reaction Volume Run Time
65°C - 15 min
Step Temperature Time
Pre-equilibrate 65°C Hold
Second Strand Synthesis 65°C 00:15:00
Hold 4°C Hold
c. Remove RT Master Mix from the wells.
d. Add 75 µl 0.08 M KOH (diluted from stock; ensure accurate dilution) to each well.
! e. Incubate 5 min at room temperature.
f. Using a pipette, remove KOH from the wells.
g. Add 100 µl EB to each well.
h. Prepare Second Strand Mix on ice. Vortex and centrifuge briefly.
Second Strand Mix 1X 2X +10% 4X +10% 8X +10%
PN
Add reagents in the order listed (μl) (μl) (μl) (μl)
Second Strand Reagent 2000219 69.5 152.9 305.8 611.6
Second Strand Primer 2000217 4.0 8.8 17.6 35.2
Second Strand Enzyme 2000218/
1.5 3.3 6.6 13.2
2000183
Total - 75.0 165.0 330.0 660.0
i. Using a pipette, remove Buffer EB from the wells.
j. Add 75 µl Second Strand Mix to each well.
k. Apply Visium Slide Seal on the Visium Slide Cassette and place on the Thermocycler
Adaptor on the pre-heated thermal cycler. Close the thermal cycler lid.
l. Skip Pre-equilibrate step to initiate Second Strand Synthesis.
Click to TOC Visium Spatial Gene Expression Reagent Kits User Guide • Rev F 41Step 2 Second Strand Synthesis
2.2 a. At the end of incubation, using a pipette, remove reagents from the wells.
Denaturation
b. Add 100 µl Buffer EB to each well.
c. Using a pipette, remove Buffer EB from the wells.
d. Add 35 µl 0.08 M KOH (diluted from stock) to each well.
e. Incubate 10 min at room temperature.
f. Add 5 µl Tris (1 M, pH 7.0) to up to 4 tubes in an 8-tube strip (2 tubes will be used for
each Visium Gateway Gene Expression slide, 4 tubes will be used for each Visium
Spatial Gene Expression slide).
g. Transfer 35 µl sample from each well to a corresponding tube containing Tris in the
! 8-tube strip.
DO NOT discard sample. ~1-2 µl volume variation is expected.
h. Vortex, centrifuge briefly, and place on ice.
The Visium Slide Cassette and slide may be discarded. Ensure the slide serial number
has been recorded, as it is required for downstream analysis.
Click to TOC Visium Spatial Gene Expression Reagent Kits User Guide • Rev F 42Step 3 cDNA Amplification & QC 3.1 Cycle Number Determination – qPCR 3.2 cDNA Amplification 3.3 cDNA Cleanup – SPRIselect 3.4 cDNA QC & Quantification 3Click to TOC Visium Spatial Gene Expression Reagent Kits User Guide • Rev F 43
Step 3                                                                                                cDNA Amplification & QC

3.0
                             CHECKLIST – GET STARTED!
cDNA Amplification & QC
                             Item                                 10x PN     Preparation & Handling               Storage

                             Equilibrate to room temperature

                                      cDNA Primers                2000089    Thaw, vortex, centrifuge briefly.      −20°C

                                      Beckman Coulter
                                                                  -          Manufacturer’s recommendations.          -
                                      SPRIselect Reagent

                                      Agilent TapeStation
                                      Screen Tape and             -          Manufacturer’s recommendations.          -
                                      Reagents
                                      If used for QC

                                      Agilent Bioanalyzer
                                      High Sensitivity kit        -          Manufacturer’s recommendations.          -
                                      If used for QC

                                      DNA High Sensitivity
                                      Reagent Kit                 -          Manufacturer’s recommendations.          -
                                      If LabChip used for QC

                             Place on ice

                                      KAPA SYBR FAST
                                      qPCR Master Mix             -          Vortex, centrifuge briefly.            −20°C
                                      Minimize light exposure

                                                                  2000047/
                                      Amp Mix                                Vortex, centrifuge briefly.            −20°C
                                                                  2000103

                             Obtain

                                      Qiagen Buffer EB            -          -                                     Ambient

                                      Nuclease-free Water         -          -                                        -

                                      qPCR Plate                  -          -                                        -

                                      10x Magnetic Separator      230003     See Tips & Best Practices.            Ambient

                                      Prepare 80% Ethanol
                                      Prepare 15 ml for up to 4   -          Prepare fresh.                        Ambient
                                      reactions

                             Special Equipment

                                      Real Time qPCR System

 Click to TOC             Visium Spatial Gene Expression Reagent Kits User Guide • Rev F                             44
Step 3 cDNA Amplification & QC
3.1 a. Prepare qPCR Mix on ice. Vortex and centrifuge briefly.
Cycle Number A passive reference dye, such as ROX, may be required. Consult the Roche KAPA SYBR
Determination – qPCR FAST qPCR Kit or the appropriate qPCR system manufacturer for guidance.
qPCR Mix
3X* + 5X* + 9X* +
Add reagents in the order listed. PN
10% (μl) 10% (μl) 10% (μl)
Maintain on ice
*Includes 1 negative control
Nuclease-free Water - 12.2 20.4 36.6
KAPA SYBR FAST
qPCR Master Mix - 16.5 27.5 49.5
Minimize light exposure
cDNA Primers 2000089 1.0 1.7 3.0
Total - 29.7 49.6 89.1
b. Add 9 µl qPCR Mix to each well in a qPCR plate (a well for negative control may be
included).
c. Transfer 1 µl sample from step 2.2h to the qPCR plate well containing the qPCR Mix.
Pipette mix, centrifuge briefly (if using a negative control, add 1 µl nuclease-free
water to the corresponding well). Seal qPCR plate.
d. Prepare a qPCR system with the following protocol, place the plate, and start the program.
Lid Temperature Reaction Volume Run Time
105°C 10 µl 35 min
Step Temperature Time
1 98°C 00:03:00
2 98°C 00:00:05
3 63°C 00:00:30
Read signal
4 Go to step 2, for a total of 25 cycles -
e. Record the Cq Value for each sample.
Set the y-axis to a linear scale. Plot RFU on the y-axis if not using a reference dye, or
∆Rn if using a reference dye. The threshold for determining the Cq Value should be set
along the exponential phase of the amplification plot, at ~25% of the peak fluorescence
value.
Representative qPCR Amplification Plots
Amplification Amplification
Peak RFU: 8600
RFU
RFU
Cq Value-14
Threshold:
~25% Peak RFU
# of Cycles # of Cycles
Click to TOC Visium Spatial Gene Expression Reagent Kits User Guide • Rev F 45Step 3 cDNA Amplification & QC
3.2 a. Prepare cDNA Amplification Mix on ice. Vortex and centrifuge briefly.
cDNA Amplification
cDNA Amplification Mix 2X + 4X + 8X +
PN 1X
Add reagents in the order listed 10% (μl) 10% (μl) 10% (μl)
Amp Mix 2000047/
50 110 220 440
2000103
cDNA Primers 2000089 15 33 66 132
Total - 65 143 286 572
b. Add 65 µl cDNA Amplification Mix to remaining ~35 µl sample from step 2.2h.
c. Pipette mix 15x (pipette set to 90 µl). Centrifuge briefly.
d. Incubate in a thermal cycler with the following protocol.
Lid Temperature Reaction Volume Run Time
105°C 100 µl ~45-60 min
Step Temperature Time
1 98°C 00:03:00
2 98°C 00:00:15
3 63°C 00:00:20
4 72°C 00:01:00
5 Go to Step 2, Use the Cq Value as the total # of cycles.
See table below for total # of cycle examples
6 72°C 00:01:00
7 4°C Hold
Cycle number examples determined based on rounding the Cq Value.
Cq Value from qPCR Total Cycles
12.2 12 cycles
13.5 14 cycles
15.7 16 cycles
STOP e. Store at 4°C for up to 72 h or at −20°C for up to 1 week, or proceed to the next step.
Click to TOC Visium Spatial Gene Expression Reagent Kits User Guide • Rev F 46You can also read


