DURALINER - BGC Fibre Cement
←
→
Page content transcription
If your browser does not render page correctly, please read the page content below
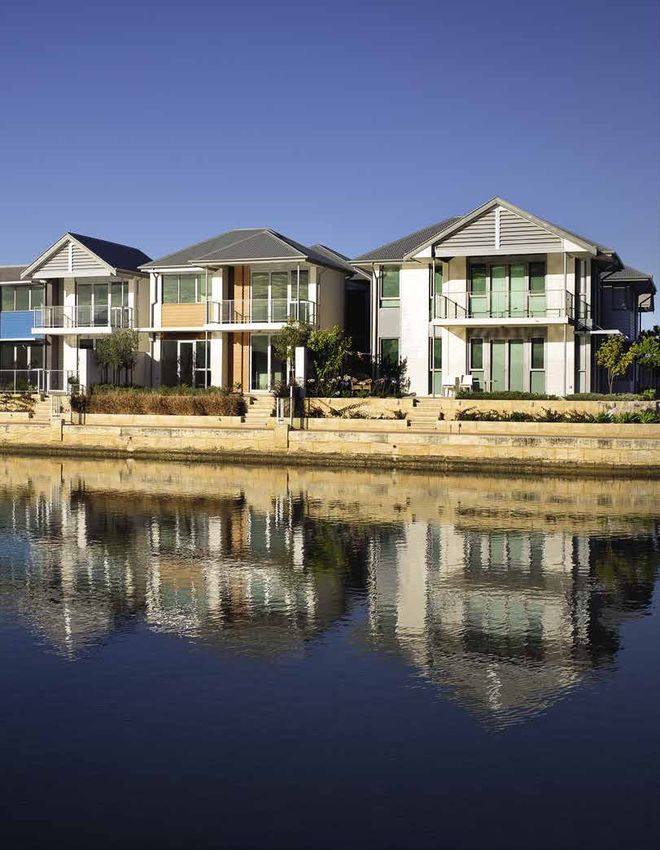
JUNE // 2021

DURALINER
                   TM

WET AREA LINING BOARD

BGCINNOVADESIGN.COM.AU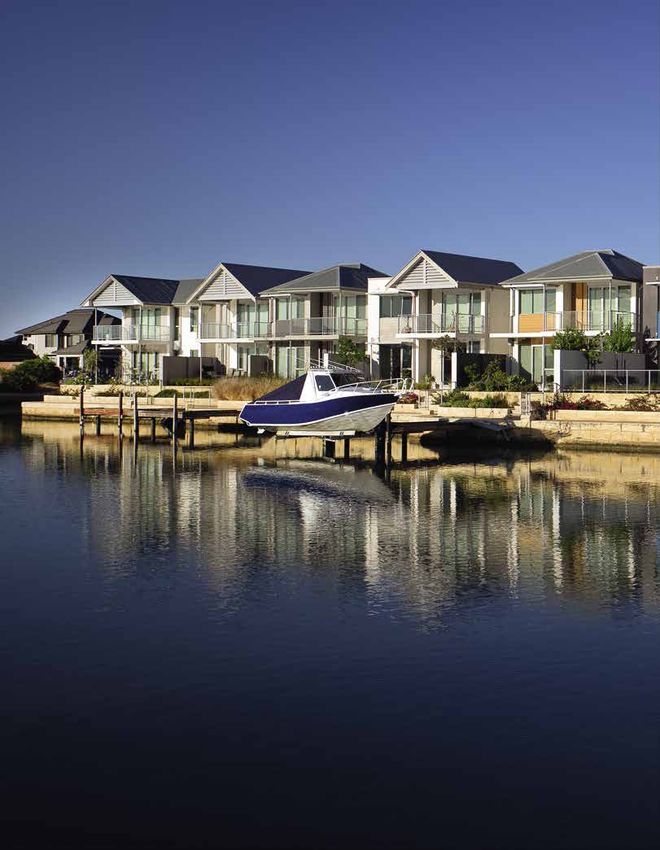
HISTORY &
MISSION

                                               Our mission at BGC is simple – we want
Our distribution network ensures that our      to ensure that people can always
entire product range is readily available in   ‘build it better with BGC’.
all states of Australia and in New Zealand.
                                               In keeping with our mission, we are
BGC has a team of technical specialists that   constantly assessing and improving
can assist with all specification and design   our products to ensure that we always
information to help ensure that you always     provide cost effective, high quality and
‘build it better with BGC’.                    easy-to-use products to the market.

2 // bgcinnovadesign.com.au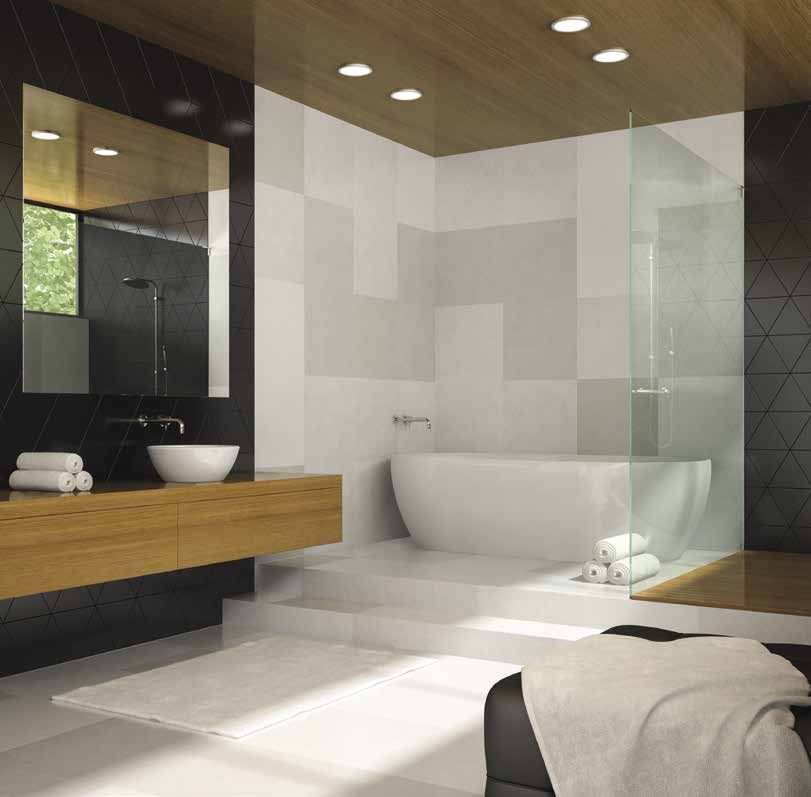
CONTENTS

                                  8 // SHEET LAYOUT – MECHANICAL
                                        FASTENERS – TILED
5   //
     PRODUCT DESCRIPTION          9 // ADHESIVE FIXING
5   //
     PANEL SIZE AND MASS          10 // WINDOW AND DOOR OPENINGS
5   //
     FIRE RESISTANCE              10 // CONTROL JOINTS
5    HANDLING AND STORAGE
    //                            11 // WET AREAS
5   //
     HEALTH AND SAFETY            12-13 // SHOWER RECESSES
5   //
     SHEET CUTTING AND DRILLING   14-15 // JOINTING
6   //
     FRAMING                      16-17 // MASONRY WALLS
6   //
     FASTENERS                    18-19 // BRACING
6   //
     CURVED WALLS                 20-22 // EXTERIOR SOFFITS
7   //
     SHEET LAYOUT – MECHANICAL    23 // PAINTING
     FASTENERS – UNTILED          23 // MAINTENANCE
8 // TILED AREAS                  23 // WARRANTY

                                                                   3 //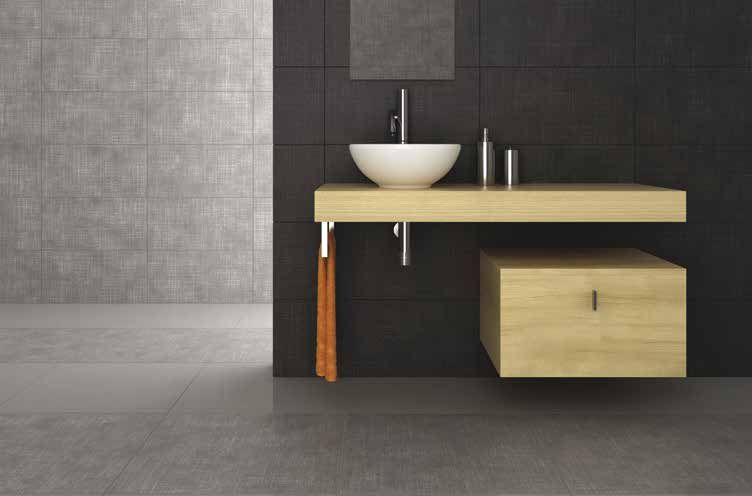
DURALINER
                       TM

WET AREA LINING BOARD

DURALINER™ PLUS IS A GENERAL-PURPOSE FIBRE CEMENT BUILDING
BOARD. DESIGNED FOR FLUSH JOINTING, DURALINER™ PLUS IS
HIGHLY EFFECTIVE FOR USE IN WET AREAS, INTERIOR LININGS,
CEILINGS, AS A SUBSTRATE FOR CERAMIC WALL TILES AND FOR
FIRE AND ACOUSTICALLY-RATED INTERIOR WALLS.

YOU CAN ALSO SPECIFY DURALINER™ PLUS      DURALINERTM PLUS
                                       // Wide range of applications
FOR SOFFITS AND OTHER EXTERNAL         // Specify as part of fire and acoustic-rated wall systems
APPLICATIONS WHERE THERE’LL BE NO      // Rebated on 3 edges for easy jointing and installation
DIRECT IMPACT FROM THE WEATHER.

  4 // bgcinnovadesign.com.au
PRODUCT DESCRIPTION SHEET TOLERANCES
Duraliner™ Plus is a general-purpose fibre cement building Duraliner™ Plus complies with the requirements of AS2908.2
board intended for flush jointing. It has been specially
formulated and prepared to meet the requirements for
use in Wet Areas, Interior Linings, Ceilings, and as a HEALTH & SAFETY
substrate for Ceramic Wall Tiles.
In heavy duty commercial applications for wall tiling, fibre Duraliner™ Plus is manufactured from cellulose fibre, finely
cement sheets are to have a minimum thickness of 9mm ground sand, Portland cement and additives. As manufactured
as per the Australian Standard AS 3958.1 “Ceramic Tiles - the product will not release airborne dust, but during drilling,
Guide to Installation”. cutting and sanding operations cellulose fibres, silica and
calcium silicate dust may be released.
Duraliner™ Plus is also manufactured in 12mm thickness
for areas where maximum impact resistance is required. Breathing in fine silica dust is hazardous, prolonged exposure
(usually over several years) may cause bronchitis, silicosis
Duraliner™ Plus is available with factory machined recesses or cancer.
on the two long sides and one end, ready for flush jointing.
DO NOT BREATHE DUST
PRODUCT INFORMATION When cutting sheets, work in a well-ventilated area and
use the methods recommended in this literature to minimise
Duraliner™ Plus is manufactured from Portland cement, dust generation. If using power tools for cutting, drilling or
finely ground silica, cellulose fibres and water. It is cured sanding they must be fitted with appropriate dust collection
in a high-pressure steam autoclave to create a durable, devices or the operator should wear an approved (P1 or P2)
dimensionally stable product. dust mask and safety glasses.
Duraliner™ Plus is manufactured to comply with the These precautions are not necessary when stacking,
requirements of AS 2908.2 Cellulose Cement Products. unloading or handling fibre cement products.
It is classified by CSIRO as group 1 material in accordance
with specification C1.10a of the BCA. For further information or a Material Safety Data Sheet
contact the nearest BGC Sales Office.
SHEET SIZE AND WEIGHT SHEET CUTTING & DRILLING
The approximate weight of Duraliner™ Plus, at equilibrium Duraliner™ Plus may be cut to size on site.
moisture content, is as tabulated.
Suitable cutting methods are:
THICKNESS WEIGHT WIDTH LENGTH mm // DURABLADE
mm kg/m2 mm
1800 2400 2700 3000 3600 4200 180mm diameter. This unique cutting
blade is ideal for cutting fibre cement.
6 8.9 900 ✓ ✓ It can be fitted to a 185mm circular saw.
1200 ✓ ✓ ✓ ✓ ✓ ✓ Please ensure safe practices when using.
1350 ✓ ✓ ✓ ✓
9 13.2 1200 ✓ ✓ ✓ ✓ // SCORE AND SNAP
1350 ✓ ✓ Using a straight edge score the sheet
12 17.9 1200 ✓ face 4 or 5 times with a Tungsten tipped
‘Score & Snap’ knife. While supporting the
scored edge with the straight edge, snap the
FIRE RESISTANCE sheet upwards for a clean break.
// HAND SAWING
Duraliner™ Plus has been tested by the CSIRO (Building, Mark out the cut lines on the face side of the sheet.
Construction and Engineering Division) in accordance with Australian Support the back of the Duraliner™ Plus sheet close to the cut.
Standard AS1530.3 see report number FNE 7524 (6mm A fine-toothed saw can be used. A quick jabbing
Duraliner™ Plus) and FNE 7527 (9mm Duraliner™ Plus). action gives best results.
This report deemed the following Early Fire Hazard Indices:
// DRILLING
// Ignitability Index 0 Duraliner™ Plus sheets can be drilled using normal high-speed
// Spread of Flame Index 0 masonry bits. Do not use the drill’s hammer function.
// Heat Evolved Index 0 For small round holes such as tap penetrations, the
// Smoke Developed Index 0 ~ 1 use of a hole-saw is recommended.
// PENETRATIONS
Penetrations can be made by drilling a series of small
HANDLING & STORAGE holes around the perimeter of the cut out. Tap waste piece
from the sheet face with a hammer. Support the underside
Duraliner™ Plus sheets must be stacked flat, up off the ground of the opening to avoid damage. Clean rough edges with
and supported on level bearers. The sheets must be kept dry, a rasp.
preferably by being stored inside a building. When stored
outdoors they must be protected from the weather. Large Rectangular Openings are formed by deeply
scoring the perimeter of the opening with a ‘score and
Care should be taken to avoid damage to the ends, snap’ knife. Next, form a hole in the centre of the opening
edges and surfaces. (see method above) then saw cut from the hole to the
corners of the opening. Snap out the four triangular
Sheets must be dry prior to being fixed, or painted. segments. Clean rough edges with a rasp.
Sheets must be carried on edge.
5 //QUALITY SYSTEMS FASTENERS
BGC Fibre Cement manufactures Duraliner™ Plus under For fixing 6mm and 9mm Duraliner™ Plus to timber framing,
the rigorous Quality Management System of the International use 30 x 2.8mm Galvanised Clouts. For fixing 12mm
Standard ISO 9001 and is the holder of Licence Agreement Duraliner™ Plus to timber framing, use 40 x 2.8mm
number QEC2955/13. Galvanised Clouts. Fasteners to have a minimum head
diameter of 6mm.
CONSTRUCTION DETAILS - FRAMING
Duraliner™ Plus is suitable for use with both timber and
lightweight steel framing.
For fixing 6mm DuralinerTM Plus to lightweight steel framing,
use No 8 x 20 Countersunk Screws. For 9mm and 12mm
GENERAL DuralinerTM Plus use 30mm Screws. For fixing 6mm DuralinerTM
Plus to 0.8 -1.6mm BMT steel framing use minimum No 8 x 20
// Framing must be constructed to comply with the Self Drilling Countersunk Screws. For fixing 9mm and 12mm
Building Code of Australia. DuralinerTM Plus to 0.8 – 1.6mm BMT steel framing use minimum
// The framing must be set to a true plane to ensure a No 8 x 30mm Self Drilling Countersunk Screws.
straight finish to the wall.
// Studs must be spaced at a maximum of
600mm centres.
// Noggings must be spaced at a maximum of 1350mm
centres. Noggings must align with the sheet joints
see Figure 2a.
// Duraliner™ Plus wall sheets must not be joined off Do not place fixings closer than 12mm from sheet edges,
the framing. or closer than 50mm from the sheet corners.
Sheet fixing must commence at the centre of the sheet and
METAL FRAMING work out to the edges to prevent ‘druminess’. The sheet must
be held firmly against the framing when fixing to ensure breakout
Metal framing must comply with AS 3623 Domestic does not occur on the back.
Metal Framing.
Duraliner™ Plus may be fixed directly to lightweight metal CURVED WALLS
framing. The metal framing must not exceed 1.6mm in
thickness and should provide some flexibility to accommodate
any differential moisture and thermal movement of Duraliner™ Plus may be used on both convex and concave
the Duraliner™ Plus . curved walls and requires no pre-wetting. With extra care,
Duraliner™ Plus can be bent to the values in brackets in the
If Duraliner™ Plus is used with rigid steel framing, it must table below.
be battened out with either timber or lightweight steel
battens prior to fixing.
ALONG LENGTH ACROSS WIDTH
Timber battens must have a minimum thickness of 40mm
6mm 1800 (1200) 3000
to allow adequate nail penetration.
9mm 3000 (1800) 4000
FIGURE 1 // To maintain the smoothness of the curve, studs are required
SHEET JOINT LIGHTWEIGHT STEEL FRAMING at the spacings detailed below.
12mm min from sheet edge
TM
RANGE OF RADII (mm) STUD SPACINGS
Duraliner Plus
1200 150
Above 1200 to 1800 200
Above 1800 to 3000 300
Above 3000 to 20000 450*
No 8 x 20mm Above 20000 600*
self embedding
head screw
* or at one third of sheet width, whichever is the lesser.
Lightweight
steel stud NOTE:
BGC Fibre Cement strongly recommends that sheets be curved
on the horizontal rather than vertical and if wetted to aid curving,
the sheets must be normalised to ambient moisture content prior
to flushing.
TIMBER FRAMING
Timber framing must comply with AS 1684 - 1999 National
Timber Framing Code.
Duraliner™ Plus must not be fixed to wet framing. It is strongly
recommended that kiln dried timber is used for framing.
If sheets are fixed to ‘wet’ framing, problems may occur
at a later date due to excessive timber shrinkage.
6 // bgcinnovadesign.com.auNAIL OR SCREW FIXING SYSTEM (MECHANICAL FASTENERS) - SHEET LAYOUT
Duraliner™ Plus may be fixed vertically or horizontally. However, most flush jointed applications suit horizontal fixing.
FIGURE 2a //
HORIZONTAL SHEET LAYOUT TIMBER
OR STEEL FRAMING FOR UNTILED WALLS
Fasteners 50mm min
from sheet corner
Fasteners 12mm min from sheet edge
Stud centres 600mm max
S (b )
S (p )
Nogging centres
1350mm max
DuralinerTM Plus
Stagger sheet end joints
one stud spacing min.
50mm min
at corners 6mm gap between
DuralinerTM Plus
and floor
FIXING CENTRES FIX SHEETS TO FRAMING AS NOTED
SHEET SHEET
PERIMETER BODY STUDS NOGGINGS TOP & BOTTOM PLATES
S(p) S(b)
UNTILED 200MM 300MM ✓ x x
NOTES FIGURE 2A:
Framing must support all sheet joints when fixed horizontally. Install bottom sheets first then work upwards.
Set bottom sheet 6mm clear of floor. Stagger vertical joints by at least one stud (600mm typical).
Do not place fixings closer than 12mm from sheet edges, or closer than 50mm from the sheet corners.
7 //TILED AREAS
When Duraliner™ Plus is to be covered with tiles it is essential Appropriate support angles are recommended for tiles
that it is fixed with nails or screws only. No adhesive is to be used. exceeding 18mm in thickness. Placement and type of angle to
The thickness of tiles used over Duraliner™ Plus is restricted based be determined by a structural engineer. Contact your local
on the stud centres and thickness of Duraliner™ Plus. BGC Fibre Cement office.
Membrane and tiles are to be applied as per Australian Standards
DURALINERTM PLUS MAXIMUM TILE THICKNESS (MM) and manufacturer’s recommendations.
THICKNESS
Studs at Studs at
(MM)
600mm centres 450mm centres
6 9 13
9 13 18
12 18 >25
NAIL OR SCREW FIXING SYSTEM (MECHANICAL FASTENERS) - SHEET LAYOUT
Duraliner™ Plus may be fixed vertically or horizontally. However, most flush jointed applications suit horizontal fixing.
FIGURE 2b //
HORIZONTAL SHEET LAYOUT LAYERED
FOR TILED WALLS
Fasteners 50mm min
from sheet corner
Fasteners 12mm min from sheet edge
Stud centres 600mm max
S (p )
Nogging centres
1350mm max
DuralinerTM Plus
Stagger sheet end joints
one stud spacing min.
50mm min 6mm gap between
at corners DuralinerTM Plus
and floor
FIXING CENTRES FIX SHEETS TO FRAMING AS NOTED
SHEET SHEET
PERIMETER BODY STUDS NOGGINGS TOP & BOTTOM PLATES
S(p) S(b)
TILED 150MM 200MM ✓ x ✓
NOTES FIGURE 2B:
Framing must support all sheet joints when fixed horizontally. Install bottom sheets first then work upwards.
Set bottom sheet 6mm clear of floor. Stagger vertical joints by at least one stud (600mm typical).
Do not place fixings closer than 12mm from sheet edges, or closer than 50mm from the sheet corners.
Fixings must be placed at 150mm centres at all sheet edges. This includes internal and external corners.
8 // bgcinnovadesign.com.auADHESIVE FIXING - STUD WALLS
Adhesive fixing must not be used where the wall is Nail or screw fasteners are still required at 200mm centres on the
to be finished with wall tiles. Where the wall is to be tiled, sheet ends and 600mm along edges. These are concealed within
nail or screw fasteners must be used. the flush finishing.
For fixing of Duraliner™ Plus to stud walls in untiled applications, Figure 3 depicts the typical construction detail.
stud adhesive can be used. Daubs of adhesive are to be applied
to the studs at a maximum of 250mm centres. The daubs of The Duraliner™ Plus must be pressed onto the adhesive until it
adhesive are to be approximately 25mm diameter. sits flat. Temporary blocking or props must support the centre
of the sheet until the adhesive is dry (normally 24 hours).
Adhesive daubs must never coincide with fasteners.
Adhesive fixing must not be used in fire rated construction.
FIGURE 3 //
DURALINER™ PLUS INSTALLATION ADHESIVE FIXING -
STUD CONSTRUCTION
NOTE: NOT SUITABLE FOR TILING
Stud Centres
600mm max
Dabs of
stud adhesive
approx 25mm dia
x 15mm high
250mm
max
Temporary block nailed
every second stud near
the sheet centre line.
Leave in place until
adhesive is dry
(approx 24hrs)
Temporary block nailed
every second stud near
Secure sheet ends
the sheet centre line.
with nails
Leave in place until
adhesive is dry
Nail centres (approx 24hrs)
200mm max
Set sheet
6.0mm above floor
Fasteners in recessed edge
9 //WINDOW & DOOR OPENINGS MOVEMENT CONTROL JOINTS
To reduce the incidence of cracks appearing in the jointing, If a continuous run of sheeting exceeds 4.2m for tiled areas,
flush jointed sheets should be cut in, 200mm minimum, around or 6m for untiled areas, then it must be broken with a movement
window and door openings as depicted in Figure 4. control (expansion) joint. BGC Fibre Cement recommends the
provision of a control joint every 4.2m in case tiling is undertaken at
If a sheet joint must coincide with the corner of an opening a later date.
BGC Fibre Cement recommends installation of a relief joint
to control cracking. See Figure 5. For tiled areas the control joint must carry through the
framing, sheeting and tiling, see Figure 6.
FIGURE 4 // For untiled areas the use of a Rondo P35 or Peer PXJ30 jointing kit
is recommended, see Figure 7.
WINDOW AND DOOR DETAIL
200mm 200mm
min min FIGURE 6 //
TILED CONTROL JOINT
250mm min
Additional stud
required in framing
DuralinerTM Plus
RELIEF CONTROL JOINTS
The use of relief joints is to control cracking at locations such
as window or door openings, when cutting sheets in around 10mm Foam
the opening is impractical. backing rod Fill gap with sealant
Do not flush over joint Ceramic wall tile
FIGURE 5 //
RELIEF JOINT (TILED)
FIGURE 7 //
UNTILED CONTROL JOINT
Timber
Framing
Stud Additional stud
quired in framing
DuralinerTM Plus
DuralinerTM Plus
Leave 6mm min gap
through DuralinerTM Plus
& tiles. Fill with sealant Ceramic Wall Tiles
Do not flush over joint Flush with
bedding cement Rondo P35 Control Joint
(Do not get cement or Peer PXJ30 Jointing Kit
into joint) Do not flush over joint
10 // bgcinnovadesign.com.auWET AREAS
Wet areas are walls in shower alcoves or surrounding a bath that include a shower. Duraliner™ Plus provides a suitable substrate
for ceramic tiles in these applications.
Semi-wet areas are walls adjacent to sanitary fittings such as baths, basins and toilet suites. Duraliner™ Plus is a suitable
substrate for ceramic tiles, paint, wallpaper or vinyl finishes in these applications.
Satisfactory performance of wet area systems depends on strict adherence to the Building Code of Australia.
FIGURE 8 //
TYPICAL SHOWER RECESS DETAIL
PVC angle overlap shower base up-stand
Start 6mm clear of shower base rim Flush jointed
Height 1800 mm min. DuralinerTM Plus
See Figure 17 as ceramic tile
substrate
Add trimmers
as required to
support fixtures
See Figure 12
Set additional nogging
25mm above shower base
for fixing DuralinerTM Plus
Notch studs and bottom
plate (max 20mm)
so that shower base
up-stand fits behind
DuralinerTM Plus
Preformed
Shower Base
DuralinerTM Plus to overlap
shower base upstand
See Figure 9
NOTES FIGURE 2A:
The inside edge of the shower base up-stand must fit in behind the Duraliner™ Plus
without distorting it. To achieve this the studs and bottom plate can be notched out,
maximum 20mm, or alternatively battens can be used to set the Duraliner™ Plus
clear of the framing.
A PVC angle or waterproof lining (membrane) should be fixed in the internal corner behind the
Duraliner™ Plus. This angle must project inside the shower base up-stand. It should start 6mm
above the shower base rim and extend to a minimum height of 1800mm. Both flanges of
the angles should be nailed to the framing at a maximum 600mm centres.
11 //SHOWER RECESSES
Table 1 summarises appropriate construction details for
use with different sub-floor materials. FIGURE 10 //
SHOWER & WET AREA WALL/FLOOR
JUNCTION TYPICAL DETAIL
Table 1 (INSITU WATERPROOF LINER)
SUB PREFORMED FULL INSITU PERIMETER
FLOORING SHOWER WATERPROOF FLASHING DuralinerTM Plus
BASE MEMBRANE ONLY
See figures See figure See figure
Timber
Framing
Ceramic Wall Tiles
8&9 10 11
TIMBER
FLOORING ✓ ✓
Insitu waterproof Liner
(see note)
Ceramic Floor Tile
PANEL
FLOORING Mortar Bed
SUCH AS (see note)
PLYWOOD ✓ ✓
OR
PARTICLE- DurafloorTM
BOARD
COMPRESSED
FIBRE ✓ ✓ ✓
CEMENT
NOTES FIGURE 10:
The waterproof lining must be installed to the
CONCRETE manufacturer’s specification.
✓ ✓ ✓
SLAB
The waterproof lining must extend 150mm up the walls
or 25mm above any hobs (whichever is greatest).
Internal corners in the shower recess must be sealed to
FIGURE 9 // a height of 1800mm minimum with the waterproof lining
or an equivalent treatment.
PREFORMED SHOWER BASE
DuralinerTM Plus Mortar Bed: The shower base must have a minimum
fall of 1:60 to a floor waste drain.
Timber The Duraliner™ Plus sheets must be flush jointed and
Framing tiled over.
Ceramic
Wall Tiles Refer to the BCA and AS3740 for waterproofing of wet
areas in residential buildings.
Fill gap
Notch framing with Sealant
(max 20mm)
to accommodate Leave 6mm
shower base clearance
Alternatively set to tray
sheets clear of
framing with battens 6mm
DurafloorTM Preformed
Shower Base
6mm
Floor Joist
NOTES FIGURE 9:
The Duraliner™ Plus must project inside the vertical lip of the
shower base up-stand. A 6mm gap must be left between
the Duraliner™ Plus and the shower base rim. This gap must
be filled with a bead of mould resisting flexible sealant.
The Duraliner™ Plus must be flush jointed.
Ceramic wall tiles must be installed over the Duraliner™ Plus.
The wall tiles must finish 6mm above the shower base rim.
This gap must be filled with a mould resisting flexible sealant.
12 // bgcinnovadesign.com.auSHOWER RECESSES
NOTES FIGURE 12:
FIGURE 11 // The Duraliner™ Plus should be cut out to leave a 6mm gap all
SHOWER BASE & WET AREA WALL/FLOOR round the fixture. This gap should be filled with a mould
JUNCTION TYPICAL DETAIL resistant flexible sealant.
(PERIMETER FLASHING)
BGC recommends using a hole saw to make a neat cut
out for fittings such as taps, shower roses etc.
DuralinerTM Plus
Additional framing must be installed as required to properly
Nogging to fix
Timber
support all fixtures.
DuralinerTM Plus
Framing
Ceramic Wall Tile
FIGURE 13 //
BATH RIM INSTALLATION DETAIL
Perimeter Flashing
(see note)
DuralinerTM Plus
Sealant
Ceramic Floor Tile
Mortar Bed
(see note)
Ceramic Timber
Concrete Slab Wall Tile Framing
or Flooring
Nogging for
Backing Rod DuralinerTM Plus
Sealant lower fixing
NOTES FIGURE 11:
Perimeter flashing may be preformed PVC angles or a Nogging to
waterproof flashing strip such as Hypalon. support Waterproof
Flashing Tape
bath rim
The flashing should extend 80mm min up the wall and 50mm Bath
min across the floor. The corner detail must be waterproof.
Notch stud
The flashing must be bonded to the floor with a two-part 20mm max.
flexible epoxy resin designed for this application.
The flashing must not be bonded to the Duraliner™ Plus
wall sheets.
An additional nogging must be installed so that the bottom FIGURE 14 //
fixing of the Duraliner™ Plus sheet is above the flashing. SINK/BASIN FLANGE DETAILS
Internal corners of the shower recess must be sealed with a
bonded PVC angle or flashing to a minimum height to 1800mm. DuralinerTM Plus
Mortar Bed: The shower base must have a minimum fall of
1:60 to a floor waste drain.
Ceramic
The Duraliner™ Plus sheets must be flush jointed and tiled over. Wall Tile Timber
Framing
FIGURE 12 //
SEALING PREPARATIONS
To form neat holes
for penetrations in
DuralinerTM Plus - a hole Sealant
saw is recommended Timber Sink /
Framing Basin
6mm gap all round
Silicone
Sealant
Ceramic
Tiles Install
noggings
as necessary
to support
DuralinerTM Plus
fittings
13 //FLUSH JOINTING
NOTE: This section is for areas outside of wet areas such FIGURE 15 //
as adjoining walls within a bathroom that is untiled. Any areas FLUSH JOINTING
that are within a wet area must be trowelled with BGC Exterior
and Wet Area Base Coat. (Refer page 15)
The edges to be joined must be recessed.
1. Fill recess
Before jointing, sheets that have been cut on site, or the with bedding
un-recessed end of DuralinerTM Plus sheets must be recessed. cement
The recess should be a nominal 40mm wide by 1.5mm deep.
The Hitachi ‘Easy Bevel’ (Model EB100) or equivalent is specifically
designed for this purpose. The recessed surfaces must be 2. Install perforated
sealed using a PVA or Acrylic sealant, such as Cemstick, First coat paper tape over
Lokcrete or Bondcrete. bedding cement joint centre line
100mm approx
FIRST COAT: Fill the recess evenly with bedding/base cement
such as GTEKTM Basecoat 45, 60 or 90. For flat joins and
internal corners install a perforated paper tape over the centre
of the join. Self adhesive tape is not be used. Always use a
perforated paper tape. Additional bedding cement is then
applied to cover the paper tape and the joint edges feathered
out to produce a joint that is approximately 100mm wide
(50mm each side of the sheet edges).
Internal corners should be prepared and flushed as 3. Lightly cover
shown in figure 17. paper tape with
bedding cement
For external corners an external angle bead should be fitted First Coat
prior to filling. Paper tape is not used for external corners.
Refer figure 18.
Apply a layer of bedding cement over all fastener heads.
SECOND COAT: After allowing for the first coat to dry, a
second coat of bedding cement such as GTEKTM Basecoat 45,
60 or 90 is applied. This coat should overlap the first coat by 4. Second coat
about 40mm each side (total width 180mm) and be feathered bedding cement
out to produce an unobtrusive joint. 180mm approx
Apply a second layer of bedding cement to all fastener heads.
TOPPING COAT: (For untiled areas only): After the bedding
cement has dried thoroughly, a layer of topping cement such
as GTEKTM All Purpose, GTEKTM Topcoat can be applied.
This layer should overlap the preceding layer by 45mm
to 50mm each side of the joint and be feathered out to
produce an unobtrusive finish.
Allow 24 hours for the Topping Compound to dry. Sand with
180 grit paper to match the finish of the DuralinerTM Plus.
Topping Compound must not be used on top of
Second Coat
Basecoat that is to be tiled.
5. Apply
topping coat
(Untiled surface only)
270mm approx
Topping Coat
(Untiled intsallations only)
14 // bgcinnovadesign.com.auWET AREA JOINTING
The edges to be joined must be recessed.
FIGURE 17 //
Before jointing sheets that have been cut on site, or the FLUSH JOINTING INTERNAL CORNER
un-recessed end of Duraliner™ Plus sheets must be recessed.
The recess should be a nominal 40mm wide by 1.5mm deep.
The Hitachi ‘Easy Bevel’ (Model EB100) is specifically designed
for this purpose. The recessed surfaces must be sealed using
a PVA or Acrylic sealant, such as Cemstick, Lokcrete or
Bondcrete.
Evenly fill all recessed joints and both sides of any corners Shower recess Timber
with BGC Exterior and Wet Area Basecoat. Firmly bed into joint backed framing
BGC Exterior and Wet Area Base Coat ensuring all air by PVC
bubbles are removed.
Apply a skim coat of BGC Exterior and Wet Area Base Coat 6mm gap
over embedded paper tape ensuring the paper tape is First coat fill with
completely covered. Cover all fastener heads with BGC bedding flexible
cement sealant
Exterior and Wet Area Base Coat. includes
perforated
Apply a skim coat of BGC Exterior and Wet Area Base Coat to paper tape
the edges of the plasterboard at sheet junctions with shower
bases and baths, feathering out the BGC Exterior and Wet
Area Base Coat onto the board. Allow 24 hours to dry DuralinerTM
before tiling. Second
Plus
coat
bedding
cement
FIGURE 16 //
WET AREA JOINTING
Exterior and Wet FIGURE 18 //
Area Base Coat 1. Fill recess FLUSH JOINTING EXTERNAL CORNER
with bedding
cement
2. Install perforated
First coat paper tape over Timber framing
bedding cement joint centre line
100mm approx
DuralinerTM Plus Sheets
butted
at corner
External
angle bead
3. Lightly cover
paper tape with
bedding cement Second coat
First coat bedding cement
bedding cement
15 //DRY CLAD MASONRY WALLS
Duraliner™ Plus can be used to cover brick and masonry construction to obtain a smooth flat finish for subsequent decoration or tiling.
Table 2 summarises the various methods recommended, their applications and limitations.
Table 2
METHOD CLAY BRICK AAC FIGURE REMARKS
CONCRETE
BLOCKS
CONCRETE
TIMBER ✓ ✓ 19
BATTEN
STEEL // Recommended for use with tile applications
BATTEN OR // Suitable for uneven and misaligned walls
✓ ✓ 19
FURRING // May be used over flaking walls and drummy render
CHANNEL
// Provides a cavity for services if required
FURRING
CHANNEL
✓ ✓ 20
& CLIP
SYSTEMS
PLASTIC // For use with AAC products
NAILS X X 21
// Suitable for tile applications
TIMBER & STEEL BATTENS
Sheets may be installed horizontally or vertically.
FIGURE 19 //
The wall should be battened out in accordance with DURALINERTM PLUS INSTALLATION TO
Figure 20. MASONRY WALL
Timber battens should have a minimum thickness of 40mm to
allow adequate nail penetration and holding. Timber battens
that support sheet joints should have a minimum face width of
45mm. All other battens should have a minimum face Masonry wall Mortar joint
width of 35mm.
Steel battens/furrings that support sheet joints should have a
minimum face width of 38mm. All other steel battens/furrings
should have a minimum face width of 30mm.
Typical steel batten systems are Rondo Part No 129 or 308
furring channels with Rondo Part No 237 clips, or Peer FC18/
FC28 channels with C37 clips. See Figure 21.
Fastener as
Vertical battens must be provided at a maximum of 600mm per furring Proprietry furring
centres to suit sheet joints. manufacturer’s & anchor clip
instructions
The battens should be packed to correct any misalignment
or unevenness in the base wall.
No.8 Self embedding head screw
Fix the battens to the base wall using suitable masonry DuralinerTM Plus
nails or wall anchors.
16 // bgcinnovadesign.com.auTIMBER & STEEL BATTENS PLASTIC NAILS
Install services before installing Duraliner™ Plus. This system is only suitable for use with standard density (approx.
550kg / m3) – Autoclaved Aerated Concrete (AAC) block walls.
Install Duraliner™ Plus in accordance with Figure 2. For higher density AAC use the furring channel system.
Sheet ends to be joined centrally over a batten or furring The base wall should be flat and true (maximum variation must
channel. For untiled walls fix at a maximum of 200mm centres not exceed 15mm).
on sheet ends and at 300mm maximum centres in the body of
the sheet. Sheets may be installed horizontally or vertically.
For tiled walls, fixings are to be at a maximum of 200mm The sheet layout should be generally in accordance
centres on the sheet ends and also in the body of the with Figure 19.
sheet. Where the wall is to be tiled, it is recommended
that noggings be installed under all sheet joints to Chase the walls and install any services before installing
alleviate any sheet deflection upon impact. Duraliner™ Plus.
Control joints should be installed: Using an 8mm hole punch, indent the Duraliner™ Plus lining
at all fastening points to locate and assist penetration of the plastic
// To coincide with any movement control (expansion) nails. See Figure 22.
joints in the structure.
// At the junction of any dissimilar base wall type Install the Duraliner™ Plus sheets, and fix by hammering the
or construction. plastic nails flush with the sheet surface.
// To break any continuous run of Duraliner™ Plus greater
than 4.2m tiled applications or 6m untiled NOTE: The plastic nails must not be installed closer than 50mm to
applications. sheet corners or closer than 15mm to sheet edges.
FIGURE 20 // FIGURE 21 //
TYPICAL DURALINER™ PLUS INSTALLATION TO DURALINERTM PLUS INSTALLATION TO
MASONRY WALL BATTENS/FURRINGS AAC WITH PLASTIC NAILS
Batten/furring Vertical battens/furrings
to support 600mm max centres
top edge AAC blockwork DuralinerTM Plus
of sheet
Fastener centres
200mm max
200mm max
Batten/furring Fasteners Fasteners Set sheets
to support lower 50mm min 12mm min 6mm
Fasteners 50mm Fasteners 15mm Set sheet 6mm
edge of sheet from sheet from sheet edge above floor min from sheet min from sheet above floor
corner corners edges
17 //BRACING
Duraliner™ Plus can be used to provide bracing to resist
racking loads due to wind loadings when installed vertically. FIGURE 22 //
DURALINER™ PLUS INSTALLATION TO MASONRY
The use of Duraliner™ Plus to provide bracing on timber WALL DIRECT ADHESIVE FIXING
dwellings are those built to the Australian Standard for
“Residential timber-framed construction”.
Fasteners 12mm min from sheet edges
AS1684.2 (Non-cyclonic areas) Fasteners 50mm min. from sheet corners
AS1684.3 (Cyclonic areas)
Racking forces due to wind loading shall be calculated
as per these Australian Standards.
For bracing data on other construction methods and
applications, contact your BGC Fibre Cement Sales Office.
NOMINAL WALL BRACING
Up to 50% of the total bracing requirements can be
supplied by BGC Duraliner™ Plus sheeting installed normally.
To be eligible for inclusion in calculations as nominal 200mm
wall bracing: max
150mm
max
// The minimum length of each nominal bracing panel
shall be 450mm.
// Nominal bracing shall be distributed evenly Tie down
throughout the building bolts 100mm
max from
stud face
The bracing capacity for nominal bracing is given in edge on
the following table: each bracing
panel
NOMINAL SHEET BRACING WALLS
BRACING
METHOD CAPACITY (KNm) M12 Tie down bolts at
1200mm max centres
Sheeted one side only 0.45 With 50 x 50 x 2mm washer
Sheeted two sides 0.75
STRUCTURAL WALL BRACING Stud Centres
See bracing capacity
The use of Duraliner™ Plus is not limited to the provision
of nominal wall bracing.
Figure 22 gives the design bracing capacity for panels secured
with tie down bolts. This table can be considered to be an FASTENER SPACING
addition to Table 8.18, AS1684.2 - AS1684.3.
When using tie down bolts, fasteners are to be fixed at 150mm
max around sheet perimeter and 200mm max in the body
of the sheet.
STUD CENTRE CLADDING BRACING CAPACITY
(mm) (k/N/m)ULS*
600 One Face Only 2.40
450 One Face Only 2.70
600 Both Faces 3.40+
450 Both Faces 3.80+
*Ultimate Limit State design.
These results are from testing on JD5 Grade timber. If hardwood
frames (JD2) are used, the ULS will increase by 12.5%.
Permissable Stress Design (PSD) = Ultimate Limit State (ULS)
1.5
+Calculated through interpolation.
18 // bgcinnovadesign.com.auBRACING PANELS HEIGHT GREATER THAN 2700mm
Figure 23 gives the design bracing capacity for panels The bracing capabilities, Figures 22 and 23 are applicable
secured with anchor rods. This table can be considered to a maximum panel height of 2700mm.
to be an addition to Table 8.18, AS1684.2 AS1684.3.
For panel heights greater than 2700mm the bracing capacity
shall be reduced using the panel height multiplier given in the
below table.
FIGURE 23 //
DURALINER™ PLUS BRACING CAPACITY USING
ANCHOR RODS BRACING CAPACITY - PANEL HEIGHT MULTIPLIER
Fasteners 12mm min from sheet edges WALL HEIGHT (MM) MULTIPLIER
Fasteners 50mm min. from sheet corners 3000 0.90
M12 Anchor Rods with 3300 0.80
50 x 50 x 2mm washers
Minimum 2 (one each sidebracing panel) 3600 0.75
Maximum Centres 2400mm
3900 0.70
4200 0.64
PANELS LENGTH LESS THAN 900mm
DuralinerTM
Plus The bracing capabilities, Figures 22 and 23 are applicable
to a minimum panel length of 900mm. Effective bracing
150mm 200mm M12 Anchor is achievable with panel lengths down to 450mm. Reduce
max max Rods with the bracing capacity for panel between 450mm and 900mm
50 x 50 x long, using panel length multiplier given in the table below.
2mm washer
Anchor Rods
100mm max BRACING CAPACITY - PANEL HEIGHT MULTIPLIER
from stud
face edge PANEL LENGTH (MM) MULTIPLIER
on each
bracing 850 0.92
panel
800 0.83
750 0.75
Intermediate M12 700 0.66
Tie Down Bolts with
50 x 50 x 2mm washers 650 0.58
1200mm max centres
600 0.50
550 0.42
Stud Centres 500 0.33
See bracing capacity
450 0.25
FASTENER SPACING
When using Anchor Rods, fasteners are to be fixed at 150mm
max around sheet perimeter and 200mm max in the body
of the sheet.
STUD CENTRE CLADDING BRACING CAPACITY
(mm) (k/N/m)ULS*
600 One Face Only 4.95
600 Both Faces 5.10
*Ultimate Limit State design.
These results are from testing on JD5 Grade timber. If hardwood
frames (JD2) are used, the ULS will increase by 12.5%.
Permissable Stress Design (PSD) = Ultimate Limit State (ULS)
1.5
19 //EXTERIOR SOFFITS
A soffit is defined as an external ceiling under roof or other ENSURE YOU CONSIDER:
decking structures with limited space above. Eaves and verandahs
are usually narrower and are at the perimeter of the building. // Engineered frame providing for imposed wind load, control
joints, thermal movement and ventilation. Typically Rondo
A current trend is to design a seamless flushed finish to external and/or Peer can provide this information
soffits to complement the flushed finish on internal ceilings.
The soffit or external ceiling is in an external environment which // A minimum space of 1m above the soffit. Ventilate the
is subject to weather extremes, wind pressure and significant space to minimise heat build-up. A few suggestions are
thermal variation. Thermal variation can result in flush joint ventilation slots cut in the perimeter of the sheet, install
cracking. Ambient temperatures affect the dimensional stability thermal vents in the sheet, roof whirly birds or all of these.
of most materials notably steel and to a lesser extent timber.
While ambient range can be 0c – plus 40c; unventilated spaces // Roof insulation is fitted; Anticon or similar.
immediately above the soffit are capable of reaching in the vicinity
of 70c. Such a large temperature range results in thermal move- // Consider orientation and prolonged exposure to extreme
ment primarily in the soffit supporting structure. This movement radiant heat in summer as this can cause localised heat
results in cracking of the flushed joints. build-up and excessive thermal movement.
DuralinerTM Plus can be flushed with BGC exterior base and // Install DuralinerTM Plus to furring channel typically Rondo
topping compounds. However, this system must incorporate 129 and ensure a minimum 35mm bearing area. Furring
control joints as per our details attached. While this system channel is to be fixed via a suitable clip or suspension system.
achieves a seamless appearance, apart from the control joints, Sheets are orientated at right angles to furring channel.
it is not recommended in applications where higher levels of Do not fix sheets directly to the underside of the roof framing
thermal variation are likely to occur in the space immediately or structure above.
above the soffit.
// Reduce control joint centre to 3.6m i.e. two flushed joint
DuraluxTM Plus on the other hand offers crisp lines by expressing between control joints to better cater for thermal movement
every joint. This detail eliminates the risk of flush joint cracking and or use expressed joints.
and is the preferred option. The decision to specify a flush jointed
external soffit in DuralinerTM Plus needs careful consideration of // Use minimum class 3 corrosion resistant fasteners.
the immediate environment of the soffit lining. As a general rule, Corrosive atmospheres i.e. industrial locations and coastal
soffits where the space above is less than 1m should not be flush or estuary locations with airbourne salt spray will require class
jointed. Should the designer/specifier or others want a flushed 4 corrosion resistant fasteners.
finish in tighter spaces very careful detailing to address heat
build-up and thermal movement is required; regardless cracked // Flush DuralinerTM Plus joints with BGC Exterior and Wet Area
joints are a real risk. Base Coat and BGC Exterior and Wet Area Top Coat. Refer
to application instructions on the buckets and the attached
The following suggestions cover most of the key issues to data sheet.
be considered in minimising the risk of flushed joint failure.
Please note these suggestions do not eliminate the possibility // Paint the surface with quality exterior grade paints that adhere
of cracked joints. Refer to figures 25 to 31 on the following to the paint manufacturers’ recommendation. The paint
pages. system should consist of a suitable sealer and two top coats.
The above points are not a guarantee to eliminate cracking
of flush joints
20 // bgcinnovadesign.com.auEXTERIOR SOFFITS
FIGURE 24 //
DURALINER™ PLUS MOVEMENT CONTROL BAY
LAYOUT CONFIGURATION FOR FLUSH JOINT SOFFITS
1200
Expansion Control Joints
1200
1200
3600
Expansion Control Joints
Max. No. Longitudinal Flush Joints
2 Per 3600mm Bay
FIGURE 25 // FIGURE 26 //
CONTROL JOINT CONTROL JOINT
PARALLEL TO FURRING CHANNEL PERPENDICULAR TO FURRING CHANNEL
50mm max Furring
Channel
fixed with 15mm max
suitable clip
suspension
system to
supporting
structure
Expansion Joint Expansion Joint
/ Rondo P35 / Rondo P35
/ Trimtex 72-093V / Trimtex 72-093V
DuralinerTM Plus / Peer PXV30 DuralinerTM Plus / Peer PXV30
21 //EXTERIOR SOFFITS
FIGURE 27 // FIGURE 29 //
STEEL WITH FURRING CHANNEL JOINER STEEL AND TIMBER
100mm max
Backing strip,
riveted at
600mm
max.crs.
Backing strip,
DuralinerTM Plus TM
riveted at
Duraliner Plus 600mm
max.crs.
FIGURE 28 // FIGURE 30 //
BACKING STRIP FIXED WITH POLYURETHANE BACKING STRIP RIVETED
150mm max 150mm max
DuralinerTM Plus DuralinerTM Plus
22 // bgcinnovadesign.com.auCERAMIC TILING WIND LOADING
Duraliner™ Plus sheets used as a substrate for ceramic tiles The following supportive information is to assist in the
must be fixed to the framing with either screws or nails (adhesive design and fixing 6mm Duraliner™ Plus in high wind areas.
fixing of sheeting is not acceptable for tiled applications).
Framing must support all sheet edges. Prior to fixing sheets in place, ensure that the supporting structural
systems comply with the BCA and have been certified by a
For fixing of tiles follow the tile manufacturer’s instructions. professional engineer.
BGC recommends the use of a flexible tile adhesive complying
with Part 1 of Australian Standard AS 2358 “Adhesives - For
Fixing Ceramic Tiles”. In some tropical regions flexible adhesives DESIGN TO AS 4055-1992
may not be suitable – check with tile merchant or adhesive
manufacturer for recommendations.
AS 4055-1992 is applicable for residential applications and the
tabulated data is suitable for both timber and lightweight CFS
steel framing systems.
LIGHTING
WARRANTY
It is important to understand how the overall wall or ceiling
appearance is affected by glancing light (light that shines We warrant that our products are free from defects caused
obliquely across the surface of the wall or ceiling) and the by faulty manufacture or materials for the following period
choice of decoration. from the date of purchase:
Lighting design is very much a matter of cause and effect. • 25 years for the Nuline™ Plus, Stratum™ and
Refer to Australian Standard AS2589 for further details on six Duraplank™ ranges
levels of finish. It is recommended designers give consideration • 10 years for the Montage™ range and
to the level of finish required and eliminate potential problems • 15 years for all other BGC Fibre Cement and Innova™ ranges
due to critical lighting.
If you acquire any defective products, we will repair or replace
them, supply equivalent replacement products or refund the
PAINTING purchase price within 30 days of receiving a valid claim, subject
o product inspection and confirmation of the existence of a
defect by BGC. We will bear the cost of any such repair,
BGC recommends that at least two coats of paint be applied. replacement or refund.
The choice of decoration is dependent upon the level of finish
required. The paint manufacturer’s recommendation on application This warranty is given by:
and maintenance of the paint system must be followed.
BGC Fibre Cement Pty Ltd
Ground Floor, 290 Bushmead Road, Hazelmere WA 6055
Phone 08 9374 2900 Fax 08 9374 2901
MAINTENANCE
To claim under this warranty, you must provide proof of
Duraliner™ Plus, when used in accordance with this literature, purchase as a consumer and make a written claim (including any
requires no direct maintenance. However in wet areas, regular costs of claiming) to us at the address specified above within 30
checks (at least annually) must be made of the tiling system to days after the defect was reasonably apparent, or if the defect was
ensure it remains watertight. Any cracked or damaged tiles, tile reasonably apparent prior to installation, the claim must be made
grout, or sealants must be replaced or repaired immediately as prior to installation. You may not claim under this warranty for loss
for new work. Any grout or sealant likely to allow leakage must or damage caused by:
be raked out and restored to original condition.
• faulty or incorrect installation by non-BGC installers
Damaged sheets should be replaced as originally installed (BGC’s installation procedures are at www.bgcinnovadesign.com.au);
as for new work. • failure to comply with the Building Code of Australia or any
applicable legislation, regulations approvals and standards;
• products not made or supplied by BGC;
• abnormal use of the product; or
• normal wear and tear.
The benefits available under this warranty are in addition to
other rights and remedies of the consumer under the law. Our
goods come with guarantees that cannot be excluded under the
Australian Consumer Law. You are entitled to a replacement or
refund for a major failure and for compensation for any other
reasonably foreseeable loss or damage.
You are also entitled to have the goods repaired or replaced if
the goods fail to be of acceptable quality and the failure does
not amount to a major failure.
23 //TO CONTACT
YOUR NEAREST
BGC STOCKIST,
PLEASE CALL:
ADELAIDE
TELEPHONE BGC FIBRE CEMENT PROVIDES BUILDERS, DEVELOPERS
08 8480 1700 AND ARCHITECTS WITH A RANGE OF DESIGN ALTERNATIVES
BRISBANE AND INNOVATIVE PRODUCTS, SUCH AS:
TELEPHONE
07 3548 8400
EXTERIOR PRODUCTS AND APPLICATIONS EXTERIOR PRODUCTS AND APPLICATIONS
MELBOURNE INNOVA RANGE OF PRODUCTS BGC FIBRE CEMENT RANGE OF PRODUCTS
TELEPHONE
03 9492 1700 DURACOMTM / A compressed fibre cement DURASHEETTM / Ideal for the cladding of gables
facade system. and lining of eaves. Can also be used on commercial
PERTH DURAFLOORTM / Is the ultimate flooring product soffits and cladding on non impact areas.
TELEPHONE that can be used in both interior and exterior DURAPLANKTM / Available in Smooth, Woodgrain
08 9374 2900 applications. and Rusticated finishes, DuraplankTM is ideal for
DURAGRIDTM RESIDENTIAL & DURAGRIDTM exterior cladding of upper storey conversions or
SYDNEY LIGHT COMMERCIAL / A light weight facade ground level extensions.
TELEPHONE giving a modern and durable finish. DURATEXTM / A base sheet used for textured
02 8107 9500 coatings on exterior wall applications.
DURAGROOVETM / A vertically grooved exterior
NEW ZEALAND facade panel. COMPRESSED / Used for domestic, commercial
DURASCAPETM / A lightweight exterior facade sheet for wet areas, flooring, partitions, exterior
TELEPHONE decking, fascia and facade cladding.
0011 64 9273 1457 base sheet with a subtle vertical shadow line.
NULINETM PLUS / A weatherboard style DURALUXTM PLUS / Suitable for exterior applications
TECHNICAL HELP LINE cladding system. where it will be sheltered from direct weather.
1300 652 242 DURALINERTM PLUS / Suitable for exterior
DURACOM GREYSTONETM / A pre-finished
facade system. applications where it will be sheltered from
BGCINNOVADESIGN.COM.AU direct weather.
MONTAGETM / A pre-finished versatile facade
system that can be used internally and externally.
STONESHEETTM / Purpose designed substrate
for stone tile facade.
STRATUMTM / Is a trio of plank products, each of
which can be used as stand alone products or used
together to create a striking exterior cladding solution.
INTERIOR PRODUCTS AND APPLICATIONS
BGC FIBRE CEMENT RANGE OF PRODUCTS
DURALUXTM PLUS / An interior lining board suitable
for ceilings and soffits.
DURALINERTM PLUS / An interior lining board,
this is the perfect substrate for tiles and is ideal
for wet areas.
Safe working practices - Please wear a P1 or P2 mask and safety goggles (approved to AS/NZW1337 standards) whilst cutting
or installing DuralinerTM Plus. DuralinerTM Plus can be safely handled during unloading or stacking without the use of these precautions.
Cleaning up - Always wet down your work area when cutting DuralinerTM Plus , to ensure that dust is managed.
Dispose of any vacuumed dust with care and using containment procedures.
Design by The SHAPE Group www.theshapegroup.com.au BGC1462You can also read